That's amazing, this should be an official Epic ship for X-Wing the scale and style fit perfectly ![]()
MacrossVF1s corner of paint and plasticard
Two thumbs up well done!
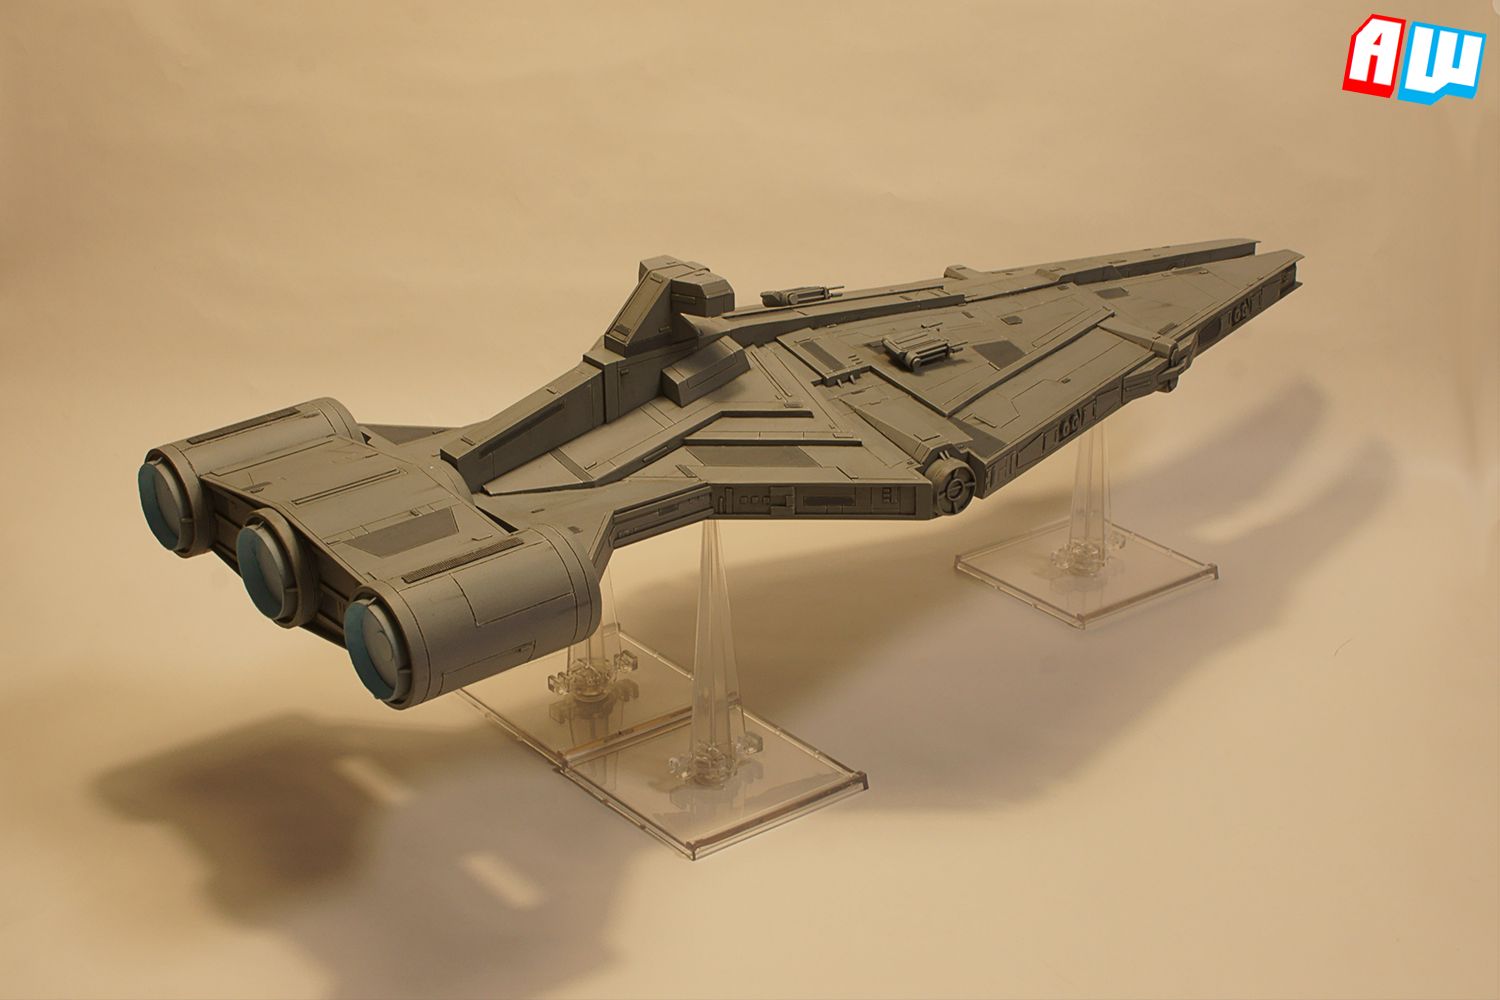
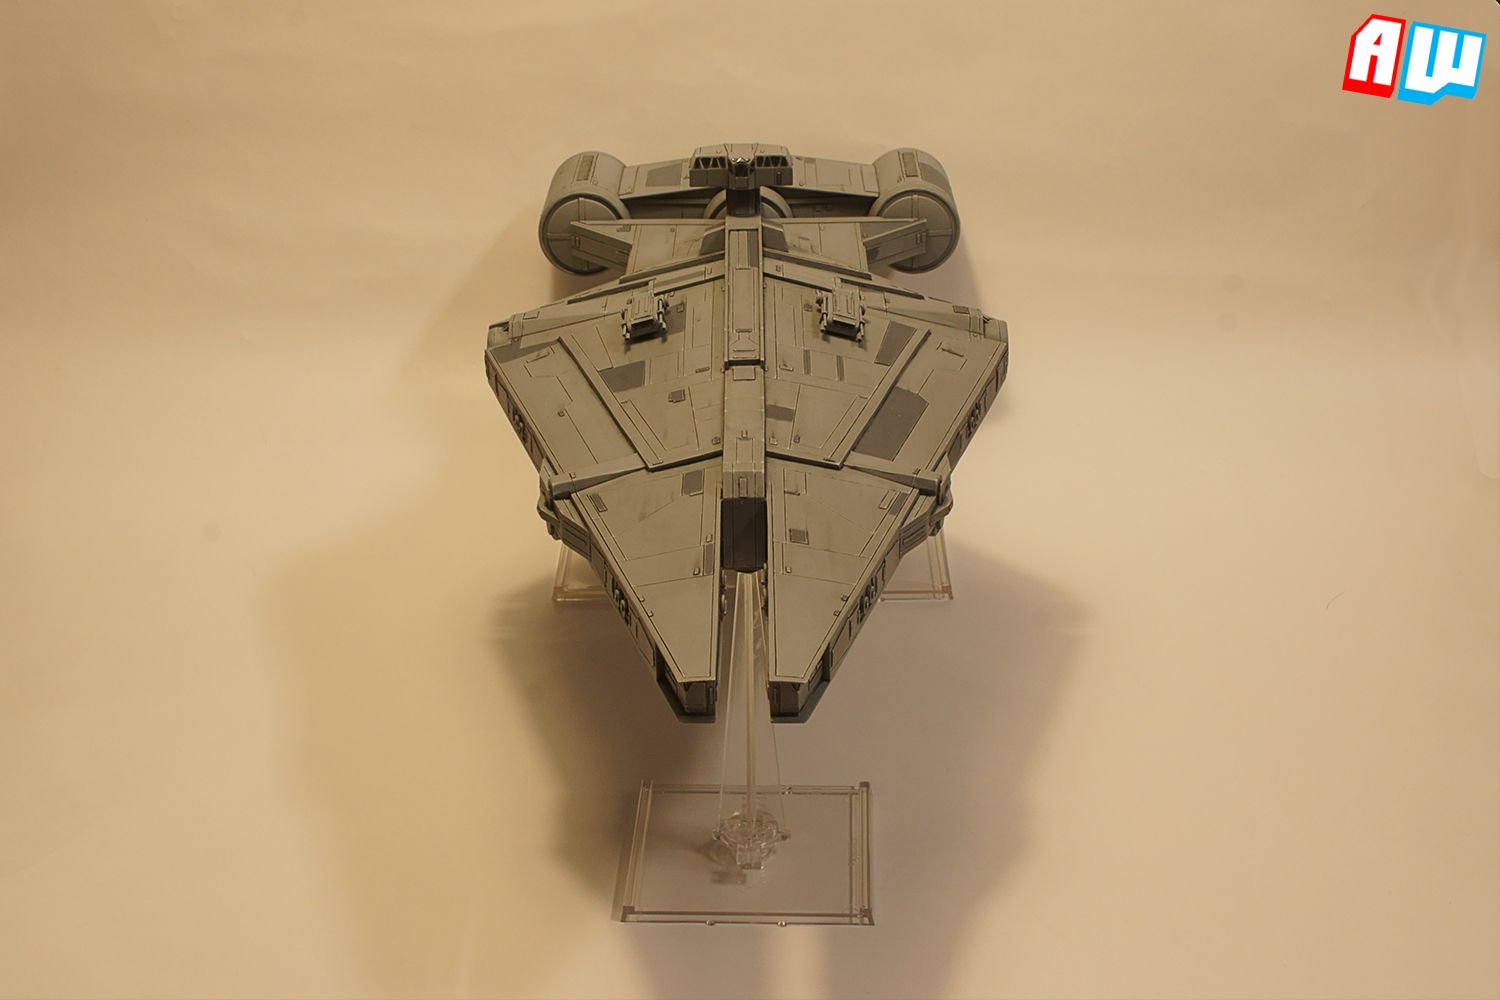
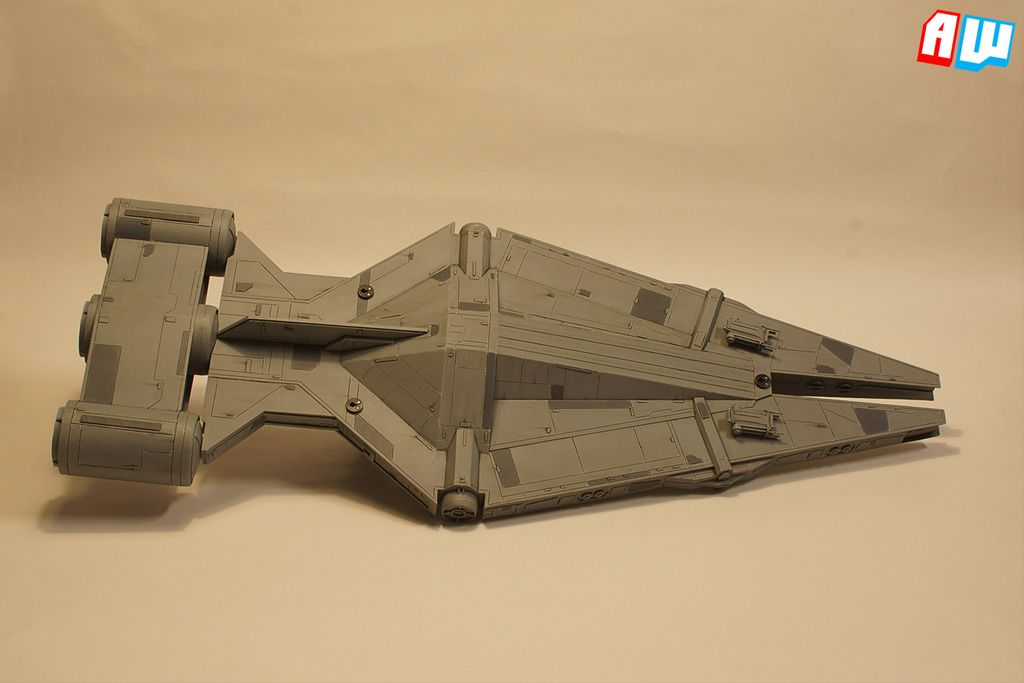
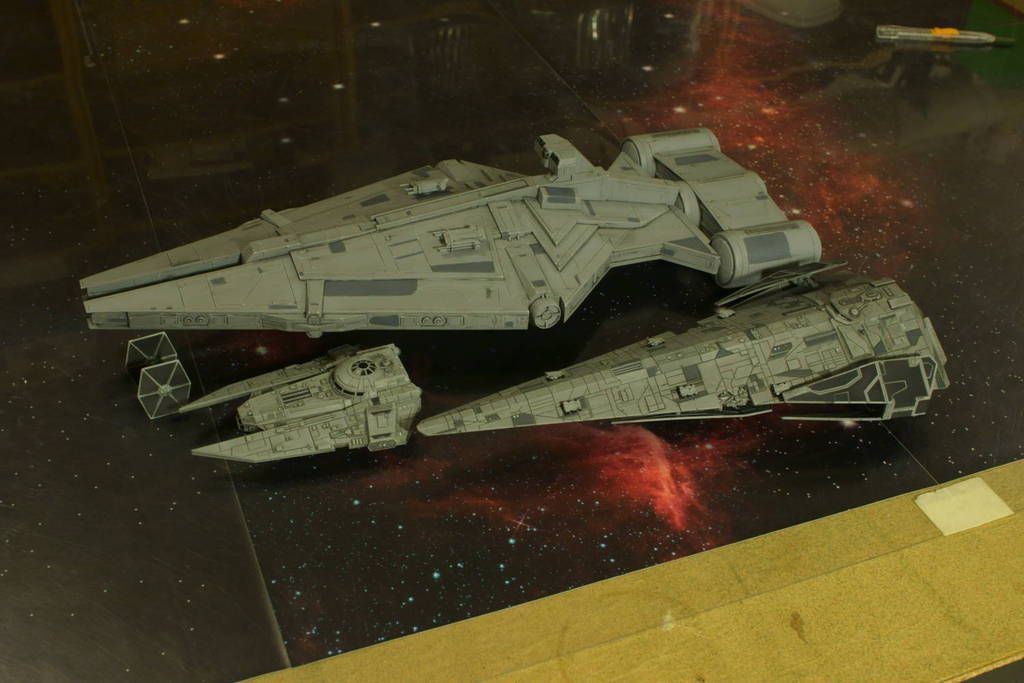
And now, for the moment you have all waited for... The Arquitens-class light cruiser!
Now I'll be the first to admit that the quality of these pictures are not up to my usual standard but the size makes things difficult.
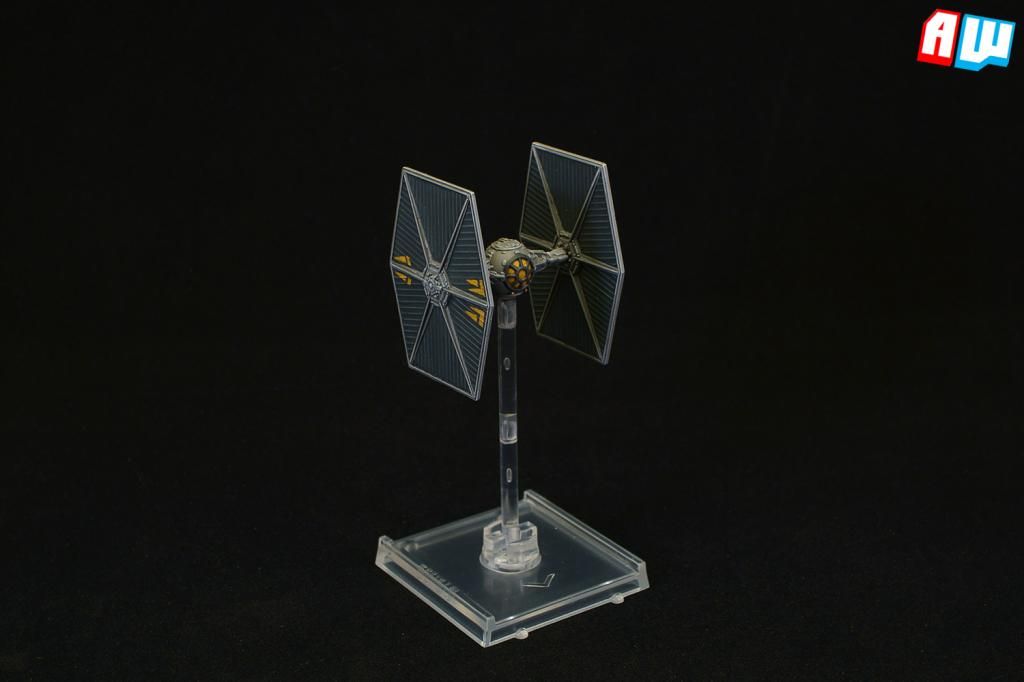
The paint job itself isn't really anything special, the ship has specifically been painted to look similar to the Raider and Gozanti. Other than that it is supposed to represent a ship that has seen a decent amount of service patrolling the space lanes but haven't been involved in much action.

Oh my god...
That's amazing, dude. Wow.
A bit late I suppose but here are the promised comparison pictures.
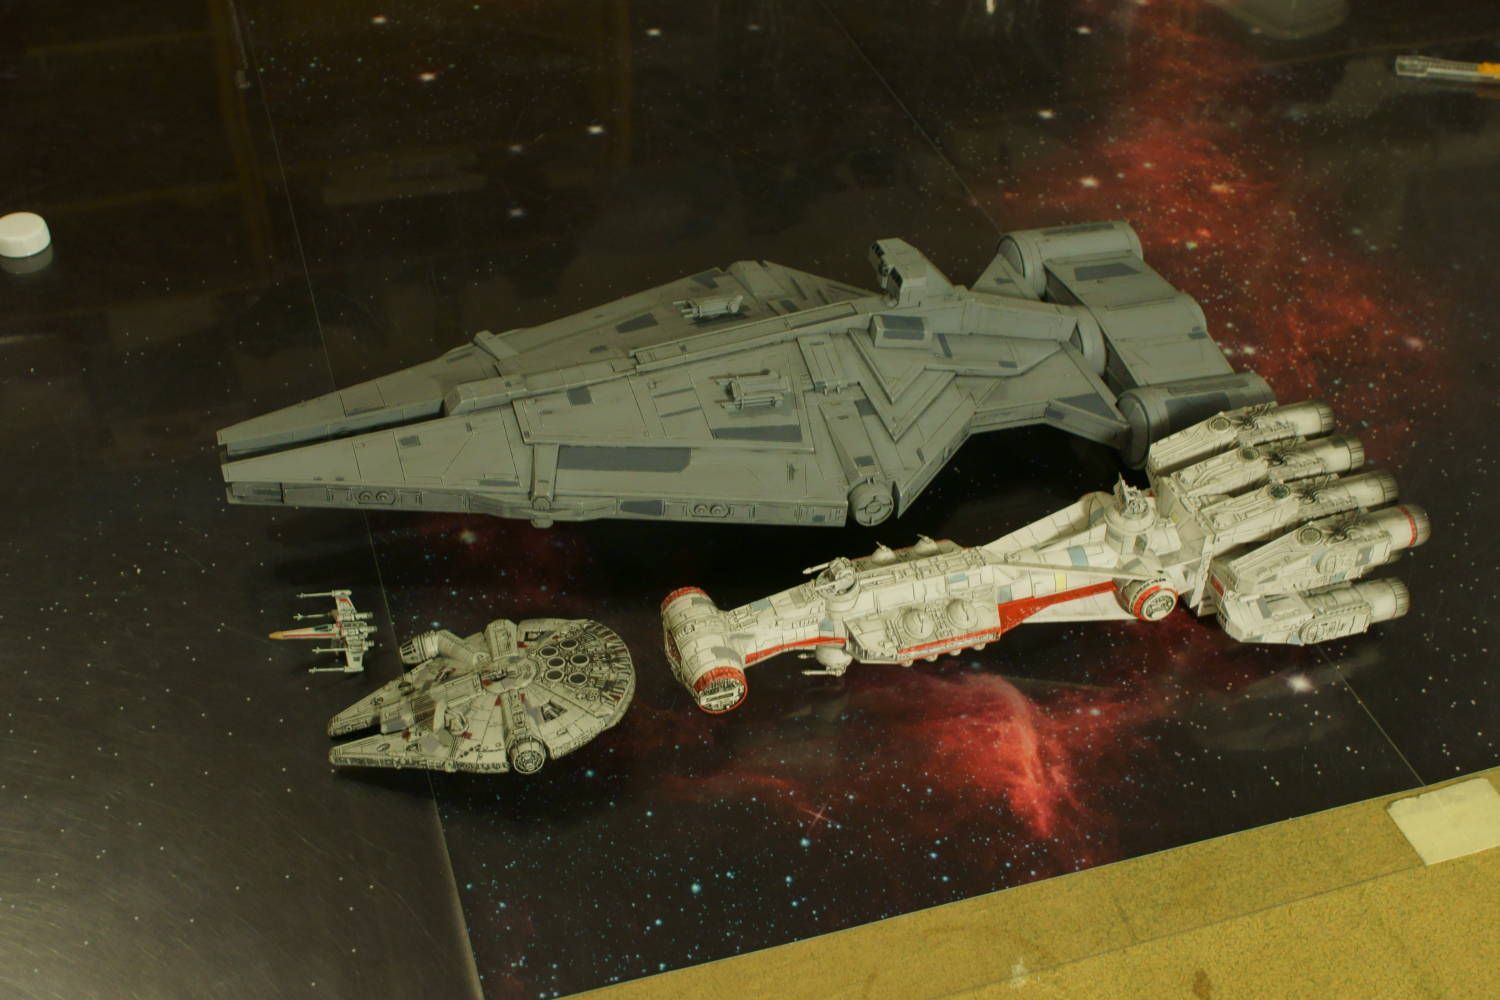
So how we killing this thing again?
I can only imagine the headache of creating a cardboard base template for that thing 
But even then... I STILL WANT ONE. *grabby hands*
Mac, I think you could give away 50% of your ability and still have a strong lead over us plebes. I'm beginning to think that you could throw a ship into a plastic bag, add some paint and pour out a well painted model. No shaking required!
No, see when I said .5%, I was meaning that that way he could give a little of his talent to more of us. Hmm, maybe that should just be .1%. To us lowly plebeians.
This lowly plebeian salutes you Mr Macross!
*standing crookedly at attention throwing a wild salute, as a lowly plebeian would*
8p

I have been just looking in awe at all these re paints. Beautiful work.
I have a question I was hoping you could help me with?
I have painted a decimator and was looking to add some paint chipping effects (similar to your K wing) what technique did you use for that? It looks like a slight black streak with silver then added to the centre?
Also in terms of rust/grime streaking do you tend to go with the direction of travel of the ship?
thanks
I actually wrote a tutorial on that very subject about a year ago. http://alternativewargamer.blogspot.se/2015/03/tutorial-scratches-dents-and-blaster.html.
As for rust and grime streaking, those are two different subjects. Rust tend to accumulate rather slowly and rust streaks can take a long time to form. As such, rust streaking is usually found on objects that has been standing unmoving/or moved rather slowly, for long periods of time and go towards the nearest gravity source, usually towards the floor/ground.
Dirt and grime usually gather much faster and are much more sensitive to movement. Therefore it's often better to paint dirt and/or grime going in the direction of travel of the ship. Of course if the ship has been standing still, it is perfectly okay to paint streaks as running down towards the floor/ground.
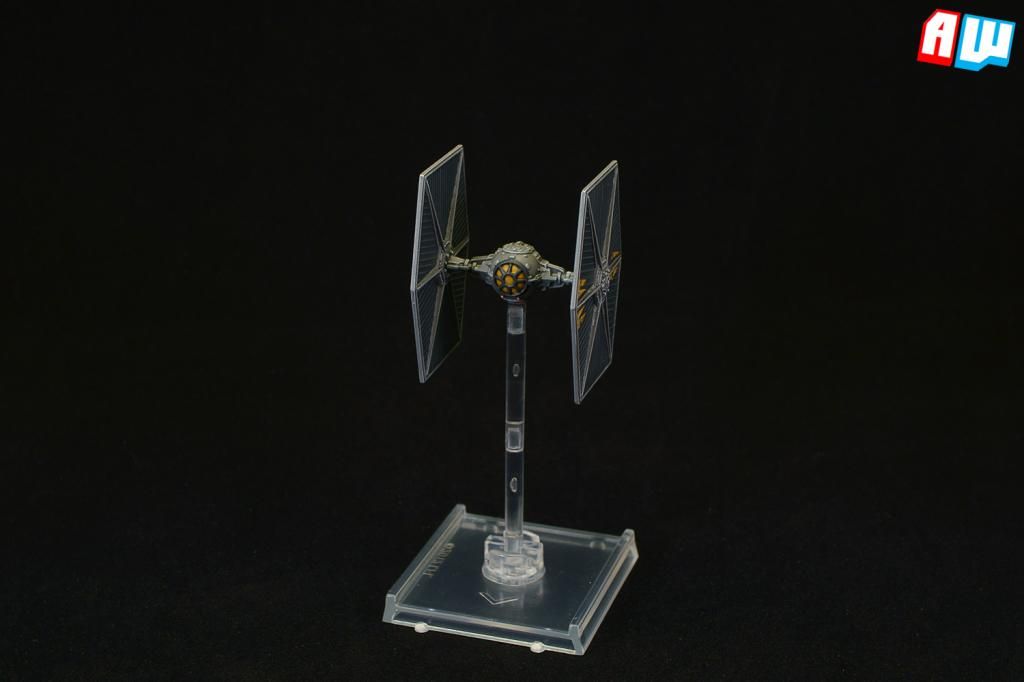
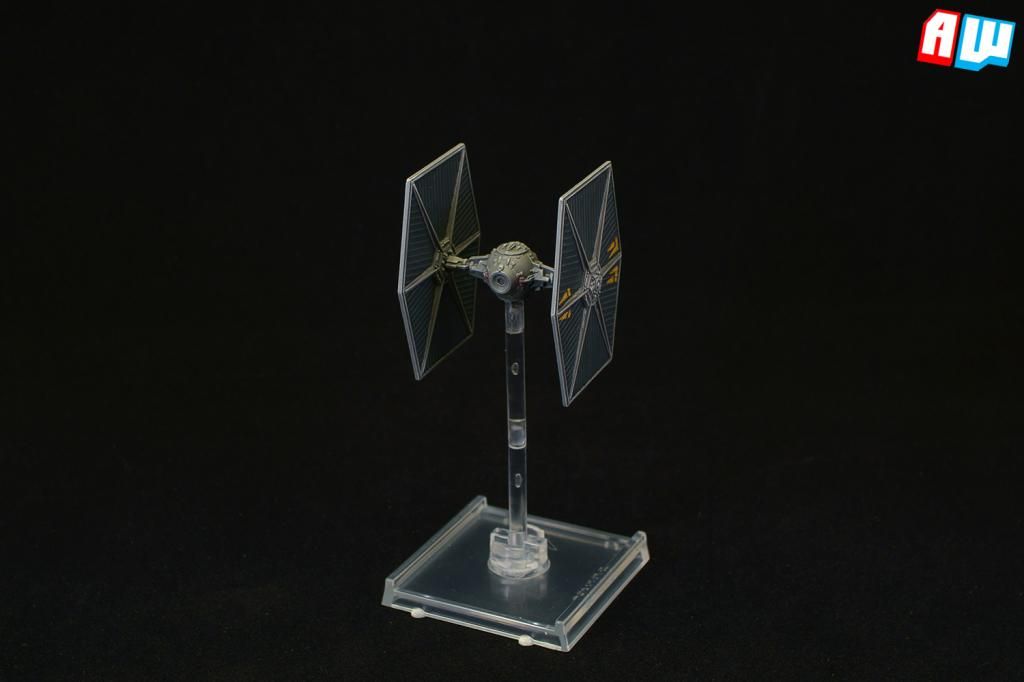
Managed to paint more of my Imperial ships. As with my other TIEs they are painted as if part of Admiral Zaarin's forces. I also did a small mod to the Punisher and yet despite its simplicity it really improves the look of the ship!
- - - -
Link updates
Great clean work as usual
Hey, I'm finally checking in after all this time of keeping up on your posts!
Let me start by saying I'm a HUGE fan of everything you post. It is wonderful to look at and also inspiring for my own work. I appreciate greatly what you are doing. ![]()
Now, the reason I post is I am not very familiar with the Punisher model (as I don't own any so I haven't looked at any up close). Could you point out the mod that you did? I'm sure it's obvious to most, but I don't know what I'm looking for.
Thanks!
I found it! Should've looked harder before asking lol!
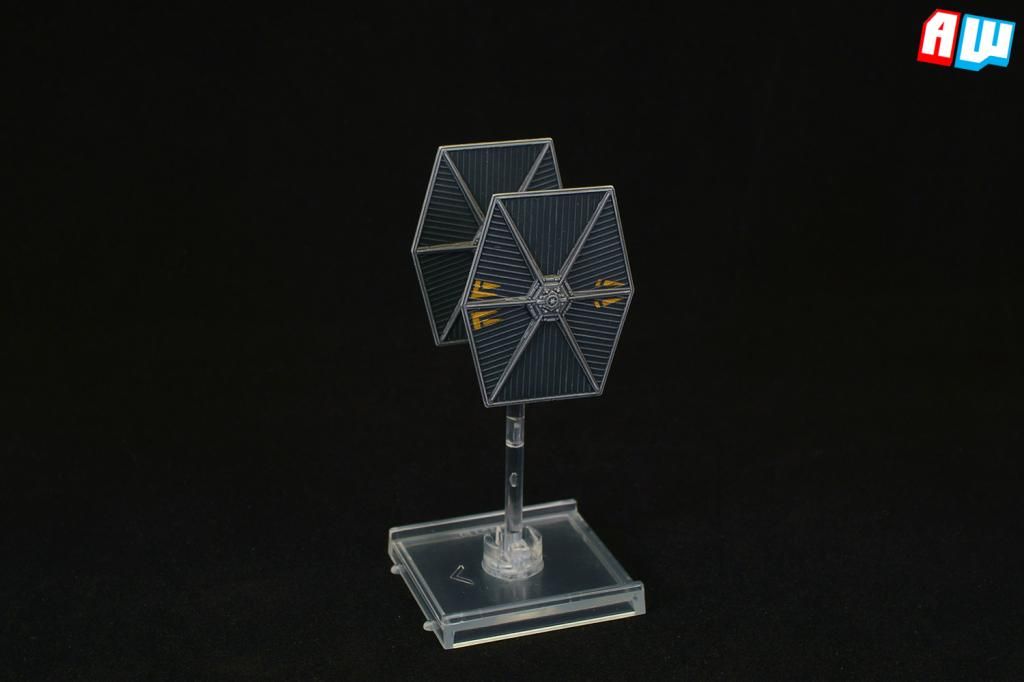
First update to my little corner and this time it's some TIE Fighters. I've recently been playing GOG's release of the old TIE Fighter game and noticed that some ships had some interesting yellow markings. I had to have those on my ships!
You must be playing the '98 version. Love the graphics. Hate the shoe-horned John Williams music.
A bit late I suppose but here are the promised comparison pictures.
So how we killing this thing again?
Just use 1 B-Wing.
I have spent the last few days reading this post from beginning till now... I have painted/built models since I was 9 years old (lets say I am over 40 now, lol!)... Macross.. you are a true Master in the Art of Paint and Scratch Build. I can and will use the techniques used in your models but there is not a flipping chance in Hell I can ever compete on the the level you have attained. I really hope FFG sees this and gives you a job in their model department. It is a true pleasure seeing this work laid out and skill you shown to the rest of us. Well Done!
Edited by Black Griffon 1On 2016-02-05 at 0:20 AM, That One Guy said:You must be playing the '98 version. Love the graphics. Hate the shoe-horned John Williams music.
Oh yes, the '95 version didn't have good enough graphics to include the yellow markings, at least I can't remember it. I still have my floppy disks for the '95 version. Nostalgia is awesome! ![]()
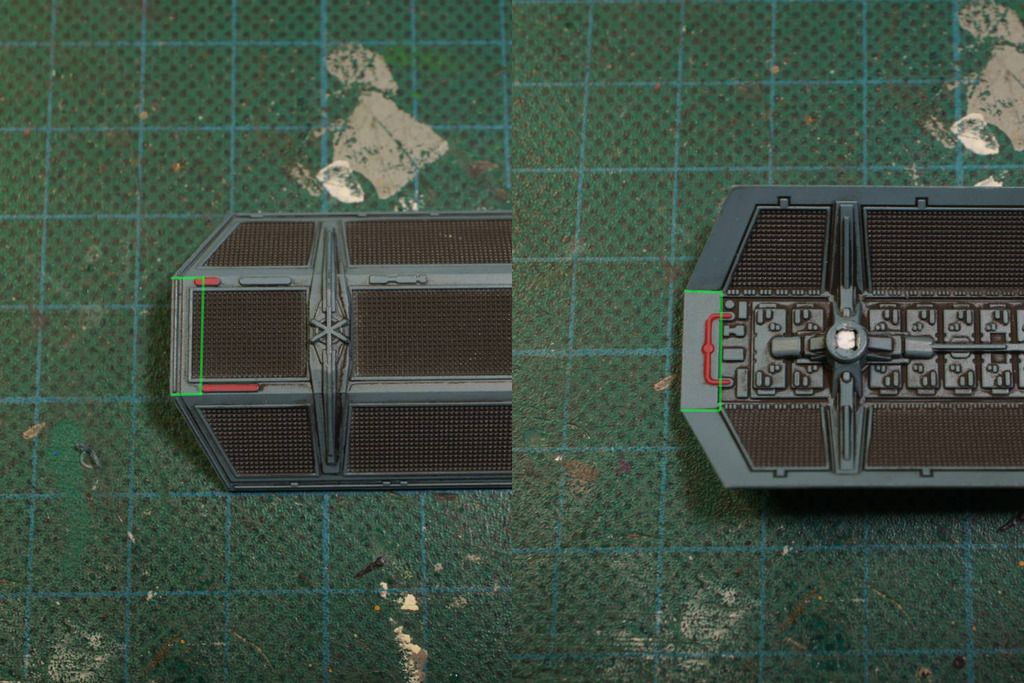
Anyway, I was a bit surprised that some of you guys didn't spot the mod. It's subtle yes, but I didn't think it would be near invisible. Here's how I did it:
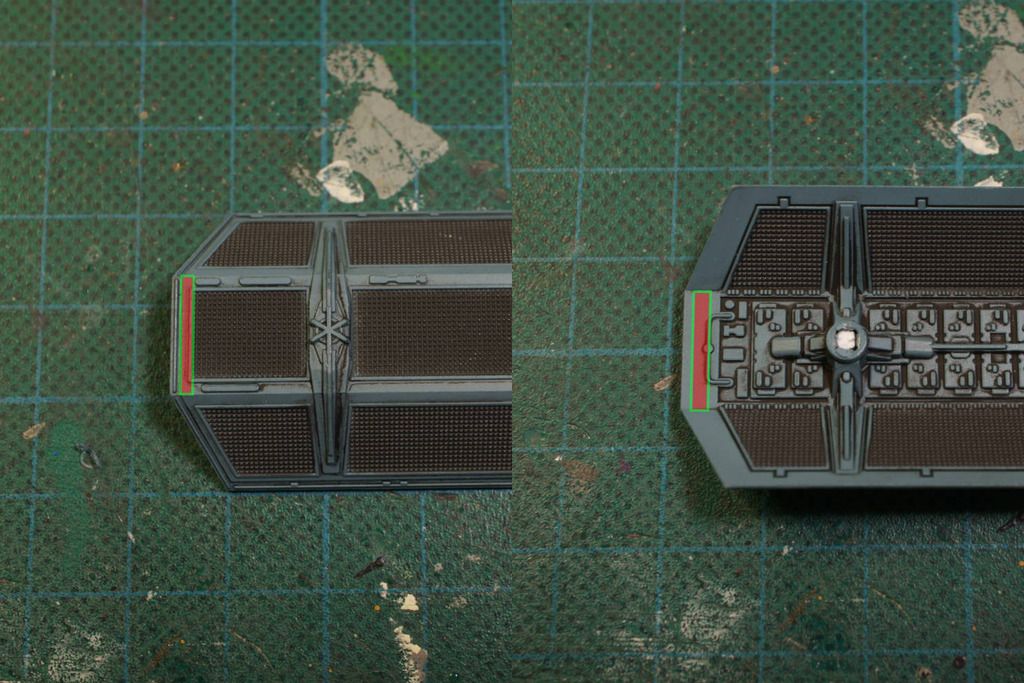
First you need to remove the details marked in red. After that it's a rather simple matter of cutting away a rectangular piece from the front/middle of each solar panel. The green lines show roughly where I cut. Now, do NOT throw away this piece, it will be needed later.
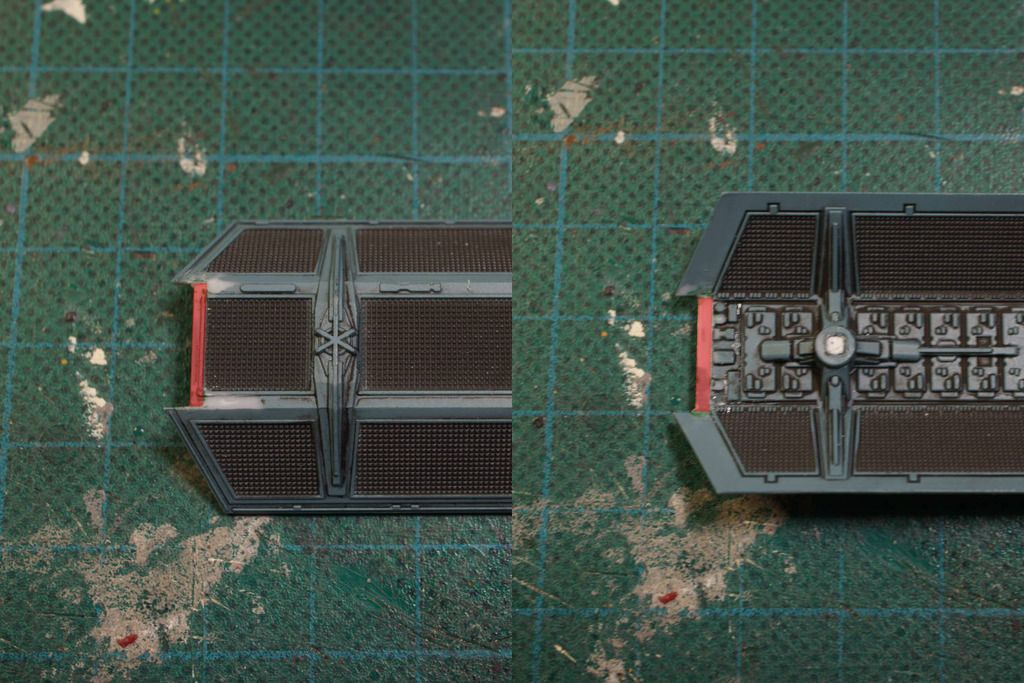
When the cuts has been made, the loose piece needs to be trimmed down. All we really want left is the middle of the piece.
With the excess removed it's a simple thing to glue the remaining piece back into the previously created cavity. Some modelling putty is needed to fill in any holes and correct any flaws. Voilà, quick and simple Punisher improvement.
Edited by MacrossVF1Link updates
You must be playing the '98 version. Love the graphics. Hate the shoe-horned John Williams music.
Oh yes, the '95 version didn't have good enough graphics to include the yellow markings, at least I can't remember it. I still have my floppy disks for the '95 version. Nostalgia is awesome!
Anyway, I was a bit surprised that some of you guys didn't spot the mod. It's subtle yes, but I didn't think it would be near invisible. Here's how I did it:
First you need to remove the details marked in red. After that it's a rather simple matter of cutting away a rectangular piece from the front/middle of each solar panel. The green lines show roughly where I cut. Now, do NOT throw away this piece, it will be needed later.
When the cuts has been made, the loose piece needs to be trimmed down. All we really want left is the middle of the piece.
With the excess removed it's a simple thing to glue the remaining piece back into the previously created cavity. Some modelling putty is needed to fill in any holes and correct any flaws. Voilà, quick and simple Punisher improvement.
Your attention to detail is commendable!
Personally, I would have just cut out the wing segment and, if it didn't look good, I would just stand a little further away. ![]()
Time for another scratch build! This time it's the Wayfarer-class medium transport. What's that you say? I've already built one of those? And you'd be correct, however this time it's an up-scaled version, making it epic sized.
Link updates
He's at it again! ![]()
You must be playing the '98 version. Love the graphics. Hate the shoe-horned John Williams music.
Oh yes, the '95 version didn't have good enough graphics to include the yellow markings, at least I can't remember it. I still have my floppy disks for the '95 version. Nostalgia is awesome!
Anyway, I was a bit surprised that some of you guys didn't spot the mod. It's subtle yes, but I didn't think it would be near invisible. Here's how I did it:
First you need to remove the details marked in red. After that it's a rather simple matter of cutting away a rectangular piece from the front/middle of each solar panel. The green lines show roughly where I cut. Now, do NOT throw away this piece, it will be needed later.
When the cuts has been made, the loose piece needs to be trimmed down. All we really want left is the middle of the piece.
With the excess removed it's a simple thing to glue the remaining piece back into the previously created cavity. Some modelling putty is needed to fill in any holes and correct any flaws. Voilà, quick and simple Punisher improvement.
Your attention to detail is commendable!
Personally, I would have just cut out the wing segment and, if it didn't look good, I would just stand a little further away.
Is this for a Gand Starfighter conversion?
Is this for a Gand Starfighter conversion?
Gand Starfighter? Never heard of it.
Some additional work on the cargo pod. Of course the container is the easy part, the rest of the ship is slightly more difficult.
Link updates
I didn't bother with an update yesterday as everyone was too busy with the latest preview. Not that I think the situation has improved much by today. ![]()
Anyway, I've started on the connecting/docking boom. It might not look like much but it's a rather complex piece and extremely important for the rest of the ship. To complicate matters further the starting tube didn't have the right diameter so I had to wrap a layer of additional plasticard around it. The second photo show the start of the engine array/rear of the ship.
Link updates
More work done on the engine array.
Link updates