Painting The Forces of Hepitude

By Hepitude, in Runewars Painting and Modeling

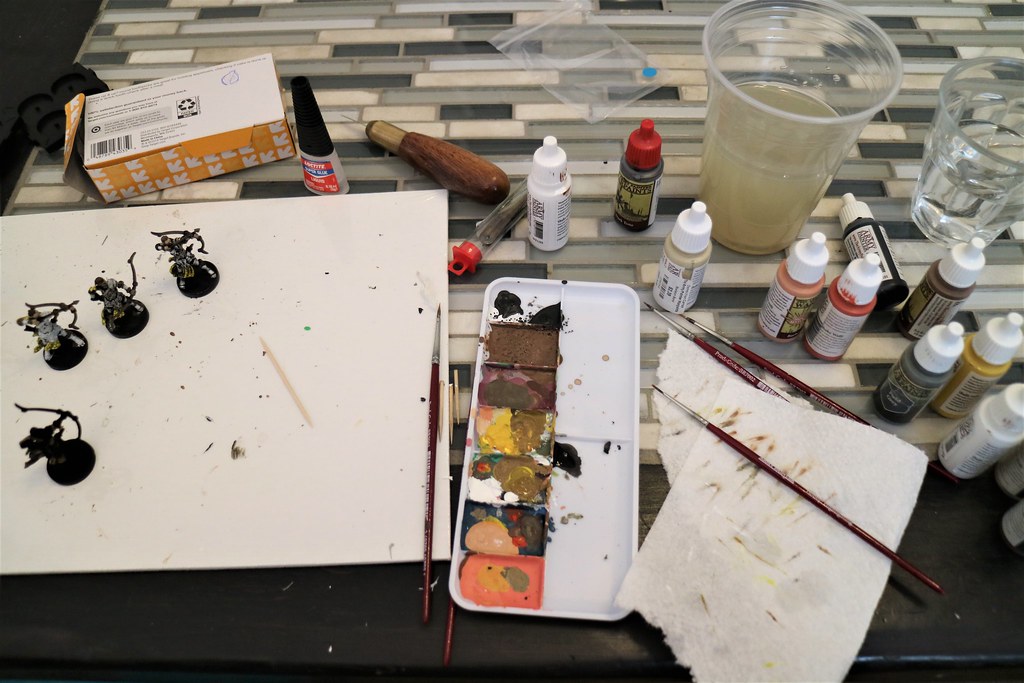
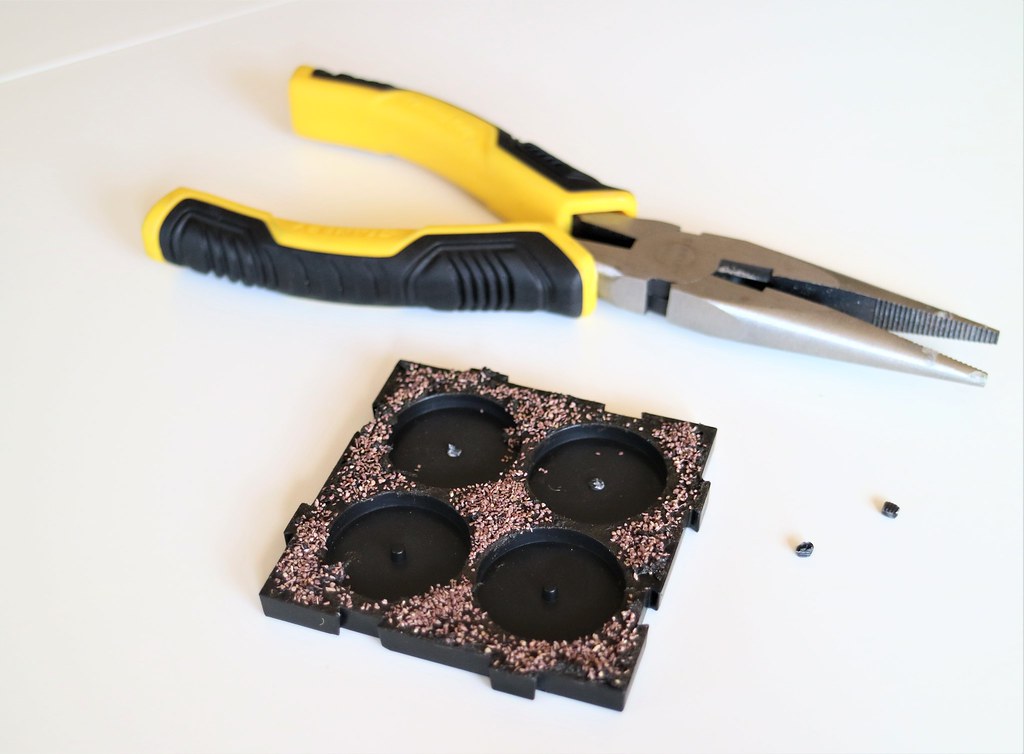
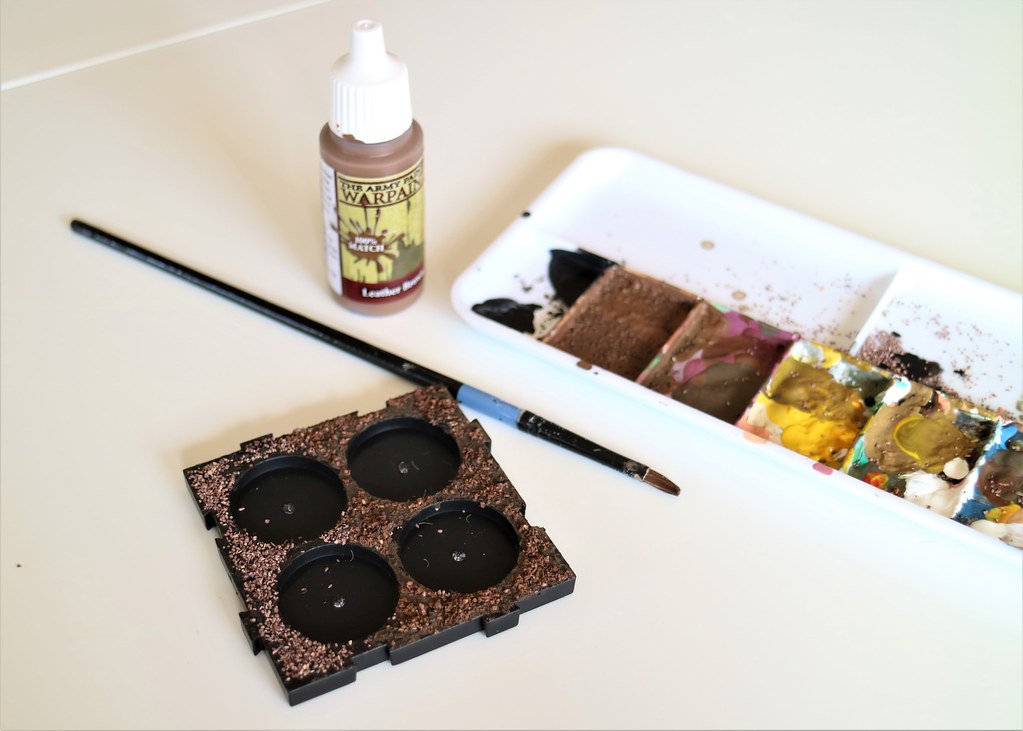
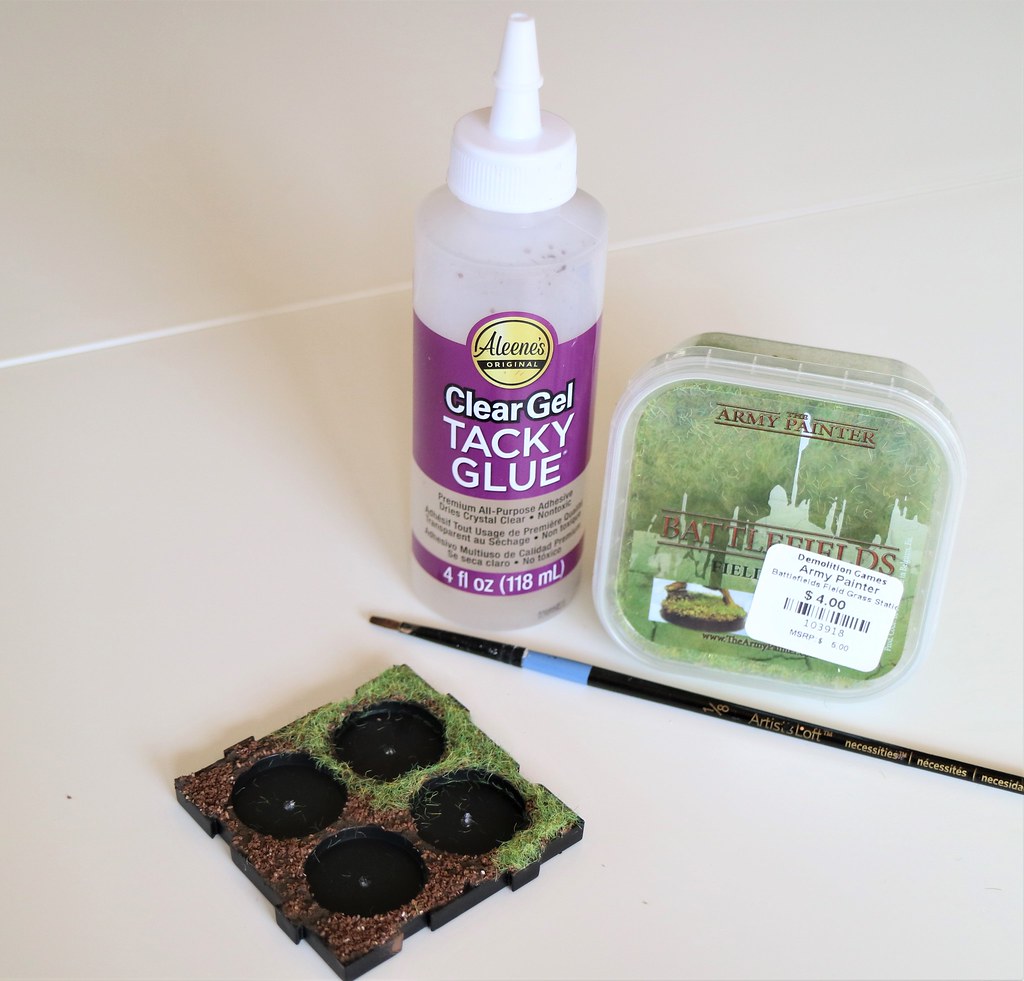
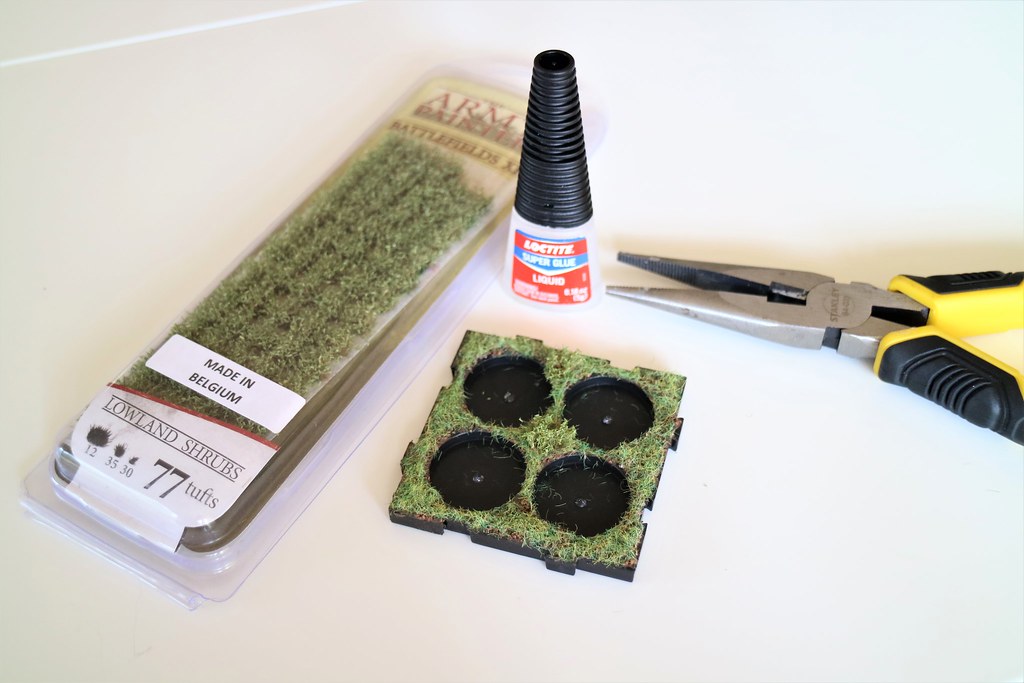
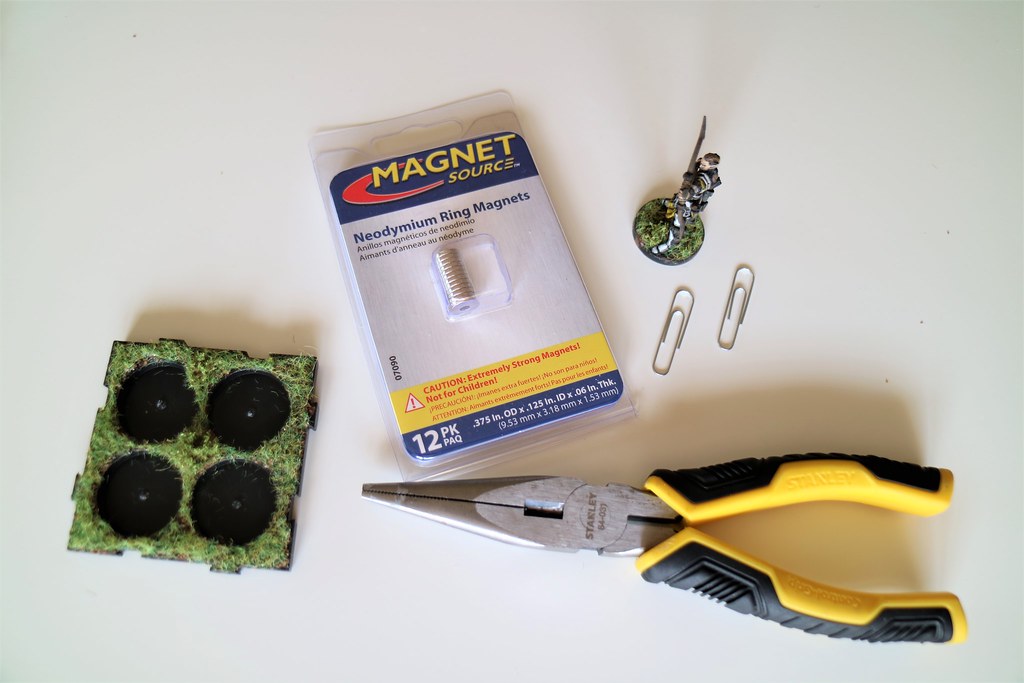
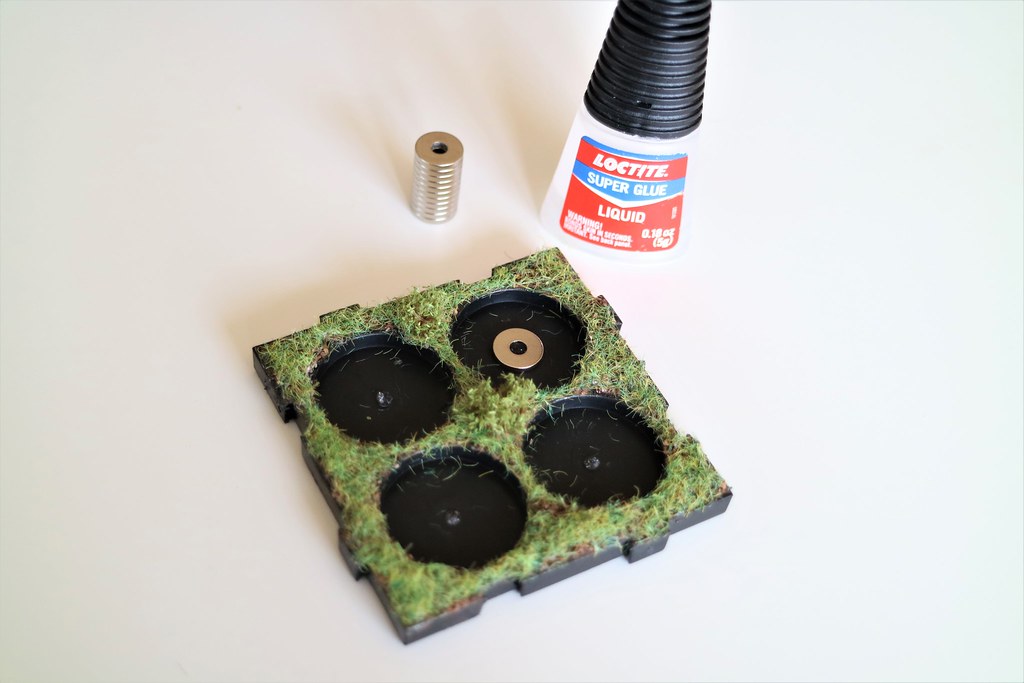
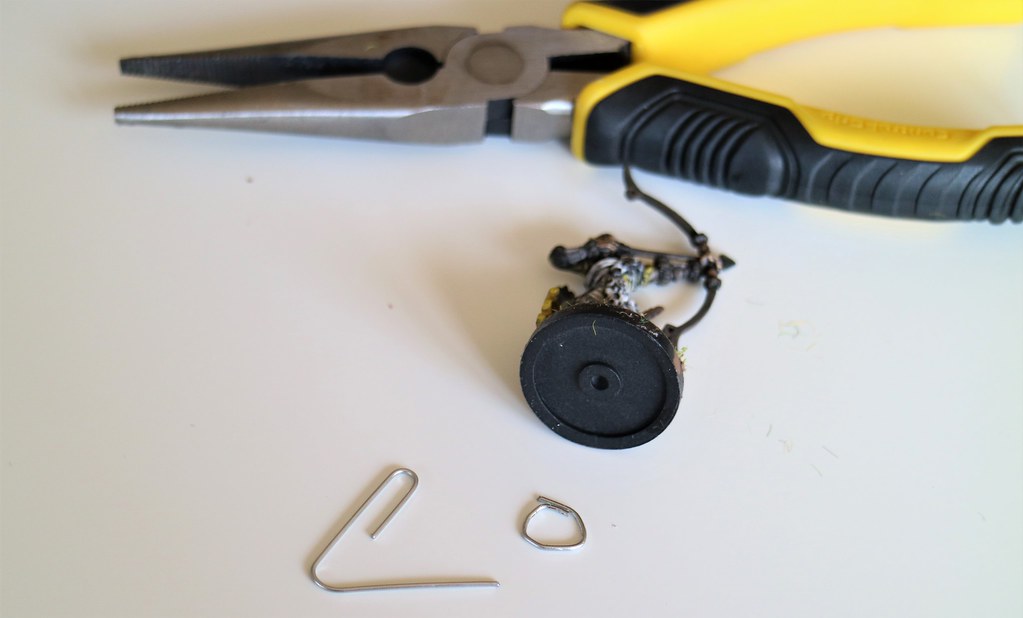
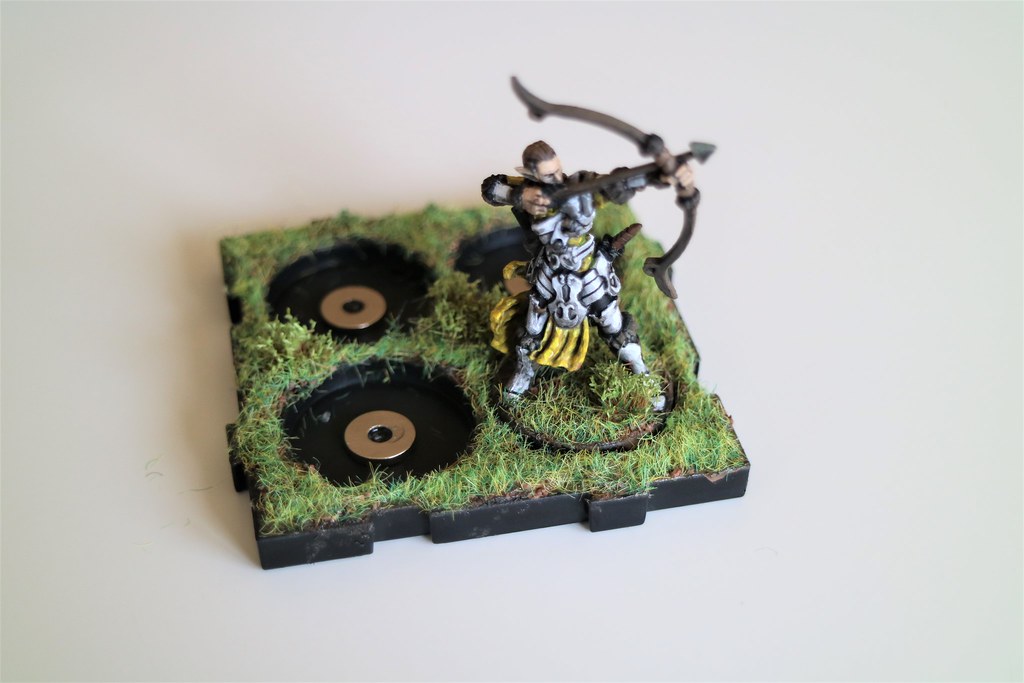
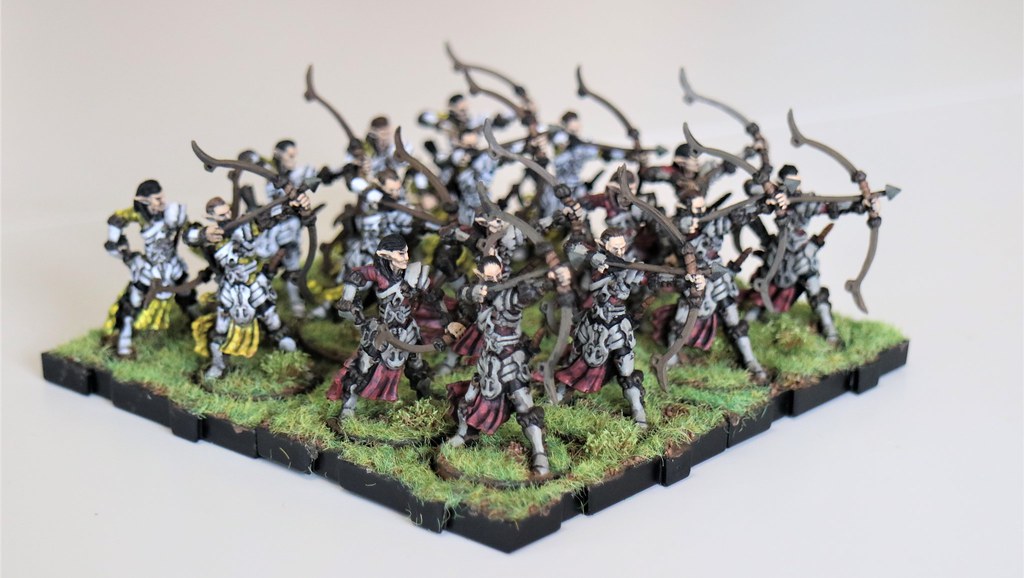
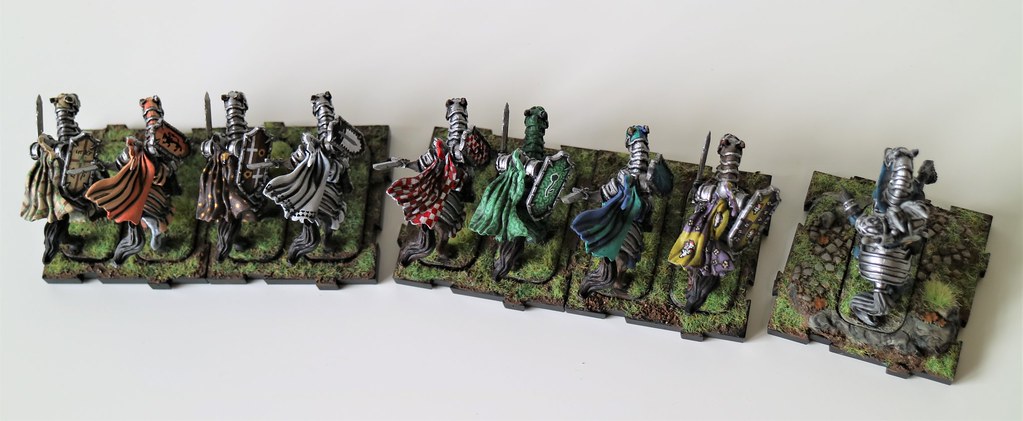
EDIT: I added a couple simple step by step tutorials on painting, basing and magnetizing trays in the comments below if you're interested!

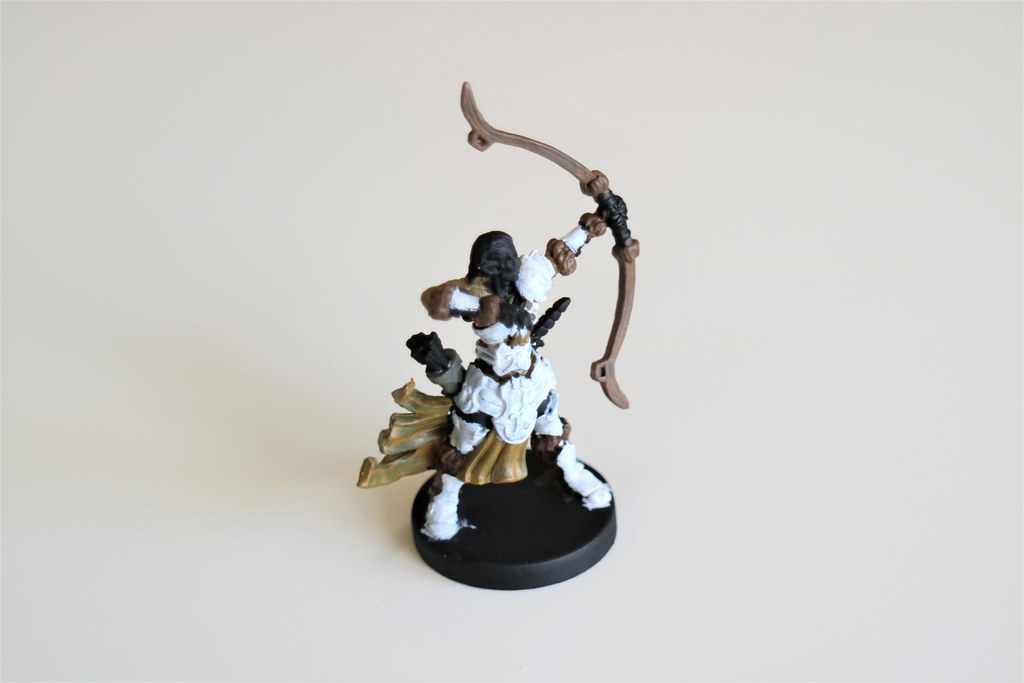
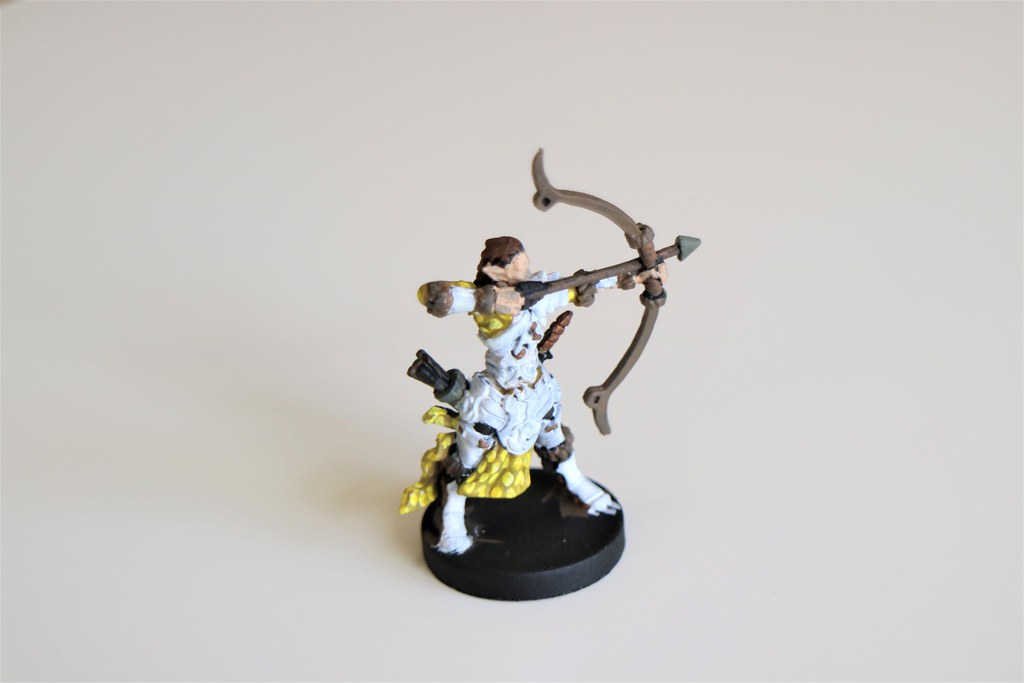
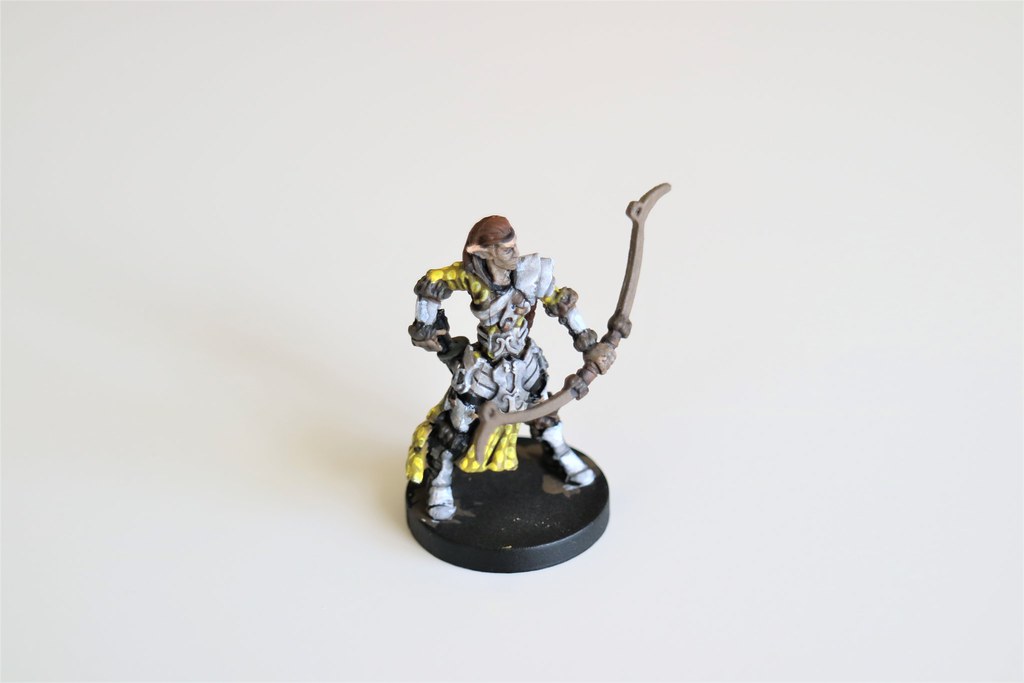
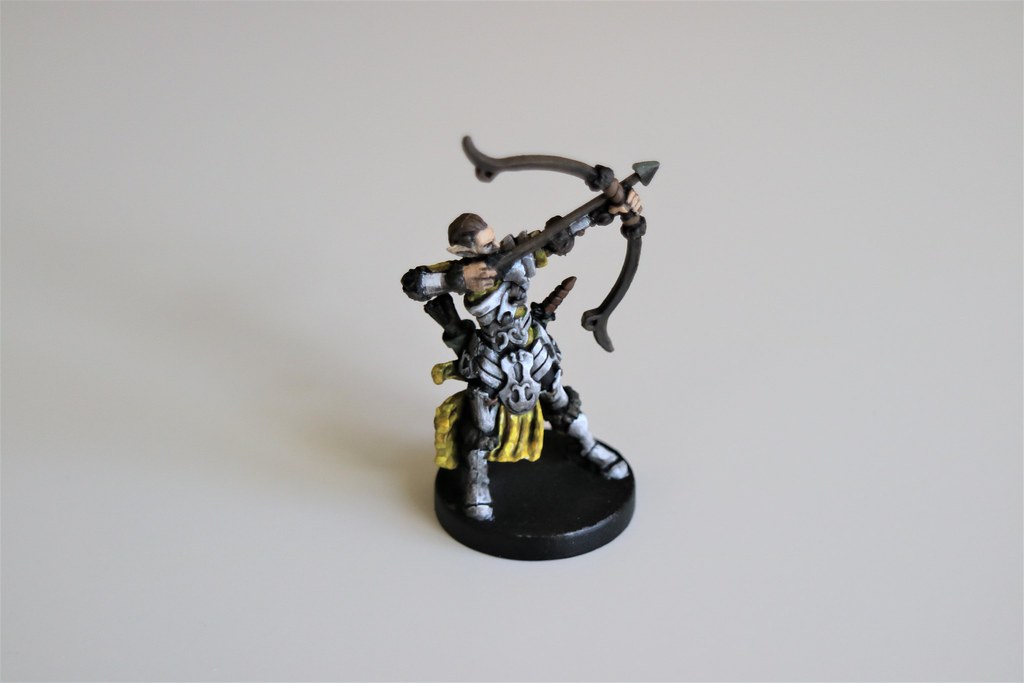
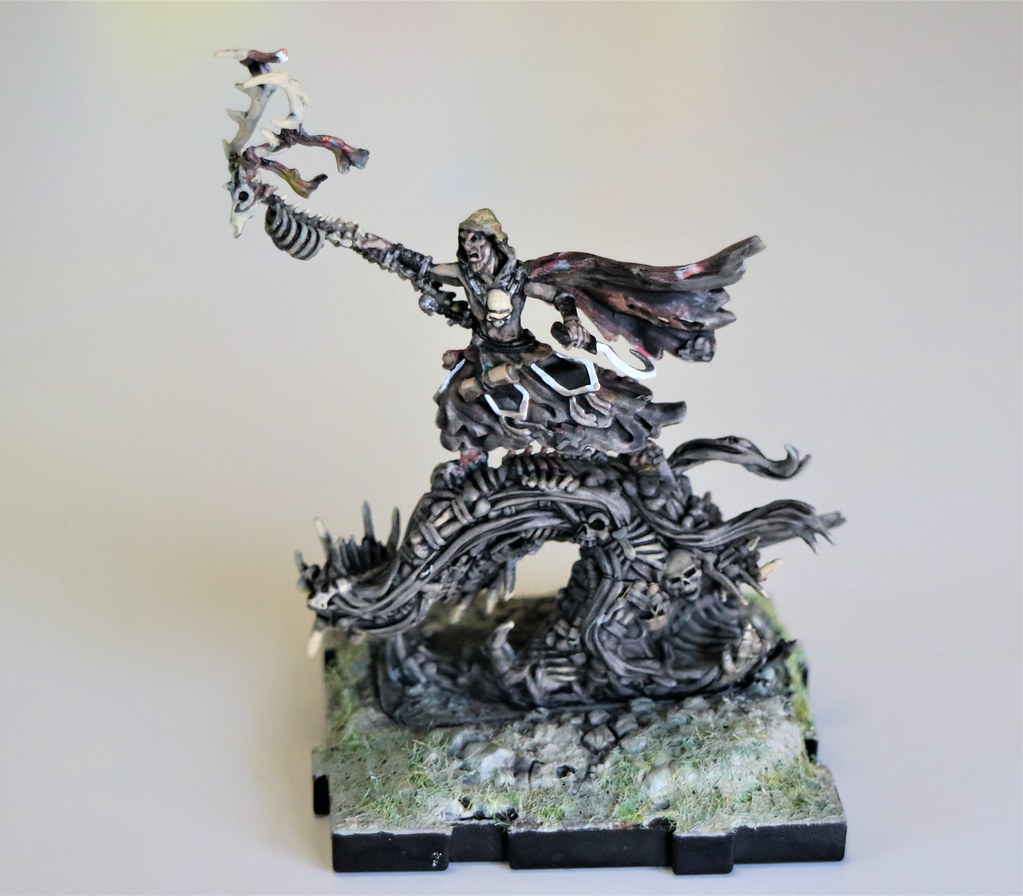
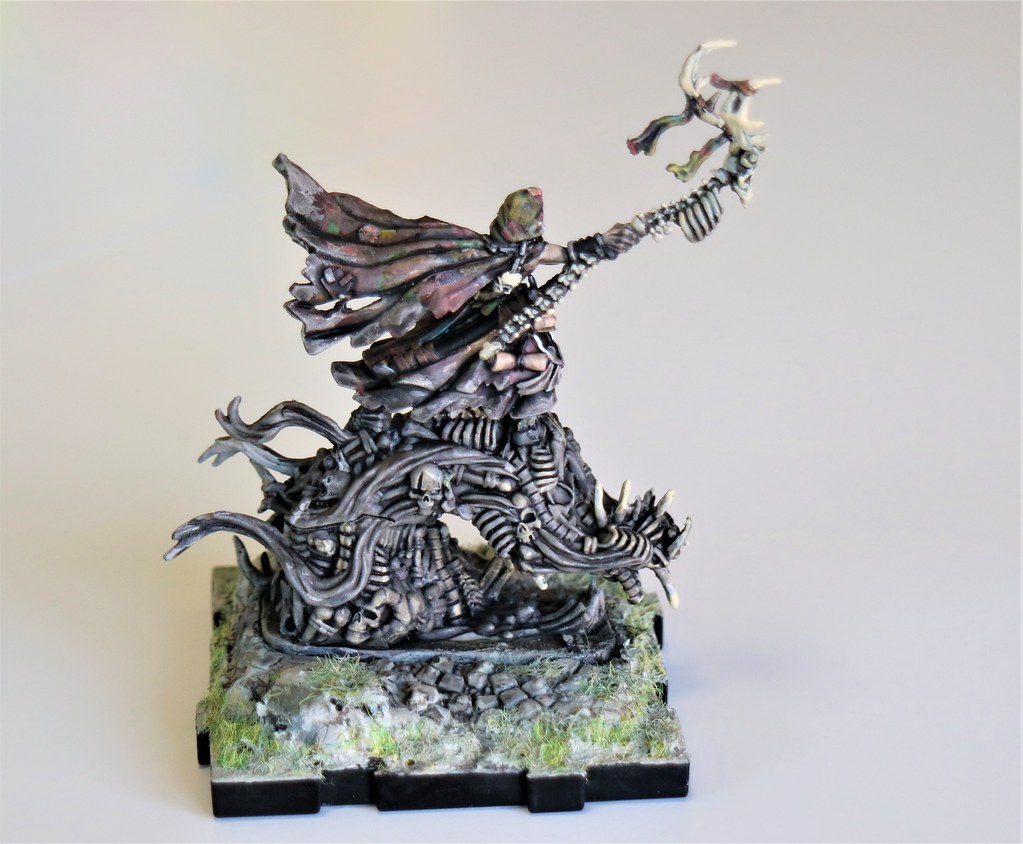
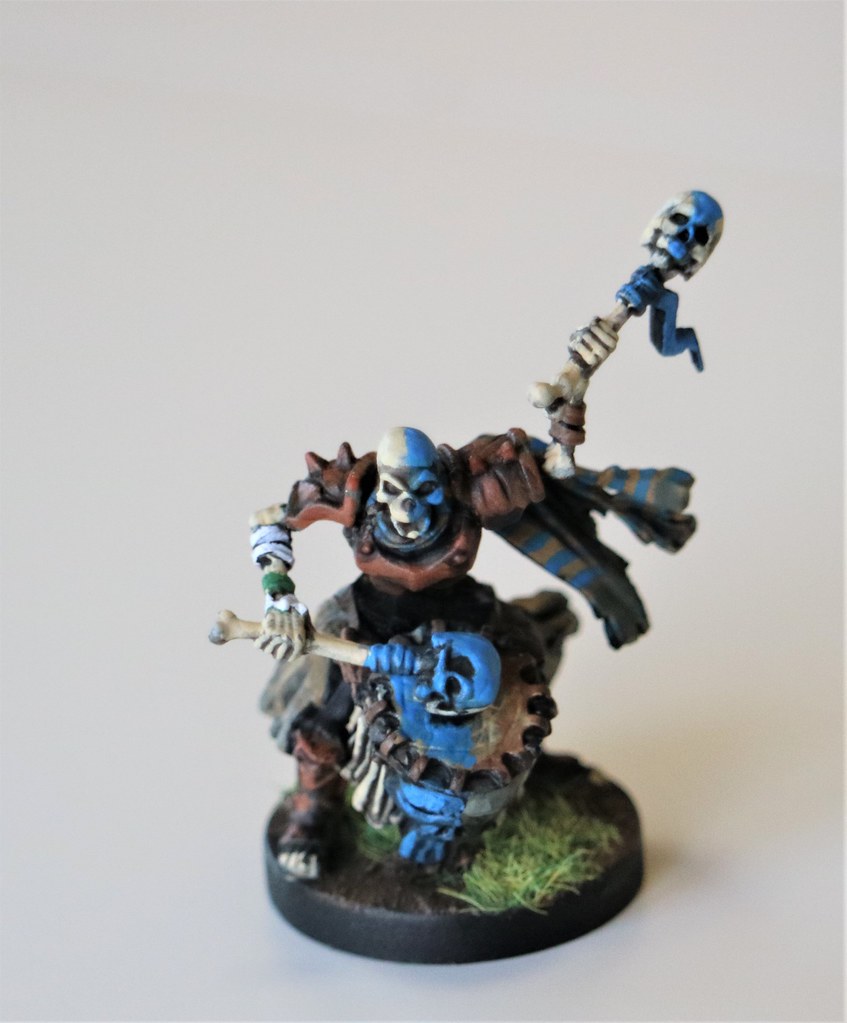
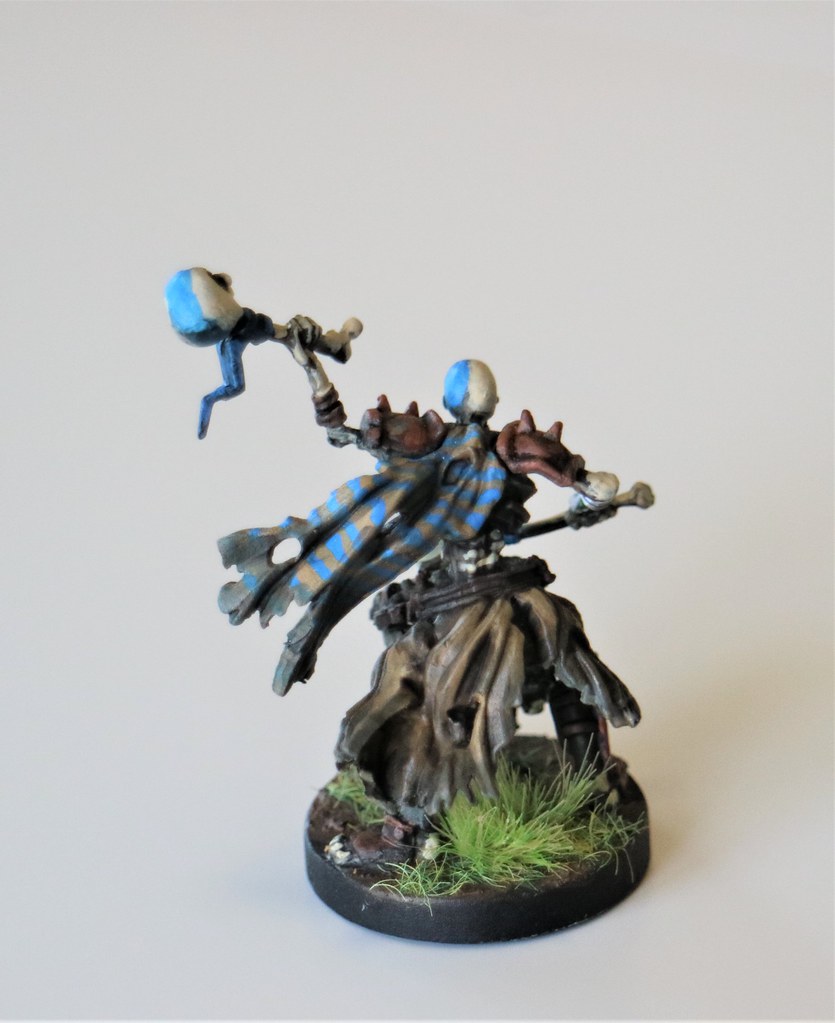
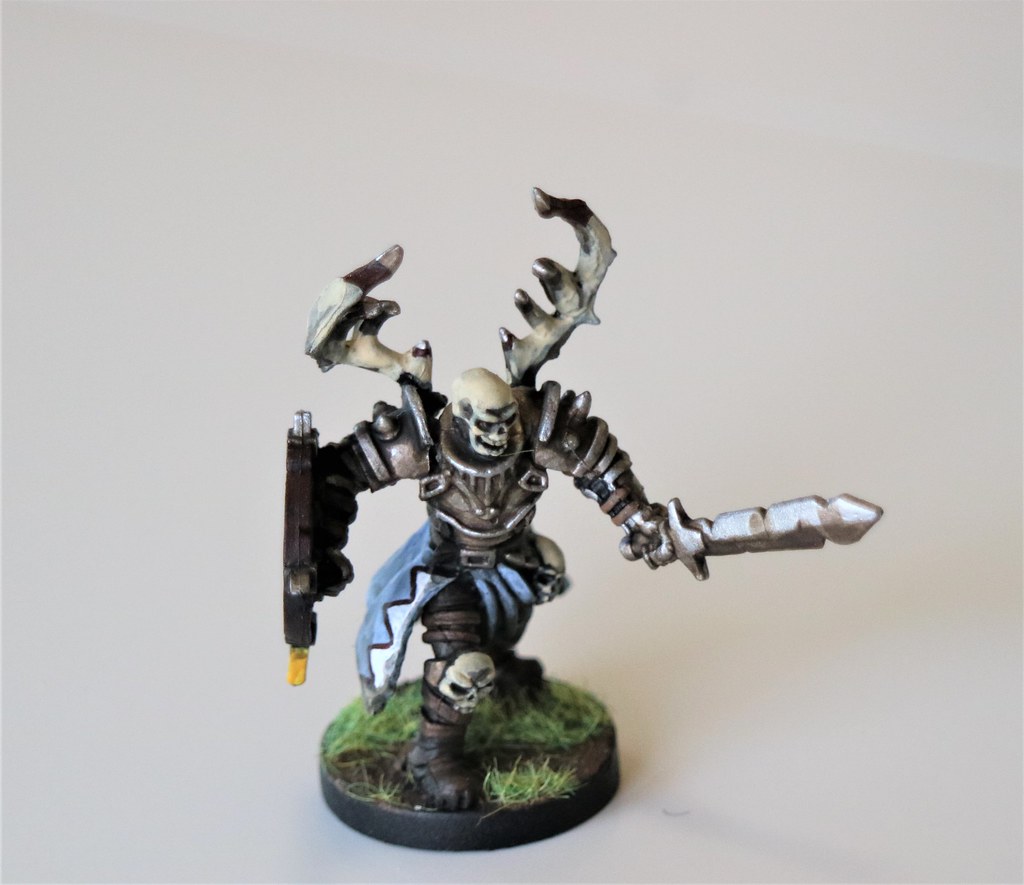
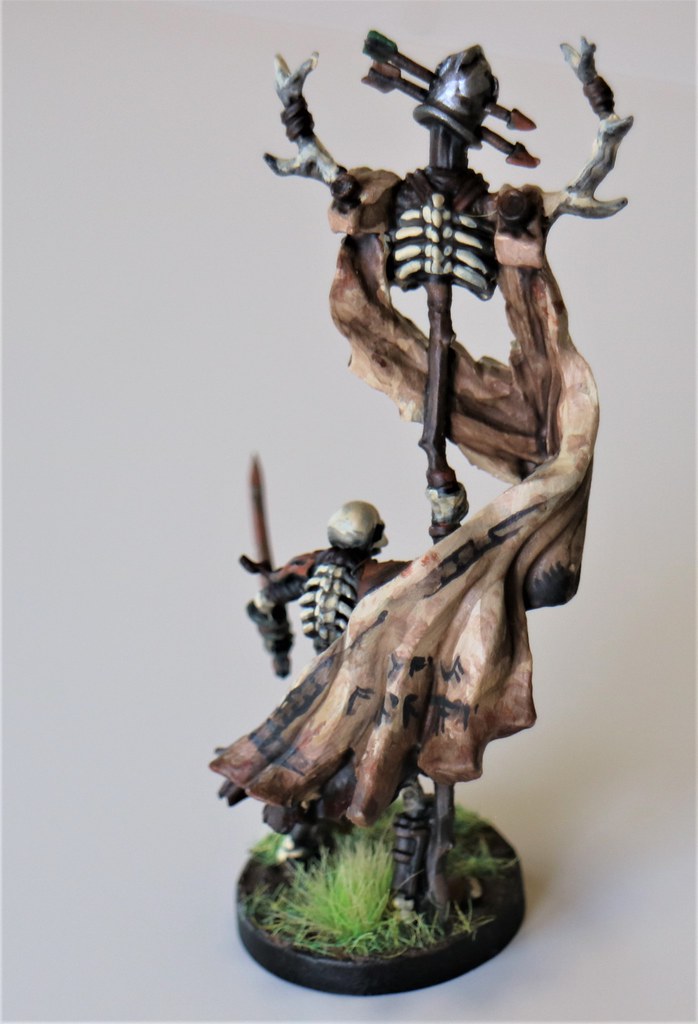
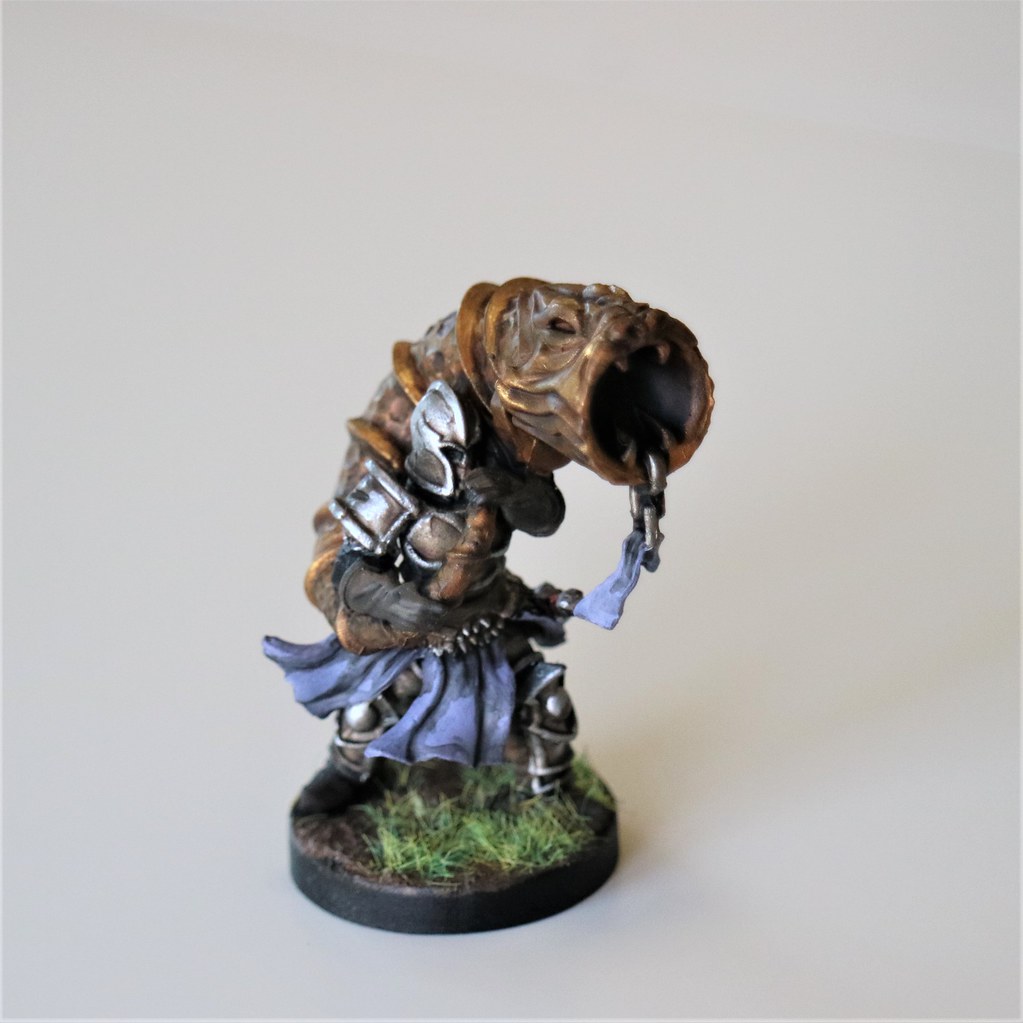
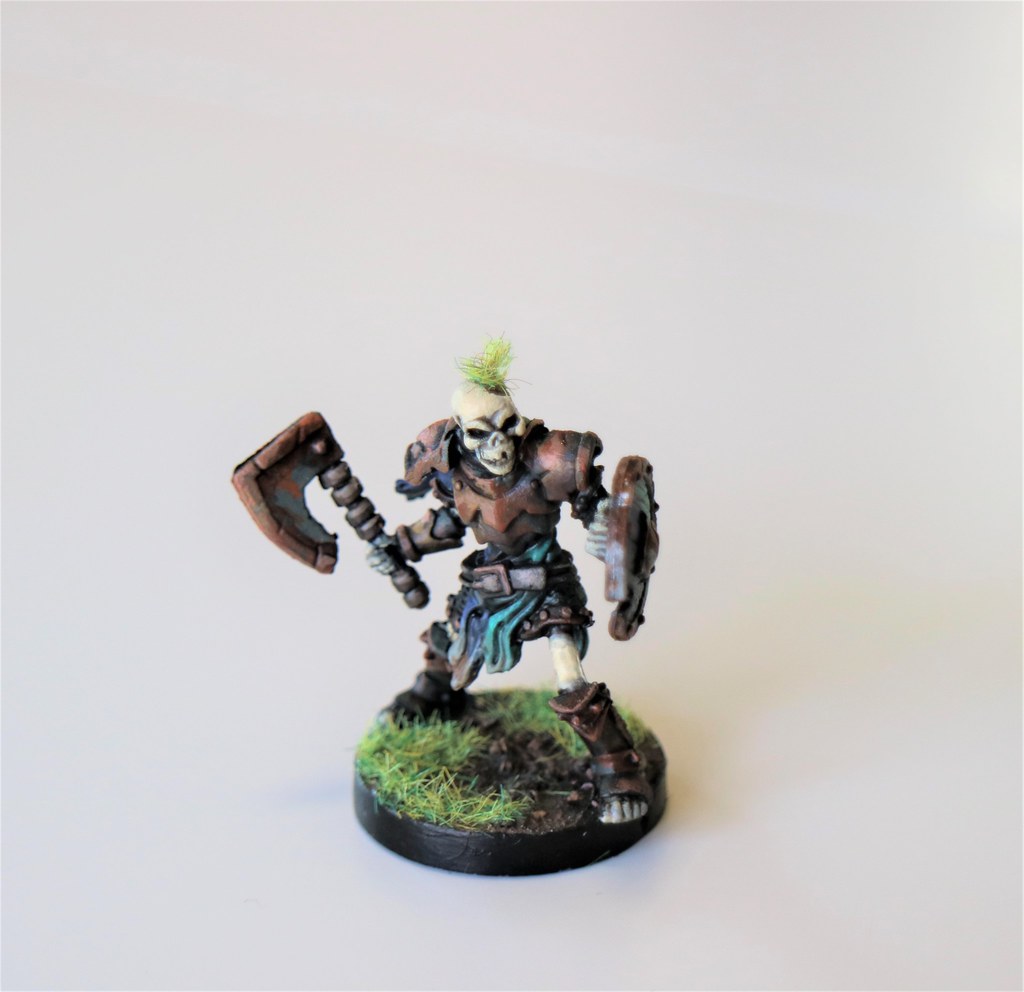
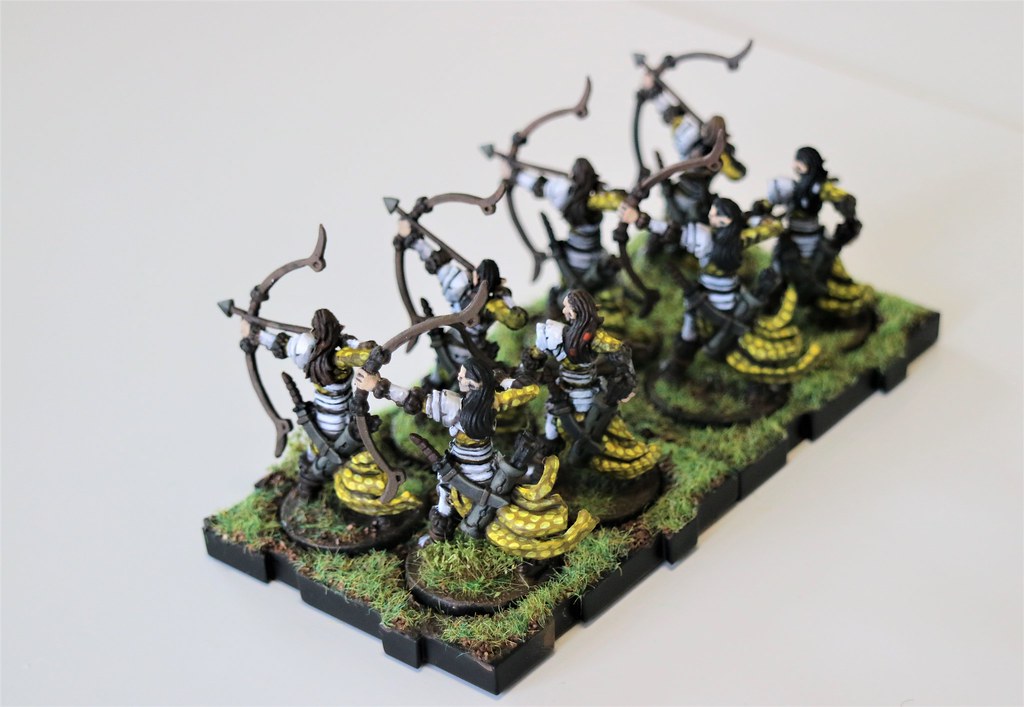
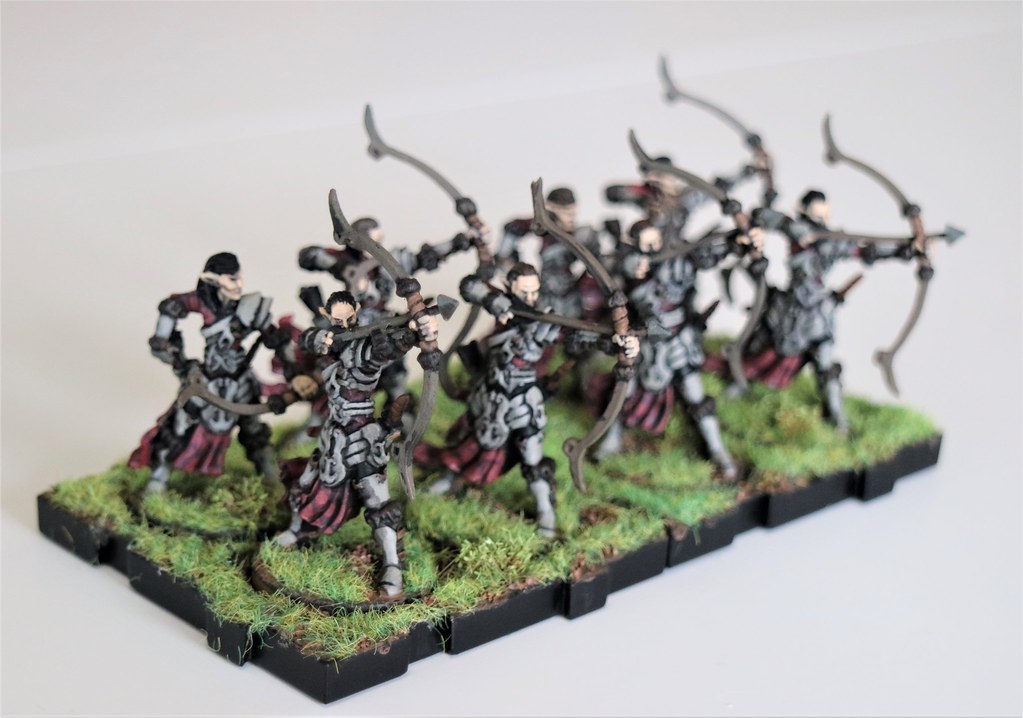
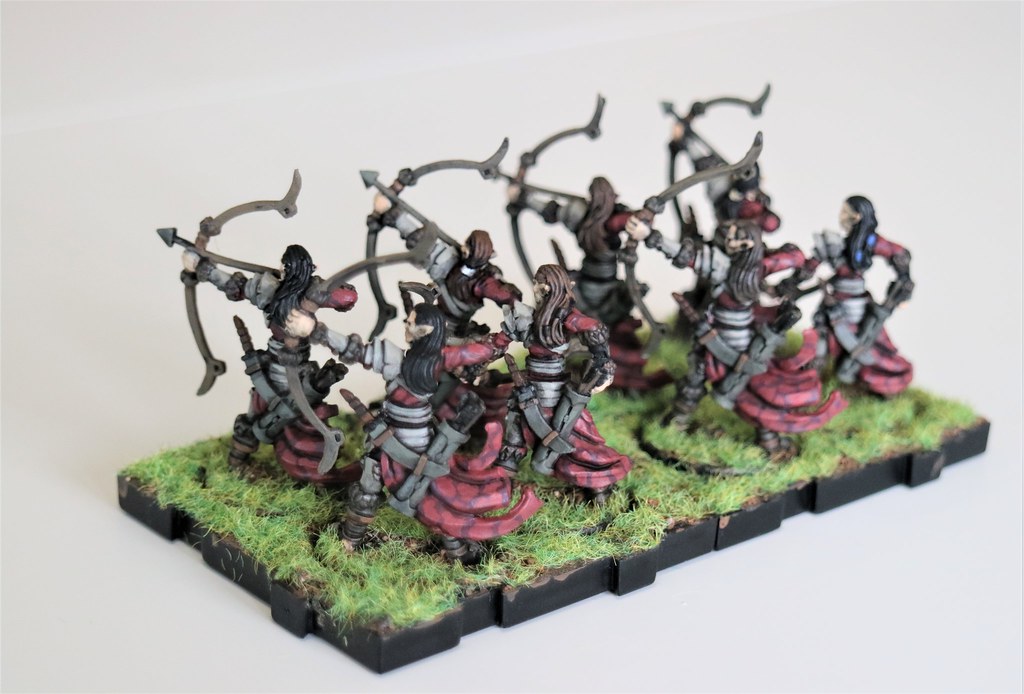
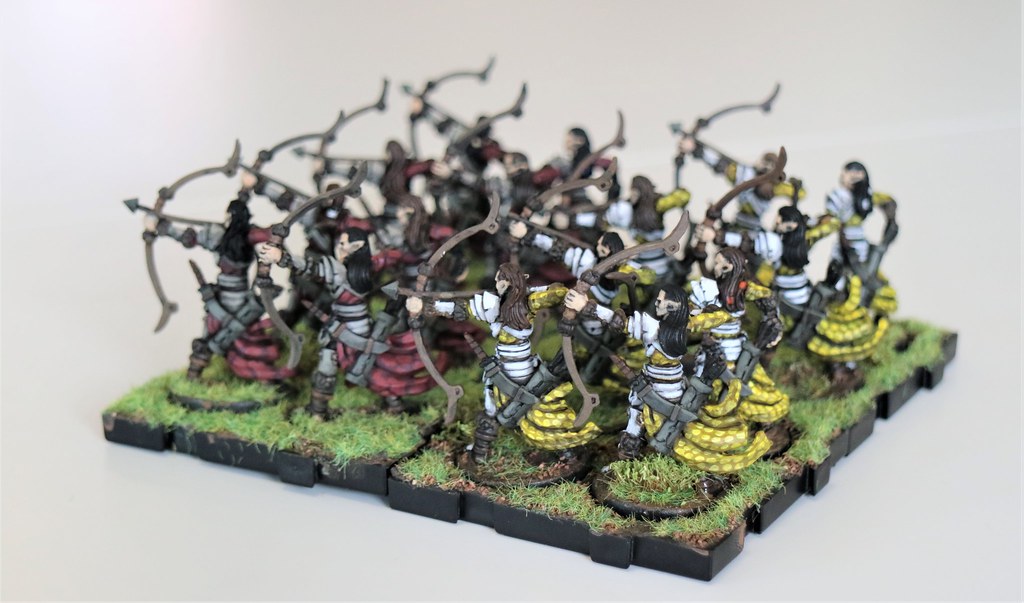
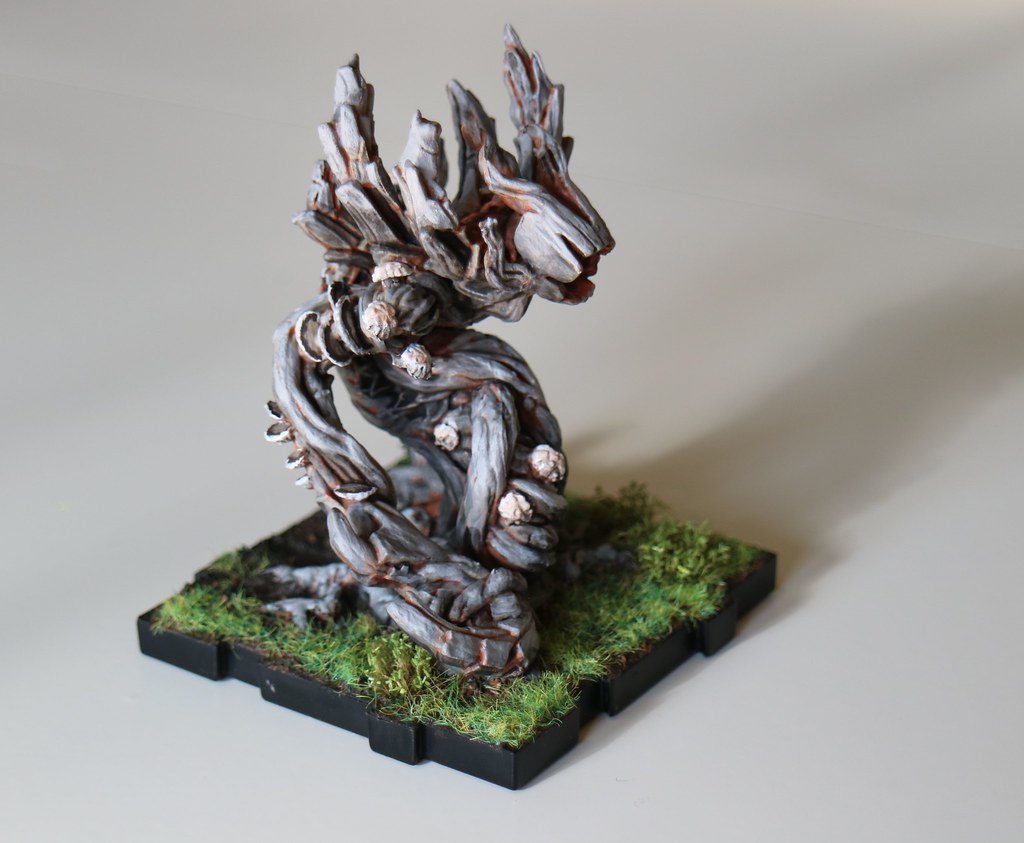
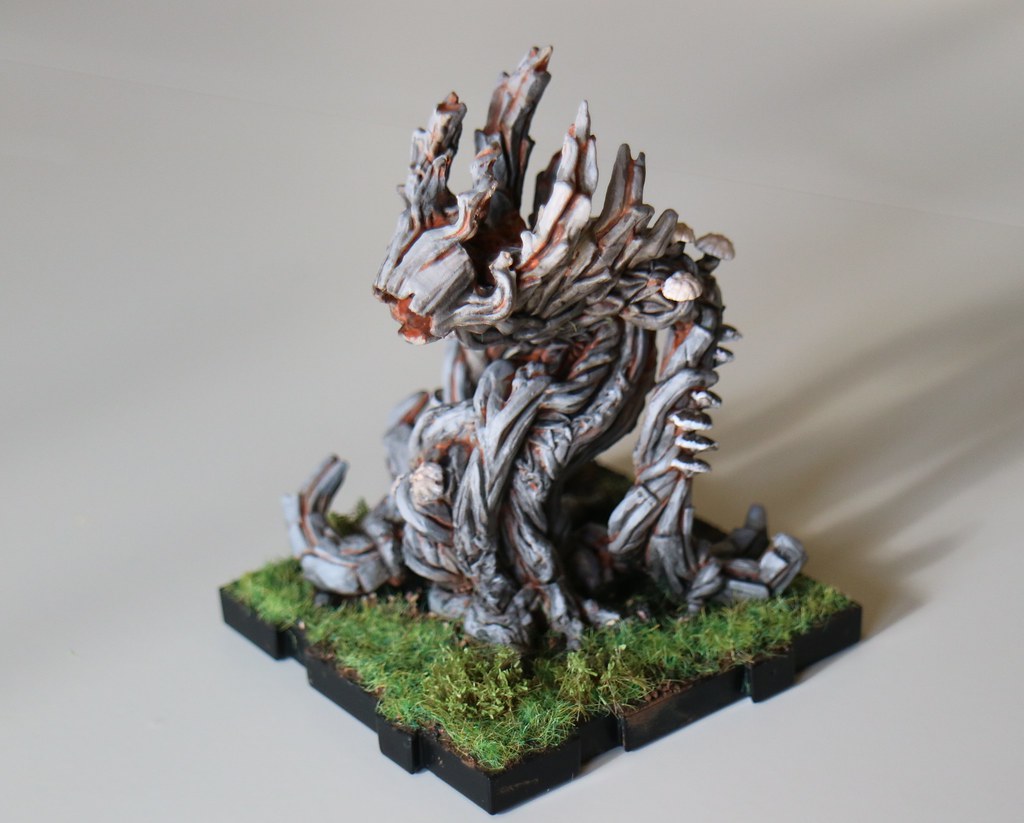
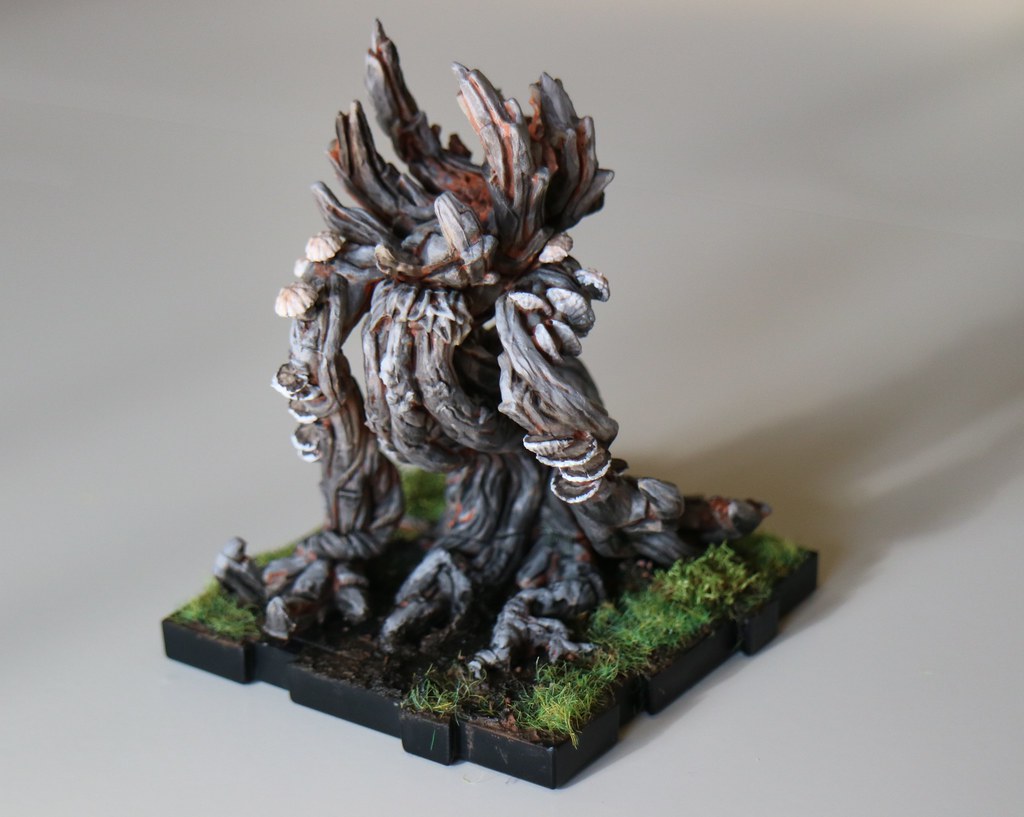
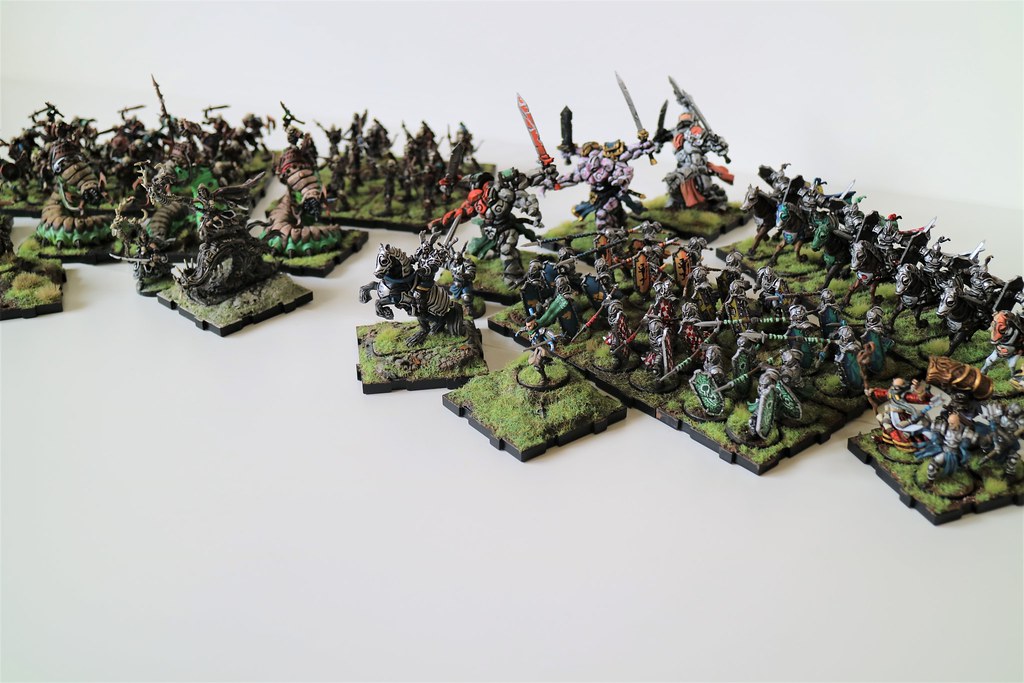
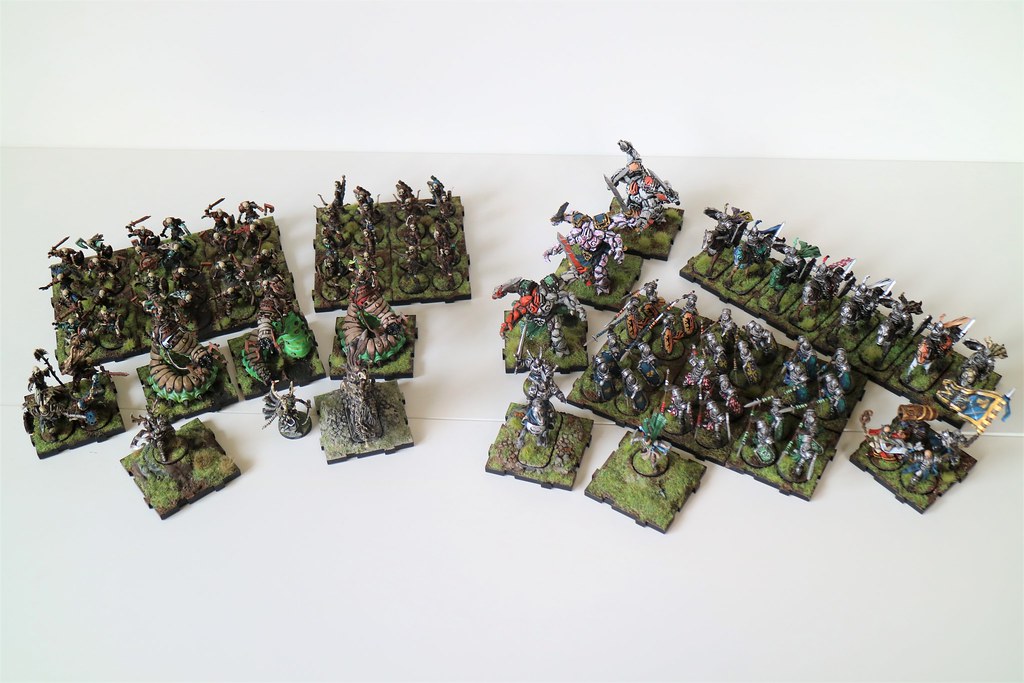
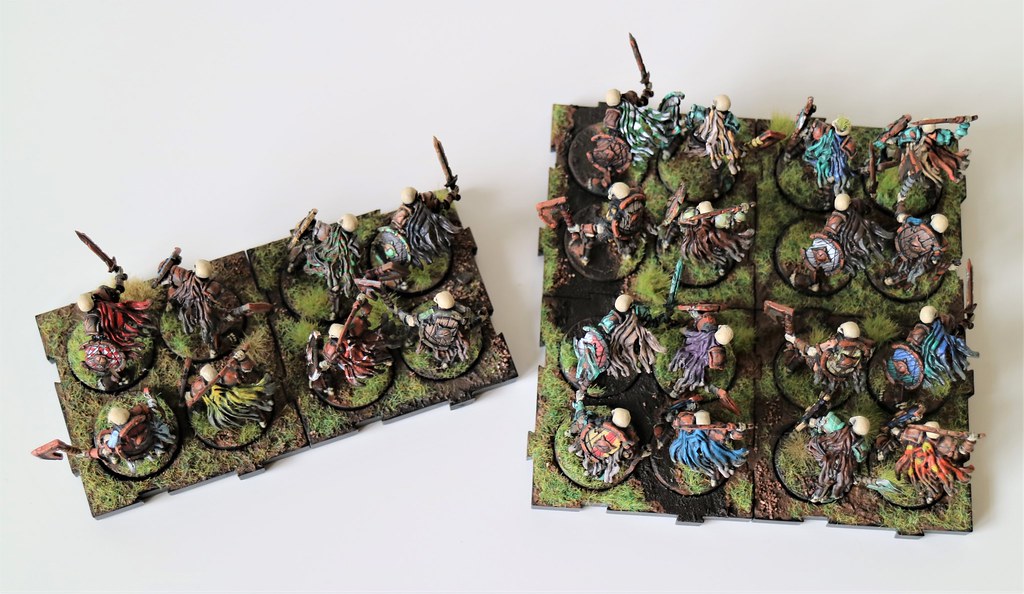
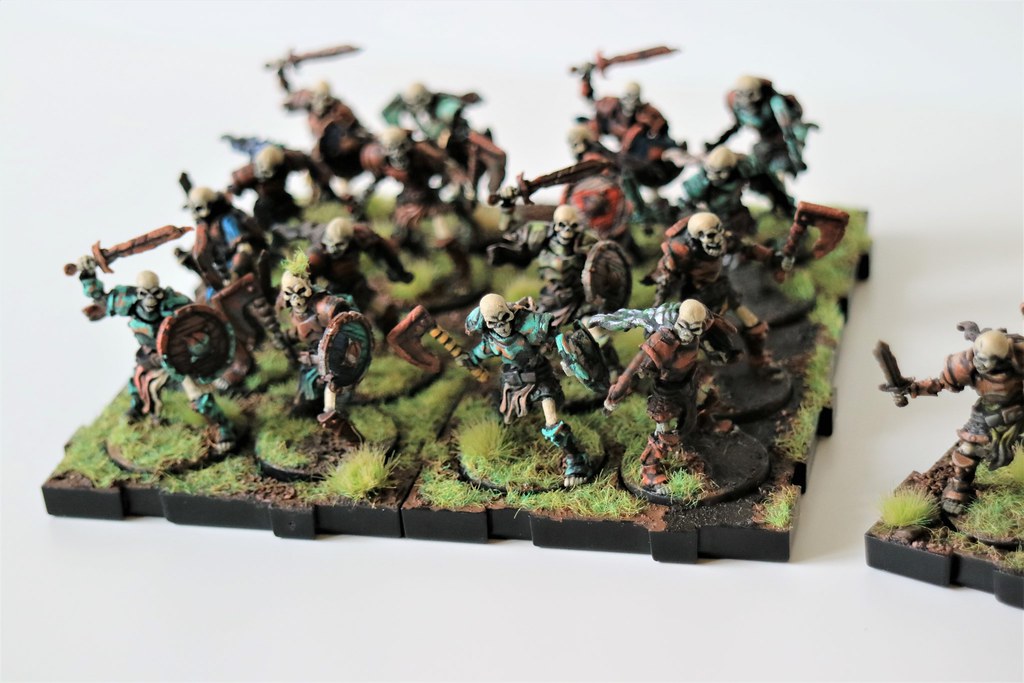
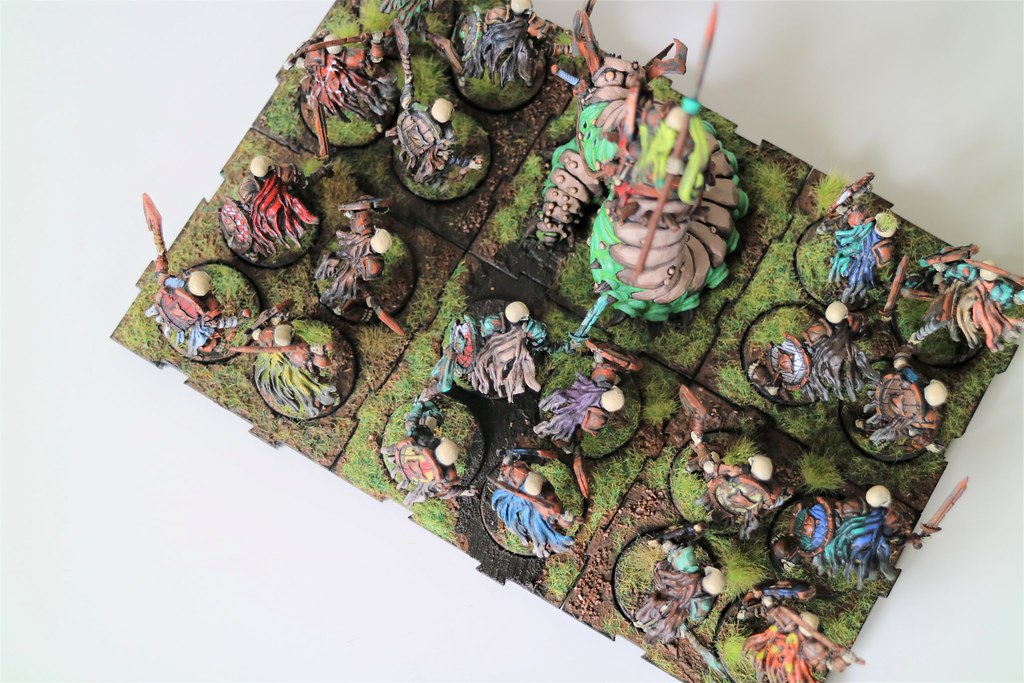
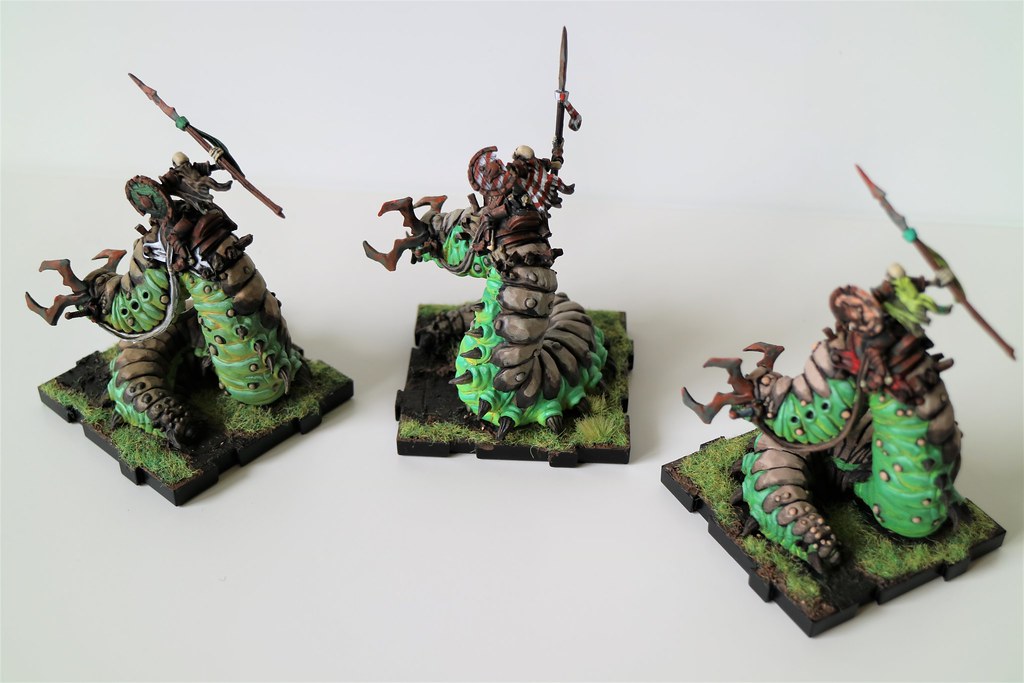
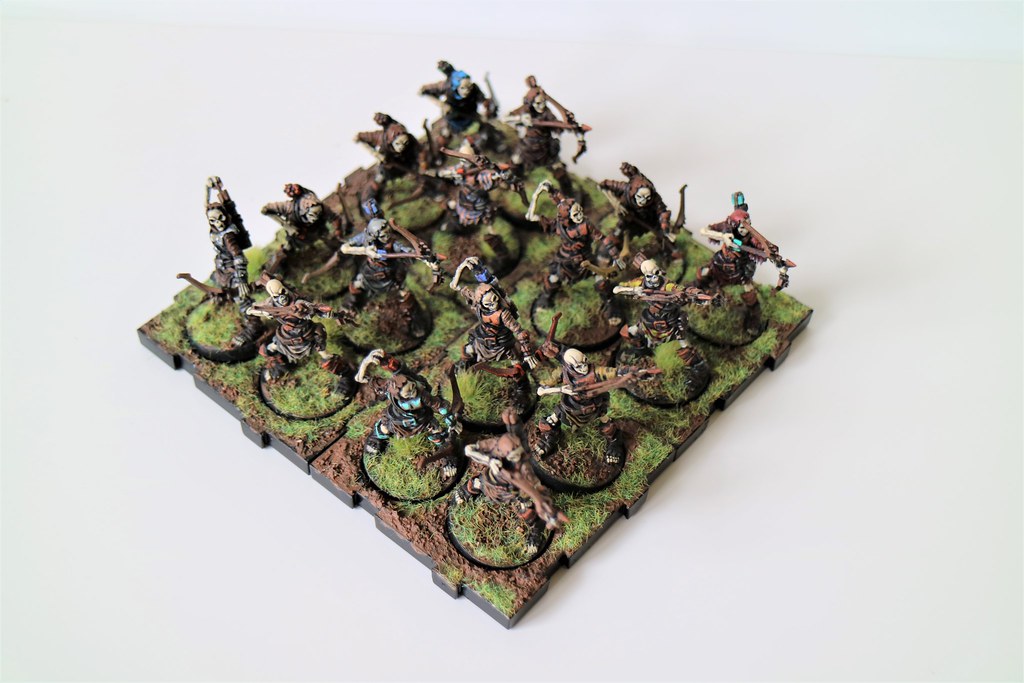
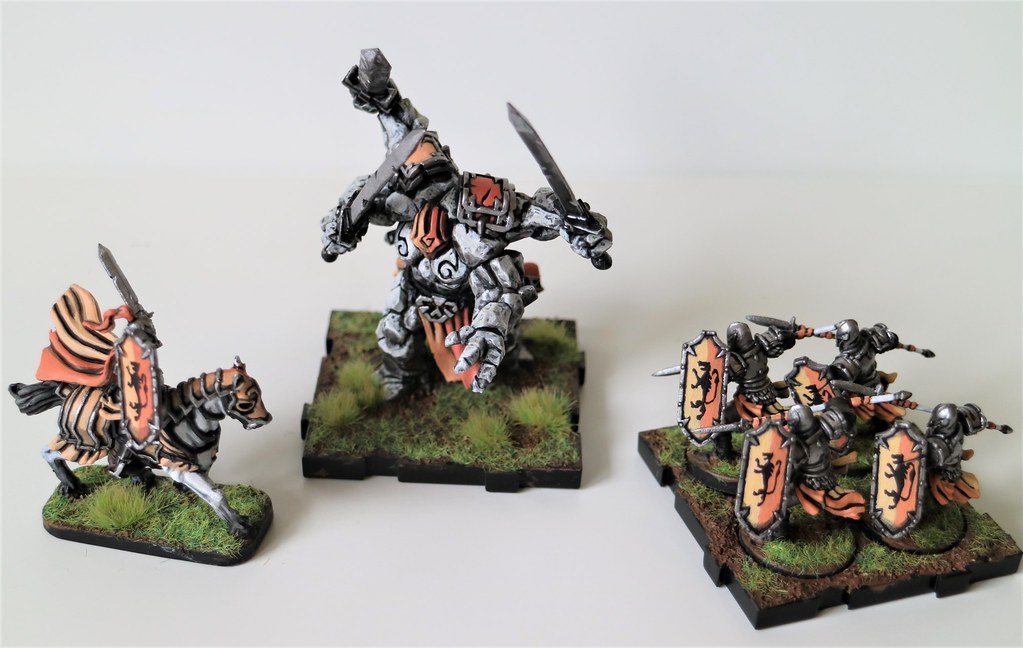
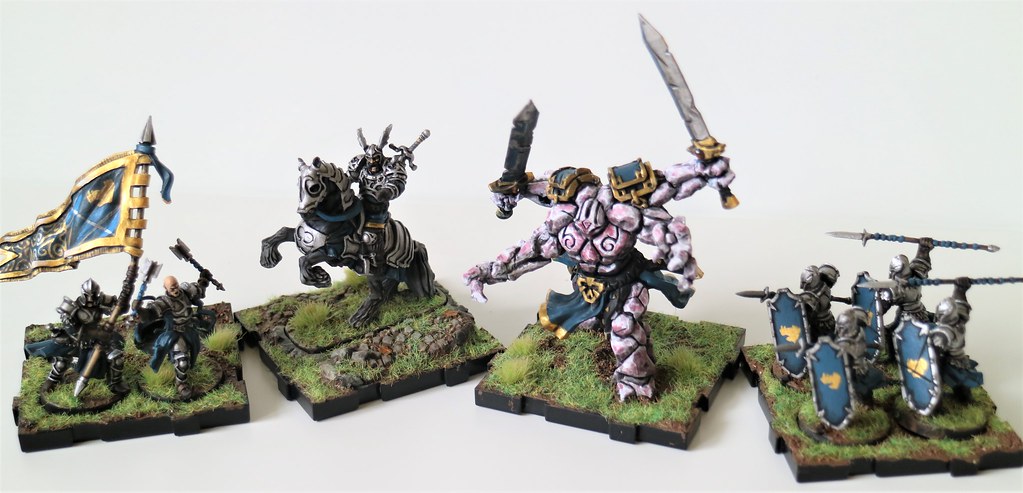
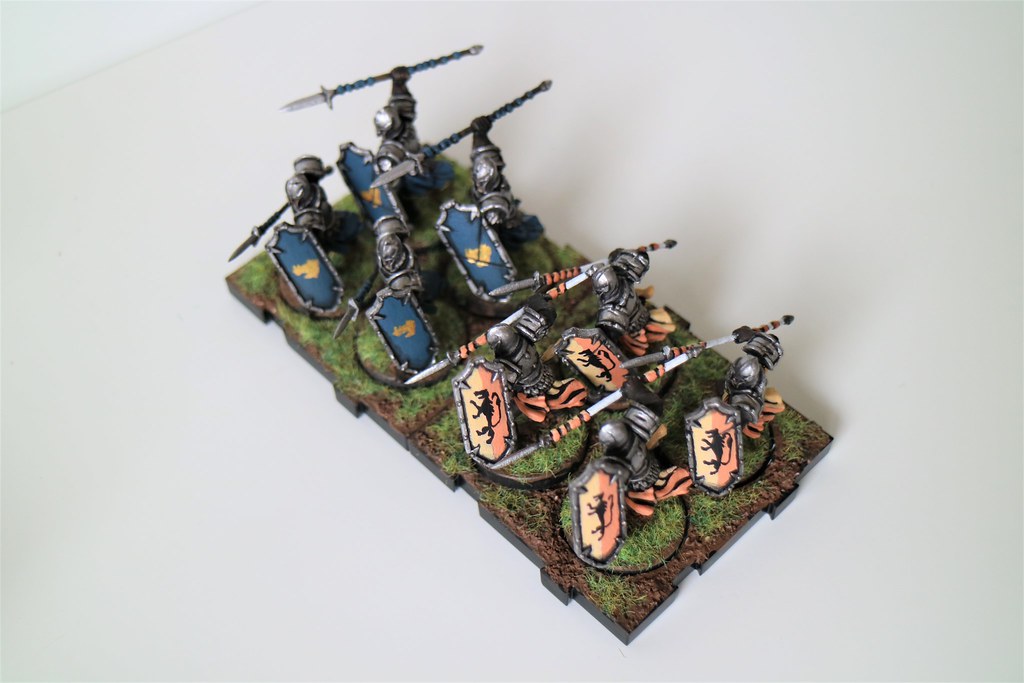
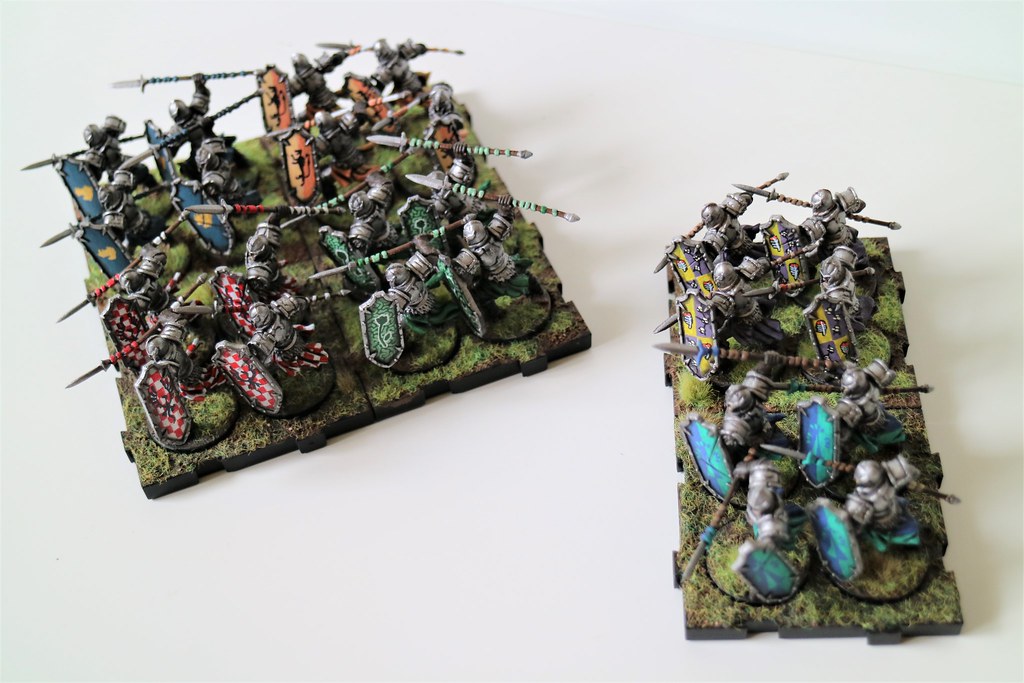
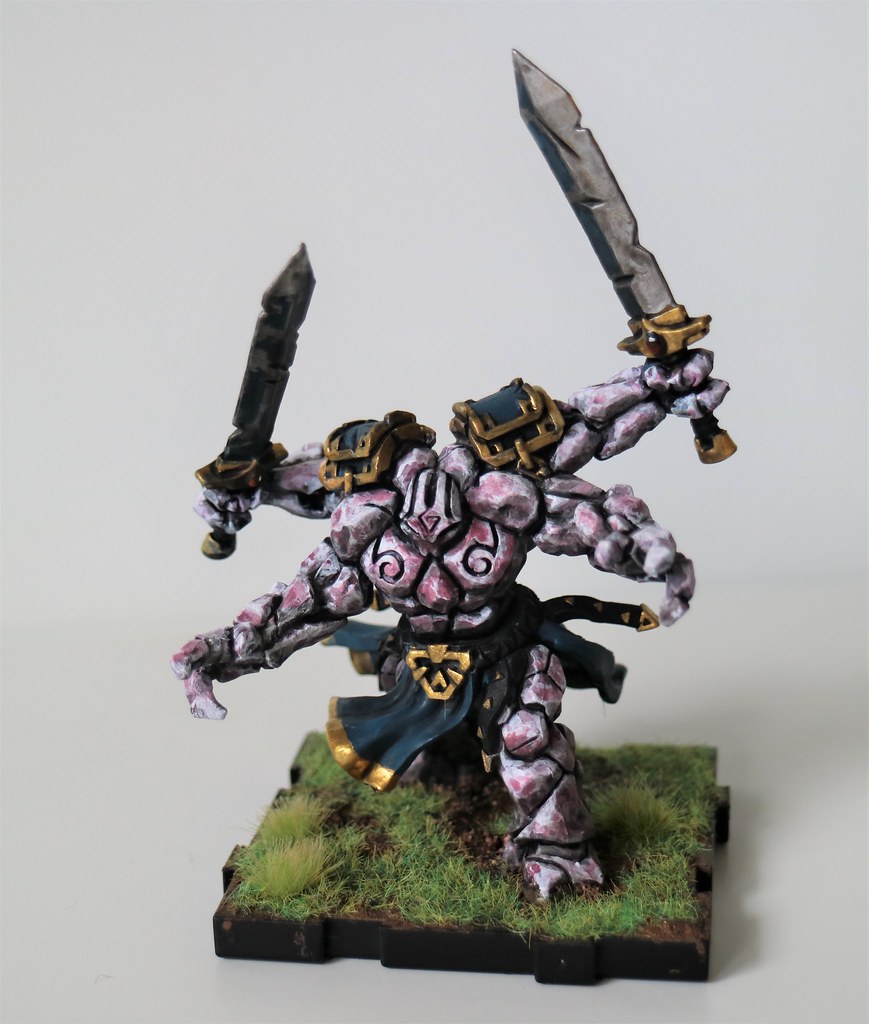
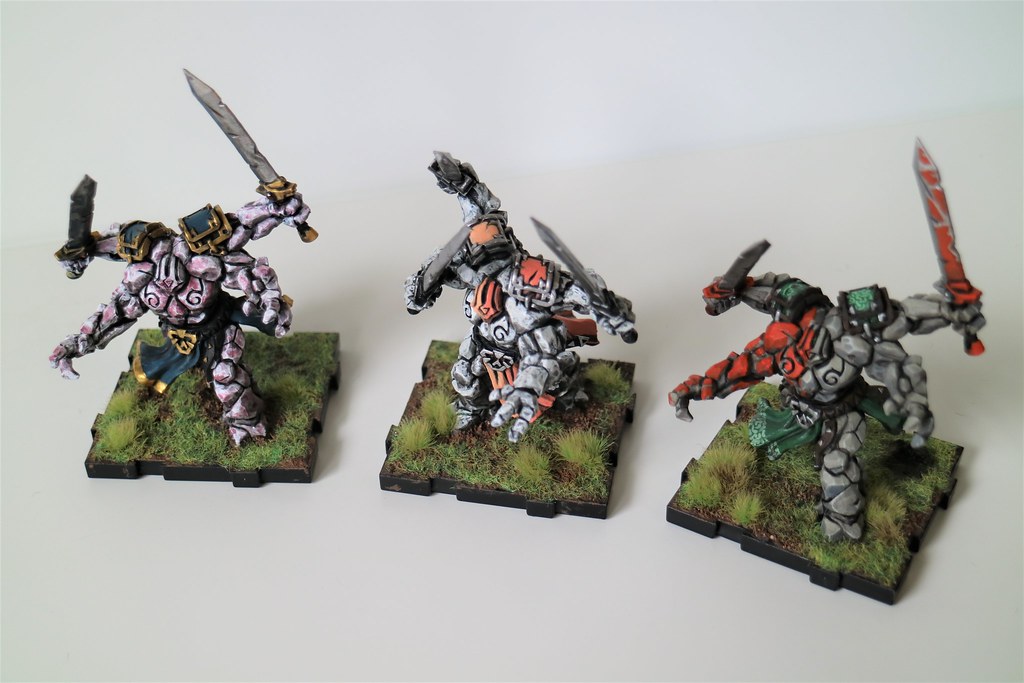
I've been posting my painting in random places, but I decided that I should just stick to one thread from now on. That seems to be what everyone else is doing. Anyway, in the brief lull between now and elves where I have all the expansions painted I thought I should post pictures of my completed army! It's been so much fun playing this game!

Runewars Miniatures Current Army Side Runewars Miniatures Current Army Runewars Miniatures Maru Upgrade Front Runewars Miniatures Skeleton Infantry Back Runewars Miniatures Skeleton Infantry Top Runewars Miniatures Skeleton Infantry Runewars Miniatures Carrion Trench Runewars Miniatures Carrion Lancers Runewars Miniatures Skeleton Archers Runewars Miniatures Orange Set Runewars Miniatures Blue Set Runewars Miniatures Daqan Infantry Runewars Miniatures Daqan Infantry Runewars Miniatures Golem Rose Quartz Runewars Miniatures Golem Orange Runewars Miniatures Rune Golems Runewars Miniatures Oathsworn Cavalry Runewars Miniatures Cavalry Charge

Edited by Hepitude

Fan-explitive-tastic. I love you psychedlic use of colours and refusal to be cohesive as an army. Your freehand work is, as always, enviable as well. I need to do a patter on a Golem loin cloth or something.

I love it all, thanx for sharing. Some really cool schemes there.

22 minutes ago, Darthain said:

Fan-explitive-tastic. I love you psychedlic use of colours and refusal to be cohesive as an army. Your freehand work is, as always, enviable as well. I need to do a patter on a Golem loin cloth or something.

Thank you! It's definitely more entertaining painting when each piece is something new. :) I've been trying to keep the sides somewhat cohesive, even with a ton of colors. Lots of silver for the Daqan and rust for the Waiqar.

So beautiful!

Such talent!

I presume you'll be doing the Elves & any of the other expansions when they come. I will keep an eye out when the time comes.

3 hours ago, Force Majeure said:

So beautiful!

Such talent!

I presume you'll be doing the Elves & any of the other expansions when they come. I will keep an eye out when the time comes.

Definitely elves, not so sure about the uthuk... I dont like what they look like all that much, but I love having options for playing the game so who knows?

15 hours ago, Hepitude said:

Thank you! It's definitely more entertaining painting when each piece is something new. :) I've been trying to keep the sides somewhat cohesive, even with a ton of colors. Lots of silver for the Daqan and rust for the Waiqar.

I hear you, I'm considering a second scheme to round out my daqan painting. We'll see if I actually do it.

Forum police, arrest this person. They paint too well.

I'm not sure anyone cares, but as I'm painting the elves I thought I'd show step by step photos. I try and paint my miniatures so that they look great from three feet away (I want to play with these models, not display them). This means using lots of high contrast colors next to each other and dark washes to exaggerate details. Here's a picture of my setup.

Runewars Miniatures Elf Workbench

In case you've never painted before this is everything I use:

One cup of clean water for mixing into paints (Army Painter is water based so if the paint is too thick I either use a wet brush, or mix in some water drops).

One cup of dirty water (it doesn't start out dirty) for cleaning brushes.

Cheap Army Painter brushes.

Box of toothpicks. I typically paint the pieces of the miniatures before I glue them together. I glue the pieces to the flat end of toothpicks that I've broken in half using superglue.

Superglue.

Painting tray that I got from Blick art materials for 40 cents.

Carving knife. I actually happened to have a carving knife which has been awesome, but I've also used a kitchen knife. I use the knife to shave the connection points on the individual pieces if they don't fit together easily before I glue them.

Paper towels (generic brand).

I use Army Painter paints and I've loved them. I know professional artists don't like the quality, but as someone who is both poor and doesn't have a lot of time to invest in painting they have been great. They're thick, so it's easy to get layers of colors, but thin down well when I mix water into them. And they DRY SUPER FAST! I can usually put a second coat of paint over the first coat by the time I've finished the first coat, which is a huge time saver and TERRIBLE if you're good enough at painting that you want to do a lot of blending. Again, I'm painting for an audience three feet away, so I don't typically blend layers.

These are all the colors I used for the elves (the color pairs are paints I mixed together).

Runewars Miniatures Elf Paints

And here is the step by step of elf painting. I wanted my elves to have modeled their uniforms and armor on specific trees. My first group of elves are based on Aspens (or Birches). White and black bark, with yellow leaves (I'm assuming its the fall fashion). This goes against my art design because yellow and white are BOTH really bright, so it was actually a bit of a nightmare experimenting with those colors until they actually looked good together. I finally decided to make all the other details very dark to help with the contrast.

Step before Step 1: I took all my models outside and use Army Painter primer to spray them down until they were black. I've tried painting un-primed models and it is not fun.

Step 1: The cloth is the bottom layer of the uniform and also has a lot of fiddly little nooks and crannies so I painted that layer first. I used 50/50 mix of Daemonic Yellow and Leather Brown to achieve a dark enough yellow that I could actually put a pattern of yellow leaves on it later and have them show up. I added two layers of this yellow to make sure it had an even coat. Also, I glued this guy together so the pictures would be cohesive. Usually I won't glue the model together until right before I add the Dark Tone wash.

Runewars Miniatures Aspen Elf 1

Step 2: Next I painted in the tufts of padding (or whatever it is) at the joints of the armor, the boots and the bow. I mixed Field Grey and Dirt Splatter (close to 50/50, but a little heavy on the Dirt Splatter to make it primarily brown). I love this mix because it makes a gorgeous nearly black color when I go over it with a Dark Tone wash. I also painted the scabbard and quiver in Field Grey.

Runewars Miniatures Aspen Elf 2

Step 3: The Storm Trooper layer. I used good old Matt White and painted in all the armor. I was a little less sloppy with this layer because white actually shows up under a Dark Wash.

Runewars Miniatures Aspen Elf 3

Step 4: I blocked in the rest of the larger details next. For the elf's skin I used a 50/50 mix of Skeleton Bone and Barbarian Flesh. I painted the hilt of the rapier in Dirt Splatter and used Matt Black on the arrows. For the hair I either kept it black or did Dirt Splatter or Leather Brown depending on how light I wanted it. I also added the leaf pattern on the tunic using Matt White (filling up my paintbrush and poking it once on the tunic for each spot) and then washing over each spot with Daemonic Yellow.

Runewars Miniatures Aspen Elf 4

Step 5: THE BEST STEP! This is where the model finally starts to look good! I used a Dark Tone wash over the model. I don't dip my models, instead going over the model with a paintbrush so I have more control over where the darkness spreads. I use lots of wash in the cracks and less (if any) over the brightest spots on the armor or tunic.

Runewars Miniatures Aspen Elf 5

Step 6: This is the final fiddly little highlights, detailing and shading step. Using all my previous colors I highlight all the places that would catch the light and add more Dark Wash in the places that are too light. I tried a version where I added the dark bark marks that you can see on the trunk of a Birch, but it made the armor look way too busy and messy so I decided to forgo that particular detail.

Runewars Miniatures Aspen Elf Completed Front Runewars Miniatures Aspen Elf Completed Back

Once all eight are done (I'm working in sets of eight) I'll add the basing and post of picture of them on here. Hopefully this is helpful for new players who want nice looking models for playing the game, but don't feel up to investing the time in professional quality paint jobs.

P.S. I do apologize for the enormity of this post.

Edited by Hepitude

That's a good guide and a fine looking elf. Painting the innermost surfaces first and creating high contrast are excellent tips. What stands out the most to me is your beautiful use of freehand textures.

I know you're in elf-mode right now, but I'd really love a rundown of your basing technique and product choices. I still haven't done mine yet and I'd love to achieve a similar look to your Daqan and Waiqar bases.

10 minutes ago, Contrapulator said:

That's a good guide and a fine looking elf. Painting the innermost surfaces first and creating high contrast are excellent tips. What stands out the most to me is your beautiful use of freehand textures.

I know you're in elf-mode right now, but I'd really love a rundown of your basing technique and product choices. I still haven't done mine yet and I'd love to achieve a similar look to your Daqan and Waiqar bases.

Thank you and for sure! I usually base once I have enough for a tray, so I'll take pictures as I work on them.

Here is the step by step process I follow when I'm basing my trays. Hopefully it will be helpful if you've never done any basing before (I had to learn when I started collecting Runewars).

Runewars Miniatures Basing All Steps

Step 1: Mud. I'd never paid money for mud before, but I guess there's a first time for everything. I've been using Vallejo Thick Mud and it works great. I use a bad paintbrush to cover the entirety of the base.

Runewars Miniatures Basing Step 1

Step 2: Rocks. Before the mud dries I sprinkle it with Army Painter Brown Battlefields rocks. The rocks mostly stick to the mud, but if I'm going for a rockier base, I'll press them down a little so more stick. Since I'm poor, I put a folded piece of paper under the base when I'm doing this so I can pour all the rocks that don't stick back into their container and use them later.

Runewars Miniatures Basing Step 2

Step 2.5 (OPTIONAL): I magnetize all my figures, so in preparation for this I use pliers and twist out the little pegs inside the bases.

Runewars Miniatures Basing Step 3

Step 3: Dirt. Next I water down some Leather Brown paint (Army Painter again). It's a little more than 50% water I would guess, but the precise mix doesn't matter all that much as long as the paint is watery. I cover all the mud and rocks with this mix. I've found it creates a nice highlight pattern without having to drybrush a lighter brown over the top once it's dry. I usually use a ton of grass so highlighting the dirt isn't terribly important to me. If you're going for rockier bases though mixing a little white into Leather Brown and drybrushing over everything is not a bad idea.

Runewars Miniatures Basing Step 4

Step 4: Grass. I use my bad paintbrush again and put a clear glue gel on all the spots I want grass. I use Aleene's Clear Gel Tacky Glue, but any clear or clear drying glue should work. Once the glue is on the base I take pinches of grass and cover everything. As with the rocks, putting a folded piece of paper under the base lets you reuse the material that doesn't stick.

Runewars Miniatures Basing Step 5

Step 5: TUFTS! This is the best step! I never knew that Tufts were a thing until I looked up tutorials on basing. They are my favorite! Seriously, I get way too much enjoyment out of these little plants. I use Loctite Super Glue and some tweezers to stick the tufts onto the base once the grass is dry. I'm using Army Painter Lowland Shrubs for my elves and they look amazing! I used Army Painter Jungle Tufts for the Daqan and Waiqar. NOTE: I couldn't find my tweezers so I used pliers instead.

Runewars Miniatures Basing Step 6

There you go! If you're looking for something basic I've found this basing style is pretty easy and a lot of fun (TUFTS!).

P.S. I know I call it my bad paintbrush, but I use that thing for mud, water rock paint, and glue and it's still in great condition?!? I don't know how it's possible, but it's a trooper that's for sure.

Edited by Hepitude

I've seen lots of people ask about magnetizing trays and I've got a REALLY simple solution that doesn't look too bad. Most importantly there's no drilling or carving involved. The figures sit a little taller than the trays, but it's not really that noticeable. In case anyone is interested here is the step by step for magnetizing bases as well.

Step 1: All I use are paperclips, some Loctite Super Glue, a pair of pliers and Magnet Source Neodymium Ring Magents (THEY SOUND SO TERRIFYING!).

Runewars Miniatures Magnets Step 1

Step 2: Glue magnets to the trays. I twist out the pegs in the trays because the peg height is just a little higher than the magnet.

Runewars Miniatures Magnets Step 2

Step 3: Cut a paper clip into thirds and twist the metal into a rough circle with some pliers. This really doesn't have to be precise at all since the magnets are so powerful. I've done a terrible job on a few of the rings and they still work fine.

Runewars Miniatures Magnets Step 3

Step 4: Glue the ring to the base of the figure.

Runewars Miniatures Magnets Step 4

The figure doesn't stick too far above the tray and the magnets are powerful enough that the figure stays in the tray even if you hold it upside down, but it's still super easy to pull the figure free from the tray. This isn't the most professional way to magnetize a tray, but you get great results and it's SUPER EASY (which was most important to me).

Runewars Miniatures Basing and Magnets

Great stuff! I'm thinking of leaving my Waiqar army with muddy trays. What steps would you suggest for making that look good? I'm thinking of just putting the mud down, and then dry brushing with a slightly lighter color, but not as light as Leather Brown. I'm also considering doing little pools on some of the bases with that cool resin stuff that bumyong showed of on his YouTube channel when he made 3D swamp terrain.

1 minute ago, Parakitor said:

Great stuff! I'm thinking of leaving my Waiqar army with muddy trays. What steps would you suggest for making that look good? I'm thinking of just putting the mud down, and then dry brushing with a slightly lighter color, but not as light as Leather Brown. I'm also considering doing little pools on some of the bases with that cool resin stuff that bumyong showed of on his YouTube channel when he made 3D swamp terrain.

Thank you! And I think you're right, stopping at the mud step and then doing a (slightly) lighter wash over the top will probably look great. Army Painter also sells Winter Tufts which look like dead dry grass. A few of those might go well with muddy trays depending on the look you're going for.

Good call on the winter tufts. I think those will look great interspersed among my soldiers.

1 hour ago, Hepitude said:

Step 1: Mud. I'd never paid money for mud before, but I guess there's a first time for everything. I've been using Vallejo Thick Mud and it works great. I use a bad paintbrush to cover the entirety of the base.

Ha! Thanks so much for the guide and my new shopping list. @Polda should add this thread to the sticky for sure.

How the heck do you have time to paint all those wonderful checkered patterns and erbs and warpaint and whatnot? :D

Edited by Polda
17 hours ago, Polda said:

How the heck do you have time to paint all those wonderful checkered patterns and erbs and warpaint and whatnot? :D

Haha... oh man, I really don't have the time. I have so many other projects going on plus... you know, my job. :)

I hope you'll forgive me for indulgently re-posting pictures from previous posts, but I'm trying to condense all my favorite figures into one thread.

Ankaur Maru Front Ankaur Maru Back Runewars Miniatures Daqan Flag Bearer Runewars Miniatures Waiqar Drummer Runewars Miniatures Waiqar Drummer Runewars Miniatures Daqan Hero Runewars Miniatures Ardus Ix'Erebus Runewars Miniatures Daqan Wizard Runewars Miniatures Daqan Wizard Runewars Miniatures Waiqar Wizard Runewars Miniatures Waiqar Warrior Runewars Miniatures Waiqar Flag Bearer Runewars Miniatures Daqar Trumpet Runewars Miniatures Grasshead

Edited by Hepitude

Here is my first batch of completed elves (based on an Aspen or Birch tree)! I'm doing eight in each color scheme to help differentiate them from the Daqan, who I painted in pairs of four. I'm excited to see what Kari can do with them!

The next batch has a color scheme based on a Royal Maple tree, which will be dark red tunics and grey armor!

Aspen Elves Front Aspen Elves Back

I finished up all the elven archers from my core set. The last eight have uniforms loosely based on the Royal Maple tree. I think it might be the fact that my only good paintbrush was finally ruined halfway through painting these guys, but they took forever! It seems like every time I went back to correct a mistake I'd wind up causing another one. Hopefully getting a new brush will make things easier again.

Runewars Miniatures Royal Maple Elves Front Runewars Miniatures Maple Elves Back Runewars Miniatures Elven Archers Front Runewars Miniatures Elven Archers Back

I thought it would be a while before I could post anything else, but I got obsessed painting the Scion last night. This was definitely my favorite miniature to paint so far, especially after all the tiny detail on the elves' armor. I used a picture of a rotten log I'd taken as reference and a scraggly old brush and had a great time. I can't wait to get more of these guys!

Runewars Miniatures Scion Right Runewars Miniatures Scion Left Runewars Miniatures Scion Back

Gorgeous. I do think you could introduce an accent color somewhere, or even just give the leaves a bit of autumn color.