For the compound curve under the bridge, I used the top of a 1:144 ET from a Space Shuttle model kit I scrapped a long time ago. The rest is just sheet styrene bent and glued into place. I thought about vacuforming, but the ET tip was just the right size for what I was trying to do.
Imperial Customs Corvette scratchbuild
Wow. Incredible work, man. Thanks so much for sharing.
Thanks! ![]()
I can't believe it, but I think I might actually get this thing done by Friday! I don't want to jinx my progress, but the lower hull is about 90% complete, and the upper hull is 99% complete in regard to the scratchbuilt sections. I only have a couple more panels to install, then I can spend a couple days on the greebles and painting.
I was told by the kind person who sent the Millennium Falcon part that the USPS lost it . . . Ugh, I hate it when this happens, especially when the other person was so kind as to send it and not charge me anything! ![]() Hopefully I can dig around and find a tube which is the right diameter, or close to it, before Friday.
Hopefully I can dig around and find a tube which is the right diameter, or close to it, before Friday.
But on the bright side, there's little to do before I can start the fun task of greebling. ![]()
Anyway, here are the pics:


You can see the captain there, standing proud on the bridge of his ship with his hands folded behind him. I wish I could get a better pic looking down the hall, because there's a little dude in the back waving at the spectator. I need to clean off some spilled superglue on the window before I can call this area done.

I might connect some piping to that exposed area, but I think it's good for now.
I'm pretty stoked about this build! It's going very smoothly, and I think I might even be able to get it finished this week! ![]()
(And now that I've typed those words, watch me spill glue on it, drop molten solder on it, miss with my dremel, crack a window, leave seams unfilled . . .  )
)
The level of detali is unreal. Awesome.
The Force is strong with this one!
erm greebling??? Otherwise: great progress!
Greebling refers to the process whereby I add bits to the surface of the ship in order to break it up, add visual interest, and give it a sense of scale. All ships in Star Wars were "greebled", in the sense that they had a ton of tiny model kit parts and plastic bits added to the surface to make them look like real machines with functional parts.
Excellent work so far.
Thanks. ![]()
I'll save that third engine for later. Right now I want to finish up the hull so I can start detailing this beast. There are only a few sections remaining before I can do that, though I have put in a few greebles here and there. The biggest improvement, or at least the most visible one, is the addition of the dorsal armor plate. There will be a few more smaller plates along the nose, as well as a bunch of scribed panel lines.


This is looking great! Can't wait to see the finished product.
I'd ask, dear friend, if you know how talented you are.
But you probably do. ![]()
I am really impressed with the crew... who did you do that?
You are obnoxiously talented. Obnoxiously!
The crew window is particularly well done and unique -
You are obnoxiously talented. Obnoxiously!
The crew window is particularly well done and unique -
Not unique for long, consider that idea stolen for my Asteroid smuggler base.
Edited by Rodent Mastermind
You are obnoxiously talented. Obnoxiously!
The crew window is particularly well done and unique -
Not unique for long, consider that idea stolen for my Asteroid smuggler base.
Not so unique at all...
![]()
Well, I've completed this project to the point that I feel ready to show my progress on it. I want to get it done in time for a model contest in a couple of weeks, so hopefully it'll be done pretty soon.
The model will be fully lit, with a couple dozen spotlights and internal lights for the windows. The windows will all have small rooms behind them (and naturally I'll be limiting their number because of this) and some crew, as well as a full-size bridge which will sit under the ship. The lower hull will contain a battery for the power source and will attach to the model via permanent super magnets.
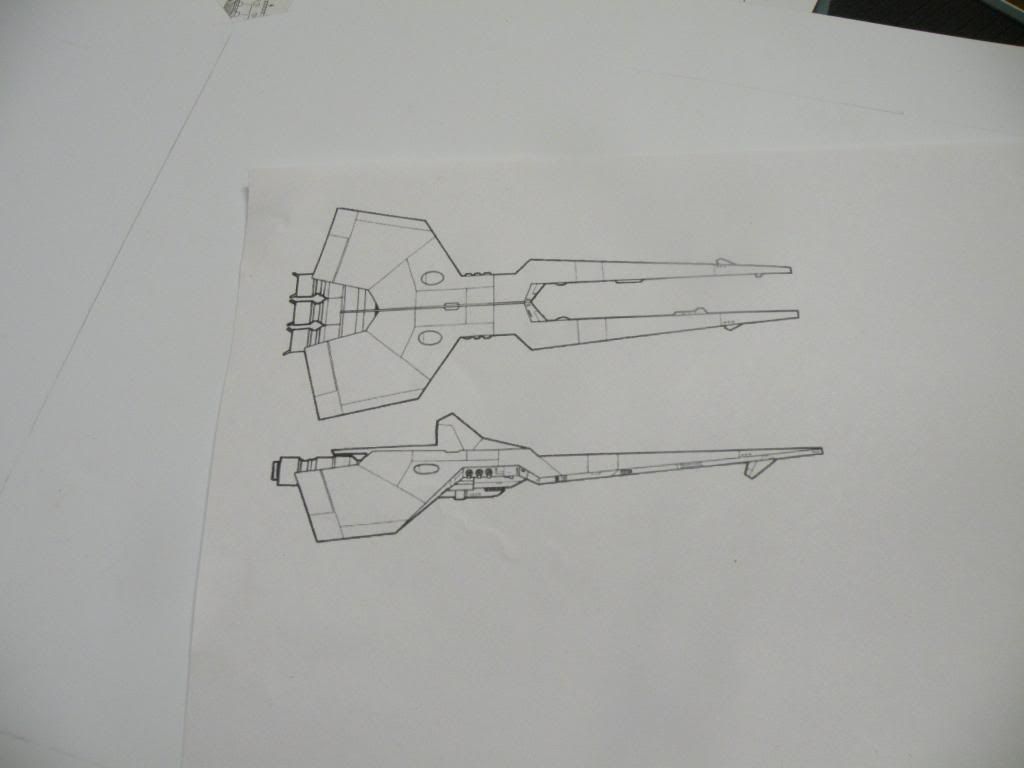
First, here's the blueprint I'm using for the model:
I modified it slightly by changing the angle of the hull to a much shallower one. It feels more "Imperial" to me this way.
Here's the main hull:
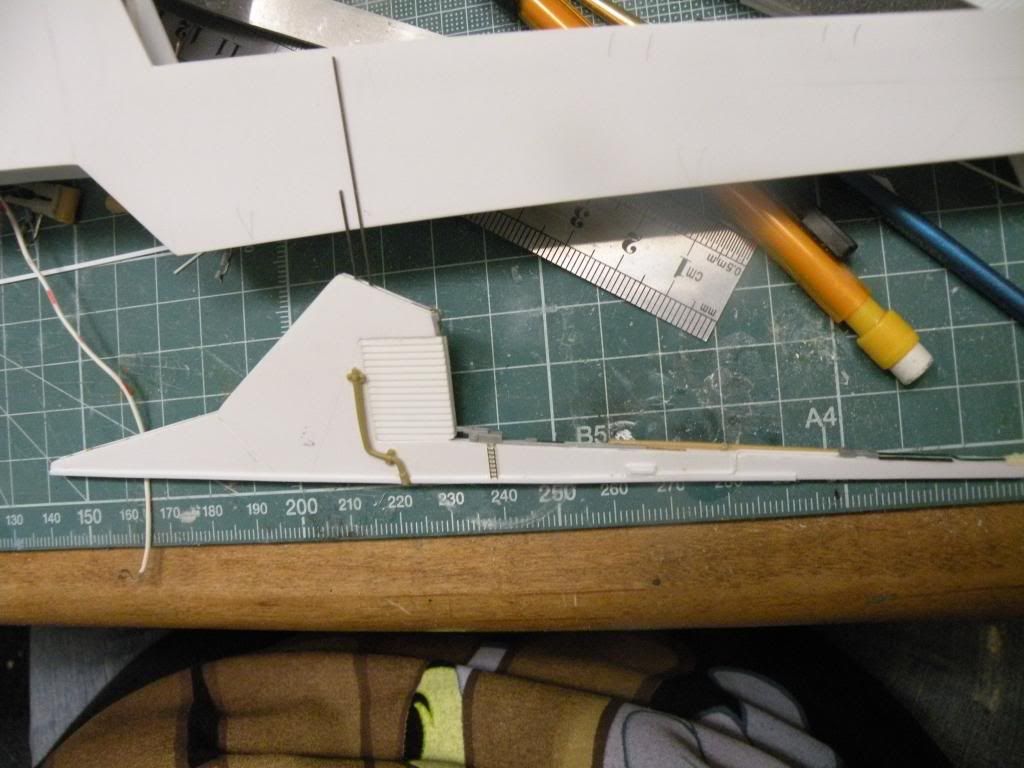
And the "sail":
The sail served as a sort of test bed for the level of detail I wanted to attain, and yes that is a tiny brass ladder on the side. They gotta get up there to perform maintenance somehow, right?
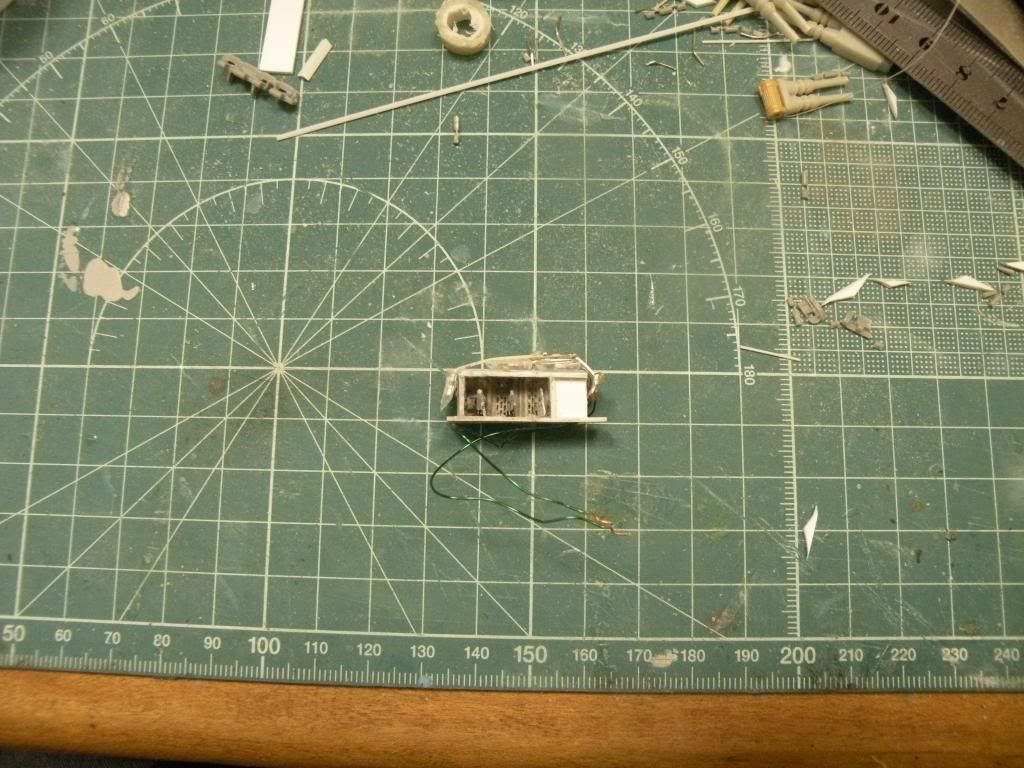
I'm also putting in tiny rooms behind a select number of windows, starting with the Boarding Operations bridge:
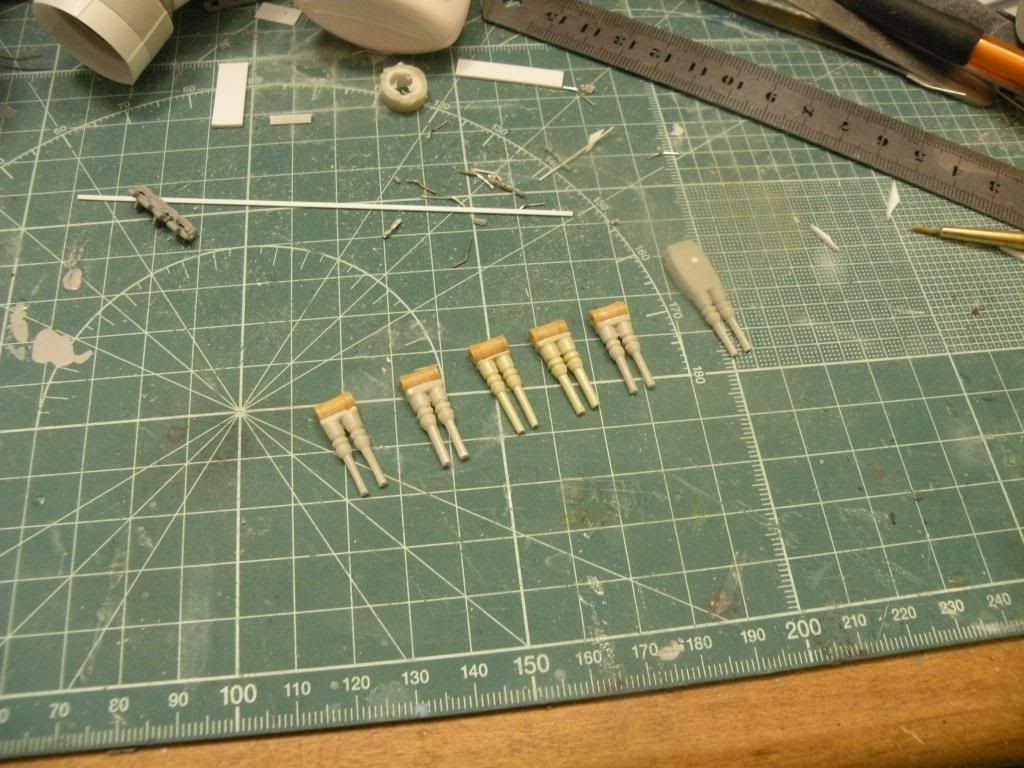
I'm also putting in turbolaser turrets which will be able to rotate and elevate. I'm short one of the elevation mechanism greebles, but I'm hoping some modeling buddies of mine will be able to find one for me in their spares:
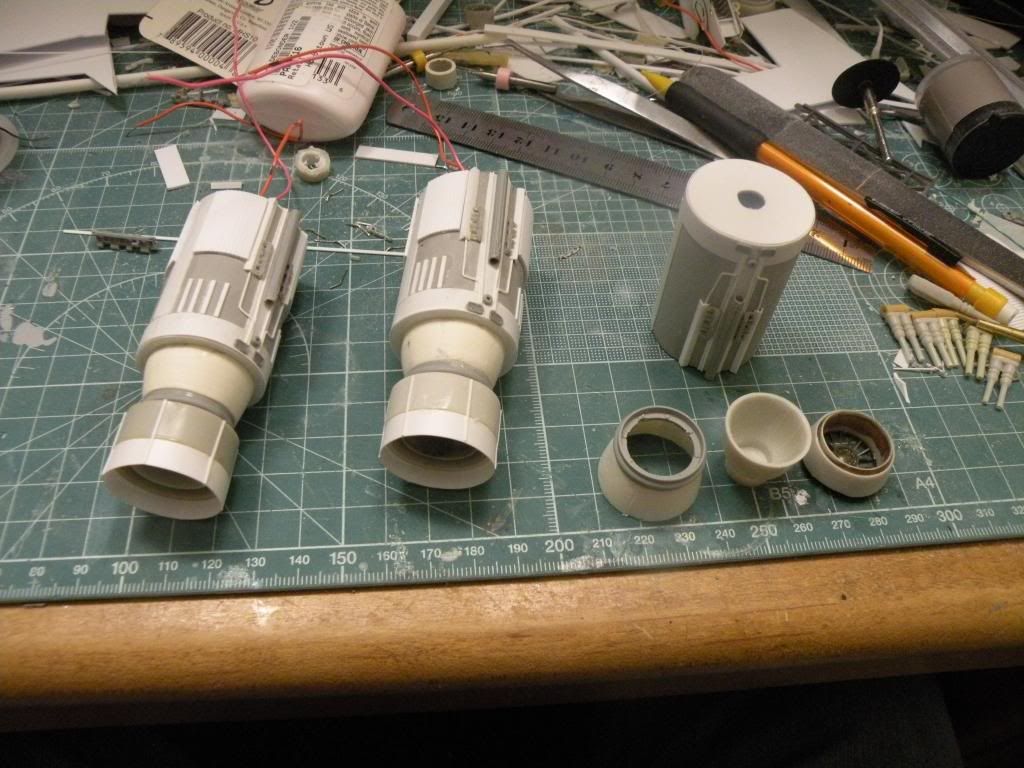
Here are the main engines. I'm waiting for a part to come in the mail so I can finish the third engine, but you can see the parts breakdown here. The engine bell is actually from the Imperial Star Destroyer kit, which is fitting as this ship is supposed to function as a sort of mini-Star Destroyer in the roleplaying game.
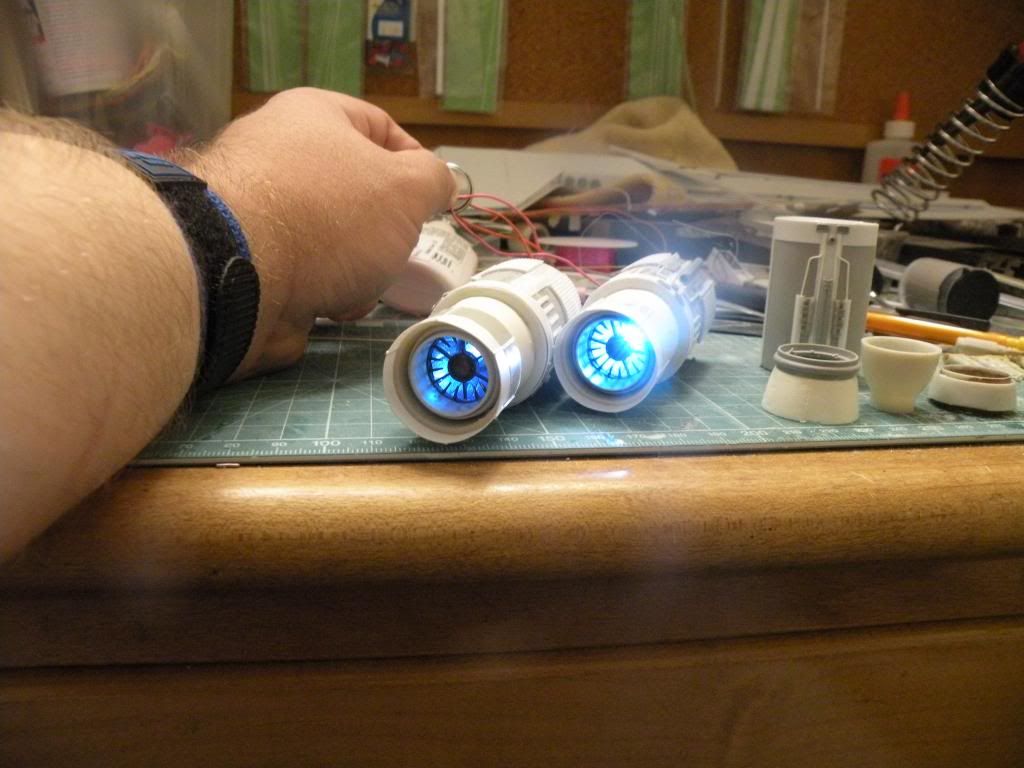
And here are the two finished engines lit up:
I'll be blocking in the lower hull tonight and hopefully will get it finished before the week is out. Then I can concentrate on greebling it, and finally applying paint and weathering.

What is this made out of!? This is amazing!
Well, mostly styrene sheet plastic that I've cut and assembled, as well as styrene stock rod and strip and model kit parts. I've got several Plano boxes filled with bits from tanks, battleships, airplanes, etc. that I draw from whenever I scratchbuild something like this. I didn't really have any plans other than that blueprint, either. I just blew it up to 1:350 scale (so it would be in scale with the new Blockade Runner miniature) and started measuring and cutting. Slab-sided ships like the Customs Corvette are pretty easy, actually. If you look at it, it's just four big planes that are glued to thin strips of styrene and then a bunch of detail parts are added to them.
For me, this is sort of my zen. I can sit at a workbench on my days off for hours without getting up, just "in the zone" with my project. It's extremely cathartic. ![]()
To everyone else, thanks so much for the compliments. There are better scratchbuilds out there, but I'm glad you like the one I'm doing right now. ![]()
I began the greebling today. No school because the teacher is sick, so I was able to devote pretty much all day to this project. I got the inside surfaces of the forks completely covered in detail parts, making sure to pay special attention to the places where lights poke through the plastic in order that the light bounce in an interesting way off the greebles. I would have gotten more done, but I had to take a guy to work and attend a meeting in the evening, so I didn't get as much done as I wanted to. I might do some more tonight before bed, though.
I also added a feature I had forgotten about. There were two . . . wedges (?) in between the forks on the plans, but since there is a window in that place with a room behind it I decided to move the wedges below the forks. They still look good this way, so no harm done.
Here are the pics:
First, the obligatory full size shot:

I forgot to shoot a pic of it, but you can see in that one two blisters on either side of the sail. Those were shaped by hand out of sheet styrene, then polished with a fine grit sanding stick to get a near-mirror finish.
Here's the starboard interior fork:

And the port fork:

I also detailed the engine area:

There are a couple of new blisters under the forks as well as new armor panels:

And because I feel like it, here's a pic of one of my parts boxes:

I have nine more just like it with other part types (that box is "Tank parts - non-wheel"), as well as a couple of small boxes with LEDs and battleship parts, and three large boxes with big parts that don't fit in the small boxes (like tank bodies/chassis and ship hulls), and a pill box that contains photoetch bits (basically really tiny bits made out of brass).
Also, here's a pic of the plans I'm measuring from:

It's actually drawn in pencil. When I printed the RPG blueprints at 1:350 scale, the lines were really thick, so I laid a large piece of paper over the printout and redrew the plans in pencil so the lines would be fine enough to measure off of.
I am really impressed with the crew... who did you do that?
Tamiya sells a set of plastic crewmen for warship kits in 1:350 scale. I had bought a set for my 1:350 Refit Enterprise model, but I had a bunch left over even after crewing the shuttlebay, botanical garden and lounge, so I appropriated them for my Corvette. All I really needed to do was paint them gray, paint a stripe of black on their legs for boots, then a dot of flesh tone for the hands and head and a small splotch of black or brown for the hair (and gray in the case of the captain).
I think I'm going to be using GW, Epic scale Imperial Guard characters when I do my pirates. They are also around the right scale at 1/300.
Though I wish I could be that restrained when painting tiny men. I tend to go over the top.

Well, it helps that the plastic figures have no detail whatsoever. If they were, say, Preiser figures:

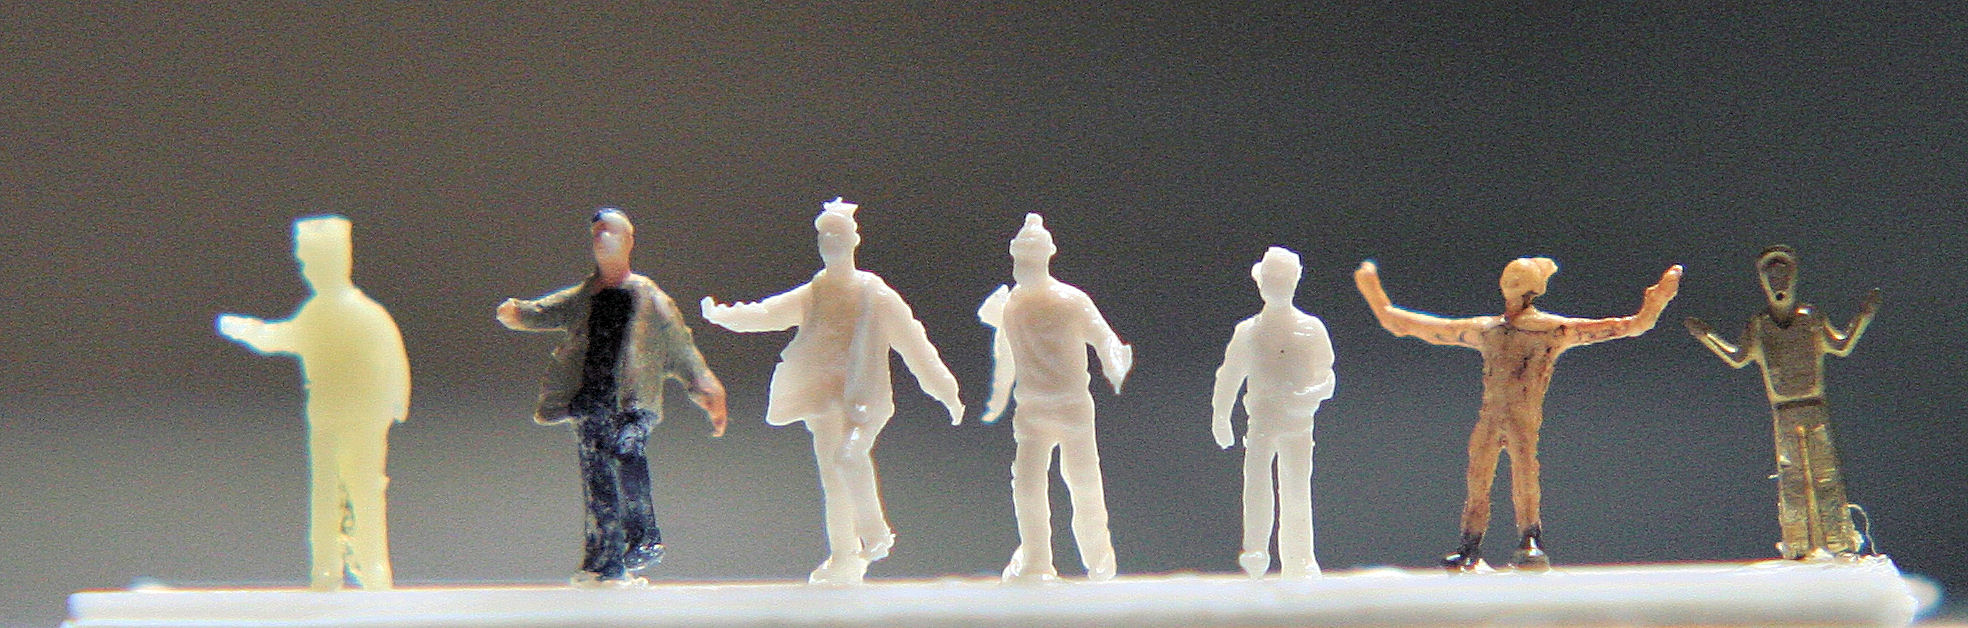
I would have gone a LOT crazier with the detail painting. Heck, I would have painted the officer's rank badges, code cylinders, belts and buckles, and even the little silver dot on their caps if the figures were anything other than this:

But as Preiser figures are freaking expensive and I'm on a budget, I decided to simply give the impression of detail rather than actual detail here.
Shouldn't matter as much when they are being back lit. It's looking awesome so far.
Well, I thought I would get it done by today, but I forgot about how time consuming scribing and greebling can be.
I've got the trenches all greebled, and most of the top hull scribed, but I'm going to wait till later today to post any pics because I want to work on it some more.
Can't wait to see it finished. Excellent job!
You sir have true skill.
Enjoying the build almost as much as you must be!
Thanks you guys! ![]() I really do appreciate your kind words, and I'll try to live up to them as much as I can.
I really do appreciate your kind words, and I'll try to live up to them as much as I can.
Well, I have gotten some more work done on this beast. ![]() Most of the work has been on the scribing, which you would not BELIEVE the difficulty of doing. It's not hard to do the lines themselves. Just take a scriber and move it along a ruler, no pattern, just by feel. But the act of scribing creates raised edges on the sides of the line which I have to carefully scrape off. Too little pressure with the scraper and the edges aren't fully scraped off. Too much and I gouge the hull. Sigh . . .
Most of the work has been on the scribing, which you would not BELIEVE the difficulty of doing. It's not hard to do the lines themselves. Just take a scriber and move it along a ruler, no pattern, just by feel. But the act of scribing creates raised edges on the sides of the line which I have to carefully scrape off. Too little pressure with the scraper and the edges aren't fully scraped off. Too much and I gouge the hull. Sigh . . .
But it's coming along. I finished all the scribing on the topside of the main hull and am working on the bottom of it, then I'll work on the bottom hull.
Anyway, here are some pics:
This is the left fork's outside trench, which is completely greebled

And here's the other one:
Here are a couple of examples of my hull scribing:


I did manage to add a little to the midsection as well:
