Diary of a Newbie Painter

By Loophole Master, in Dust Tactics

And here's the Honey! I decided to give it a different colour, so it would stand apart from the Wildfire. The problem I had was that it turned out much "dirtier" than I intended. I'm just having difficulty controlling the staining of the wash on light surfaces, where it shows up a lot more. In the end, the texture is so beat up that I didn't think it was necessary to add chipping effects, it might have been a bit too much texture. This was also my first experiment with the decals, and while applying them was much easier than I expected, they did present a couple of problems. First of all the decal has a much higher reflectivity than the plastic, so the decal region stands out depending on the light angle. To diminuish that, and also to tone down the decal colours a bit, I applied the wash over it, but then this highlighted the borders of the decals... any suggestions regarding these issues?

Honeya.jpg

Honeyc.jpg

Honeyb.jpg

Also, here's my work in progress Hot Dog. I applied some decals and wahsed it. Since I wasn't very happy at how dark my Pounder turned out, I gave it some heavy drybrushing with a lighter green, which I think turned out quite well. Next step, weathering.

HotDog2a.jpg

HotDog2b.jpg

Wow Those last walkers look real nice!

Great Job Loop!

Thanks, guys. Well, with the arrival of the decals, I was finally able to finish my Special Ops and Command Squads. Applying the decals to the figures presented some challenges, though. The big hurdle was the difficulty of getting the decals to sit nicely on a curved surface. This is not a big problem if the surface is bent on only one axis, like a cylinder, but if it bends on two or three axis, like a sphere, then it becomes a real problem. Applying decals to the axis shoulder armor was easy, as long as I kept it on the lower part, avoiding the slope on the upper end. The ally shoulder armor, however, is very rounded, and thus very problematic. Keeping to the lower part is not always possible and doesn't look quite right. Applying a decal to the ally medic turned out to be flat out impossible, so I painted the red cross instead. A tip I found online which was quite useful was to quickly dunk the decal in vinegar before applying, that made it more pliable and easier to conform to the rounded shapes.

Anyway, I gave the "Robot Corps" symbol to any unit that works in tandem with the walkers (Foxtrot, Radioman and Mechanic). Since the Axis doesn't seem to have an equivalent symbol, I adopted the orange V as that, looks pretty cool. The sniper got some fitting skulls, while I still need to find something for the ally model. Ally officer got the shoulder rank, while the axis officer got the aces. I tried using the black cross for him, but it wouldn't show up against the black armour.

Boss2.jpg

CrackShots.jpg

Foxtrot.jpg

Kommandotrupp2.jpg

Snipers.jpg

Beobachter2.jpg

Nice camo for the germans

Tks. And here's a little break I took: With all the core sets and expansions, I was quickly amassing a large number of useless ammo crates. The most any mission asks for is 6, and so I had another 10 crates that would never see any action. Well, taking a page from Dust Models, I decided to make a small ammo dump, which serves the same purpose as a wall. I took the 10 crates and super-glued them all together, then painted them. I also thought I'd have some fun with the decals, and they do add some nice interest to the crates. Notice the little joke with Manfred's crate being stored with the wrong way up.

AmmoDump1.jpg

AmmoDump2.jpg

This sure looks great on the battlefield. And we're even considering allowing it to be used as a 1-storey building, so troops can climb onto it, fire over obstacles and get some soft cover.

And here's a little scene I like to call: "Oh S***! There goes the Radioman..."

OhShit.jpg

Looks nice, good id btw! The decals look nice on them.

Grt Tom

Think I finally finished my Hot Dog. It's funny how with the walkers I'm never sure when I'm done with them. It always seems like I could add another layer of weathering, or another decal or whatever. At some point you just have to give up and move on. Anyway, I thought I'd go a little further with the rust on this one. Seeing as the Hot Dog is always going deep into the thick of things in battle, it should look a little more beat-up. I also charred the flamer nozzle ad the whole front section of the tank, from all the enemies that burn to a crisp at its feet.

HotDog3a.jpg

HotDog3b.jpg

HotDog3c.jpg

Looks really good. Love the coppery nozzle on the flamer.

The scratches/weathering job is most excellent.

I knew I wasn't done with this Hot Dog yet! I looked at the pictures of the upcoming Recon Mickey and noticed a very nice effect they used, but a whitish layer of rust collected in the creases. I decided to try something like it, so I made a mix of white, yellow and a bit of beige, dilluted it a bit and dabbed around the feet. I then quickly wiped the whole thing out with a piece of cloth, so that only a little bit remained inside the folds and creases. It was a bit hectic, but it worked out nicely. I then added a bit of ogryn flesh wash to blend it in and make it a bit more reddish. I thought it added a lot of realism and brought out some of the detail in the model.

HotDog4.jpg

And here's the latest batch of ammo crates. I really love what they look like with some decals. This was a also a colour test for what I plan to do with the Steel Rain.

Crates.jpg

Loophole Master said:

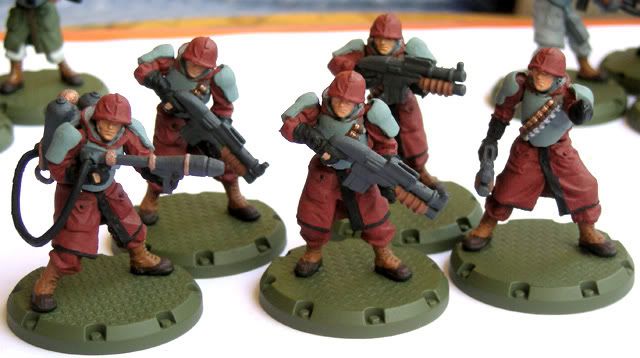
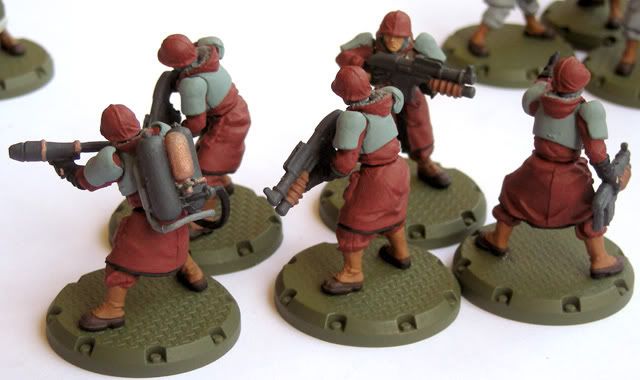
Finally, here's my base painted BBQ squad! I know this brownish-red is not the most combat-savvy of colours, but then again my BBQ squad has never been known to sneak discreetly across the battlefield.

DSCN6945.jpg

DSCN6946.jpg

And with this I'm done withe base colours for my ally troops (until my expansions arrive). I still have quite some time to wait until my washes arrive, so I guess there's nothign else I can do to them in the meantime. Should I apply a coat of matte varnish at this stage or just when the whole thing is done? It's supposed to be a spray, right? Hope I can find it around here...

Now I'm not sure whether I move on to the axis troops, or start playing with the tanks for a change of scenery.

I think the color would instill fear in the enemy. Like the way the fling tigers used the shark mouth on their planes.

I like the look of everything. Wish i could paint that well. I think when I get to painting mine I will use the blue color scheme on all my axis troopers.

In my last reply spelled flying wrong by the way.

Don't be discouraged, as the title of this thread indicates, I had never painted a miniature in my life until I started with Dust Tactics a few months ago. I'd never worked on anything with this scale, never worked with these kinds of paints and techniques. And if the results are coming out nicely, it means all you really need to do it is patience, dedication and a community to support you and give advice. corazon.gif

I've started work on my Mickey. This is the first medium walker I do where I have to completely repaint it, so I was actually dreading it a little bit, given how difficult I always found to reach some bits of the allied medium walkers. So it was with great relief that I realized I could disconnect the body from the legs without much difficulty or danger!

Mickey1.jpg

I'm using the same colour I used for my Honey, but doing two layers on the entire walker did use up a lot of paint... I'm trying to give this a bit of a "light walker" feel (since the Mickey is Fast) by having some extra metallic bits, specially on the legs. To give it more variation, I added some black stripes on the main body and will be playing around with some decals. Also notice the modification I did to the Mickey's main cannon, the howitzer. I never liked the standard "missing cannon" look of the Mickey, it seemed like a cheap way to get an extra model out of the Pounder. So I hacked off an extra 88mm Ludwig cannon tip and attached it to the Mickey. I think it looks quite nice.

And here's Mickey with the decals and wash, as well as highlights to the metal parts:

Mickey2.jpg

I'm liking how this is turning out, I think it does look lighter and faster than my other medium walkers. Now just some more highlights and a little bit of weathering and I'm done with it. I think I'll go light on the weathering, with hardly any rust, just some scratches.

Thats one cool looking walker! Realy looking forward to the end result.

Tom

Wow great job! Did you washed also the "metal" parts?

Lska said:

Wow great job! Did you washed also the "metal" parts?

Yup, washed with Badab Black and highlighted with Mythril SIlver.

you have done a great job with everything and i look forward to see more, so keep us updated.

And here's the final Mickey, ready to pounce on those nasty nazi troops:

Mickey3a.jpg

Mickey3b.jpg

Great job! This topic, when you read it from begining seems like "from zero to hero" in painting stuff:D

Here's my work-in-progress Steel Rain:

SteelRain1.jpg

First thing to note is that i modified the rocket racks, turning them on their side. I was never pleased with the look of the Steel Rain, because looking down on them (which is how you usually look at units on the board) you could barely see the rockets hanging under the rack, like they're on a clothesline or something. So I cut off the supports, trimmed them a bit and glued them sideways. It may not be historically accurate or make perfect engineering sense, but I think it looks way cooler!

Other than that, basepainted it in gray-blue and washed with badab black. I'm just not sure wether I should wash the rockets as well. I like the idea that they'd look much more pristine than the walker, since they are replaced all the time, but I'm afraid they might look too shiny and out-of-place.

I would stick to shiny new rocket. Thinking logic, they just came from the box, and are un-loaded if weren't used in combat. To think about it, you could make movable rockets, to show how much ammo there is left:D

That was my intention, but it's very hard to remove the rockets without breaking the little pegs that hold them. I only managed to save one rocket with the pegs intact, so I didn't glew it and it's removable, so I can chuck it at my enemies. But the others I had to glew back after painting, since I couldn't figure out an alternate system (no way to put magnets in those).

And yeah, I'm leaning towards a clean and shiny look for the rockets. It's a pity they aren't big enough to put some decals with girls' names on them.

While the rockets should look unweatherd, I'd expect them to be OD green like the rest of the GI equipment. Pretty colors went for aircraft rockets.

As for decals, you could always print out some on decal paper at the right size for your rockets. Simpler ideas would probably be more common, as they might not be around long enough to finish painting, but you could come up with slogans or other things to put on them. I painted shark heads on my first set, and am still deciding for my second.

They make small rare earth magnets that should fit where the mounting pegs are. I use them to hold on ship turrets for another game. I use 0.125" for larger things, including my Allied walker turrets on plastic card I added across the openings, but have 0.0625" for small turrets that should be a good fit.