I don't really see a reason to use enamels, if you have acess to acrylics. Enamels are toxic, so you're always breathing in those fumes, plus it's better to dillute them in paint thinner before using them, so you have another foul-smelling chemical by your side, and to finish it off, you need the paint thinner to clean your brushes which I think really decreases their lifespan. They don't really seem to be worth the bother.
Diary of a Newbie Painter
When I first started painting, you were foolish to paint with acrylics, because their quality control was abyssmal.
By the time my kids got old enough to reach my work table, acrylics were at least as good as enamel, so I switched over.
That was over twenty years ago, and acrylics have continued to improve to the point I have no interest in using enamels. The palettes of colors are normally much wider with the acrylic lines, and all of the comments about the chemical problems are very real. You have to have the chemicals, they do shorten the lifespan of brushes, and they are much more of a pain than simple water for cleanup, thinning, or anything else.
Most of the special purpose enamel paint mixes can be duplicated with painting techniques using acrylics, so you don't need to carry multiple sets to accomplish wonderful things.
Gimp said:
Most of the special purpose enamel paint mixes can be duplicated with painting techniques using acrylics, so you don't need to carry multiple sets to accomplish wonderful things.
I agree. I already use the "Dip" method though and love it, and so I have solvent for that to clean off the brush I use to paint on the "dip". So it wasn't a huge deal to use the enamel-based mixes. I have found the ones by MIG look nice and are quite easy to use, so I'm happy with using them. I looked at some instructions on doing rust with acrylics, and to my eye the special mixes looked better and were easier to use, so I went for them.
But I'm very new to painting miniatures, and am not very skilled, so I'm always looking for the easy way to produce the best looking miniatures with the least amount of skill. The more I paint, the more I keep adding in new, more advanced techniques, mainly because it's fun and I like to try new things. And that's partly why I got these effects too - They were something different and fun to try out.
But yeah, overall, I haven't seen enamels as being necessary, and that's why I was asking about them. I was just curious to know why people use them. The only advantage I've found to them is that they take longer to stick and to dry, which means you can wipe off a mistake, even just with your thumb. I find with acrylics, if I try to do that, I just smear the paint and possibly make it worse.
The only reason I paint with enamels is that that's all I found around here. The one store I was able to find only had a VERY limited selection of colours in acrylic and the attendant said enamels were no different from acrylics (hahaha).
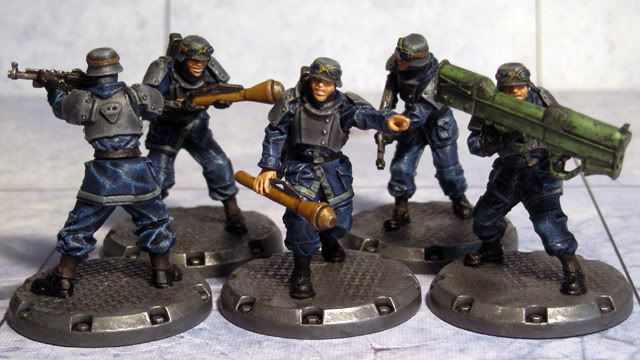
Anyway, I think I am done with my core set ally troops! After a long, arduous learning process it seems they are done. All there's left is spraying them with varnish. What do you think of the final result, and is there anything else I really should do?
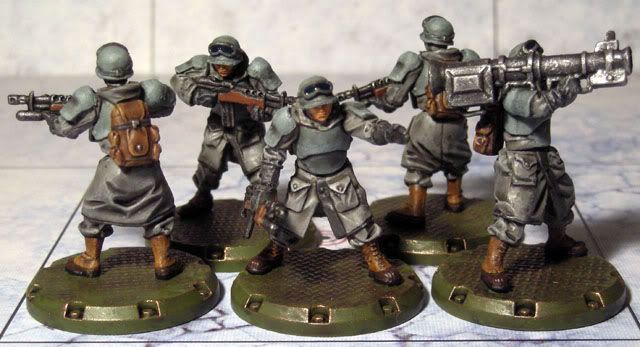
I think they look fantastic. My only recommendation would be to spray them with dullcote after you varnish them. The more matte, the better, in my opinion. ;-)
I've got my core set troops all painted up and have moved on to my expansions. I'll hopefully soon post my own pics up, as I'm a newbie at this too and it's been fun to paint them and show them off. :-)
Anyway, great job - I'm looking forward to seeing how you do with your walkers.
Thanks, still a long way to go till the walkers. Need to finish the core axis, then take care of a couple of expansions (command squads, specops, cyclone heroes), only then I can move on to the walkers. As I see it, the walkers already look great as they come, it's the troops that desperately need painting fisrt.
felkor said:
the "Dip" method though and love it, and so I have solvent for that to clean off the brush I use to paint on the "dip". So it wasn't a huge deal to use the enamel-based mixes. I have found the ones by MIG look nice and are quite easy to use, so I'm happy with using them. I looked at some instructions on doing rust with acrylics, and to my eye the special mixes looked better and were easier to use, so I went for them.
You can duplicate the effects of the dip method with acrylics, but the miniature will have to be sealed, unless you use an acrylic finish. I know a few people who use acrylic finish for their dip jobs, and have been happy with it. I prefer more control over the final product than simple dipping gives me, but that only matters for the figures I paint for me. So long as you're happy with the results, whatever you're doing is working.
Gimp - Since I paint my "dip" on, I pretty much get the effect I want as I decide how much to put on the miniature and where. With a demanding job and a wife and 1 year old son, I also don't have a lot of time to paint, and as this both shades and seals the miniature all in one fairly quick step, it saves a lot of time and gives a good effect.
Loophole - I agree about the walkers. I have been holding off on them as well, but when my MIG effects came in the mail the other day, I couldn't help but try them out and painted up one of my walkers. I have to say, as much as I agree that they look good as they are, they look amazing when painted up! I am going back to painting my troops now but am looking forward to painting more walkers, and will probably do another one before finishing my troops, just to break things up a bit.
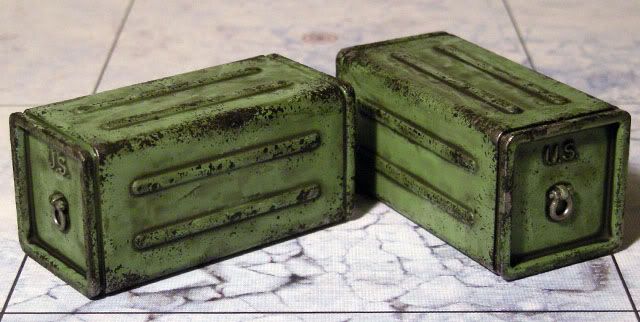
As a little exercise for the sort of techniques I'll need for the walkers, I did some work on the ammo crates. Applying the wash on such a large surface was a bit of a pain, but it turned out ok. I also tried the sponge technique for the first time, and was quite happy with the results. The only thing is that after a little while the paint starts to melt the sponge a bit...
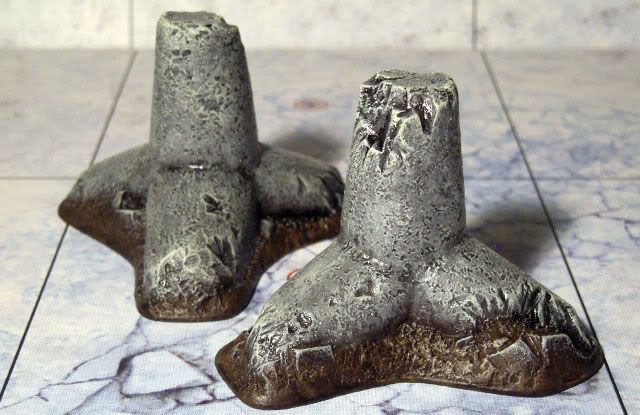
And for completeness' sake, here's my latest tank traps:
These look great. I'm surprised that the enamels worked so well the with acrylics. The ammo crate looks amazing too. Do you plan on basing the models?
Yeah, I didn't have much of a problem highlighting with the enamels, using the enamel colours wasn't much different from highlighting with mithril silver. I just had to be careful not to add too much thinner to the paint, otherwise the highlight would start to remove the paint coat underneath.
No, I don't plan on basing the models. I don't really fancy all that clutter on the base, and it makes the figure feel out of place depending on the scenario terrain. I'm keeping it simple, just washing the bases and giving them a metallic highlight to bring out the grates, silver for the axis, copper for the allies.
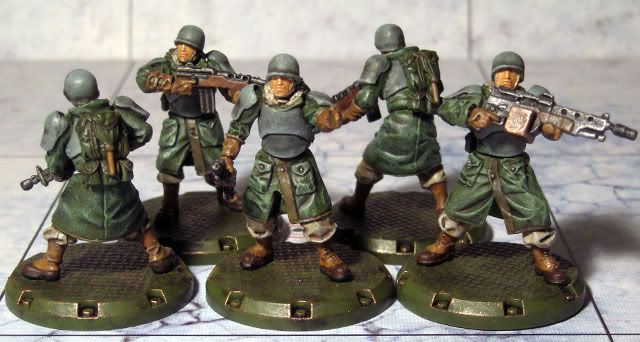
And finally, here are my finished Axis Core Set soldiers! Really happy with these ones, the detail is great in this miniatures, with great folds on the fatigues and all the bolts on the armor and stuff.
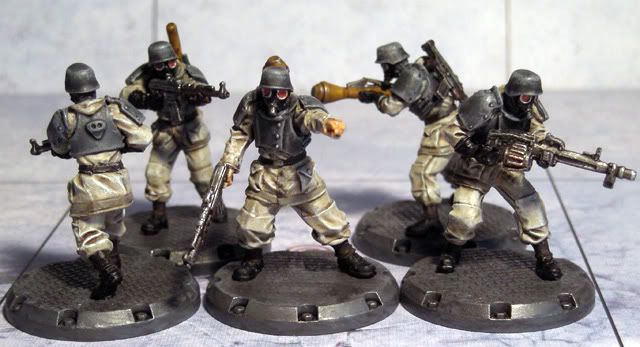
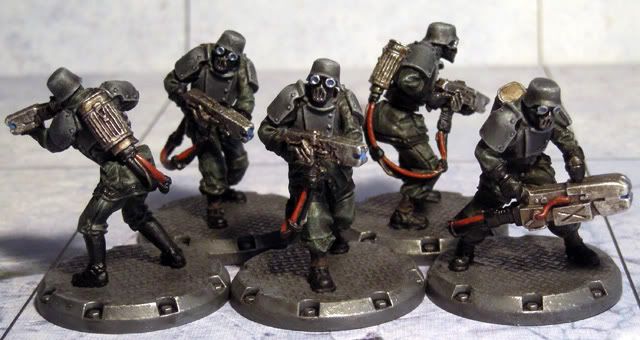
Now I just need to spray them with varnish and they are ready to battle! Thanks again to all who've helped me get this far!
And now, on to the expansions...
Your armies look great, Loophole!!
I realy like the Laser Grenadiers, very "dark stormtrooper"! And the red Sigrid is wonderfull, who would of thought she could be so....saucy! the naughty little dumpling!
Even your crates look great!
Cant wait to see one of your finished walkers!
Have fun blow'n stuff up!
PS: I'm having a difficult time believing you are a Newbie Painter?!?!?! Your stuff looks TOO good! Kepp up the great work! 
Thanks a lot! The walkers will have to wait a while still, cause I want to get my expanion infantry painted first.
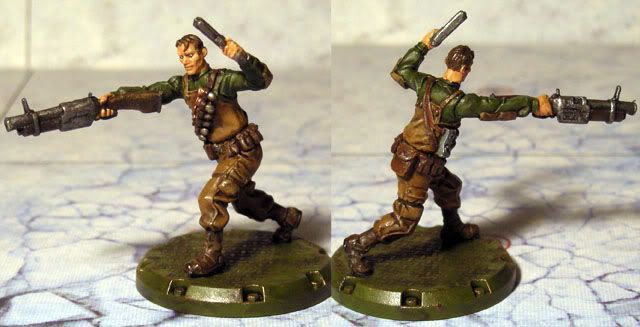
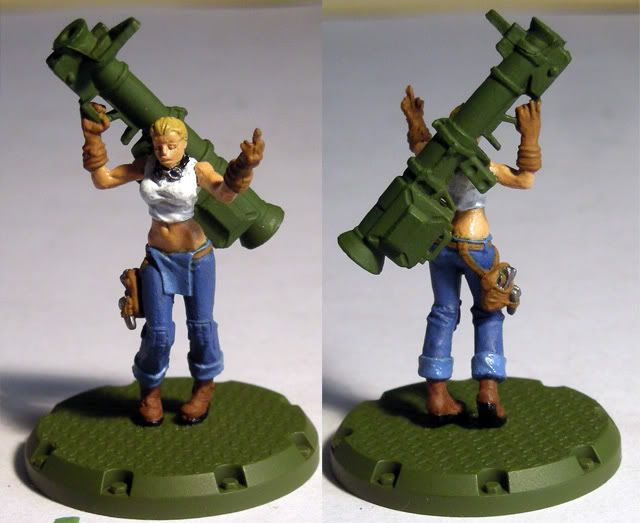
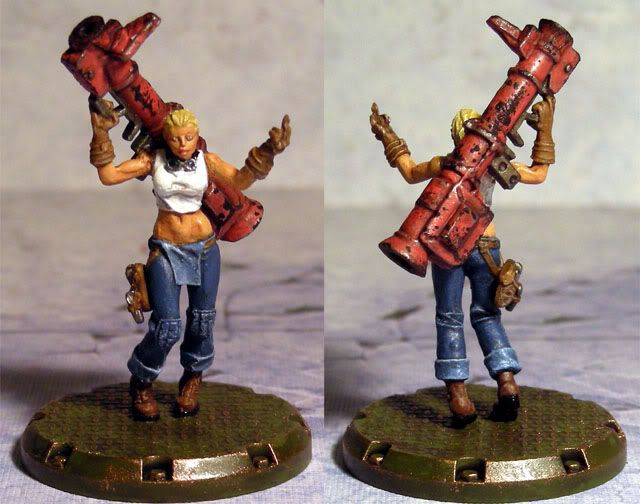
Here's the base colours for Rosie. She's quite a different model, with very normal clothes and lots of skin showing. Too bad her face is hideous, cause I really like the rest of the model. She relly should be more of a looker. I considered making her a redhead, but in the end decided to stick with the "official look".
Not sure what colour to paint the bazooka yet. Primer green might not be a bad idea.
Everything looks great. I like how you did different colors for the squads.
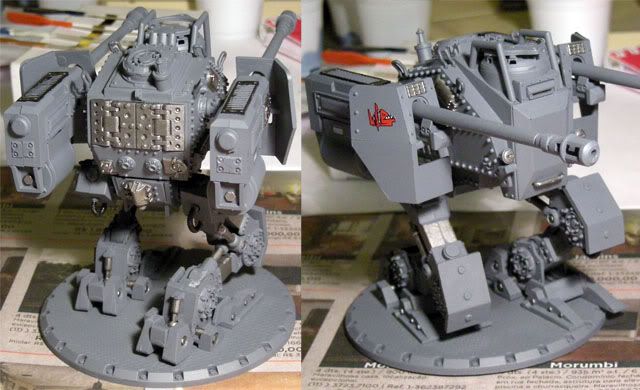
This weekend I had some free time, but I didn't have my figures with me, so I decided to start playing with the couple of walkers I had lying around. Since I'm using the primer colour as the base for the core set walkers, there isn't really a whole lot to do as far as base colours go.
For the Ludwig I just added some gunbolt metal to parts I thought would look good as raw steel, just highlighting the inner workings of the machine. Also painted a few parts black, like the hoses.
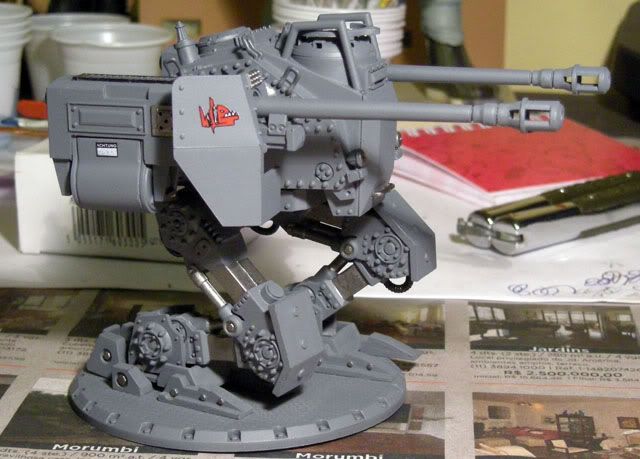
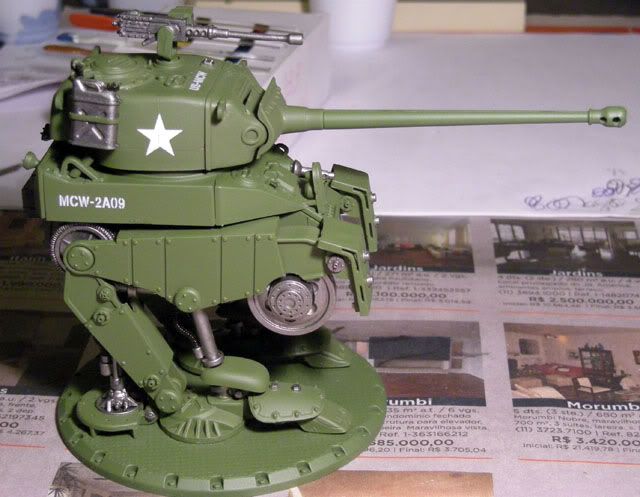
Next I did the Pounder, again pretty much the same thing. Notice that I decided to customize it a bit, to make it more distinct. In order to give it a more streamlined look, I removed the searchlight and brought the .50 gun a bit forward and lower against the chassis. I think that gives it a more "determined" look.
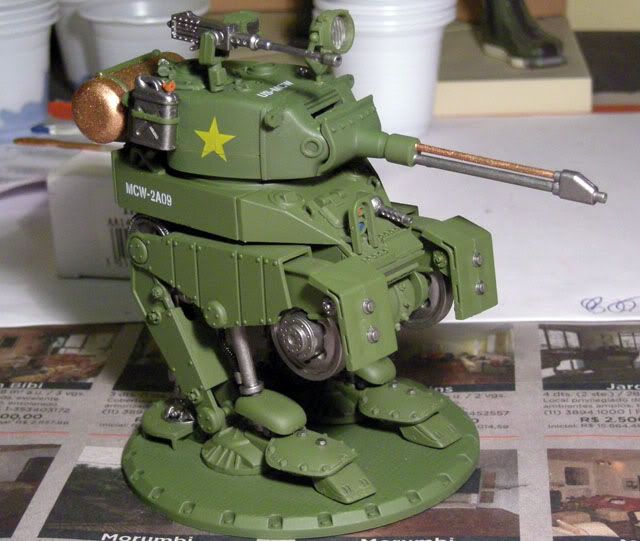
I also had a Hot Dog's head available, so I did that as well. Since I had given my BBQ flamethrower a copper tank, I thought it would be nice to do the same thing to the Hot Dog, also using the material do link the tank and the emmiter. Also to change things up a bit, I positioned the .50 on the other side of the walker's head.
Ok, got my Rosie and went ahead and finished her. It sure is nice to be working on a single figure at a time, instead of 6 squads. You don't work any faster, but you feel like you're accomplishing more in less time.
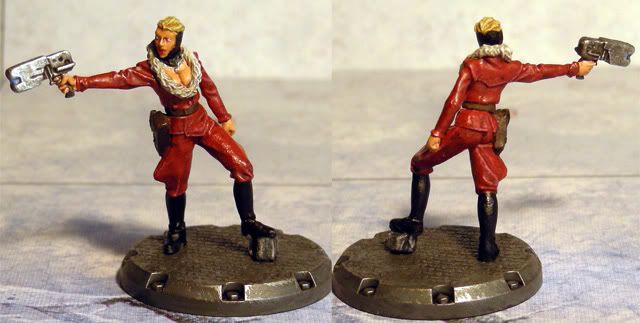
Anyway, Rosie was a really nice figure to work on. Because she wears such plain clothes I tried not to "dirty her up" too much. I wanted her top to really look white, and the jeans to be recognizable, so I went quite light on the washes. To top it off, I thought since this was quite a cheeky figure (petit blond girl with a huge bazooka giving the enemy the finger) I decided to paint her bazooka pink! I figured it went with the name "Rosie", and would give the figure a bit more character (plus, after her killing spree last gaming session, she deserved a treat). I was a bit scared of it turning out a bit too ridiculous, and it did look like that at first. But after applying the wash, metallic highlights and some sponge weathering, I think it fits in nicely with the rest.
i dig that red white and blue on rosie. great job. what are you planning for those walkers? Ink and edge highlight?
Rosie looks great!
The face paint looks fine, you did wonders with a crappy sculpt. I honestly didnt realize the bazooka was pink until you said it, I thought it was weathered red! Thats a little disturbing-whats next? a Hello Kitty decal?
I kid! It looks fantastic!
And dont think I've forgotten your walkers! nice start, but I want to see finished, ready for battle, supertanks! My eyes are hungry!
Have fun blow'n stuff up!........and then painting it pink, of all colors! Sheeesh!
The picture came out a little more reddish than the real thing, but the bazooka is definitely pink. Though I made sure to make it a more "conservative" pink, nothing too garish, to be on the safe side. I do think the colour came out a nice match for the Rosie's white and blue, though. It doesn't look out of place.
As for the tanks, don't get too excited, I'm a bit uncertain as to how to handle them. After doing these metallic details, the plan is to wash them, then add some metallic highlights, then I guess go nuts with a sponge adding some weathering. The problem is that the metallic highlights and the dark sponge weathering kinda seem like opposite finishes competing for the same spots...
i think the sponge weathering over the metalics would be fine, after all, metal bits get dirty too!
After the weathering, you might consider drybrush highlighting the Ludwig in the same gray you used for your Axis troop armor, to create consistancy in the army. I tried to do the wash only on my Axis walkers, and the primer just isnt a good enough base layer, it just ended up looking like dirty plastic. I eventualy painted them in Italian Tri color camo ( wich took FOREVER, and drove slightly insane.....).
I will be patient and stop pestering you.
Have fun blow'n stuff up!
Not pestering at all, encouraging.
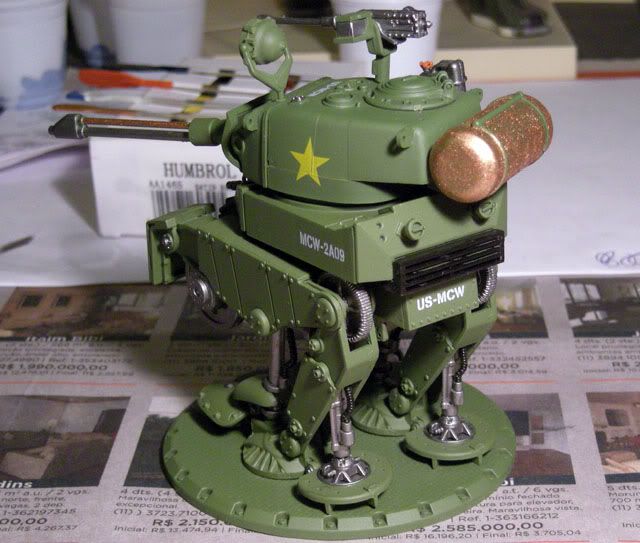
Anyway, here's the progress on the Pounder. I simply washed it and applied some metallic highlights all over:
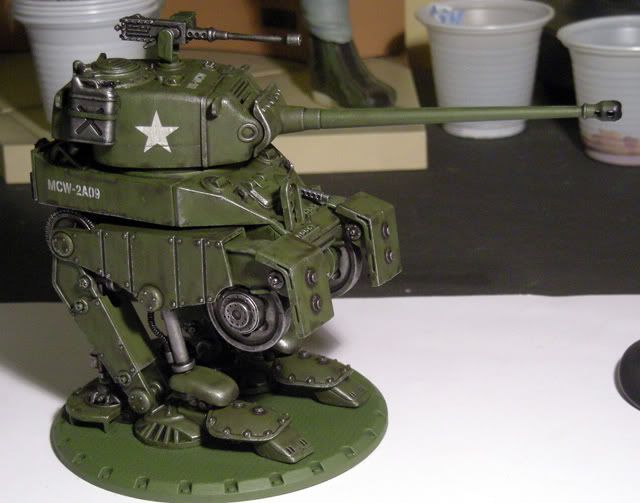
It's looking good, but too vanilla. Not sure which route I should take. Black sponge on the corners? Speckles of yellow or orangy rust? I think it's just looking too uniform.
Really nice results with a simple but well executed paintscheme.
I think that the armor plates on the sides (upper leg piece) are great to add some extra color, maybe something like the black and white invasion stripes seen on the plane wings, or just a color band to identify sqaudron (a bold if scratched yellow, red, light blue, etc.).
Some rust on the bolts and rivets is also a good idea, and if you feel like it, add some mud splashes on the lower legs (the armor plates on the "feet" are great to add metallic sponge scratches too).
I've ordered the decals from Dust Models to apply to my tanks and some of the infantry. But I have no idea how those decals work. How do you apply them to the models? Can anybdoy who's used them explain it to me? Please tell my I just need to soak them in water and then apply them to the models, or something like that. Don't tell me I need some fancy fluids. I can't GET those fancy fluids.
That looks realy good!
I like the placement of the Maw-Duce, now it looks more crew controlled, and less like someone has to cling like a monkey to the back of the turret!
I agree, some mud splatter from the feet up would look good, not so much the rust, though. Tank crews, the good ones at least, were pretty good about not letting their tanks rust!
I usualy feel that unit individuality on a realistic vehicle should come from decals and names and such, not whole sections painted different colors ( except air planes, those thing got painted crazy different!)
Keep it going! Soon you will have painted the WORLD!!!!
Have fun blow'n stuff up!