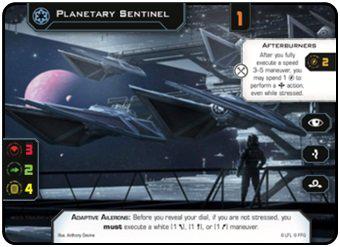
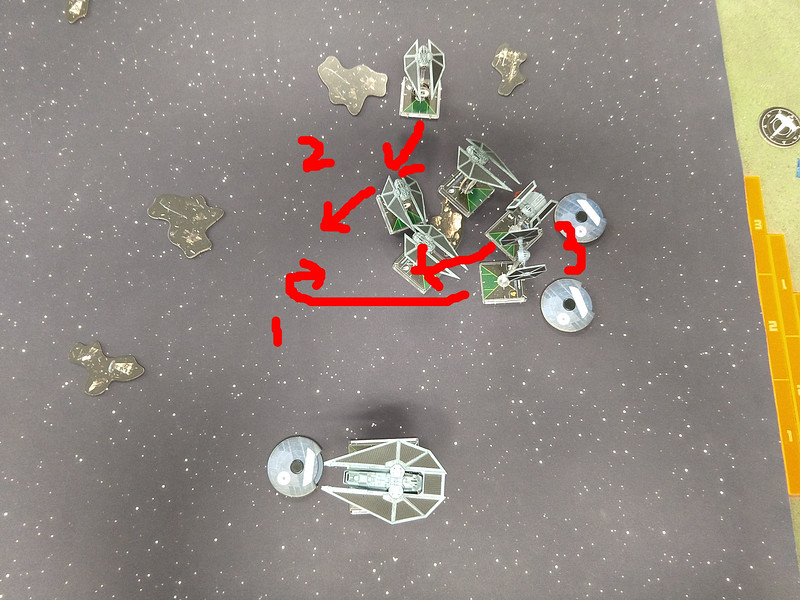
I'm relatively new to flying in formation, as I never flew regular Ties in 1.0 much. Now I've had some experience with regular Tie swarms and FO Ties. Of course, the Strikers are an even different animal with the Ailerons. My feeling is that in most cases it's still best to fly together and hit something hard at once. Then you can potentially drop multiple bombs as well, although I'm still not sold on bombs. I'm curious about the idea of Hull/Shield upgrades at this point, so I might try out 5 Sentinels with a Shield Upgrade (200 pts).
The (possibly) exciting thing I just realized today is that should the Strikers even drop one point when the points change in a few days, you'll be able to fly SIX Strikers at once. I think this is doubtful, although they haven't been performing great and the re-release is coming in the next wave. If they wanted to push Strikers, especially in Hyperspace and give Imperials an interesting option for that format, this might be a good time to drop them down a point and see what happens.