From 3D model design to Table ready... (cloud Car files release)

By DL-44, in Terrain Building

12 hours ago, thestag said:

Awesome! I'm going to see about printing that this week. I might push the envelope by printing at .1mm on my Prusa Mini. I'll post pics if I'm able to get it done. Thanks!

Good

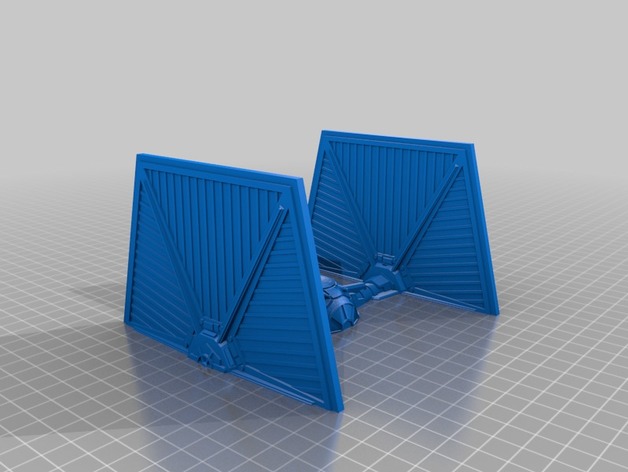
Let me know if assembly is fine, as there is always room for improvement

So I'm printing one today, and I ran into an issue on the landing gear. The 2 pins on the top snap right off when applying almost no pressure. I'm guessing it's because my infill % is so low (5%). See image below. This is the layer that prints right before the pin starts, and the next layer, which is the first layer of the pin.

rvlyjtW.png

What's odd is the back (left) cylinder never had any infill added, and the front (right) cylinder stopped adding infill 12 layers before the pint started.

I sliced it again with 75% infill and I'm printing a new one. The increased infill adds only a minute or 2 to the print time.

Edited by oreet
4 hours ago, oreet said:

So I'm printing one today, and I ran into an issue on the landing gear. The 2 pins on the top snap right off when applying almost no pressure. I'm guessing it's because my infill % is so low (5%). See image below. This is the layer that prints right before the pin starts, and the next layer, which is the first layer of the pin.

rvlyjtW.png

What's odd is the back (left) cylinder never had any infill added, and the front (right) cylinder stopped adding infill 12 layers before the pint started.

I sliced it again with 75% infill and I'm printing a new one. The increased infill adds only a minute or 2 to the print time.

I think I did print with 100% infill but cant remember for sure

75% should be enough

In case you still have problem maybe increase Nozzle temp, or maybe you have under extrusion issue

Edited by DL-44
43 minutes ago, DL-44 said:

I think I did print with 100% infill but cant remember for sure

75% should be enough

In case you still have problem maybe increase Nozzle temp, or maybe you have under extrusion issue

Good info.

What program are you using to design this?

Which type of printer do you have? what recommendation do you have for settings? etc.

So the 75% infill worked. I'm now on to printing the 4 larger pieces.

Thank you so much for including the .txt file that says how many of which parts are needed to print, and which ones needed supports. that was a huge help in prepping the .gcode files.

20 minutes ago, oreet said:

So the 75% infill worked. I'm now on to printing the 4 larger pieces.

Thank you so much for including the .txt file that says how many of which parts are needed to print, and which ones needed supports. that was a huge help in prepping the .gcode files.

👍 good

34 minutes ago, buckero0 said:

Good info.

What program are you using to design this?

Which type of printer do you have? what recommendation do you have for settings? etc.

I did use tinkercad, its a simple online program quite easy to handle

Its ok for vehicles or buildings design, for organic shapes I think Blender is better (but so far I didnt use that much as the learning curve seems too much time consuming for me)

You can find printer settings with the txt file attached with the Stls (its mainly a guidance for settings)

I love that you made the holes for connecting pins roughly the size of filament. I have a few remnants from the ends of rolls, so always nice to have a use for it. I did have to drill out the holds on the left hull bottom to get the filament to feed in, but that only took a few seconds. Left hull top is printing now. The engine and engine grill's holds were a lot smaller, but i didn't bother drilling those out, they glued just fine without any pins, and their alignment is a little less crucial than the top and bottom pieces.

23 minutes ago, oreet said:

I love that you made the holes for connecting pins roughly the size of filament. I have a few remnants from the ends of rolls, so always nice to have a use for it. I did have to drill out the holds on the left hull bottom to get the filament to feed in, but that only took a few seconds. Left hull top is printing now. The engine and engine grill's holds were a lot smaller, but i didn't bother drilling those out, they glued just fine without any pins, and their alignment is a little less crucial than the top and bottom pieces.

Looks like we will get another cloud car to display very soon

just an advice before gluing top and bottom hull, make sure the support are cleanly removed (the reactor may be tight to fit) at least that was the case for me.

I had use a file to make a "flat" surface in order to fit the reactor to the both "twins"

This is something I plan to maybe change in next(s) version of stls

Just let me know if it was easy going for you or painfull

Edited by DL-44

Just finished gluing this together.

afrAgIg.jpg

Overall, print and assembly went really well. I had to drill out all of the holes that use filament as pins, but other than that, i just had to remove my supports and it all fit together great. I'd say if there's anything to improve, the engine piece is smaller than the slots that accept it on both hulls, making for a pretty loose fit. It'd be nice if it was a little snugger, but it still went together great.

So after giving it some thought, how doable would it be to turn this into a 2 or 3 file print. See this item:

https://www.thingiverse.com/thing:2910890

Specifically images 4 and 5, that look like this:
b049c4d44b22925200ed851fb9e2bc99_preview

Maybe have the bottom of both hulls and the bottom of the engine all one connected file, the tops all 1 connected file, and if needed, the landing gear piece as a separate part. That would theoretically make it a supportless print. It would take up more real estate on the printing bed, so smaller printers would need the original 7 file setup, but it could offer more stability at the connection where the engine attaches to the hulls, and would eliminate the need for the separate engine grill piece.

4 hours ago, oreet said:

So after giving it some thought, how doable would it be to turn this into a 2 or 3 file print. See this item:

https://www.thingiverse.com/thing:2910890

Specifically images 4 and 5, that look like this:
b049c4d44b22925200ed851fb9e2bc99_preview

Maybe have the bottom of both hulls and the bottom of the engine all one connected file, the tops all 1 connected file, and if needed, the landing gear piece as a separate part. That would theoretically make it a supportless print. It would take up more real estate on the printing bed, so smaller printers would need the original 7 file setup, but it could offer more stability at the connection where the engine attaches to the hulls, and would eliminate the need for the separate engine grill piece.

I agree with you, the first prototype I did print was 4 parts (Top hulls and top half reactor + lower hulls and lower half reactor+ 2 landing gears)

However I didnt like the seamline on the reactor front and back, this is why I came back to a 7 parts solution)

Next Model on the "workbench"

oUO3RjC.png

5 hours ago, DL-44 said:

Next Model on the "workbench"

oUO3RjC.png

Looks like the old Flash Gordon rocket ships

If at some point you need beta testers to print it out, let me know. I'm taking a break from Legion terrain printing right now to build out a Marvel Crisis Protocol board or two.

Here it is. I edited the .stl files a bit. I combined the top and bottom, separated rears at an angle so I could print it without supports and separated the cockpits so I could print them at .05.

9156wPR.jpg

kEwBjiq.jpg

I5kBvtR.jpg

kh78md6.jpg

16 hours ago, buckero0 said:

Looks like the old Flash Gordon rocket ships

Its actually a Mobquet A1 deluxe speeder.

But I agree it does have a kind of Flash Gordon perfume

6 hours ago, oreet said:

If at some point you need beta testers to print it out, let me know. I'm taking a break from Legion terrain printing right now to build out a Marvel Crisis Protocol board or two.

Thanks for the offer

I will be back home in 2 weeks , at least I hope (travelling is a bit complex thoses times)

Still working on Stl's for the momment so should be OK

2 hours ago, thestag said:

Here it is. I edited the .stl files a bit. I combined the top and bottom, separated rears at an angle so I could print it without supports and separated the cockpits so I could print them at .05.

9156wPR.jpg

kEwBjiq.jpg

I5kBvtR.jpg

kh78md6.jpg

Very nice

this model rotation really makes a difference

did you print the "bodies" at 0.2?

or everything at 0.05 (same as cockpits)

@thestag , your print looks VASTLY better than mine. So much smoother.

2 hours ago, DL-44 said:

Very nice

this model rotation really makes a difference

did you print the "bodies" at 0.2?

or everything at 0.05 (same as cockpits)

I printed everything on a Prusa Mini at 0.2 except the cockpits at 0.05. I originally printed the cockpits at .2 with everything else, but the step lines were really noticeable and I was having trouble sanding them down and keeping it all looking nice. In the end, I didn't sand anything except the rear pieces. The paint smoothed out a lot of issues. Here are the edited stls https://drive.google.com/drive/folders/1Qnvj0mt_QSkWidL6X4zZwOMeyi3InXDT?usp=sharing

I was going to seal the crack connecting the rear to the main body before painting it, but I decided to leave it since it's hardly noticeable with other lines on the body. I'm going to go over it with a wash (someday) and see if I can get it to have a slightly more used look as well as making the clean parts pop. If I get a chance to do that I'll post those images as well.