Nantex Battle Reports

By Magnus Grendel, in X-Wing Battle Reports

Thanks for the report, @Ryuneke . Thanks for keeping the thread alive. I agree, it feels like there are some lists that just straight lose against Nantex. But there are some that will just straight burn the bugs without even trying. It's an odd ship, and balancing it will be extremely challenging for the devs. I've been out of town for a bit and unable to play. I *really* need to get some ships on the board!

Oh yeah, interesting reading about your Grievous experience. He feels like he perfectly fits with the bugs - thematically. He either is a monster, or almost totally ineffective. For me, anyhow.

Edited by Kleeg005
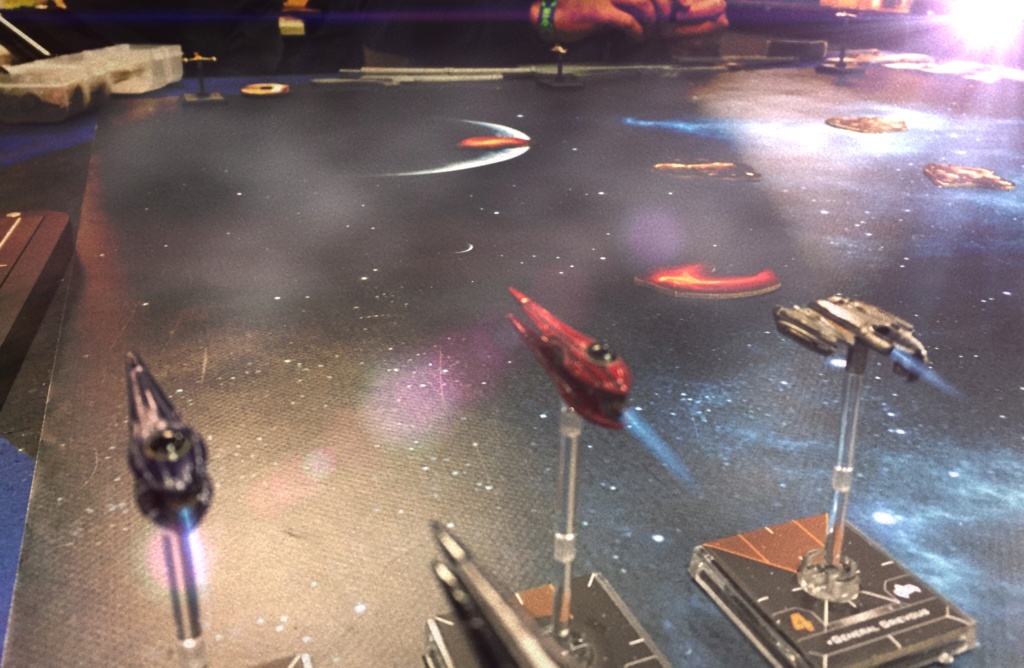
I wanted to chime in on this thread to give an alternative view on Grievous and his effectiveness.

I've now taken the following list to two 40 person Hyperspace Trials and ended up top 8 in one and top 4 in the other. Prior to the first trial I played in a local OP, going 4-0 (including against a player with a Worlds invite and previous for making it deep into cuts in 200+ person events):

General Grievous (44)
Crack Shot (1)
Impervium Plating (4)
Soulless One (6)

Ship total: 55

Chertek (39)
Ensnare (10)
Crack Shot (1)

Ship total: 50

Sun Fac (54)
Ensnare (24)
Crack Shot (1)

Ship total: 79

Total: 184

In the first trial I went 4-1 (with the loss being an honourable joust because neither I or the other 4-0 wanted an intense game having both made the cut). I lost in the first cut game to an Imperial Ace list with an 18 point bid. The loss was down to a terrible approach on my part, which led to an unlucky one-shot of Chertek by Vader. In the second trial I topped Swiss at 5-1 (people got paired down so there were no 6-0s) with the loss being to an exact mirror who won the roll-off. I won the first cut game and lost in the Top 4 to a Vennie and 3As list. Again, my approach was dreadful, and I gave up Grievous for nothing. I'm confident if I played that matchup again I'd win. Both cut games I lost were to the eventual tournament winners.

Overall my experience with this list is that Grievous is the actual heavy-hitting threat. Opponents have to ignore him and focus on the Nantex if they want to avoid getting tractored, and that's where he does his best work. For that reason I prefer Crack Shot on Grievous to Outmaneuver, as Outmaneuver means that opponents make a bee-line for him and don't give him the time to move around the outside. In a matchup against four Supernatural Inquisitors Grievous one-shotted two Inquisitors in two rounds thanks to a mixture of the tractors and his ridiculous amount of mods. Using Ensnare to reposition Grievous is the key to this list, and the number of times I caught people out with that trick was ridiculous.

In 18 games with the list, I've faced medium-based spam (Obi and 3 Arcs, a nasty 4 Arc list), droid and TIE swarms, the mirror with Outmaneuver Grievous and less of a bid, Imperial Aces, Jedi Aces and Rebel Beef-esque lists. I can honestly say that the games I have lost have pretty much all been due to my own inexperience with the list or tiredness from already having played seven games that day. The list isn't for the faint-hearted, and needs a patient approach to get Grievous behind people and the Nantex knife-fighting, but it's incredibly potent and a lot of fun to fly. Both Chertek and Sun Fac are odds on (83% and 73% respectively) to one-shot a tractored droid with a range 1 bullseye shot even without Crack Shot. Add in Crack and you're looking at 63% and 75% to one-shot TIE Fighters and Interceptors. Tractoring medium bases is easy as pie, and although Arcs seem scary in theory they melt immediately if you can tractor one and get shots with both Nantex and Grievous on them.

The biggest threats I can see are aces with bigger bids - although I think with more reps I could consistently go toe-to-toe with them at least, and possibly the 4U list which I've yet to come up against yet but seems scarier than the 4 Arc list I beat. Overall though I'm pretty sure that the list can take on almost any list in the game and win with a little bit of helpful variance in the initial approach and some thoughtful use of the Tractor Array and Ensnare. And as I say, I'm convinced that Grievous is a huge part of that potential.

Played Grievous+3 Nantex against Ani, Obi, Ric yesterday. I was really excited about this matchup because I wanted to see how my list will perform against Aces.

My oppontent had no regen because he wanted a deep bid.

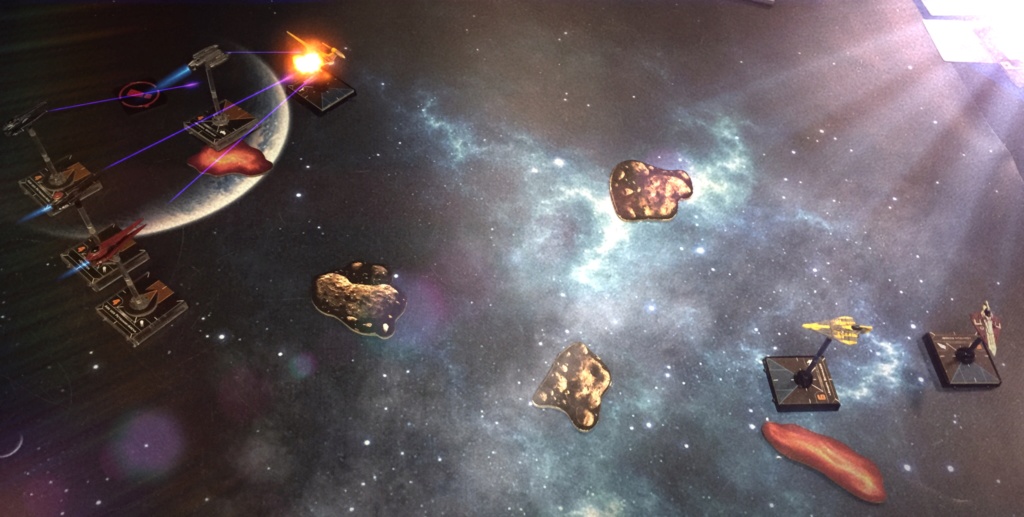
img_1719.jpg

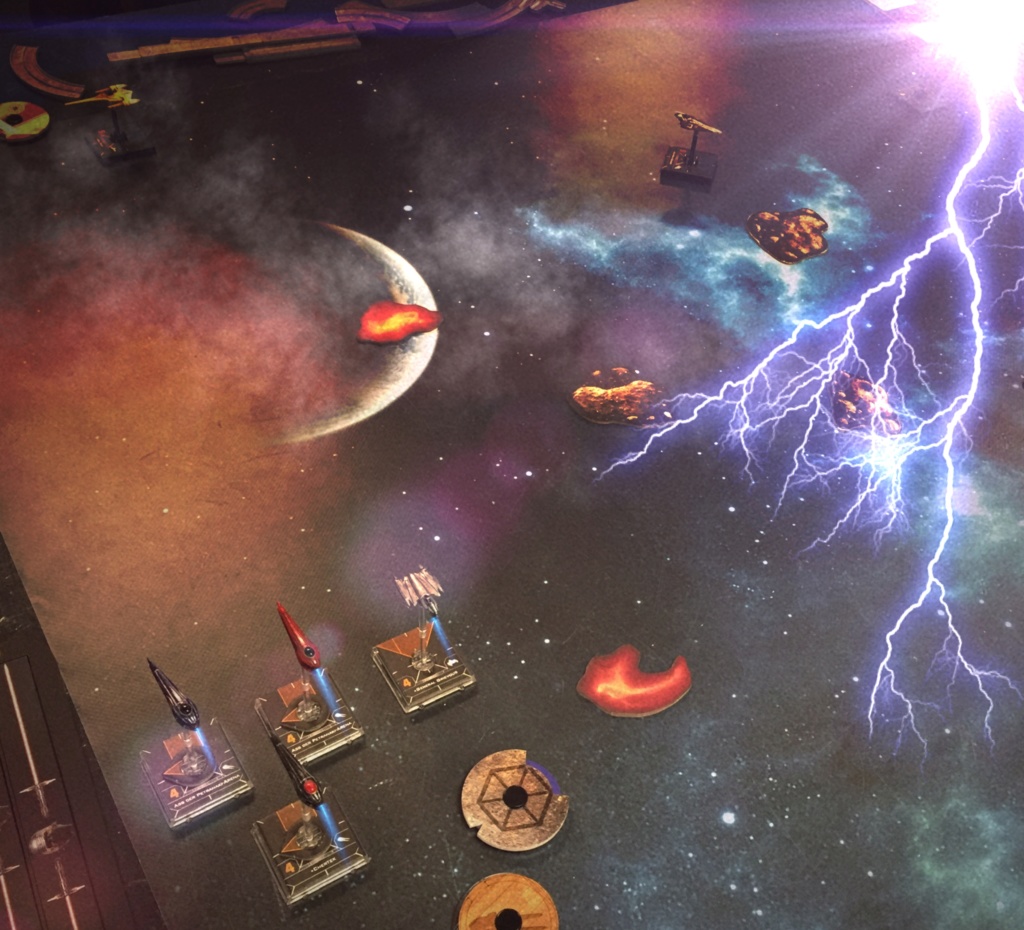
As always I setup my ships in formation with Grievous on the right side. Ric started on the opposing site and Obi-Wan in the middle.

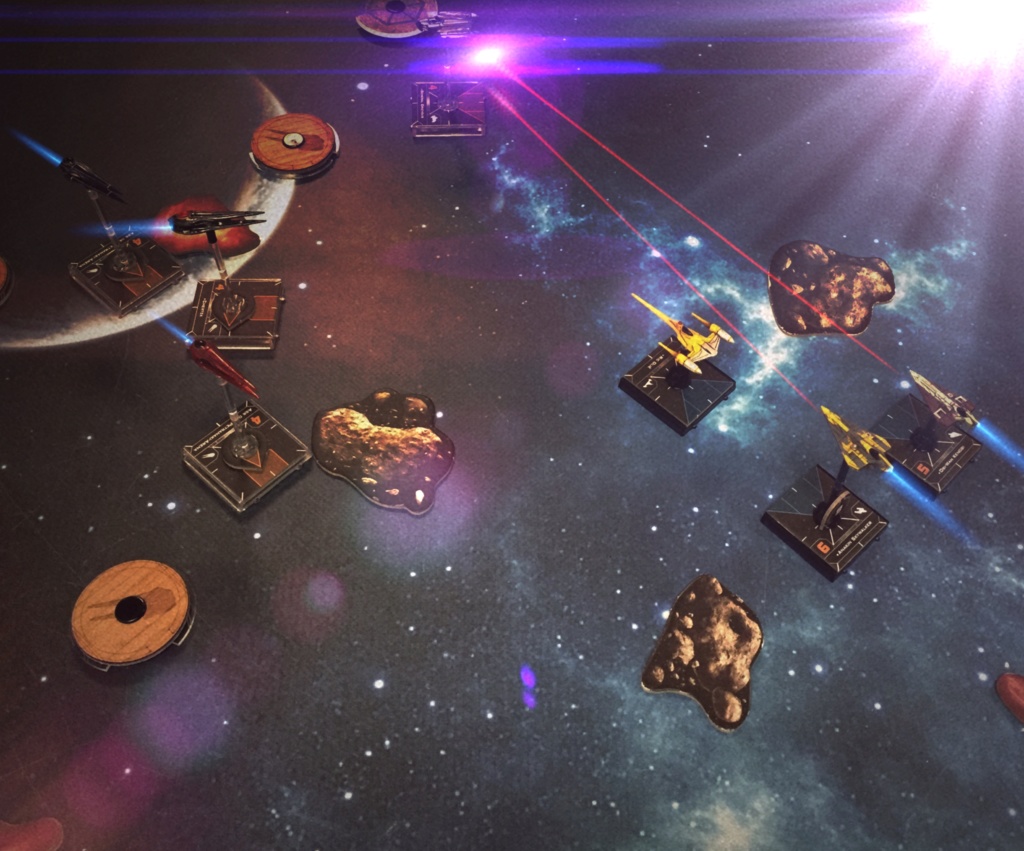
img_1720.jpg

5 straight to victory! Ric turned away.

img_1718.jpg

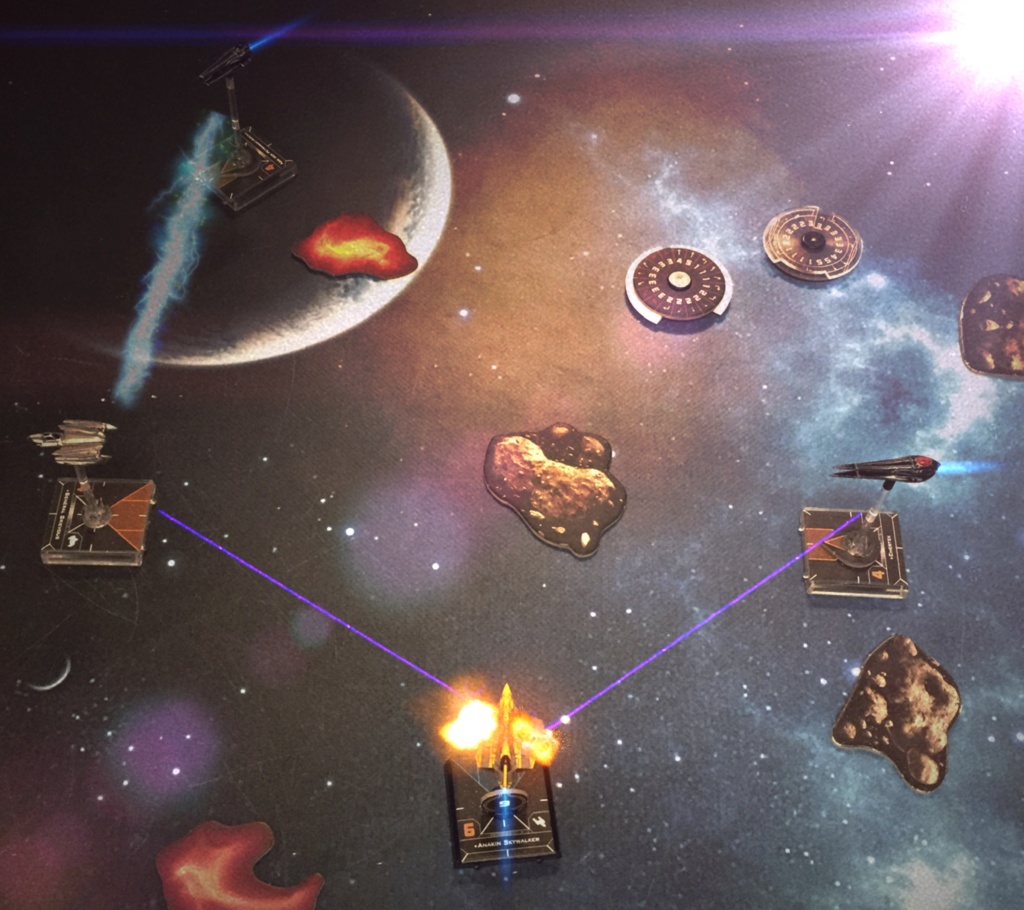
My opponent thought that I would turn in with the entire formation. However my intention was to track down Ric. So I caught Ric who wanted to flank by surprise. The Nantex on the left gave his tractor to Grievous who rolled into range 1 of Ric. With everyone shooting into him, he barely survived with 1 hull left.

img_1721.jpg

An important turn because I had to setup an optimal engagement for next round without taking tons of damage. Both Jedi fired at Grievous who lost one shield. So far so good.

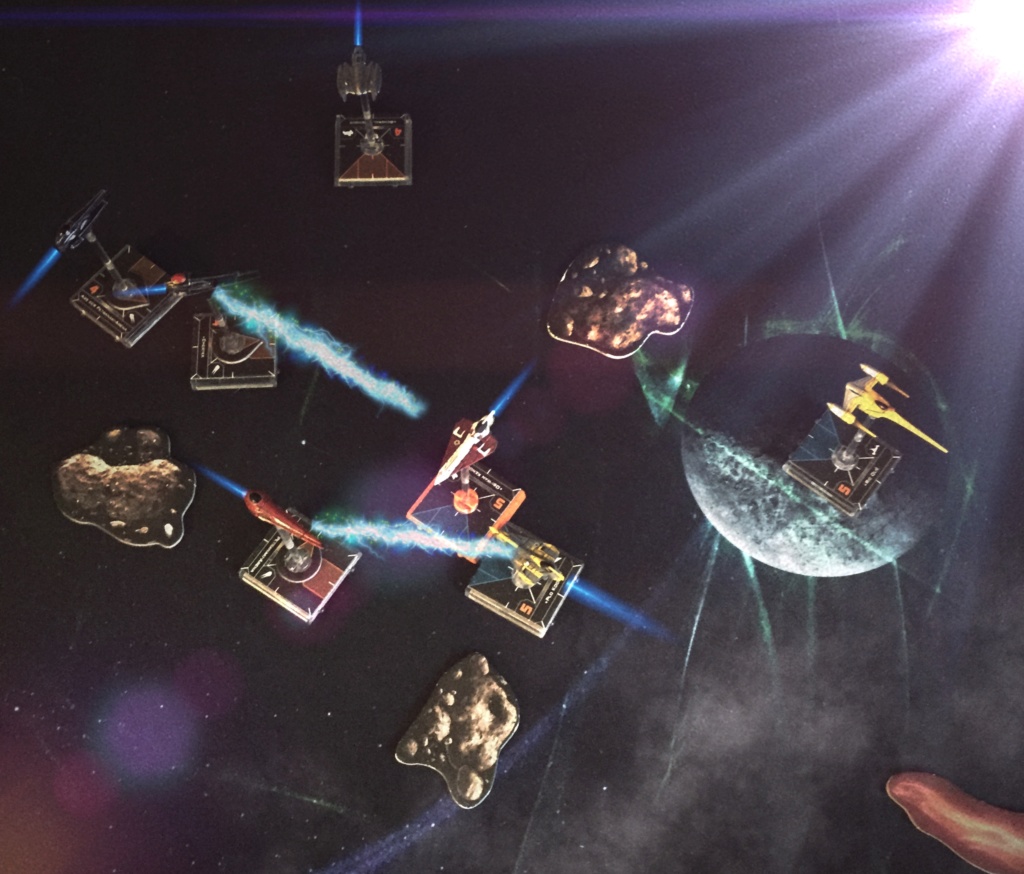
img_1722.jpg

(Had to rebuild the positions at home because I forgot to take a picture)

The situation at the end of the activation phase. I tried to cast a wide net where the opponent ships can't go without getting tractored. It shows very well that the Jedi haven't had much options to get out of this tricky situation. Everything worked perfect: The red Nantex tractored Anakin onto the rock and Chertek rolled Obi-Wan to the right into his bullseye and into range 1 of Grievous.

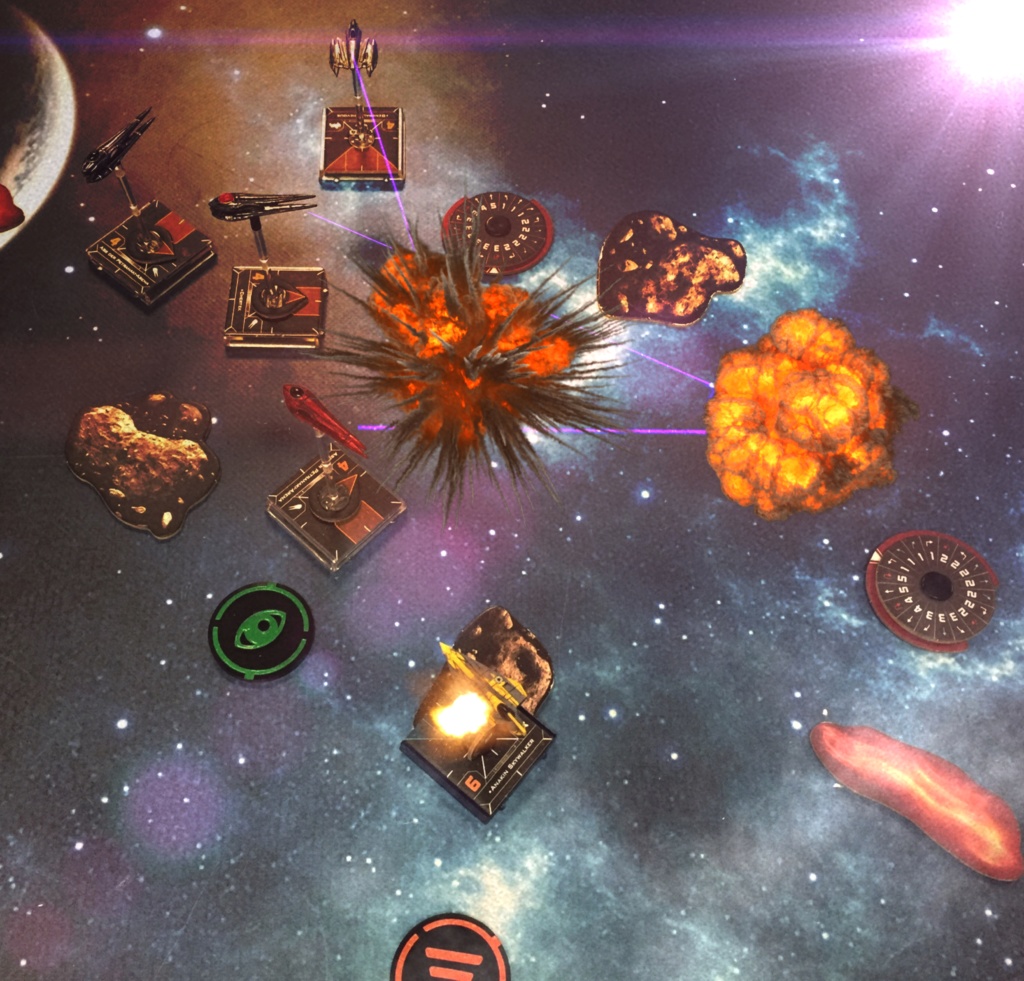
img_1723.jpg

The Engagement Phase: The red Nantex suffered two damage from Obi-Wan. 8 highly modified dice were too much for Obi-Wan. Ric died as well because of cold green dice. Anakin took one damage from the rock and another one next round.

img_1724.jpg

I forgot taking pictures again... Anakin was able to kill the red Nantex but took heavy damage from Grievous and Chertek. One round later he dealed two damage into another Nantex but died in return. The picture shows how Grievous got tractored by the purple Nantex to get a shot at Anakin.

Conclusion:

What a game and ****, those Nantexeseseseses are good.

- Setting up a good engagement is key.

- Keeping the Nantex together was the right decision in this matchup

- Playing against Aces on small bases is definitely winnable

- Grievous is way better than a 4th Nantex. (Thanks to everyone, who participated). He can hit like a truck and tank lots of damage. He's a decent flanker as well. The most important mechanic is that the Nantex can tractor Grievous at the end of the Activation Phase having perfect information. I did it twice this game and was able to get into range 1 to ric and even get a shot on Anakin. This "trick" is harder to perform when flying 4 Nantex

I played more games against harder matchups:

I'm still flying 3 Nantex+Grievous

1) Separatist Swarm

Played two games against the list. It's a tough matchup because the Nantex can die so fast. I kept everyone together in the first game which was a huge mistake. The drones annihilated 2 Nantex very quick. Game over....

I spread out my formation a bit more in the second game and went after Cpt. Sear being super aggressive. Ignoring the Drones was the right decision. Sear got tractored and died. I was able to win with Chertek and Grievous left on the board.

I still think that it's a difficult matchup if you're playing against an experienced swarm player. There are just too many bodies on the board and if you lose one Nantex early on it'll be super hard . . .

2) HAN (with Seasoned Navigator) + Luke

The Nemesis. Tractoring large bases is hard. Tractoring Han with Seasoned Nav. is impossible. I killed Luke without losing a Nantex but Han was still able to kill over half of my list. I won by points because of dice variants.

The second game I played against the list I tried to kill Han first which didn't worked. I nearly got tabled...

3) Double Deci

😭

These guys just dont care about the Nantex at all. The good thing is that the Nantex can use it's ship ability after a bump so Oicunns ability + Intimidation doesn't do anything. I got murdered in the first game especially because of Vader crew...

In the second game I tractored Oicunn onto a rock and he had to fly over it again next round. With this huge advantage he died pretty fast. RAC wasn't able to win all by himself.

Conclusion:

Yes, there are really tough matchups when flying a Nantex centric list. I mean every list has a difficult time when facing it's counter but if you bring a Nantex counter it'll be really hard for the Separatist player to win the game.

Flying this list is a gamble I am really happy to take. X-Wing is such a good game!

Thanks for the continued reports, @Ryuneke . I did get two games last week with DBS-404, Chertek, and two Petranakis versus a Gavin E-Wing, Jake, and Arvel. I wasn't going to write anything up, because I simply crushed my opponent and wasn't able to draw many conclusions - except don't even try to joust Nantex in the middle of the obstacle field. Also, DBS-404 is *not* a good wingmate for the Nantex - he died in both games having done a single point of damage (although that may be as much about me as him, ha ha). I will say that going 404 instead of Grievous allowed me to get both Ensnare and Gravitic Deflection on all three Nantex, and that GD did some heavy lifting, denying something like six points of damage. I can fit two TFD Vultures in the list instead of 404, so I think that will be the next iteration. Or perhaps a Feethan. My limited experience so far is that GD is worth losing a slightly more potent wingmate - who generally ends up being bait at best, as my local opponents don't even want to try to chase the bugs.

All that said, I'm running a small tournament later today, and am bringing a list just in case we have an odd number of players. With only three rounds scheduled regardless of turnout, getting a by is no fun at all, and we're in this for the fun. And as all that is the case, I'll not be bringing Nantex. Probably some kind of Scum jank, as I'm only there to be a punching bag and not to win the whole bloody thing.

Thanks for sharing. Its good to see that the anger of the webs hasn't scared everyone off from playing these extremely creative ships.

I have been flying 404, Grievous, Chertek and a Petrekani. 404 usually takes the initial heat which leaves the Nantex to get to a good flanking position safely. With bigger threats on the board, Grievous generally gets ignored and is able to punch through the other flank. I have not tried Gravitic Deflection yet (running them with only Ensnare). It looks interesting, but more often than not I am passing off my tractor token so it would probably just be wasted points. The fun thing to do is pass the tractor off to 404 to give it that extra boost to put it to range 1 in arc.

Finally got a game after ages - it looks like the last time I played a proper games was October! - with the Bughouse Swarm.

Game 4

  • 5 x Stalgasin Hive Defender
    • Gravetic Deflection

Versus

  • Whisper
    • Fifth Brother
    • Passive Sensors
    • Stealth Device
  • Soontir Fel
    • Predator
    • Stealth Device
  • Omicron Group Pilot
    • Emperor Palpatine
    • Hull Upgrade

So...actual 'Palp Aces' - with a good player at the helm. Feels like First Edition all over again!

I mean - no it doesn't, but I'm aware that trying to shoot at a target with focus and evade and 3+ green dice and a force charge in a communal bin with primary-2 popguns is somewhat futile. So in the best 1st edition tradition, Palpatine Must Die .

The Omicron set up first (yay for Initiative 3 basic pilots) in the top left and I more or less set up facing it; three in a V in my bottom left corner and two facing along my edge in case I needed to spread out.

Whisper set up mid-board and Soontir on the far right-hand edge.

  1. With no imminent threat from the aces, I cranked on the speed. Palpatine's shuttle stopped as expected on the first turn so the ships facing along my edge did a speed 3 turn to point at it and everyone else did a speed 3 straight up the board towards the shuttle, everyone swinging turrets to the right and boosting. Whisper turned to face me and cloaked whist Soontir went pac-man-ing up the flanks.
  2. The following turn whisper decloaked forwards, the shuttle banked towards me, whilst the leading nantex did a speed 5 straight - leaving their turrets sideways, because their primary-3 centrelines had the shuttle dead to rights. The other ships moved up, swung turrets forward and closed the range. Whisper banked in and Soontir continued to flank. Whisper shot first and got a range 2 shot on a tractored Nantex. Gravetic Deflection did it's thing, giving me double-evade, but with target lock and fifth brother he got a single critical through regardless. The Nantex responded by shooting up the shuttle - thanks to three of the five fighters having their centrelines aimed, the lambda took 8 damage, and did a couple in return, leaving the damaged Nantex on 1 hull.
  3. Most of the Nantex wheeled around to avoid crashing into the shuttle (which as I expected stopped), aside from one brave bug who shot through a gap between it and a rock, slewing its turret to get a 'safe' range 1 shot into the shuttle's flank. A couple of Nantex slewed turrets to point where I expected Whisper to be, whilst a third pointed its guns at the shuttle. The damaged nantex kept its tractor beam to itself and evaded, hoping agility 4, multiple gravetic rerolls and an evade token would keep it alive (spoilers: It didn't). Whisper pulled a classic TIE phantom 'hockey-stick' which did park her in the mobile arcs of two ships but kept her guns on the damaged one, and Soontir turned into the fight, but was still a turn's fast movement from getting involved. Thanks to lock & force, Whisper racked up a 4-hit shot and the Nantex exploded. To make me feel better, the two nantex with shots on the shuttle destroyed it before it could fire, and the two other nantex managed a single hit on whisper. Okay....no. I'll be more specific. My opponent let me have a single hit on whisper, because he was left choosing between spending whisper's second evade to make the attack miss and not being able to recloak, or losing a shield and the charge on the stealth device, and chose the latter. I think I'd personally have gone for the former and disengaged the next turn, but hey, not my call.
  4. Three of the remaining Nantex continued to circle-strafe around Whisper's expected location, and she ended up in (mobile) arc of most of them, so recloaked as her action instead of trading shots. The nantex who'd flanked the shuttle pulled a hard turn and then triggered his tractor array to roll, hoping to catch Soontir in the flank as he moved to engage the mob circling Whisper. As it happens, he'd been planning to flank the group the other way, so there was one ace on each side of them, meaning we ended up at range 1 in one another's bullseye arcs. He caused two damage to the nantex (getting 4 hits versus two evades) and thanks to a 4-hit attack back from the bullseye and a truly awful defence roll (three blanks and a single focus) took three in return and exploded. With whisper already de-stealthed versus four Nantex, three of them untouched, we called the game there.

Main lessons:

  1. Palpatine is still a pain in the neck and killing him first remains a good call. If soontir had an evade and palpatine's force instead of a focus, he'd have survived the head-on pass and it's quite likely I'd never have got a centreline on him again. Plus, whilst Nantex turrets are pretty feeble popguns, the centreline remains a good answer to big ships, especially low-initiative 'support ships' - you can deploy after them and since you have the same straight-line speed of a TIE interceptor, can catch them before they can run for the protection of their aces.
  2. If a phantom is cloaked, the safest spot to aim for is behind where it currently is. That's not a universal answer - and that's why the speed 2 roll to one side and speed 1 turn back is a bit of a signature move - but they're not totally unpredictable. Echo, specifically, is, and trying to nail him down will be a lot harder.
  3. Having 4 hull rather than three makes a nantex very tough and with gravetic deflection they often get 'full' evades if they have a focus token; it's when asked to deal with 3-4 hits they take damage. Being able to have an undamaged nantex tractor itself to protect a buddy can be priceless, too - as with all swarms, if you can get your opponent to split fire and damage 2-3 ships instead of killing one you're on to a winner.
  4. No amount of initiative, ship rules or upgrades help if you fly face-first a range 1 shot and your green dice decide they hate you. Question 1 with aces (and to a lesser extent generic Nantex) is "where can I go that's not going to get me shot?" and question 2 is "how do I get a shot when I'm there?"

We'll have to wait and see what tomorrow holds. I wouldn't be surprised to see ensnare get hoofed in the unmentionables - 90% of complaints about Nantex are really complaints about Ensnare (maybe 99% if you assume that Ensnare is what enables Sun Fac and Chertek...) - but I hope the Bughouse Swarm remains useable. I have 5 points in the can, and I've not seen many complaints about gravetic deflection or the cheap generics, so I hope so.

Edited by Magnus Grendel
3 hours ago, Magnus Grendel said:

We'll have to wait and see what tomorrow holds. I wouldn't be surprised to see ensnare get hoofed in the unmentionables - 90% of complaints about Nantex are really complaints about Ensnare (maybe 99% if you assume that Ensnare is what enables Sun Fac and Chertek...) - but I hope the Bughouse Swarm remains useable. I have 5 points in the can, and I've not seen many complaints about gravetic deflection or the cheap generics, so I hope so.

I do believe something was mentioned about a change to tractor rules. And I do think a nuke of Ensnare might be an expected accompaniment. Which is sad as it is such a devious, tricksy, entertaining mechanic. I did run a trio of Petranaki's with Crack and Predator as part of an Epic game a bit ago, and they can do some heavy lifting. Of course, without Ensnare, and facing a huge base ship, my opponent chose to ignore them. He learned the error of his ways - or rather, the Gozanti and Major Vynder learned. I didn't miss tractor as an offensive effect at all. But I did miss the joy of the jank. On the other hand, it is such a joy to fly such a maneuverable ship after flying Scum for so long.

1 hour ago, Kleeg005 said:

On the other hand, it is such a joy to fly such a maneuverable ship after flying Scum for so long.

Try starvipers. The continuously pinwheeling cybernetic ninja (aka guri) is ridiculously manoeuvrable, even by jedi standards.

44 minutes ago, Magnus Grendel said:

Try starvipers. The continuously pinwheeling cybernetic ninja (aka guri) is ridiculously manoeuvrable, even by jedi standards.

Oh, I know a thing or two about 'Vipers. I've got six of them, after all. And while Guri in particular has moves unmatched in the galaxy, that dial is still rather restricted compared to the Nantex. Or any true interceptor. I would *love* for Scum to get a true interceptor in the line of the Nantex, the A-Wing, the TIE/in - fast, maneuverable, and cheap. Something that could really - effectively - support the 'Viper platform. But that's another thread, eh?

I've got a triple Petranaki/Grievous/DFS-311 I want to get on the table someday. But my locals are pretty hung up on Epic just now.

4 hours ago, Kleeg005 said:

I've got a triple Petranaki/Grievous/DFS-311 I want to get on the table someday. But my locals are pretty hung up on Epic just now

With what on the aces?

I have to say I'm liking the Bughouse Swarm every time I play them. With 5 ship's and no ensnare, they play a lot like historical shock cavalry - line up and charge the biggest threat you can see with your lance (bullseye primary-3), then wheel, draw short blades (mobile primary-2 swung sideways) and circle back around the flanks and rear of the enemy. The version I've tried with "shields" (hive guard with gravetic deflection), but I do need to try the lighter, nimbler version with bigger, nastier "lances" (aces with predator)....

I've been running the Aces with Predator and Crack Shot. Well, I say I've been running them, but I think I've actually only tried them that way twice? The i4 has been extremely helpful as so many generics getting spammed out there are i3. Now that the HMP Gunship has been spoiled, maybe they'll get a solid centerpiece. Fat Grievous, a couple Hyenas, some Vultures - none of those combos has quite scratched the itch.

How do you compare the 5 Gravitic Deflectors to 5 Strikers?
Mobility is interesting, but the more stable defense seems useful.

7 hours ago, Vespid1311 said:

How do you compare the 5 Gravitic Deflectors to 5 Strikers?
Mobility is interesting, but the more stable defense seems useful.

They play very differently but I think they're probably a 'better' heavy swarm.

  • Advantages of the Nantex
    • They have answers to most problem archetypes for swarms - when engaging Concordia Face-off Protectorates, for example, it's worth noting that the ship ability does nothing if you're firing on them sideways with the mobile primary-2
    • base Initiative 3 means they get the drop on most other generics (certainly other swarms) but don't give up too much to do so in the way Black Squadron Scouts and Saber Aces do.
    • Flanking with their mobile primary-2 means they don't have to fly directly at the enemy to attack them
    • With everything from speed 1 bank up to speed 5 straight plus boost, they have a much greater range of possible speeds, and when circle-strafing with their turret they rarely have to use a red move, so you almost always have a focus token.
    • The ship is tougher - base agility 3 with 4 hull is better (obviously) but even when tractored you have your gravetic deflection reroll, which is pretty reliable. Especially worth noting is using one ship to 'shield' another - if a ship has 1-2 hull left, then in addition to flying it defensively (and possibly evading) you can make sure a different, undamaged nantex uses its pinpoint tractor array, giving the wounded bug 3 green dice plus rerolls.
    • A much more dangerous close-in fighter; with its mobile arc you can concentrate 3-4 ships' fire pretty easily turn after turn and you don't have to deal with the striker's ridiculous minimum speed.
    • Even with a turret to the side, you still have your bullseye, which - with several wingbugs in close formation - can be harder to evade than you'd expect, giving you coverage to front and side against a slippery opponent.
  • Advantages of the TIE/sk
    • It's easier to concentrate maximum firepower in an initial pass. Yes, both have a primary-3, but getting more than 1-2 bullseye shots on the same target, even in a head-on pass, is very hard unless it's on a big base. Strikers can reliably pump fifteen-rounds-rapid into any ship of your choice.
    • The much more varied upgrade slots - a shield upgrade is a means of trying to compete with the Nantex's durability but you have the alternative loadout of mines or afterburners.
    • A far better ability to do big swoopy turns (note that a tractored 'boost' doesn't allow a ship to change course) - especially with afterburners.
    • A better ability to fight at range 2-3 where the mobile primary-2 will lose a lot of damage to bonus green dice.
8 hours ago, Kleeg005 said:

I've been running the Aces with Predator and Crack Shot.

That's a good thought. If I tried 5 aces instead of 5 generics, I suspect you're still going to have problems getting bullseye shots repeatedly from a single ship.

Crack Shot/Marksmanship might give more bang for the buck than Predator if you assume you'll only fire the centreline gun on a given Nantex once. A primary-3 with a free critical and the ability to remove the first evade you roll is pretty scary for a squad-of-5 ship.

Alternatively (and this is more of a problem because I don't intend to buy three copies of Servants of Strife!) Treacherous might be an interesting pick. Getting a shot obstructed by another ship (friend or foe) isn't that uncommon, and if it does happen it's essentially a 2-point shield upgrade that might refresh itself.

Hmmm... Ensnare, as expected, took a hoof to the unmentionables - it's now much more expensive. 12 for Hive Guard, 14 for Aces (and Chertek) and an eye-watering 28 on Sun Fac. Plus not hyperspace legal.

Trying Aces may be shelved - with both Predator and Crack Shot no longer Hyperspace Legal, the idea of a heavier 'lance' becomes much less appealing.

Gorgol having a mod slot is intriguing. Stapling Afterburners on top of Pinpoint Tractor Array makes for one heck of a zippy ship!

Edited by Magnus Grendel

I tried a Hyperspace list last night. Three Aces with GD, two Concussion Sep Bombers - versus three Fanatical i3/fo's, an i3/sf, and a Marksman-Procket Recoil. We also, just to make things weirder, played with the Minefield Environment. Set-up ended up with a line of obstacles and mines almost edge to edge across the middle, with only a single big gap on my right and a random set of Clusters on the far left corner. I lost the die roll for initiative - which HURT. My Bombers went just left of center, aimed at a big rock and a small gap, which my opponent answered with placing the three /fo's in corner to the left of the Clusters. I put my Aces on the right aimed at the big gap. The /sf had already gone just to the other side of the Cluster, and Recoil went just to its right. I sent the Bombers up towards the little gap and the Aces screamed forward for some aggressive flanking. The /fo's and the /sf all moved relatively quickly straight forward while Recoil diddled around in the back. Round two saw engagement, and was the best attack round for me - I almost killed an /fo and stripped Recoil's shields. Then the bumpfest commenced as the /fo's and the Bombers got all tangled up. And my dice went cold. While the First Order could lean on Fanatical for free mods, I generally had nothing. And when you're throwing just two or three unmodified reds against three frequently modified greens - and then receiving two or three and sometimes four frequently modified reds against two and occasionally modified greens.... It did not go well. I never managed to throw a single Concussion Missile - the Bombers were too slow and the First Order too fast and maneuverable. While the Aces had excellent time on target, I just couldn't get through the First Order's green dice, and even without Recoil's amped up Marksmanship my unshielded ships were crit magnets. Game ended at time with me losing 137-156. I was down both droids and one and a half bugs, having taken half of the /sf, half of Recoil, and one and a half /fo's. As it was just late enough to not be able to put in a full second game, we opted to play out the game to total destruction. My dice woke up at that point - a little. It took a full forty minutes longer, and the final round came down to a single-hulled Ace versus a single-hulled Recoil. The Ace had a turret shot, unmodded at Range 2, and was defending against an unmodded Marksmanship shot from Recoil. Recoil's defense gave up in the last shot and I plinked a single hit onto him - he rolled two nattie crits, and the Ace rolled and rerolled (thanks, GD!) into evades.

So. The initiative bump for the Aces versus Hiveguards allowed me to initiative-kill two /fo's and the /sf during the game, but losing the initiative versus Recoil was awful - given how ****** slippery the Silencer is. Gravitic Deflection procced maybe fifteen times, but only for two or three results. And as I said, I never managed to throw even a single Missile, whether due to just plain not being able to keep up with the Silencer or getting blocked by the scrum. The Bombers did maybe a total of four points of damage between them, as they didn't have any significant way of modifying their little popguns against all those dodgy TIEs.

I think the changes to tractor and the loss of Ensnare and Crack Shot and Marksmanship in Hyperspace have effectively killed the Nantex in that format. The loss of the Belbullab has further degraded their chances by removing one their strongest wingmen. Maybe the Bughouse Swarm is still okay? But I'm just not prepared to dig any deeper into my wallet for a ship for which FFG has signaled their eternal hatred. Dunno. I mean, it was a *close* game. But it never felt like a good game. I outflew the **** out of my opponent, but couldn't touch him. It just felt...bad.

@Kleeg005 I've been looking at running a very similar list, but found the same issue that you had. The bombers just melted and the Nantex had a hard time pushing damage through. I ran Maul with three Hive Guards with Gravitic Deflection instead. The Hive Guards make for excellent blockers against higher init aces. They have an amazing dial and can get just about anywhere you want them to be. Against lower init pilots they were able to dodge out of arcs and rotate their arc to continually have shots. They were absolute nuisances to my opponents and Gravitic Deflection saved their bacon numerous times. Maul made for the bigger threat so my Hive Guards were left alone which made it even easier for them to get blocks and threaten large portions of the board. They didn't push much damage through (no target lock hurts), but the area control you can manage and their time on target makes up for their limited firepower. The list still needs a few tweeks, but I am a fan of the Nantex, even without ensnare. Maybe I'll try them with Dooku next so they are all at init 3...

@dunhop Yes, I know I should be running an Infiltrator with my triple bugs. I know. I just, quite irrationally, don't want yet another large base ship. And it looks so goofy! Blarg. I'm pinning all my hopes on the HMP for now. And still regretting, ever so slightly, purchasing two of the Hyenas. **siiiiiiigh**

@Kleeg005 I feel your pain. I bought two of the Hyenas as well, yet never fly them. The only reason I have done even moderately well (1-1 both very close games) with triple bugs is because of the threat the ugly large base ship provides, which makes them less threatening. Here's to hoping for the HMP. I'm excited to see what they do with it.

So....actually got some more games in last night, at a local game night kit. Twice in a month - and (due to a combination of eye-watering jammyness, ridiculous damage card sequencing, everyone being tired to the point of exhaustion and all the caffeine ) even managed to win it with the Bughouse Swarm!

Game 5

  • 5 x Stalgasin Hive Defender
    • Gravetic Deflection

Versus

  • Darth Vader
    • Passive Sensors
    • Hull Upgrade
  • Rear Admiral Chiraneau
    • Dauntless
    • Intimidation
    • BT-1
    • Seventh Sister
    • Grand Inquisitor
    • Agent Kallus
    • Advanced Proton Torpedoes
    • Seismic Charges
    • Hull Upgrade

I set up in my normal box in my bottom left corner:

l l -

/ -

Such that turns and rolls could point me either way.

As it happens, Vader and Chiraneau deployed above me in the top left, and the first pass happened down the outside left channel.

My ships pointing the right way moved slowly 'up', with the angled one banking to drop in behind. The two pointing the other way swung the formation 'open' with a speed 1 and speed 3 turn (keeping the two bugs in the same position relative to one another)

83467949_10218389454186121_8399818259779

I slightly misjudged how Chiraneau was going to approach - I thought he'd move in faster when he actually just did a bank 1, so the three ships on the left which had sped forwards had close range but the two flankers, who'd banked in at speed, were a bit further back and didn't get their bullseye weapons lined up.

Fortunately, he had for some reason sent Vader round the outside of Chiraneau, and proceeded this turn to fly the Dark Lord into the back of the VT-49. Which helped, since a 2-die attack and a hesitance to spend force as he was sat in a bullseye arc did nothing. Chiraneau got his advanced torpedoes away at the hunted Nantex (annoyingly) but gravetic deflection did its thing and the Nantex took three damage , but only three - meaning that thanks to its extra damage compared to a TIE interceptor it stayed alive. In return, two bullseye shots and three mobile shots put a tolerable quantity of damage onto the decimator, critically giving it a damaged sensor array, meaning no reinforce action.

The bugs peeled away from the head-on pass (with Vader following up, head-butting an Intimidation VT-49 with Dauntless felt like a bad plan), turning out of the way and slewing turrets to the side, before rolling 'up' the board.

Thanks to the Grand Inquisitor, Chiraneau took the chance to focus, then did a speed 2 straight and fixed his sensors (good) before realising he was in a five-way kill-box (less good). Vader collided again, but at least with an enemy ship this time. Unfortunately, he'd been attempting a koiogran and was now stressed.

Chiraneau finished off the damaged nantex, then all the lasers hit him from every direction. Remarkably, he ended the turn still alive - but only due to the hull upgrade, and with a couple of extra criticals (I believe one was Stunned Pilot?).

The following turn, stuff continued to circle around, pursuing Vader - who was stressed from his failed koiogran, and with a TIE/x1's pretty shoddy blue dial, fairly predictable.

An almost casual primary-2 shot finished off the decimator, before Vader got lit up by all the lasers in turn. He survived, but rather on fire, and the following turn he managed to turn to face the right way but was tokenless and shot to bits.

Result - 1 Nantex lost, 1 on half points, all enemy ships destroyed.

Main Lessons

  1. Because Nantex have a range of speeds from speed-1-bank/turn up to speed-5-straight-and-boost, it's very easy for them to get spread out. If the Nantex facing straight 'up' at deployment hadn't hit the gas so much, then the VT-49 wouldn't have gotten its advanced protons off that turn, and - if I flew it right - I might have gotten more than just two bullseye shots in the first engagement. Rather than swinging the other side of the box around with speed 1/speed 3, pivoting it with speed 1/speed 1 and then rolling 'left' to tuck in behind the 'top' side might have been a better plan. Once roughly on the right heading, it's not like Chiraneau could dodge, and if he reinforced to take the 'lance charge' then that means no torpedoes.

Game 6

  • 5 x Stalgasin Hive Defender
    • Gravetic Deflection

Versus

  • Fenn Rau
    • Fearless
  • Boba Fett
    • Slave One
    • Fearless
    • Maul
    • Advanced Proton Torpedoes
    • Cluster Mines

  • I'm getting heartily sick of advanced proton torpedoes.
  • So - this is a very good opponent, with two ships I know are pains in the neck to fight with swarms because you absolutely cannot afford to engage them at range 1.
  • I once again did my standard deployment in the bottom left.
  • Fenn and Fett set up top right, heading 'down' the outside channel.
  • There were two real left-to-right channels.
  • I moved 'up' on the left, and Fenn and Fett moved 'down' on the right - Fett moving much faster and clearly planning to take the 'lower' channel, Fenn taking the 'upper' one.

84000149_10218389452266073_8414171224438

  • I decided to go for Fenn first - yes, he's the cheaper ship and my opponent was happy to expend him for a good first engagement and a kill or two if needs be, but I decide that killing an agility 3 ace is best done whilst I have my full squad, and I have painful experience of what 5-dice attacks can do if he gets in close.
  • I'll take credit for a pretty good kill on Fenn. He lagged behind the first engagement, with Fett coming in from the flank. Only one Nantex got to shoot back (doing nothing) and it took a single critical for its trouble (structural damage. Woo-Hoo.)
  • The formation spread out as much as possible, all turning away and rotating their turrets inwards into a kill box. Fenn tried to avoid flying into it, but instead flew into the damaged Nantex - which was good as (a) he couldn't finish it off, and (b) he was facing a bunch of primary-2 shots without a focus and he couldn't use Concordia face-off against the range 1 shots. He survived, but on one hit point.
  • The following turn he was still in the middle of a nasty kill box and died from the first attacker to shoot him. He and Fett did take out a nantex (not the damaged one) and I got some assorted pot-shots into Fett, dropping his shields.
  • Fett continued to loop after the damaged Nantex and its wingbug for a couple of turns, meaning he was now between those two and the ones which had formed the other side of the kill box - I was trying to hold the range open, but with a boost he got into range 1, getting a reroll-and-maul range 1 shot which killed off the damaged nantex. In return, I only got one damage through....but it was a critical, and it was a Hull Breach.
  • The following turn, the three remaining ships in the swarm continued to circle him, one slowing to bank-1 to avoid the predictable but no-less-lethal-if-I-hadn't-honoured-the-threat cluster mines. One more nantex took two damage.
  • However - he'd focused, to try and avoid the damage in the first place, rather than using an action to fix the hull breach. This proved to be a bad choice.
    • Two attacks did nothing, but the third landed two 24?cb=20180905025543 .
    • Hull Breach turned these into 24?cb=20180905025543 .
    • The first one proved to be Fuel Leak.
    • The second was another Fuel leak, which set off the first Fuel leak, causing another 24?cb=20180905025543 , which Hull breach turned into a 24?cb=20180905025543 which set off the second Fuel leak.
    • This resulted in another two face-up damaged cards, both of which were Direct Hit, which spawned another two damage cards on top.
    • The virtually undamaged Slave One detonated in a huge cloud of coaxium vapour.
    • "Oh."

Result - 2 Nantex lost, 2 on half points, all enemy ships destroyed.

Main Lessons

  1. Criticals are harsh! Getting Hull Breach/Fuel Leak/Fuel Leak/Direct Hit/Direct Hit has to be pretty low odds, but it was just devastating.
  2. Spreading out is key. One big advantage of the Nantex over, say, a TIE/ag or Y-wing, is that your turret can fire at range 3. When dealing with someone like Boba Fett, who gets rerolls out the wazoo when in the midst of a swarm, it's better to be at range 3 than range 1. Obviously range 2 is the sweet spot, but if you end up in range 3, it's not the end of the world.
  3. Protectorate Fangs go down surprisingly easily in a crossfire when they don't get Concordia Face-off. If you're in a head-on pass with one, then the turn you move into engagement range, turn or bank away and slew your turret to the side. Yes, you'll lose 1 agility, but gravetic deflection generally picks up the slack (especially if you have a bunch of wingbugs doing the same) and it will deny them Concordia Face-off and Fearless. Plus, multiple ships at 45' angles firing in in a crossfire are harder to arc-dodge than a solid 'block' closing from one direction.

Game 7

  • 5 x Stalgasin Hive Defender
    • Gravetic Deflection

Versus

  • Darth Vader
    • Foresight
    • Passive Sensors
    • [Optimised Prototype]
  • Duchess
    • Snap Shot
    • Fifth Brother
    • Seismic Charges
  • Captain Feroph
    • Director Krennic
    • Angled Deflectors

  • Feroph set up first top left, with her ship facing right along the top board edge.
  • I set up everyone facing 'up' in a W pattern in my bottom left. I know chasing Feroph is probably a bad plan, but she's the only target I've actually got right now.
  • Duchess deploys mid-board facing down, and Vader deploys on the right flank.
  • Feroph heads along the board edge at medium speed. I head up the outside left channel. Duchess starts to turn in, Vader moves further down to flank.
  • I continue to head 'up', but everyone slews their guns to the gap I expect Duchess to come through. She does, but at range 3 she gets a hit and I don't. Her attack does an impressive 24?cb=20180905025543 24?cb=20180905025543 24?cb=20180905025543 but gravetic deflection is awesome in a tight formation and only one 24?cb=20180905025543 gets through from an initially blank roll.

83923517_10218389450946040_5629901190964

  • Feroph turns to face into the same gap, but she's had to use a red turn - tokenless, so not a huge threat. Vader turns in and will get involved in the fight next turn. Duchess pulls a bank/segnor and.....lands in a kill box, because the Nantex have all gently banked and turned in whilst keeping their turrets pointed to the side. There's a sort of 'phut' noise as the striker takes primary-2 fire from every direction.
  • The following two turns see the Reaper battered to bits. It's forced to do a blue move the next turn and can't use ailerons, meaning it takes loads of fire. With Feroph's ability and reinforce, she doesn't take too much damage, but her shield goes and she takes a bit of hull damage. Vader loses one shield from a Nantex who can't range on the Reaper.
  • The following turn the Reaper has to loop to keep on target. Which means no reinforce, and hence lots of damage even though the shots are at long range. It's left on one hull, stressed, with a loose stabilizer - i.e. completely predictable because if it does anything but a straight it'll die instantly. One Nantex finishes it off before it's Vader's turn to be covered in bees* - he manages to half-point one Nantex but I get lucky because (a) I pull off a speed 1 turn that has the proverbial gnat's wing of clearance from the board edge (and then roll back into the board going 'no, no, no, no!' because otherwise there'd be no safe manoeuvre the next turn...) allowing one Nantex to keep shooting at Vader without needing a red move or several turns spent going the long way round a rock, (b) Vader took a foresight pot-shot but it missed (c) I realised whilst moving my ships that Vader might try a risky talon roll to get out of dodge and rotated a turret to face him. It was the only primary covering the spot, but he'd also parked in a bullseye. Two range one attacks later, and a force charge down from using foresight, Vader was thwap-ed.

Result - 1 Nantex on half points, all enemy ships destroyed.

Main Lessons

  1. Snap Shot didn't actually trigger, and foresight triggered once to no effect other than burning a force charge Vader really wished he'd had later that turn. It never really felt that scary, and reinforces my view that it's only ever really worth it if you have an 'after/when you attack' trigger (like Turr Phennir, for example).
  2. You won't have tokens to fend off snap shots, BUT you might have a gravetic deflection reroll - either because you are first player (in which case you might even be able to roll or boost out of the shot entirely!) or because a wingbug in arc already has a tractor token (remember boosting or rolling into the arc will not .

* Best Eddy Izzard voice: " I'm covered in Bees!" - the best way I have to sum up the Bughouse Swarm's fighting style.

Edited by Magnus Grendel

Had a game against a friend last night.

Game 8

5 x Stalgasin Hive Defender

  • Gravetic Deflection

Versus

5 x Black Squadron Scout

  • Ruthless
  • Hull Upgrade

This was a demo game as he's taking my TIE/sk to the Systems Open this weekend.

The game didn't go too well for him, as - advice and consultation aside (I'd set my dials then help advise him on his) - I know how the TIE/sk handles at least as well as he does, they lack the agility to mitigate concentrated 2-dice fire, and since a Gravetic Deflection Hive Guard is 39 points and has nothing else to spend points on, I have a 5 point initiative bid I can't really get rid of, so he's going first.

The Nantex isn't quite as manoeuvrable as the aileron-equipped TIE/sk - it's basic dial is good but not that good, and it should be comprehensively outflown by the nimbler striker. However......

hDEA9D3C7

  • With 10 of the most squirrely ships in the game on the board the planning phase can basically be described as "Some stuff will be somewhere. Buggered if I know where."

84665335_10163255911455392_6015505021246

  • The initial pass happened at range 2 - which is good because it avoided the one-shot territory at range 1 - and then, crucially, he assumed I was going to slow roll in instead of breaking past and slewing turrets.
  • After that, things broke up into a massive swirling dogfight with about 2-3 actual mini-fights going on at various points.
  • He didn't do that badly, netting two kills and damage on most targets, but in the end was reduced to a single damaged TIE/sk versus three Nantex in various shades of 'on fire', at which point we called things.

Result - 2 Nantex destroyed, 4 Strikers destroyed.

Main Lessons

  1. Facing the wrong end of a heavy swarm is a scary experience. A Nantex - especially with a Gravetic Deflection reroll - can afford to exchange shots at range 2-3, but not for long. It really claws back damage on the turns where the Striker pulls red moves and the Nantex has tokens but the Striker doesn't. Moving in 'behind' a Striker with turret slewed sideways isn't too hard.
  2. Concentrated fire is key. With the same initiative, you can't get any kills, without return fire, so you need to drop whole ships - and 5 hull is harder to take out than you expect.
  3. Strikers throw a lot of red dice, but they're unmodified a lot of the time due to the need to loop around.
  4. Tractoring undamaged ships, and switching to evading on heavily damaged ships, persuaded my opponent to spread his fire around the squad a lot, which probably saved at least one ship, maybe two.
Edited by Magnus Grendel

I ran my list of 3 Hive Guards (Gravitic Deflection) and Count Dooku (Title, Proton Torpedo, General Greivous) in the local store tournament with a surprising result. Out of 31 players, I ended up in 9th place with a list I didn't even expect to make the top half. Nantex, even without Ensnare, are really good ships and are a ton of fun to fly.

Round 1

vs. 4 Skull Squadron Fangs with Fearless

I set up with Dooku on the left and the bugs aimed straight into the debris fields and he set up on the opposite corner from Dooku. I charged my ships forward to make sure the battle field was where I chose, but unfortunately in my rush forgot to decloak Dooku. I hoped I would be able to shed the decloak after defending, but the initial engagement went into the bugs, and then the Fangs swung around attacking Dooku from outside his firing arc. The Bugs did great setting up blocks while still getting shots off with their turrets, but their 2 die attacks didn't carry much punch against the fang's defenses. Gravitic saved their hides more than once with an amazing reroll. Not having Dooku involved in the combat for the first three rounds really hurt. When he finally was able to get involved he one shotted a Fang with a protorp, but by then he was limping along and the bugs had taken on severe damage.

Loss 125 - 200

Round 2

vs. Poe, Kare, Red Squad with Ion Cannons

I rememebered to decloak Dooku this time and slow rolled Dooku in to prepare his protorp shot. The bugs once again charged in to get their blocks and harass the x-wings with their turrets. My opponent concentrated on trying to Ion Dooku off the board, but was unable to land any solid hits. The first protorp into the red squadron left him limping along and the bugs swarmed around the edge to finish it off. The second got a solid hit on Poe, and he went down the following round to concentrated fire from Dooku. Kare kept getting blocked and was out of the fight until the end where she was overwhelmed by the whole swarm.

Win 200 - 20

Round 3

vs. Boba Fett and Koshka Frost

We both set up on the same side of the mat in a clear jousting lane. I lunged Dooku forward to block the firesprays and brought the bugs along through the obstacles to block the escape routes and harass with their turrets. I was able to line up a few bullseye shots with the bugs, but trying to block Boba proved to be very difficult. I set up a block with one and lined up bullseyes on where I thought he would be, but he turned away from it leaving him at range 2 of all my ships. All 3 bugs had good shots and Dooku had swung around the other edge to get a range 3 protorp. Boba went down and Koshka was quick to follow. He got half on Dooku and one bug.

Win 200 - 62

Round 4

vs. 6 A-wings with intimidate (Arvel included)

We both set up on the edge for the clear jousting lane. I tried to sneak behind him with a decloak and 5K, but he got off a good block which left Dooku in the firing arc of the entire swarm. He managed to half Dooku and I only knocked off two shields. Having Dooku shoot, then cloak was the only thing keeping him alive most rounds. The bugs were able to take down a couple a-wings, but took on heavy fire themselves. In the end Dooku managed to get off his protorp and only get 1 shield off Arvel, then died in a blaze of glory.

Loss 96 - 161

Round 5

vs. Emon Azzameen, Kad Solus, Serissu

Unfortunately for my opponent, Emon is one of my favorite pilots and I know flying with bombs very well. Emon set up in the middle of the map with the Boba crew so he could get a bomb drop off on round 1. I charged Dooku in the chase off Emon losing a shield to the seismic charge, while my bugs circled around. Dooku kept the threat on Emon, keeping him out of the fight for most of the match and getting him to waste his bombs ineffectively (0 damage from bombs outside the 1st). Once again the bugs flew in to get amazing blocks off while still getting to shoot out their turret arc. He managed to take one bug out, but Kad and Serissu were limping along. My remaining bugs were finally able to get Serissu trapped in the corner and finish her off, and Dooku got the last shot on Kad. Dooku by this time was hurting pretty bad and Emon was able to finish him off. My bugs did what they do best, one would run in and get the block while the other would roll out of arc and shoot with his turret. After a few rounds of this, Emon went down.

Win 200 - 141

Overall, I am very pleased with the way the Nantex flies and don't feel like they need Ensnare to be good. I was able to maneuver them in to get a block almost every turn. While the 2 die turret attack didn't do much damage, I was able to get a shot with all my ships almost every turn as well. As my brother likes to say "quantity has a quality all of its own". Eventually the odds would turn in my favor. My opponent said after my fourth match, all of these ships were deceptively tanky and performed far above what was expected at first glance. I would have never thought of trying this list if it wasn't for the new hyperspace restrictions, and I am grateful for it. I have found a list I love flying that is distinctly off-meta and performed well with it. I can look back and see where I made mistakes and know that I can do even better with this list in future events (decloak Dooku!)

Edited by dunhop

Sorry to ask but I don't get it why Gravitic Deflection is so good on Hive Guards.

I have only 2 Hive Guards so in order to use Gravitic Deflection both ships have to be tractored and have their attack arc's pointing at eachother in order to get 1 reroll for each one of the Hive Guards, right?

I assume a tractored Hive Guard is not in its own attack arc but maybe I'm wrong.

56 minutes ago, Slade said:

Sorry to ask but I don't get it why Gravitic Deflection is so good on Hive Guards.

I have only 2 Hive Guards so in order to use Gravitic Deflection both ships have to be tractored and have their attack arc's pointing at eachother in order to get 1 reroll for each one of the Hive Guards, right?

I assume a tractored Hive Guard is not in its own attack arc but maybe I'm wrong.

The *defender's* arc makes no difference. It's how many tractored ships are in the *attacker's* firing arc that determines the number of rerolls offered by Gravitic Deflection. So a bug with a tractor token, in order to be attacked, *must* be in the attacker's firing arc - and therefore receives a reroll from GD. And frequently two, given that you generally fly them somewhat grouped. It's solid, but not game-breaking good.

Edited by Kleeg005