Nantex Battle Reports

By Magnus Grendel, in X-Wing Battle Reports

So - I had my first game with the Nantex fighters, and I was impressed how it went.

Game 1

  • Stalgasin Hive Defender x 5
    • Gravetic Deflection

versus

  • Darth Vader
    • Fire Control System
    • Proton Rockets
    • Afterburners
  • Soontir Fel
    • Targeting Computer
  • "Duchess"
    • Predator
    • Fifth Brother
    • Seismic Charges
    • Afterburners

This game was against one of the best players in our local store. Obviously it was his first time facing Nantex but it was also my first time using them, and they gave a very respectable performance - I actually ended up winning, though I admit that was after probably an hour and a half and he'd been ahead on points for pretty much all of it; had it been a game whose result 'mattered' he could have run for it earlier on. Still, I win few enough games against him that that's an unusual achievement for me in and of itself.

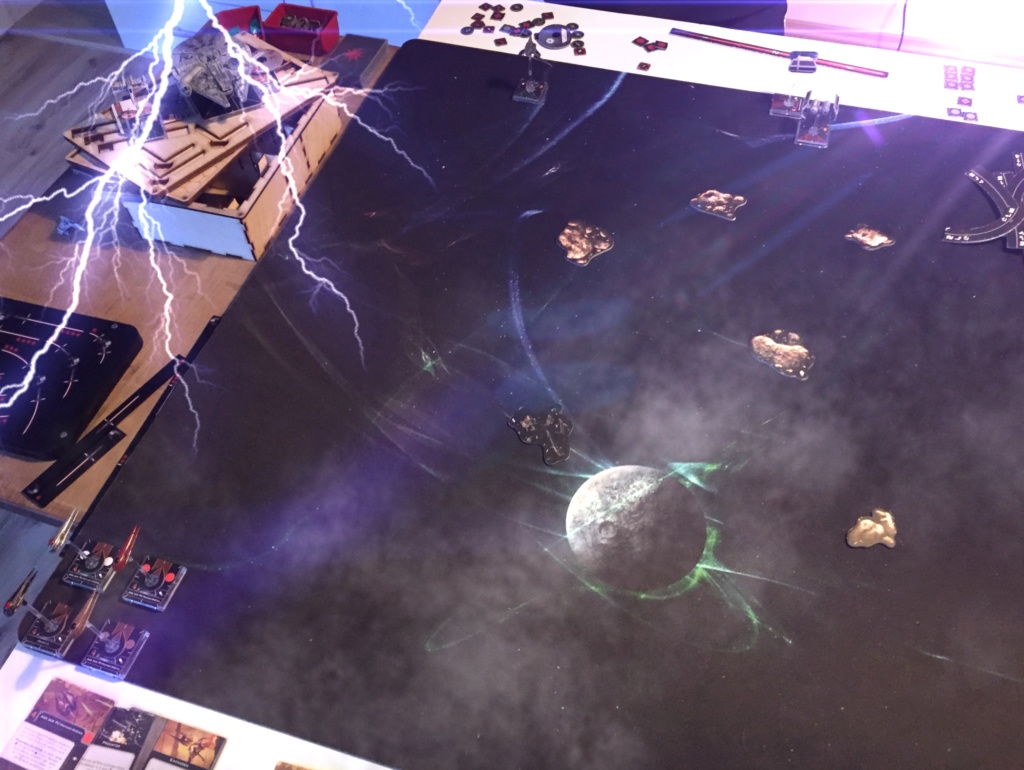
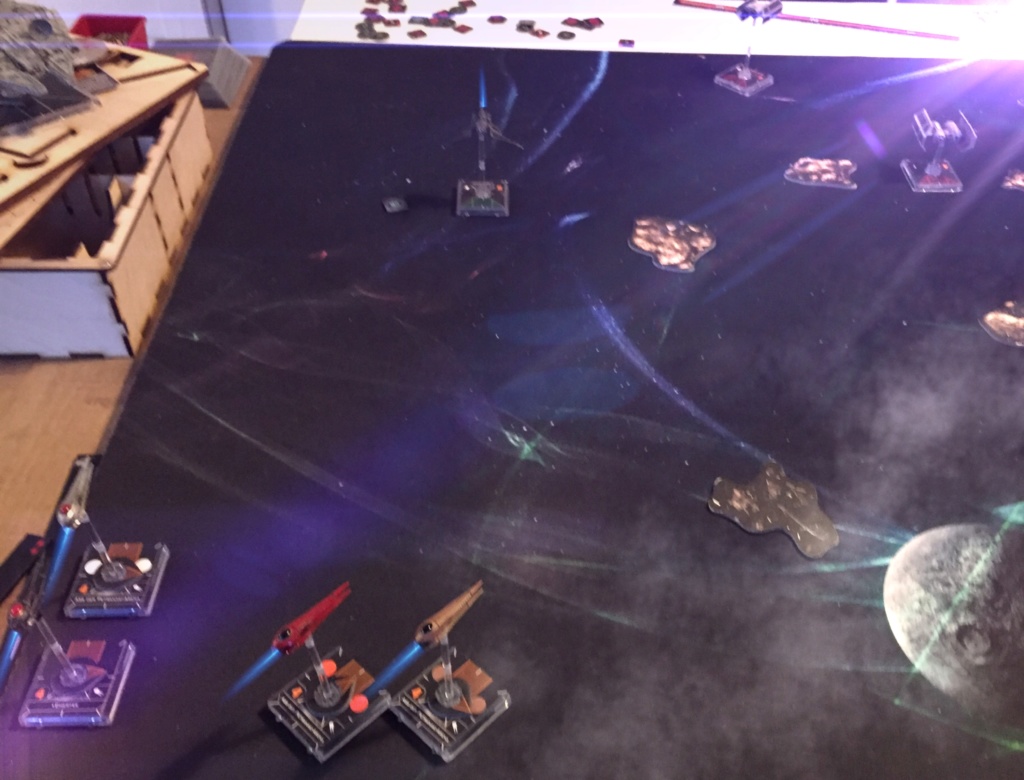
  • I set up in a loose 'gaggle', one group of three and one of two.
  • Stupidly, I put the two on the inside, with the upshot that when I engaged, he was able to throw all three aces at the ship on the end of the line at range 2, whilst only that ship got shots back.
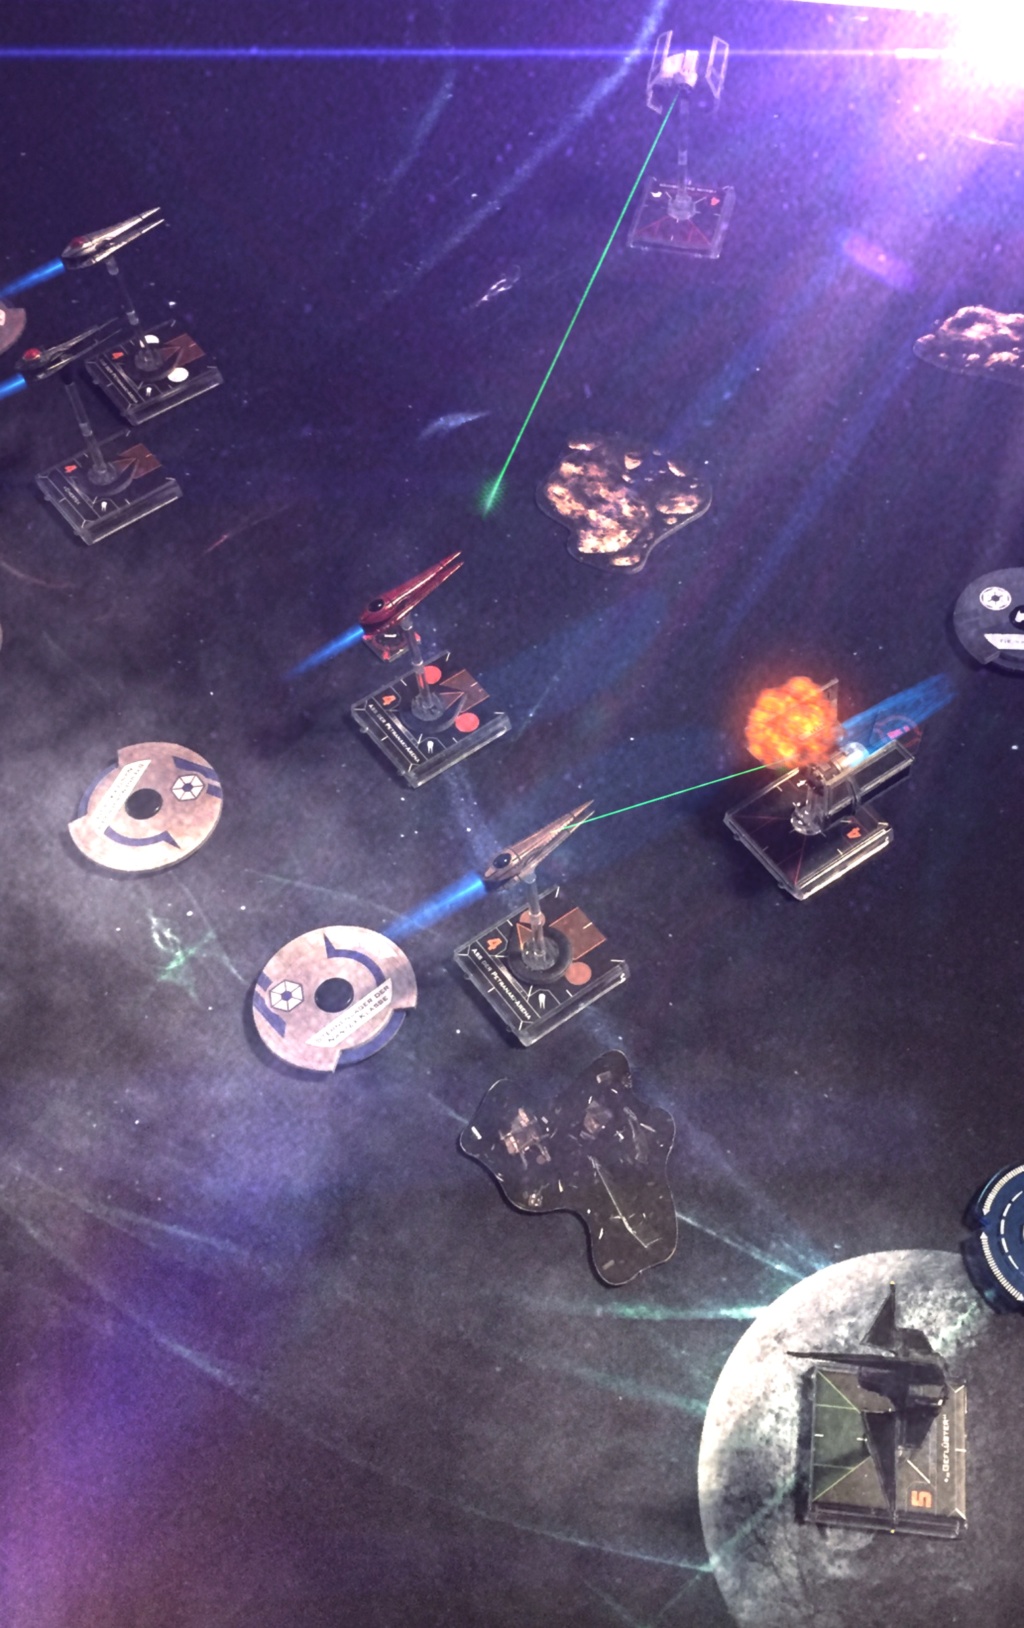
  • Gravetic Deflection made its debut in no uncertain terms; thanks to rerolls, that the targeted ship faced with three double modified, 3-dice attacks casually went 'triple evade, triple evade, double evade' and only took damage because the last attacker had rolled more hits than I had evade dice.
  • Also, the fourth hit is very nice. One Nantex got hit by "Duchess" seismic charge and my first thought was genuinely 'eh' - especially given that the blast clipped Vader and took off a shield as well. Even with range 1 force/fire control, focus/predator or focus/lock attacks being the norm, I never felt I was in danger of having a ship one-shotted.
  • In the following turn, everyone pretty much turned and used pinpoint tractor array to slew their turrets; "Duchess" was able to evade the killbox but only by using her ailerons and a fast bank manouvre through a debris cloud (picking up 2 stress) and burning an afterburners charge. To add insult to injury, the one hit I did get was a panicked pilot, leaving her carrying a faintly ridiculous stack of four stress tokens around.
  • The game pretty much shifted into the aces doing ace things and the Nantex circling with their turrets slewed sideways.
  • I didn't get much use out of the bullseye arc - I think I fired it maybe twice? - but against these ships making my opponent take the odd stress token on barrel rolls to avoid bullseye shots counts as as much of a win as I think I have a right to expect.
  • 2-dice attacks are a lot more reliable than they were in 1st edition. Obviously I've played TIE fighters and know that intellectually, but 2-3 2-dice attacks is a genuine threat even to someone like Vader or Soontir. One thing to note was that Fel and Vader kept having to kiogran and talon roll whilst I could just do a white turn and still focus; once "Duchess" eventually died, Soontir went down a couple of turns later because he kept coming under fire with no actions and only his innate free focus to protect himself.
  • One thing that felt very impressive is that in the process of fighting three of the most mobile ships in the game, I didn't feel tempted to do a red move once; the colour only mattered at the point one Nantex took a panicked pilot critical and was nailed to banks for a couple of turns.
  • My opponent fairly consistantly went for ships which had tractored themselves, but a couple of times I was able to make him fire at a full agility ship with rerolls if he wanted the kill.
  • It eventually boiled down to a full health Nantex and one on a single hit versus a shieldless Vader. He took out the damaged one after a couple of turns, but took a structural damage critical. We then ended up on parallel courses with my turret facing him. He closed, shot the Nantex and put two damage on it, but the return fire killed him.

The Bughouse Swarm was very interesting to play. They feel very mobile - with their turrets they don't have much firepower but felt able to consistantly keep laying attacks on a target; a genuinely top-tier player with an Imperial Aces list was getting shot at every turn. Granted each individual shot doesn't do much but they add up fast and with the dial allowing a range of movement from speed 1 bank all the way up to speed 3 turn and a boost or barrel roll without giving up focus, Nantex can circle-strafe like few other ships.

Major lessons:

  • Keep Nantex in at least supporting pairs. The lone flanker was asking to be pounced on and only Gravetic Deflection kept it from being killed in one turn for no return shots.
  • Most 'aces' can't put their arcs of fire on a spot just behind their starting position without giving up their action and being fairly vulnerable. Turn behind and Pinpoint Tractor Array to rotate feels generally a better choice than a koiogran.
  • You're unlikely to lose a ship in one shot. Being killed before you can engage is different, but if you can at least force your opponent to use 2-3 attacks to get a kill, in a heavy swarm you're probably on to a winner.
Edited by Magnus Grendel

Thanks for the write up.

You're making me wonder if the 2 I ordered will be enough!

I've been looking at how these guys might be incorporated into my usual CIS list, and not seeing anything obvious. It sounds like they are a sufficiently different paradigm that I should think less incorporation and more replacement. Maybe three of these and a mini-swarm or something. Thanks!

2 hours ago, Kleeg005 said:

I've been looking at how these guys might be incorporated into my usual CIS list, and not seeing anything obvious. It sounds like they are a sufficiently different paradigm that I should think less incorporation and more replacement. Maybe three of these and a mini-swarm or something. Thanks!

What is your usual list?

7 hours ago, MarkEmm said:

Thanks for the write up.

You're making me wonder if the 2 I ordered will be enough!

Certainly with Gravetic Deflection, they give a lot of mutual support. I imagine Ensnare-based lists will be as well. Certainly I don't think you can just plug Sun Fac into a squad like you would Soontir Fel without planning the force around him.

@Magnus Grendel : I lately have either a Feethan or Sear (if points allow) with Kraken, three or four Vultures with Struts (sometimes Precise Hunters if points allow, sometimes with ESC), and one or two Hyenas of various load-outs. I haven't really settled on an exact list or composition, as nothing has *really* gelled with me yet. I love a fully kitted Grievous, but he always seems to have too big a target on his back. I think, with all the various versions on 0-1 Belbullabs, 2-4 Vultures named or not, an 0-2 Hyenas named or not, I'm running something like 20 wins and 15 losses. I don't have and don't want the Infiltrator - I'm not feeling large bases in 2.0. And the more I fly them, the more I test them, the less I am enamored of Hyenas - so maybe that's where I find the points for the Nantex.

If you're trying a squad in support of droids, maybe try Berwer Kret? You can field him with Ensnare for a lot less points than Sun Fac, and if hes not I6, he's still I5, which isn't normally available to CIS small-based ships. Plus his ability looks like it pairs well with droids, especially if he can tractor their target too.

Berwer seems...like a trap. It's a lot of hoops to jumps through, eh? First, you have to take locks with your droids rather than the safer and generally almost as effective calculate. Second, you have to actually hit with your attack. Third, you have to have the target in your droids's arcs as well as in Kret's in order to make full practical use of the ability. And finally, you have to deal with all of your droids being stressed. That's not as bad as some of the effect-chains out there, but it's still not as good as, say, Sinker swarms. Or Howlrunner swarms. Or...a lot of other stuff. I bet it's not bad against lower initiative targets, but my local meta is choc-a-block with Jedi and Imperials - which means, generally, all i5 and i6.

It feels like Chertek should make a semi-decent pocket almost-Ace, albeit hampered by i4? It still seems that they really want to have at least two on the board, or - as you say above - a singleton might be too easy to focus down. Unless it's Sun Fac doing crazy Ace-y stuff. I dunno. I'll just have to put one on the board and see, eh? And probably pick up a second, and then a third, and then.... Ha ha.

yeah.... now I'm considering four total, they seem like they're fun in multiples... ugh

what do people think about 4 buying bugs?

Petranaki Arena Aces with Snap Shot and Gravetic Deflection look interesting. Bob on 50 points a piece, with a good enough initiative to pretend to be 'aces' against most generics and limiting most of the downsides from pinpoint tractor array whilst keeping the benefits.

My flgs has been taking some hits with reduced interest out here in the Outer Rim, so I was only able to get my hands on one. I'm pretty sure I want two. And four sounds a freaking treat.

@theBitterFig had the sensible idea of pairing Berwer Kret with Syllabub-22s rather than Vultures or Hyeenas.

The Feethan Ottraw Autopilot doesn't get the normal backstop of networked calculations, gets a 3-dice primary, and you can pack Kret, Grievous and two generic Bellboy-22s and even have Kraken so you've got double-calculating ships (or still have a calculate if you've spent one to defend yourself). I don't think you'd use the trigger with every ship (as you say, it causes stress) but it's a nice-to-have if you hit.

4 hours ago, Magnus Grendel said:

@theBitterFig had the sensible idea of pairing Berwer Kret with Syllabub-22s rather than Vultures or Hyeenas.

The Feethan Ottraw Autopilot doesn't get the normal backstop of networked calculations, gets a 3-dice primary, and you can pack Kret, Grievous and two generic Bellboy-22s and even have Kraken so you've got double-calculating ships (or still have a calculate if you've spent one to defend yourself). I don't think you'd use the trigger with every ship (as you say, it causes stress) but it's a nice-to-have if you hit.

Oh, I stole the idea from someone else, but my memory is only amazing for useless stuff and can't remember who.

I went 3-1 this past weekend at a tournament with Chertek (Ensnare + Crackshot) and the I4 Generic (Ensnare + Predator)... both 50 points, and I think they can fit in with anything. (I ran them with x5 Strut Vultures at 200 total) Might drop Predator for another Crackshot to have a 1 point bid. (Most CIS lists I've played against are 200, and you want to give them First player for Ensnare) VERY fun ship to fly.

Edited by Maizrim

I finally managed to put a Nantex on the table. I went Chertek with Ensnare and Crack, Grievous with Soulless and Crack, and two Bombards with TrajSim, Proton Bombs, Fuses, and Struts. Opponent brought Sunny, Serissu, Laetin, and a TPV, all with Shield and Autoblasters, and Snap Shot for those who could (not Sunny). It...didn't feel like a good test? In an attempt to abuse Serissu's pilot ability, he kept them in formation which made it *very* easy for my "aces" to get flanking positions. The Bombardment Drones abused those extremely pricey Sims (and reload) to control space and drop loads of crits. And the Scyk dials are just so clunky, he never had a chance to disengage/re-engage. He did say that he was basically trying to run away from every element of my list, and consequently got himself stuck in a corner, which just made everything easier and easier for me. Worse, I did as much damage self-bombing as he did shooting - the dice were extremely unkind. I tabled him, taking a total of four points of damage across the two Bombards. So, yeah. I can draw no conclusions. Except that I like TrajSim Bombards, and that the Nantex is a load of fun to fly even if I only managed to Ensnare one enemy ship once; I mean, I used it to push Grievous into better positions a couple of times, so that was good. It still feels like two Nantex would be better than one and Grievous...maybe? And I maybe need to be more aggressive with Chertek? Obviously, I need to get some table time, and more serious lists than Scyks. (And I still ******* dread facing Jedi - they feel worse to me than First Edition Kanan/Biggs.) But so far, so good.

I had two more games with the bughouse swarm last night.

The first game was an 8-threat quick-build game against a returning 1st edition player who is still feeling his way into both 2nd edition and Seperatists.

Game 2

  • 4 x Stalgasin Hive Defender
    • Ensnare
    • Gravetic Deflection
    • Targeting Computer

versus

  • DBS-404
    • Predator
    • Plasma Torpedoes
    • Afterburners
    • Landing Struts
  • Precise Hunter
    • Concussion Missiles
    • Shield Upgrade
    • Afterburner
  • Separatist Drone
    • Energy-Shell Charges
    • Shield Upgrade
    • Grappling Struts
  • DFS-081
    • Proton Rockets
    • Hull Upgrade
    • Grappling Struts

70507742_10162110653445621_4941522790747

  • This was kind of a rout for the droids. They set up in a 'T' formation at the left of the board at the top with 'error type 404' at the back, whilst I deployed in a fairly loose net on the right of the board spread out.
  • The Nantex all banked and hit the gas for the lower flank. Two zoomed up the flank whilst the others moved into the centre of the board (there were three rocks and three gas clouds, and I'd made sure to put the rocks in the centre).
  • This turned the fight through 90 degrees over the next turn or so and led to the droids coming at me in a conga-line. 404 locked one nantex but thanks to mediocre red dice and gravetic deflection it avoided the shot, then hit the gas and zoomed past the droid line, swinging its turret to the flank.
  • The first ship in the line was the precise hunter, and it...basically flew straight at the bugs. I was first player, and had parked next to a rock, slewing turrets to point in the direction of the oncoming droids, and the lead droid obligingly flew straight into their arc, shortly afterwards finding itself face-planting into the rock and losing its shot. Massed 2-dice fire has its limitations but is more than sufficient to execute an already tractored vulture droid who isn't close enough to his mates for networked calculation.
  • Things then broke up into a swirly fight of close-range shooting. I didn't get to use Ensnare again much because I generally had my arc where I needed it, but being able to turn and shoot out the flank rather than needing to talon roll means I had tokens and the droids didn't. I did manage to ensnare 404 at a critical moment - I genuinely think he'd forgotten that I could do that - which cost him a range 1 primary that could have killed off a Nantex and hurt him into the bargain (note: droids can only land "when you execute a manoeuvre". being tractored onto a rock still hurts. By comparison, Mining Guild TIEs can still keep right on rolling without damage, though they would still lose their shot).
  • Whilst the quick-build Stalgasin Hive Defender has a Targeting Computer, honestly I didn't acquire a lock at any point.

Main lessons:

  • Obviously there are only so many lessons you can draw from a quick-build squad which is applicable to a normal squad. You can fit 4 ships with Ensnare in a normal squad (Petranaki Arena Aces with Ensnare and....something for 2 points - either Treacherous or Predator?) but not with the I-can't-overstate-how-awesome-this-ability-is Gravetic Deflection.
  • Ensnare was nice; twice in the game it turned a range 1 shot into a ship parked on a rock. At the same time, that's with 4 ships equipped with the talent, and 4 ships to use it on, and it only came up twice. How it'll play out with aces and higher initiative Nantex, I'm less sure.
  • Circle-strafing by putting one arc to the side and banking or turning over several turns allows pretty sustained fire on a target. The Nantex is very forgiving to fly in this fashion, but with only a 2-dice primary you'll need to have several laying fire into a target to reliably hurt anything tough.
  • Never attack head-on. You want to come at something from an angle so - if needs be - you can hit the gas with a 5-straight-and-boost tractor slingshot, swing your arc 'inwards' and loop behind them.
    • This might play out differently if engaging a less manoeuvrable big ship and going for bullseye shots. Petranaki Arena Aces with Predator deliver serious pain if they can aim their centreline guns correctly; with predator a Nantex delivers some 2-3 times the damage if it can boresight its opponent.

The second game was against a good player but - let's be fair - one who had just finished a brain-liquefying 12 hour shift. As much as anything, it ended up being a showcase of why the details of the tractor token and arc rules are important.

Game 3

  • 5 x Stalgasin Hive Defender
    • Gravetic Deflection

versus

  • Ketsu Onyo
    • Shadow Caster
    • Maul
    • Fearless
  • Old Teroch
    • Fearless
  • Talonbane Cobra
    • Predator

70282164_10162110653385621_4004249141646

  • I deployed in a spread-out 'net' again along the left. Ketsu placed herself front-and-centre along the right middle with Talonbane on her wing, whilst Teroch (the empty base) parked himself in the top right corner
  • I banked everyone over to try and mob Teroch. Ketsu obligingly flew into a cloud of debris and lost her action, and without a focus token she couldn't hit her target. Old Teroch was most put out to find himself under fire from just about every direction, but critically from people firing in their side arc, who didn't let him use either his pilot ability or fearless. He would manage to use his ability later on in the game, but his target not losing its focus token (plus gravetic deflection) and no Fearless meant that what could have been a clean kill became something rather less and he was left stressed and pointing emphatically the wrong way for the bulk of the fight. Talonbane had bad luck and was shot to crud over the following few turns; agility 2 isn't enough to fend off 3-4 focused 2-dice attacks, especially with so-so rolls.
  • The scum ships got a kill after ketsu turned into the fight, tractored an opponent off talonbane and the two ships blew it to bits (gravetic deflection is great but there's only so much you can do when Talonbane gets a range 1 shot with predator) but the game really fell apart for the scum in the next turn. Ketsu turned, hoping to start wheeling round, and landed smack dab on the rock, getting no action, no shot....and having teroch fly into the back of her. To add insult to injury, the nantex ahead of them had gotten into position via pinpoint tractor array and was already tractored - meaning no further repositioning; even though it was in position for Ketsu to use her ability; she couldn't heft it into Teroch's arc as well. With Teroch increasingly getting pounded by flank arc shots where Concordia Face-off doesn't help, it took another turn for him to go down, and then the nantex switched to shooting up Ketsu. With the initiative 5 shadow caster repeatedly getting blocked, she pulled a maximum speed koiogran to get clear space and get her nose around, but that was a last gasp, and on the run back in she took a massive amount of damage. With firing from the flank removing Fearless, and gravetic deflection taking much of the sting out of being tractored, she did a bit more damage but was left on one health and we joined it there.

Major Lessons

  • Fearless requires you to be in mutual frontal arcs. Turning away and firing to the flank avoids this without giving up your own shot.
  • Concordia Face-Off also requires your frontal arc to be pointed at the enemy, as does Old Teroch's ability. Circle-strafe for the win.
  • Remember that a ship is repositioned by tractor tokens when it becomes tractored . An Ensnare-capable ship might become tractored twice (since it can receive one, pass it off and then receive another one) but for most small ships, becoming tractored happens once, the first time you receive the token. This means that if you tractor yourself , you can't then be flung around by the enemy.
  • Lancer -class, unusually for big ships, have a forward arc and a single mobile arc. If their arc is forwards they don't have tail guns!

Had another game last night. It was a local 'academy' night, so I was mostly trying to run through some useful rules of thumb (stuff like deploying rocks to create 3-3 'safe zones' in a corner to deploy in, and eyeballing banks, turns and range bands from a ship's base). The game itself was lengthy but good fun, even if my opponent's dice rolls were horrendously bad.

Game 3

  • 5 x Stalgasin Hive Defender
    • Gravetic Deflection

Versus

  • Poe Dameron
    • Heroic
    • R4 Astromech
    • Integrated S-Foils
  • Nien Nunb
    • Black One
    • Heroic
    • Pattern Analyser
    • Integrated S-Foils
  • Ello Asty
    • Heroic
    • Integrated S-Foils

71222611_10217233287162668_4528426269213

71230119_10217233286962663_6574339949322

  • I deployed in the top left corner, whilst the Resistance set up bottom right. Most of my ships pac-man-ed it down the left flank, then turned in, so by the second round there was a net of bugs zipping through the asteroid field in a (rough) line abreast as shown.
  • My opponent had, I think, planned on going right round the rocks at the top, and he kind of got caught with his formation side-on. Nien had bumped into Poe in the first turn, and was left lagging behind, whilst once Poe had moved up, that rock between him and the bugs stopped both him and Ello getting into the fight as quickly as he would have liked - and he also overcooked a turn to try and fix this mistake and clipped the rock with Poe, leaving him without actions two turns in a row.
  • Nien got mobbed and - having been moving too slow for Black One to get him clear - got shot to snot from several directions.
  • Ello eventually went down, and killing Poe took even longer, but the Nantex managed to avoid too much damage in the process. One took a focus/locked range 1 shot from Poe and was left with two face-down damage and weapons disabled, so unsurprisingly decided he vas hitting ze accelerator very hard and zooming off into the distance to fix it and evade a lot.

Major Lessons

  • Circle-strafing with basic Nantex remains effective. Not trying to use Ensnare means I don't have to stress about trying to get range 1 on stuff, which is a lot safer for the bugs.
  • Nien and Ello's party pieces are the ability to talon roll and still remain unstressed with plenty of tokens. Which becomes a much less impressive trick against a swarm armed with turrets.
  • I have to admit I'll be interested to see how they do against other turret-wielding opponents, especially with Republic Y-wings showing up on other tables last night.
  • 3 green dice - or 2 with a reroll - will generally bag you at least one evade with a focus token. That means that even a 4-dice attack will generally not manage to one-shot you, which as far as I'm concerned means 'tough enough' for a heavy swarm ship.
  • Massed bullseye shots rarely get to fire against higher initiative 'aces' but are good at persuading them to use actions to boost or roll instead of focus (especially where your arc is elsewhere, so it goes from 3 dice to 0 instead of 3 dice to 2, even if you had actually planned on firing on a different target).
  • Keep the obstacle fields OPEN. One thing NEVER to forget with Nantex is that your 'free boost' and 'free barrel roll' are the repositioning effects of becoming tractored. That means if you try to boost or roll you CAN land on an obstacle and will have to eat the collision effects if you do so. Always be VERY VERY SURE you think you have space for the reposition you're planning to do.

So....we had another player trying out some Nantex last night - having reached for 'that thing off teh internetz" he had rocked up with

  • Sun Fac
    • Ensnare
  • Chertek
    • Ensnare
  • General Grievous
    • Outmanoeuvre
    • Soulless One

He found himself up against a local player who is getting rather good with a scum kamikaze squadron: 7 Z-95s with Deadman's Switch.

72719689_3022602884433427_67577526751120

It didn't help that he's still getting used to ensnare, but the main problem was the sheer number of arcs of fire criss-crossing the board, and the fact that engaging at range 1 is asking to be caught in the detonation when the target is killed - and the eye-wateringly expensive Nantex only have the same number of hit points as the headhunters.

He got a couple of kills, but eventually the game wound up with five remaining Z-95s chasing Grievous around the board until his rerolled green dice eventually gave out.

After this, I broke out a (slightly reduced) squad of Aces with Snap Shot (I wanted to try the ability) and got a game against a friend's latest squad of scum hijinks.

Game 3

  • 4 x
    • Petranaki Arena Aces
      • Gravetic Deflection
      • Snap Shot

Versus

  • Zuckuss
    • Tobias Beckett
    • Jamming Beam
    • Mist Hunter
  • Sol Sixxa
    • Proximity Mines
    • Seismic Charges
    • Skilled Bombardier
    • Dorsal Turret
  • Torkil Mux
    • Proximity Mines
    • Moldy Crow
  • Captain Seevor

71958101_3022603094433406_36666124209540

The game was interesting - it's a nasty squad to face!

  • I won, only losing one Nantex, but that belies the fact that of the remaining three, two had serious criticals (one wounded pilot/damaged engine and one damaged sensor array) and the other had three out of four damage cards. Note the scattered critical and stress tokens!
  • I did get lucky - smacking Seevor with two criticals on the first shot of the game, which proved to both be Panicked Pilot (a.k.a. not getting an action again ever )
  • The squad basically all set up on my left flank to zoom forward and try to smack Zuckuss around the head. With a low agility, large bullseye-susceptible base and a massive gun, I wanted the space pram dead as soon as possible. I got a pretty decent chunk of him, and then the ships broke formation to fire into it from the flank.
  • One ship which had sped down the flank with its turret right zipped past and banked in behind. I was a gnat's wing clear of being hit with a proximity mine by Sol Sixxa (a speed 2 turn thanks to skilled bombardier), and guessed right that Torkil would drop mines of his own and dropped in behind him, avoiding the mines (and his turret) with a very tight turn, whilst Sol tried and failed to talon roll thanks to the Ace's higher initiative. Zuckuss subsequently exploded.
  • I got lucky again the following turn where a proximity mine only did the minimum 1 damage, and I was able to hammer Sol Sixxa.
  • The HWK took some killing (chopping through focused agility 2 with only 2 dice isn't easy) and I must say his ability is very annoying....
  • Sol talon rolled and shot up the only remaining intact nantex, putting two damage on it, but was reduced to one hit remaining in reply. The following turn I banked the nantex in behind him - I was certain (and correct) that he'd seismic charge the rock nearby, but since I was on two damage out of four, it wouldn't kill me and a range 1 turret shot should kill him. It did.
  • At the same time, a lucky turret shot took out the TIE fighter, and then it was all over bar a couple of turns pummelling the Moldy Crow.

Major Lessons

  • I didn't actually use Gravetic Deflection much, but it was critical on those turns where it was used; the nantex I lost took structural damage as its first damage card, and being able to use a wingbug's tractor token to give it a defensive reroll kept it alive at least a turn longer than it had any right to.
  • That fourth hit point relative to a TIE interceptor is amazing, especially where bombs come into play.
  • Snap Shot barely triggered. I think I got maybe 2 snap shots off in the game and only 1 point of damage. I suspect it might not be that great on a nantex because the way I fly them they're generally pointed flank-on to the enemy. It particularly didn't work here since all the enemy ships were lower initiative.
  • Having higher initiative was a pleasant change! I'm not sure if it was good enough to justify the loss of a ship, but they did well. Of course, for a lot of opponents I4 won't be enough to give me the edge, but where opponents move after me Snap Shot may be better. If I can get behind someone and 'chase' them then Snap Shot might be more useful.
  • The Bullseye did actually get a fair amount of use. There may be an argument for Gravetic Deflection and Predator - I'm not sure what to do with the rest of the points in this case, though.
Edited by Magnus Grendel

Slow night at the FLGS: just myself and one other regular. In the expectation of an upcoming nuke-nerf to Ensnare, I ran triple Petranaki with Snap/Crack escorting Grievous with Soulless/Impervium/Outmaneuver. Opponent flew Ten with HLC/Lone Wolf/FCS/something, Shara with Kanan/Hull/Expert Handling/VetTailGunner, and Miranda with Lando/Barrage/Proton Bombs/Shield/AdvSLAM. All i4 across the board, and 198 points each. He won the roll and gave me first player. Rocks set up in a broad band across the middle of the board - well, one gas cloud, two rocks, three debris fields. I put the three Aces in the middle of my side, facing into the obstacle field, with Grievous on my left. He then set his whole list facing Grievous. I didn't really know how to approach this. What I did know is that Grievous wants to flank and was stuck facing the entire list, and the Aces are squishy AF, whereas his ships are tanky mothers with some minor buffing options. I needed to abuse my speed and try to focus down one ship at a time, preferably the regen monster first.

I 3-banked right with the Aces, getting ready to turn into the field if he went hard at Grievous or fly away around the field if he decided to try to go through to get at the little bugs. Grievous 1-hard right to GTFO - or turn back in on flanking posture if the other squad turned into the obstacle field. He split his forces, SLAMming Miranda directly at Grievous and banking the others into the obstacle field. My first priority was to have been Miranda, because regen is crap, but I would have to take what was presented. And given that my ships have a maneuverability advantage in an obstacle field, I decided to turn in and try to set up some Crack shots on those medium bases. Grievous long banked in to turn the following turn to bat clean-up. After this, it gets messy in my head. Miranda comes around, sort of flanking and dropping bombs to sort of corral my fleet into an engagement with Shara and Ten. Ten bumps Shara's butt a lot and gets focused down right quick, followed by Shara; but not before I lose two bugs and more than half of Grievous. Impervium plating? Yeah, whatever. Let's take a load of Pilot crits, ha ha. So it's one bug and a Blinded, Stunned Grievous against a Miranda who has only taken damage by spending shields to nuke bugs. Woof. I disengaged hard and split my remaining ships to get Miranda pincered. Fortunately, the K-Wing had spent her bombs and never quite got into a good position to reload. After another ten minutes or so or resetting and repairing and chipping away and running away, I finally put the beast down 200-122. Never used a single Crack Shot, and only Snapped once for zero damage. Huh.

We reset, and I won the die roll this time. Moving first hadn't been a determining factor in the previous game, so I decided to see if moving second would make a difference. Well, it certainly did in terms of getting a favorable turn zero and first engagement! He set Miranda and Shara on my far left, Ten in the middle. I set all my ships on my far right, three Aces across with Grievous behind. 5-straight with everyone for me, while he 3-banked Ten towards me, SLAMmed Miranda the long way 'round, and banked Shara straight into the obstacle field. A single range 3 shot took a shield off Ten with no damage in return. Ten went 1-straight focus/roll, Miranda 2-hard/SLAM, Shara straight into the obstacle field and wildly out of position. Bugs went 5-straight again, one being blocked by Ten and the other two getting out his arc. Grievous 3-banked left, roll/focus to get Ten in arc. Ten's shot stripped Grievous's shields - again. But the two bugs and Grievous stripped all of Ten's shields, and he had nowhere to go. Ten bumped, having no maneuver he could do to avoid my mini-swarm. Miranda came in to obstacle field, and Shara continued a slow drift through the obstacles. My bugs 3-hard turned left behind Ten, and Grievous juuuuust barely bumped Ten...in Miranda's arc, but barely out of Shara's. Miranda's powered-up shot blanked out, and Grievous breathed a sigh of relief. The bugs needed all three range one shots to finish Ten, but they did it. Grievous just barely squeaked a shield off Shara. Shara then 4-k'ed...what? And Miranda slow-rolled through the right-hand edge of the obstacle field. No knowing quite where he would end up, I just turned all my bugs 1-hard left into the obstacle field and sent Grievous way out to reset for his next attack run. My opponent had no shots, and I had one bullseye set on Shara and two on Miranda. Shields gone on Shara and Miranda down to four hull; my dice were on fire. Next round saw the first Snap Shots, one for each opponent, for a single point into Shara's hull as the ARC turned hard right keeping her stress. Miranda dropped a Proton and SLAMmed out of the obstacle field. I sent the bugs hard right, away from Miranda as I didn't know quite where she would end up. Grievous bumped into a bug, but that was okay, he'd still get a shot on Shara. Bey, still stressed and actionless, evaporated to three range one and one range two shot, while Shara very nearly one-shot the lead Nantex. That bug bugged out, and the other two led Greivous to hunt Miranda down in the next three turns for a 200-23 win.

Conclusions: My opponent's list felt bloated and unoptimized. We talked about how Ten Numb is just fine naked, how he never once used a single upgrade on that ship, and where he could put those points to use. We discussed alternate builds and turn zero strategies that might have given him a stronger game. Also, he was unaware that Miranda's reload affected bombs as well as missiles, which would have helped him. Grievous continues to underwhelm, and the Nantex...the Nantex. It is fun to fly. It really does feel a nearly proper Interceptor. But the load-out still gives me fits. Snap Shot only activated I think four times in both games for a total of one point of damage - against 1-Agility ships. And I never had the chance to use Crack Shot - I only had something like six bullseye shots in both games against 1-Agility medium bases, so that even did I get the bullseye I didn't need to Crack that non-existent Evade roll. I actually really missed Ensnare - I'm not sure I had that many opportunities to actually use against his ships, but those opportunities would have been massive, and I was definitely more cautious about using my tractor-reposition than I maybe wanted. If I'd been facing something more squirrelly than three Rebel Tanks, I might have had a LOT more trouble. But if not Ensnare, maybe Crack/Predator to keep them cheap; circle strafe and take any bullseyes of opportunity? And maybe try to dump Grievous for...a Hyena? Two, if I can swing the points? Drop the Petranaki's to Stalgasins to free up more points? Dunno. The Nantex feels like it is truly only fully optimized as an Ace platform, in much the same way that the TIE Interceptor is - you only see Soontir for a reason. I love the Ace/mini-swarm archetype, but I'm not sure that Nantex are the right platform for the mini-swarm...and I'm pretty sure that it will soon not be a real option for the Ace role either. Dunno. I'll just keep fiddling until something sticks, I reckon.

Edited by Kleeg005
7 hours ago, Kleeg005 said:

Conclusions: My opponent's list felt bloated and unoptimized. We talked about how Ten Numb is just fine naked, how he never once used a single upgrade on that ship, and where he could put those points to use. We discussed alternate builds and turn zero strategies that might have given him a stronger game. Also, he was unaware that Miranda's reload affected bombs as well as missiles, which would have helped him. Grievous continues to underwhelm, and the Nantex...the Nantex. It is fun to fly. It really does feel a nearly proper Interceptor. But the load-out still gives me fits. Snap Shot only activated I think four times in both games for a total of one point of damage - against 1-Agility ships. And I never had the chance to use Crack Shot - I only had something like six bullseye shots in both games against 1-Agility medium bases, so that even did I get the bullseye I didn't need to Crack that non-existent Evade roll. I actually really missed Ensnare - I'm not sure I had that many opportunities to actually use against his ships, but those opportunities would have been massive, and I was definitely more cautious about using my tractor-reposition than I maybe wanted. If I'd been facing something more squirrelly than three Rebel Tanks, I might have had a LOT more trouble. But if not Ensnare, maybe Crack/Predator to keep them cheap; circle strafe and take any bullseyes of opportunity? And maybe try to dump Grievous for...a Hyena? Two, if I can swing the points? Drop the Petranaki's to Stalgasins to free up more points? Dunno. The Nantex feels like it is truly only fully optimized as an Ace platform, in much the same way that the TIE Interceptor is - you only see Soontir for a reason. I love the Ace/mini-swarm archetype, but I'm not sure that Nantex are the right platform for the mini-swarm...and I'm pretty sure that it will soon not be a real option for the Ace role either. Dunno. I'll just keep fiddling until something sticks, I reckon.

Wanted to chime in, I've always felt underwhelmed by Grevious too. He just doesn't deal enough dmg to really be nasty if the opponent ignores him. And its hard for him to get close.

People suspect the Nantex base cost is likely too high and the Ensnare cost too low.

I'm sad to hear its not a strong ship outfitted as a non-ace, and I hope that that's untrue.

Has anyone used 4xPetranaki Aces with Ensnare? What’s your opinion @Magnus Grendel ?

1 hour ago, Ryuneke said:

Has anyone used 4xPetranaki Aces with Ensnare? What’s your opinion @Magnus Grendel ?

I've played a quick build force - Stalgasin Hive Guard come in at 2 threat with Deflection and Ensnare and it seems to work well, so 4 with ensnare could be good.

On 10/11/2019 at 4:06 PM, Kleeg005 said:

I love the Ace/mini-swarm archetype, but I'm not sure that Nantex are the right platform for the mini-swarm...and I'm pretty sure that it will soon not be a real option for the Ace role either.

i have to say 5 with Deflection seems to work well. I agree snap shot feels underwhelming unless you have something (like Seevor's Jam ability or Turr's free boost/roll) that triggers off attacking; I'd rather have the fifth warm body.

We had an odd number at the pub last night, so we set up a flight school for a portion of the evening. 80 points, single ship. We had a Ten Numb with AdvSen/ProtTorp/Elusive/Shield/HLC, Corran with AdvProTorp/Elusive/R5-X3 (illegal), and I flew Sun Fac with Ensnare. We also played with the Asteroid Storm Environment, which was a freakin' blast! Anyhow, just a few quick impressions since it wasn't a full game:

1) Loaded Ten is a waste, especially without support and against more maneuverable ships - no surprise there. He managed just one Torpedo shot, and zero HLC's. Mostly, he just died.

2) Corran is not bad. Or rather, the E-Wing is pretty solid. He had a Resistance-only 'mech on there, which he never once used. His dice were ON FIRE - Advanced Proton for three hits, three crits? Jesus.

3) Sun Fac - the important part. Without a little help, it is very difficult to get decent range control to get him close enough to trigger Ensnare and his ability - especially against tanky targets loaded with Torpedoes. I did manage to roll the B-Wing onto a rock and then hit it reasonably hard. But I couldn't touch the E-Wing. The one solid tractor I pulled against it, I only rolled two hits on five dice, and he evaded out of it easily. I intentionally tractored myself onto rocks twice to dodge arcs - and given how weak my dice were all night, I didn't take any damage for doing so. The whole business of trying to plan two and three turns ahead to tractor-rotate is taxing.

So, again, the Nantex is one of those high-risk, high-variance ships. I'm feeling like I maybe shouldn't have picked up the third one. Two with some kind of support might be okay, and one (Sun Fac) in an Ace role backed up by a bunch of drones is solid. But three? Not quite good enough. Four or five sound like they're getting somewhere, but there is a threshold there which three does not meet. Perhaps Sun with Gravitic supported by two Ensnaring Stalgasins and something to make up the final points? My local meta is full of Beef, Jedi, and TIE swarms - all of which the Nantex struggles to handle.

19 hours ago, Kleeg005 said:

3) Sun Fac - the important part. Without a little help, it is very difficult to get decent range control to get him close enough to trigger Ensnare and his ability - especially against tanky targets loaded with Torpedoes. I did manage to roll the B-Wing onto a rock and then hit it reasonably hard. But I couldn't touch the E-Wing. The one solid tractor I pulled against it, I only rolled two hits on five dice, and he evaded out of it easily. I intentionally tractored myself onto rocks twice to dodge arcs - and given how weak my dice were all night, I didn't take any damage for doing so. The whole business of trying to plan two and three turns ahead to tractor-rotate is taxing.

Doesn't surprise me too much; I'm glad to see that solo he's not the scariest thing in the world. Facing a B-wing who can safely lurk at range and lob torpedoes at you probably doesn't help!

19 hours ago, Kleeg005 said:

Two with some kind of support might be okay

Sun Fac and Chertek with Grievous is supposed to be good.

19 hours ago, Kleeg005 said:

one (Sun Fac) in an Ace role backed up by a bunch of drones is solid.

Ace and mini-swarm is a reliable archetype in any faction. Styles may vary, but tractoring someone in front of droid fighters is always going to be good...

19 hours ago, Kleeg005 said:

Four or five sound like they're getting somewhere, but there is a threshold there which three does not meet. Perhaps Sun with Gravitic supported by two Ensnaring Stalgasins and something to make up the final points? My local meta is full of Beef, Jedi, and TIE swarms - all of which the Nantex struggles to handle.

Five certainly seems capable. Much like Resistance A-wings, or TIE/sf, being able to come in from odd angles and keep on hammering the same target with multiple focused 2-dice attacks turn after turn is surprisingly effective.

I was finally able to get this list to the table:

3xPetranaki Arena Aces with Predator and Chertek with Crack Shot (200 points)

I played 4 casual games that evening.

Game 1 & 2 vs Han, Wedge

I thought that I won't have a chance against two I6 pilots. I deployed the 4 Nantex in formation and let them slowly fly along the board edge. Wedge came a bit too close to disengage so I went after him. Major lesson: Against higher initiative pilots its not easy to tractor someone. Wedge was able to dodge out of r1 most of the time. On the other hand he haven't had a shot and lost couple of hitpoints due to the Nantex mobile arc. As Han finally arrived to kill Chertek, Wedge died and Han lost all of his shields. My opponent was really afraid to come close to the Nantex. They finished Han in the end.

Second game against the same list. This time my opponent tried to joust the Nantex. Wedge had to barrel roll to not become tractored. Without any tokens and facing a bullseye he died in the first round of combat. Unfortunatly the Rebels weren't able to initiative kill one Nantex.

Game 3 vs Vader, Echo, Tomax Bren (never saw him in 2.0)

I finally took some pictures

211.jpg

Setup all the Nantex together.

310.jpg

Echo came forward and tried to bait and switch. Luckily I flew a ton of Echo so I was pretty sure that she's gonna disengage. I split the Nantex to produce multiple threats.

410.jpg

Echo disengaged and wasn't able to dodge the Nantex. She lost her first shield. Meanwhile Vader and Tomax approached.

510.jpg

I sent two Nantex after Tomax. The other two after Vader. My goal was to go all in on Vader one round later. Tomax had to roll to not become tractored. He lost a couple of hull points in exchange for 1 damage on 2 Nantex.

610.jpg

Tomax dropped a seismic. I moved all Nantex into position to kill Vader. He disengaged to the left and was unable to dodge or pass the red Nantex. Vader activated his Passive Sensors but got tractored onto a rock. With Pass. Sensors he rolled off the rock and shot into the red Nantex who survived with 2 hull points. A tractored Vader without any force remaining is a sad Vader. All three Nantex killed the Dark Lord. Meanwhile the brown Nantex reduced Tomax Hull to 1. My opponent conceded.

Game 4 against Echo, Nightbeast and 3 Bombers

Against 4 ships flying before the Nantex it was a goodd matchup. I lost one Nantex because I flew him off the board 😐 . It was hard for me to believe but the list completely dominated the opponents ships.

Conclusion:

- Fighting large Bases is tough. Especially if they moving after you
- Things that are moving after you are not easy to tractor. It's a gamble because not every Nantex will lose its tractor token
- a Nantex who's moving last is a happy Nantex
- the most matchup depending ship ever
- the best knife fighter in the game (imo). With 4 of these guys (with Ensnare) you can cover so much space where your opponent doesn't want to be
- If your green dice fail you once....

the most important thing you should do with this ship is practicing. It flys so different from most of the other stuff I’m usually bring to the table.

Edited by Ryuneke

I played at a tournament yesterday. Not much people were there so we only had 3 rounds. After playing 4 Nantex for a couple of games I tweaked the list a bit:

General Grievous (Soulless Title + Impervium Plating)
Chertek (Ensnare)
2 x Petranaki Aces (Ensnare)
199pts.

I really wanted to see how Grievous will do and if he's better than the 4th Nantex.

Game 1 against Scum (Quadjumper, Sol Sixxa, Torani Kulda, Kavil)

The bid helped me to give him the initiative.

I know my opponent very well and he's been flying this list for a while. It's a good list because it has all the nasty tools (tractor, ion, bombs). I kept the Nantex together and gave Grievous the flank. He was able to deal some Damage without being in trouble. I held the 3 Nantex back and waited for a good opening engagemt. As some of his ships turned into Grievous the Nantex came into the fight. They deleted Sol Sixxa in 2 rounds with only suffering a single damage. Then both Kavil and the Quadjumper died in the same turn after Grievous explodes.

Win 200 - 54

Game 2 against Rebels (Han+Wedge)

A tough matchup because those rebels can initiative kill a Nantex and Han is nearly impossible to catch and to tractor. I kept all of my ships together and moved super slowly. Both Wedge and Han showed up and had range 3 shots on a focused Nantex: They killed it. (I went through the probabiltiy calc. = 3% chance). I traded one Nantex for a shield on Wedge. Bad start. I then created a killbox for Wedge. He turned away, regened a shield and took 3 more damage. Han came back and had a range 1 shot into a Nantex: He killed it (calc. says 4% chance). Luckily Wedge explodes as well. Grievous with 5 hull left and a full Chertek against a shieldless Han isn't a good late game for me. Grievous + Chertek were able to put 4 more damage into Han but suffered damage as well. After setting up a block Han had to move close to the board edge and remained stressed. My opponent then 3 banked him off the board by a millimeter. I was really lucky there because I cleary would have lost that match. Grievous and Chertek had only 2 hull left and I don't think that they would have been able to deal 4 more damage into Han.

Win 200 - 148

Game 3 against Imperials (Sai, Vynder, Sabacc, Rhymer)

The one point bid helped me a lot here because all my ships moved last.

I gave Grievous the flank and sent him in really aggressive. I split up the Nantex this time. Grievous dealt 3 damage to the bomber without any consequences. Most of the enemy ships turned into Grievous. With the Nantex showing up I was able tractor Grievous out of an arc after he already barrel rolled. The Bomber died and Grievous only lost two shields. After that first engagemt my opponent wasn't able to do much. With the Nantex moving lost they were just moving things around and destroying everything in 1-2 rounds. It was ridiculous to watch how super powerful the list is.

Win 200 - 51

I won the tournament because Han flew off the board...

Conclusion:

- The list is cleary better than 4 Nantexesesese imo. Grievous brings a pretty consistent gun to the table without losing much. He's a pretty good flanker and whats more important, a distraction which 4 Nantex can't provide.
- Giving Grievous the tractor token is a huge advantage: Moving one of your ships after everything else has can give you a huge advantage against aces. On the other hand you give your opponent a juicy target and he might turn away from a Nantex. With Impervium Plating Grievous is hard to kill (You want those crits 😅 )
- The list struggles against large bases that are moving after you. Everything with a higher initiative is hard to pin down especially because you can lose a Nantex in the opening engagement.
- Some lists have nearly no chance against this. And I think this is a problem. The 3rd game I played is a perfect example. Once the Nantex were in the fight there was nothing my opponent could have done to turn the tide. He was really frustrated because everything he dialed was nearly pointless. The nice thing about X Wing is that your decisions matter. At some point in the game his decisions didn't matter anymore. And not only for one round but for the rest of the game.
- Nevertheless the list is fun to fly. I really like the looks of it and how the Nantex operate.

I really want to practice this list more. Unfortunately I feel bad when flying this against certain lists. Giving your opponent a bad time isn't what I want...Mh. But maybe players will adept after playing against it for a while and they'll find tools against it. I really hope so.