Sorastro's Painting

By Sorastro, in Imperial Assault Painting and Modification

Either way its been great, thanks again.

Alright so I have been back in the saddle even though I haven't secured new brushes yet, I couldn't wait, and working on the Royal Guards. I've got one at 'complete' and the others are at various stages. I like the way it turned out but I am a bit dissapointed how glossy it is after the lacquer. I used the exact same one as Sorastro, tried to keep it the right distance and didn't use to much, or so I thought, just a 1 2 on the front then a 1 2 count on the back moving the can back and forth. I put the Ardcoat on the helmet but the whole figure seems to be the same amount of shiney. What did I do wrong? Any tips on how to improve for the next 3? Should I try applying more Ardcoat to the helmet? I'll put the pictures in spoiler for size.

The first two were with natural light:

IMG_3565.jpg

IMG_3566.jpg
Next to one that hasn't been high lighted yet for comparison:
IMG_3567.jpg

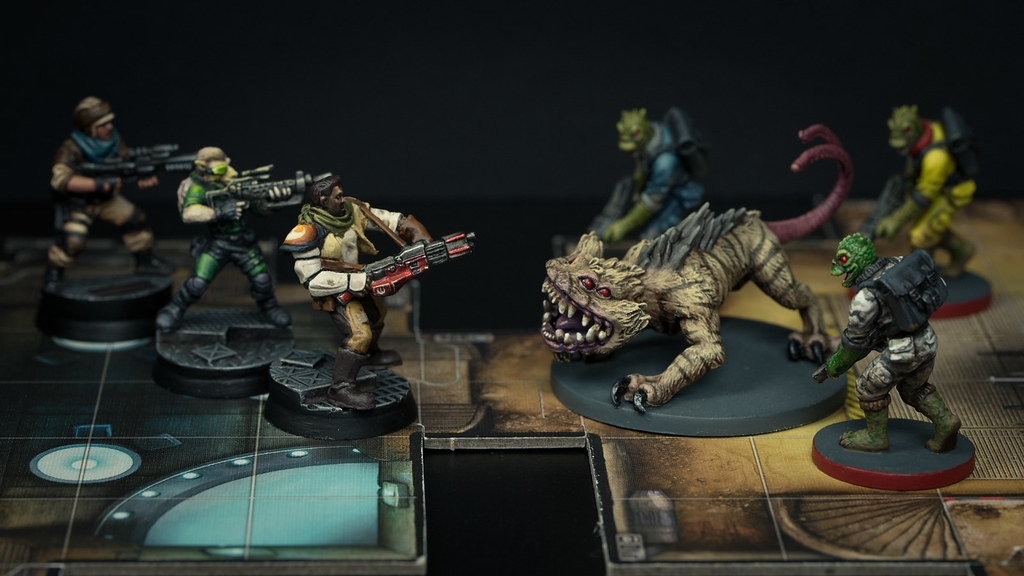
Next to one of the big baddies from Mansions of Madness to tempt Sorastro :D

IMG_3568.jpg

Edited by FrogTrigger

What kind of lacquer are you using?

Hmm that does seem strange FrogTrigger; Testor's Dullcote usually does give a super matte finish (more matte than some painters like in fact). I'm assuming you gave it a good long shake before spraying?

Hmm that does seem strange FrogTrigger; Testor's Dullcote usually does give a super matte finish (more matte than some painters like in fact).

Yeah, that's the only varnish I've used on my minis and I've never had them look that shiny after it's dried.

I figured out the problem, I bought the same can as you (Testors Spray Lacquer) but I just matched the look and didn't look at the label, I got the glosscote not the dullcote. What a bone head move by me :P I hadn't really noticed the shine much before now because the Storm Troopers get the Ardcoat treatment anyway to give the armor the glossy look and the e-webs/probe droids have a metallic finish that really hides the shine.

So can I just spray the dullcote over this glosscote to get rid of the shine? Or do I need to re high light over the glosscote then spray the dullcote? Not sure if I care that much for one figure to re paint anything, but I am glad I caught this!

You might lose a little detail with the second application of varnish, but I think it should be fine. You could always try throwing some red on a bottle cap, spraying it with the gloss, then again with the matte, and checking how that comes out.

It's really impressive to see how FFG has stepped up the quality of their miniatures since IA first came out. Diala's robes make a solid block between her legs, and Chewie's bowcaster is really lacking detail. Recent minis like the Inquisitor look so much better.

I figured out the problem, I bought the same can as you (Testors Spray Lacquer) but I just matched the look and didn't look at the label, I got the glosscote not the dullcote. What a bone head move by me :P I hadn't really noticed the shine much before now because the Storm Troopers get the Ardcoat treatment anyway to give the armor the glossy look and the e-webs/probe droids have a metallic finish that really hides the shine.

So can I just spray the dullcote over this glosscote to get rid of the shine? Or do I need to re high light over the glosscote then spray the dullcote? Not sure if I care that much for one figure to re paint anything, but I am glad I caught this!

Doh! Easily done though.. The good news is that you should be just fine just spraying the Dullcote on top :)

Doh! Easily done though.. The good news is that you should be just fine just spraying the Dullcote on top :)

Yeah, of all the figures for this to happen on, the RGs are probably one of the better ones. There aren't a ton of details in the sculpt!

Hi folks! Better steady those hands.. the Biv is coming :)

29669402433_5a6b4d0812_b.jpg

For those who like links, here's the Biv Bodrick vid! :D

I'm kinda curious, considering we're talking about clear coat - does one have to use the Testor's brand? Is there a generic matte brand one could get at a typical hardware store? What kind of Matte finish clear coat is the Testor's dullcote in another brand?

Jacob

I'm kinda curious, considering we're talking about clear coat - does one have to use the Testor's brand? Is there a generic matte brand one could get at a typical hardware store? What kind of Matte finish clear coat is the Testor's dullcote in another brand?

Jacob

There are a lot of options. Some spray, some brush on, some matte, some glossy... hard to say which one is "best" as a lot of it comes down to personal preference or even your local environment - some spray varnishes get cloudy in high temp / high humidity.

I've used Liquitex Matte in the past, and really like the end result. I've been using Testor's just because it's easy to apply. With the Liquitex, I'd use my airbrush to apply it (thinned with water first), so there was more cleanup involved.

So I sprayed the dullcoat over the RG and it made a huge difference, I think it is still a little shiny but not nearly as bad. I then put some Ardcoat on the helms and the contrast is evident. I am not overly happy with my shading though, I find it is very easy to tell where the shadow stops and my layering starts with the Evil Sunz, and when I put the wild rider on you can clearly see where it stops.. I didn't have a chance to take any pictures but I wish I could tell what I was doing wrong. I did two base coats, the shade, then I did three coats of Evil Sunz, one broad coat that went right up to the edge of the shadow leaving a bit of the base coat on the edge, then a smaller one trying to blend it, then a third coat that was basically just the tips and tops of all the folds. The Wild Rider I did the upturned parts of the robe on the bottom, the helm and tops of the shoulders and the chest then tried to blend it into the rest of the robe.. but failed. Maybe I needed another coat of Wild Rider?

I know this is hard to give advice without actually seeing them I will post some pictures later. My goal in this process is to first off have fun, which I am, second produce table top quality miniatures, which I have, and third continue to improve from stage to stage. I just want to make sure that I am getting better and not making the same mistakes over and over.

I'd say if your shading is really evident from a distance, you might benefit from thinning your paint a bit more. You could also try applying some shade/wash over those areas after you're done layering.

Someone better than me at this could probably offer better advice!

Edited by KalEl814

@FrogTrigger Did you happen to go as far as using the Bloodletter glaze to help tie in all those highlights before the dullcoat?

I second KalEl's and Darksidenet's advice, FrogTrigger. When highlighting in multiple layers, it's easier to have your paint a bit too thin than to try and make layers that are too thick blend together. If you're having issues getting the look right, put a thin layer down and wait for it to completely dry before deciding if you need to add another. When dry, these acrylic paints (Vallejo and Citadel) are pretty translucent, so you'll see some of the underlying color come through. Until you get more comfortable with applying multiple highlight layers, especially in a gradient application, take your time with them. Thin washes and glazes can really help "tie the room together", so experiment with that as well. :)

As an aside, Sorastro's mentioned in his videos that he'll take a damp, clean brush and "feather" the edges so as to better blend them together. Another technique, though a bit more technical and difficult to get right, is called "wet blending". This technique has you apply one color layer, then apply a second color layer along side it and, while both layers are still wet, gently feather the two together. This is a technique I don't use all that often because it is more time consuming and can be difficult to get the look right. It's worked better for me when I have a larger, flat surface area where I want a color gradient. With the small areas on these IA figures, I don't know how helpful wet blending would be. I only mention it in case you'd like to check out another method, and compare the results.

Keep on truckin', dude. Practice and patience are the best teachers you can get. :D

Edited by ElJeffe313

Ya I did the glaze and it definitely helps things blend together. On the table top they look good, its up close and personal that I am not happy. The feathering idea is interesting, that must be in a different video because I didn't hear that mentioned in the RG and I have watched it probably 30 times now lol. I will give that a try and it makes sense to me. I think one of my problems is not waiting long enough for layers to dry before going at it again. How long do you typically give a layer to dry?

I think my paints are thin enough, I am on the border between consistent color to being very watery and hard to control. I want to get a dropper bottle so I can always measure exactly how much I am putting in to be consistent. Right now I just have an old brush that I use to scoop paint out of the pot put, it on my pallet then dip the brush in a cup of water and swirl it around in the paint. Is there a better method than that for citadel paints? I prefer the Vallejo dropper bottle method honestly, I always feel like I am wasting paint by using a brush in the Citadel pots.. but I prefer the Citadel colours.

Ya I did the glaze and it definitely helps things blend together. On the table top they look good, its up close and personal that I am not happy.

I know that feel. I paint my minis with a magnifying headset that has bright / white LEDs. So while painting I'm up close and personal with every blemish, missed spot, or dubiously applied layer. I just remind myself that nobody is going to look at my work with that level of scrutiny. It also has the nice "placebo" effect when I take a newly painted mini out of the box and into a mission for the first time... things always look much better than I remember!

Diala is a good example of this for me... I recently changed her lightsaber color from green to blue and I forgot how "bad" her face looks up close. But on the tabletop she looks rad! So keep in mind that your friends / opponents aren't going to have the same critical eye as you.

No you're absolutely right and like I said before I am having fun and I know as far as tabletop goes these look great.. but I still want to improve as I go, so I will continue to pester people with my questions and absorb all that I can :D

And then contribute where I can on other parts of the forum to pay their time and effort forward!

I'm kinda curious, considering we're talking about clear coat - does one have to use the Testor's brand? Is there a generic matte brand one could get at a typical hardware store? What kind of Matte finish clear coat is the Testor's dullcote in another brand?

Jacob

There are a lot of options. Some spray, some brush on, some matte, some glossy... hard to say which one is "best" as a lot of it comes down to personal preference or even your local environment - some spray varnishes get cloudy in high temp / high humidity.

I appreciate the advice, but what I'm looking for really is a brand or product I can get at someplace locally. I can't seem to find Testers Dullcote anywhere.

To be honest, I can't really prime or spray clear coat for about 6-8 months of the year where I live anyway. If there are any reliable products for both priming and clear coating that I can brush on that would be the best!

Jacob

Ya I did the glaze and it definitely helps things blend together. On the table top they look good, its up close and personal that I am not happy. The feathering idea is interesting, that must be in a different video because I didn't hear that mentioned in the RG and I have watched it probably 30 times now lol. I will give that a try and it makes sense to me. I think one of my problems is not waiting long enough for layers to dry before going at it again. How long do you typically give a layer to dry?

I think my paints are thin enough, I am on the border between consistent color to being very watery and hard to control. I want to get a dropper bottle so I can always measure exactly how much I am putting in to be consistent. Right now I just have an old brush that I use to scoop paint out of the pot put, it on my pallet then dip the brush in a cup of water and swirl it around in the paint. Is there a better method than that for citadel paints? I prefer the Vallejo dropper bottle method honestly, I always feel like I am wasting paint by using a brush in the Citadel pots.. but I prefer the Citadel colours.

Drying times can vary, but I typically don't have to wait more than 2-3 minutes for a highlight layer to dry. To help determine if my paint is too thin or too thick, I'll wipe the brush over the edge of one of my painting tray pods and see how quickly it runs down to the center after I've finished mixing the paint. If it runs down nearly instantaneously, it's too thin. If it tends to gather on the edge, it's too thick.

I've used Vallejo and Citadel for all my painting, and I also appreciate the preciseness you can get from dropper bottles. To that end, while using Citadel paints, I use an older brush to transfer the paint onto my palette, and have a flow-improver/water mix stored in a dropper bottle. I have better control over how thick/thin my paint gets this way. I've tried to cut back on "extra" paint when using Citadel's pots by taking less than I think I need, and slowly adding small amounts if the color or consistency isn't right. It's a lot of trial and error that's gotten me to this point! :)

Part way through painting the AT-ST just did a layer of the corrosion, going to look at it again tonight and see what areas need another layer. I like it so far except I feel I might have done a poor job wiping away the nuln oil on the sides of the head. It looks blotchy instead of streaky and is overly dark. Can I just highlight this area back up with the white/grey mix I used on the edges and then nuln oil over again? OR is it going to start looking funny if I just highlight certain parts (I wouldn't do the whole side as I like the way parts of it look).

Edited by FrogTrigger

Part way through painting the AT-ST just did a layer of the corrosion, going to look at it again tonight and see what areas need another layer. I like it so far except I feel I might have done a poor job wiping away the nuln oil on the sides of the head. It looks blotchy instead of streaky and is overly dark. Can I just highlight this area back up with the white/grey mix I used on the edges and then nuln oil over again? OR is it going to start looking funny if I just highlight certain parts (I wouldn't do the whole side as I like the way parts of it look).

Hi FrogTrigger! I would just try to layer some thin highlights (like I did in the Weiss video) with a grey that matches the bits you need to work on. If you keep it reasonably thin and build the layers up carefully you should be able to gently smooth over those blotchy areas. I think adding more Nuln Oil could cause further issues :)

Leia is looking really really good Sorastro!!!

Leia is looking really really good Sorastro!!!

Thanks Darksidenet!

The Leia tutorial is live - I hope you all enjoy it :)

30624269645_d011df8202_b.jpg