Sorastro's Painting

By Sorastro, in Imperial Assault Painting and Modification

Your Gideon looks neat, Sorastro. I see you also painted the Rebel symbol on his shoulder. I left that out though I did paint the "Purina logo" on his chest. Also, the highlighting is much better than mine. I kinda wish I hadn't painted my Gideon. Though I suppose I can still do some extra highlighting and repairing on top of the varnish.

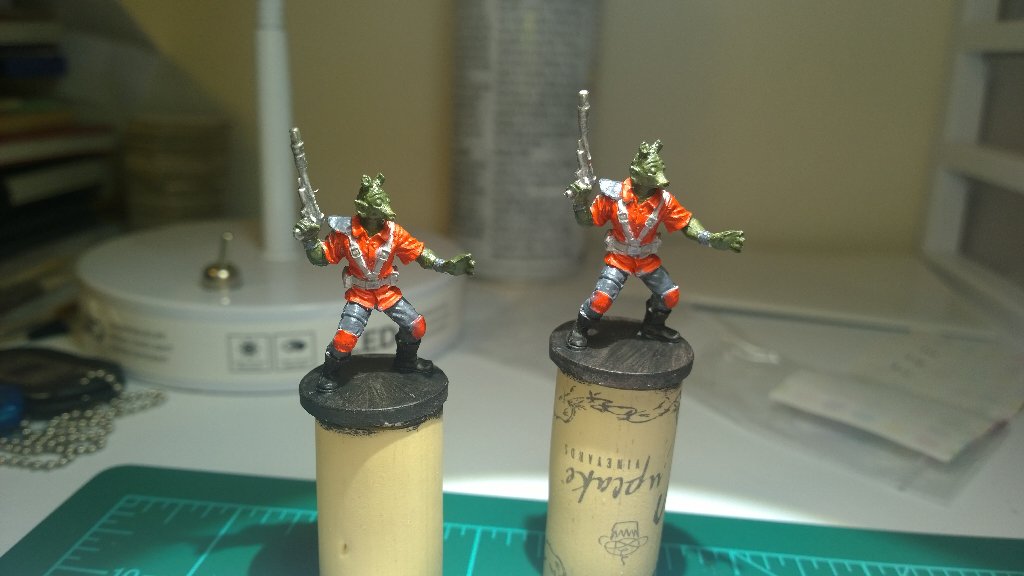
I'm curious. Did your Gideon figure have a huge gap between one arm and the torso? From my copy of the game I think it was the figure that required the most green stuff.

Yes mate - there was definitely some green-stuff action going on before priming (as you'll see in the video) :)

Hey Sorastro, can we get the paint list for Gideon?

Hey Sorastro, can we get the paint list for Gideon?

Sure mate; the editing is stil in very early stages but I'll compile the list and get it up at the weekend :)

Hey Sorastro, thanks for all the videos, I love them! They've gotten me into the hobby of miniature painting. My only request is this: would it be possible to release, along with the list of paints you used, a sort of "budget" paint list? Just substitutions, mixing a couple colors instead of using one you use, stuff like that? It would be most appreciated! Again, great videos, can't wait for the next one!!

Hey Sorastro, thanks for all the videos, I love them! They've gotten me into the hobby of miniature painting. My only request is this: would it be possible to release, along with the list of paints you used, a sort of "budget" paint list? Just substitutions, mixing a couple colors instead of using one you use, stuff like that? It would be most appreciated! Again, great videos, can't wait for the next one!!

Hi LucarioB! Thanks for the nice comment and the suggestion. I like the idea of a "budget" paint list; although I do try to keep the required number of paints to a minimum I know it's getting pricey to buy all the paints I use! I would have to sit down and see which colors can be mixed to produce which other colors, then I could publish my findings to hopefully reduce the "required paints" list further. I'm not sure when I might find the time but if it would be helpful to enough people I'd be happy to do it :)

Edited by Sorastro

Hey Sorastro what did you use to attach your miniatures to the cork and bottle caps for painting? Did you use modeling clay?

They're attached to the corks with pegs made from snipped paper clips. Those pegs are glued into a hole drilled in the model's foot.

I have no idea what he uses to put them in the plastic caps. I have been using Dixie Cups and a piece of tacky.

Hey Sorastro what did you use to attach your miniatures to the cork and bottle caps for painting? Did you use modeling clay?

Hi Boomer! TheRedSon is correct about the paper clips. To stick the mini to the bottle cap I just use white tack although I understand such stuff isn't so commonly found in the US?

It's poster putty here in the us, I use it too!

Yeah it is like a $1.77 at walmart. Go to the paint section and it is around there with the other types of glue. I use that to hold my figures to my block of wood for painting.

Wanted to get at least some of my list painted before Worlds.

These guys still need some touch ups, eyes painted, and a dark wash, but I'm pretty please with how they're turning out!

My first ever attempt at painting. (besides small details on X-Wing ships)

CSc5a_TVAAA19xI.jpg

CSg7x4EUsAAK8IG.jpg

Gave them a more popping skin tone, did some touch ups, some dark wash. I think they're done! :D

CSg7x4EUsAAK8IG.jpg

Gave them a more popping skin tone, did some touch ups, some dark wash. I think they're done! :D

They look good!

Sorastro's figures look great, and he does a phenomenal job of teaching the traditional "serious" way of figure painting, i.e. multiple layers and washes to build depth of tone in specific areas. But you can get very far with some simple base colors and a shading wash. If you look at most pre-paints - from the old WotC Star Wars collectibles, up to most MacFarlane action figures and similar toys - that's really all they have.

The full "Sorastro" treatment is well worth it for small numbers of special figures - and with IA, that can easily qualify as the whole game. But if you're feeling rushed, or just a little uninspired by the idea of painting your third batch of something, there is no shame in scaling back a bit - 80/20 rule and all that. And usually, even a mediocre paint job looks better than none!

- H8

I posted this elsewhere but I guess it should be in here as I am inspired by Sorastro's tutorials too.

I love that skintone Hatemonger, really limey and pops out really nicely.

IMAG0271.jpg

I thought the Royal Guard Champion might be an exception with his foot placement on the base.

22023282604_b1cbd1d975.jpg

He turned out alright though.

22620052366_fcd6224dc0.jpg

My matte coat made my model gray, wtf happened? Should I just rewash/ reweather/repainted it to fix or will that not work on top of matte coat? Thanks.

My matte coat made my model gray, wtf happened? Should I just rewash/ reweather/repainted it to fix or will that not work on top of matte coat? Thanks.

Sounds like you encountered the frosting effect. Does the "gray" effect look a little like ice?

That has happened to me few times and it usually occurs if you spray the figure with the varnish from too far so the varnish dries in the air, haven't shaken the can properly before spraying, spraying in too humid conditions or too close. Or combination of those things. Also, if the paint on the figure hasn't settled properly, it can cause the frosting effect. There are some techniques to get rid of the frosting but results seem to vary. Some techniques work for some people and some for others. And in some cases the only solution is to put the figure into a solution that eats away the varnish (and paint) and repaint it. Window cleaner and some other cleaning liquids work for this purpose. Google wargaming figurines remove frosting.

Oh and you can paint on top of the varnish. I've heard that some people actually prefer to paint one phase, varnish the model, paint the next step, varnish and so on.

It's just grey, not sparklie like ice. I was at the end of the can. Odd thing is I did my storm troopers and my probe droids at once and only the droids got it.

Olive oil. A friend in our gaming group encountered the same problem and said it worked a treat: https://m.facebook.com/groups/2543200215?view=permalink&id=10151666839325216

I've read about olive oil too and I found this article: http://dusttears.blogspot.fi/2011/12/matt-varnish-frosting-solution.html

I also watched a Youtube video where the method was to spray the figure with gloss varnish, leave it somewhere warm to dry and then apply matte varnish. I think the olive oil treatment sounds better.

Ok all,

Here is my first set of glamor shots. Stormtroopers. Let me know if you think I should keep going or stop ruining my models.

IMG_0243.JPG

IMG_0244.JPG

IMG_0245.JPG

IMG_0246.JPG

Edited by flightmaster101

Keep going. :)

They look great.

Sorry about the double-post but I have a quick question for Sorastro.

Sorastro, are you planning to do a separate video for the Heavy Stormtroopers from the Twin Shadows expansion, or does the first video apply as they are basically the same as the default Stormtroopers? And what about Kayn Somos?