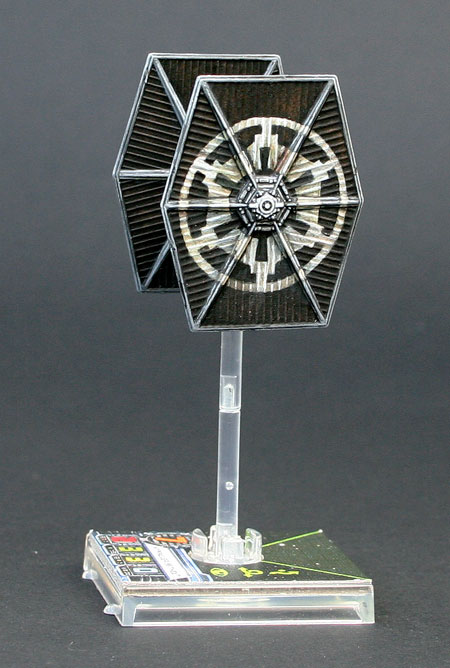
Some Photos of stuff, you know Slave-1 & Interceptors.

By Rodent Mastermind, in X-Wing

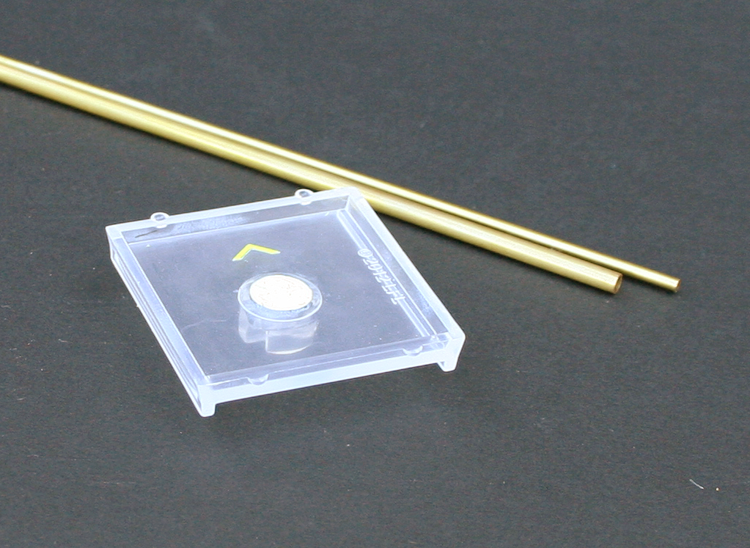
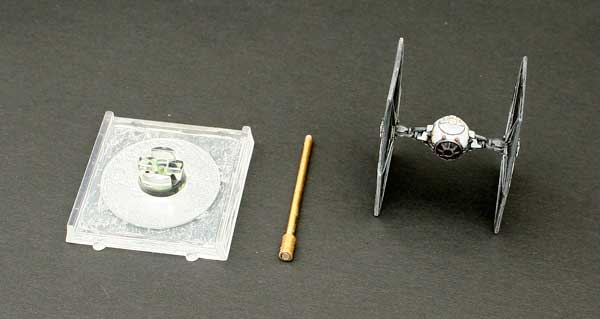
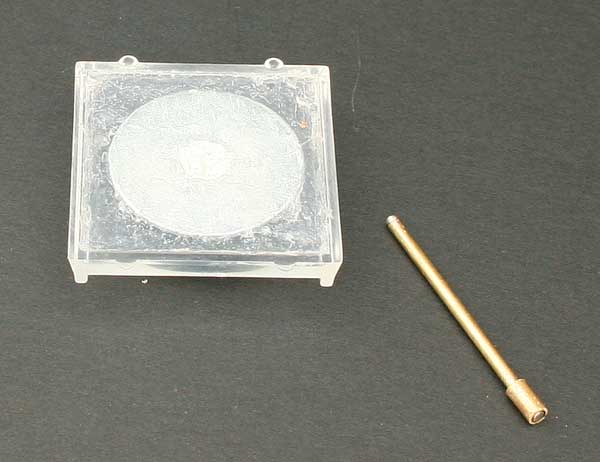
OK a few people on Facebook have asked me about the bases and how they are made. As you lot here will know these went through lots of iterations but I will describe how I made the Mk3 version which is the one I will use in the long run.

I started up with 3 types of magnet

  • A Big chunky one which is used inside the base, it is 6mm diameter and 3mm deep.
  • A Small one 2mm diameter by 1mm deep, these were set into the vast majority of the smaller fighters.
  • A Slightly bigger 3mm by 1mm deep magnet, which where used for heavier ships like the X1, HWK and the B-Wing, as they rotate far too easily under there own weight with the smaller magnet. They are also used on the bottom end of the rods where they plug into the base.
  • 2mm brass rod
  • 3mm brass tubing
  • 30mm steel washers with a 6mm hole (has to be at least 6mm so the magnet can fit in)
  • Milliput or Greenstuff (I generally use a mix of the two as it's more robust)
  • Black Spray
  • Silicon used for sealing baths.
  • Paints (Dark Red, Black, Dark Blue, White, Grey, Grey Blue)
  • Washes (Crimson, Blue)
  • Araldite Epoxy Glue
  • Super Glue
  • Gloss Spray Varnish

Base-Stage1.png

Step 2. While this is drying you can glue the washed into the back with Araldite. Then leave it overnight for everything to dry.

Step 3. Take a 6mm drill bit and drill through the hole center of the washer, this is the bit where you have to be careful, what you are aiming to do is drill out the center pin and leave a hole where the magnet can sit flush, so the magnet on the rod can touch it and give a solid connection. This will invariably cause some damage to the inside of the mount but this can all be fixed.

Step 4. Get some putty and use it to fill in any damage caused by the drill. Wet down the end of your 3mm piping and push it into the hole to make sure it sits snuggly and there is no putty on the face of the magnet, you can also use a probe, pin or sculpting tool to clean up the inside. This bit can be a bit annoying but the more careful you are in Step 3 the less work you will have to do. Then leave it to dry, I would recommend overnight.

Step 5. Glue in a 6mm Magnet with superglue... IMPORTANT: make sure the polarity of all your magnets match so any rod will fit any base

Step 6. Fill the back of the base with Silicon. try to get it into all the gaps so it doesn't leave air holes, then use a metal ruler or the straight back of a knife and in a smooth motion run it across the top of the silicon to remove all the excess and leave it flush. The leave to dry for a couple of hours.
Base-Mk2-1.jpg

Base-Mk2-2.jpg

NEXT PAINTING.

Step 7. Put all your bases on a spray board and give them 2 or 3 coats of black spray.

Step 8. Paint them, you could skip this stage and leave them black if you want, or paint them any colour you like, they could look awesome in brass to go with the rods.

My Paint Scheme. First thing I did was use a largish brush to tint areas of the black dark blue or dark red. On some of these areas I highlighted up with more red and the grey blue to give the hint of the edges of gas clouds. I also used the Crimson and the Blue wash to make the areas look smoother against the black

Next I got a small brush and painted lots of small grey dots. In some areas I washed over these with the Blue or Crimson wash and then painted more in the grey to give denser areas of stars. I then got the white and painted a few white dots into the mix.

Basing-Finished1.jpg

Basing-Finished2.jpg

Edited by Rodent Mastermind

The Rods.

Step 1. Get out a dremmel and pop the cutting disk on it. take the 2mm brass rod and cut it into pieces the desired length. Mine varied from around 38mm to 80mm as I wanted a variety of heights so I could swap them if I needed to raise or lower my gaming piece, most were around 55mm. B-Wings will need longer stems, I would recommend between 65mm and 80mm.

Step 2. Cut cowling pieces from the 3mm brass tubing. You will need 5.5mm piece for each of the rods you are making. You will need an additional 2.5mm for each rod you are making for a larger model (B-Wing, HWK-290, Tie Bomber)

Step 3. Use a metal file to file the ends of the rods and cowling flat.

Step 4. Glue the pieces together, I found superglue worked best for this job. I started by glueing a small 2mm magnet to the end of each rods. IMPORTANT, make sure the polarity of all these magnets is so that either end will stick to the magnets inside the bases.

Step 5. Next glue the cowling over the ends of the rods so they sit flush with the small magnets you should have a flat end. You will need one of the large cowlings for each rod and a smaller one at the other end if you are making a rod for a larger model (B-Wing, HWK-290, Tie Bomber).

Step 6. Glue one of the larger 3mm magnet onto flat surface of the ends with cowling.

Step 7. If you are making a rod for a B-Wing get two pairs of pliers and bend it into the desired shape.

Edited by Rodent Mastermind

The Models

Step 1. Get a pair of pliers and gently try to twist the peg out of the model. It will invariable snap, but it's worth a try.

(For Step 2,4 or 4 If your model is a HWK-290 or a Tie Bomber use a 3mm drill bit and magnet for Step 2 or 3, or do what I did and just glue a 3mm on top of the 2mm)

Step 2. Get a 2mm drill and drill out the peg that snapped so you get a nice 2mm hole.

Step 3. Get a small about of putty and drop it into the hole. then wet a bit of the 2mm rod with a flat end and push it in to around 1mm to give you a nice socket for your magnets.

Step 4. After leaving the putty to dry for a couple of hours, glue a 2mm magnet in with superglue. IMPORTANT, make sure the polarity of all these magnets is correct so the model will stick to your rods.

B-Wings are an exception. With the B-Wing I have got a better result drilling in a bit futher, around 4mm. This means more of the rod goes into the housing area and it's less likely to spin. You will also need to use a 3mm drill bit and magnet. I then used a bit of putty to tidy up the engines and give a nice tight fit for the head of the rod. (though I did leave the slight gap between the engine nossels open in case a magnet comes off the rod, I can easily get it out of the engine with a pin)

Edited by Rodent Mastermind

Nice job on the models and I absolutely love the paint job on your bases!!!

Edited by Boomer_J

Thanks for the latest updates on how to build new stands.

Also, great job on the last 2 paint job, once again, it is very inspiring.

One question though: after painting the stands, did you have any trouble fitting the pilots base on it? I ran into that problem...

Edited by Fencer

Thanks for the latest updates on how to build new stands.

Also, great job on the last 2 paint job, once again, it is very inspiring.

One question though: after painting the stands, did you have any trouble fitting the pilots base on it? I ran into that problem...

They are a little bit tight, but no major issues.

:o

I've also been making bases for my Asteroids this week, I've cut out the shapes of the Asteroids in the set in Plasticard, I've then drilled a hole for a GW flying stand.. I've then built up a small amount of greenstuff/milliput mix, coated the stand in Vasaline and then pressed it in, then smoother out the putty into the base.. once dried I've sanded in down so it was fairly smoothed then put a coat of hard drying water effect to smooth it down even more... Once that is dry I'm putting a thin layer of plastizote foam to stop slipping and spraying black..

I'll paint them up when ready, I'm thinking of adding some sensor sweeps in green to make them much more obvious when the Asteroids aren't in place.. The idea that you can remove the Asteroid easily when there are collisions.

So here are some images of the finished asteroid bases.

AsteroidBases.jpg

And some pictures of my other Equipment.

Here are some of my bases

Equip-Bases.jpg

A pile of Counters, I've filled some of the recesses to make things like the Target Locks easier to read. They are a lot smaller than the ones in the game so sit neatly on the ships base, which stops all of those annoying situations where TLs get left behind when you move the ship.

Equip-Counters.jpg

As I said at tournaments where you quite come up against the same faction spotting which dials are yours can get really annoying. I hate picking up my opponents dial, and have to apologies for seeing his maneuver. This fixes the issue. As I paint my ships they will probably get some more markings, you can see one of the Bs has the 2 blue lines that are shown on the ships tail.

Equip-Dials-Rebels.jpg

I originally painted this with one of Vallejo special silvers but it reacted with the varnish I think and went copper in patches. So I repainted with just normal silver, I won't bother with the alcohol based silver in the future. I've marked ship type and numbered them so they match my ID tokens.

Equip-Dials-Imp.jpg

The first of my Ruler sets

Equip-Rulers-Rebel.jpg

My Imperial Set

Equip-Rulers-Imp.jpg

Oooh! You have a set of stuff from Cog'O'Two. I just saw these for the first time earlier today and though they looked pretty great but maybe a bit large but they actually look like a reasonable size. I really want to invest in a set.

Oooh! You have a set of stuff from Cog'O'Two. I just saw these for the first time earlier today and though they looked pretty great but maybe a bit large but they actually look like a reasonable size. I really want to invest in a set.

He's a mate of mine, So I designed them and said he could keep the designs in case anyone else wanted any.

OK lets try to do this. Some people have been asking how to do the symbols on the Tie Fighters.. They are not easy but this is how I do them.

Get a coin that is the size of the outer ring. and paint around it.. then thicken it out till it's the desired width, you can use black to clean it up if it' bulging a bit by painting along the outside of the beige area. You might have to work back and forward a bit to get it looking smooth.

Symbol1.jpg

Once you have that. Paint six lines coming inwards about 5mm or so.. So now you should have something that looks like a bike wheel with no hub. Again use black to clean up and get each of these line equal width, and try to get them as evenly spaced as possible.

Symbol2.jpg

Next you are painting a hexagon, make special not of the relative sizes of the crescent shapes inside the circle and try to get them to look balanced.

Symbol3.jpg

Next you need to paint horseshoe shapes. try to imagine a circle in the middle of the hub, you can see it here in black. try to bring the lines up so they fall just short of the imaginary circle.

Symbol4.jpg

Next paint in the circle, once you have it even on the inside, get some blank and pant 6 black spokes coming in to the horseshoes that are equal widths and break the circle into 6 segments.

Symbol5.jpg

Fill in the space in between the hexagon and the horseshoes.

Symbol6.jpg

Lastly paint a lines down from the corners of the horseshoes to the ends of the circle segments, this should give you 6 fairly even wedges

Vet-Side.jpg

Edited by Rodent Mastermind

Thanks for that. Those really dress em up nice, I have 10 TIEs and really want to set a few apart.

Great diagrams. I am going to try this out over the holidays. I have painted for years, off and on, but this will be my most ambitious project to date.

I'm going to do it on one of my ties. I think I'm going to have 3 generic, 1 with squad leader markings, one with blood stripes, and one with the imperial emblem.

What paint do you use?

I think he uses Vallejo, if I remember correctly..

I also have an idea for a squad leader type emblem, will post pics when I do it.. in my own thread as this one is for the Rodent.. I have also made the red stripes on my A-Wings green, did one a while back and just did the second today. I haven't the skill to paint the rebel and unit markings and will try to print a decal I can use for those.. small as they will be.

Vallejo for Paints, Though I still have some GW in the mix

Vallejo Matt Varnish

GW for Washes

GW for Metallics

P3 for Stains (Inks)

Edited by Rodent Mastermind

OK Finished Gavin Darklighter, He's originally from Tatooine and his ship is painted to resemble a Krayt Dragon. So I wanted it to feel dusty and windswept.

Gavin1.jpg

Gavin2.jpg

Gavin3.jpg

Gavin4.jpg

Gavin5.jpg

Gavin6.jpg

Gavin7.jpg

Gavin8.jpg

Gavin9.jpg

Gavin10.jpg

And I thought seeing as that is the last of my X-Wings. Here are the Rogues and friends.

Rogue1.jpg

Rogue2.jpg

Rogue3.jpg

Rogue4.jpg

Stunning.

Dayum, Those are purty.

These look amazing!

Nice to see a shot of them all together.

What's next on the list to paint?

Bloody hell Rodent... They're amazing! The detailing that you manage on such small, flat surfaces is stunning.

You don't by any chance do commissions do you? ;) :lol:

absolute madness. your a maniac