How thin should your paint be?

By Whalers on the moon, in X-Wing Painting and Modification

I'm far from the most qualified here to give a tutorial, however, when I first started painting I was always unsure of just how thin paint should be when it goes on. I took a picture of each layer of orange (vallejo's bright orange) on this ship in hopes that it might help someone.

00100lrPORTRAIT_00100_BURST2020060214094

00100lrPORTRAIT_00100_BURST2020060214313

00100lrPORTRAIT_00100_BURST2020060214500

00100lrPORTRAIT_00100_BURST2020060215094

And now I started mixing the Orange with bright yellow (Vallejo yellow-green) with an equal amount of Vallejo glaze medium (but water or air brush thinner would probably work just as well) to add in brighter highlights toward the bottom:

00100lrPORTRAIT_00100_BURST2020060215194

00100lrPORTRAIT_00100_BURST2020060215290

00100lrPORTRAIT_00100_BURST2020060221124

00100lrPORTRAIT_00100_BURST2020060221240

So it took a lot of layers to get where I was going. You can see where the thin paint ran into the grooves here, but I hit those again with black paint and was pretty happy with the results. Now I need to apply the same technique to the sides of the arms/wings, then do the same thing to it's twin and lastly, post them on the IG-Aggressor forum page.

qzZbCynp0RKRaI-mv6aC7vKciIGXlBp7f-iERLts

Hopefully this helps someone someday.

Edited by Whalers on the moon
oh, and figure out what to do with the cockpit.
This is perfect. I have wondered the same thing and thought I was doing it wrong when my paint started getting watery and running all over the place. But I guess its right.

So looks like its 4 thin layers.

Thanks for posting about this. I just had an airbrush given to me randomly and I'm thinking of repainting some 1.0 ships as test models to see what I can do with it. Did you use any masking tape?

Also, did you do a basecoat or just paint over the existing paint app? Looks like whatever you did worked really well.

Love that gradation of orange to yellow.

Hmmm... hard to give a straight answer, but let me try.

For regular painting where you want to 'cover' to model in a certain color quick, the paint is to thin. I don't know this model to well, but there seems to be a ridge to point out the curved line. You can see that the paint pulls towards that edge. A bit thicker paint wouldn't have that issue so much.

But... using layering techniques, you can achieve a great radiant. But then you must be carefull not to use to much paint, because then you will get pooling. Again, as seen in the first picture. For this to work best (and easy) you start with the lightest color first and slowly move towards the darker tones. As darker tones cover lighter ones more easy. And in that light, you had started with a very dark base color. It would have been easier if that was primed first.

Last note: Red, yellow and white pigments can sometimes be very hard to result in a smooth coverage. It's to be expected that in this case multiple layers are necessary.

But with that all said... by not giving up and some touch ups, you managed to put down an excelent result. 👍

23 hours ago, koolaidyeti said:

Thanks for posting about this. I just had an airbrush given to me randomly and I'm thinking of repainting some 1.0 ships as test models to see what I can do with it. Did you use any masking tape?

Also, did you do a basecoat or just paint over the existing paint app? Looks like whatever you did worked really well.

Love that gradation of orange to yellow.

I did the blue with an airbrush and that is a completely different animal; complicated by the fact that it is also color-shift paint, which has a lot of it's own unique qualities.

When you use the airbrush, make sure you add airbrush thinner to your paint and then test it on something else to make sure you are getting smooth coverage. typically, you don't need to prime these models, unless you want to make the color lighter than what is already on there. You can find a lot of great airbrush tips from the Gold Squadron Paintcast (RIP) here: https://www.youtube.com/playlist?list=PL7nFEFabTU5gMqBDdyoeA_d-qe1rF5Bnn . He will be a much better teacher than I. I made this post mostly because when I first started I usually thought my paint was too thin after one coat and then did a second coat way too thick.

Awesome suggestions. Thank you!

When I painted some 1.0 stuff by hand I felt that I couldn't get the right paint and water ratio. It would either be to thick or too watery. I'll have to experiment more and see what helps. Thanks again for the video link.

Now this is a subject that I'm intimately familiar with. 'Thin your paints' is perhaps the most common advice given to new painters. Of course no one can ever give a good answer on how much thinning a paint need. In broad terms, you need the paint to be thin enough that you don't leave traces of the brush strokes visible on the painted model and that the paint doesn't clog up details.

However it varies greatly from paint to paint as some are stuffed full of pigments and flow easily (black) while others are the spawn of Satan and needs to be burned for its' sins on a pyre made from used brushes (I'm looking at you yellow). The model being painted can also necessitate less or more thinning. For instance, I'm currently painting a model that has lots and lots small panels. When I thinned the paint too much, surface tension made the paint flow around the panels to places I most decidedly did not want it.

The best advice I can give beyond 'thin your paints' is to experiment. It might take a thousand tries but soon enough you should develop an instinctive need for how much thinning is needed. I can also highly recommend getting something called flow improver, that pretty much does exactly that, improves how the paint flows to and from the brush which really helps in most situations.

5 hours ago, MacrossVF1 said:

Now this is a subject that I'm intimately familiar with. 'Thin your paints' is perhaps the most common advice given to new painters. Of course no one can ever give a good answer on how much thinning a paint need. In broad terms, you need the paint to be thin enough that you don't leave traces of the brush strokes visible on the painted model and that the paint doesn't clog up details.

However it varies greatly from paint to paint as some are stuffed full of pigments and flow easily (black) while others are the spawn of Satan and needs to be burned for its' sins on a pyre made from used brushes (I'm looking at you yellow). The model being painted can also necessitate less or more thinning. For instance, I'm currently painting a model that has lots and lots small panels. When I thinned the paint too much, surface tension made the paint flow around the panels to places I most decidedly did not want it.

The best advice I can give beyond 'thin your paints' is to experiment. It might take a thousand tries but soon enough you should develop an instinctive need for how much thinning is needed. I can also highly recommend getting something called flow improver, that pretty much does exactly that, improves how the paint flows to and from the brush which really helps in most situations.

Thanks MacrossVF1!

I kind of fell out of Xwing for a little while due to life changes but I've enjoyed many of your posts over the years.

I figured I would jump on Whaler's post (sorry 😁 ) to see what current suggestions people may have since he's working though similar things that I'll no doubt be going through.

19 hours ago, MacrossVF1 said:

Now this is a subject that I'm intimately familiar with. 'Thin your paints' is perhaps the most common advice given to new painters. Of course no one can ever give a good answer on how much thinning a paint need. In broad terms, you need the paint to be thin enough that you don't leave traces of the brush strokes visible on the painted model and that the paint doesn't clog up details.

However it varies greatly from paint to paint as some are stuffed full of pigments and flow easily (black) while others are the spawn of Satan and needs to be burned for its' sins on a pyre made from used brushes (I'm looking at you yellow). The model being painted can also necessitate less or more thinning. For instance, I'm currently painting a model that has lots and lots small panels. When I thinned the paint too much, surface tension made the paint flow around the panels to places I most decidedly did not want it.

The best advice I can give beyond 'thin your paints' is to experiment. It might take a thousand tries but soon enough you should develop an instinctive need for how much thinning is needed. I can also highly recommend getting something called flow improver, that pretty much does exactly that, improves how the paint flows to and from the brush which really helps in most situations.

I've been using Holcroft Flow Medium this year, and I'm loving it. It's not gaming specific, you can get it (or other brand) in any good art store. I think from memory it cost me around $20 AUD for a 250ml bottle.

I bought some small needle nose dropper bottles and put some flow medium in those. That way you can measure out a more precise amount. And yes it works well with model paints. I mainly use Vallejo paints, but also have a number of Citadel and even older Humbrol paints. Seems to work with all those paints ok. Been using about two drops or so with my paint, and that seems to be the right amount most of the time. But like Macross said, every paint/colour/mimiature and even day/humidity can play havoc with thinning paints at times. Add more if you're more aiming for a wash/glaze.

I've also put in some kicker for ca glues in the little dropper bottles as well. This works a treat, instead of spraying your entire figure, hand, and your table with kicker, you can apply the kicker exactly where you need it. Only thing is that these bottles don't seem to be able to keep the kicker from evaporating, so only put a little in when you need to use it. Otherwise it's a waste of kicker, and that could be expensive.

Edited by CyCo

When you paint tiny and/or neat details or freehands in a bright color over a dark color, you make your life a lot easier by first painting on the detail in white (white usually has a higher density of pigments). It does not need to cover perfectly - it reduces the number of layers required of the bright color significantly and also encreases the brightness and saturation of the brightly-colored detail.

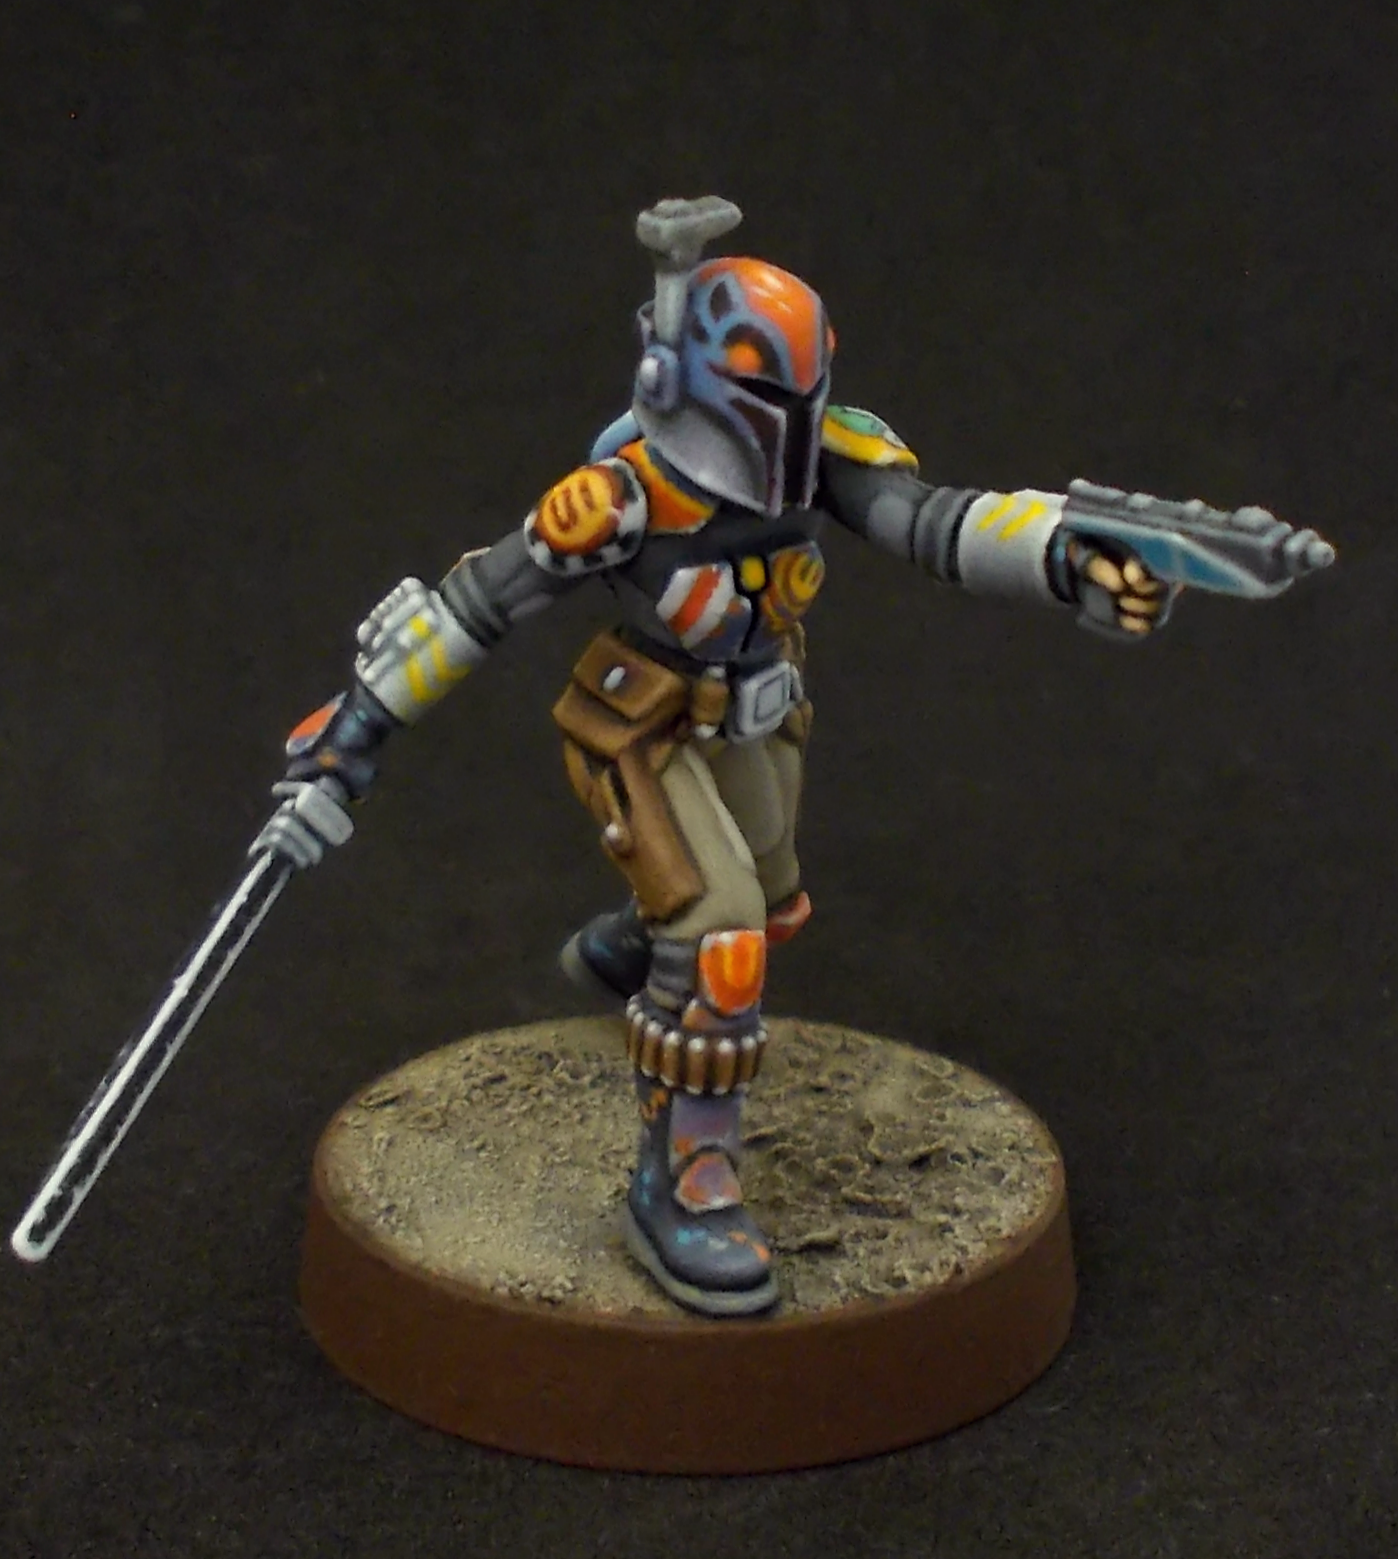
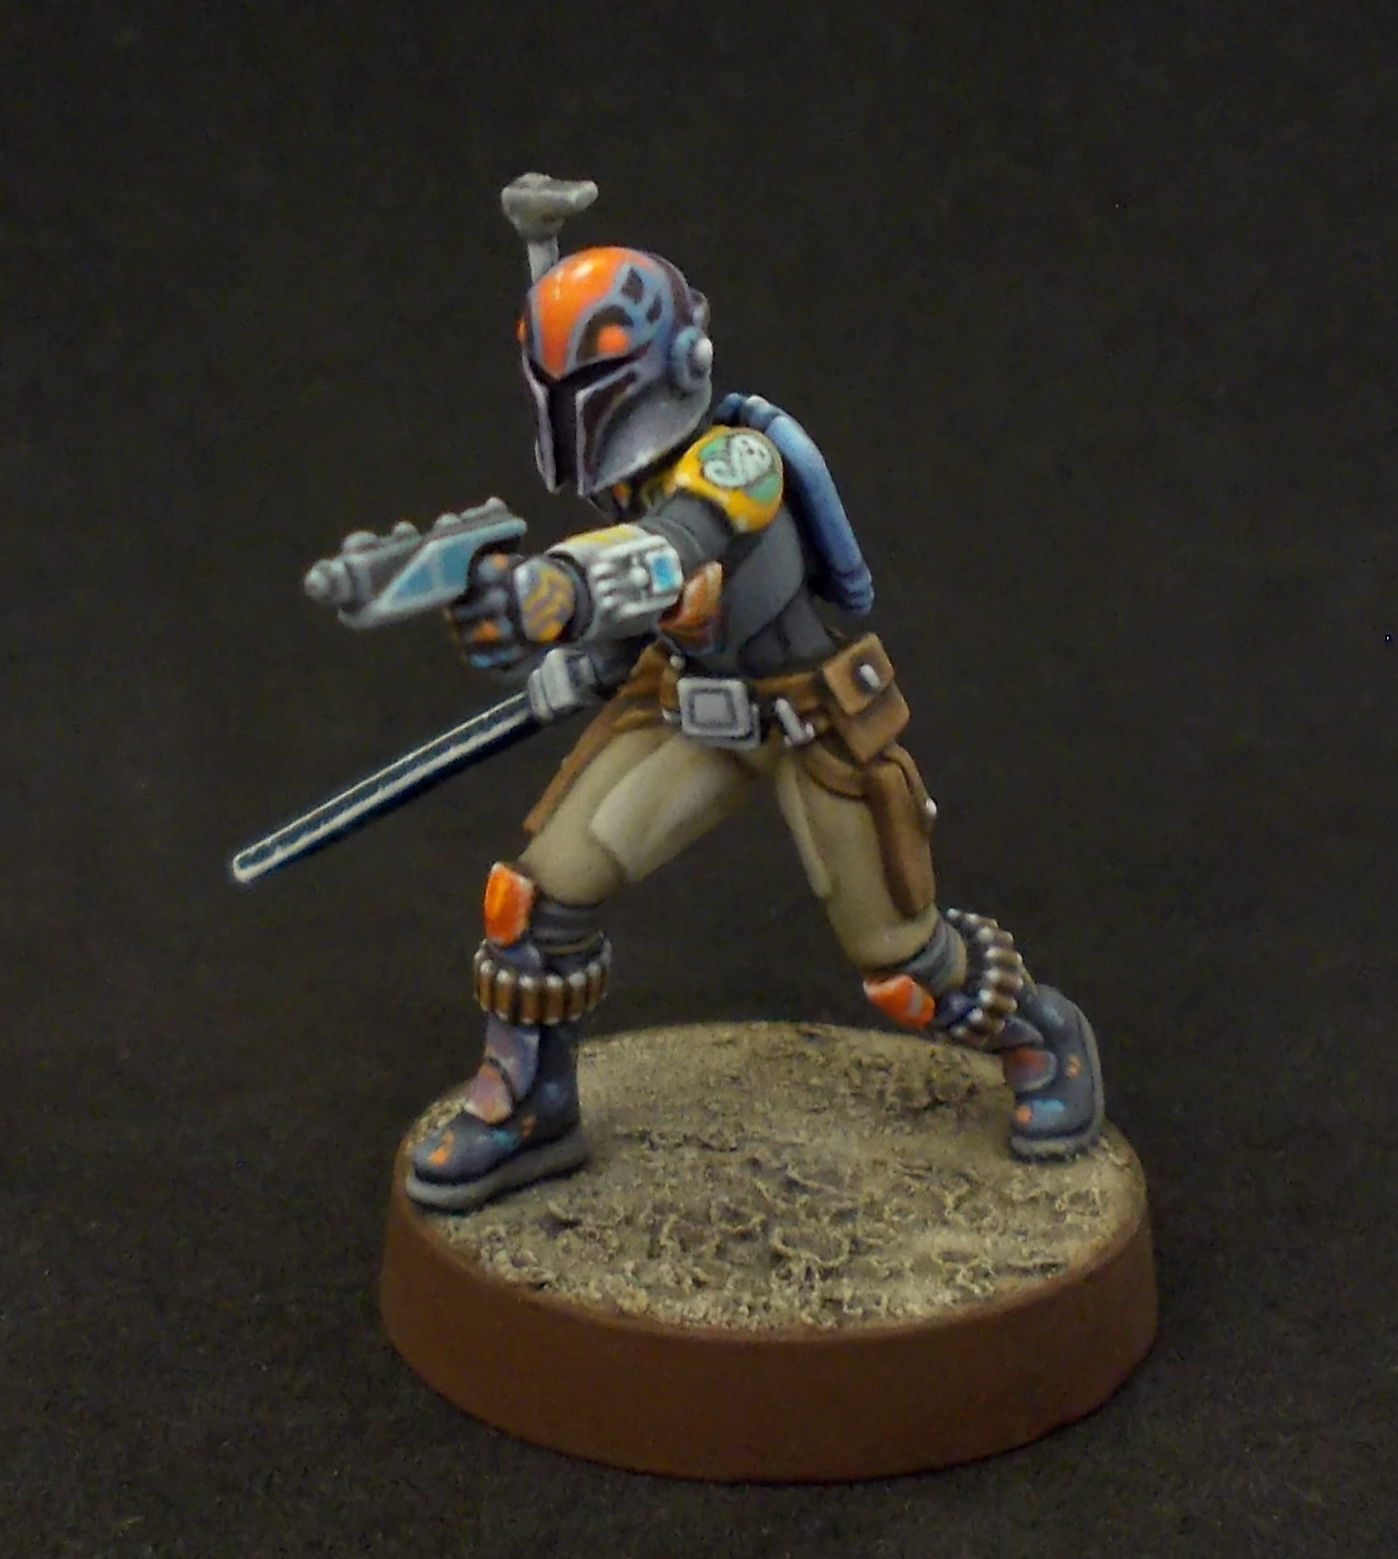
Without that technique, it'd have been impossible for me to achieve the details on my Sabine Wren for Legion, which is a good showcase for the merits of this technique:

Sabine_Wren007.png.0ebef8beb6427cb2a9d89

Sabine_Wren005.png.eb7e9b610a29b9657185d

Edited by Fourtytwo