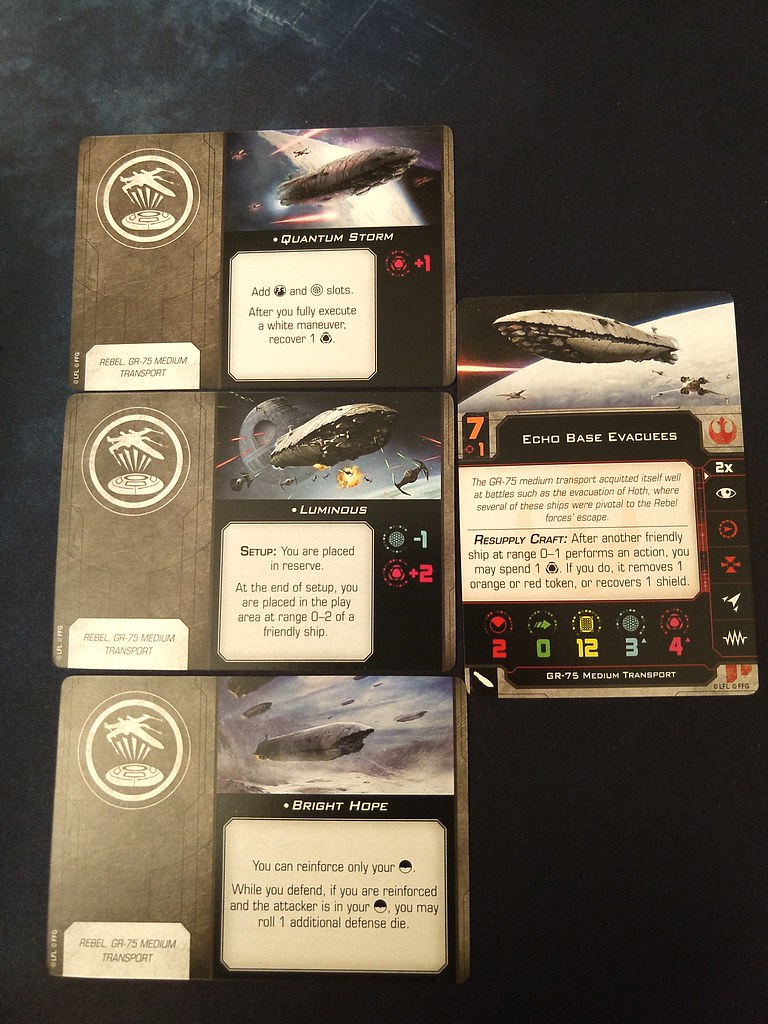
The GR-75 has a really interesting ship ability:
Resupply Craft: After another friendly ship at range 0-1 performs an action, you may spend 1 energy. If you do, it removes 1 orange or red token, or recovers 1 shield.
I have given it much thought. I tried using it once to help a Resistance Bomber reload a bomb, but ditch the weapons disabled token so it could still fire. It was ok.
Then I realized. What ship gets the most actions? Huge ships! So I began thinking about running a support GR-75 alongside a CR90 (in Rebels, of course). The GR-75 could spend 4 energy to let the CR90 recover 4 shields - in addition to the 2 shields it recovers in the End Phase! That's some serious healing. Here's an example squad.
|
Alderaanian Guard (146) Point-Defense Battery (10) Turbolaser Battery (15) Perceptive Copilot (8) Sensor Experts (10) Damage Control Team (3) Tibanna Reserves (3) Liberator (5) Ship total: 200 Echo Base Evacuees (55) Tibanna Reserves (3) Ship total: 58 Wedge Antilles (55) Swarm Tactics (5) Servomotor S-Foils (0) Veteran Wing Leader (2) Ship total: 62 Blue Squadron Escort (41) Servomotor S-Foils (0) Ship total: 41 Blue Squadron Escort (41) Servomotor S-Foils (0) Ship total: 41 Half Points: 21 Threshold: 3 Bodhi Rook (49) Pivot Wing (0) Ship total: 49 Half Points: 25 Threshold: 4 Bandit Squadron Pilot (23) Bandit Squadron Pilot (23) Total: 497 View in Yet Another Squad Builder 2.0 |
|
|
Essentially the GR-75 hangs back at range 1 of the CR90 while the starfighters move up into range to allow the CR90 to lock onto an enemy to power Turbolasers thanks to Bodhi Rook's ability. The key is to make sure the CR90 gets targeted before the GR-75, but have at least one round of firing with the CR90 beyond range 3. |
|