1L Armada in NoVA - 20170421 Game

By ShoutingMan, in Star Wars: Armada Battle Reports

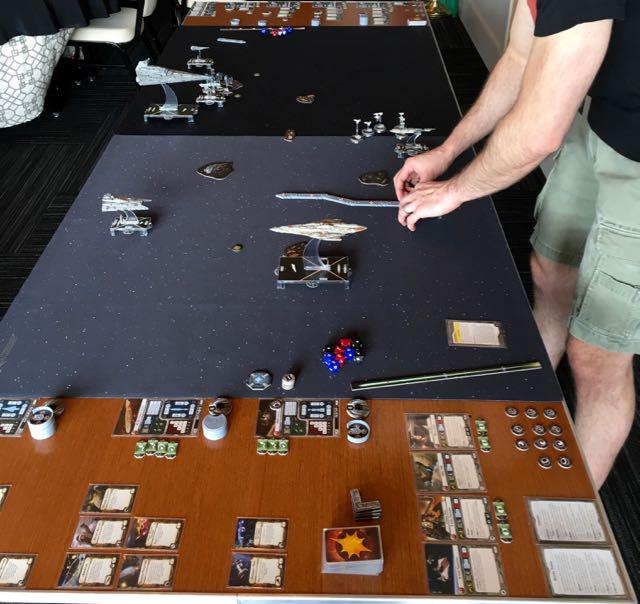
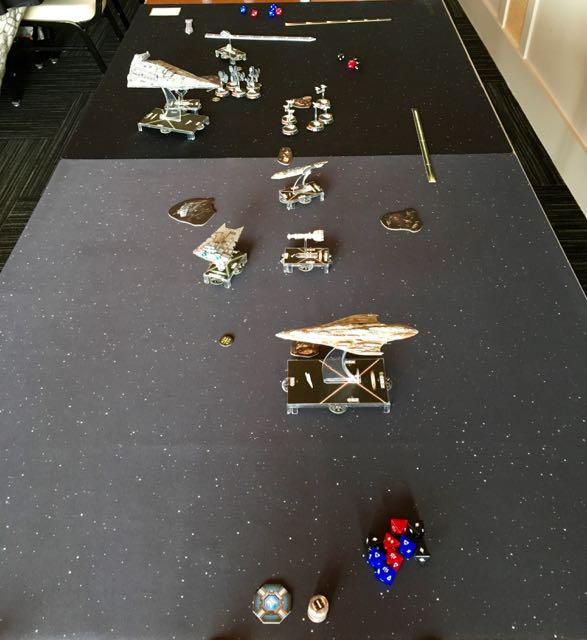
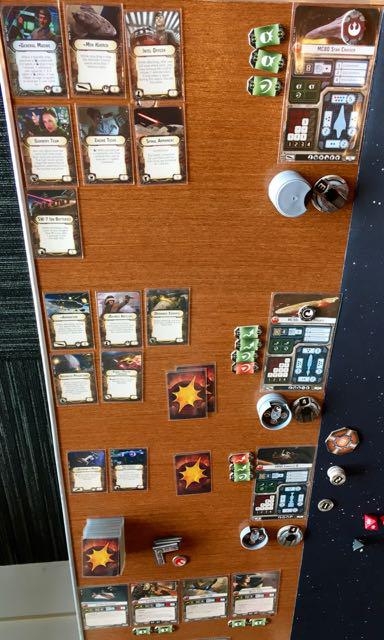
Played a new fleet against my friend who played an iteration of a fleet he flew last time. Our fleets are pictured here, with mine detailed following. I'll msg my opponent and see if he can share his fleet. (Sorry if the photos make you dizzy :) )

IMG_0000.jpg.c2082977b5bea084fc6e96d8f2422baf.jpg IMG_0001.jpg.78a00d197f04e3e298913c7615c6b202.jpg

http://armadawarlords.hivelabs.solutions/view_list.php?token=96909&key=888880e07427eeaad07b6a0354bf2343

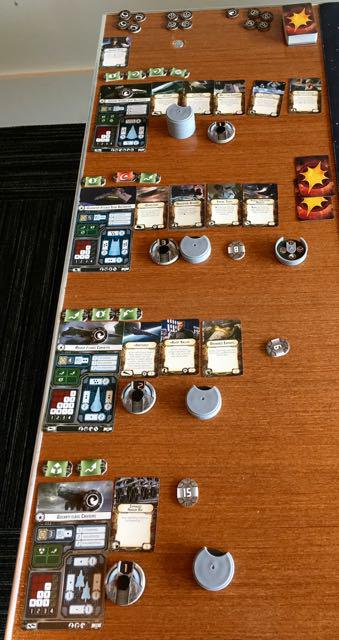
Navigate / Slow Them Down - 20170421
Author: ShoutingMan

Faction: Galactic Empire
Points: 399/400

Commander: Admiral Ozzel

Assault Objective: Advanced Gunnery
Defense Objective: Fire Lanes
Navigation Objective: Intel Sweep

Gozanti-class Cruisers (23 points)
- Expanded Hangar Bay ( 5 points)
= 28 total ship cost

Raider-I Class Corvette (44 points)
- Impetuous ( 4 points)
- Agent Kallus ( 3 points)
- Ordnance Experts ( 4 points)
= 55 total ship cost

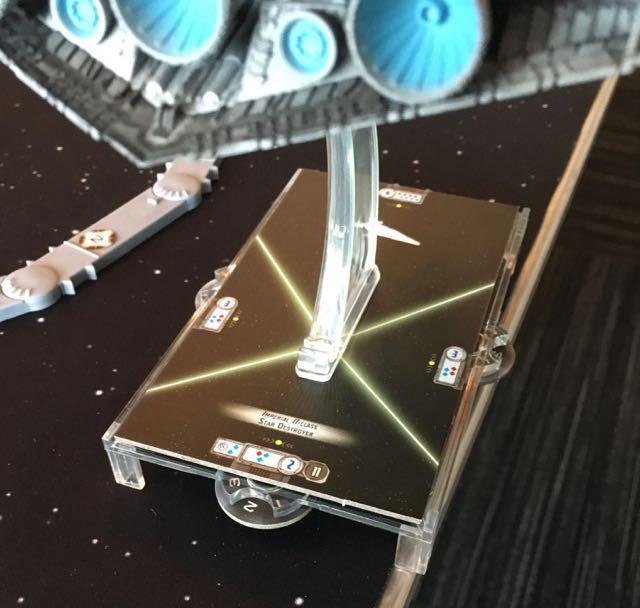
[ flagship ] Imperial II-Class Star Destroyer (120 points)
- Admiral Ozzel ( 20 points)
- Avenger ( 5 points)
- Defense Liaison ( 3 points)
- Phylon Q7 Tractor Beams ( 6 points)
- Electronic Countermeasures ( 7 points)
- NK-7 Ion Cannons ( 10 points)
= 171 total ship cost

Gladiator II-Class Star Destroyer (62 points)
- Demolisher ( 10 points)
- Navigation Officer ( 6 points)
- Engine Techs ( 8 points)
- Assault Concussion Missiles ( 7 points)
= 93 total ship cost

3 TIE Fighter Squadrons ( 24 points)
1 "Howlrunner" ( 16 points)
1 TIE Advanced Squadron ( 12 points)

Ah. I'd hoped to attach a series of photos to illustrate the game. But I realize there's a ~380kB total limit on thread uploads. Let's try this with a few pics then.

My goal, and theme, was to use navigation flexibility to my advantage. To speed up to get away or into a fight. To slow down to camp on tokens, to navigate obstacles (first game with them), to land on the station, to cruise my Glad past a CR90 giving it the broadside goods. I also tossed in a Goz Carrier to try out a cheap ship as carrier and also the benefit of an extra activation. For bonus fun, I tried for the first time The Tractor Beam on my ISD. I flew a minimal squadron

What went right:

1) I launched slow, and kept my ships in the fray longer, and camped on the tokens in the beginning.

2) Flying a Raider into a Squadron furball is sweet!

3) Had i not lost my Glad, I think I'd have played very competitively

Three things went wrong:

1) My Glad was killed early Round 2

2) Opponent also built a Nav-aggressive fleet making Tractor Beam effects moot

3) I flew my ISD conservatively instead of working to get the pointy end towards the MC80 and risking the onslaught of three ships. With that, I should have got Raider in to harass the CR90.

Early in Round 1. My opponent launches his MC80, I moved my Goz Carrier forward speed one, and he's measuring to move his CR90.

IMG_0067.jpg.b7e1874d82bd9cd1be0bb9b7029ec2ee.jpg

The end of Round 1 gives us this. My Gladiator is in a world of hurt. And I forgot to make my Engine Techs speed-1 move, which left him in even greater peril.

IMG_0072.jpg.ad8f9396235a7c7b5c010cfa8e3ceae7.jpg

Edited by ShoutingMan

Ending Round 2, I've lost my Gladiator, which was the end of the game for me in all practicality.

In an attempt at a radical gameplay, I rammed my opponent's MC30 twice with my basic movement and again with the Engine Techs movement. Then I launch a broadsides at him post move with Demolisher. But I was scatterbrained and forgot the side facing him had zero shield, lost from the earlier attack by his CR90 at the start of the Round. His activation, he hit me with a broadsides form the MC30, had for three damage and I was done.

Had I gotten in the Engine Techs move in Round 1, and then moved forward dead center of the MC30, I could have punished him some, survived his counter-attack, and possibly escaped on Round 3, maybe even hitting the station to drop a card.

IMG_0082.jpg

Ending Round 4, we're here. Early on I was spamming the Objective Tokens to get a point lead, but having lost my Glad, I got spooked and let myself get run off my position. But, I three ships targeting my ISD, and my two support ships were a Goz and a Raider I launched into the squadron furball to finish that. Regardless, I should have pointed my ISD at the MC80 rather than trying to fly off. I didn't have turns enough to get into a position for Objective Tokens.

IMG_0086.jpg.3a7af5838af6e8b651b68c294542515e.jpg

I'll jump ahead to Round 5...

Knowing I'd lost the game on points by Round 4, I decided to take a chance in flying my ISD to cut the corner and stay on board. I was correct about the front. I forgot to consider the rear before moving. Missed it by <this> much! And the ISD was off the table, securing my defeat.

IMG_0096.jpg.bbb57adb9030db5aede0768346c41172.jpg

This allowed my opponent to camp on the Objective Tokens for another round and spam some points. I was too far out to get anything to the third Token to reduce the relative difference.

(OK so i can't do a photo report as i hoped. I'll have to figure something else out next time.)

I haven't gotten all the way through it yet, but FYI, you can post the images to imgur.com and then embed them here just by copy-pasting the link.

10 minutes ago, Ardaedhel said:

I haven't gotten all the way through it yet, but FYI, you can post the images to imgur.com and then embed them here just by copy-pasting the link.

Thanks. I'll check that out.

In order of images, showing the game:

  1. My Imperial fleet: 399 pts
  2. Rebel-scum opponent's fleet: 391 pts. He's first. Picks " Fire Lanes " from my Objectives.
  3. I forgot the setup and beginning photo. This third activation of Round 1. He setup his MC80, CR90, and MC30 bracketing my Gladiator. He launched the MC80. I moved out my Goz (just next to the ISD) and here he's measuring for the CR90 Corvette.
  4. CR90 moved
  5. My Raider is out at speed 2
  6. This is the beginning and end of my game. I send my Glad Demolisher out and away from the MC80. I started my Glad at speed 1. But the speed-4 ISD (speed 3 at start plus Engine Techs) made it look like a bad day coming. I spent my initial Nav command plus Adm Ouzel to jump to speed 3 and try to get in better position. I'm broadsides of the Corvette and him him good. I thought there might be a chance to kill him. I'm Long range of the MC80 so I can survive with some luck and smarts. But my smarts aren't doing so well: I forgot my Engine Techs and lost an extra distance one I should have covered.
  7. The view ending my Squadron phase
  8. The view ending Round 1.
  9. The squadrons at end of Round 1
  10. Round 2: Fight!
  11. My photos are sporadic here. My opponent started with the CR90, attacking my Glad and then moved below the station. He wanted to land on the station but couldn't get there. I moved my Glad to get away from the MC80. I did something crazy -- to try it -- but it ultimately was a terrible idea. I ran speed three in the MC30. We took a card. I then used Engine Techs and hit him again. We took cards. Then I broadsided him and got some good damage in
  12. Then he activated the MC30, broadsided me back, got a great roll. And I was scatterbrained at the start of the game, and neglected that I had no shields on that Hull Zone from the CR90 attacked. I died. (sad trombone)
  13. MC80 cranking around at speed 3+1. My ISD tilting towards the fight. My Raider and Goz puttering slowly away from the tokens. I'm taking two tokens and he's getting one. So there might still be some hope for me to win off of Obj points.
  14. Squadrons! I'm aggressively using my Goz to squadronate. I got Howlrunner and some TIEs in there to mix it up. Unfortunately, he's got Counter 2 on everything and that stinking Snipe 4 squad. I'm being judicious in my attacks. But I'm still being frazzled and launch attacks on his HWK rather than the Moldy Crow, which is what I needed to kill. Also, the blue dice hate me. Despite around 20 blue dice thrown at the HWK, I couldn't kill it.
  15. The view from afar
  16. Squadron situation.
  17. Round 3: Fight!
  18. I landed my Raider right in the middle of the squadron tangle. It was beautiful.
  19. This was my next major strategic error: I moved my ISD towards safety instead of towards the fight. I should have taken the risk and tried to get the beautiful front arc aimed at something. I was getting no use so far from Avenger and NK-7 and this didn't help. (Side note: Tractor beams were useless. My opponent had a Nav heavy fleet with Madine.) Adding insult to injury, taking this route landed me on an Asteroid, giving me a face up card.
  20. Squadrons. Sadly, the sniper on the left was a hair out of range. I was going to clobber him with 6 black dice total, but my opponent landed him just outside my range.
  21. Round 4!
  22. He's bringing his big guns to the Objective Tokens, but I'm always out of reach and he can't get any dice on me
  23. Everythings out of range of everything.
  24. The raider did his thing and eliminated the final squadrons save the sniper
  25. Goz had Squadron, and I killed the Sniper with a TIE
  26. I'm trying to get my ISD back around to do...something...anything...before the game ends. Opponent's soaking up the Obj Tokens now.
  27. Round 5
  28. Squadrons got nothing to do but fly to safety. I thought I could claim a Token with them, but that's not so.
  29. I knew I'd lost by points so I decided to try and make the turn at speed 3 (and used my engineering to remove the face up card). I'd checked and measured and though I had it. But I hadn't checked the rear of my base, and I was off. The ISD was out of the game completely.
  30. Flying...in a jet plane
  31. ...don't know when I'll be back again...
  32. Round 6, just cleanup
  33. Flying
  34. Rebel losses
  35. Imperial losses
Edited by ShoutingMan

Here's the fleet he was playing against. I basically spammed Nav dials the whole game on all my ships.

Faction: Rebel Alliance
Points: 391/400
Commander: General Madine
Assault Objective: Most Wanted
Defense Objective: Fire Lanes
Navigation Objective: Intel Sweep

[ flagship ] MC80 Star Cruiser (96 points)
- General Madine ( 30 points)
- Mon Karren ( 8 points)
- Intel Officer ( 7 points)
- Gunnery Team ( 7 points)
- Engine Techs ( 8 points)
- Spinal Armament ( 9 points)
- SW 7 Ion Batteries ( 5 points)
= 170 total ship cost

MC30c Torpedo Frigate (63 points)
- Admonition ( 8 points)
- Raymus Antilles ( 7 points)
- Ordnance Experts ( 4 points)
- Advanced Projectors ( 6 points)
- Assault Proton Torpedoes ( 5 points)
= 93 total ship cost

CR90 Corvette B (39 points)
- Dodonnas Pride ( 6 points)
- High-Capacity Ion Turbines ( 8 points)
= 53 total ship cost

1 Jan Ors ( 19 points)
1 HWK-290 ( 12 points)
2 A-Wing Squadrons ( 22 points)
1 Corran Horn ( 22 points)

Hmm... Interesting CR90B build...

I think I like it.