The Perpetually In Progress Works de los DUR

By DUR, in Star Wars: Armada Painting and Modification

That sounds like a metric a@$-ton of work. I'd recommend doing one or two windows (if you haven't already) before you set off on a run. I've had many good ideas that briefed well and that I fully executed only to have it look horrible and all get washed away. Now, when I try something new, it's always got at least one trial run on the bottom corner of the ship haha. You have an ambitious plan. I just grab the yellow, a toothpick with a sanded tip (for a sharper point) and dab away. Afterward, I go back with the background color and, where necessary, trim the windows into a desired shape. I only glaze light spillage around the big windows (Raider/GSD/Goz bridges, GSD hangars) that have structure nearby. When I get to my interdictor, that'll be another story haha.

I got some watercolor pencils; can you give us some tips on using them please?

Edited by WGNF911
That sounds like a metric a@$-ton of work. I'd recommend doing one or two windows (if you haven't already) before you set off on a run. I've had many good ideas that briefed well and that I fully executed only to have it look horrible and all get washed away. Now, when I try something new, it's always got at least one trial run on the bottom corner of the ship haha. You have an ambitious plan. I just grab the yellow, a toothpick with a sanded tip (for a sharper point) and dab away. Afterward, I go back with the background color and, where necessary, trim the windows into a desired shape. I only glaze light spillage around the big windows (Raider/GSD/Goz bridges, GSD hangars) that have structure nearby. When I get to my interdictor, that'll be another story haha.

I got some watercolor pencils; can you give us some tips on using them please?

I'm starting up my next two ISD's while I wait for my "die cut reflectors" (i.e. glitter) to arrive via mail order (yes, I WAS too ashamed to marchinto Joann's and buy some myself), so I'll take some pics, though it's basically this:

Starting with a matte paint star destroyer (stock FFG works for this too!), start shading in the panels with your color pencil. You use it just like you would on paper, i.e. pressing down harder will put more pigment down, which will make it darker. You will see it look like a ghetto, pencil colored ISD at first :)

You want to shade just a little bit darker than what you want the final to look at. Also, only color in 1/2 to 3/4 of what you want to modulate at this stage, leaving some extra "blank" spots for a step that's coming up.

Once you've colored up the panels, mix some water with ox gall at about double the recommended strength (or use other wetting agent). Using a finer brush with a smaller reservoir (like a size 1 or 0 brush), dab your wetwater, and then dab a lint free cloth or towel to remove some of the liquid: you want damp, not dripping bristles. Then, one by one, "paint out" the textured pencil-y look with the brush- the little bit of wetwater should turn the drawn look into a transparent color look. It can be splotchy right now- don't worry about that so much. Do this for every panel you've colored. Try to avoid letting the paint get into the panel lines- they're cut too deep on FFG models, so they contrast too high. If you do, we'll correct for it later, but it helps to just avoid doing it in the first place with brush control.

Once that's all dry, it's time for some smoothing. Using your finger, or a smudge tool/barely damp sponge brush, try to rub out the splotchiness on the panels- this is why going extra dark helps, as you'll be removing pigment at this point.

Now is when I do my first round of correction for panel line contrast: using a just damped, very fine detail brush, I paint wetwater over anywhere I have darkened the panel lines. This has the side effect of providing an edge highlight to all the panels as you pull off pigment from those edges. I'll take some of this pigment I pull out and dump it on the unpainted panels to get a very, very light modulation. I then repeat this process for the whole ship, every panel, every panel line: hopefully you'll start getting the hang how how this kind of pigment behaves and you'll start seeing how you want to address the whole ship.

If you screw up, you can always just take a damp, lint free cloth, and just wipe away!

Additional tips:

-DON'T USE Q-TIPS! I did this at first for my smudge tool and it ended up leaving little linty things all over the place that I then had to very, very carefully remove. I use q-tips for when I paint watercolor on canvas (yeah, I do that too...) but it totally sucks to get the little fibers on your ship. Use a dry paint brush, a sponge, your finger, or even a bamboo cooking skewer to get into tiny spots to smudge.

-Use a big fat brush to tone things down- just rubbing over a spot, even with the brush dry, will knock off some pigment- you can use this to very finely control the tone quality of an area or individual panel

-Sometime panels will look stained and trying to correct the paint doesn't seem to work with just a wet brush. That's ok- just seal it up, and repaint over it with your base color after.

-If you want strongly contrasted lines, just paint on a big fat opaque stripe. Then come back and wipe off the excess from the raised areas. This is how I did my guns/major transition areas on my ISD- the strong contrast on a few key points also creates the optical illusion that the other panel lines are softer.

-For further panel line decontrasting, I make a wash out of china white watercolor and wetwater and let it really seep into the cracks. Don't brush it too aggressively, though- it may form a bubble if you do this and it will look really ugly and be really annoying to remove from the deep panel lines.

Dang that ISD is freaking sharp. I probably don't have the patience (or near the ability) but love the variability.

Ben, I promise I'll be working on those lights... some time before the Apocolypse :P

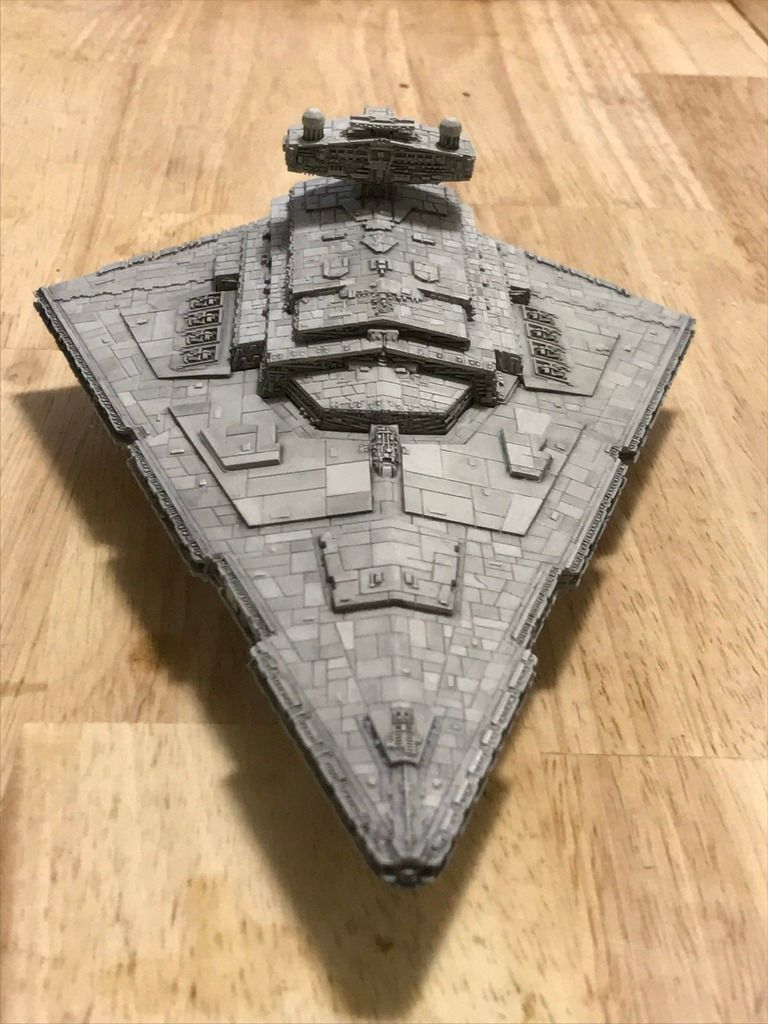
Anyways, more subtle touchups to ye olde ISD: a lot was done on the underside, that I did not photograph (PS: how many of you actually bother painting the bottom carefully?)

Starting on the edge highlights, but need to clean up.

IMG_0566_zpshknx3ixr.jpg

That is a awesome paint job...........does look a little worn