Custom articulated X-wing mini (how-to)

By Millennium Falsehood, in X-Wing

So I was perusing the threads and someone mentioned they had tried and failed to make one of their X-wings articulated, with opening wings. Unfortunate for them, but it got me thinking about what would be required to make an articulated X-wing . . .

My mind came up with a design in ten seconds flat, patterned after a paper model I'd built once, and I went downstairs to my lair and started working. Before I got too far though, I figured someone might want to know how I did it, just in case they got the itch to try it themselves, or just wanted to see how crazy I could get. So I photographed every step and this is the result:

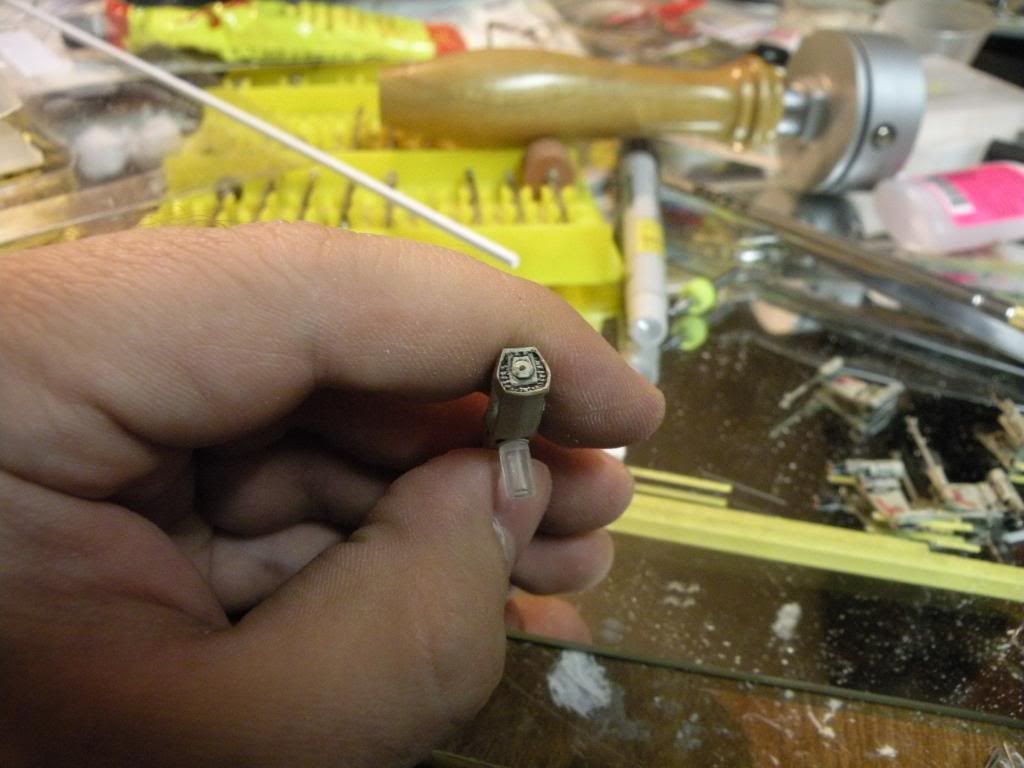
First, I detached the wings on one of my X-wings. I wanted to use one that I didn't mind destroying, just in case I royally screwed this up, so I went with one of the lesser-quality minis in my box. Then I hollowed out the wing mechanism section using a Dremel with a really tiny milling bit chucked in, making sure to square off the insides so the wings could reach all the way to the top:

DSCN5738_zps38b387b2.jpg

After that I set it aside to get started on the hinge. I took a piece of .080" square styrene stock from Evergreen Scale Models and cut it into three pieces of equal length, fitted to poke out about a millimeter from the fuselage on either side. Then I chucked in an even tinier milling bit into my Dremel and drilled out holes for the steel wire I would be using for the axle:

DSCN5740_zps58724306.jpg

I then mounted them in a hand vise and cut grooves in their edges. The reason for this will become apparent later:

DSCN5741_zps2abbd338.jpg

After I finished that and cleaned up the edges, I mounted the hinge parts on the wire, alternating them:

DSCN5742_zps864dc91f.jpg

I then cut six small rectangles out of the square stock and glued them on the hinge parts like so:

DSCN5744_zpsa00f2b1b.jpg

While the glue set on those parts I set them aside and got to work on the fuselage. First I found the centerline by tracing back from the lip along the nose, then drilled a hole the same size as my wire in the S-foil actuator box: http://i60.photobucket.com/albums/h4/Millennium_Falsehood/Articulated%20X-wing%20miniature/DSCN5745_zps34e45dc6.jpg

Then I took 0.060" C-channel, also from Evergreen, and cut two small sections and drilled holes in them. These were then glued inside the fuselage to give them some bite on the hinge. I aligned them by inserting the hinge wire through the back and through the C-channel, then superglued them in place: http://i60.photobucket.com/albums/h4/Millennium_Falsehood/Articulated%20X-wing%20miniature/DSCN5747_zps0375349a.jpg

Then I inserted the hinge and threaded the wire through it, making sure it interfaced with the hole in the front of the hinge area:

DSCN5748_zps10c6160d.jpg

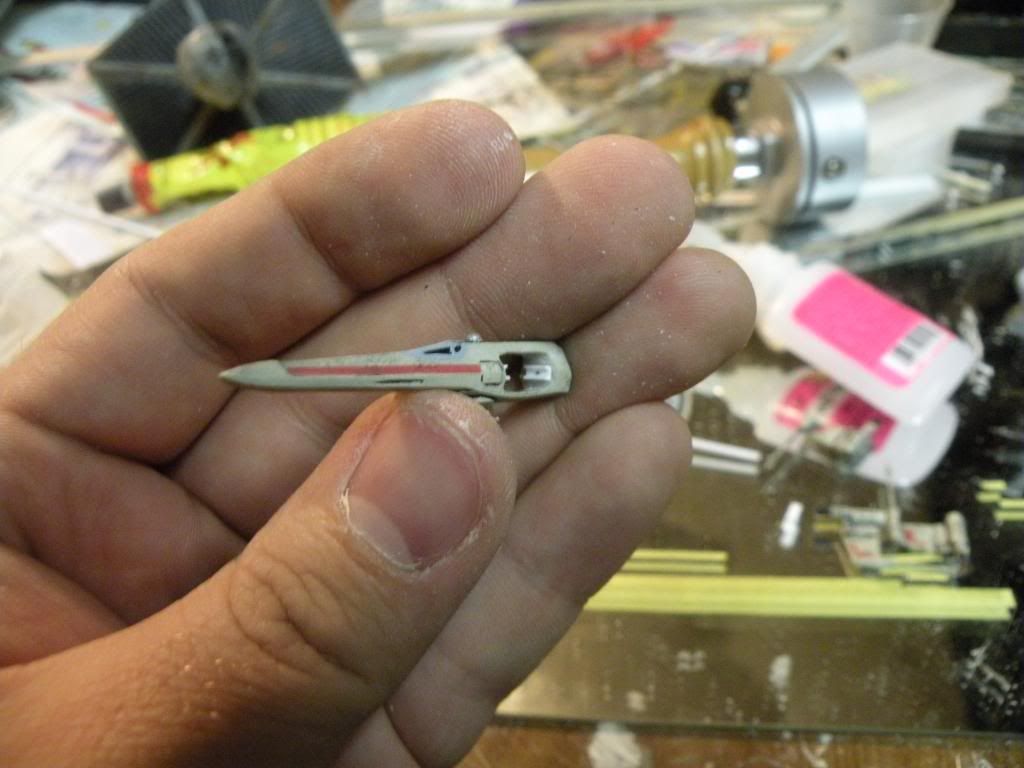
After that was secure I set it aside and began working on the wings. I sanded off the rough parts of each wing, then I cut four pieces of C-channel the same length as the width of the hinge box. Then I cut off one of the sides on each one in order to make a socket for the hinge. An L-shaped socket will give it a lot more durability than simply butt-gluing in in place:

DSCN5750_zps8348e779.jpg

When all four wings had their sockets glued on, I gave them about ten minutes to cure, then started gluing them to the hinge. First I glued the top wings on, making sure they were completely level when the hinge was closed: http://i60.photobucket.com/albums/h4/Millennium_Falsehood/Articulated%20X-wing%20miniature/DSCN5751_zps031699fb.jpg

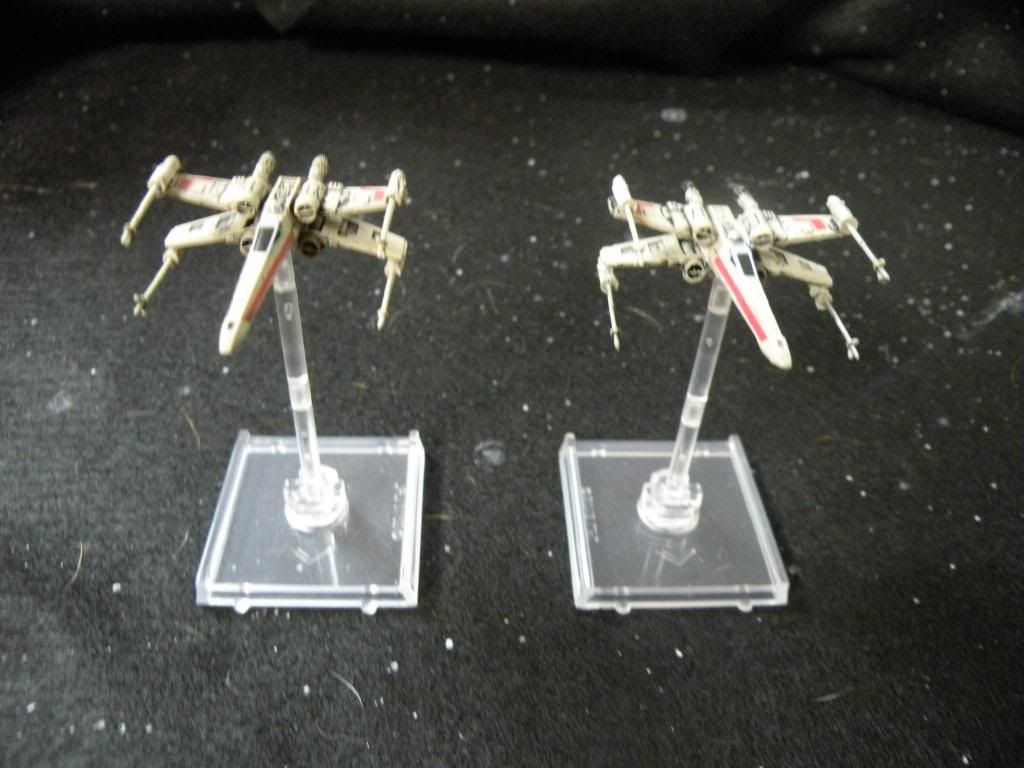
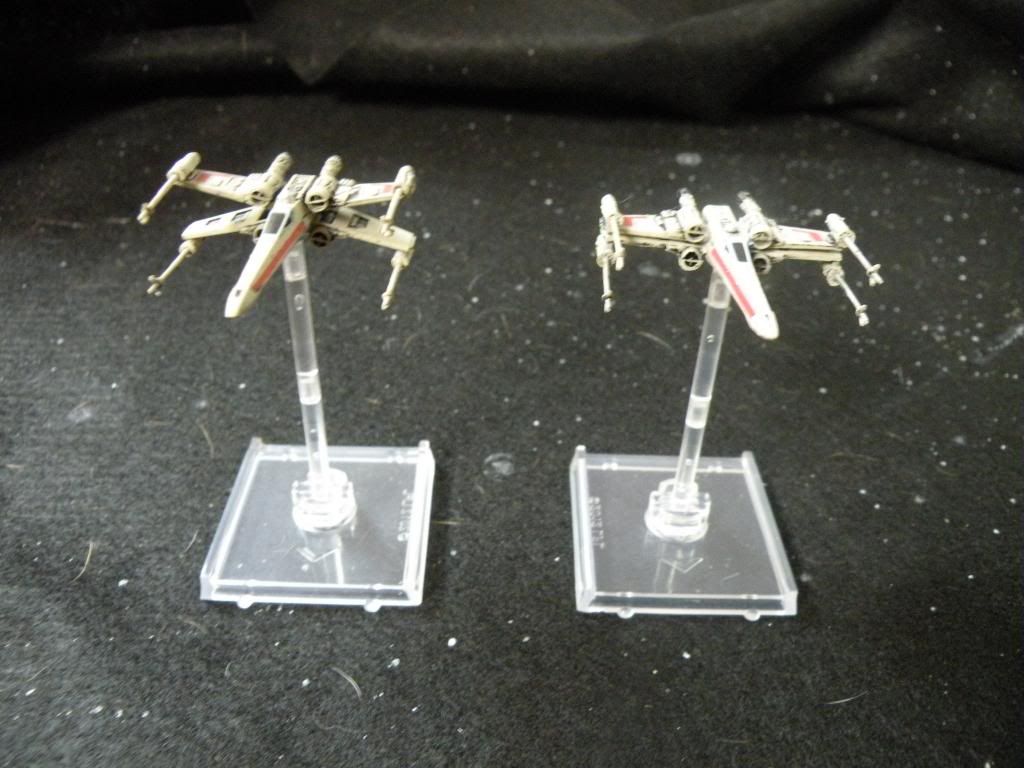
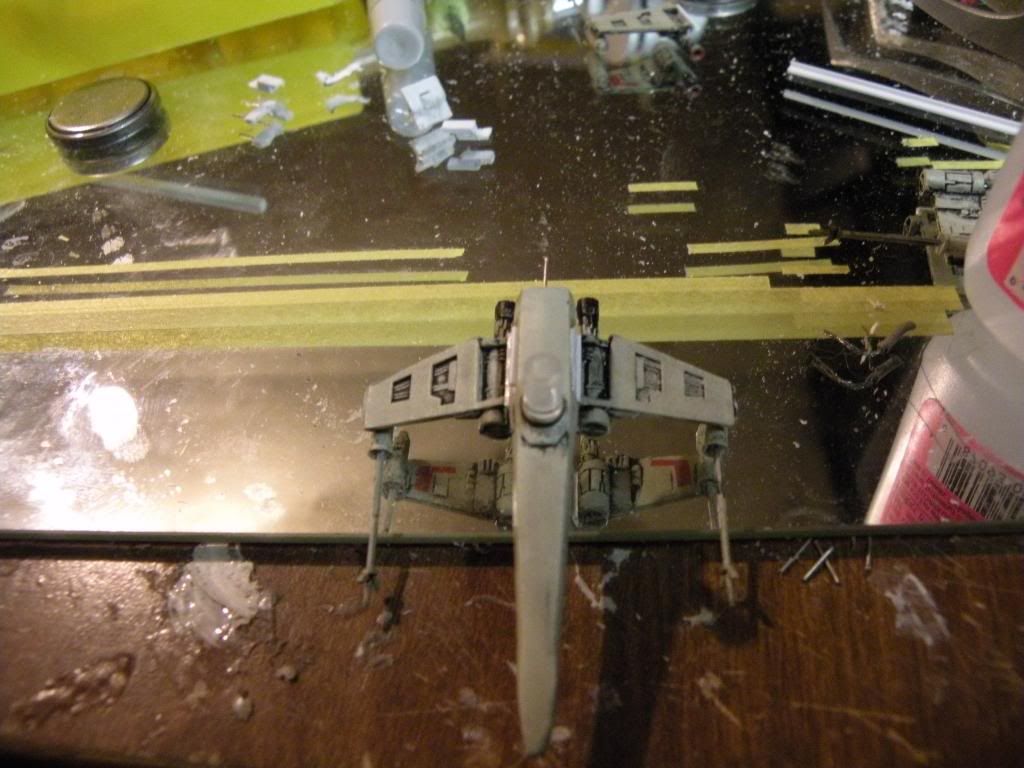
Finally, I glued the lower wings in place, and then this little beauty was finished:

DSCN5752_zpsab8f037b.jpg

Pretty nifty, eh? :D

Here she is next to an unmodified X-wing, demonstrating her articulated wings:

DSCN5753_zps63ba8cb5.jpg

DSCN5754_zpsdc559d76.jpg

Before anyone asks, I don't think I'll be doing a B-wing any time soon. Their wings are extremely thin, and I don't know if I can get away with a hinge that tiny. Maybe if I built it out of brass tube or something . . .

Anyway, I really enjoyed building this little beauty. I'm thinking about doing a couple more of them so I can have a trio of articulated X-wings. :)

any chance of some diagrams too, some of the pictures are quite hard to make out.. and the one taken on the mirror just confused me until I worked out there was a mirror there.

What? you maybe have supervision... I can't do that because I can't even see does small pieces well.

Really good job, congrats.

Wow looks amazing, in that first comparison shot I couldn't even tell which was which!

any chance of some diagrams too, some of the pictures are quite hard to make out.. and the one taken on the mirror just confused me until I worked out there was a mirror there.

Lol, sorry 'bout that. ^_^ I have a mirror on my workbench because it enables me to cut thin brass without bending it, and the mirror was the only piece of tempered glass in the house.

Anyway, here's a diagram of how the hinge is set up:

DSCN5755_zps3f85f201.jpg

What is the reason for the u-cross-section piece on either end rather than a block?

To increase the coefficient of friction on the hinge. The hinge itself has almost no friction, so I needed to put some C-channel in there to get the wings to stay put when they're closed (there's nothing to prevent them from tilting left or right).

hmm but wouldn't having a block give you a larger area in contact and therefore improve the friction over the smaller are of contact of the U?

I'm wondering if plastizote blocks with a small plastic tube in the middle to hold the pin might be even better. The foam would be slightly compressed so give much more friction.

Edited by Rodent Mastermind

Yes, but the C-channel will keep the friction constant as the wings move up and down due to the surface area of the point of contact remaining relatively the same through the action (or at least, moreso than a solid block), making the action smoother while still giving the fuselage some bite. It will also serve to lock the wings in place in attack position because the tips of the C-channel will be pressing on the wings with the highest amount of torque when they're in they're fully extended position, and then when they're retracted the shape of the C-channel discourages tilting to the left or right, similarly to how a pair of spring-loaded ball bearings above and below the wings would do the same thing.

At least, this is what I've come to conclude through experience with the T-65. I've built a few articulated X-wings in various scales, and this is something that bugged me until I found a solution in using C-channel or strips of material next to the wings. On larger scales it's more obvious, but at this scale it isn't noticeable.

Yes, but the C-channel will keep the friction constant as the wings move up and down due to the surface area of the point of contact remaining relatively the same through the action (or at least, moreso than a solid block), making the action smoother while still giving the fuselage some bite. It will also serve to lock the wings in place in attack position because the tips of the C-channel will be pressing on the wings with the highest amount of torque when they're in they're fully extended position, and then when they're retracted the shape of the C-channel discourages tilting to the left or right, similarly to how a pair of spring-loaded ball bearings above and below the wings would do the same thing.

That makes a lot of sense, I'll have to get some c section then.

First, Fantastic job. Truly great. This belongs up top with the lit Falcon engine. People like you make me wish FFG had a customizing contest where people could submit pictures of their handy work. We'd be treated to a real treat and maybe FFG could make a special edition expansion of the winner's model (though probably along paint lines more so than physical adjustments). Same stats and everything, just a 'Design-a-ship' contest. I've loved viewing what people come up with, thanks for sharing.

Understand why the B-wing would be tight, maybe you can swivel some A-wing guns or make a spinning Y-wing turret instead? Or the ordinance pod on the TIE/B looks like an easy thing to hollow out, maybe somebody could put a flashing red LED in there or something.

Second, I'm curious, would a closed-wing X-wing have different stats? The fluff is all over the place. The Rogue Squadron video games have them going faster but unable to fire. Michael Stackpole's X-wing novels mention them being able to fire while closed at single rate. You never see them fire while closed in the movies and most other literature takes the same route. Maybe they'd get +1 evade but -1 attack? Or, if released I'm assuming it would articulate so perhaps more green manuevers and just 1 attack, no secondary? Just spit balling.

Third, awesome all over again!

Some people...

:lol:

**** You!

:angry:

Thanks a lot, guys! :D

Second, I'm curious, would a closed-wing X-wing have different stats?

Actually, I had a thought along those lines last night. I remember when I played Rogue Squadron that I could close my wings to increase my speed and maneuverability at the expense of being able to fire weapons, so I thought this could be translated the following way:

S-Foils

Modification

Cost: 1

Effect: Ships with S-foils may close them to cruise position. They immediately gain Boost and all Speed-1 and -2 maneuvers are green. They may not attack when S-foils are in cruise position.

EDIT: The ship may convert back to attack mode at any time. (There. Happy?)

Edited by Millennium Falsehood

I always had something like this in my head too. In the films they have to have a reason for these opening and closing wings. I figured they could fly better or something with the wings closed...Ha!

I like your idea to include this in the game.

Nice!

:D

...of coarse some smart ass gamer will rules lawyer it and say that "In space you do not need wings."

Ah shad-up you!

:lol:

Nah some wise ass rules lawyer will point out your rule has no way to open them back up again. So your just removing all your offensive power forever.. mu ha ha haaaah

That too...

:rolleyes:

Nerds!

:lol:

Nah some wise ass rules lawyer will point out your rule has no way to open them back up again. So your just removing all your offensive power forever.. mu ha ha haaaah

D'oh!

Genius!

Question: What glue did you use to glue the FFG material to Styrene? Superglue or is plastic cement working (Tamiya,...)?

I used superglue, specifically this brand called Zap-a-gap that is very thin and comes with an applicator so I don't get it everywhere. For bonding styrene to itself, I prefer Flex-i-file's model cement.

I prefer Flex-i-file's model cement .

Why for come?

:)

Well, it's very "hot", in that the solvent in it quickly melts styrene and ABS plastic and fuses it, and since the solvent is also very effervescent it evaporates quickly as well, meaning the joint gets hard pretty fast (about two or three minutes). Usually I use Ambroid Pro-Weld, but I couldn't find it at the hobby store when I needed to replace my plastic cement supply. They had some of this stuff though, so I picked up a bottle and tried it out at home. It was just as good as Ambroid, so I think I've found my backup glue.

MF, you are off the hook.

I love that MF.

Cool Brother Cool, because you had me almost worried as I DO use good ole Ambroid , and you had me thinking that there might be some sexy new kitty on the block, that dances better or some such...

:lol:

Most Impressive!

Thanks a lot! :D