Masking experiment on a walker - pic heavy

By ItsUncertainWho, in Dust Warfare

I have been experimenting with an old modelers trick for masking organic lines on armor. Silly Putty, yes the stuff in the red egg, is the key. It covers details, goes around edges, is reusable, and does not leave a residue.

This scheme was as much an experiment as anything else. It is very loosely based on an early war tank scheme. I am happy with the results, although I would use a lighter grey and possibly do a three color pattern next time.

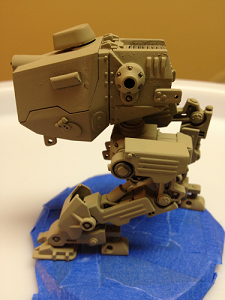
I started by base coating in a khaki. I had done this a week or two earlier and had played a few games with the walker, hence the clean tape on the base.

Once the base coat is dry, break out the silly putty. Break off small pieces, about the size of a large pea, and roll them into snakes and apply as you like.

LW-BaseCoat.png LW-SillyPutty1.png LW-SillyPutty2.png

Once you are happy with the pattern, spray the next color. If you are doing a three color pattern wait for your paint to dry and then apply another layer of silly putty. Be very careful not to mangle the first layer of masking.

LW-GenSpray.png LW-GenUnmask.png

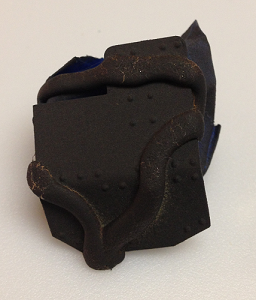
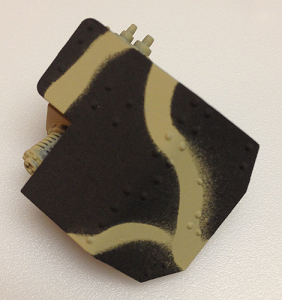
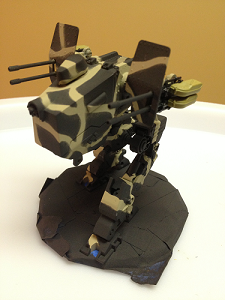
As you can see above, the putty works great as a mask. The one thing to keep in mind is spray angle. How soft of an edge you get will depend on how aggressively you spray. On the above armor I did not get the spray into the front of the curves and ended up with a very soft edge vs the harder edges elsewhere.

I don't mind this personally. Most vehicle camouflage was applied in the field, by the crews, using mops and brooms. These areas can also be covered up as an area of light damage or rust.

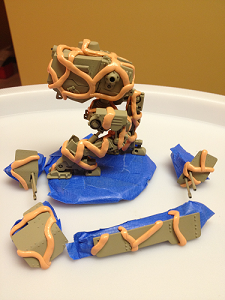
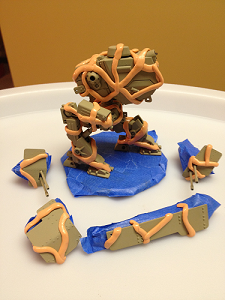
Below is the full, but unfinished model, with both weapon configurations.

LW-5.png LW-4.png

LW-3.png LW-1.png LW-2.png

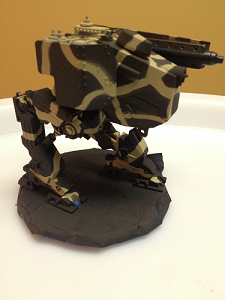
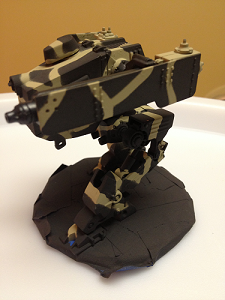
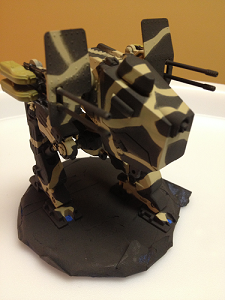
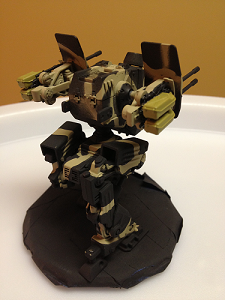
At the above stage there is Dark Grey and Khaki, with the laser and gun bodies picked out with gunmetal and the ammo boxes in dunkelgelb.

I realize the lighting needs some work.

That is a fantastic idea. I'm going to pick some up today and go for it.

That's pretty cool. I'll have to try that.

Thanks for posting.

This is a technique I had known about from my model building days, but never tried.

I have found what seems to be a disconnect between war gamers and model builders. A lot of war gamers don't seem to make the connection that building and painting plastic tanks for a game is the same as building a tank for a display piece, only we are less obsessive about it. The same techniques translate directly to what we are doing and there are vast resources available for armor modeling that are perfectly useful for what we are doing.

I strongly suggest for people to check out model building websites. They have tons of tutorials that cover everything you would ever want to know about painting, weathering, detailing, supplies, tools, and almost anything else you could ever want to know.

-

I went back and did some minor weathering to this guy. Just throwing some muddy brown spots and some scratches on the legs did wonders for toning down the contrast and helping the camouflage pattern look better. I may go back, at some point, and tweak this, but he will stay this way for a while.

ItsUncertainWho said:

This is a technique I had known about from my model building days, but never tried.

I have found what seems to be a disconnect between war gamers and model builders. A lot of war gamers don't seem to make the connection that building and painting plastic tanks for a game is the same as building a tank for a display piece, only we are less obsessive about it. The same techniques translate directly to what we are doing and there are vast resources available for armor modeling that are perfectly useful for what we are doing.

I strongly suggest for people to check out model building websites. They have tons of tutorials that cover everything you would ever want to know about painting, weathering, detailing, supplies, tools, and almost anything else you could ever want to know.

-

I went back and did some minor weathering to this guy. Just throwing some muddy brown spots and some scratches on the legs did wonders for toning down the contrast and helping the camouflage pattern look better. I may go back, at some point, and tweak this, but he will stay this way for a while.

Actually owning my own model building business for a time I have learned to simplify my modeling techinques for game play. This way i can get nice minis on the table in as quick a time as possible.