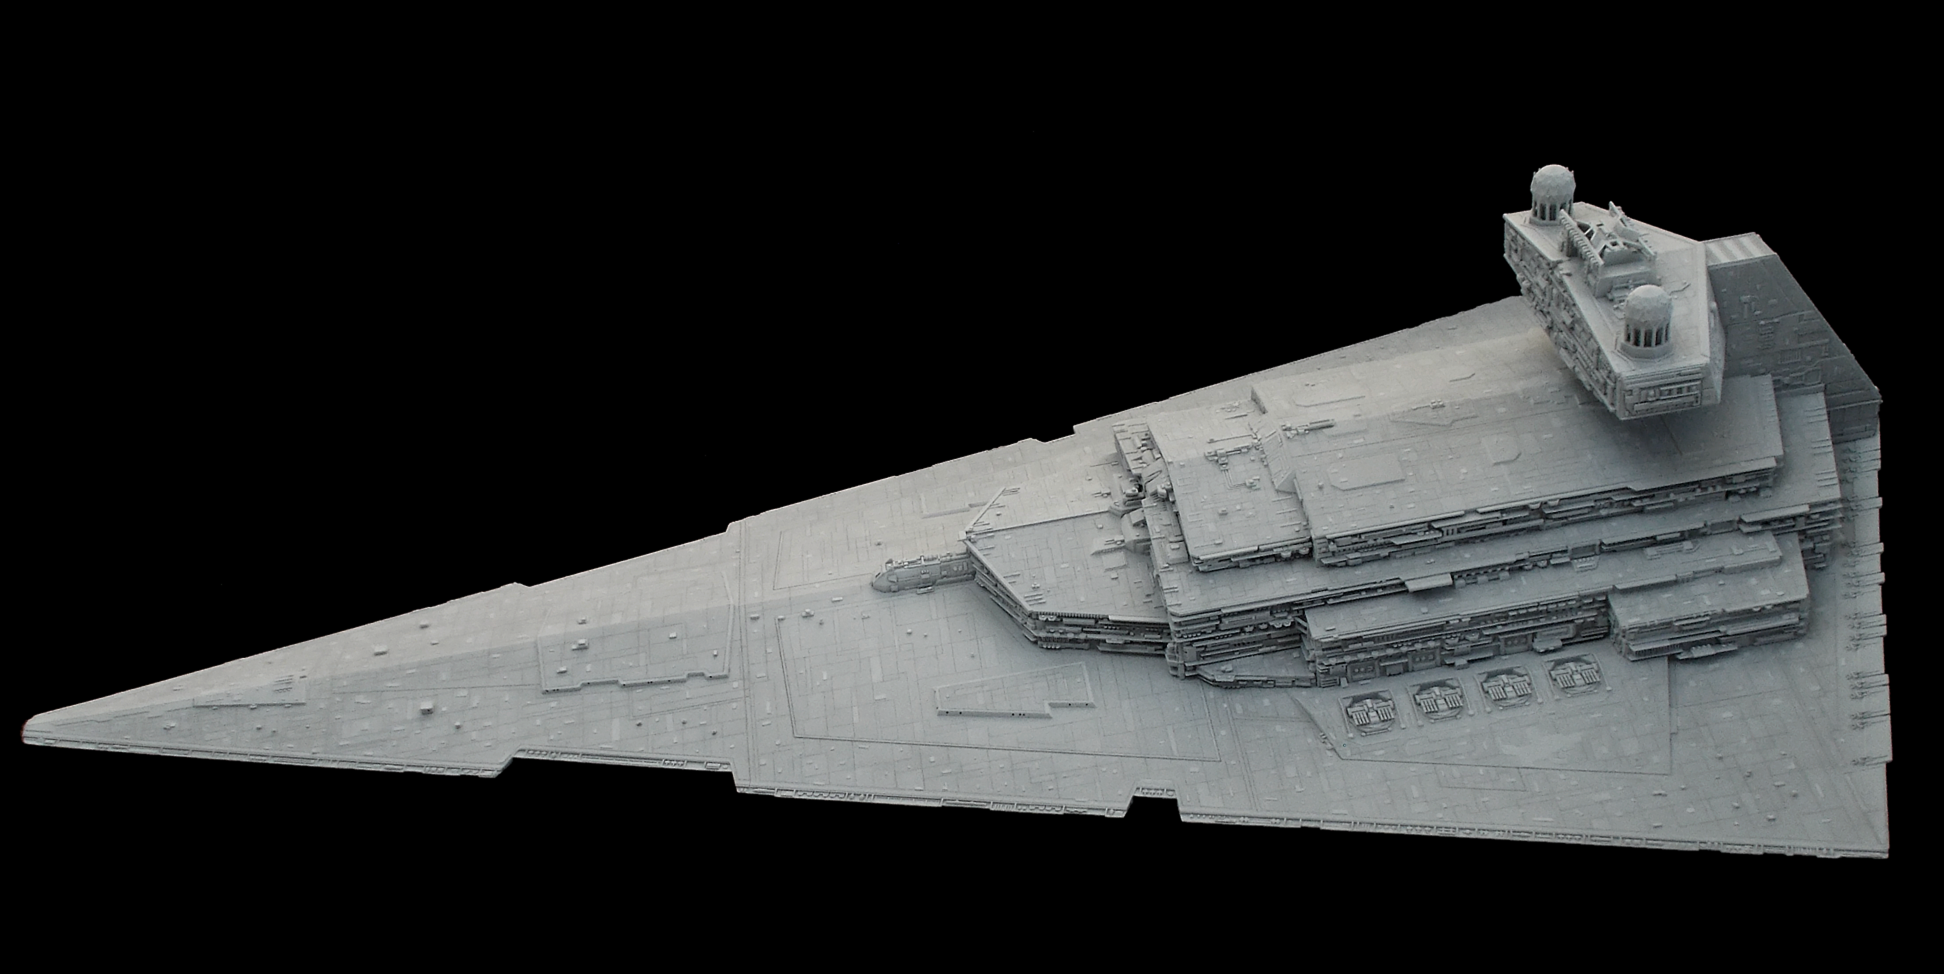
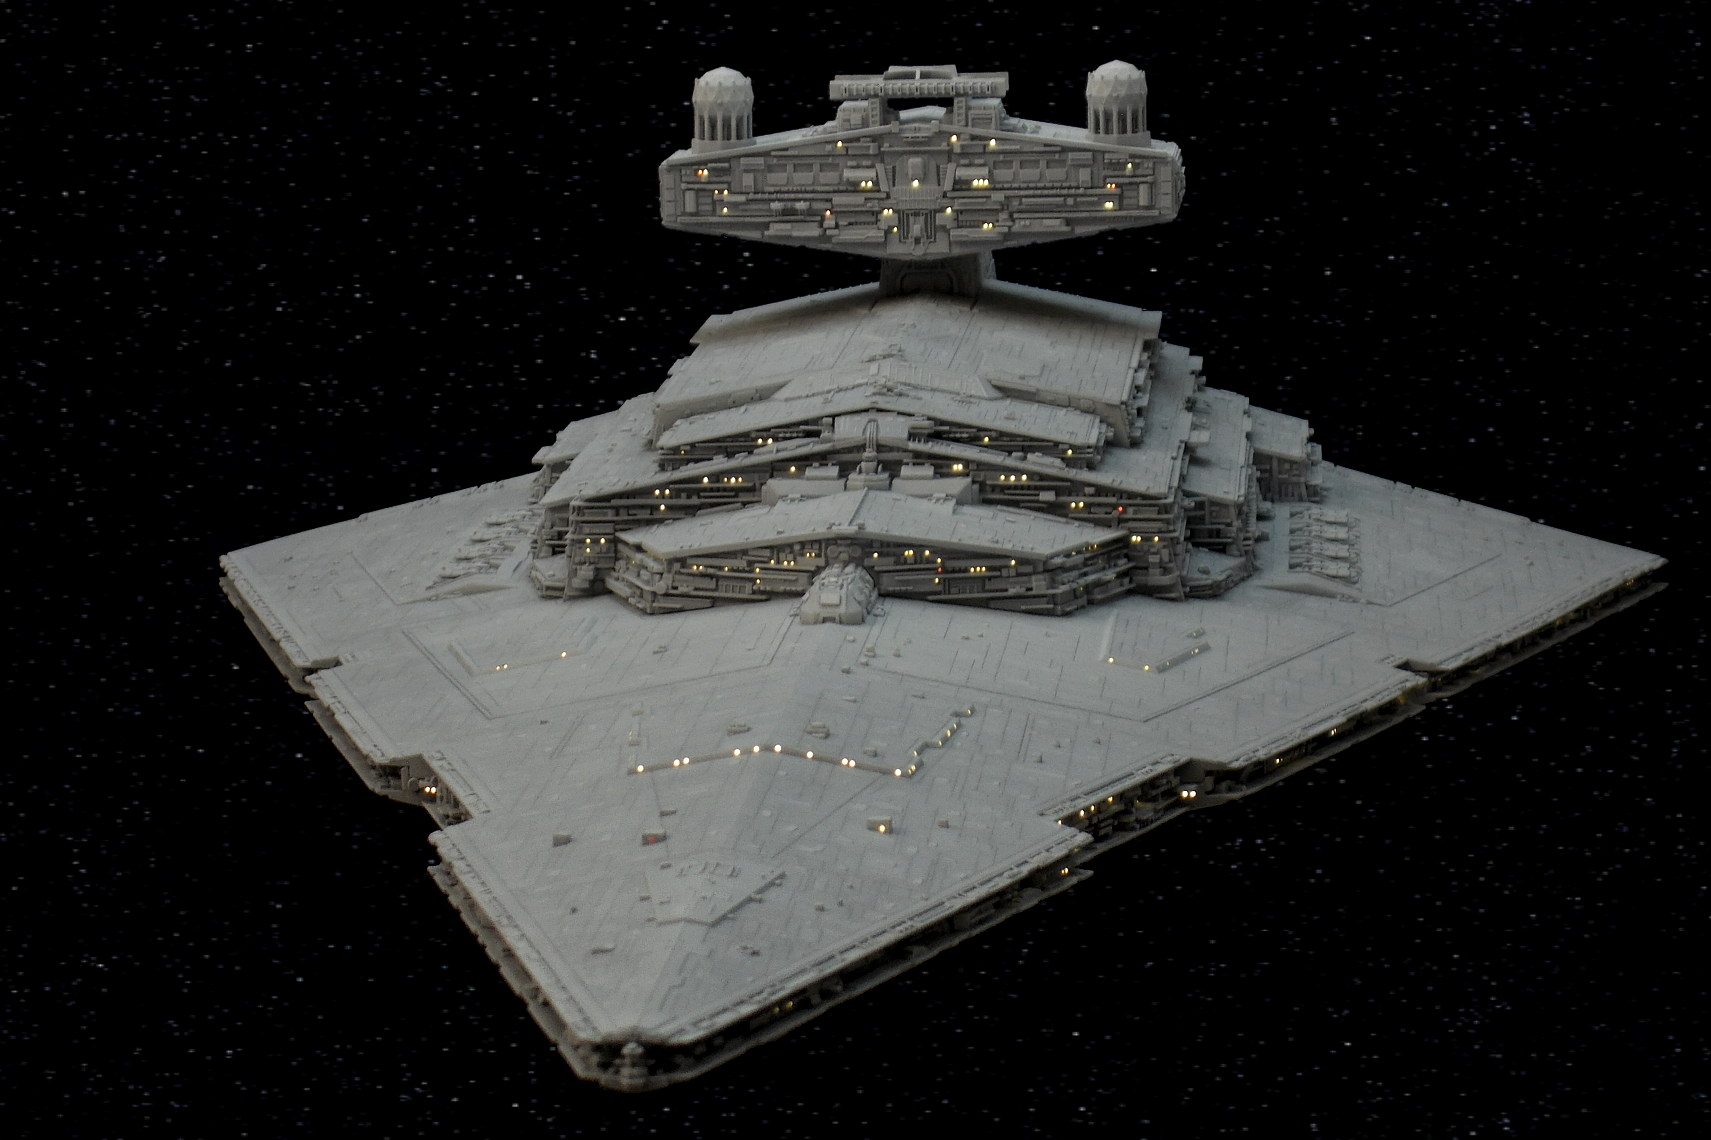
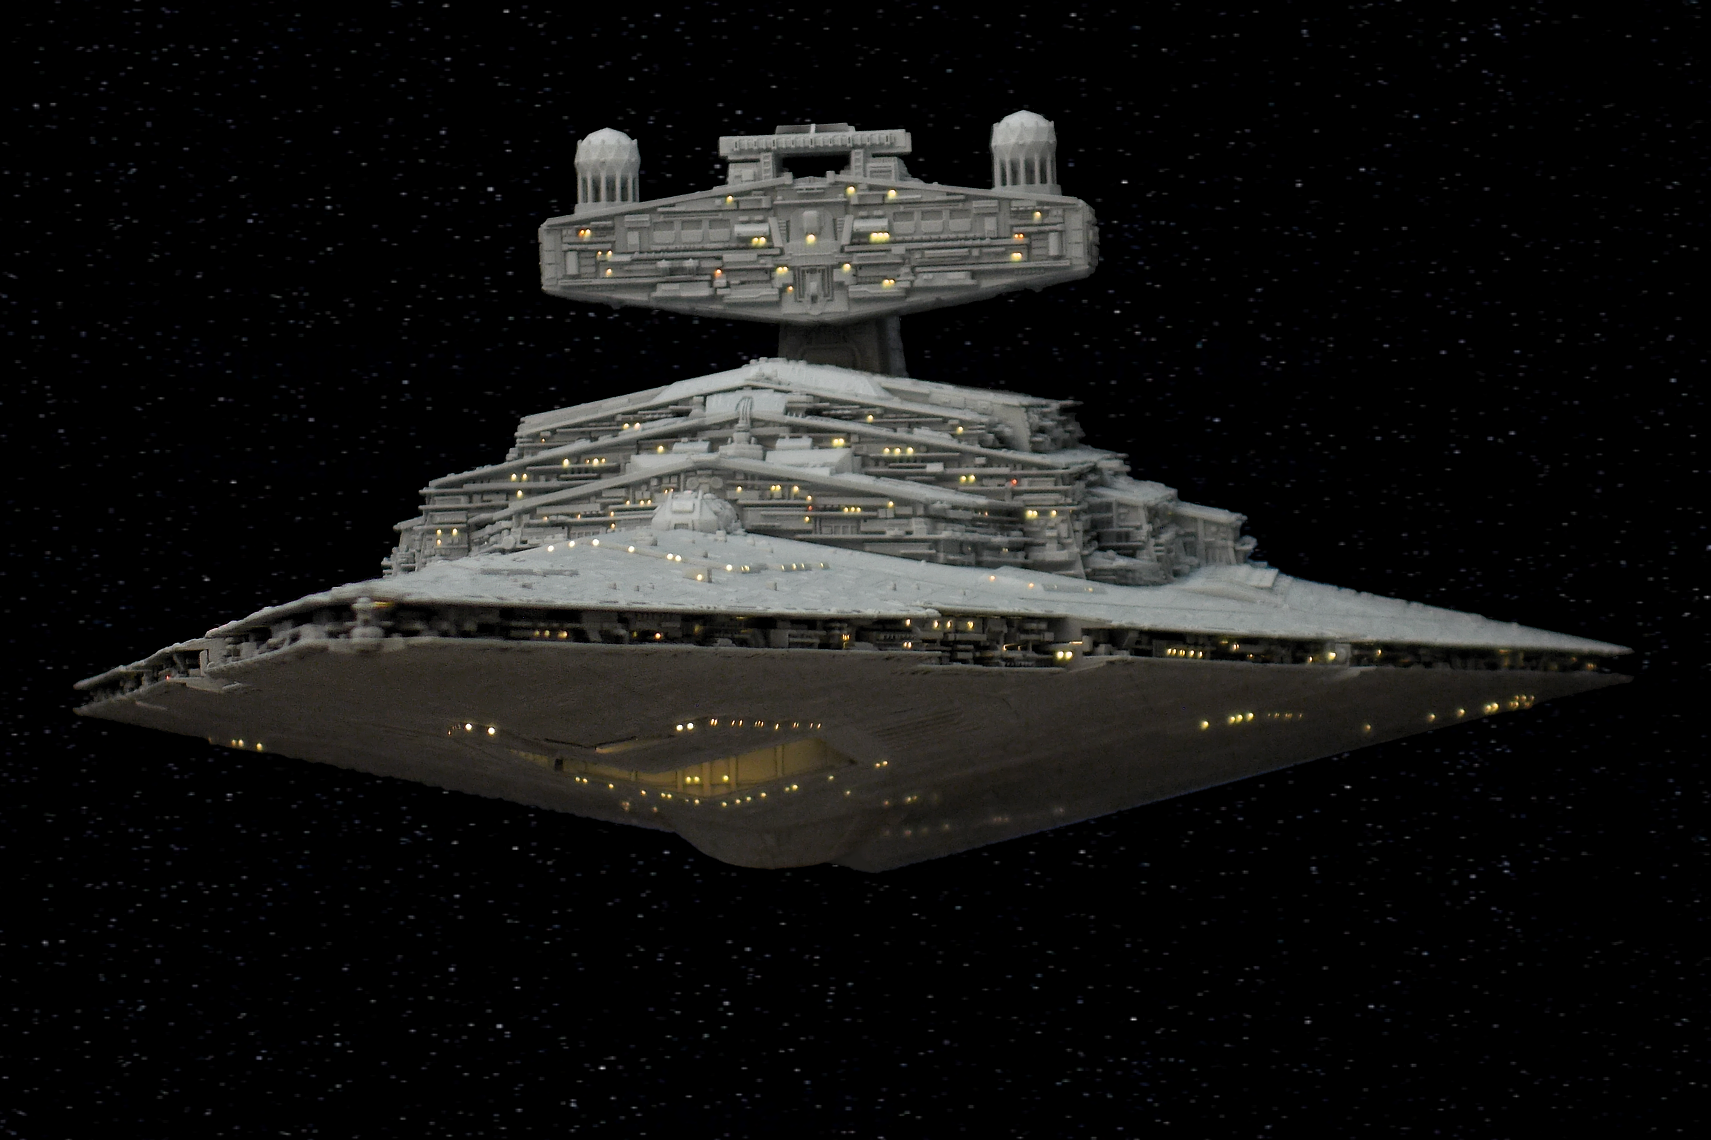
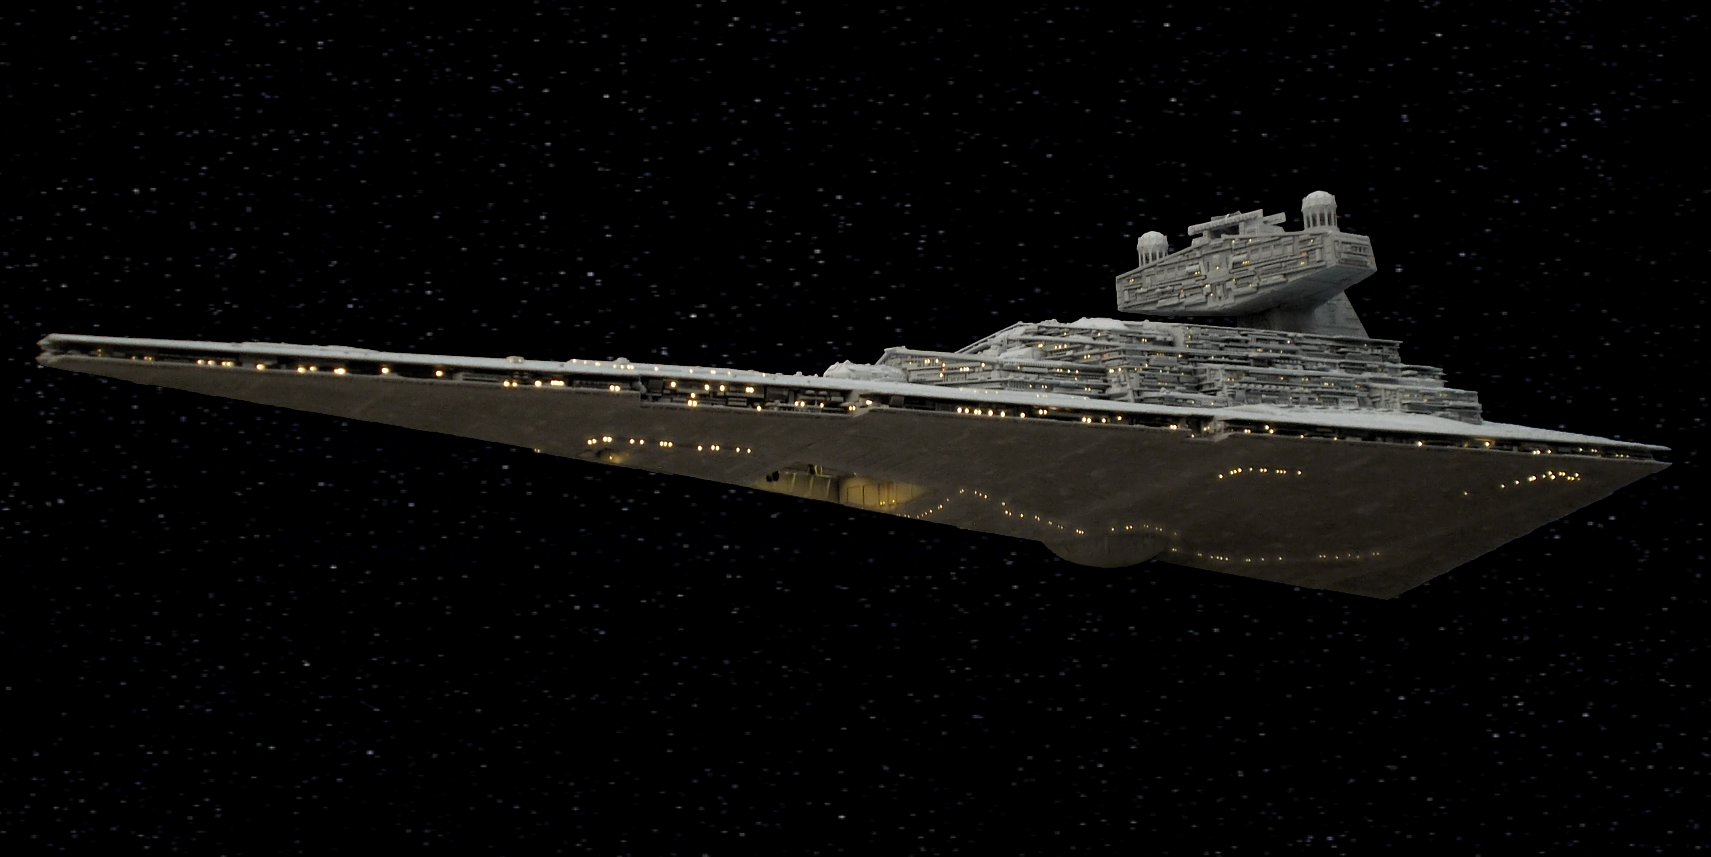
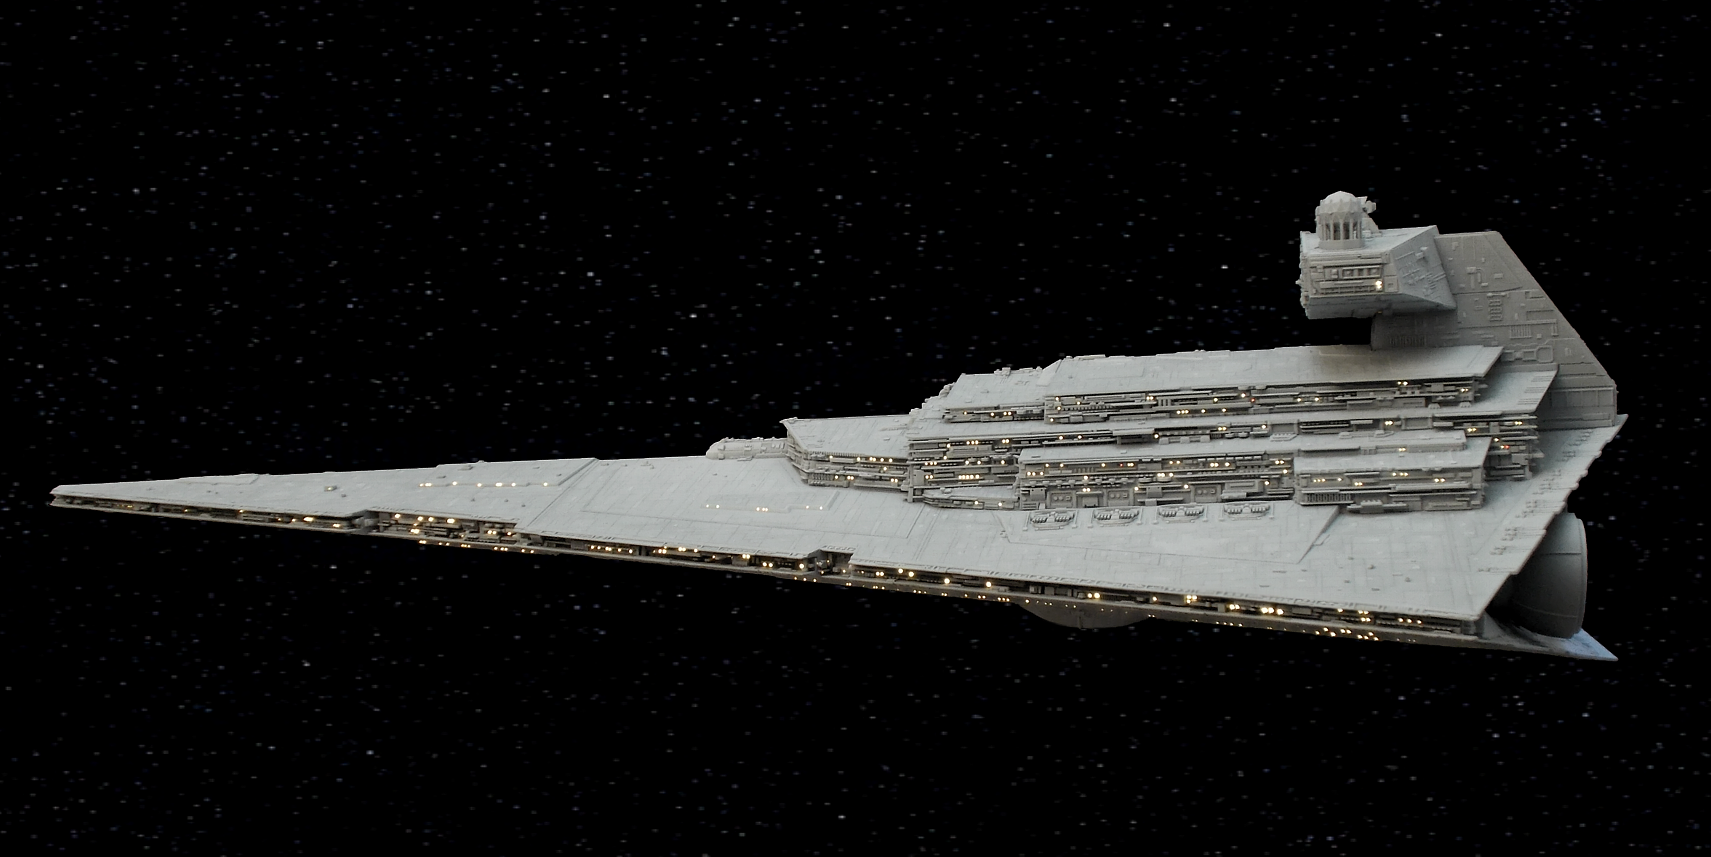
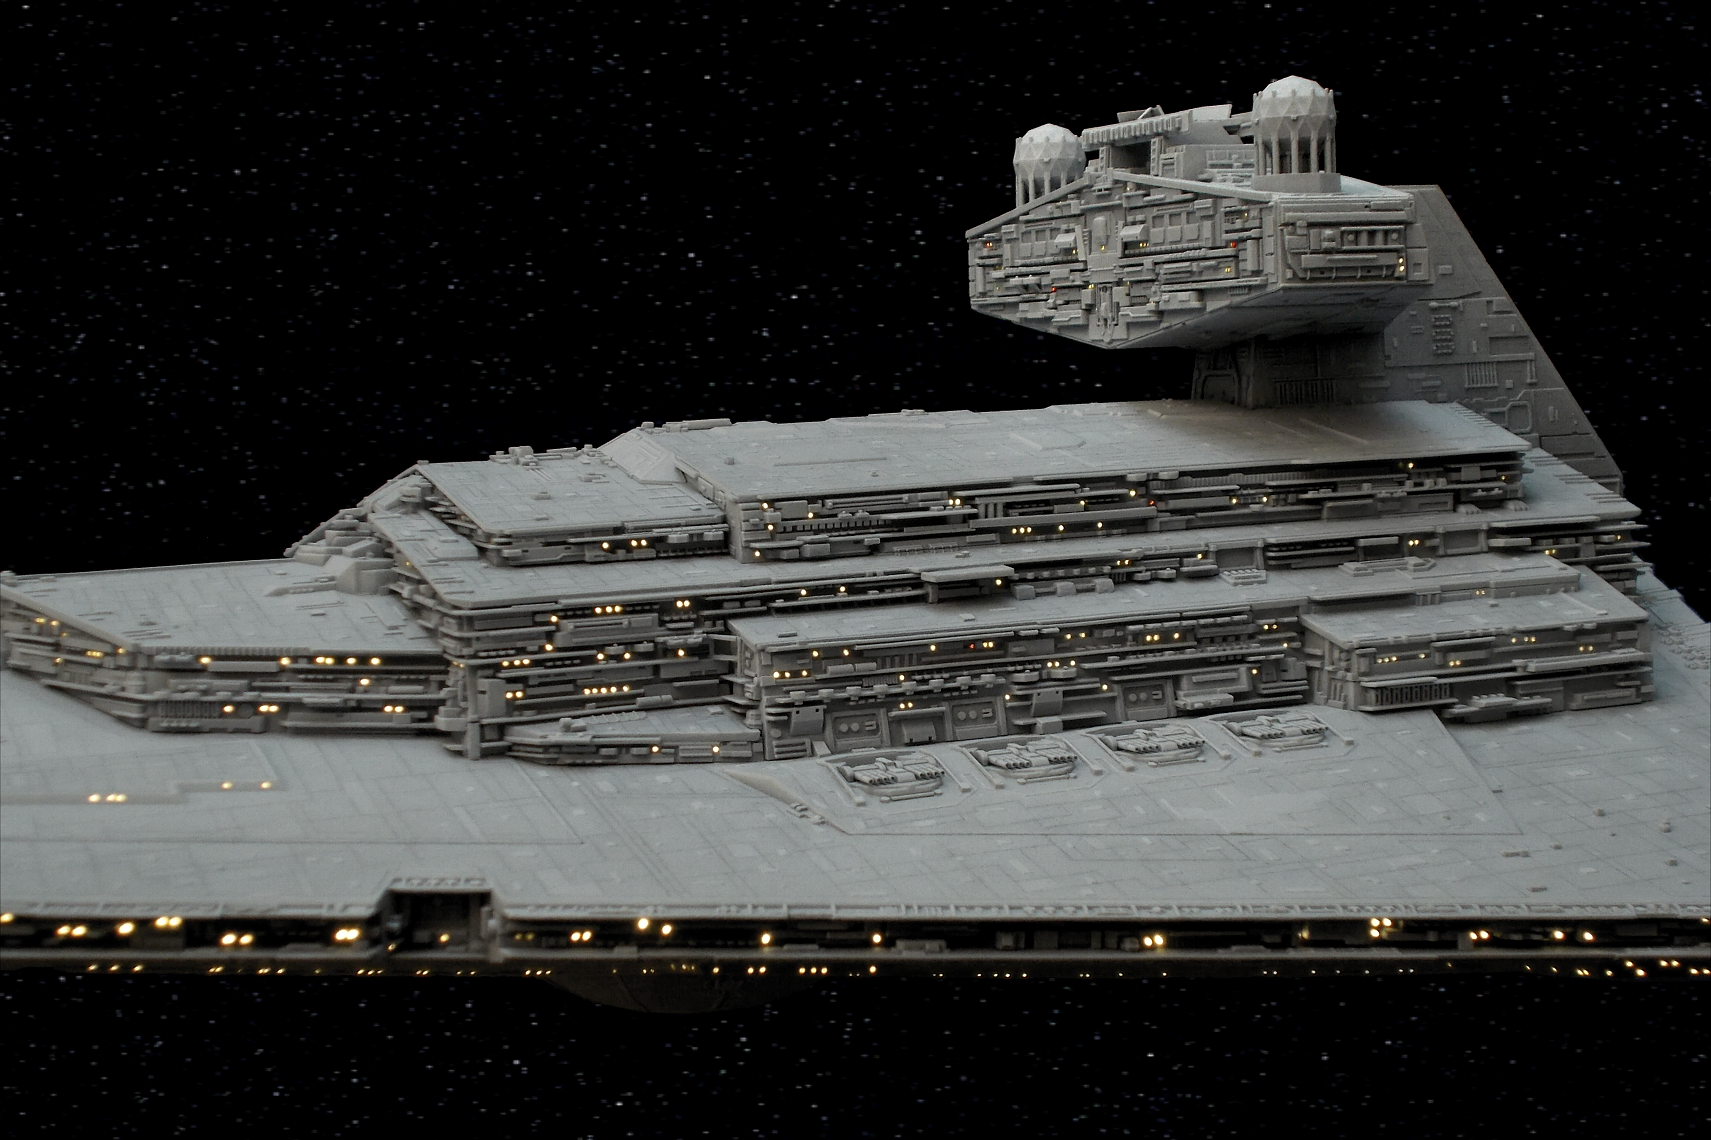
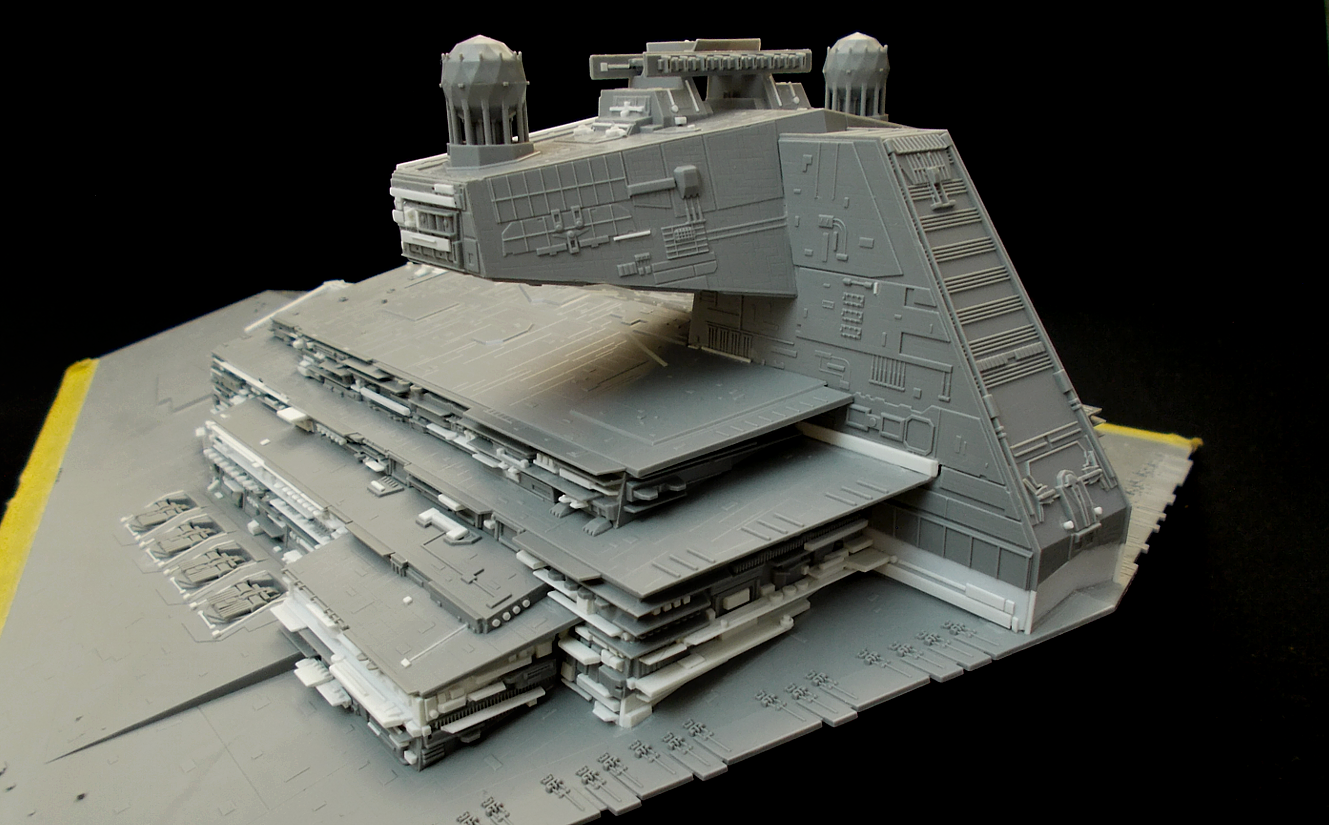
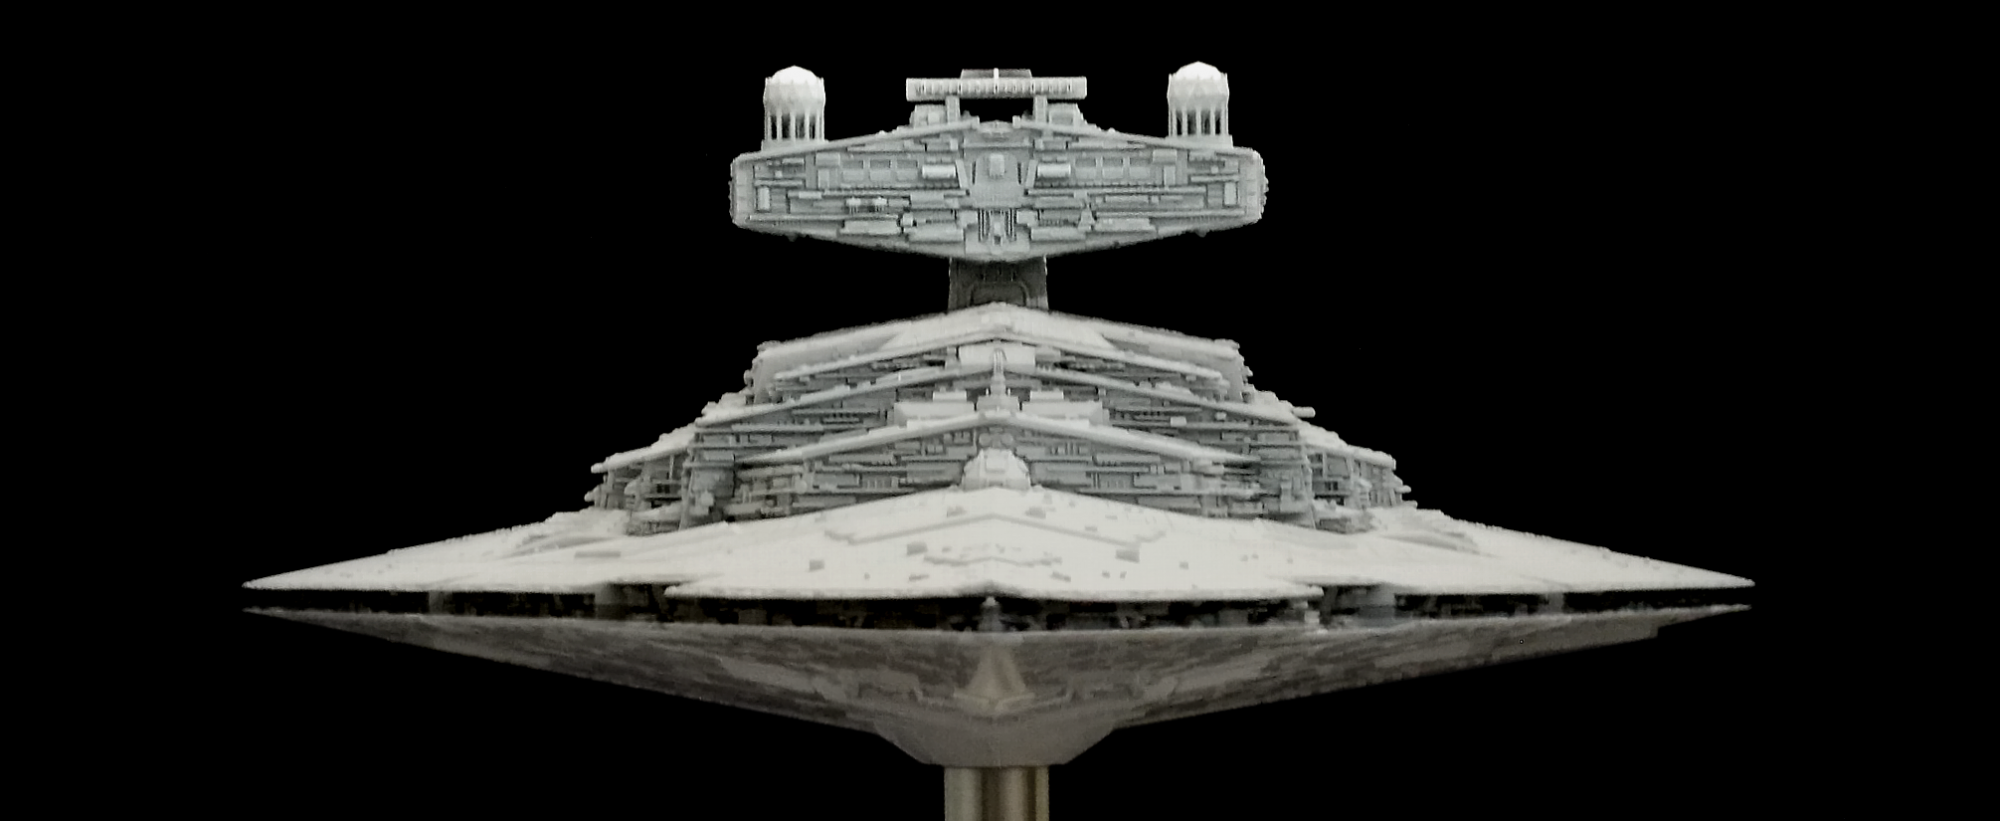
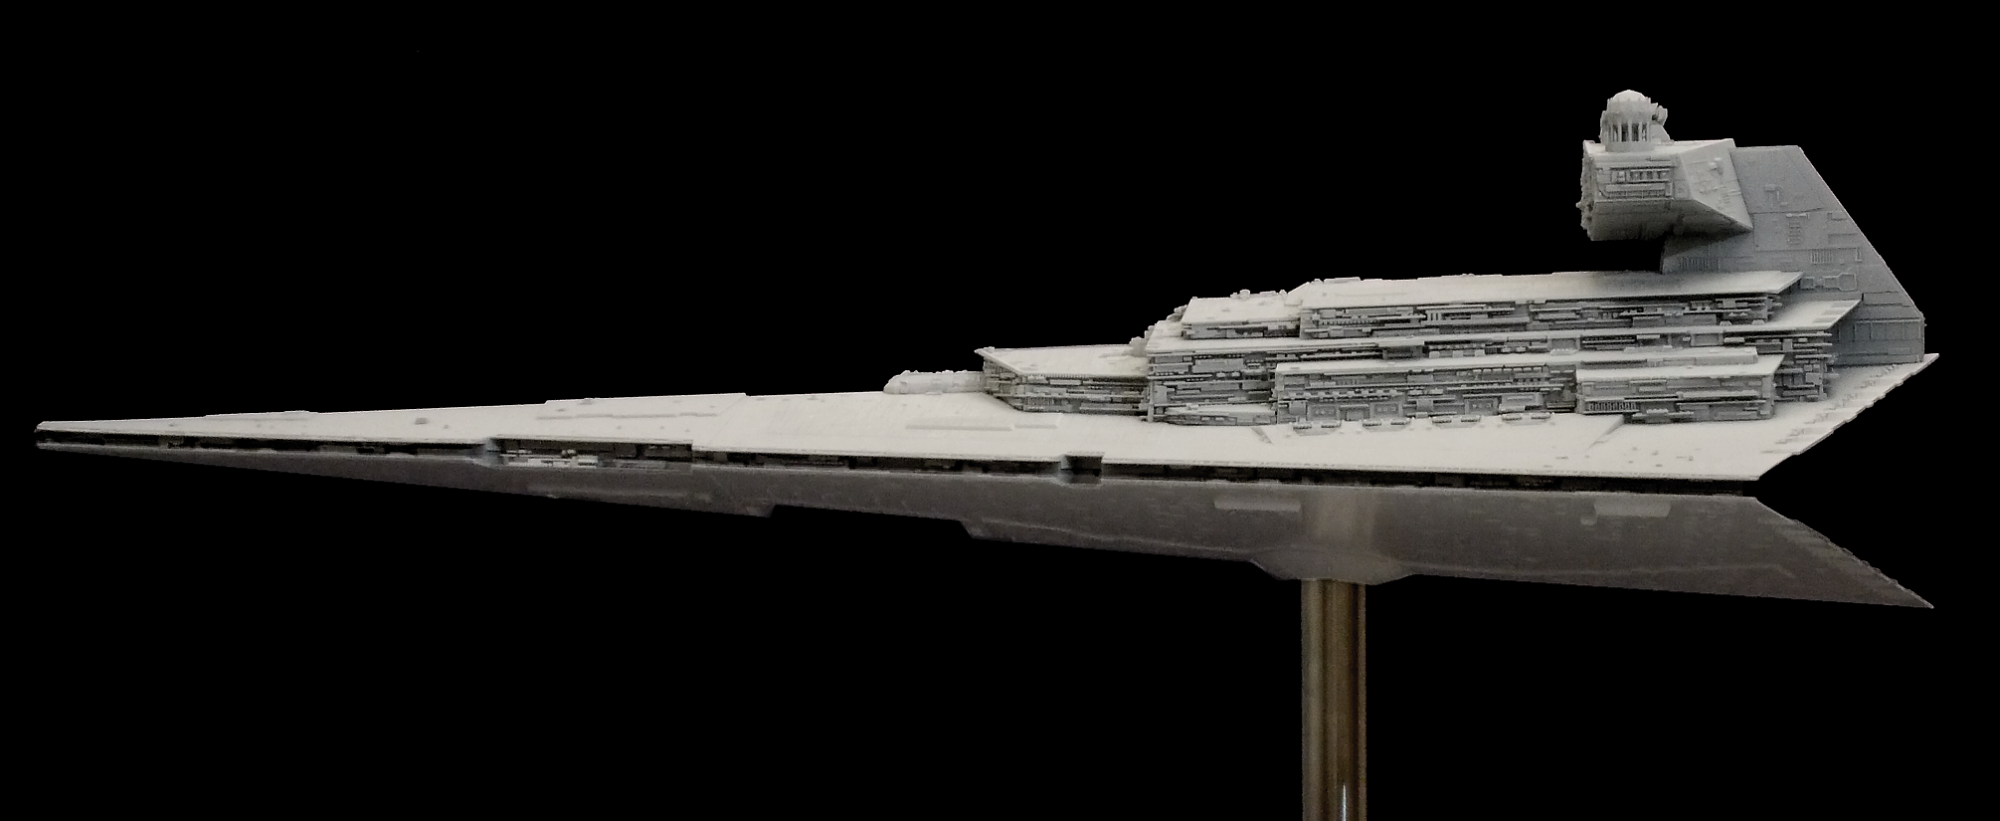
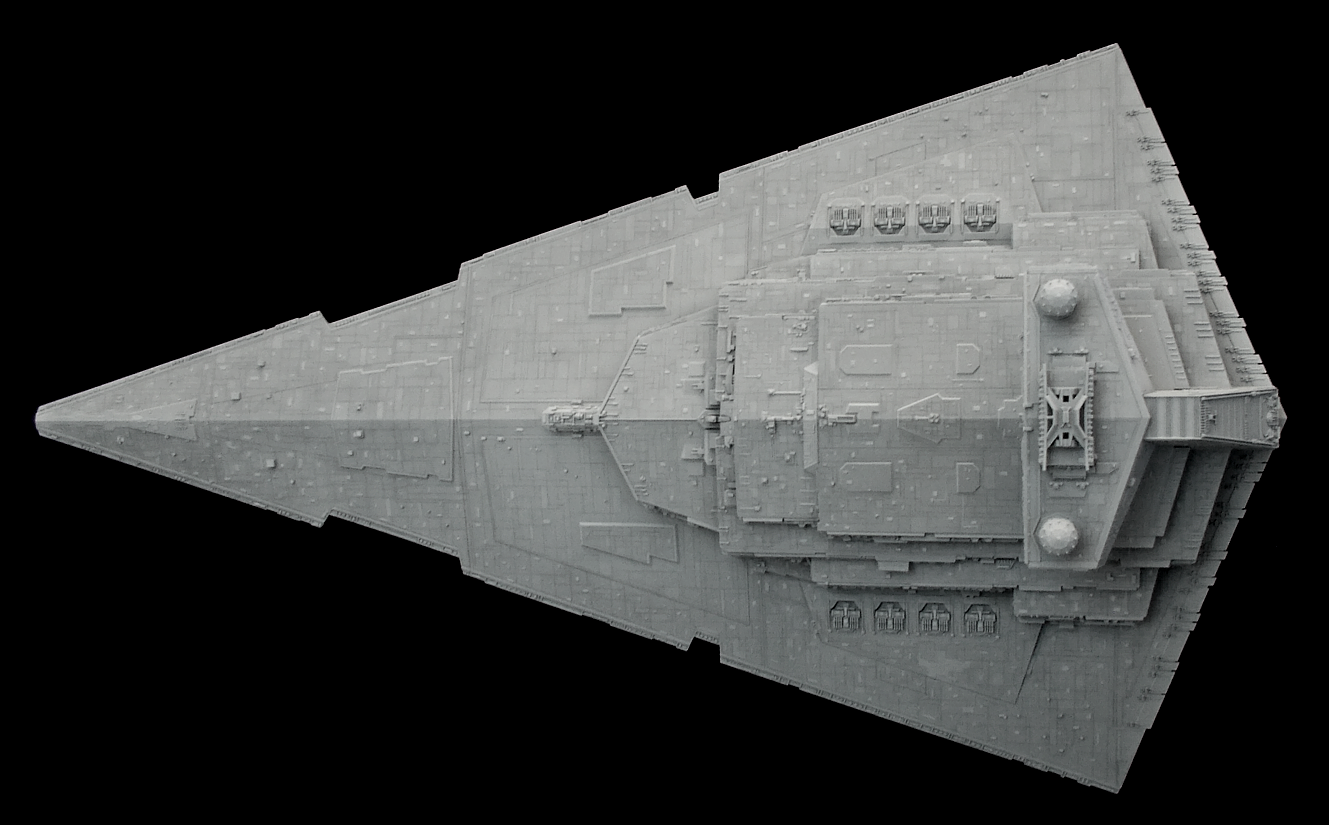
I got myself a 1/2700-scale Star Destroyer kit this april, originally by Zvesda and now distributed by Revell. The kit is 60 cm long and big enough for lighting via fiberoptics. The hull has the correct angles and the footprint of the superstructure is correctly proportioned. The kit, however, has some inaccuracies and loads of missing details, so it provided a nice challenge for some extensive scratch-building to ammend those issues and make it as accurate to the 8 foot studio model as possible - both in proportions and detail.
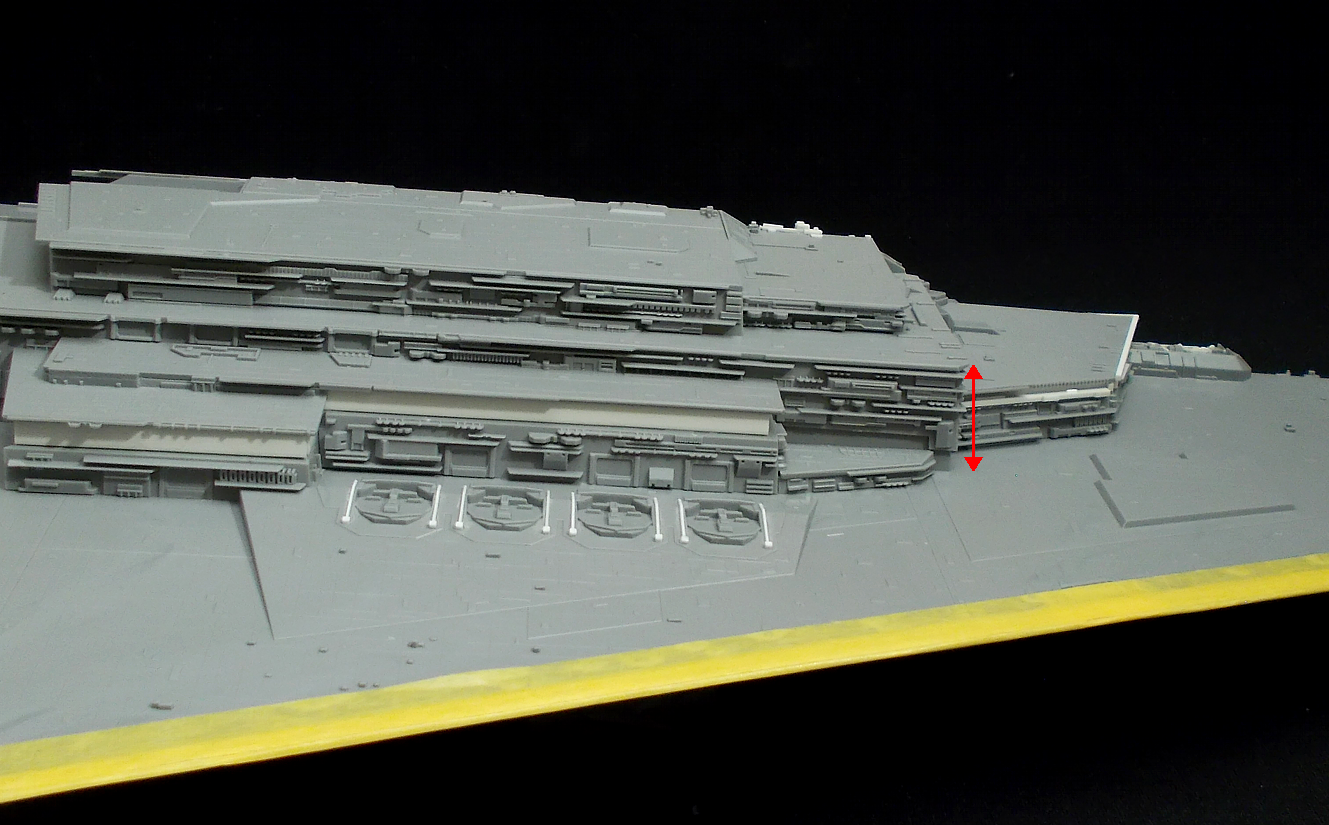
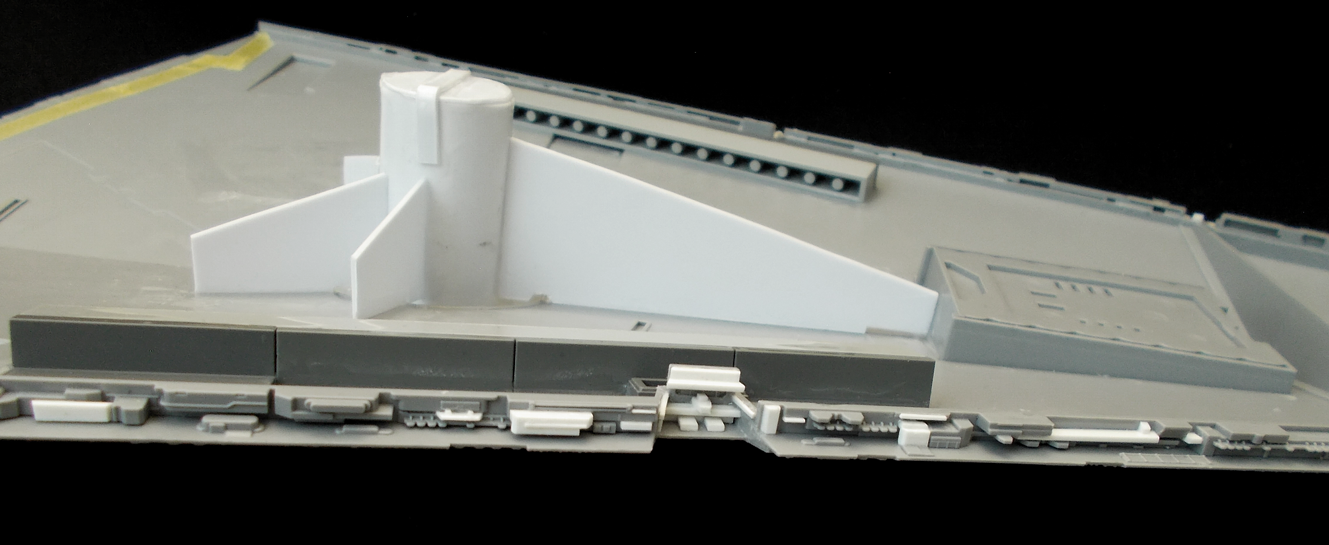
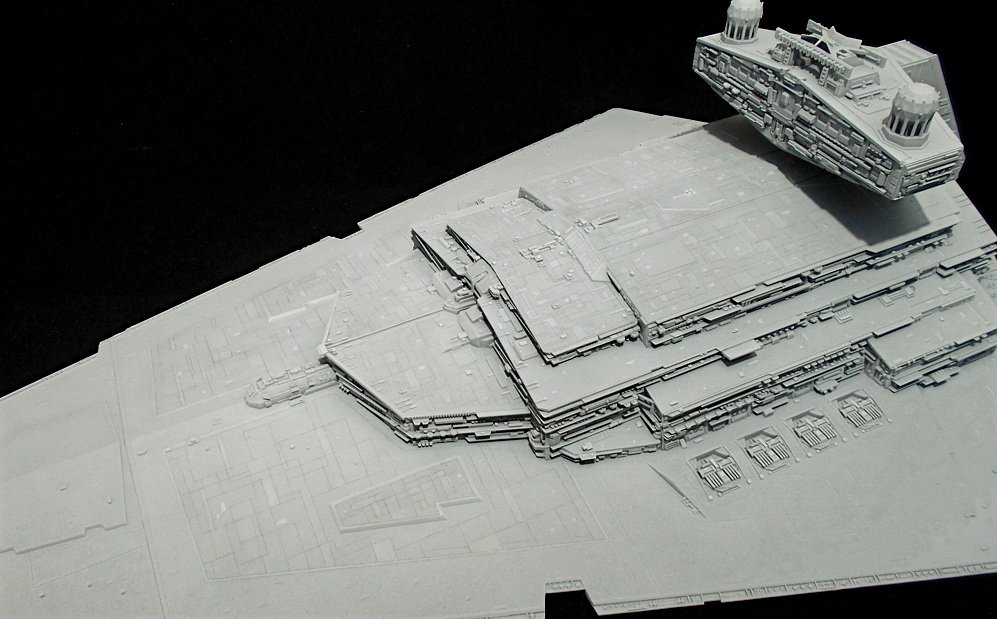
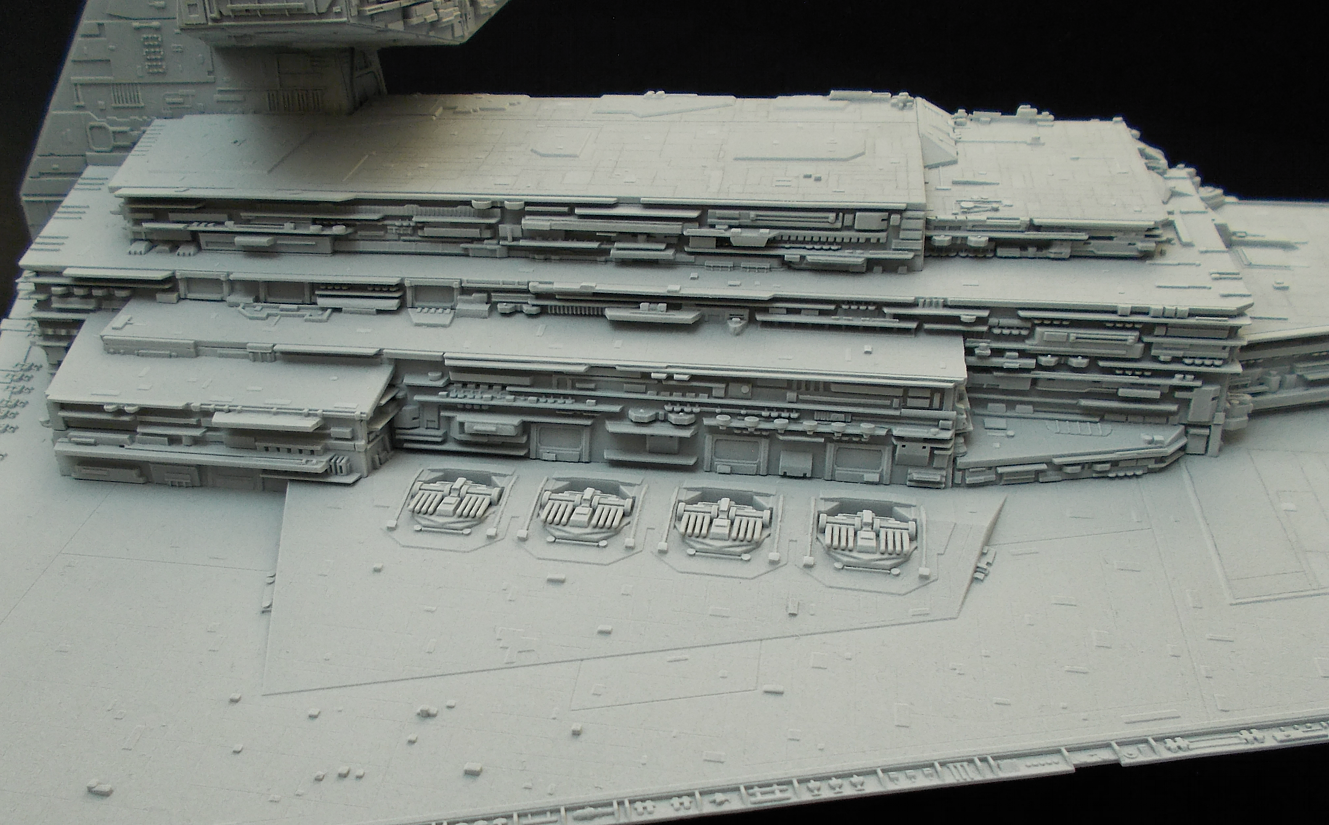
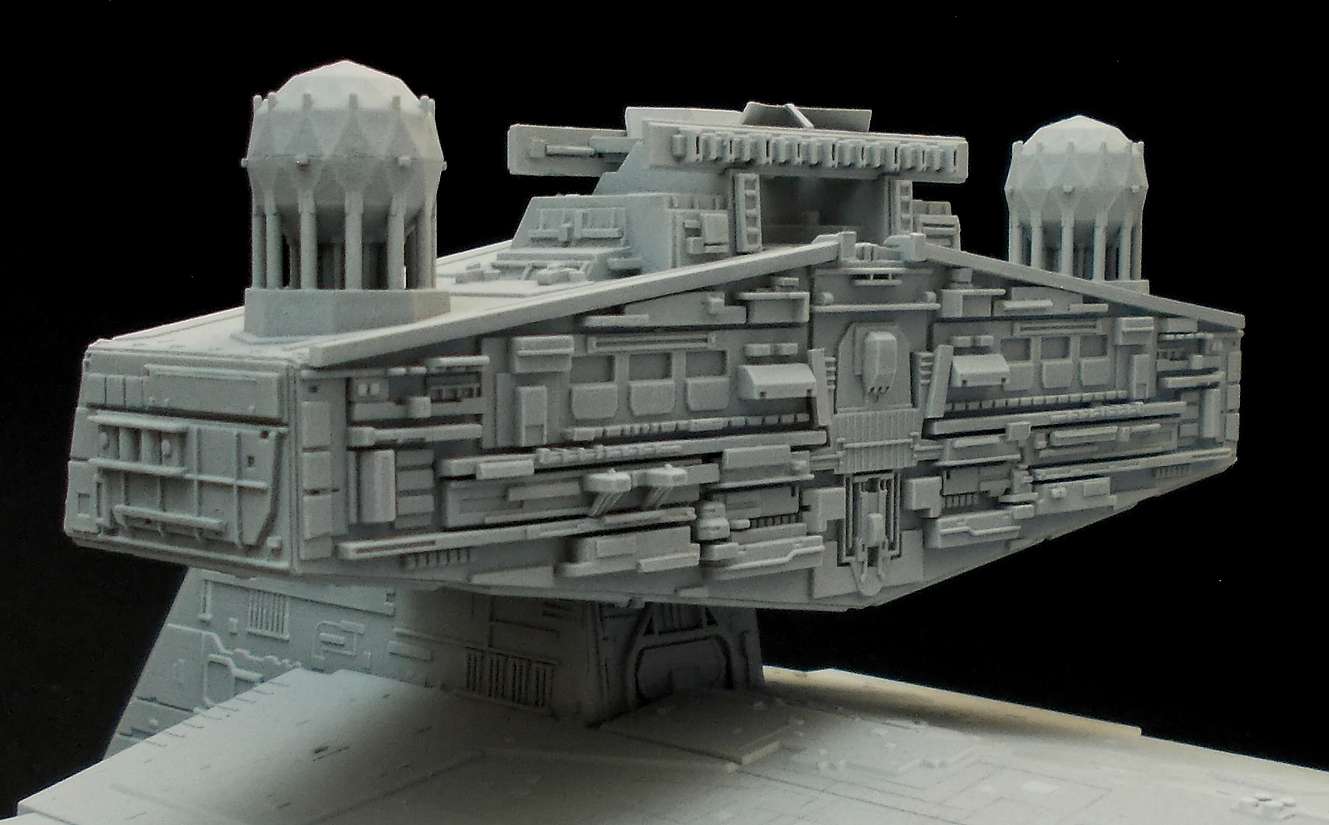
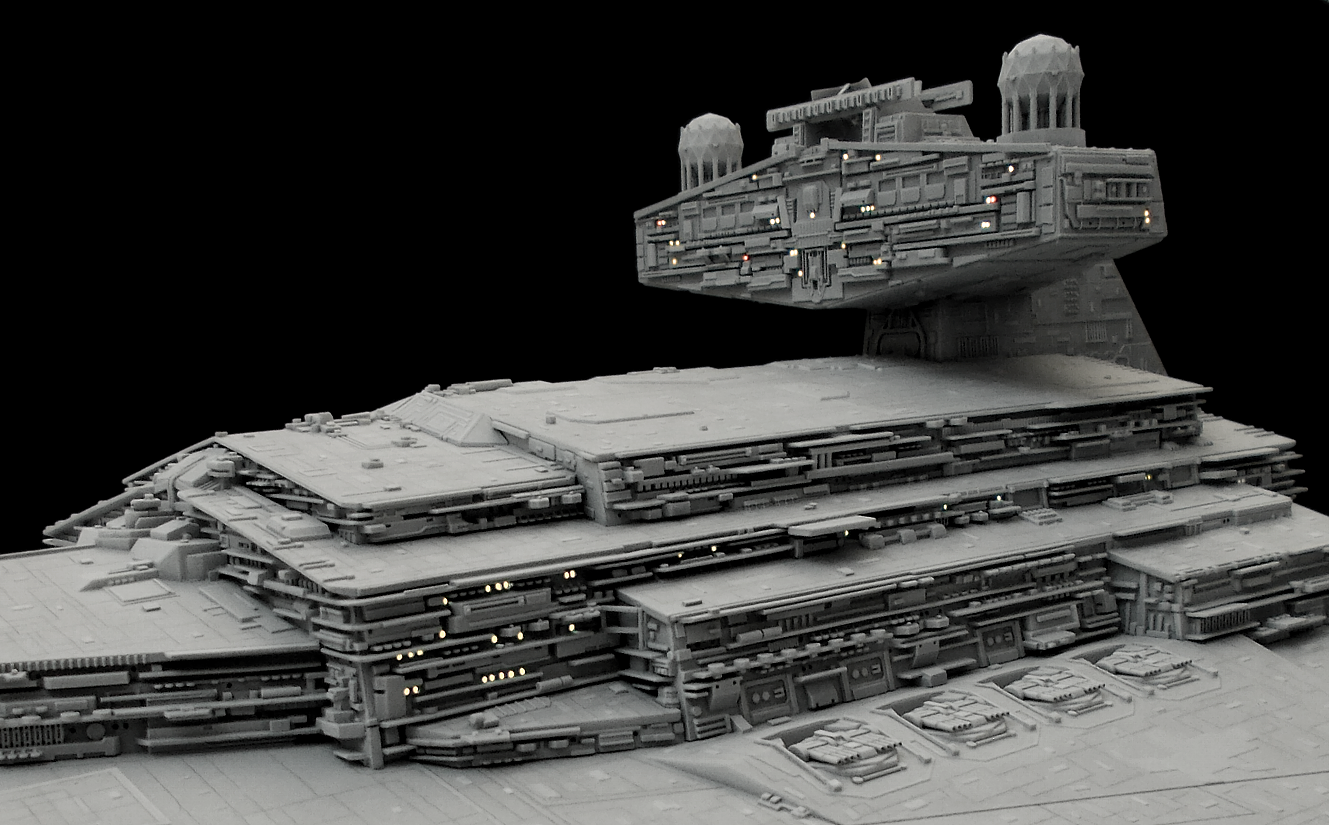
First of all, I heightened the lower parts of the superstructure to give it accurate proportions. I use plastic card for all my modifications, which will become insanely extensive soon... ![]() At that step, I also corrected the angle of the neck and bridge-section. These corrections created new surfaces on the sides which needed to be filled with detail, and I tackled this aspect when I went in and added loads of details I meticulously scratch-built to recreate the detail on the filming model. Here are some images of these steps:
At that step, I also corrected the angle of the neck and bridge-section. These corrections created new surfaces on the sides which needed to be filled with detail, and I tackled this aspect when I went in and added loads of details I meticulously scratch-built to recreate the detail on the filming model. Here are some images of these steps:
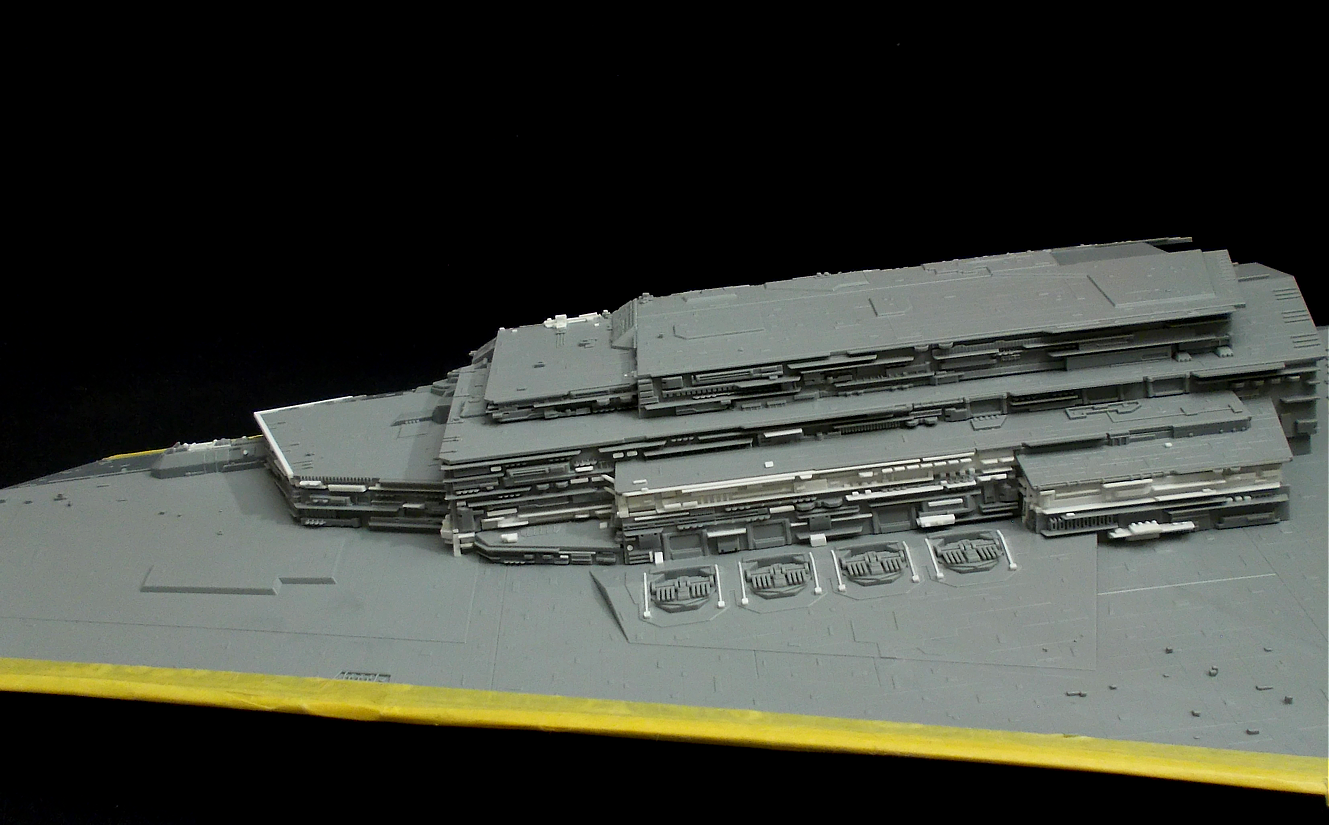
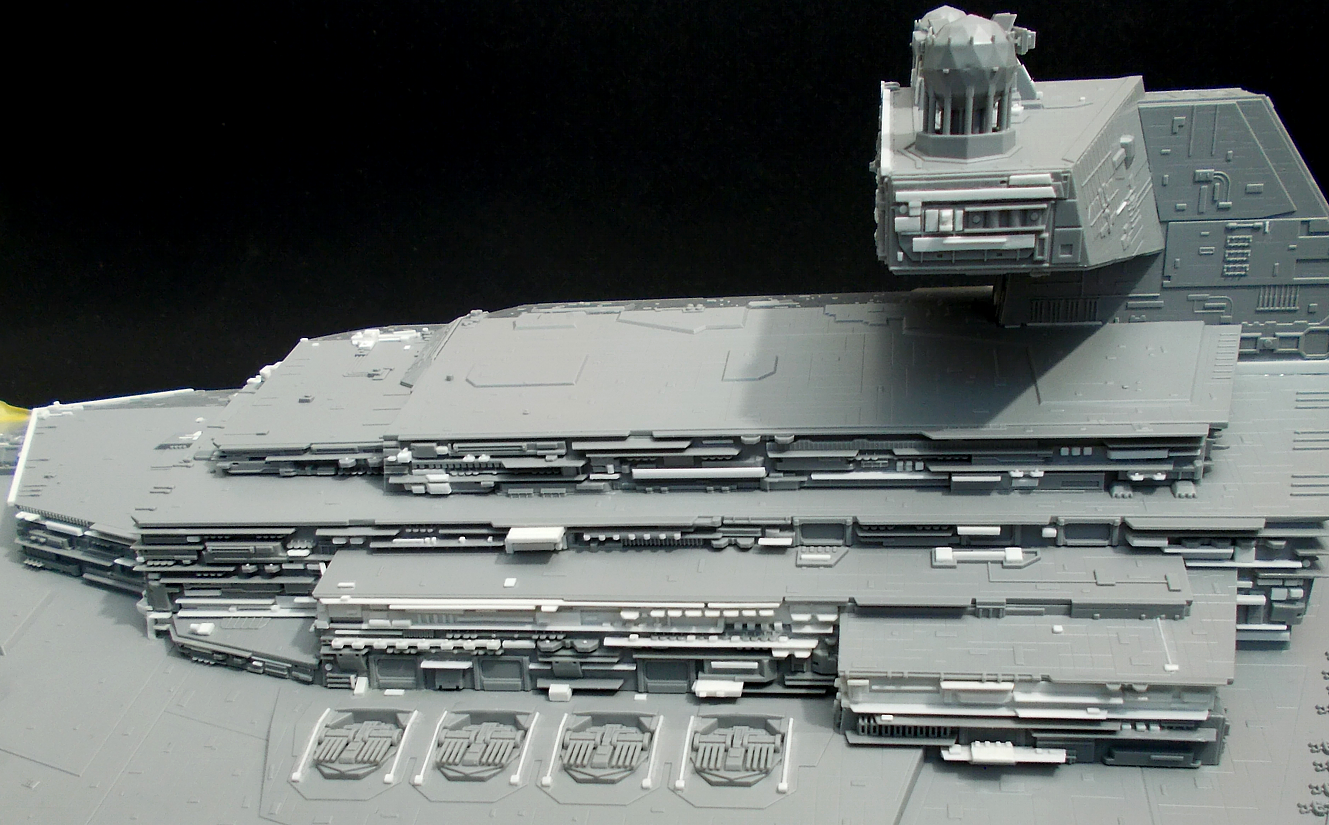
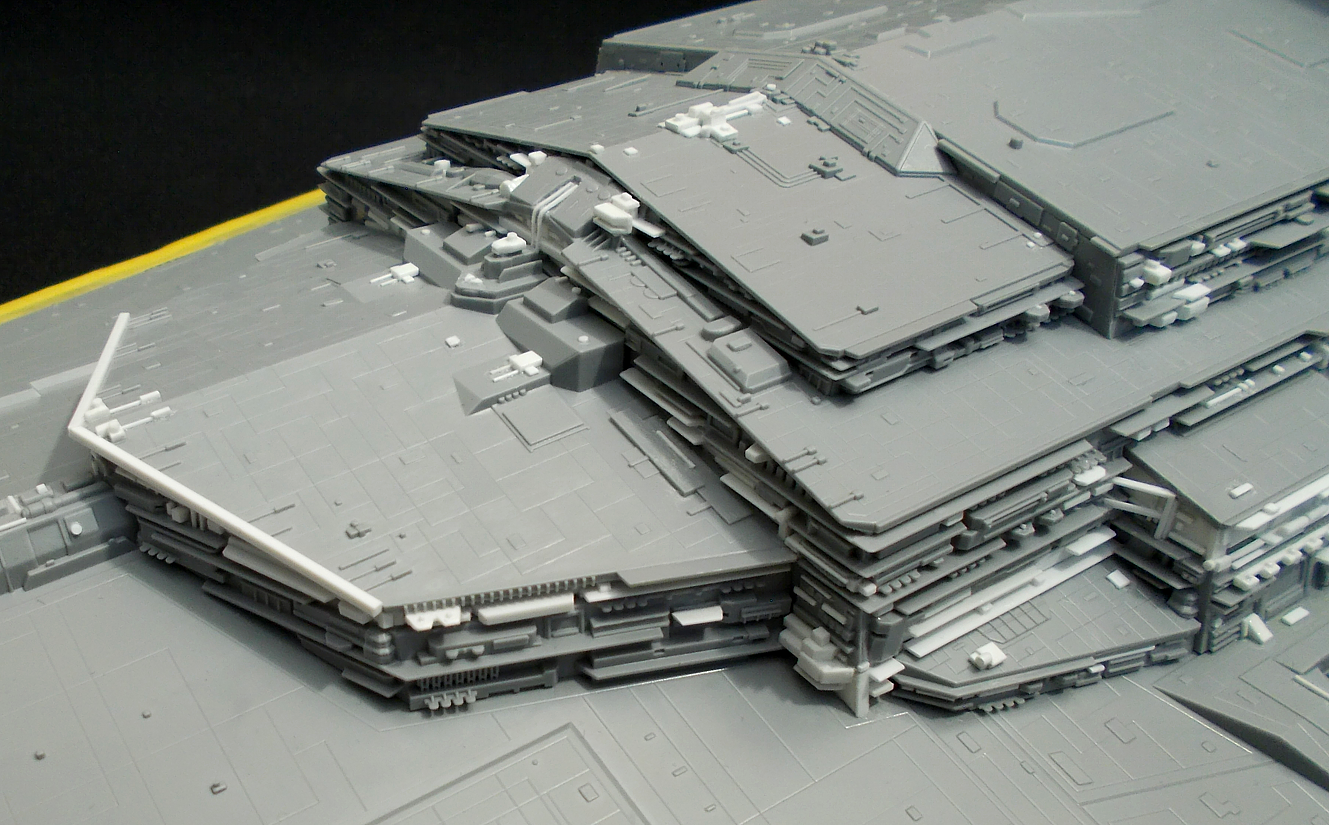
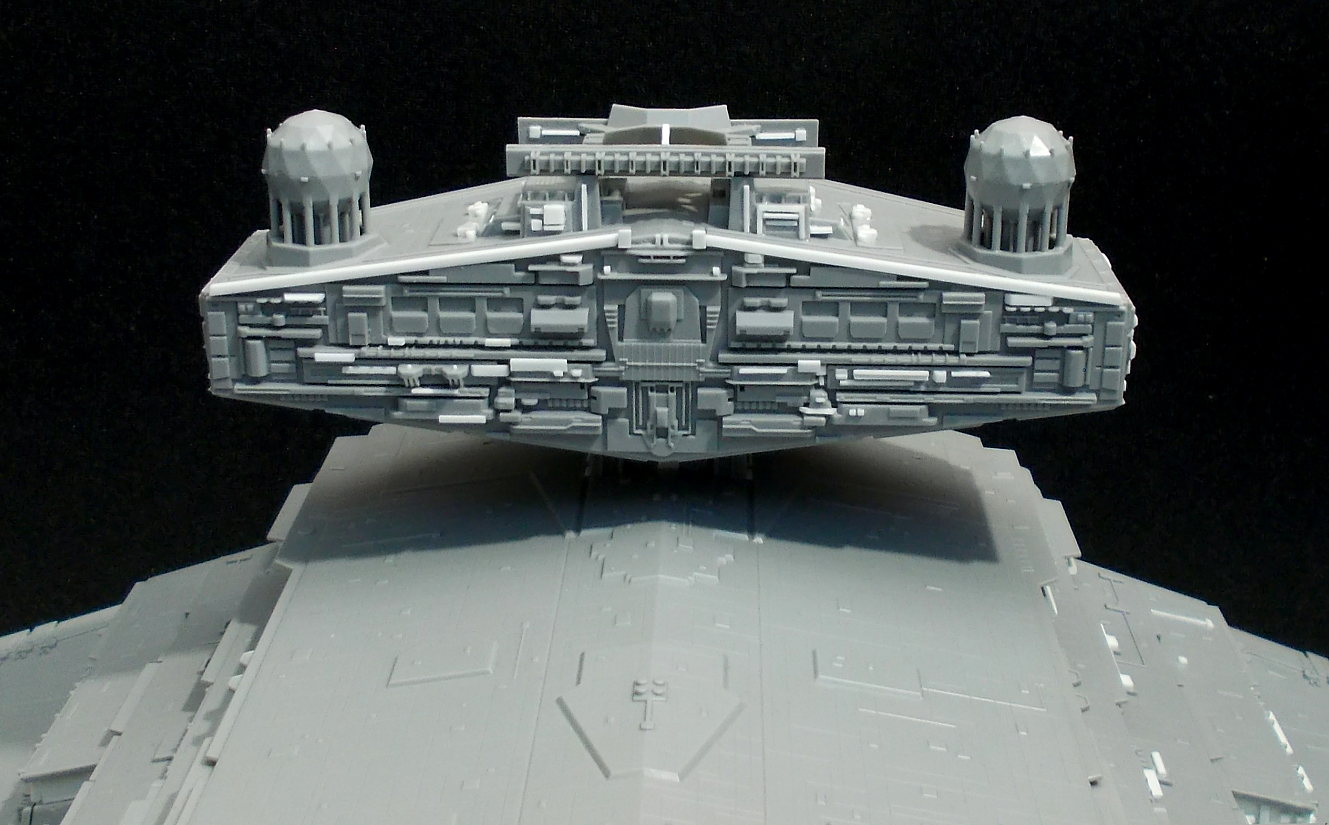
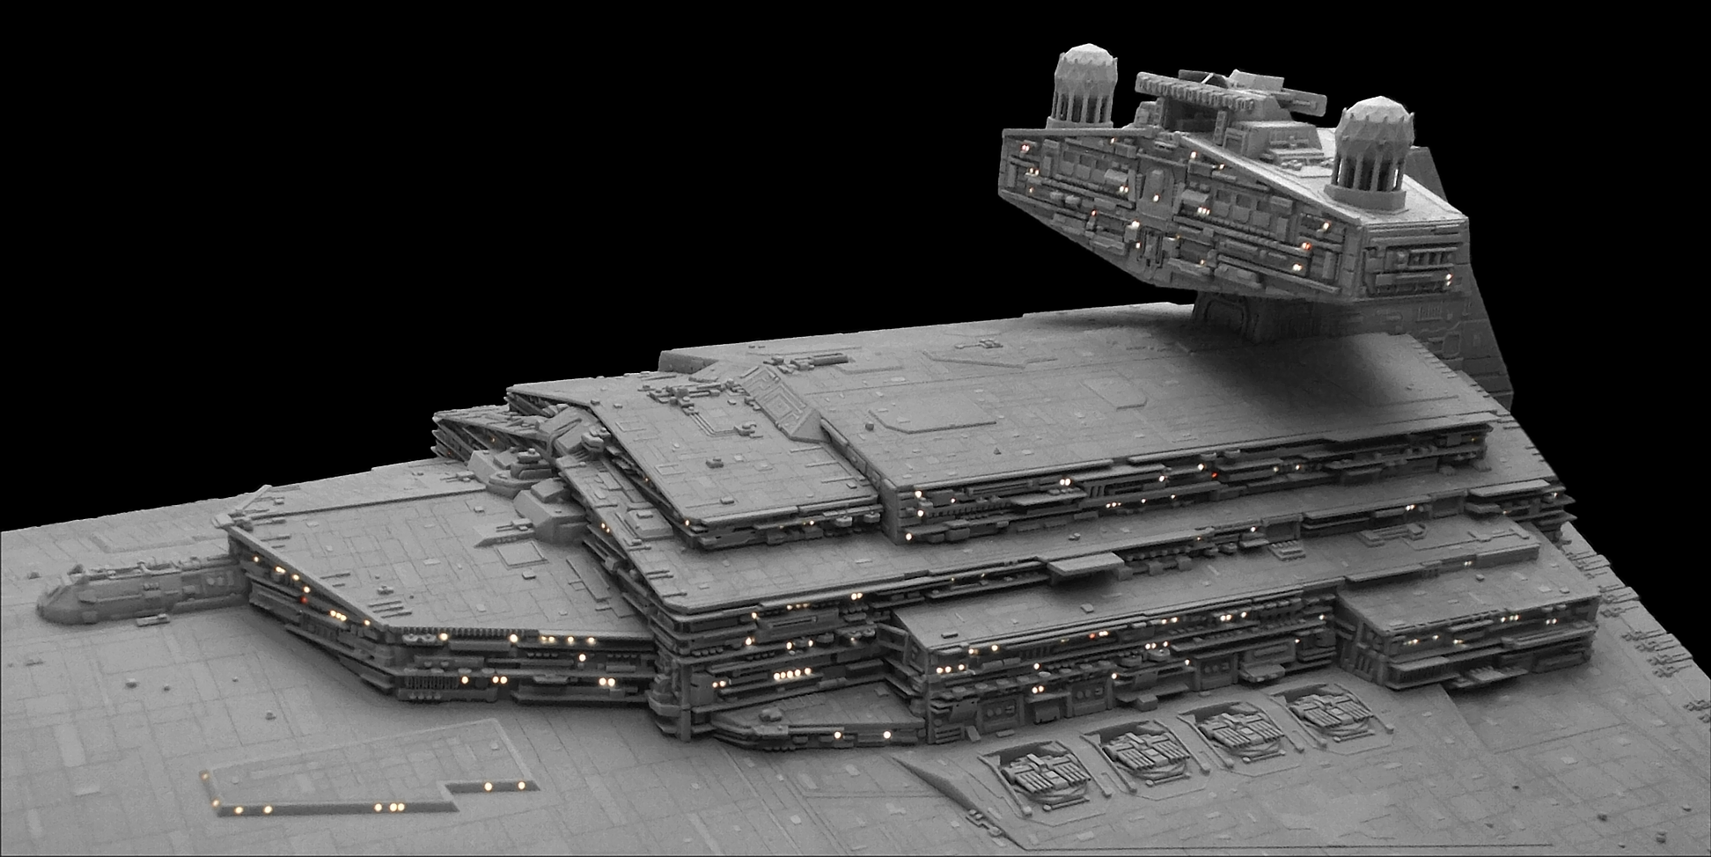
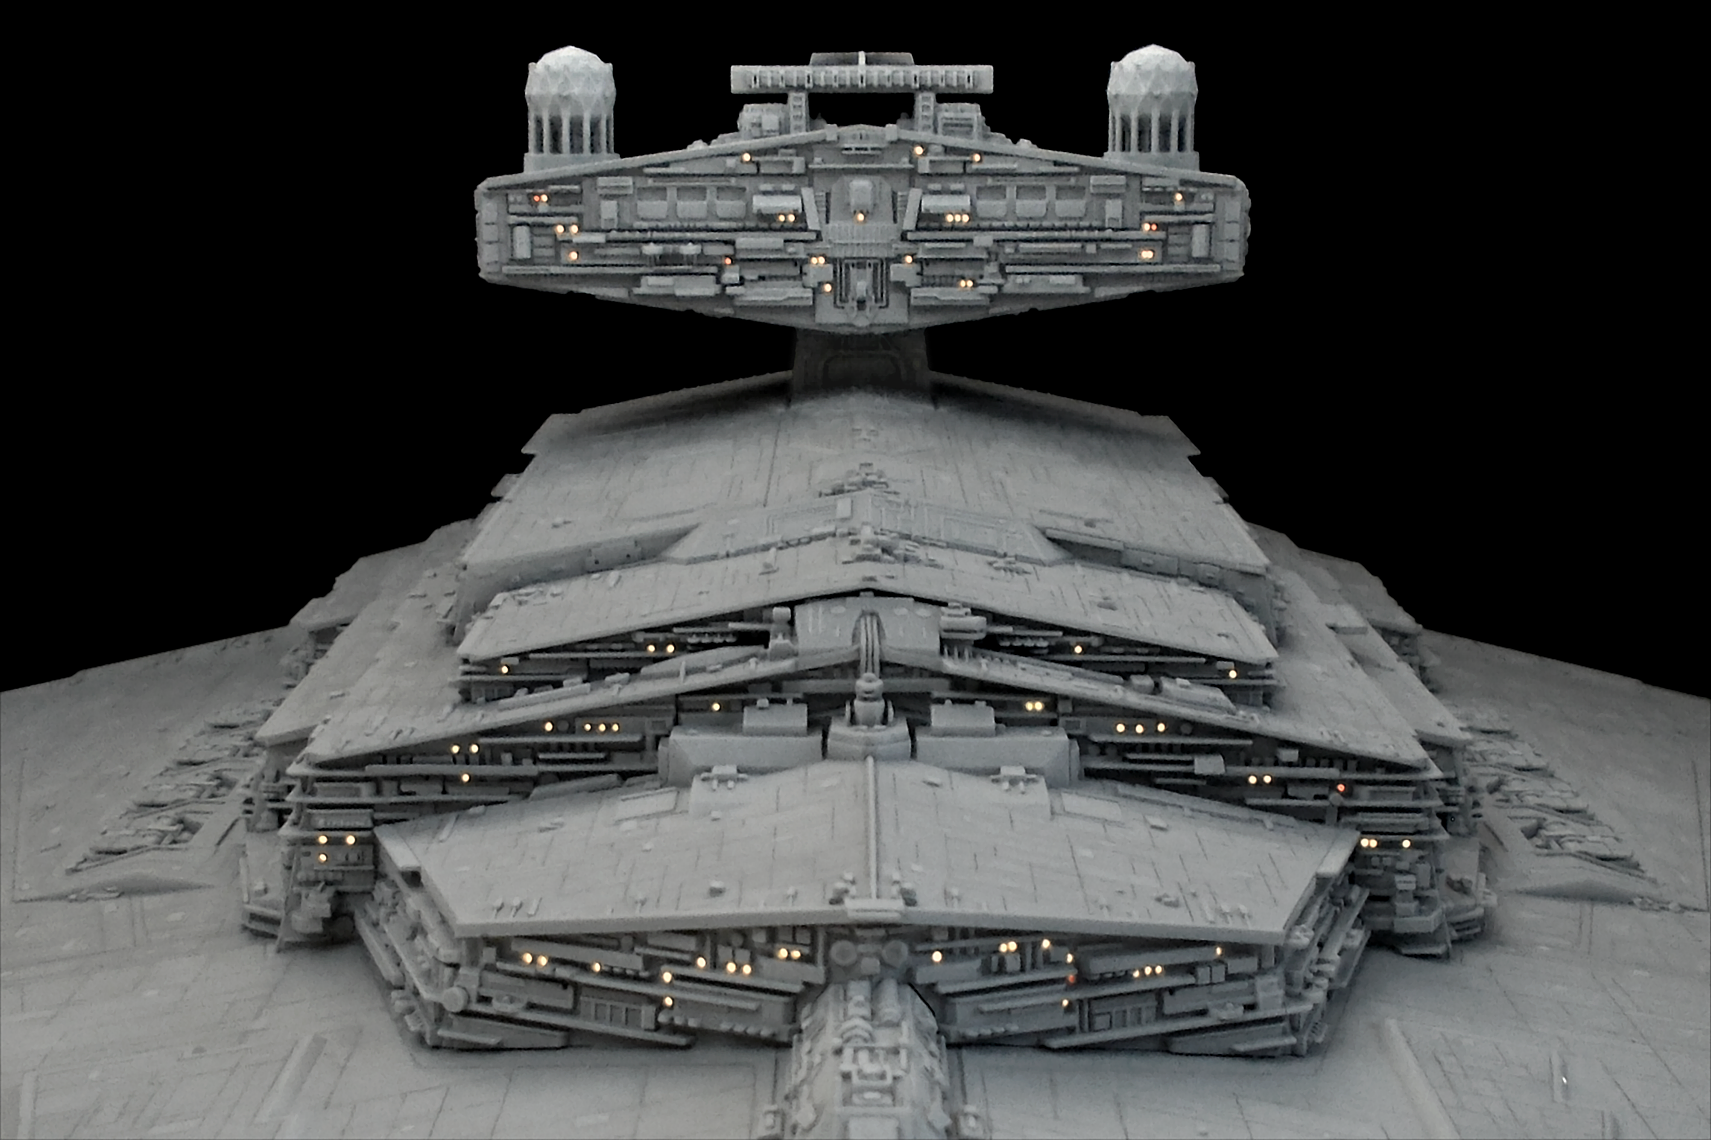
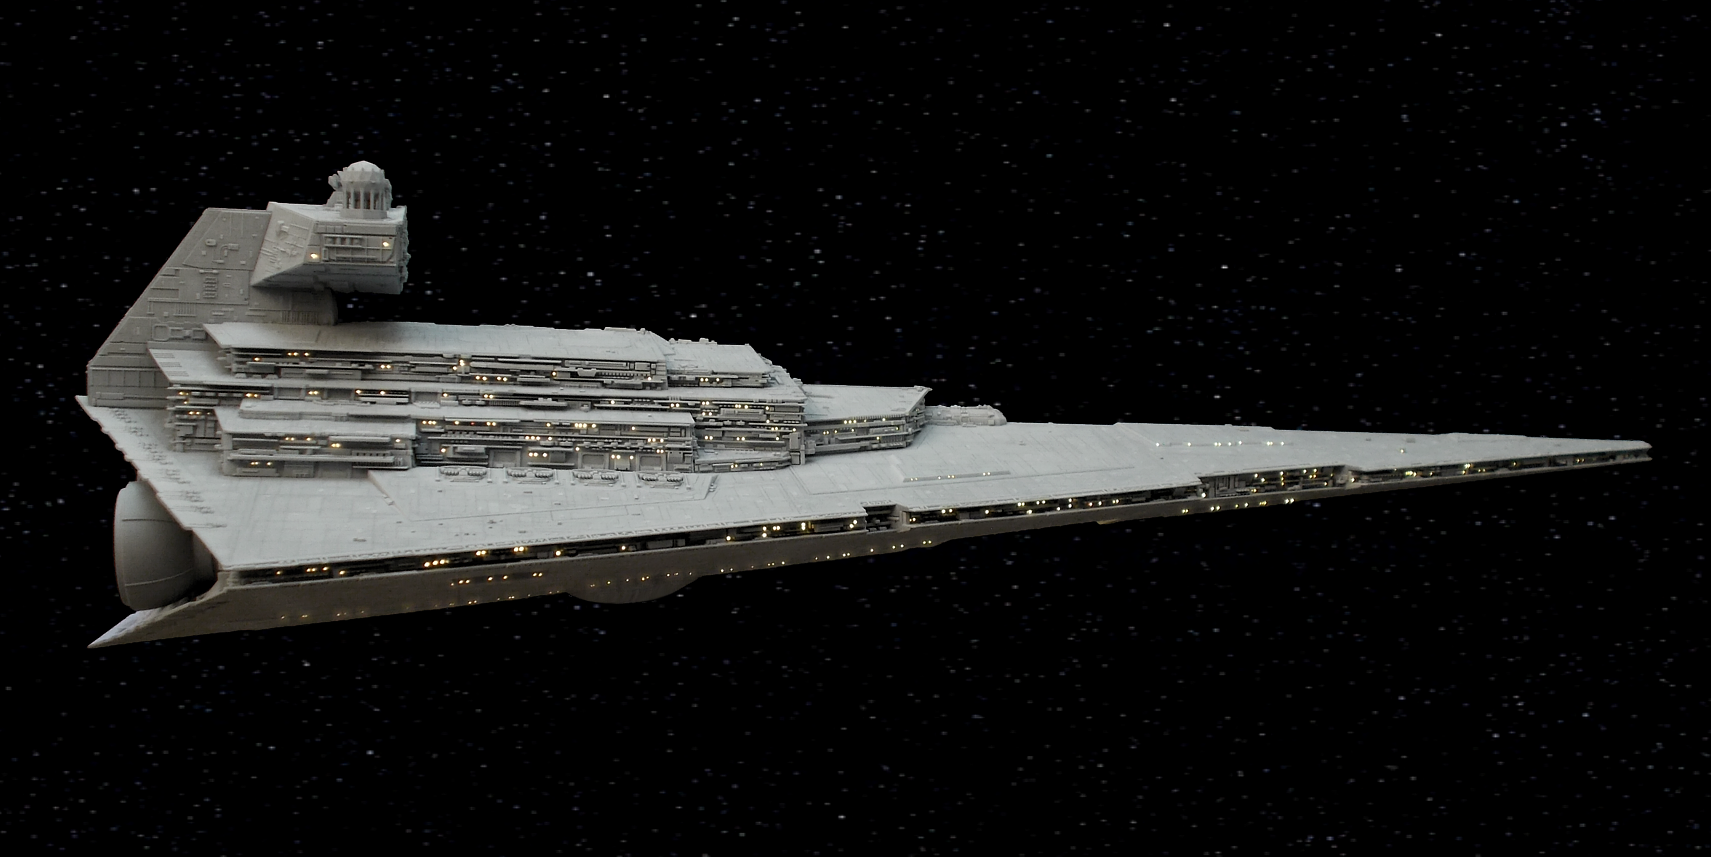
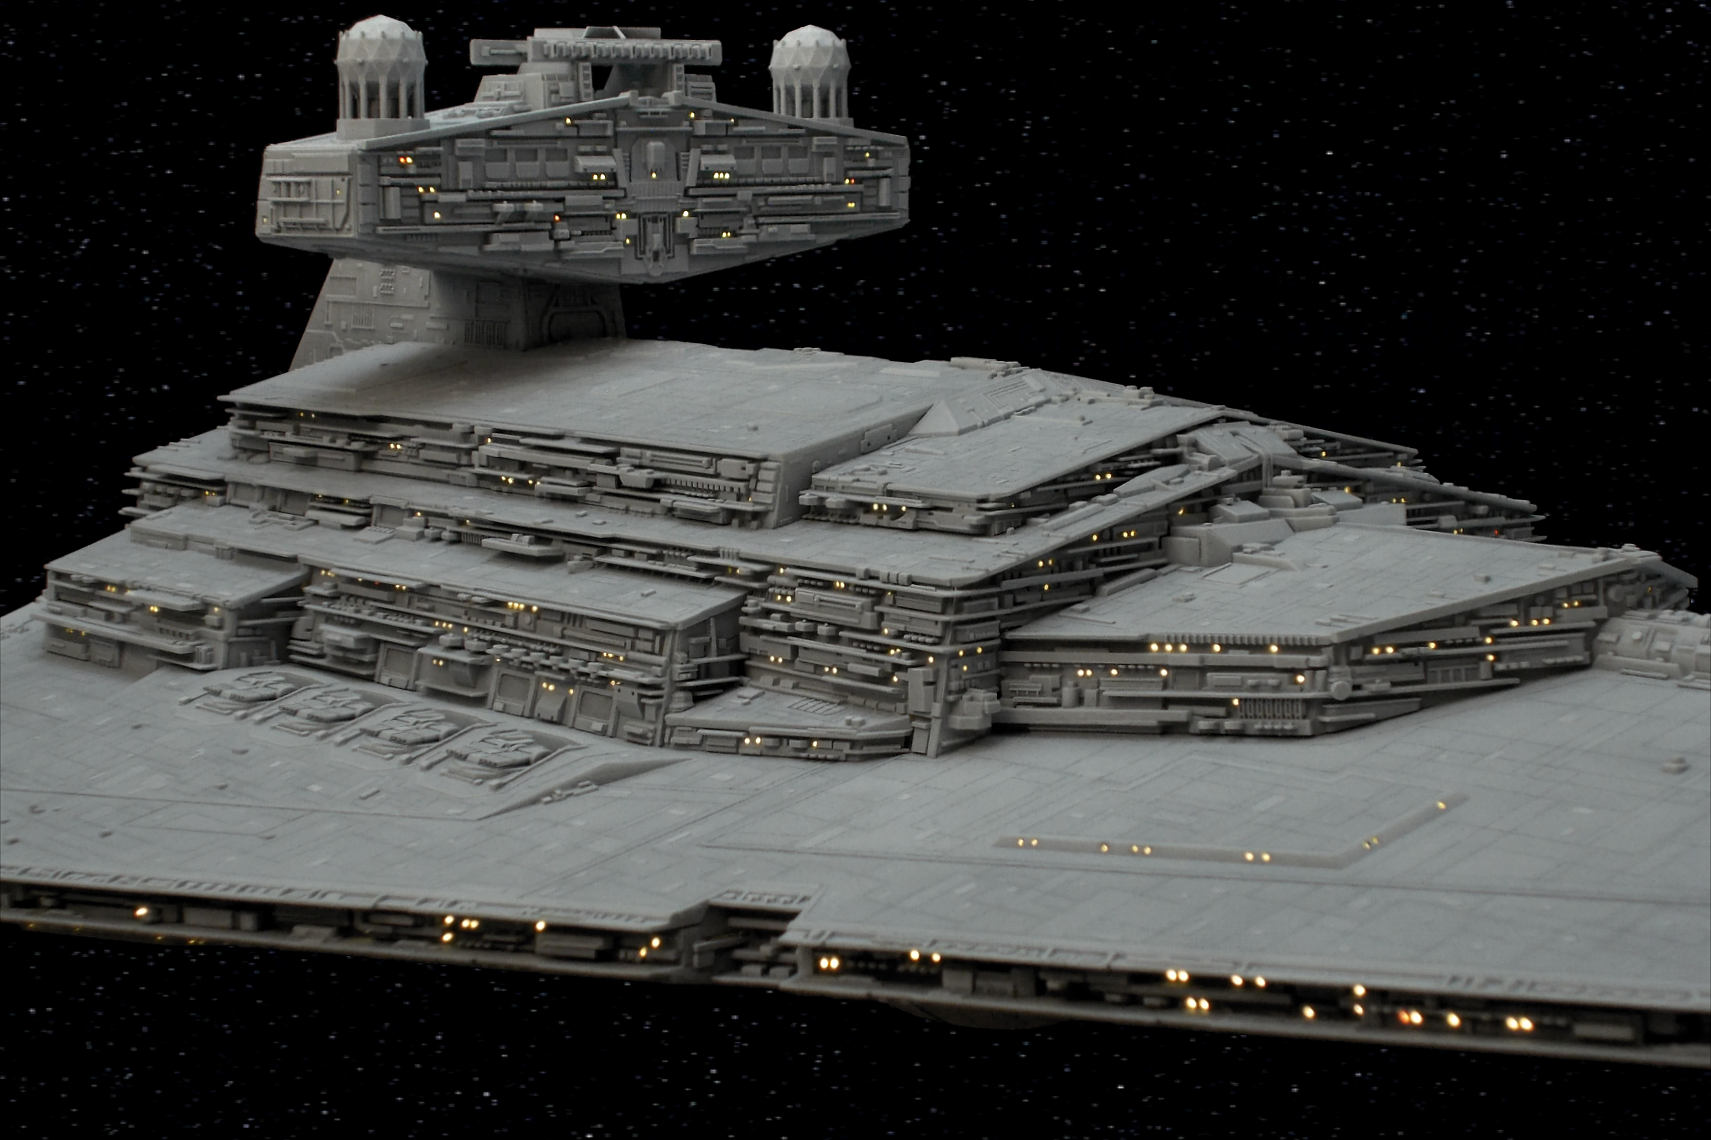
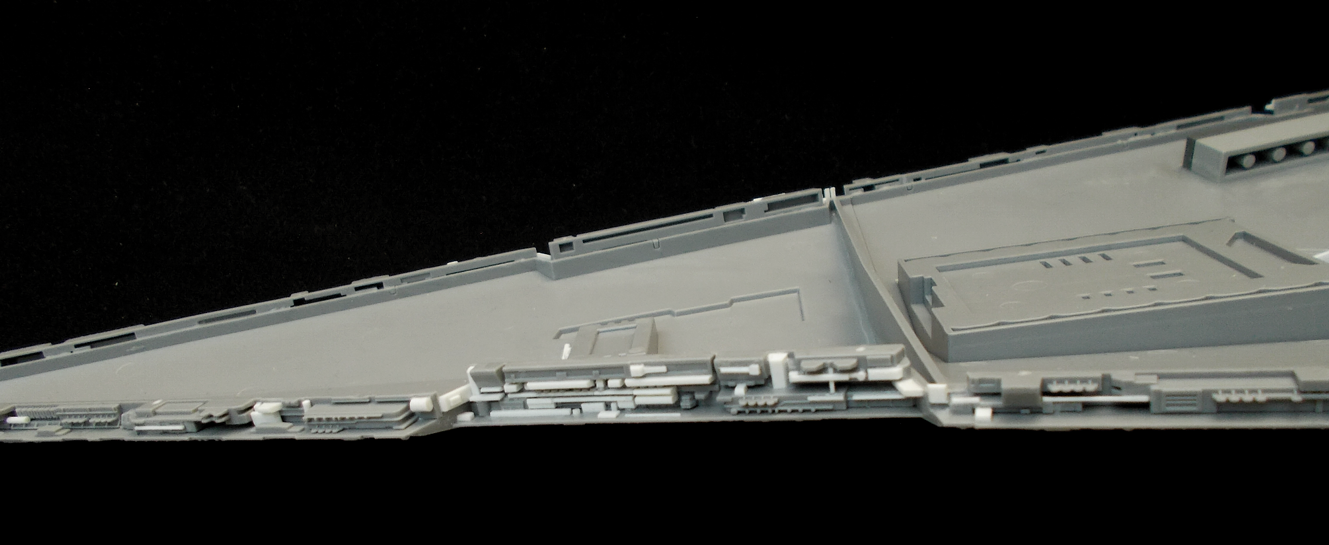
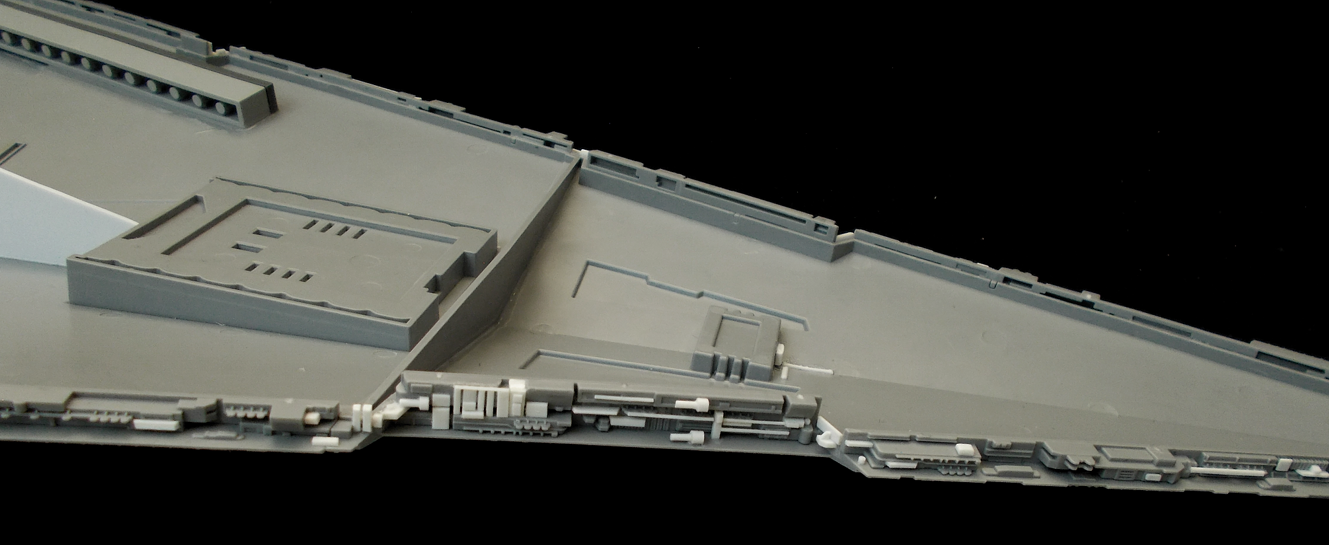
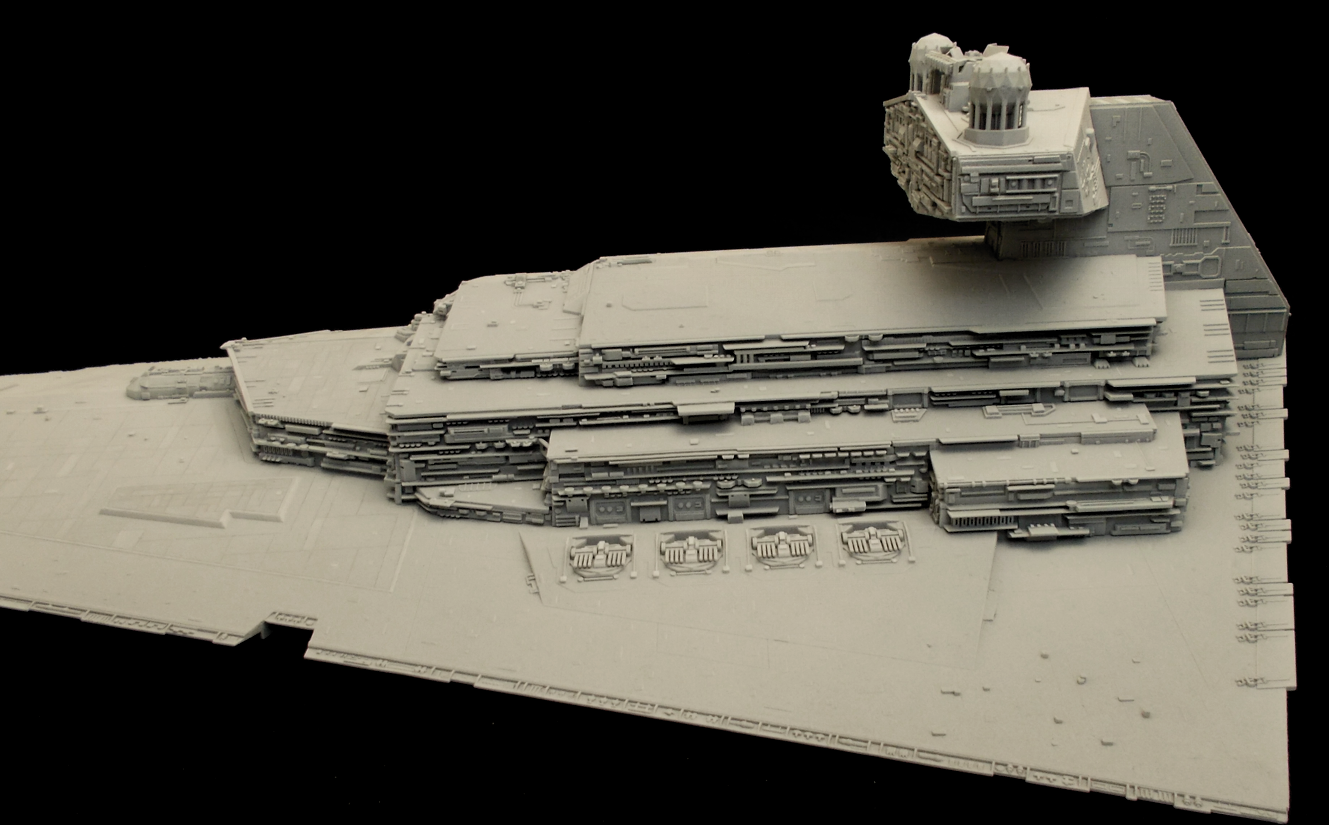
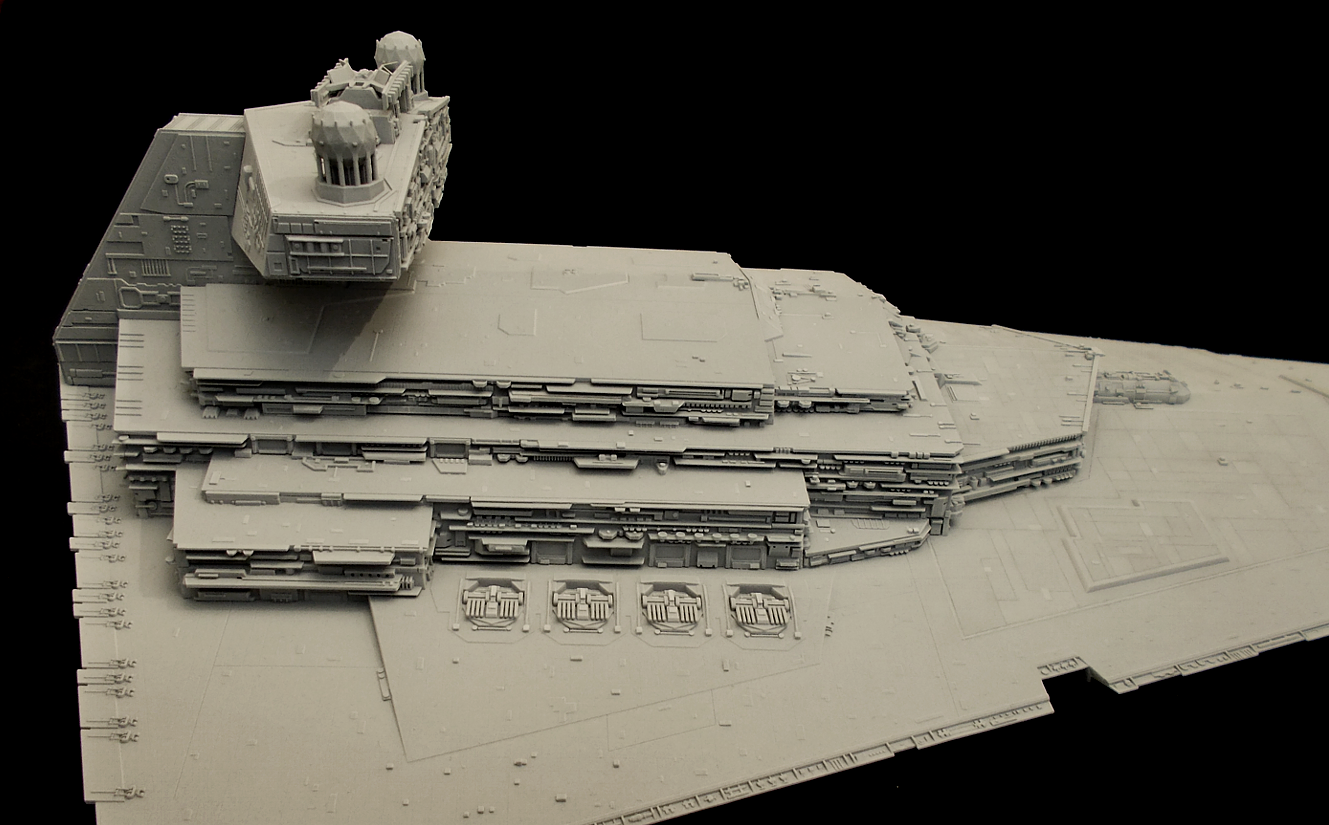
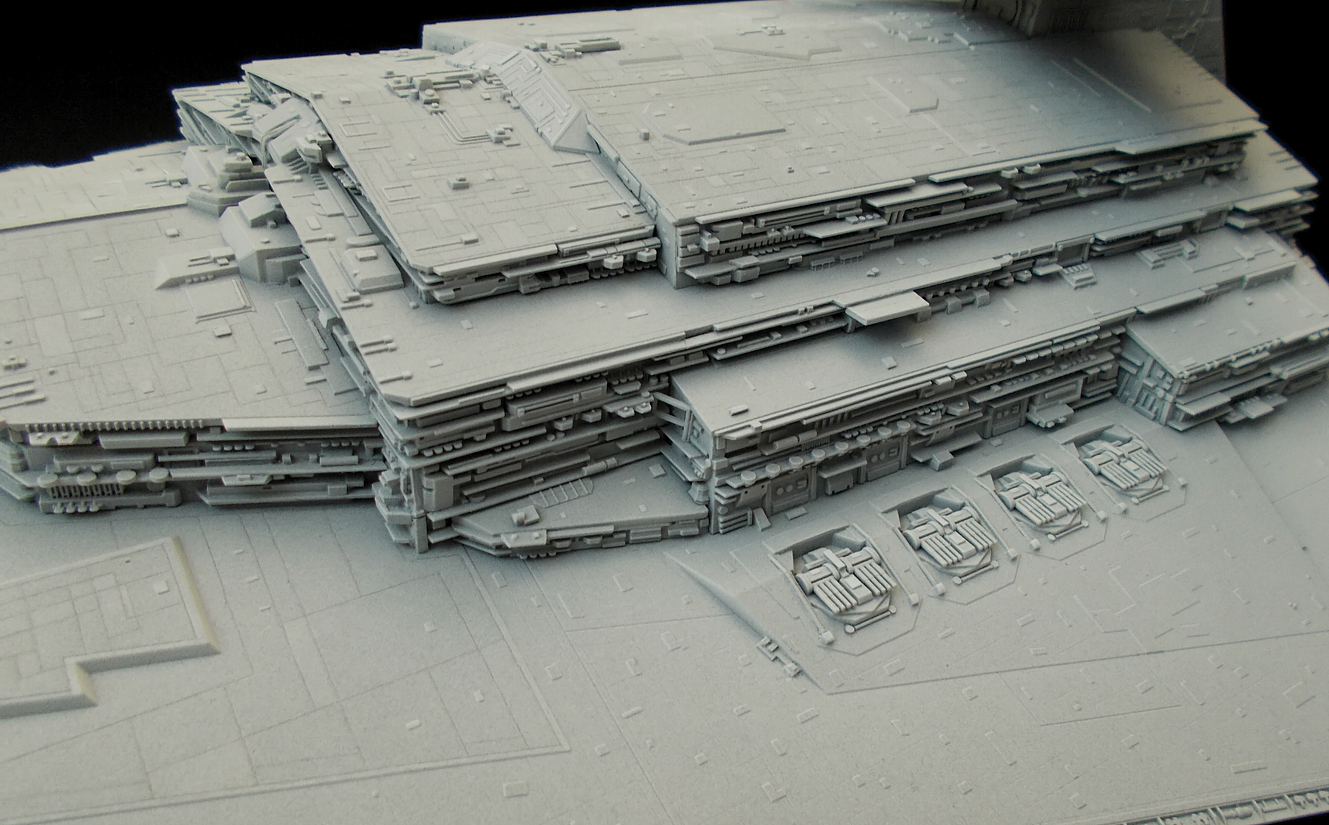
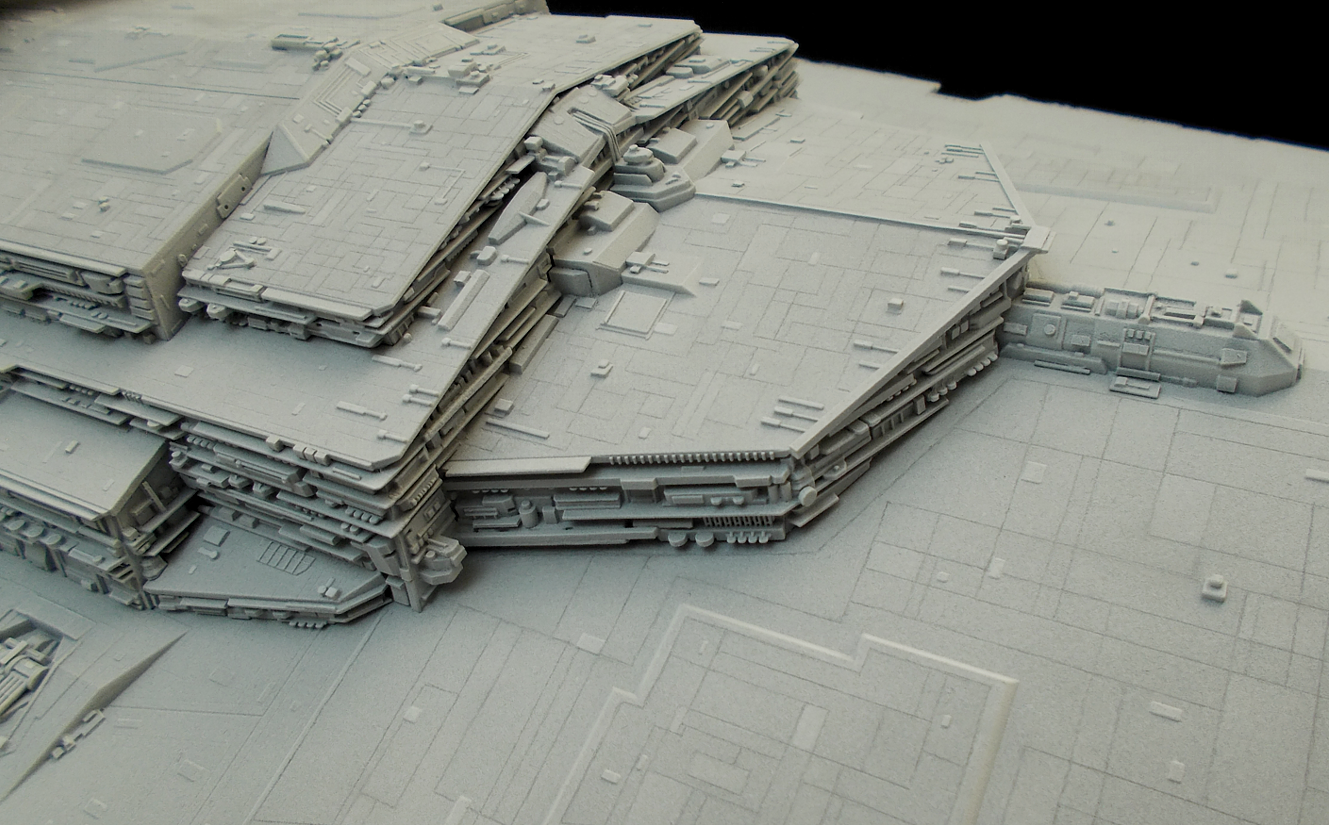
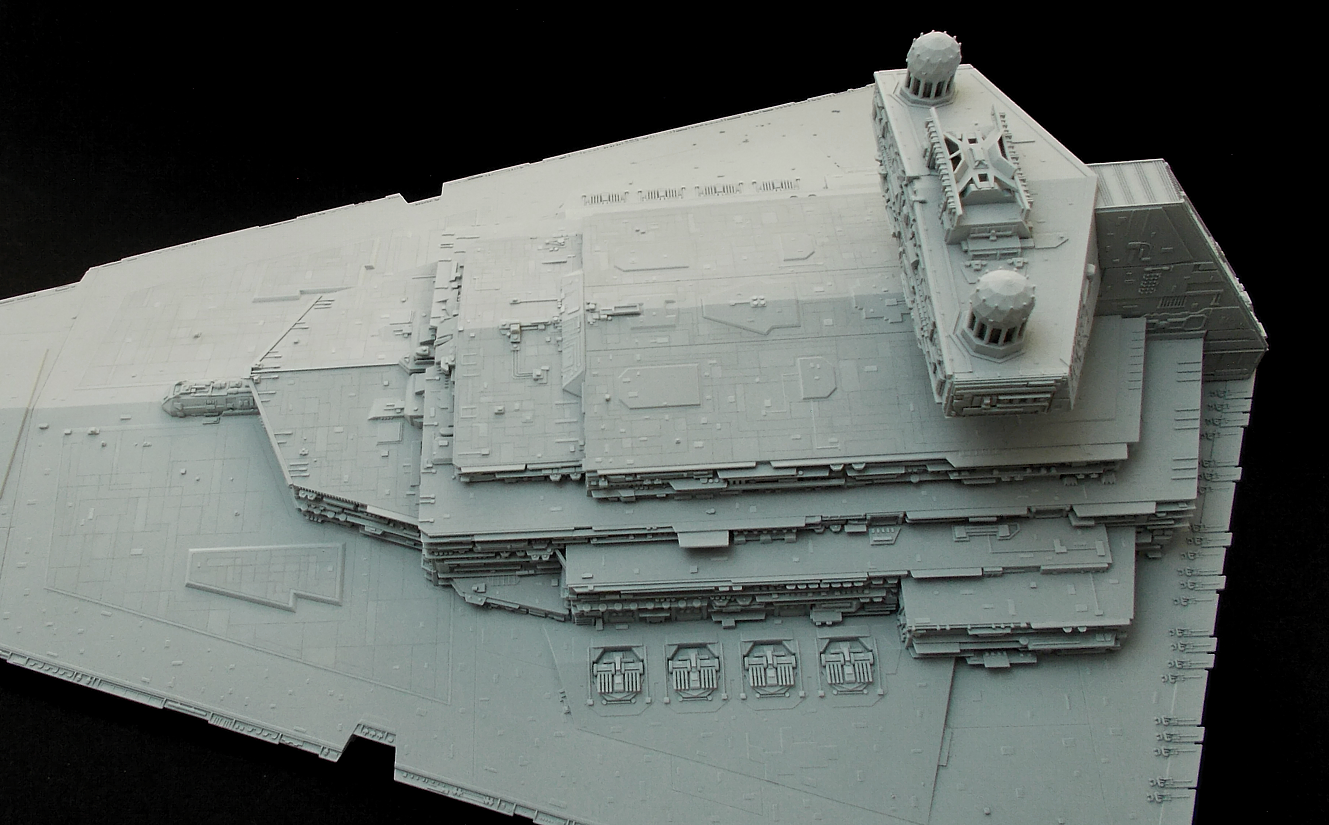
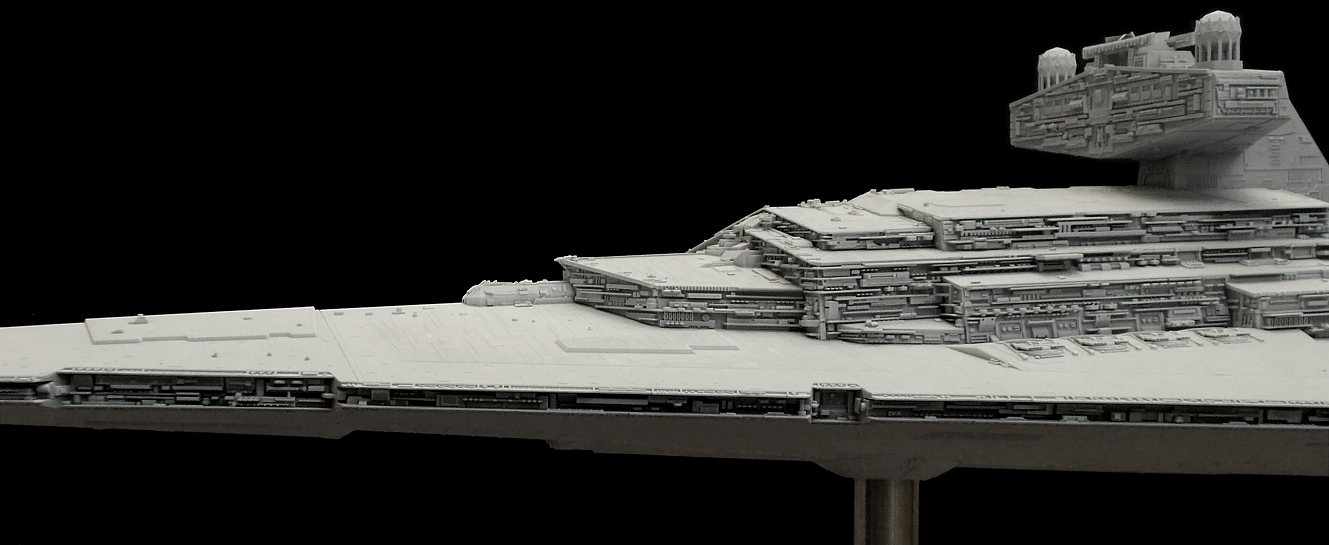
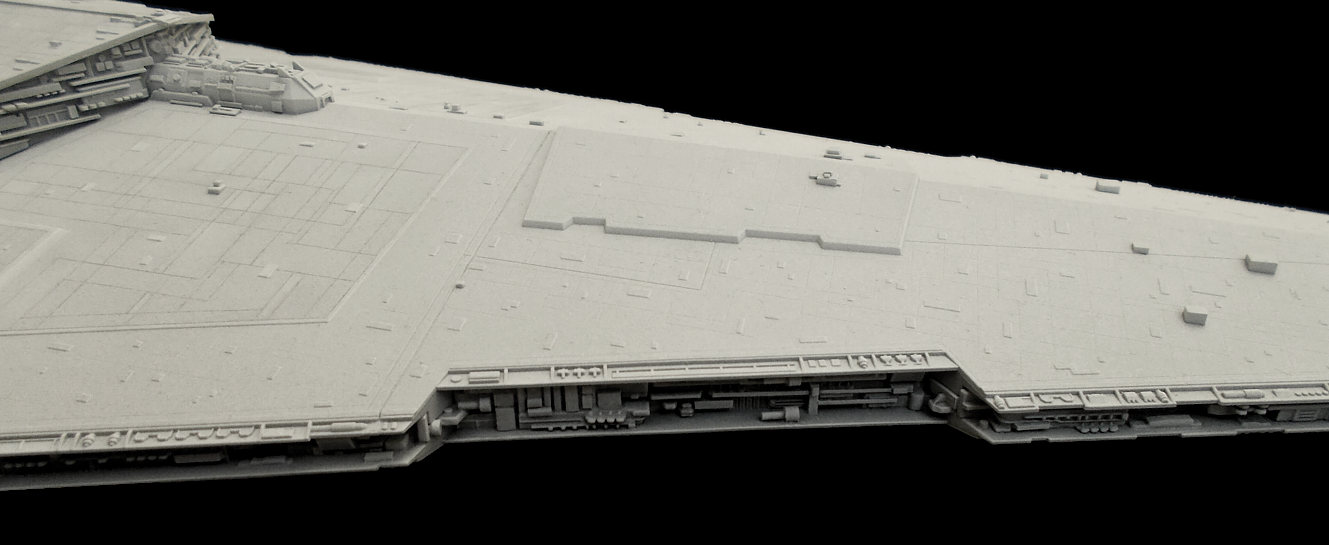
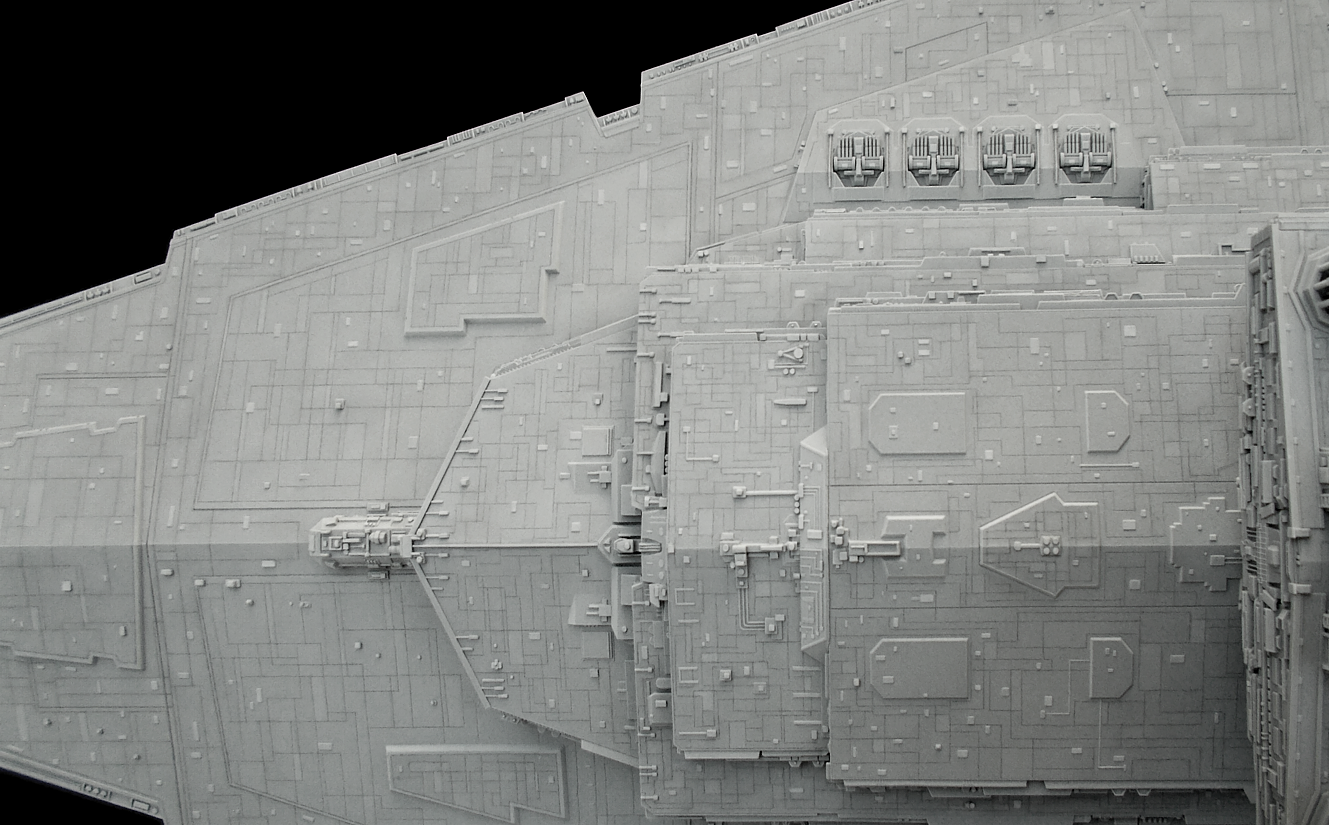
Here's the detailing of the superstructure almost finished:
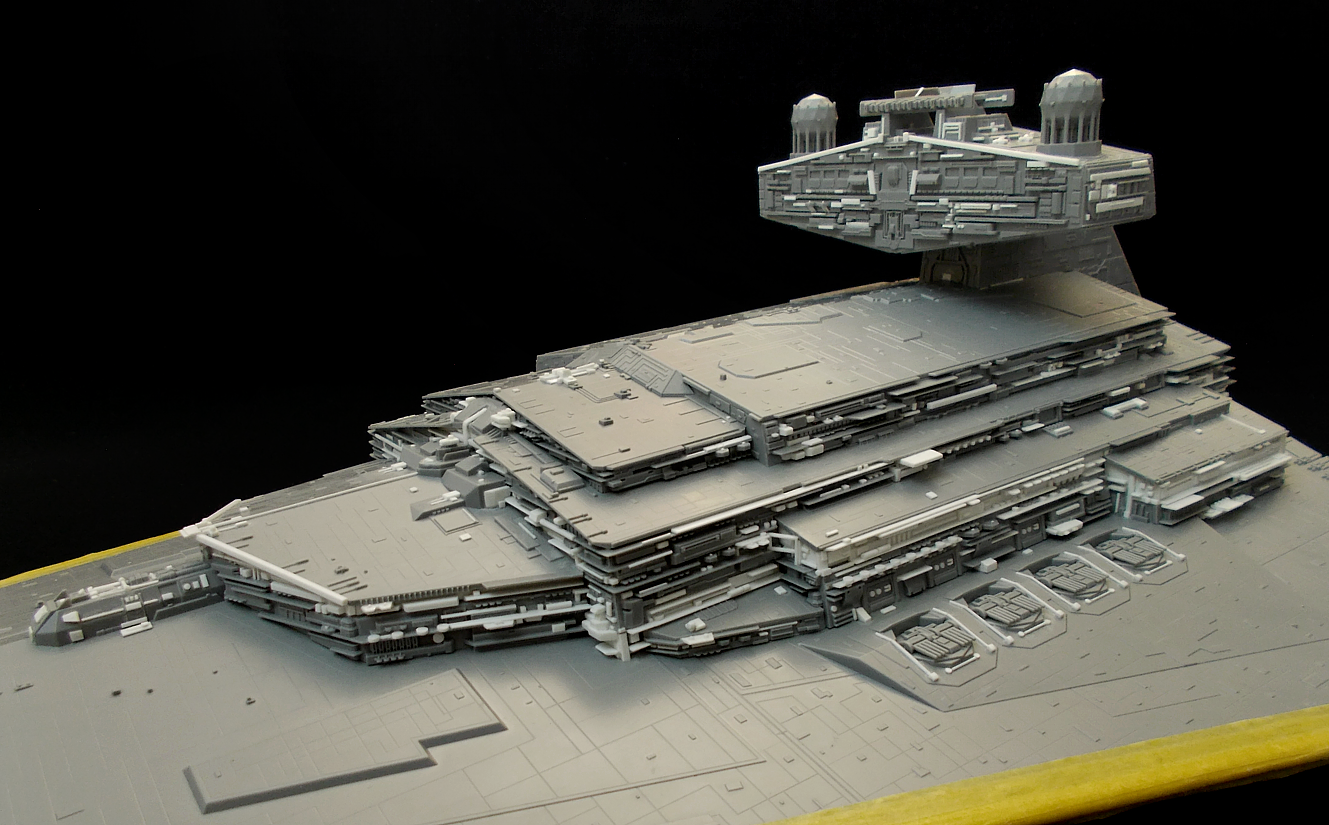
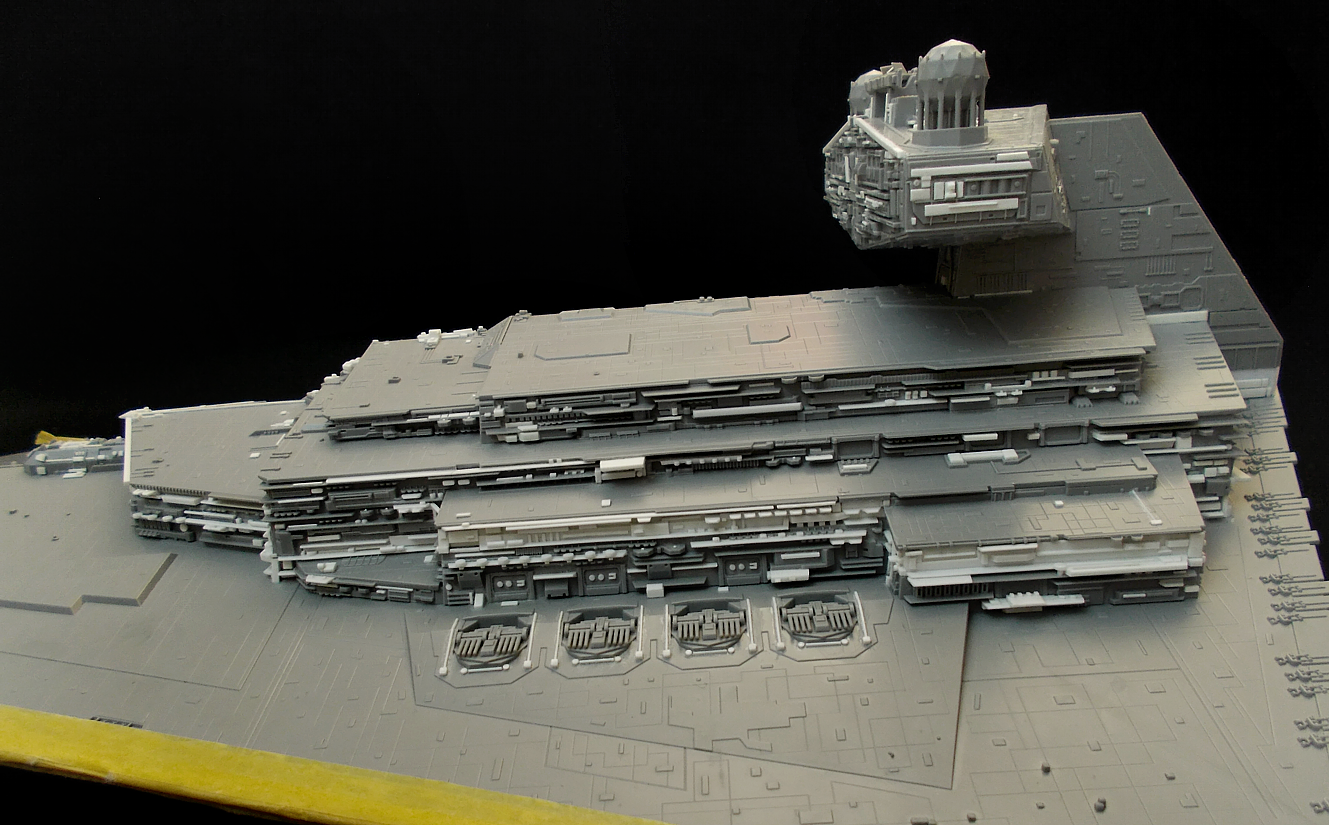

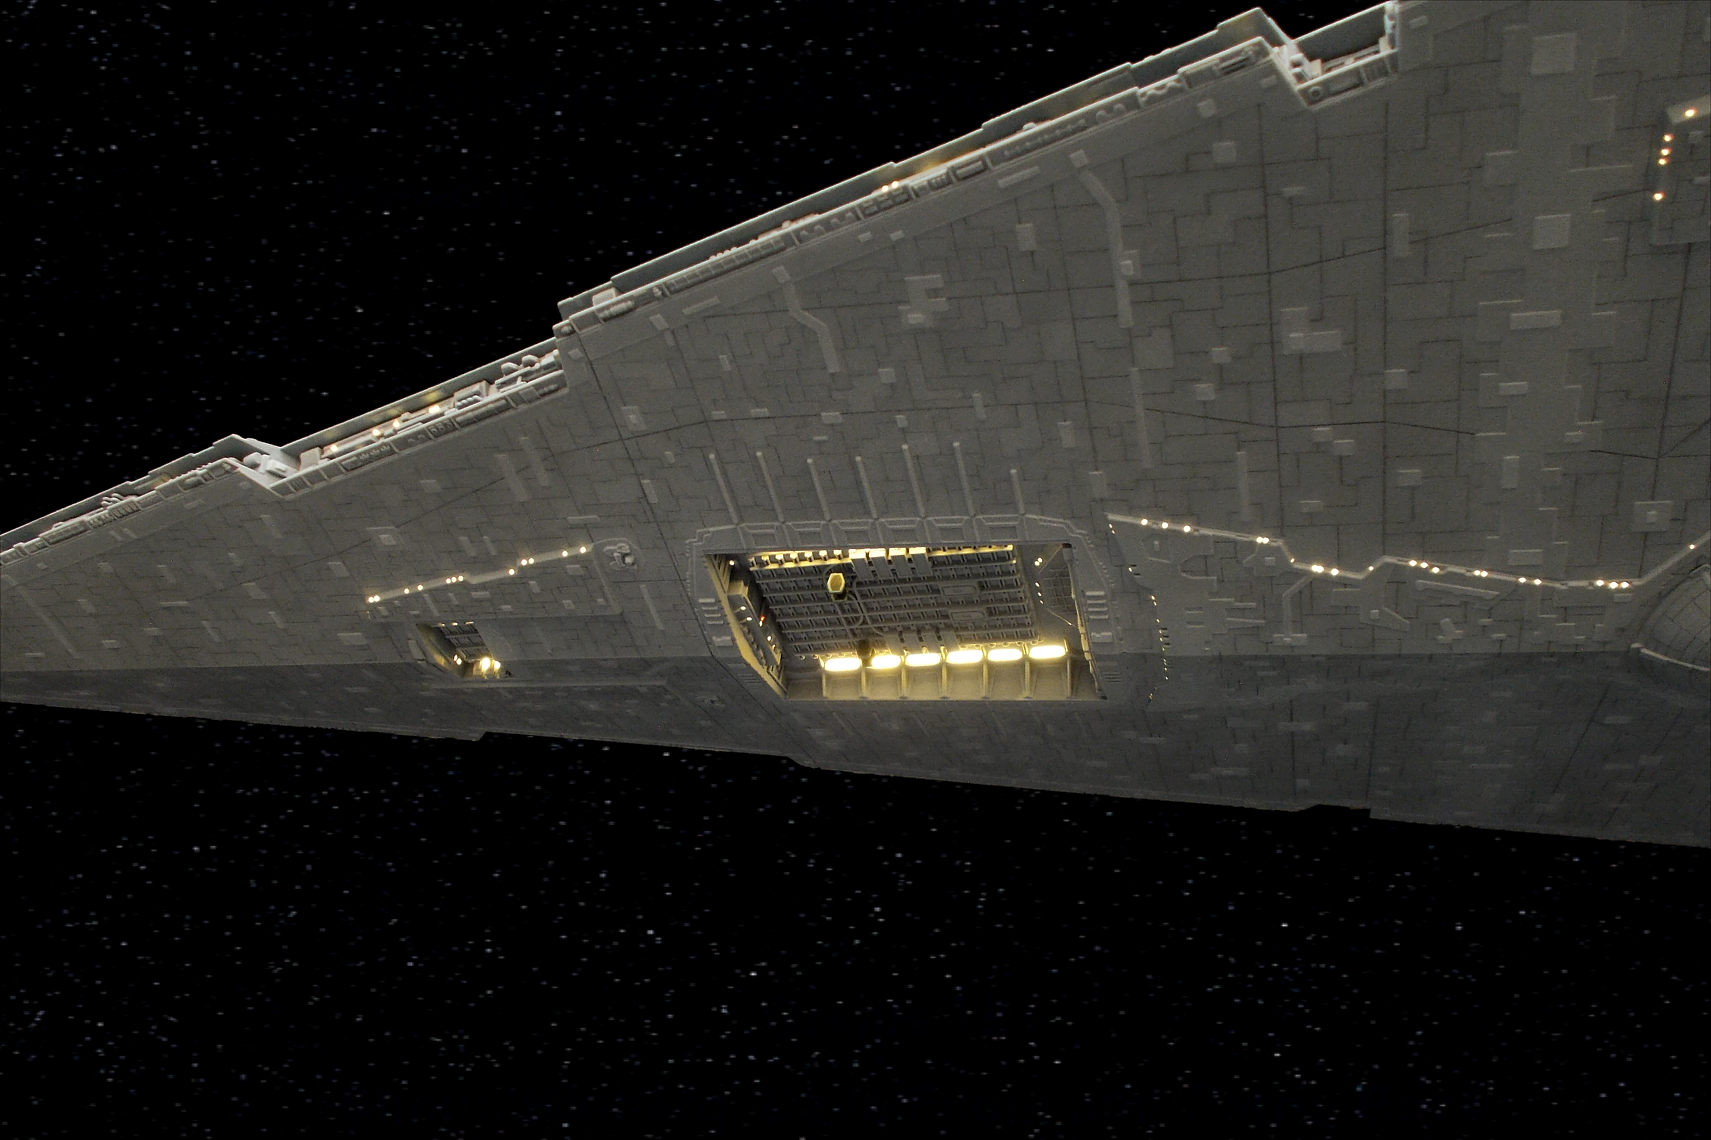
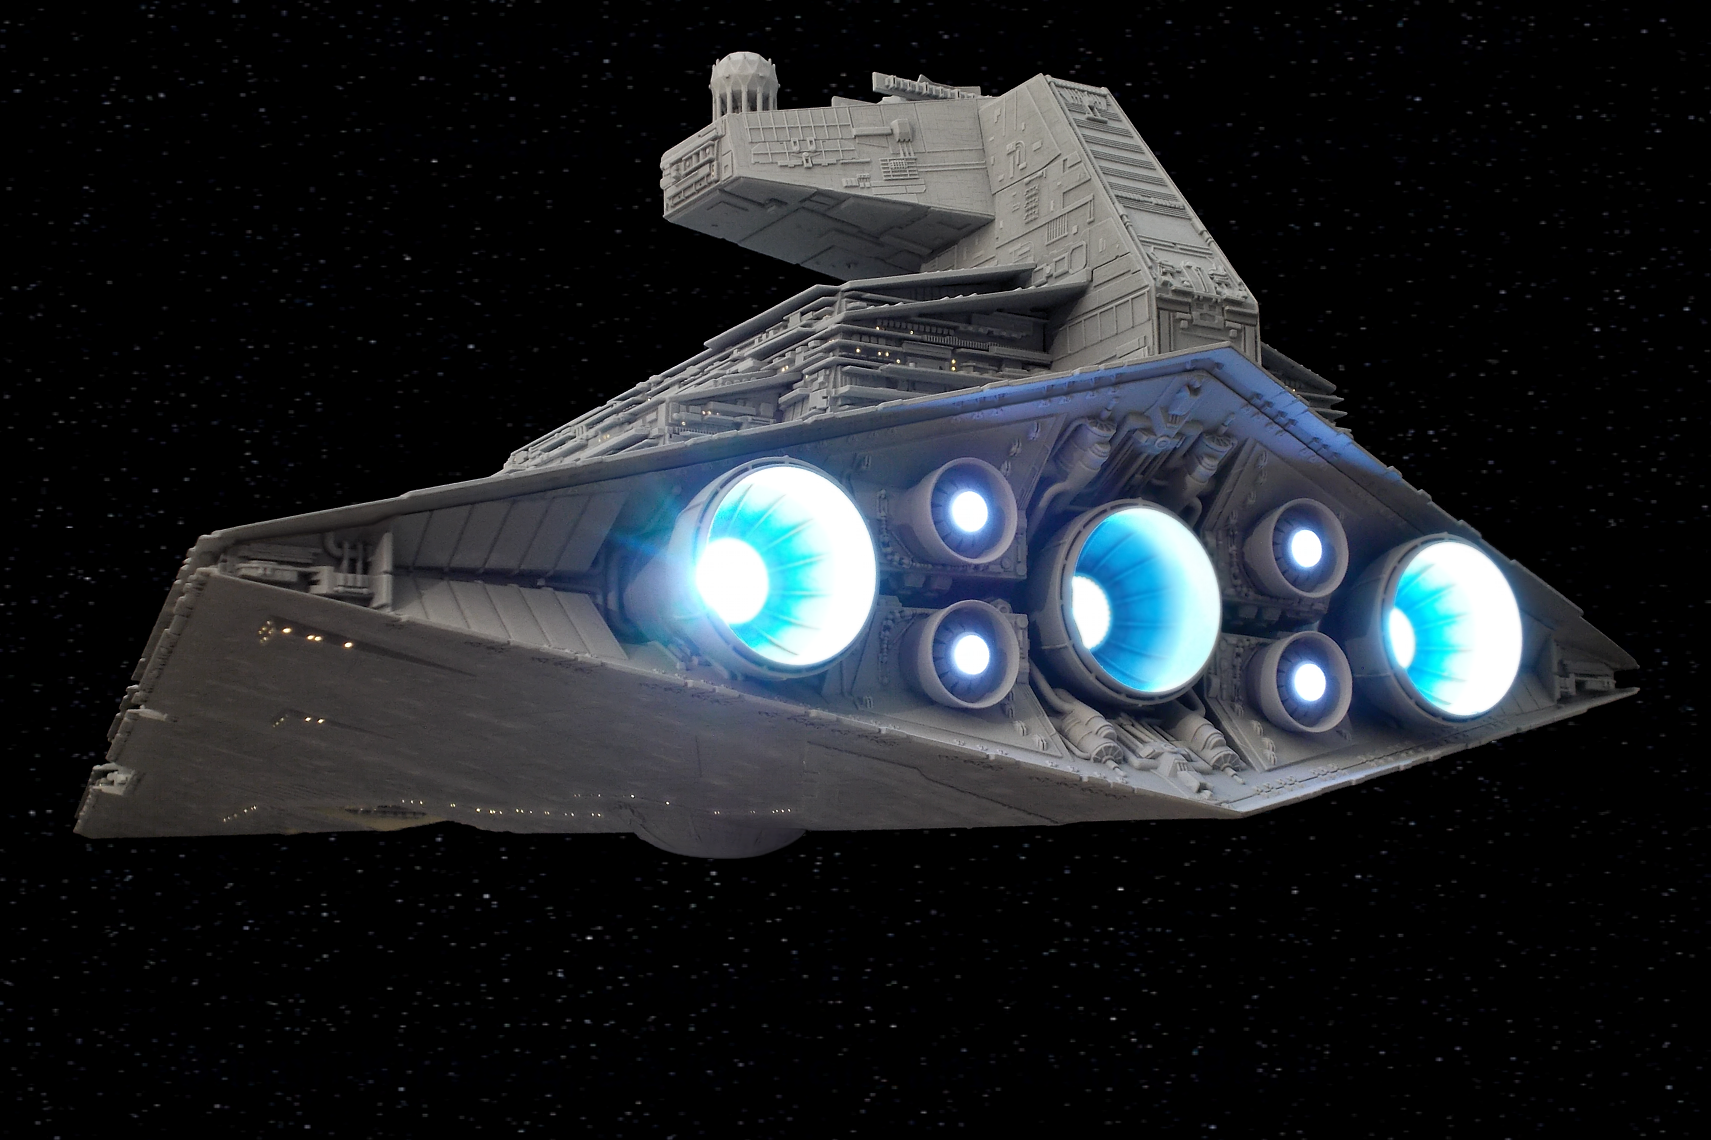
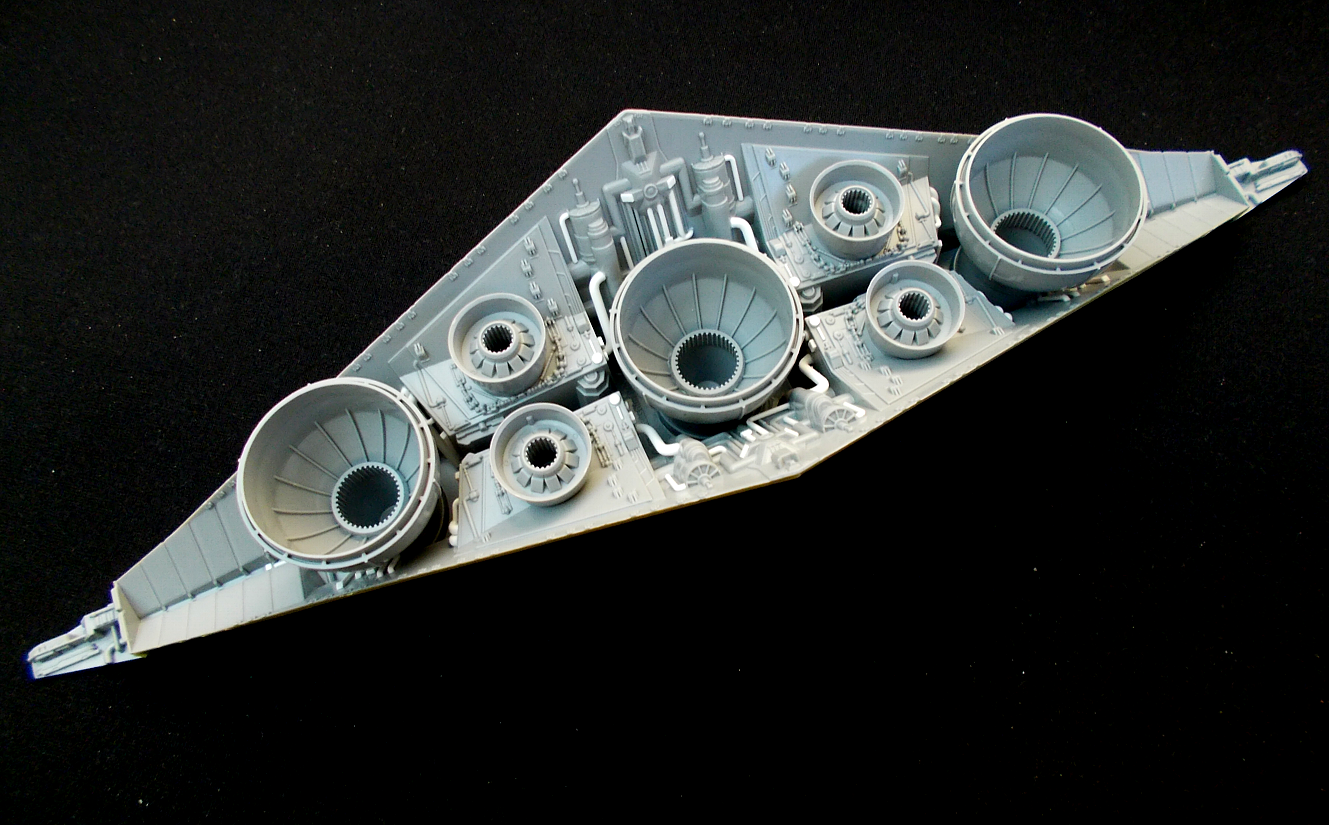
Extra detailing on the engine section as per the filming model:
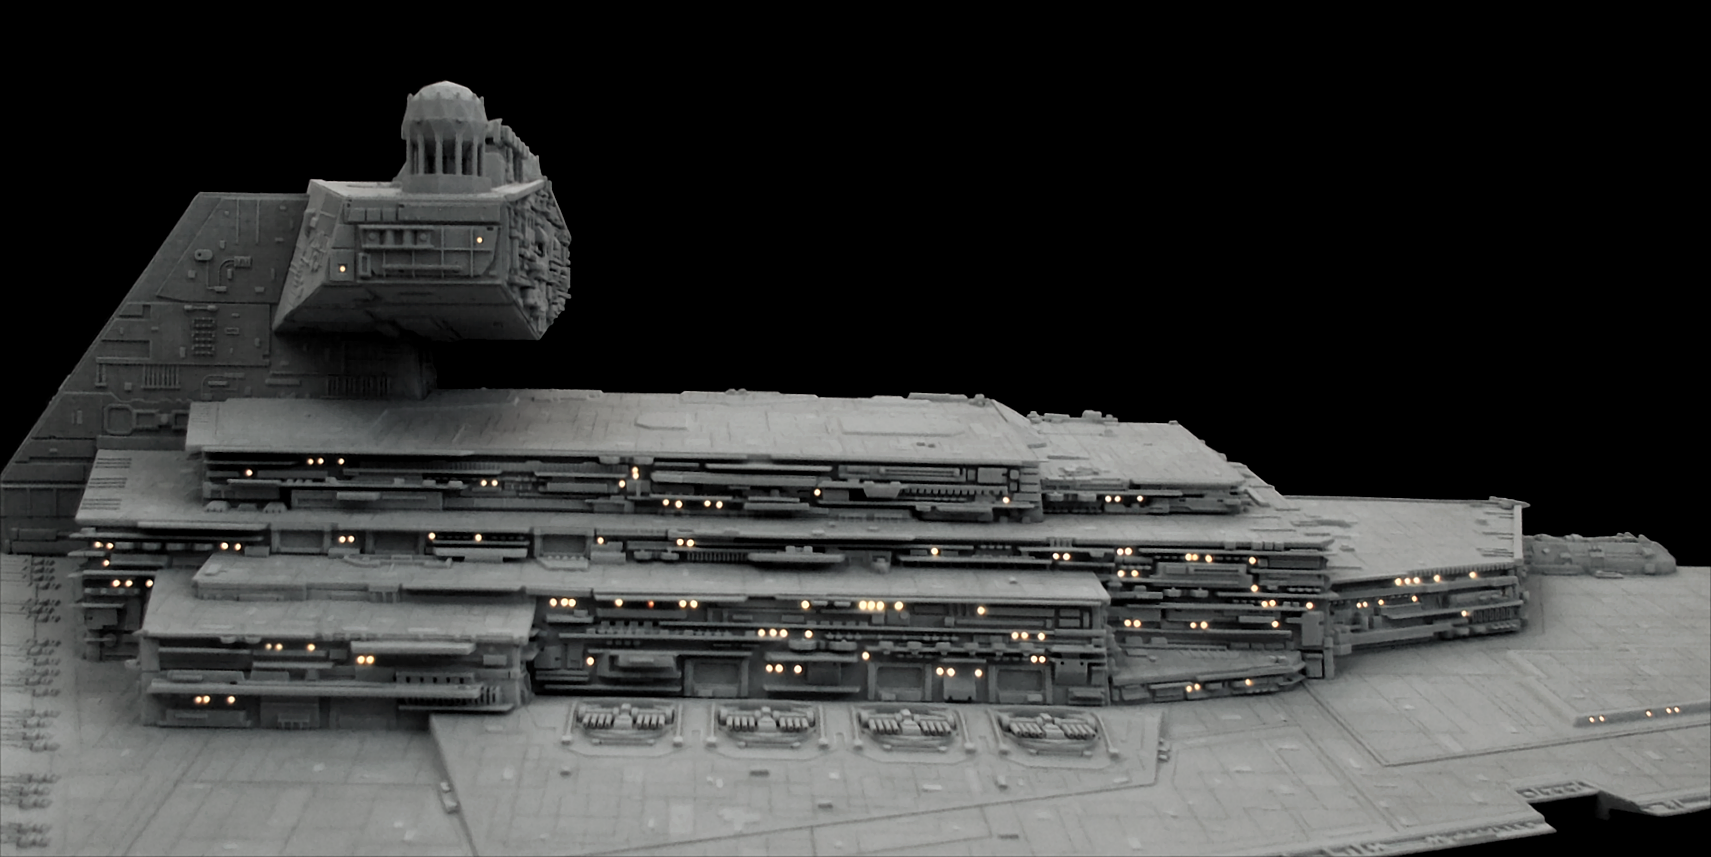
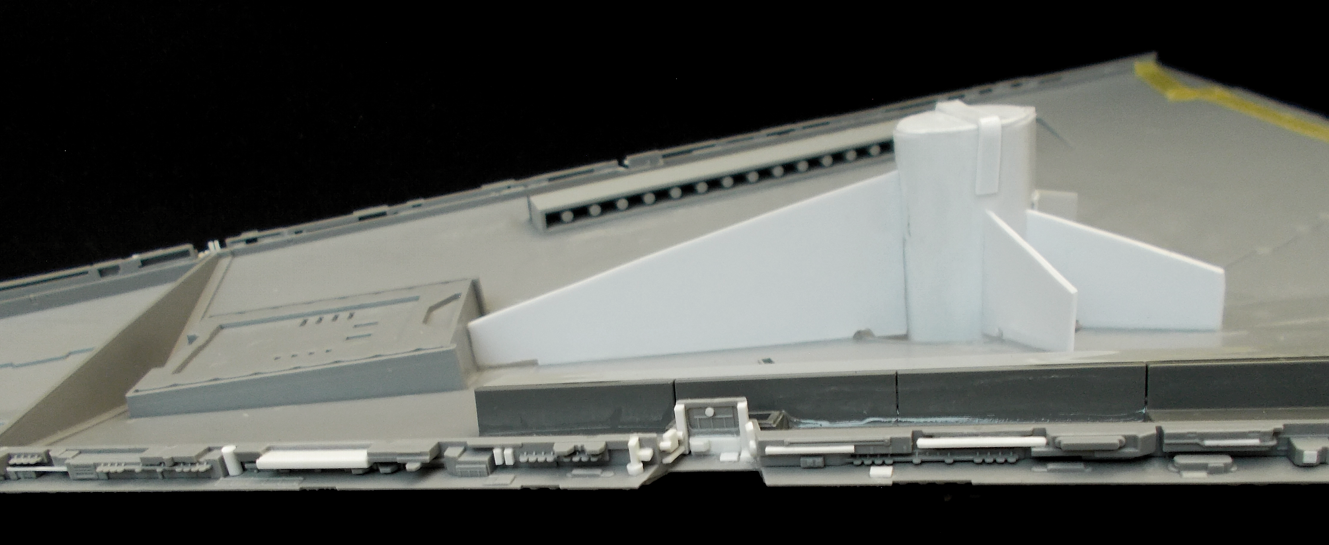
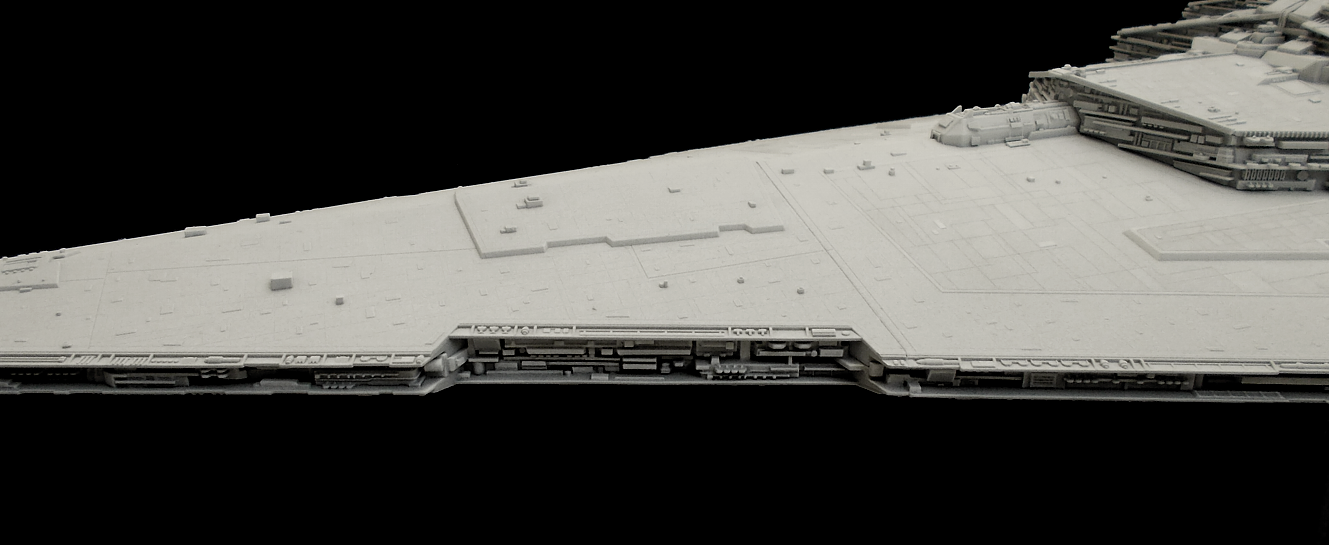
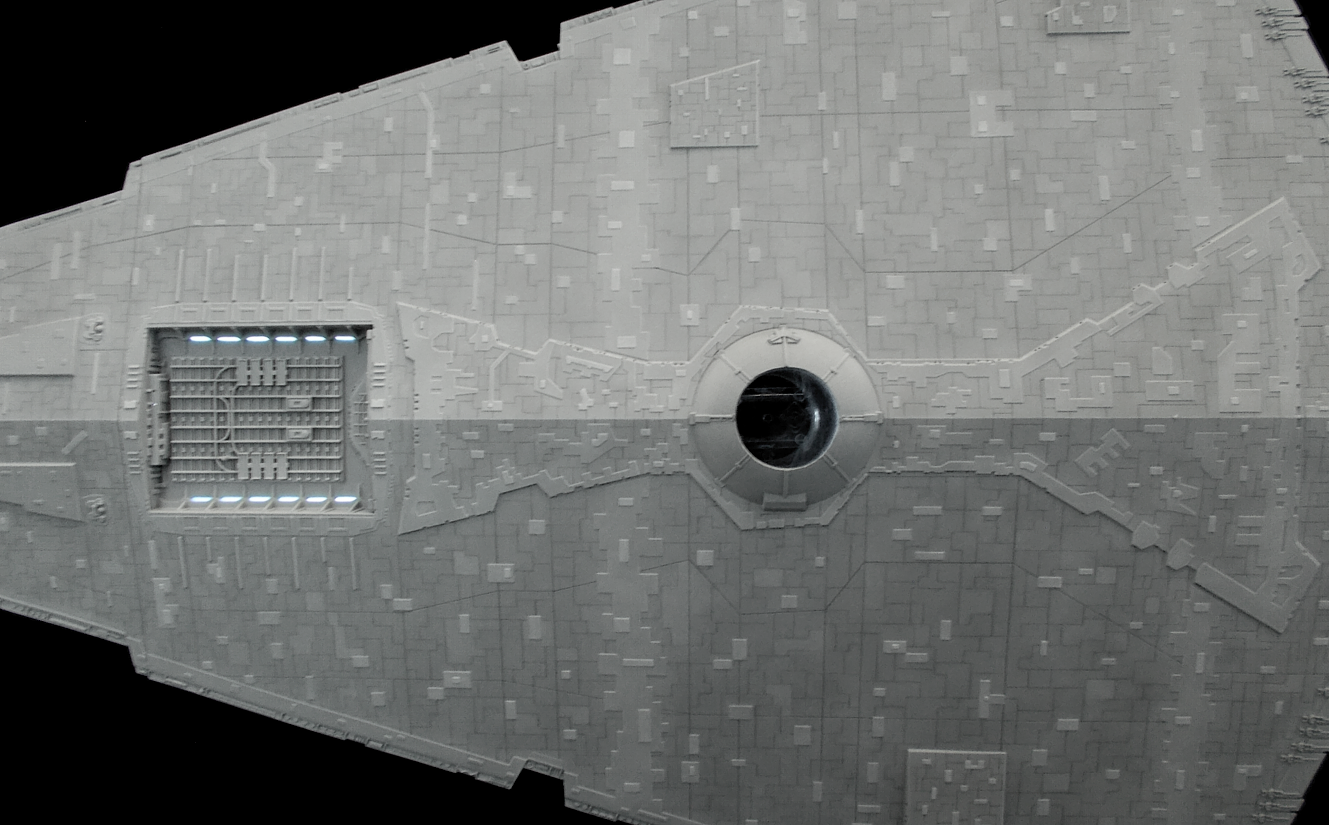
And detailing on the side trenches:
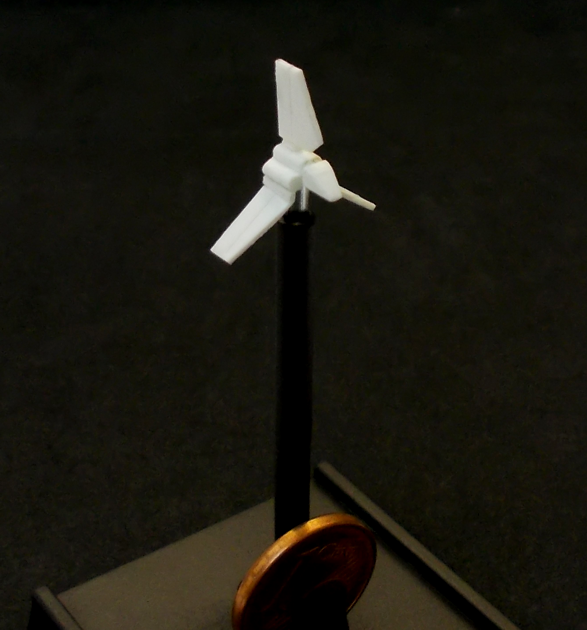
I also scratch-built a few TIE Fighters and a Lambda shuttle in scale - everyone can 3D-print or order online nowadays:

Next it was on to painting. I gave all sub-builds of the Star Destroyer a basecoat of USAF grey and then sprayed several thin layers of an off-white on top to create a soft gradient of shadowed recesses and very light surfaces and highlights. I then lightly drybrushed all raised details with a very bright clean white, and then brushpainted a thin layer of off-white on all edges and upturned detail-surfaces to make them pop subtly.
The panel lines were drawn with a very sharp hard pencil. I also brushpainted subtle variations in brightness across panels with a thin layer of white. Here are several images of the painting process:
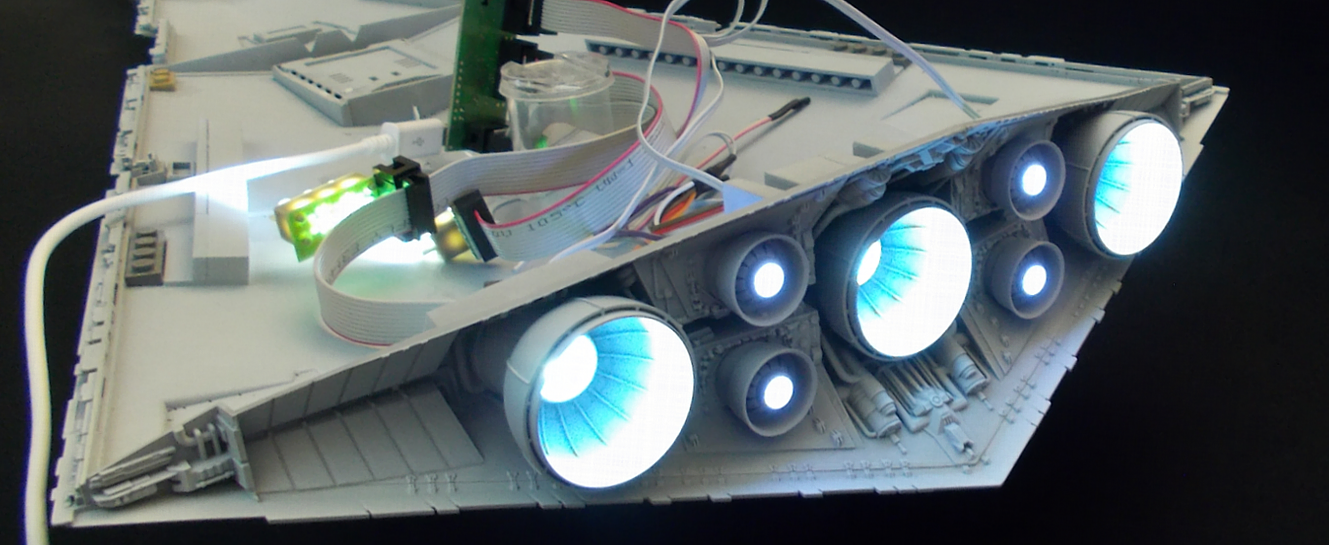
When everything was painted, sealed with matt varnish and checked to fit properly, it was time to drill hundreds of teeny-tiny holes and install fiberoptics and LEDs for the lighting, which I'm currently still in the process of doing after a break from the kit for several weeks:
So... work is progressing well, and I plan on finishing this model in the next few weeks. So far, it was the most complex and involving build I've done so far, and I'm pretty happy with it. ![]()