Alternate "Struts Flowchart"...?

By emeraldbeacon, in X-Wing Rules Questions

Trying to explain to my local gang some of the inner workings of how and when to flip Grappling/Landing Struts, and hearing that there was already a somewhat long flowchart of how to handle it, I took it upon myself to try and streamline it (omitting the explanations, and trying to keep things as straightforward as possible). I think I've got all the details in there, and it implicitly covers any oddball situations that would otherwise pop up (like hopping over one obstacle and landing on another). Some "common parlance" is included as well, rather than explicit game terminology, which will probably be ironed out in future versions. Can you suggest anything that needs to be added, removed, or altered, with an emphasis on streamlining and clarifying the process for those less well-versed in the rules minutiae?

84577369_472567696966155_311198343409277

(Improved version below)

Edited by emeraldbeacon
The rotate or remain in place is iffy. It implies that rotating is optional when it isn't, you must turn 90 degrees in the direction your dial indicates. If a turn or bank is not revealed on your dial you do not and cannot rotate.

Just now, Hiemfire said:

The rotate or remain in place is iffy. It implies that rotating is optional when it isn't, you must turn 90 degrees in the direction your dial indicates. If a turn or bank is not revealed on your dial you do not and cannot rotate.

Maybe it should be, "rotate or remain in place, per dial"?

I'd also say the left side higher-mid diamond could be slightly better phrased. Instead of "end your turn" I think "end your move" would be more correct.

Oh god... do we need flowcharts to play this game now?

Kudos to the OP for the effort.

FFG dev team: please trim out these things.

Edited by LUZ_TAK
2 hours ago, emeraldbeacon said:

Maybe it should be, "rotate or remain in place, per dial"?

That works. :D

UPDATED...

unknown.png

The only "quibble" I have about this chart, is that all lines ultimately lead to "Perform Action Step," even while one of the paths (the one that goes through "Suffer any obstacle effects") would either skip the step (asteroid, gas), or make it impossible to take actions (debris). My opinion, though, is that suffering the effects of the obstacle would tell you what to do as you proceed towards that step, anyway... so I don't think it's worth adding extra complications, just to make it "more complete."

Edited by emeraldbeacon

Thx. for the effort. Very helpfull for casual gamer like me and good as reminder whenever I play 'struts' after not playing them for a while.

Very helpful and comprehensive guide. Really loved it.

Thanks for making it.

On 2/7/2020 at 2:12 AM, emeraldbeacon said:

The only "quibble" I have about this chart, is that all lines ultimately lead to "Perform Action Step," even while one of the paths (the one that goes through "Suffer any obstacle effects") would either skip the step (asteroid, gas), or make it impossible to take actions (debris). My opinion, though, is that suffering the effects of the obstacle would tell you what to do as you proceed towards that step, anyway... so I don't think it's worth adding extra complications, just to make it "more complete."

I see. I was looking at the bottom right side of the picture where it says - Close your Grappling/Landing Struts - The way I understood and played it that if you do the 2 straight end up overlaping an obstacle you would ignore it and perform your actions before closing you Struts. The reverse of your flowchart.

I also though a box was missing there but with the - Ignore any Obstacles effects - you cover the situation I describe above.

@emeraldbeacon

Sorry, I don’t even own any or play CIS.

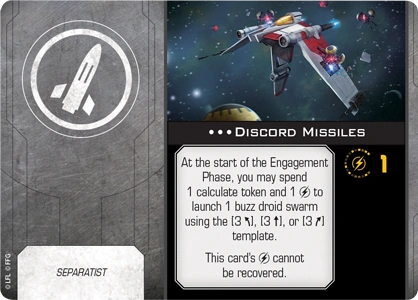
Can you do a discord missile chart, please??

4 hours ago, JBFancourt said:

@emeraldbeacon

Sorry, I don’t even own any or play CIS.

Can you do a discord missile chart, please??

Discord Missiles, hmm? So basically, how Buzz Droids get deployed, moved, and removed? I think that's a possibility...!

latest?cb=20190307204252 swz31_buzz-droid-swarm.png

Edited by emeraldbeacon
typo!

I do appreciate it cuz right now I’m at the mercy of whoever I’m flying against. Which is most likely okay 90% of the time...

But I like to know what’s going on 😜

unknown.png

Question: you’ve successfully got it attached after launch to the front. Enemy ship (friendly to droids) bumps you and overlaps the droids. Then you go and don’t move. What happens to droids? Just stay and do another crit?

So this is round after they’re fired. Oh nevermind. Duh I see it.

CANT EVEN READ A FLOW CHART!! CAN YOU DRAW PICTURES IN CRAYON PLEASE?!?!?

Edited by JBFancourt
5 hours ago, JBFancourt said:

Question: you’ve successfully got it attached after launch to the front. Enemy ship (friendly to droids) bumps you and overlaps the droids. Then you go and don’t move. What happens to droids? Just stay and do another crit?

So this is round after they’re fired. Oh nevermind. Duh I see it.

CANT EVEN READ A FLOW CHART!! CAN YOU DRAW PICTURES IN CRAYON PLEASE?!?!?

For the record, they reattach to the back, if there's space, and if not, they explode.

7 hours ago, thespaceinvader said:

For the record, they reattach to the back, if there's space, and if not, they explode.

Wellllll, now interesting question. If I don’t overlap them becuz I couldn’t move due to the bump, wouldn’t they just stay in front under the other ship. I’d still be at range 0, but I wouldn’t reactivate the attachment step due to not moving, right?

@emeraldbeacon

True yes. Ignore previous. I was assuming your bump moved at least a small amount.

5 hours ago, JBFancourt said:

Wellllll, now interesting question. If I don’t overlap them becuz I couldn’t move due to the bump, wouldn’t they just stay in front under the other ship. I’d still be at range 0, but I wouldn’t reactivate the attachment step due to not moving, right?

@emeraldbeacon

You're precisely correct. A friendly ship can fly over or even land on their own Buzz Droids, with impunity. If an enemy ship does not move (due to overlapping other ships), they do not overlap or move through the Buzz Droids, and therefore, do not trigger the relocation, and will continue to suffer the Init-0 Critical Damage (unless someone else shoots them off).

cross post

Chart is very neat. I think I'm finding some corner cases.

Ok, the charts at least didn't say anything about at a glance:

Struts open, on a obstacle, can I BR with the template going thru the rock, onto another position on the rock or a position off the rock?

If I BR off the obstacle, does that mean my struts remain open (letting me ignore obstacles while moving and at final position), and then after the maneuver is completed, they close? If I happen to final position on a rock, I still have to forcibly close the struts, meaning I now take damage?? (I can't reopen them now cuz the maneuver has completely ended and we are no longer in the "while" step, yes?)

(I don't know if this starts just becoming a whole review of what happens when you're moved by something else, either your own BR, or say a tractor effect or maybe some other effect I can't remember as a "move" and not a maneuver)

One more: my opened rocked vulture is now ioned. I know there's a rule for this, but do you want to add this as an edge case? : D

-----

Also, what did @emeraldbeacon use to create these charts?

@Blail Blerg : struts open

Quote

You ignore obstacles at range 0 and while you move through them.

So you can barrel roll at will on or off the rock.

The only way to then close struts is to execute a maneuver:

Quote

After you execute a maneuver, flip this card.

If you land on a rock with that maneuver, then no damage (they are open while you move) but since you overlap an obstacle no action and you may not shoot on an asteroid.

For the ion :

Quote

During the Planning Phase an ionized ship is not assigned a dial.

so the only part of the struts that activates is that after the 1 forward you close the struts.

3 hours ago, Icareane said:

@Blail Blerg : struts open

So you can barrel roll at will on or off the rock.

The only way to then close struts is to execute a maneuver:

If you land on a rock with that maneuver, then no damage (they are open while you move) but since you overlap an obstacle no action and you may not shoot on an asteroid.

For the ion :

so the only part of the struts that activates is that after the 1 forward you close the struts.

I think this one belongs over in Blail's "teach me to play" thread.

15 hours ago, Blail Blerg said:

Struts open, on a obstacle, can I BR with the template going thru the rock, onto another position on the rock or a position off the rock?

-----

Also, what did @emeraldbeacon use to create these charts?

There's a minor debate on whether or not your template can cross the obstacle on a barrel roll, even if you're ignoring it (it's a complex argument). Current consensus, generally, is that yes, you can barrel roll over an ignored obstacle.

As for how I made the charts, they're pretty much just brute force shapes & text in Adobe Illustrator, and some clever box positioning to keep things as compact as possible.