Just a quick write up on the Vista CA Store Champs at Pair-A-Dice Games. First huge props to the venue, super nice place to play and the prizes were awesome. I love when stores offer store credit for the winners, it's a huge incentive to show up, and then they threw in a bunch of other prizes on top of that as well so it was really nice!
Anyway, I ended up first with 27 tournament points over 3 rounds place playing Thrawn Two Ship. The list I used is as follows:
Thrawn Two Ship
Author: Brobafett
Faction: Galactic Empire
Points: 392/400
Commander: Grand Admiral Thrawn
Assault Objective: Close-Range Intel Scan
Defense Objective: Contested Outpost
Navigation Objective: Superior Positions
[ flagship ] Imperial II-Class Star Destroyer (120 points)
- Grand Admiral Thrawn ( 32 points)
- Avenger ( 5 points)
- Governor Pryce ( 7 points)
- Gunnery Team ( 7 points)
- Electronic Countermeasures ( 7 points)
- Quad Battery Turrets ( 5 points)
- Leading Shots ( 4 points)
= 187 total ship cost
Quasar Fire I-class Cruiser-Carrier (54 points)
- Squall ( 3 points)
- Captain Brunson ( 5 points)
- Flight Controllers ( 6 points)
- Boosted Comms ( 4 points)
= 72 total ship cost
1 Dengar ( 20 points)
1 Colonel Jendon ( 20 points)
1 Captain Jonus ( 16 points)
1 Maarek Steele ( 21 points)
2 TIE Defender Squadrons ( 32 points)
1 "Mauler" Mithel ( 15 points)
1 Black Squadron ( 9 points)
= 133 total squadron cost
As the description indicates, the fleet relies on the premise that by cutting the fluff - the point tax on the Gozanti's, the non-combat points spent on activations, and other fluff that I would get what is at it's core 400 points of pure power. The list functions as advertised, delivering tablings in 2 of 3 games today (and missing the third by 2 damage). I'll go over the 3 games quickly, along with a few pictures I snagged.
GAME 1: First game was vs Colin and his MC75 Ruthless Strategist grindhouse. He had the MC75 with Dodonna, strat advisor, ECM, Ruthless, Leading Shots, Ord Pods, and something else I forgot, Admo with APT, OE, Admonition, and Lando, and 2 GR75's, one with bomber command and the other with leia coms net. Then he had Biggs and 2x Xwings, a bunch of generic Y's and Gold Squad, a generic hwk, and maybe some others I am forgetting. The picture below shows our deployment, and my first round Quasar movement. You can see that in this game I move Mauler, Maarek, and both Defenders into range turn 1, killing gold squad at the top of the game. Unfortunately, due to the fact I was reaching faaaaar accross the table I accidently put Maarek just in range of the MC75's blue flak, and on the double arc to boot. I ended up losing Maarek turn 1 as well, which was terrifying cause he is such potent damage for me. The ISD would move to right on the other side of the quasar, nose pointing directly at the station - we were playing contested outpost.
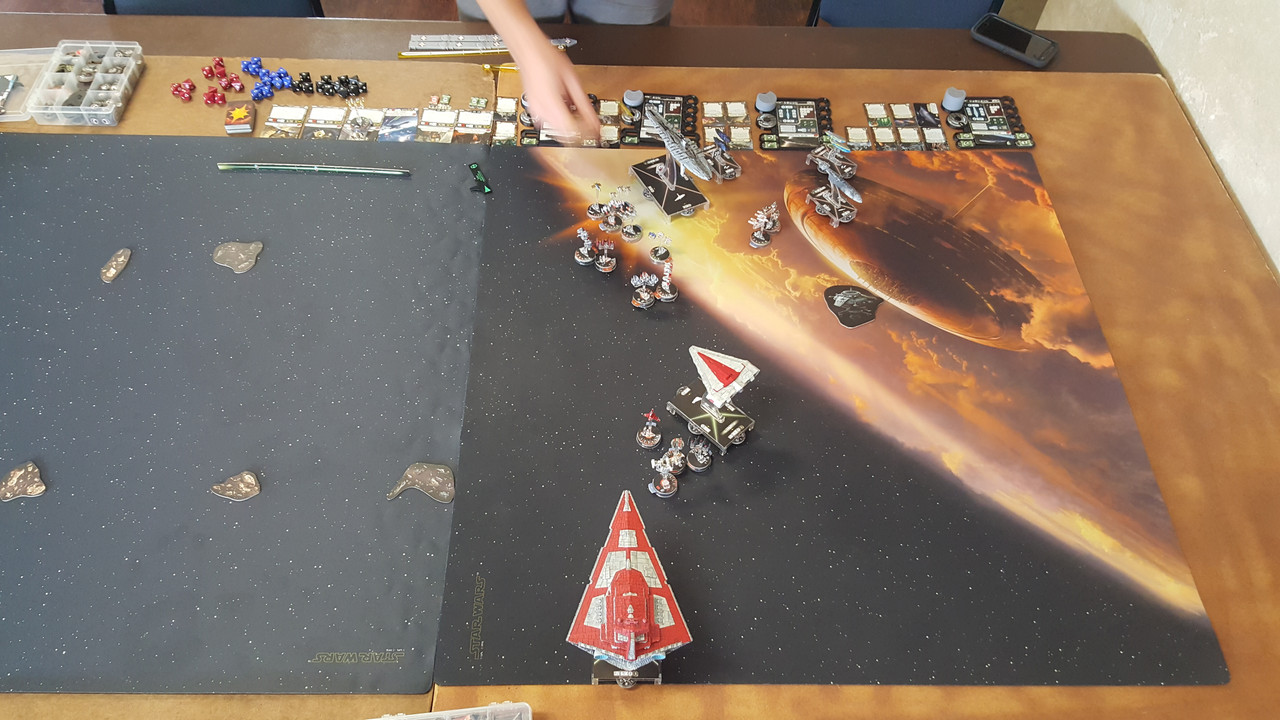
Other than Maarek, I was able to mostly mitigate Ruthless. I didn't put squads in the 75's front arc or at close range, and made him choose between shooting the quasar as it made it's speed 3 run around the back of the 75 or flakking. He choose to try and kill the quasar, but end of the game it lived on 1 hull due to the fortune of not pulling a structural in my 4 Dodonna crit options. Meanwhile, the MC75 and Admo moved up and both gently yawed to put themselves by the station noses toward the ISD. On the pryce turn a moved so the ISD had done a 90 degree turn and was double arc'd by the 75 and pointed straight toward the narrow edge. I had mid range gunnery teams on both the 75 and admo, and I used Thrawn to send squads toward admo, stripping tokens down to a red redirect and an evade. I needed 4 damage after the admo discard on the 8 dice from my ISD front arc. My roll turned up 9 damage, which he lando'd to 3 and admo'd to 2. Two damage from the front of an ISD 2. Egads. But admo was smoking and almost tokenless, and his rolls were equally bad, and the ISD was able to to do a fancy 2-1 yaw inside turn to ram the MC75 and fall back into a position where the 2 large ships were locked front to front ramming until 1 died. Colin tried to correct with Leia and nav tokens but wasn't expecting the move and the correction came a turn late. The MC75 dodged around the side, but wasn't able to dodge the front arc and the ISD got the table by killing admo out the side and the 75 with it's front arc.
Game 2: Game 2 was against Brad and his Rieekan Ace holes. Man rieekan will just not die (irony). Seems like I face this list every tourney. This list was especially brutal cause he went ahead and shoved Rieekan on a hammerhead deployed pointed completely opposite direction my fleet was and sped along the board edge just like the good old days. The picture here is taken after my rd 1 and after his pelta moved, FCTing squads into a nice tight ball in the middle of the play area, waiting eagerly for my fleet to run right through them.
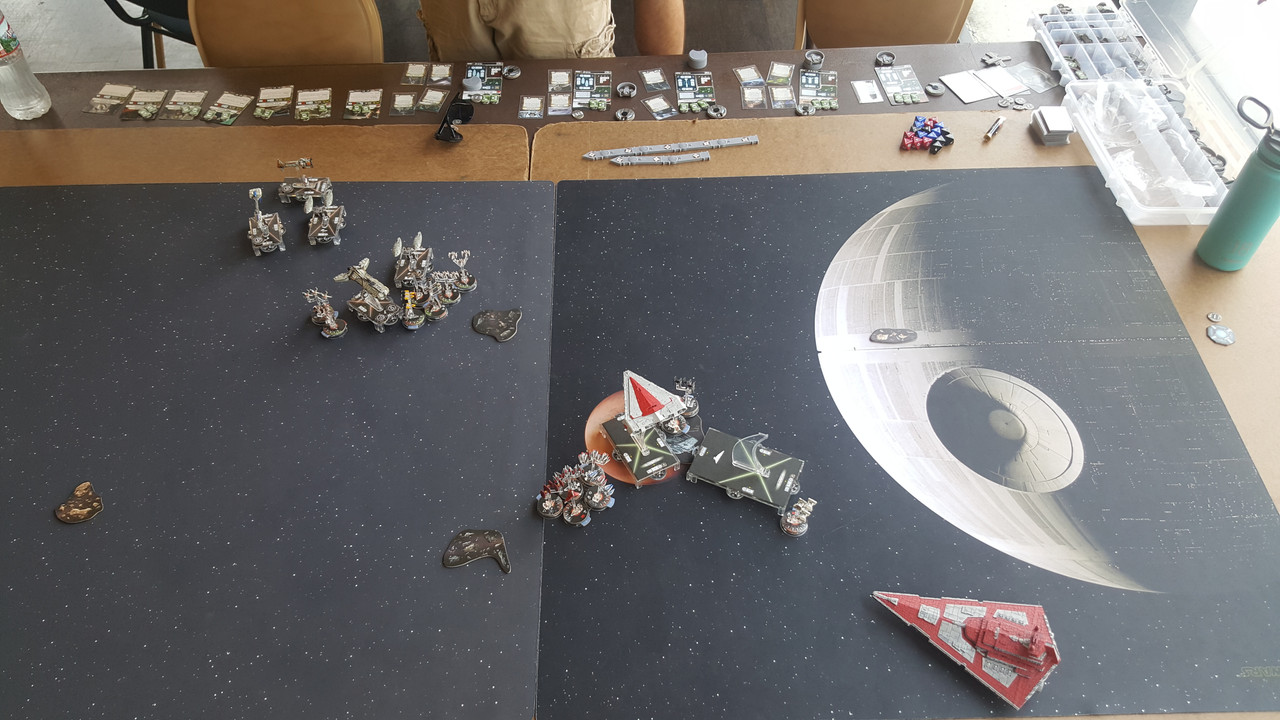
This was mostly my modus operendi with this fleet - I would deploy the quasar spd 2 and the ISD spd 1 giving off the impression that I am going to slow roll and hide behind my squads - convincing my opponent hopefully that they can safely token up turn 1. Then turn 1 I would reveal a Thrawn a nav and dial a squad on the quasar and a nav on the ISD - then I would squall and nuke with the defenders and ramp the quasar to 3 and then token/dial on the ISD and jack it up to 3 as well, tucking it safely right behind the quasar in position for a turn 2 pryce. Against Rieekan however, I was not willing to do the turn 1 alpha and eat an Adar Wedge. That was suicide. Instead I let him push his ball up, and then I flew in maarek and Mauler and engaged the whole ball, dealing mauler damage and then even being able to attack with maarek via Jendon cause I was able to position him close enough to jendons starting location he could tap turn 1 instead of move. In this picture below you can see the end positions for turn 1, setting up the pryce turn. I have 2 Defenders, jendon, jonus, and a defender on the back line (and black squad, but he is getting sent in by the quasar) ready to be activated by the ISD when he pryce's. I would unpin maarek and move him out of the scrum so the ISD could activate him with first on turn 3. This fleet plays a delicate dance with squads going in and out of the fight.
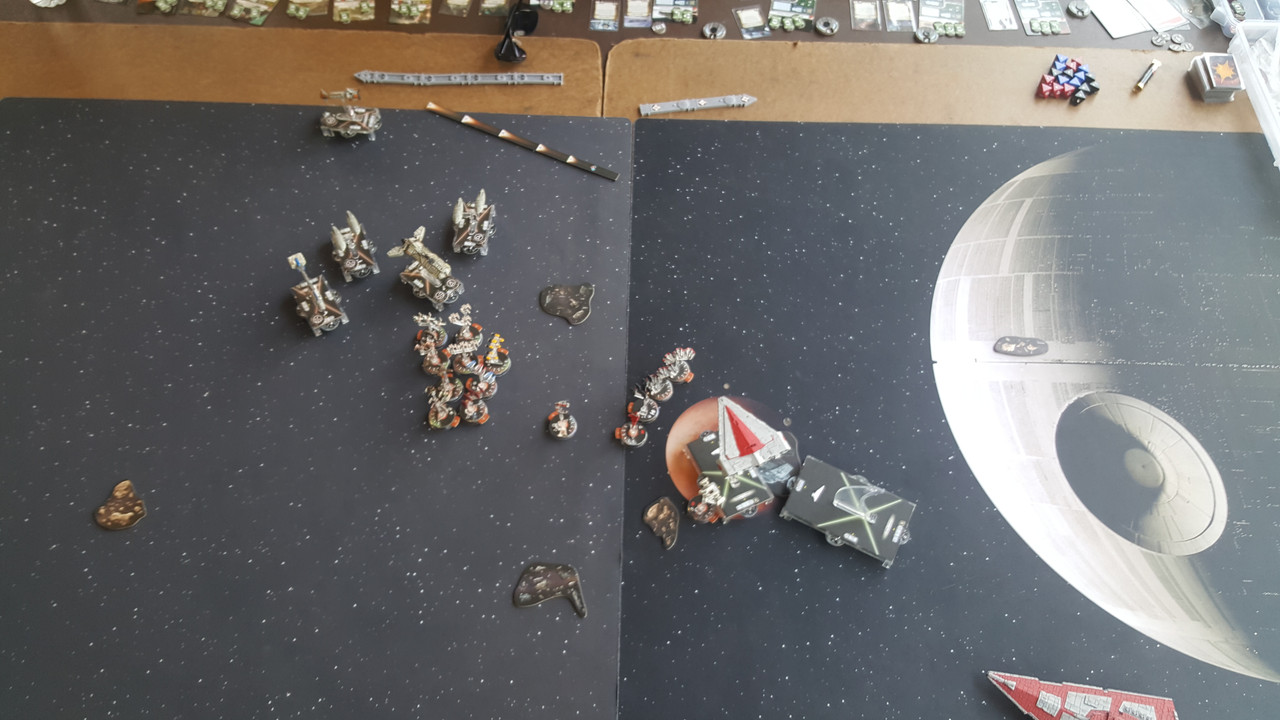
Jan died in the alpha turn 2, locking down his ball and preventing them bombing the rest of the game. But my squads bled hard against the trench trio and adar Yavaris. I was able to keep the 4 critical squads of jonus, maarek, jendon and a defender out of the scrum, sacrificing the rest to the grinder, but setting up the ISD to begin harassing yavaris and the pelta, and them move up aggressively to the point where I could get a gunnery team shot to the side of both yavaris and the pelta. With first player turn 3 after pryce I took that GT shot and killed Yavaris and the pelta, forcing him to choose to only Rieekan one. He choose yavaris, and he killed some squads, but since Jan was dead there was no way they could get onto the ISD. The ISD stayed speed 3, and made a bee line straight through the bomber cloud and racing to cut off the hammerhead as the board edge forced it to curl up. The squads continued to murder each other, but it was clear he would not be killing a ship today.
End of turn 5 Brad expertly moved the Hammerhead to a place I didn't even think existed where he wasn't in blue range. I needed 4 damage on my shot, but 3 and a ram would do it. I rolled blank, acc, acc, hit and failed to table, ending up with 1 damage and a ram and leaving him at 2 hull. We tallied MOV and since I hadn't lost any ships it was still good enough for an 8. But Rieekan is a pain.
Game 3: Game 3 I played Pete I think - I realized I was calling him Pete but that may or may not have been his name. No excuse, the guy is awesome and we have played in a bunch of the same tournaments and there is no excuse why I even should be slightly fuzzy on his name. Anyway, he was running a red dice **** vader fleet, with a Cymoon, 2 arquitens, demo, and a coms gozanti. It's the same fleet Rasproteus used at Gencon, and I am so so so stoked that this fleet is getting more play! Seriously, people should borrow fleets more, it's not a bad thing, this a darn fun fleet to fleet to fly and it performs! Man does it perform. I know cause I've played against it at the hands of Rasp so I knew what this fleet could do. Ultimately, I think this last game went my way BECAUSE I had played against it so many times before and I knew there was only 1 way I could kill it - bum rush vader, pray that the dice suck. If I can kill vader mostly unscathed thanks to Pryce, and then have his fleet be totally without rerolls I have a chance. I know that ONE of us is getting tabled this game. There's no other way we get out of it.
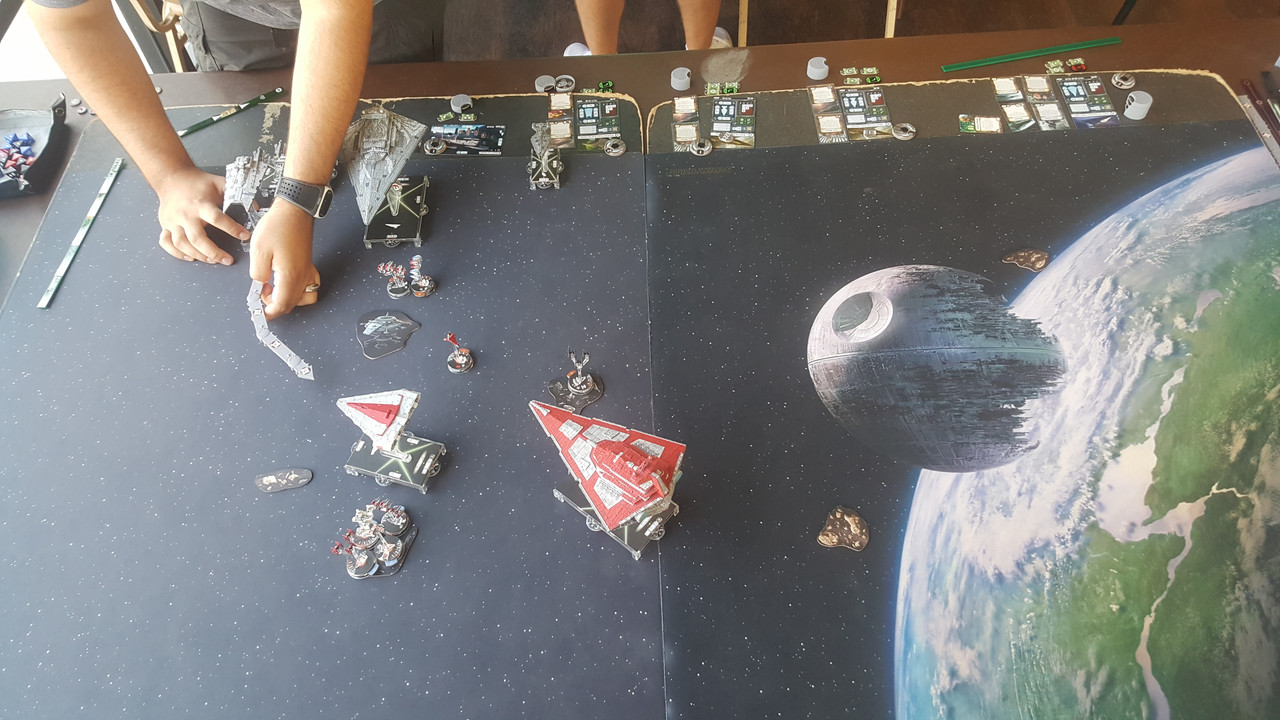
Thanks to Strategic Advisor he makes me move both ships forward, so now he gets to move his entire fleet to counter my movements. In this game, I deployed the ISD 2 at speed 2 and tokened the nav and a squad - again this is experience. I know that I need 5 squads off the pryce turn to kill the ISD, and by nabbing the nav token here, when I reveal a nav/thrawn squad next turn I can hop up to 3, double arc the ISD, kill it, then token and nav back down to 1 and camp the contested outpost and wipe out the MSU. This is exactly what I do, but since he knows where I am, he sets up a gauntlet for me to run through that is brutal.
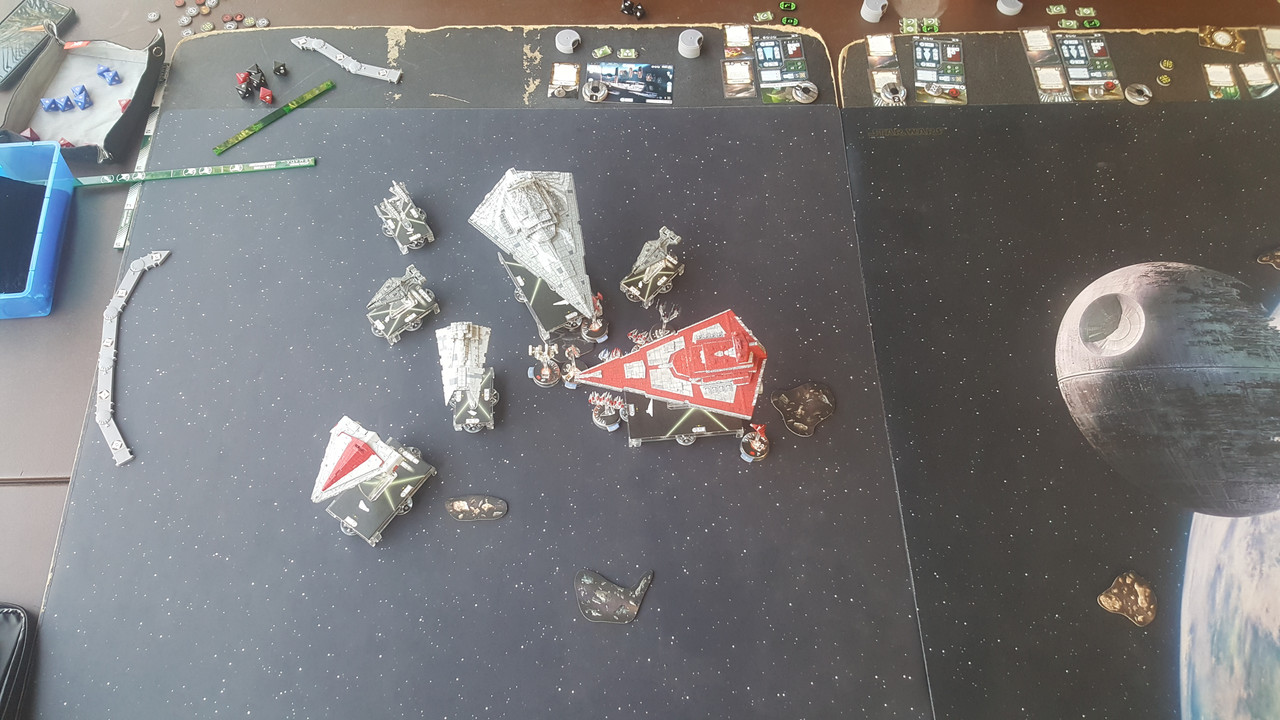
This is end of turn 2. You can see the guantlet that is set up. ISD in the middle, both side arc's of the arquitens, side arc of the demo, even the gozanti chugging forward to be prepared to add his dice if needed. I have his ISD double arc'd however, and I have been pouring squads into his front arc since turn 1, so his shields are starting to break down and I've even done a little hull. I discard the squad token and send 5 squads right into his nose. He spends some tokens, but when I have avenger AND Jonus on the board spending tokens is a mistake. The ISD needs 6 damage to kill vader after the squads, and since that is the expected damage on my front arc, I get it with my natural roll. Vader is out of the fight. My gunnery team shot goes into demo and I reduce it to 2 hull, then drop to speed 2 and ram - I can token down to 1 next turn. I am now at speed 1 on the contested outpost and have to weather 2 Arq's and demo. This turn I take it mostly on the shields - without rerolls he struggles to produce consistent damage, one of his Arq's even rolls 4 blanks and a double - 2 damage. It's a good thing too, because I lose the quasar to demo and demo scoots into my side arc. Turn 4 I kill demo, and put 2 hull damage on one Arq and 3 on the other. The damage at this point starts to add up. To survive I had to discard my brace due to IO and I am shieldless. The Goz has double arc'd me in the front and he forces me to discard my contain as well as does 2 hull damage. I am shieldless, with no brace or contain, and down to 6 hull with 2 Arq's in red range, one on each flank. The picture below shows the start of turn 5.
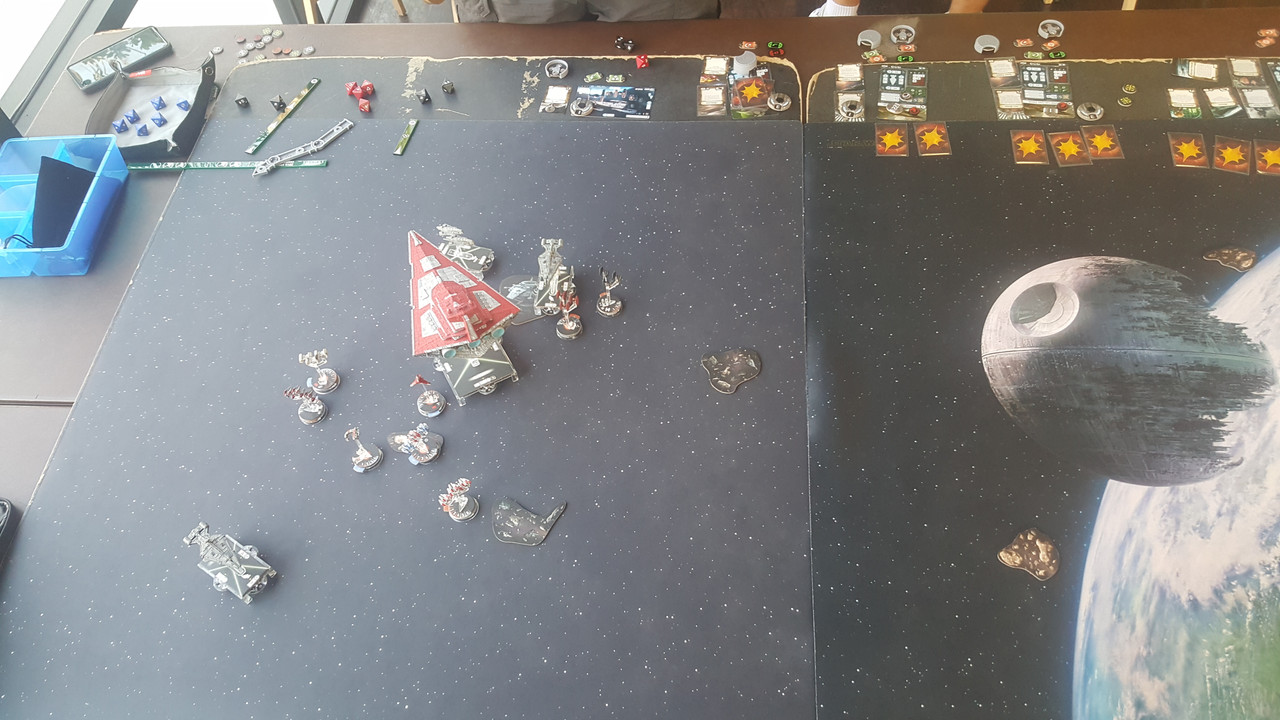
I activate the ISD, kill the far one with squads, and then I finish the other off thanks to QBT adding the extra blue to the side attack. An incredibly close game, but since the Quasar is so points-light and I had all my squads and ISD up I finished with a 10-1.
All in all this was an awesome tournament. I got to test this fleet I have been working on against 3 great opponents playing super tough and radically different fleets. I am excited to progress with this fleet, and potentially make a few slight tune up modifications to it to keep it competitive. But there is no denying in my mind at this point that 2 ship fleets with Thrawn are incredibly flexible power houses. I deployed roughly the same in each game, what I call my solitaire deployment. I deploy my stuff the same way every time, let them react to me, and then adjust to that rather than try to think up a plan on the fly on deployment. This means that each game took a radically different path to set up the damage and bring the game to a close than the others, even though the deployment was the same. That's why most of my pictures are of the end of turn 1, because my quasar deployed at speed 2 nose on the line and the ISD deployed spd 1 with it's back edge on the board edge dis 2/3 from the quasar every game (but the third where I knew I would need a nav token so deployed spd 2).
I'm looking forward to the next chance to play this fleet in competition! Potentially regionals, assuming we don't see the SSD before then. Then I will probably be on to 1 ship fleets!!