Cannot Get Your Ship Out February 2018

By Snipafist, in Star Wars: Armada

http://cannotgetyourshipout.blogspot.com/2018/02/fleet-building-201-archetype-guidelines.html

In my earlier article on basic fleet-building , I mentioned 3 basic types of "skew" fleets: Big Heavy, Swarm/MSU, and Heavy Squadron. John and I have since written articles on dealing with those types of fleets (as well as more specific components of fleets that can be troublesome), but I've had some requests for articles in reverse: namely, some idea as to how to build and use those particular types of fleets. That seems pretty reasonable, so let's proceed with Fleet building 201, an article series where I'll cover some guidelines for building and using fleets based around those three basic archetypes.


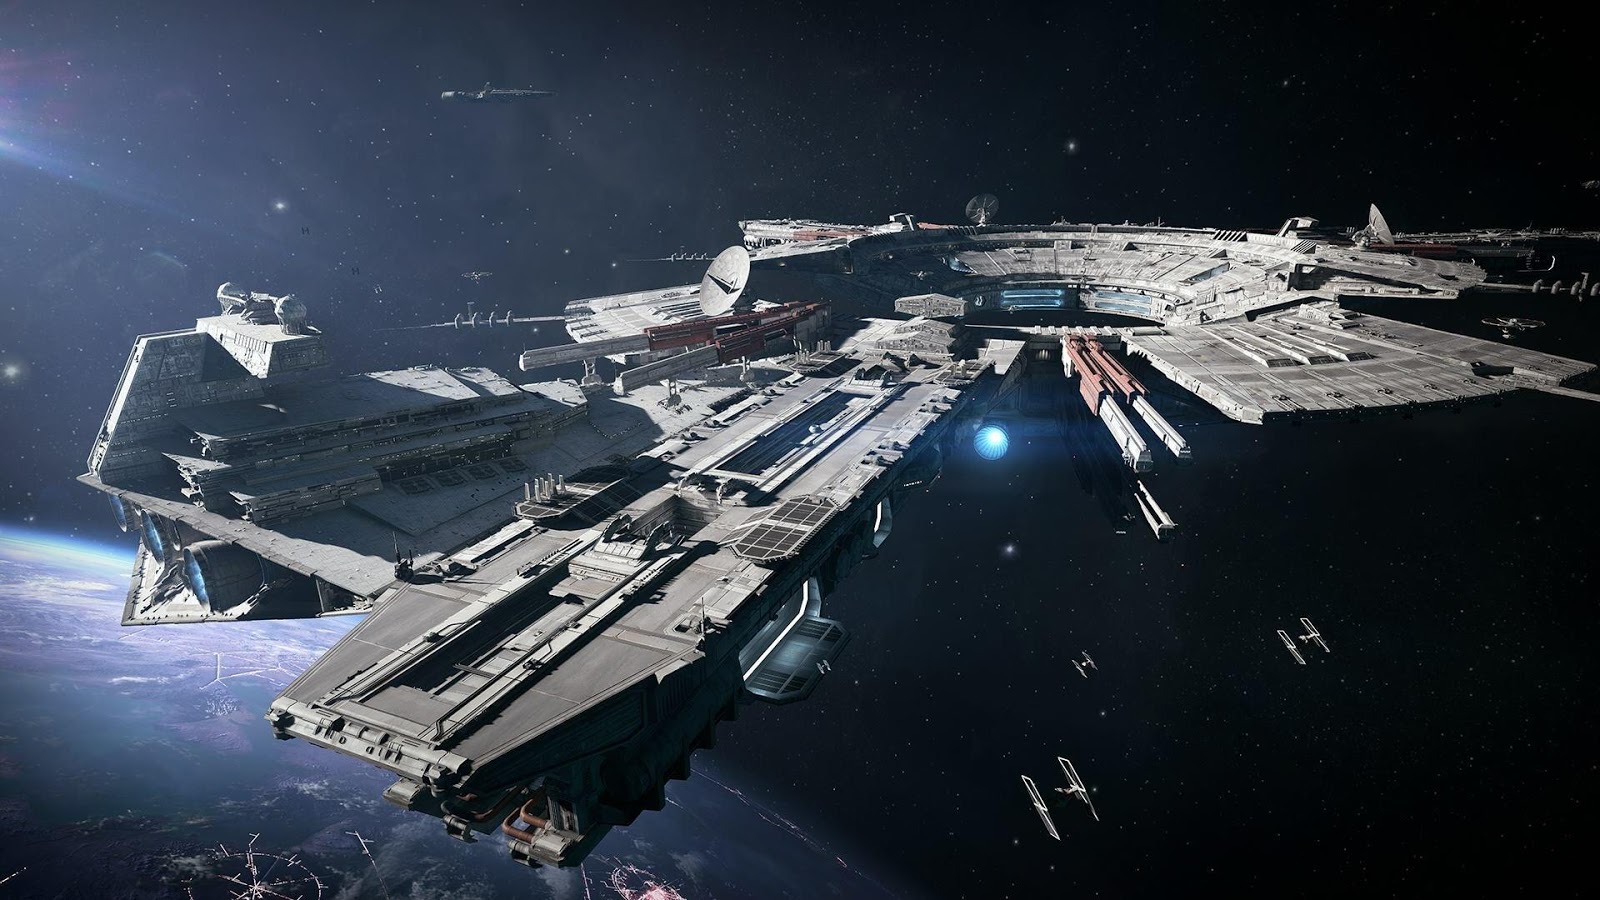
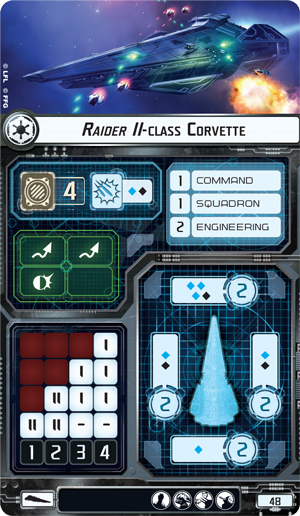
Before we get any further, I want to discuss why I consider those three options the basic archetypes for Armada: in short, it's about points and the value of asking hard questions. Let's cover points first: every fleet is given a set number of points (duh, of course) and ships are mandatory but squadrons are optional. This leads to basically three fairly extreme builds within those parameters: going lighter on squadrons but heavy on ships, which then begs the question of "is that a few big ships (Big Heavy) or is that many smaller ships (Swarm/MSU)?"; or going heavy on squadrons and then figuring out what to do with the remaining points for ships (Heavy Squadron). Skew builds also tend to ask the hardest questions, by which I mean "present a threat that the opponent needs a good 'answer' to or risk being disadvantaged." Take Big Heavy, for example, which is the most straightforward of the basic archetypes: Big Heavy benefits from the fact that larger ships offer more individually powerful activations and because damaged but not destroyed ships in Armada do not suffer any statistical detriment or give up any points at the end of the game, a heavy ship is the sort of thing that needs a substantial concentration of firepower to seriously threaten and underestimating it can be catastrophic. Effectively, Big Heavy's 'question' is "can you destroy my heavy ships in a time and cost-effective manner before they remove the credible threats from your fleet?"

Pure skew fleets, however, also tend to have the largest vulnerabilities, which is why they're often combined with elements of the other archetypes. Typically, due to points constraints, it's difficult to successfully merge all three archetypes into a cohesive fleet, but focusing on one archetype while minoring in another is common (or sometimes even double-majoring, to the complete exclusion of the third archetype). Think of it as something of a triangle, where you begin in one corner and then decide how much you want to dilute your core idea in order to include elements of the other two corners:

Untitled.png
Only the best that MS Paint has to offer for our readers, yes-sirree!

This means that even a fairly balanced fleet operating with a decent but not heavy serving of everything would find itself roughly in the middle of our example triangle - not a more heavily skewed fleet but one that includes some elements of the three stronger skew approaches.

So with all that said, I'm going to give some basic guidelines on the "undiluted" skew of each type but then also cover how to include elements of the other two, while still majoring in your chosen approach. Most fleets include elements of at least one other archetype to smooth over some of the inconsistencies of going too hard on their own shtick, and we'll cover how/why to mix them.

The original plan was to include everything in this article but it became clear rather quickly that the article would end up being extremely long. Therefore, I'll be breaking it down into articles covering each specific archetype, plus some permutations. The first article will be on Big Heavy, and it should be arriving later this week.

I feel I should mention that the Big Heavy article is at least halfway done, but a very needy infant son has made finishing it nearly impossible lately. I hope to have it done by the end of the week, but I make no promises.

http://cannotgetyourshipout.blogspot.com/2018/02/fleet-building-201-big-heavy.html

Fleet building 201: Big Heavy

heavy-metal-2.jpg
Vader knows where it's at.
Big Heavy
As mentioned in the header article , Big Heavy is looking to stress the inherent strengths of heavier combat ships (medium and large ships focusing on direct confrontation). Heavy combat ships have high-value activations that can get a lot done. For the amount of space they take up on the table, they can throw an awful lot of dice, and for the most part they can take a lot of punishment, especially if the enemy is unable to gang up on them to overheat their defense tokens. Heavy ships that are only taking one or two attacks each round are in most cases effectively immortal, especially with the right defensive tech; conversely, light combat ships taking one or two attacks each round are going to be destroyed if they can't get out of trouble and soon. A Big Heavy fleet is looking to quickly destroy heavy-hitting opposition that threatens its heavy ships and then hopes to spend the rest of the game casually gobbling up the less-threatening survivors.

Before I get any further I want to make it clear that there will be a lot of generalizations coming up in this and the future Fleet Building 201 articles, which are useful for communicating overall points but there are always exceptions, especially in fleets made by players who know what they're doing inside and out and how to play around what would be a critical problem for a less-experienced player.

Elements to consider when building a Big Heavy fleet:
  • Sufficient threat projection. With fewer activations, you're likely getting outmaneuvered and so keeping your best arcs on target could be difficult. Ships/upgrades with better speed or maneuverability can help rectify this, as can longer-ranged ships, which are more generous with their ability to project threat. Shorter-ranged heavier ships (like ISD-Is , for example) all on their lonesome without support elements or a decent bid for first player are likely to struggle to get much use from their black dice .
    • On a related note, simply bringing more combat ships can help with this as well so your fleet can be in (or at least threaten to be in) more places at once. It's a difficult balancing act to determine what type of ships and how many to bring in addition to how heavily those ships should be upgraded. Points disappear fast with Big Heavy due to the inherent expense and upgrade-hungry nature of the heavier combat ships.
    • Speaking of activations, wave 7 officers like Strategic Officer or Bail/Pryce seem to offer a means of addressing this traditional weakness.
  • Damage maximization. This includes a number of considerations against both small ship swarms and enemy heavy ships, so the upgrade suite in question will usually be some kind of compromise tilted towards whichever ship threats you consider to be more troublesome for the ships you're using. Big Heavy doesn't generally do very well if it's stuck in protracted slugging matches with other combat ships, especially if they're able to focus-fire on your larger ships. Even an extra average point of damage or two or guaranteed accuracy results can destroy enemy ships a round or two earlier, which can have cascading effects that benefit you (less ships attacking you back, less enemy activations, ability for you to focus fire on new targets without wasting attacks on nearly-dead-but-not-quite targets, etc.).
    • Basically anything that improves your dice reliability through rerolls or flipping to specific sides, adds attack dice, debuffs defense tokens (say for example something like XI7 Turbolasers ), etc. You want your attacks to be as reliable and as lethal as possible to wipe out ship threats to you ASAP.
  • Counter-tech. Consider the other two main archetypes and how you expect to handle them. If you skimp on your anti-Swarm or anti-Heavy Squadron tech, your weaknesses will be exploited. This is one of the more appealing reasons to minor in a secondary archetype, which is true of every "pure" skew archetype build but for my money is even more important for Big Heavy. Swarm and Heavy Squadron can both produce a volume of attacks that can overwhelm heavy ships' defense tokens , which can turn your previously-robust ships into scrap faster than you'd think.
    • One thing I find interesting is pure Big Heavy builds in my experience tend to suffer against pure Swarm or pure Heavy Squadron builds due to this weakness, but they tend to be stronger against more mixed builds than their two pure skew cousins, as the mixed attack approaches of more versatile fleet builds can end up lacking the focus necessary to really put the screws to several heavy combat ships in sufficient time.
Basic usage recommendations:
  • Deploy towards the edge . You will often be out-deployed as you have so many points in relatively few ships. Deploying centrally is a great way to get ganged up on, which you're looking to avoid. Attempt to refuse a flank by deploying towards an edge.
    • This also makes Superior Positions and Solar Corona easy objective choices on occasion when you are first player, as you're usually operating at a deployment disadvantage anyways. Just be careful about post-deployment elements of those objectives.
  • Positioning, positioning, positioning. The name of the game is local superiority. In general, every fleet in Armada would love to have all of its combat elements engaging only a portion of the enemy fleet at a time - the advantages are obvious in a unified fleet attacking divided opposition. Big Heavy is the archetype best able to do this because so much of its power is concentrated in so little space. Making that desire a reality requires some very savvy maneuvering, speed control, and reading the enemy fleet.
    • Try to not get in your own way. You want your heavy ships to be close enough to tag-team enemy ships but not so close that they obstruct shots or they end up ramming one another. Any ships on the outside turning in are going to need to be going a higher speed just to keep up, for example.
    • In general, cranking your speed up early on can help you engage a more thinly-spread enemy fleet before it has an opportunity to navigate all its ships to gang up on you, but be careful of being too reckless and sailing right into a trap.
      • Overall it's better to stay fast against small ships where you can expect to drop them in one or two shots so you can plow through them and move on (or make a quick getaway) and slow down a bit to keep your best arcs on target against enemy heavy ships that might require a few more salvos before they are put down.
    • In short: navigate commands are your friends. I think few would disagree when I say that navigate is quite likely the best default command in Armada and when you have so many points wrapped up in so few ships, having them in the right place at the right time is extremely important.
  • Don't be afraid to dine and dash. Evaluate the board state after your initial slugfest and determine if your heavy hitters have enough stamina to trade punches for another round or two against newcomers. This can be a very crucial decision point for a Big Heavy fleet: if you decide to dive back into the fray and end up biting off more than you can chew, your heavy ships can have a hard time disengaging and will give up a lot of points when destroyed. If things go well, however, you can win by very large margins.
    • When in doubt, it's usually best to make a break for it into the back field or off on the flanks - a heavy ship that's trying to avoid serious combat after the initial dust-up can be very difficult to destroy provided it chooses its flight path intelligently and mixes a few repair commands in there. It may in general be out of the fight but it's still dangerous to lighter ships that dally too long and don't take the threat seriously, so look for opportunities to pick up some easy kills later in the game while preserving your points.
  • Intelligently attack. A pure Big Heavy fleet does not get many individual attacks against enemy ships, so make sure you're sending attacks against appropriate targets. It's better to use one of your two attacks on a weak-arc shot that assists one of your other ships in destroying an enemy ship than to make a single strong-arc shot against a target that will require a few attacks to destroy but you're likely only getting the one as it flies by. This is another one of those "this is generally good advice for Armada overall" kind of statements, but it's particularly true for Big Heavy given its paucity (look out, fancy $5 word coming through) of attacks.
    • On a related note, flak intelligently. Many heavy combat ships have two-dice flak batteries and when overlapped appropriately and used consistently, they can really add up against squadrons. That being said, don't pull the trigger on flakking instead of making a "real" attack unless that flak will meaningfully contribute to your anti-squadron plan.
      • I guess what I'm getting at here is "I've seen people make generally meaningless attacks when they should have been flakking but I've also seen people flak but not have a plan for actually destroying/hindering squadrons, and both of those extremes should be avoided when you have better options available."
Mixing it up with Big Heavy
Adding elements of the other archetypes to a Big Heavy chassis can provide more options and produce a more well-rounded fleet. The extent to which you add in the other two, what elements of those two, and how much of one or the other (maybe a bit of each, maybe one completely to the exclusion of the other) will vary tremendously. Let's first cover some terms so it's clear what I mean when I reference different amounts of investment:

Weak would mean no more than 1/6 of your available points. It's featuring that element in a support role at best, usually to cover weaknesses. This leaves enough room to add a dash of the other archetype if you like or to really strongly focus on the base archetype (in this example, Big Heavy).

Moderate would mean no more than 1/3 of your available points. The element in question is at this point the junior partner in the fleet and starts to more strongly add elements of its archetype to the fleet as an active contributor moreso than a defensive or support element. It should be noted that while each fleet is limited to 1/3 of its points in squadrons, a Heavy Squadron archetype is more than just the squadrons - it is also points invested into carriers and squadron-boosting upgrades. A Moderate investment still leaves open the possibility of a Light investment in the remaining third archetype, but you run the risk of diluting your core archetype if you're not careful.

Strong would mean up to 1/2 of your available points. The element in question becomes a co-partner, usually to the complete exclusion of the third archetype.

In general I wouldn't recommend going past 50% of your available points on adding elements of the other archetypes or else it dilutes your fleet's purpose a bit too much. There are some exceptions, particularly when it comes to commanders that are relying on a combination of squadrons and combat ships, such as Sato or Sloane .

Swarm/MSU
Adding Swarm/MSU elements to Big Heavy provides it cheap activations it desperately wants as well as access to faster, cheaper sources of attacks that can get to specific areas of the board more easily than heavy combat ships can, and can assist your heavier ships in ganging up on tougher targets.

Weak Swarm usually means adding a few flotillas to pad your activation count and to provide some support elements (usually with Comms Nets). It could also be a single cheaper small-based ship to assist with chasing down faster, lighter enemy ships or for lurking behind your main line and finishing off enemy ships that barely survived a run-in with your heavier bruisers.

Moderate Swarm can take a few forms, from combining a few flotillas with a corvette to going heavier on one of those (lots of flotillas, or 2ish small ships). If you go heavier on flotillas, you're usually able to activation pad pretty effectively, and can meet or exceed other fleets in terms of activation count. If you go heavier on small combat ships, it usually provides better table coverage, quantity of attacks, and threat projection against arc-dodging enemy ships. Your call.

Strong Swarm generally goes heavier on the small combat ships (although you'll still see a flotilla or two, usually), with the end result often being a rush across the table, trying to overwhelm the enemy with lots of combat ships converging on select targets. It's tough to fit squadrons in this kind of build, so these fleets often go very light on squads (usually two aces or four TIE Fighters at most) or use none at all, hoping to simply annihilate the carriers before the squadrons do too much damage.

Heavy Squadron
Adding Heavy Squadron elements to Big Heavy helps cover their weaknesses against bombers, but as the investment increases it further strengthens Big Heavy's activation economy, allowing for some extremely powerful individual activations.

Weak Heavy Squadron is something of a misnomer - this level of investment is usually appropriate for Small Fighter Coverage and not much more. If you're feeling risky, you can focus on bombers and perhaps a source of Intel and hope to hit squad-light opponents; although Rebellions are built on hope, consistent Armada success often is not, so I can't really recommend that. Small Fighter Coverage, however, helps address one of the biggest weaknesses of Big Heavy, and that is getting nibbled to death by bombers that you often don't have a sufficient counter to. Getting some fighters on the table keeps the opposing bombers honest, and should give you a lot more breathing room.

Moderate Heavy Squadron will usually take one of two forms: if your heavy ships inherently have high Squadrons values and you're willing to commit to commanding those squadrons frequently (or have Thrawn as your commander and he's fine yelling at squadrons for you), then you can go all-in on a Large Fighter Coverage squadron group. We'll talk more about that under Strong Heavy Squadrons. The second, more common, option is to invest the points into a Medium Fighter Coverage group and a ship (or ships, if you're going with flotillas) to command them.

Strong Heavy Squadron is the tech and ships to boss around a Large Fighter Coverage group, although in some cases it may be a bit pared down compared to a "full" Heavy Squadron archetype. You may also need one or two of your heavy combat ships to help with squadron commands, particularly earlier on. A Heavy Squadron/Big Heavy partnership offers a number of advantages, primarily in two areas:
  1. Squadrons are the most mobile units in the game and can be extremely useful for putting damage into targets on an as-needed basis. This can be extremely helpful for going after fast ships that evade the best arcs of your heavy combat ships and for finishing off targets that got savaged earlier but need a little bit of help shuffling off the mortal coil.
  2. When combined with heavy combat ship with a decent to high Squadrons value (like an ISD-I or -II), you can get some extremely strong individual activations with this pairing. Commanding a large number of squadrons and then getting in two heavy ship attacks does a substantial amount of damage in a single activation, which can quickly overwhelm enemies that were hoping for a less explosive burst of damage all at once.
The main downside of a Heavy Squadron/Big Heavy partnership is you're frequently light on activations unless you invested heavily into flotillas, in which case it can be difficult to fit more than one heavy combat ship, or potentially two cheaper specimens with light upgrades.

A quick note on flotillas
Because flotillas are both cheap activations and cost-effective (if individually mediocre) squadron-pushers, you can really group them under both Swarm/MSU and Heavy Squadron archetypes. It depends on the way those flotillas will be used, but they effectively can count for both/either.

Final thoughts
I'll be touching on starting with a foundation of Squadron Heavy and Swarm/MSU in future installments. It may be a little while - this one took longer than expected (in part due to my son being needier than usual recently), but I look forward to finishing off this article series ASAP. As always, if you have any questions/requests, please ask!

http://cannotgetyourshipout.blogspot.com/2018/02/heavy-ion-emplacements.html

Heavy Ion Emplacements

John and I are getting around to updating older articles due to wave 7 (the list is very long). As it was in wave 6, we're trying to thread the needle between "getting new information up as soon as possible" and "actually having some experience with what we're discussing," so don't be too surprised if earlier impressions are later updated in light of a greater depth of experience later on.

For now, I've updated the ion cannons article - there was a bit of editing but primarily I updated the article with a section on Heavy Ion Emplacements:

heavy-ion-emplacements.png
Remember, kids: recreational taser play while piloting a starfighter is bad news .
Heavy Ion Emplacements
  • The effect only resolves if you have a blue critical icon showing when the time comes to choose your critical effect.
  • Heavy Ion Emplacements exhausts upon use, which means it can only be used once per activation (as it will be exhausted when used the first time) and can't be used at all if it has been exhausted preemptively by something like the MS-1 Ion Cannons.
  • You must apply as much of the card as possible, so if an eligible hull zone is missing shields, then HIEs won't affect that particular hull zone.
    • Don't forget you always have the option of using the default critical effect if you get a blue crit but your target has few to no shields remaining.
    • Because of the timing order, HIEs trigger before damage in the pool is applied, which can have consequences for redirect tokens and how much hull damage gets through the suddenly-reduced shields.
Why would you want to use Heavy Ion Emplacements?
Because it's a critical effect that adds three damage . There aren't even any black critical effects that directly add three damage to whatever they are targeting, and Heavy Ion Emplacements can even trigger from long range when used with effects that add blue dice at long range (like Quad Battery Turrets ) or when your blue dice range gets extended from Disposable Capacitors . HIEs can add a lot of extra damage over time, but it's important to realize that you'll really only want one or two in a fleet because the more effective they are at removing shields, the less effective they are in future attacks against targets with depleted shields: they're effectively an upgrade that shines brightest in the early-to-mid-game, but there's nothing wrong with being good at softening up targets for easier destruction.

Heavy Ion Emplacements have competition from other ion cannon upgrades, particularly the "standard" SW-7 Ion Batteries and Leading Shots, which are generally better for smaller double-arcing ships (SW-7s) and larger mixed-dice battery ships (Leading Shots). Heavy Ion Emplacements can act as a replacement for SW-7s on ships like CR90Bs or Interdictors , provided the player is comfortable with gambling a bit on the effect triggering or (more likely) has a commander that can assist with rerolls or guarantee critical results, like Commander Leia (concentrate fire to add a die and reroll), Commander Vader , and Admiral Screed . On larger ships, they can replace Leading Shots when used with similar commanders, provided you feel comfortable giving up the "bad dice insurance" of Leading Shots in favor of something that produces more raw damage when you get the critical.

Heavy Ion Emplacements are particularly appealing on small and medium ships with offensive retrofit slots that are already keen on using Disposable Capacitors, such as Raider-IIs , Interdictors, and VSD-IIs (usually if that VSD has some kind of dice-control commander). Disposable Capacitors and HIEs synergize very well in that they will often let the expensive HIEs start triggering one round earlier, helping to subsidize the high expense of the upgrade, but also because long-ranged attacks are often made against targets that are still pretty healthy, increasing the chances of the HIEs triggering for full effect. The Raider-II in particular is a big fan, because it generally did not gain as much from SW-7s as its CR90B cousin and it previously lacked a strong ion cannon upgrade: with one strong arc (so it doesn't matter if HIEs only work once per activation) and access to Disposable Capacitors on the cheap, the Raider-II seems designed to cooperate with Heavy Ions.

The last thing I'll add to this review is to understand the importance of target selection with your Heavy Ion Emplacements: the upgrade is stronger against ships with redirects (as it not only depletes a shield in the arc you're targeting, but also in both arcs the damage can get redirected to) and weaker against ships with evades (as if you can't lock down the evades or produce more than one blue critical result, the blue crit die will likely be rerolled into a non-crit or removed from the pool altogether). This means that in general, you should be looking to go after bigger ships with your HIE-equipped ships.

http://cannotgetyourshipout.blogspot.com/2018/02/raider-ii-section-updated-to-include.html

Heavy Ion Emplacements make a huge difference to Raider-IIs and that is now reflected in the Raider article . Later on I'll be updating the VSD(-II) and Interdictor build sections of their articles to mention HIEs, but likely won't make too much noise about it. It bears mentioning for the Raider-II, though. Here's the relevant section:

raider-ii-class-corvette.png
Winner of the wave 7 "most improved" award!

Raider-II
The Raider-II is similar to the Raider-I with a few generally minor differences:

  • Front arc trades out one black die for a blue die, bringing it to 3 blue + 1 black
  • Flak goes from 2 black dice to 1 black + 1 blue
  • Ordnance slot replaced with an ion cannon slot

With the addition of Disposable Capacitors in wave 6 and Heavy Ion Emplacements in wave 7, the Raider-II is finally having its moment. That combination, which we'll be discussing shortly, has breathed a lot of new life into what was otherwise a fairly troubled chassis. The issue with the Raider-II compared to the Raider-I is that with black dice in its anti-ship batteries and anti-squadron flak, the Raider-II does a fairly poor job unless it is at close range to get full use from its dice, but at that point, you're probably better off with a Raider-I to just go all-in. Similarly, a Raider-II compared to a CR90B is 9 more points (23% more!) for a ship that's oddly less conducive to using SW-7 Ion Batteries and less effective at medium range when factoring in both arcs. So if we're going to get solid use from a Raider-II compared to a Raider-I or a Rebel CR90B, it's going to be due to its upgrade suite. It took until wave 7, but it finally happened!

Upgrades
Disposable Capacitors + Heavy Ion Emplacements I'm grouping these together because one without the other wouldn't have been quite sufficient to do the trick. Back in wave 6, I was having mixed success with Disposable Capacitors and Gunnery Teams but it wasn't quite enough to justify the inclusion of the Raider-II, but that has changed with the addition of Heavy Ion Emplacements. I've written more about why these two go well together in the Heavy Ion Emplacements write-up in the ion cannons article, but as it relates to Raiders specifically, there are a few things to elaborate on past the inherent synergy of being able to get in an extra round of using an expensive powerful anti-shield blue crit upgrade when its targets are still full of shields. Specifically, this kind of setup, especially earlier on when you're angling to attack from long range with the Disposable Capacitors, temporarily avoids the standard problem with Raider defense tokens . Your defense tokens are best at defending at long range, and at least for that one-round window, that's exactly where your Raider wants to be attacking from. Past that, you'll want to be sneaking into medium range to continue applying pressure, but with the Raider's maneuver chart and high maximum speed, it shouldn't be too tough.

In short, Raider-IIs with this combination now have a place as medium-ranged harassment skirmishers that get a once-per game long bomb. This is a pretty different role than the Raider-Is fill, which excel at cost-effective burst damage at close range.

Builds
Light artillery
Disposable Capacitors + Heavy Ion Emplacements + Veteran GunnersAs mentioned before, Disposable Capacitors and Heavy Ion Emplacements are a great combination on Raider-IIs, but you've got a lot relying on that blue crit showing up. That's where Veteran Gunners come in: pop the Disposable Capacitors and use a concentrate fire dial to go up to 4 total blue dice. If for some reason, you don't get any blue crits, use the Veteran Gunners to reroll the entire pool. When equipped and used this way, your Raider-II's chances of triggering HIEs go from 68% (with concentrate fire, 58% without) to 90%.

If you're using Screed or Vader for better dice control, you can do away with Veteran Gunners. Whether you want to keep your Raider cheaper or fill the weapon team slot with something like Gunnery Team (for improved spray-and-pray coverage or giving you the option to attack both a ship and flak from your front arc) is up to you.

1 hour ago, geek19 said:

http://cannotgetyourshipout.blogspot.com/2018/02/prohibitively-expensive-han-hera-costs.html

Hera and Han are actually worth it, guys! (I think.....)

And I'll start hitting some of those upgrades soon enough. I'll probably be the one testing Wide Area Barrage out when I wander back into Sato-town post-Adepticon...

I've had some good success with Hera, Han, Wedge, and Shara. More importantly, they are really fun to play.

5 minutes ago, stonestokes said:

I've had some good success with Hera, Han, Wedge, and Shara. More importantly, they are really fun to play.

That's where my mind is going. I've been brainstorming a Sato blob that might work? Or at the very least, looks super fun to play.

They really compliment each other. Especially Shara and H&H. Shara wants to be in the middle of the enemy squadron ball, and H&H want to stay on the outside where they can leverage their Grit to get to the squadrons that need to die right away, or to get to ships for a bombing run. Rogue Wedge hits squadrons really hard, but I have found that he also usually dies pretty fast (having the same Escort problem as Darth Vader). I've been trying to think of a good replacement for him, but I haven't come up with it yet.

http://cannotgetyourshipout.blogspot.com/2018/02/hardened-bulkheads-added-to-offensive.html

Continuing to slowly but surely update articles to wave 7 by adding Hardened Bulkheads to the offensive retrofits article:

hardened_bulkheads.png
"All the work order says is 'paint it red and make it more orky', does anyone know what that means?"

Hardened Bulkheads is mostly straightforward, but there are some interesting interactions that bear mentioning:

  • Obviously, it's for Large ships only. No medium or small ships allowed!
  • It's common for people to misread this as "you don't take damage from overlaps involving smaller ships," but that's not quite how it works. You take 1 fewer facedown damage card. This can be an important distinction in a few circumstances:
    • When you are overlapped by a Garel's Honor Hammerhead , you will take a faceup damage card. Garel's Honor effectively dodges the Hardened Bulkheads by delivering a damage card faceup, which Hardened Bulkheads doesn't prevent.
      • It's important to note that Garel's Honor only does its thing when it is the one ramming you, not the other way around. So should you overlap Garel's Honor during your own maneuver, Hardened Bulkheads will work just fine.
    • If you are suffering from the Damaged Controls faceup damage card effect, you will suffer an extra facedown damage card whenever you overlap a ship or obstacle (in addition to the regular effects), which will result in one total facedown damage card being applied to your Hardened Bulkheads ship if it overlaps a smaller ship (1+1-1=1).

Hardened Bulkheads is worth considering on large ships that like to get into close range where they're likely to be bumping into other ships, such as ISD-Is, Kuat ISDs, and Ordnance MC75s. The main competition for the offensive retrofit slots for ships designed to be short-ranged bruisers is Boarding Troopers , which can set up some nasty double-arcs, but if your build isn't comfortable using them (especially when they ask for the weapon team slot too), Hardened Bulkheads are relatively inexpensive and much less cumbersome to use and they upgrade overlapping from an attractive option in certain circumstances to a much more guilt-free tactic against anything but other large ships. They're also worth considering on Command HMC80s that use Engine Techs, as it allows the HMC80 to trigger Engine Techs to double-ram a smaller ship in its front arc without taking any hull damage.

Hardened Bulkheads can also be worth considering on large ships should your meta have a lot of ramming small ships that you're really like to be exempt from. No more Gladiators double-ramming to finish off your Hardened Bulkhead large ships!

"more orky" :lol:

That's just what the Rebels need!