All of the GunBoats, or how I learned to stop caring and embrace the Alpha.
This past weekend, I played in the Phoenix/Arizona Regional. I started with low expectations, but I played pretty well and ended up as the 16 seed* and I ended up making the top 8, and getting my hands on some dice. (* I was #17, but someone had to drop, so I made it in. Also, I was tied for MOV at 4-2, and I won the spot based on Strength of Schedule)
The list I decided on playing was, what I called: All of the GunBoats. That list is:
ALL OF THE GUNBOATS (100)
Nu Squadron Pilot — Alpha-class Star Wing 18 Harpoon Missiles 4 Long-Range Scanners 0 Ship Total: 22
Rho Squadron Veteran — Alpha-class Star Wing 21 Deadeye 1 Harpoon Missiles 4 Guidance Chips 0 Ship Total: 26
Rho Squadron Veteran — Alpha-class Star Wing 21 Deadeye 1 Harpoon Missiles 4 Guidance Chips 0 Ship Total: 26
Rho Squadron Veteran — Alpha-class Star Wing 21 Deadeye 1 Harpoon Missiles 4 Guidance Chips 0 Ship Total: 26
This list is named in honor of all the people asking where they can buy GunBoats - I just tell them, “I bought all of the GunBoats.” (they’re sold out in our area)
Going into the weekend, I had pretty low expectations, since I was not doing well during practice games, but I did not have a lot of practice with any other list. (And after buying 2 Guns for Hire and 4 GunBoats, I felt I needed to justify the purchases.) The only thing I was confident about was that the math for deadeye vs LRS was close, and the flexibility of Deadeye + chips was strong. Throughout the day, this was confirmed - I only ran into one list that directly countered my list. Also, coming in at PS4 with the Deadeye Rhos was done to outgun the Quickdraw & 3 Nu’s. I did not run into that list all day, but I saw it on quite a few tables.
My overall strategy was to start my three Rho Boats in the corner and the Nu in the center, and fan them out to catch the opponent in the middle of the board and then block/reload or slam away to reload and turn back. Or, if the opponent set up across from me and wanted to joust (mistake!), I would turn in the Nu and use it to block the opponent outside of Range 1 of my Rhos, and… well, let’s just say that straight jousting my list was a big mistake.
Game 1
Opponent’s list: Rey - Corran (I am not using names, in case they don’t want their name out there)
Win: 100-26
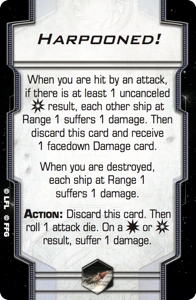
This was my warmup and first game. I started out with my GunBoats along the right side, and he started his Rey and Corran on the diagonal/opposite corner. I closed on them through the asteroid field and took out Corran pretty quickly. I got one into his hull before he ran away and regenerated with R2-D2, but I triggered the condition and that went under his shields to kill him. Rey did some work on the Nu and one Rho boat when I misjudged a turn and the Nu didn’t block Rey’s pursuit onto a rock. Rey ended up killing one of the Rho. I was able to reload the two Rhos that were not being chased, and they came back around and finished off Rey. After this match, I began to realize the power of the condition. It's free damage if I get a crit, and it's impossible to remove without taking damage.
Game 2
Opponent’s list: 2x Expertise Tactician Wookies & Lowhrick with C-3P0, Tactician
Loss: 32-48
This was a tough match. I did my fan out across the board setup instead of jousting the wookies. As a result, I was not able to get off all my missiles during the initial salvo. I also prioritized taking target locks, since they would stick around if the Rhos got stressed. This didn’t work out, and I was only able to kill one of the wookies. He was able to stay on one Rho and one Nu and hunt them down. This opponent would end out the day undefeated. He would also be my Top 16 opponent.
Game 3
Opponent’s list: Wedge, Poe, Fenn
Win: 100-26
This was a pretty fast match, and I don’t remember a lot of it - I was able to take Wedge off the board during the initial salvo. Also, the Nu put one harpoon into Fenn. Then, I passed and circled back to finish off Fenn and then Poe. Poe couldn’t roll paint to save his life, and I felt bad. But variance was definitely on my side in this match.
At this point I was feeling pretty good. I was 2-1 in my first regional, and I was not expecting at the start of the day to do this well.
Game 4
Opponent’s list: Poe, Stress Ezra, Specialist BSF Bomber
Win: 84-48
Bombs. I was not looking forward to bombs, especially with how I had been flying my GunBoats. I set up in my corner-fan formation and fanned out from the right corner. His BSF was directly across from me, Ezra was in the center, and Poe was diagonally across from my GunBoats. I knew I had to get rid of Stress Ezra quickly, or else I would not be able to SLAM away from the bombs, and I would not be able to fire off my harpoons with Deadeye. Once I fanned out, I approached the center of the board, where Ezra was headed. He correctly predicted the initial fight and had launched a bomblet into the fray with the BSF. I knew it was coming, and I ate the bomb. I then erased Ezra in the first round of fire. I then SLAMed away and reloaded, while avoiding BSF bombs. I cam around and took out Poe, but not before he was able to take out the Nu and Rho. I remember I misjudged a bump, and that was what cost me the Nu. I then turned in and got the BSF to half points just before time. This would be critical, since my MOV + SoS would be what let me get into the top 16.
Game 5
Opponent’s list: Poe, Wes, HotCop Fenn
Loss: 27-74
I was feeling good when I looked at his list - regular X-Wings melt to harpoons, right? (I didn’t see HotCop on Fenn…) This list, as it turned out, was the hard counter to my list. He was able to keep 2 gunboats per round from firing off their harpoons through Wes and HotCop. It also didn’t help that my red & green dice went cold. I didn’t roll a single natural evade. And the variance on my reds swung back to the cold side - Fenn lived at 1 health for most of the game. And when I killed him, I got on Wes, got him to 1 health, and time was called. I DO NOT want to take away from my opponent, he flew fantastically. My hat is off to him. He was super friendly, and I was bummed to see that he did not make the cut. (when I made the cut, he stopped by the say hi to me the next day, which was super cool) With only 27 points killed, I thought it was over and I was not going to make it into the top cut with that MOV. *sigh*
Game 6
Opponent’s list: 4 Imperial TLT
100-48
Final game. Win with points, and I have a chance. My opponent fanned out his TLT Aggressors, which made the initial joust tough. I ended up killed 2 of his TLT carriers, and he killed one Nu and one Rho. When it was down to the end, he asked about how much he had killed, and he learned that he only killed 48 points to me killing 50. When he saw he was not going to kill my guys in time to win, he conceded and let me win outright. While it wasn’t the best way to win my last game, I was grateful for the extra points. I would have done the same if he had killed more points than me.
When day 1 was over, we all sat in the large store waiting for prizes and the final top 32 to be announced. At this point, I figured I ended up around #20. They then started calling names, and, as it turns out, I was #16* (as explained above, I was #17, but someone had to drop so I took the #16 slot). On to day 2!!
Top 16
Opponent’s list: 2x Expertise Tactician Wookies & Lowhrick with C-3P0, Tactician (Game 2 Opponent)
100-0
This was a rematch from the Game 2 loss. This time around, I set up my Rho’s directly across from the wookies, and my Nu was directly in the center of the starting area. I also set up my rocks to keep the path from the Nu to mid-board was clear, so the Nu could enter the fight at the same time as my Rho boats. Through planning and correctly guessing that my opponent was going to try to jump range in the straight joust, I was able to completely remove one wookie in the first pass, as well as splash two shields off the two other wookies from harpoons. I then slammed past the wookies and reloaded. I was able to circle the board, and come back with harpoons into both the PS3 wookie, and then Lowhrick. It was redemption from the Game 2 loss, and it earned me my new dice. He was a great guy, and my hat is off to him for going 6-0 in Swiss.
Top 8
Opponent’s list: Timewalk Asajj & Decked Out Sol Sixxa
25-100
I know Shadowcasters are one of the few ships I practiced against that out-joust GunBoats, especially Timewalk Asajj. Also, GunBoats HATE tractor beams. And the title on Asajj guaranteed hits on 2 agility ships. My opponent flew extremely well, and I made the choice to go for Asajj. I lined up and got three of my boats into the fight (a critical mistake, since I neede all 4 in the initial joust) After the initial joust, Asajj had 2 hits into her hull and 3 harpooned conditions on it. I reloaded and chased her, but I was not able to trigger the condition. Between the Expertise Sol Sixxa, who was loaded to the gills, and Timewalk Asajj, I was not able to put out a ton of damage after the initial joust. They picked off two Rhos. When my third Rho was taken out, I conceded. It was a good game, and a good run.
It was a good tournament. Other than my hard counter in Game 5, I had decent matchups. I can safely say that all of my losses came from my bad decisions. My wins came from getting my approach to the first joust right. This list is pretty good. I don’t know if it’s A Tier, but when flown correctly, it’s probably A- or B+ tier. All of my time with Miranda last year lended itself to flying these gunboats. I am thankful for my local squadron and the practice I got in ahead of this regional. I am also thankful that I chose to stick with this list despite my reservations the night-before.
Take-Aways
-The GunBoats are quite beefy - I will gladly eat a bomb to launch my harpoons
-Harpoon Missiles is probably OP, and needs to be limited to 2 per list
-Bring 2 Harpooned tokens for each GunBoat - you will have games with this list where your conditions stick around until an opponent’s ship dies.
-Nothing I ran into (lists) out-jousted this list, if I got the approach right.
-Deadeye + Chips + Harpoon on the Rho (PS4) is strong
-Each reload adds 4 points to this list, and you reload 3+ total times per match, then you’re going to win
-Moving for a bump + reload is amazing
-SLAMing into no-fire zones is key to winning
-SLAMing for a bump is best if you are not sure when a big-base ship is going to do.
-SLAMing a U-Turn is not the correct move if you are trying to stay in the fight - the SLAM U-Turn will usually put you pointing at the spot you want to be at the following turn. It’s usually better to do a hard turn, then SLAM a bank maneuver.
-If you need to SLAM twice in a row, and you’re not running to save points, then you’re doing it wrong.
-DRINK WATER & SIT when you can - your back will thank you
Edited by RunnerAZfixed formatting & finished 2 sentences & a typo