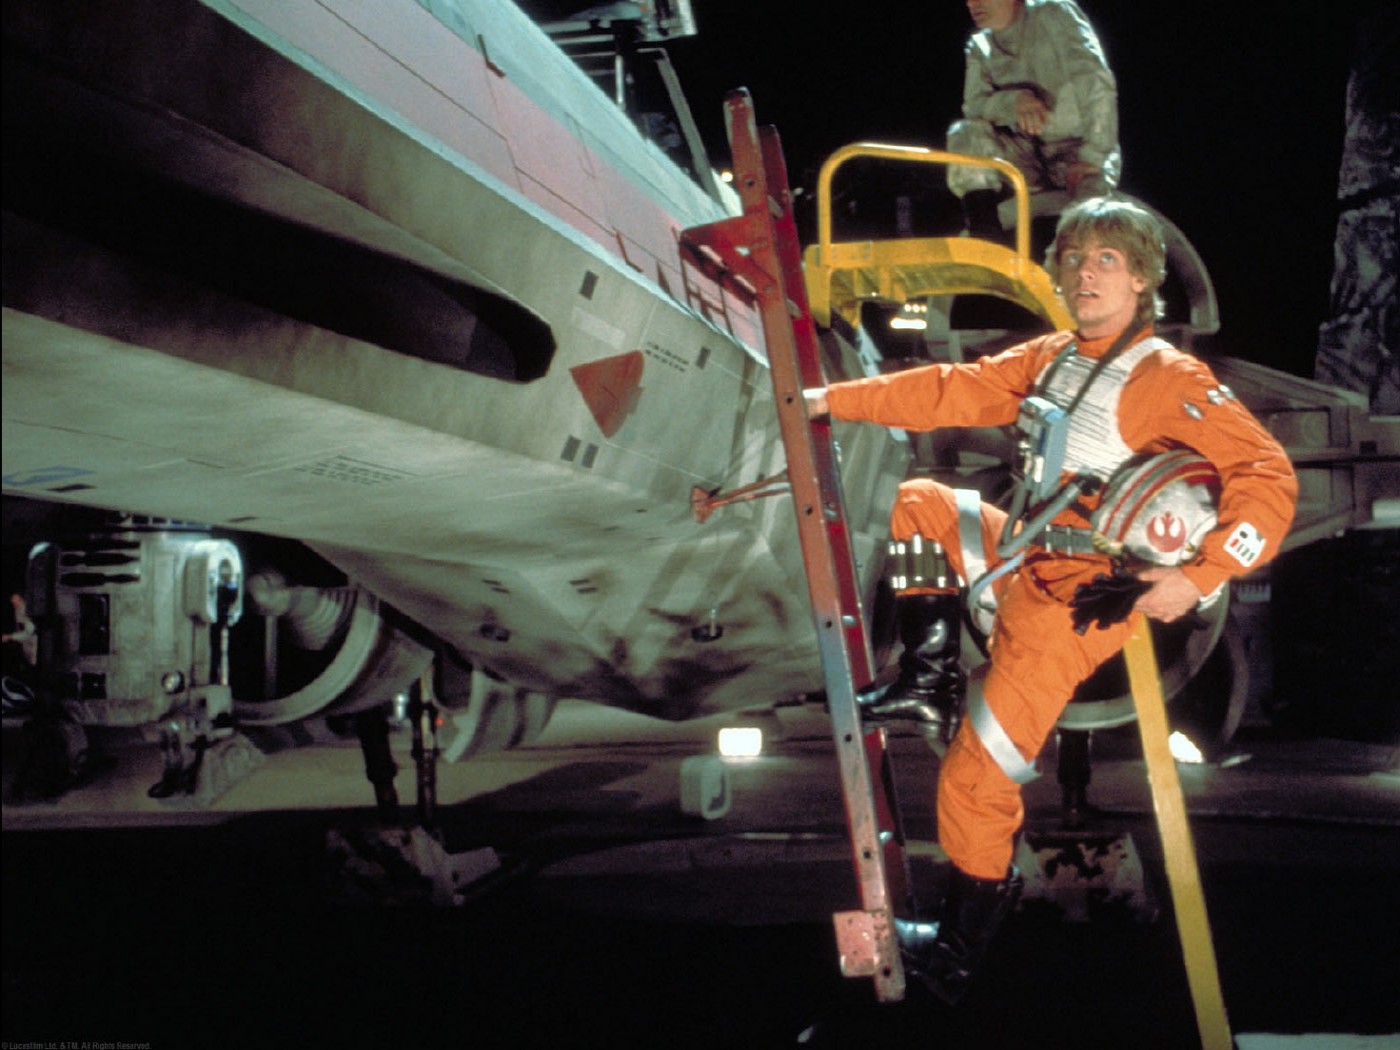
TUZ LEGION LOG

By TUZ, in Star Wars: Legion

Can't.....wait.... for.... LEGION!!! :P

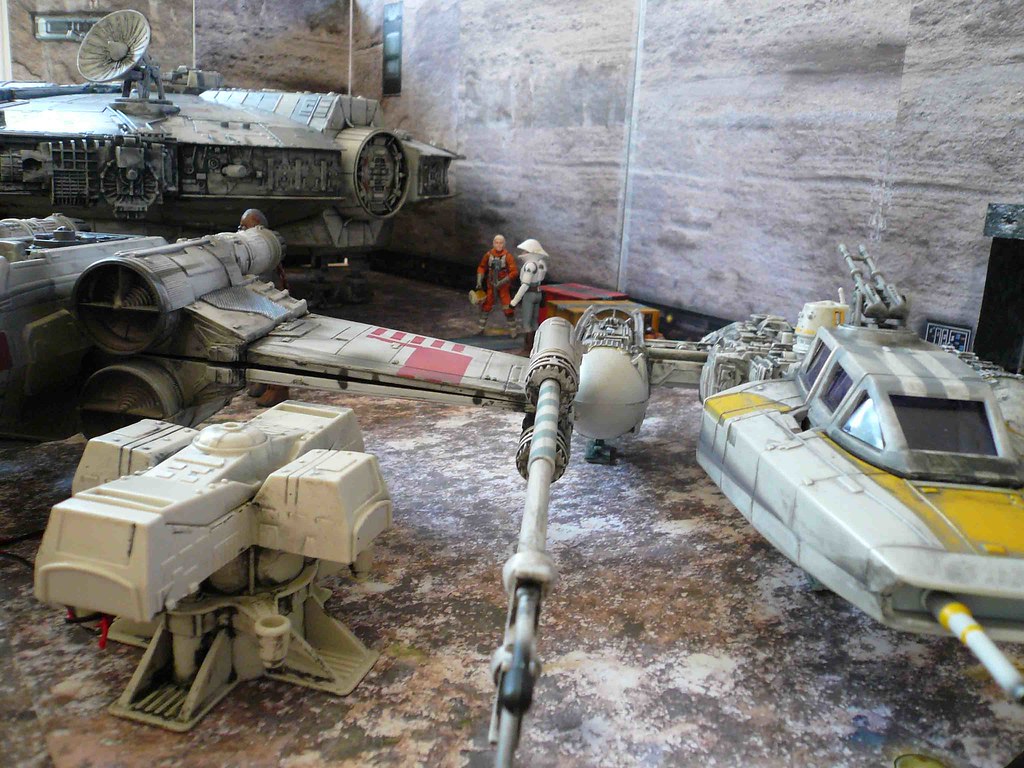
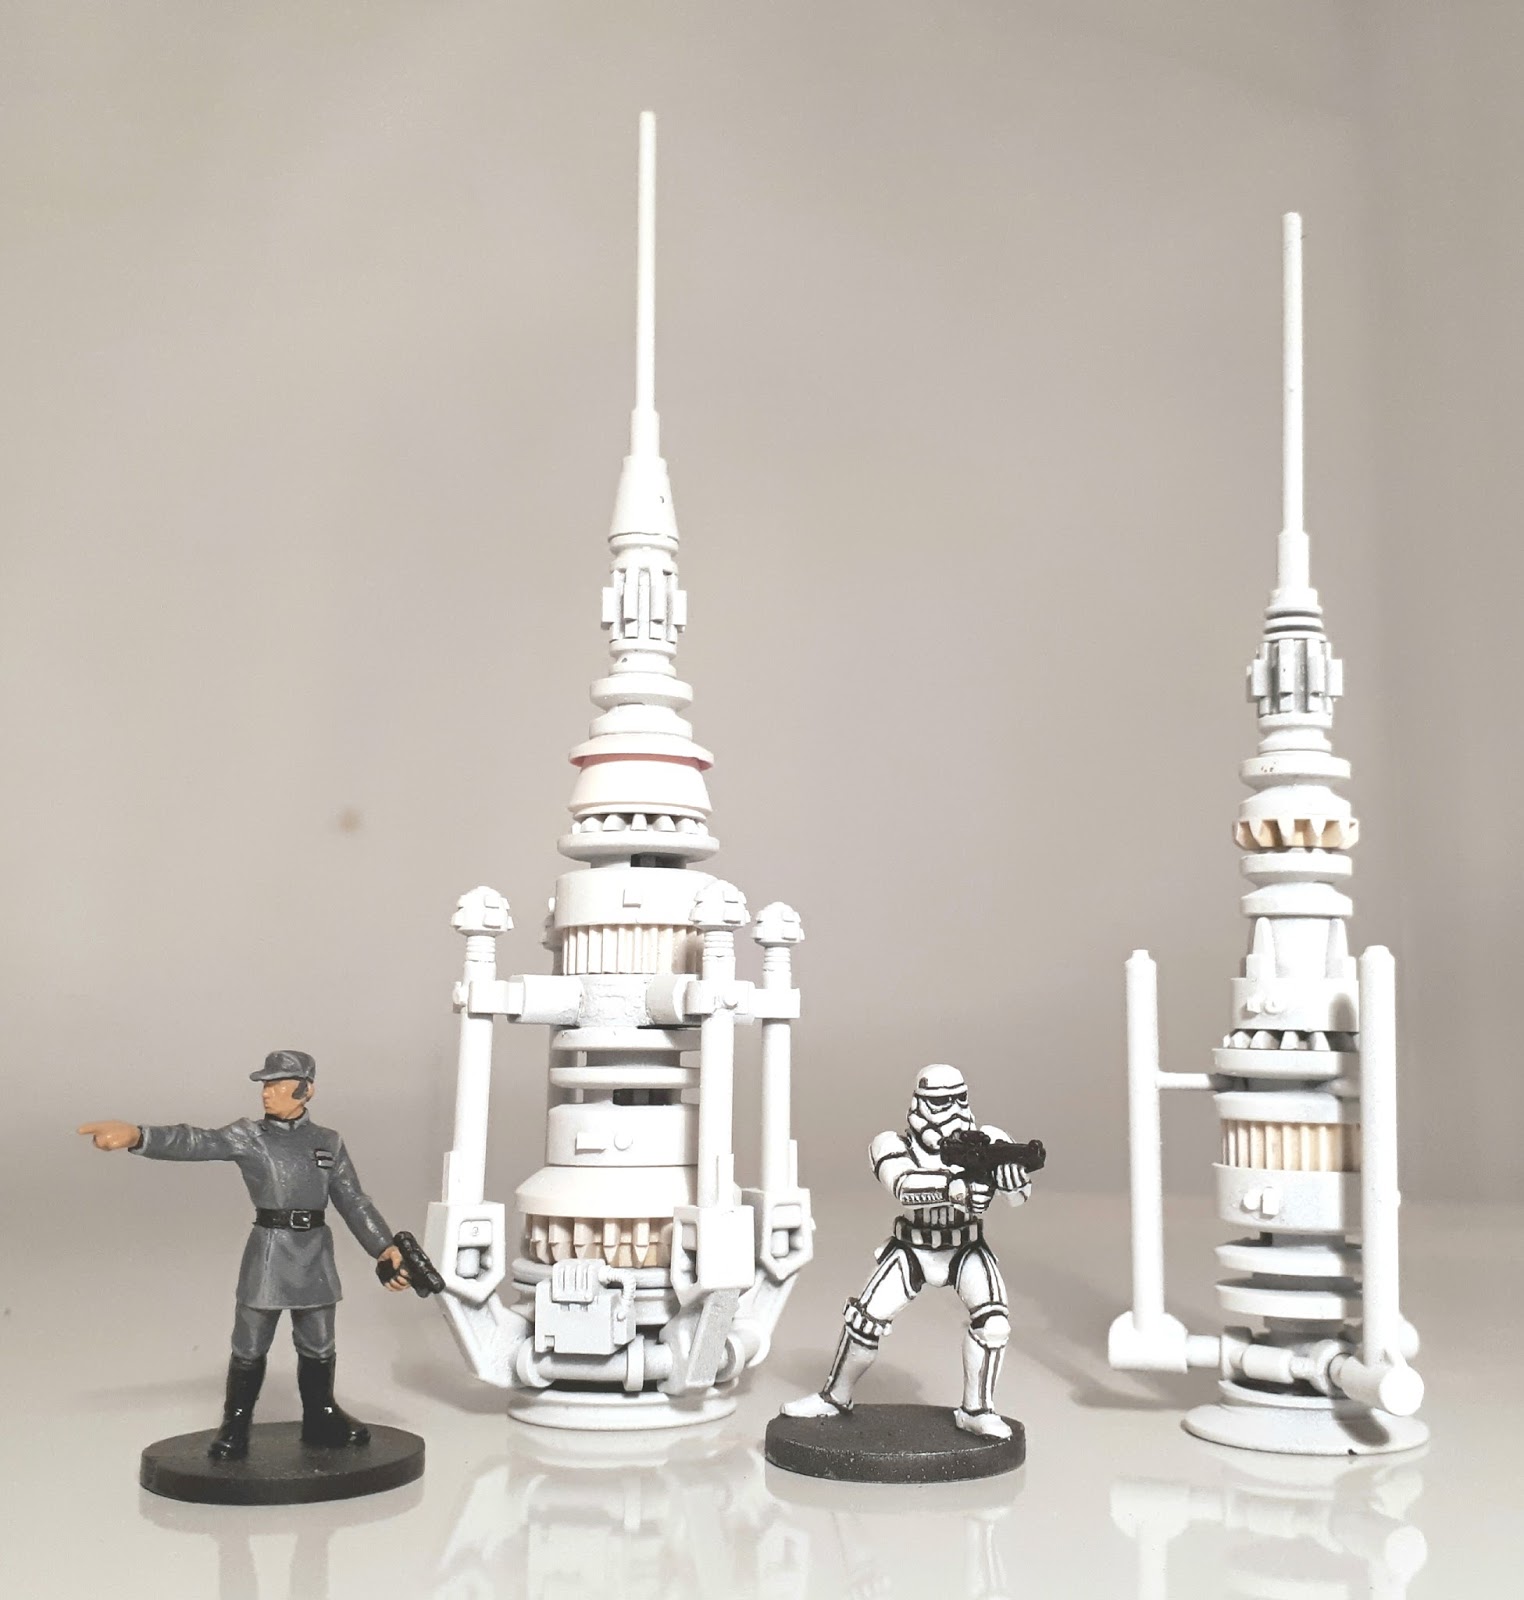
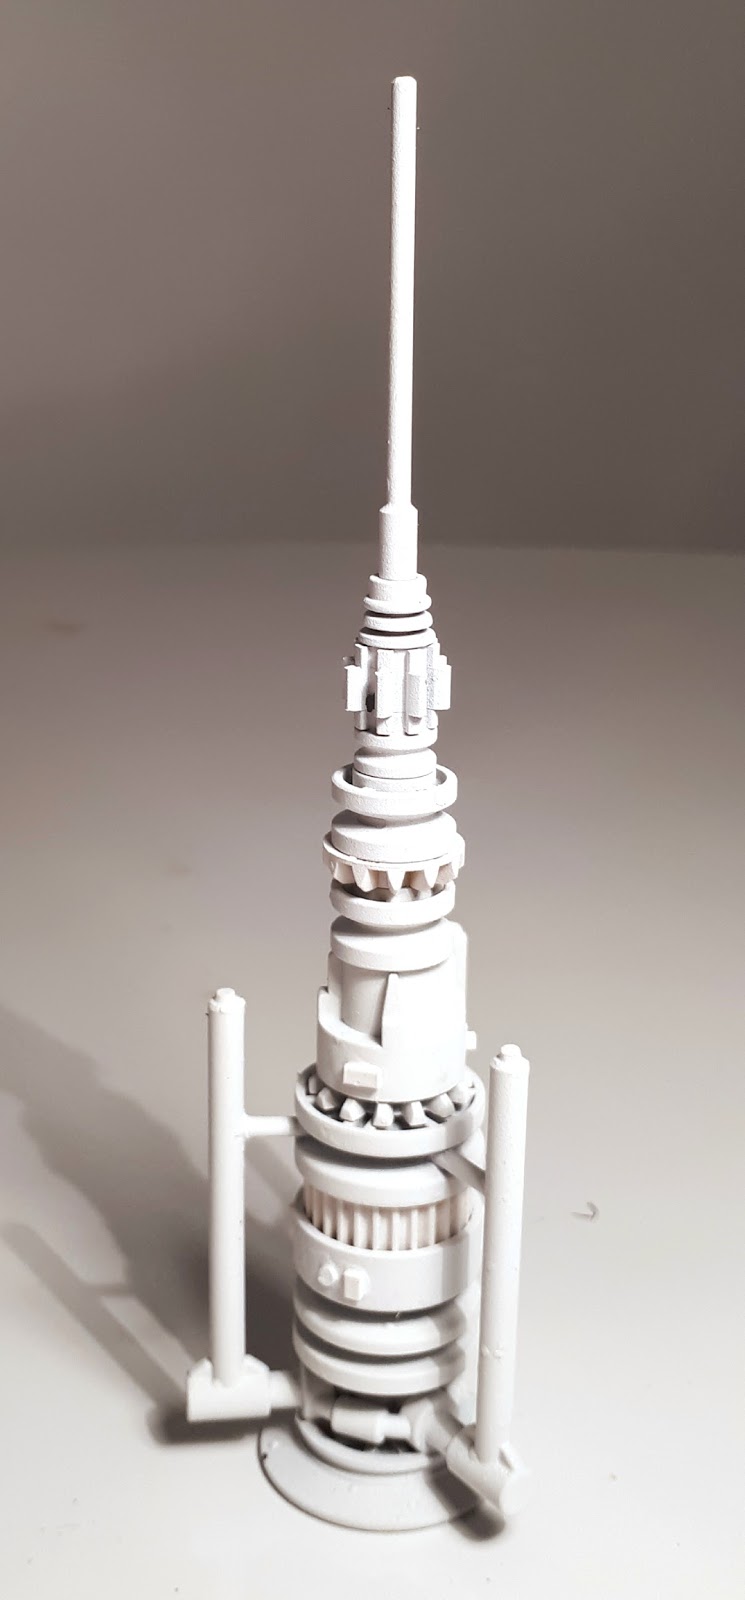
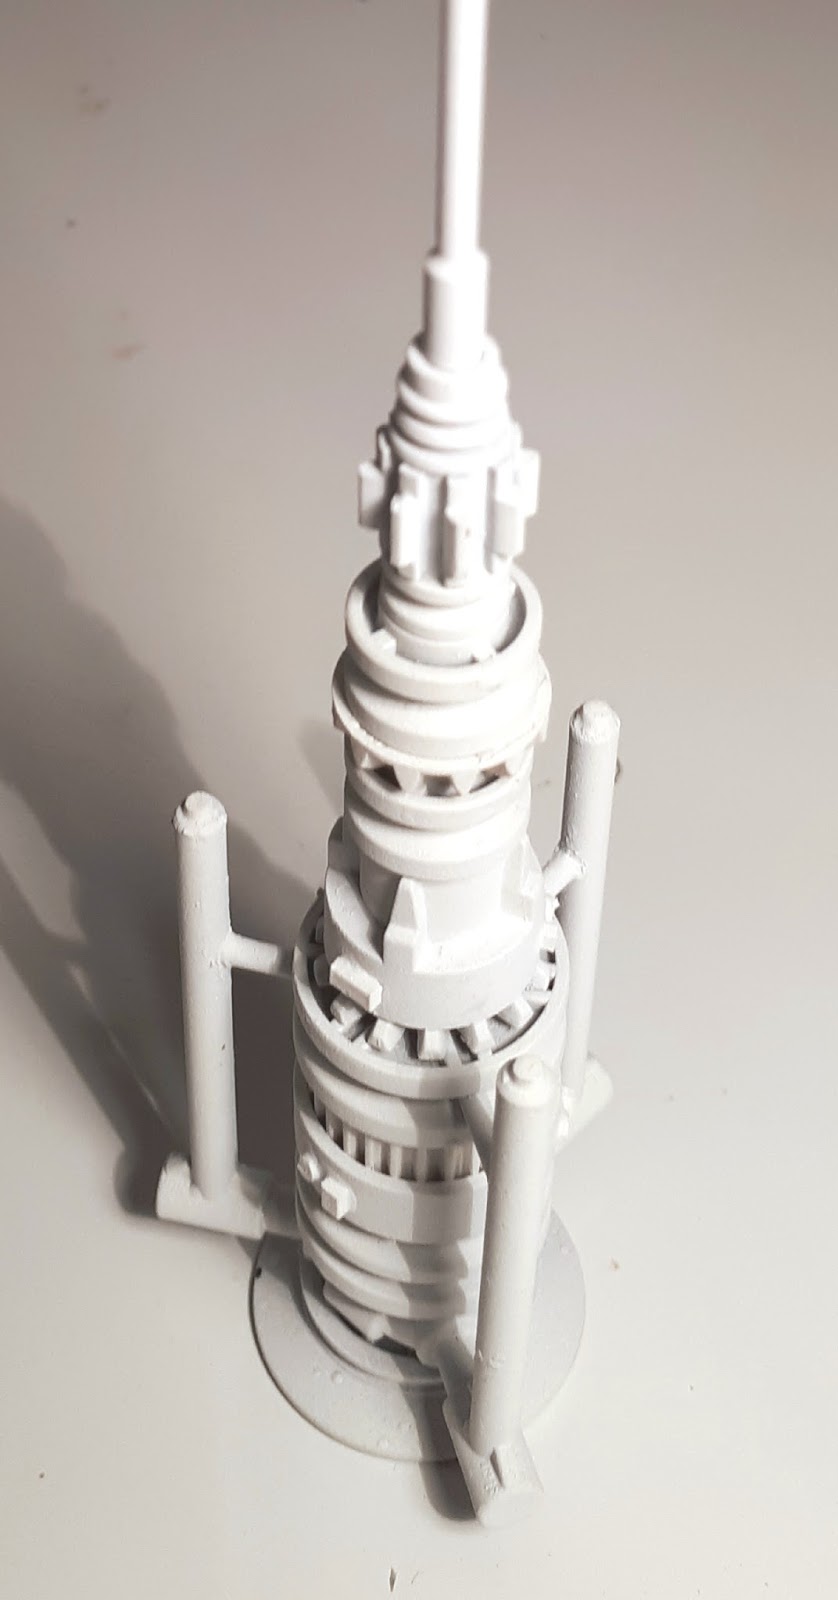
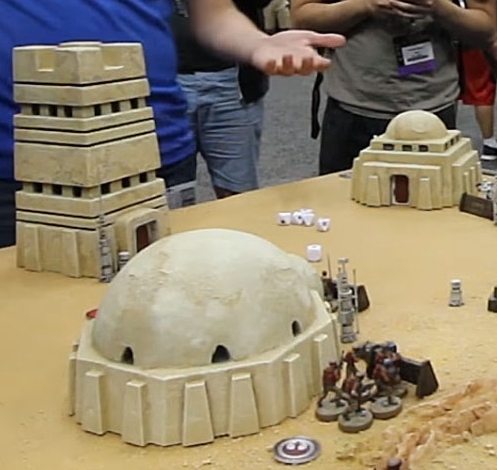
There's been some fantastic scenery on display from the FFG community and I've been inspired to get building...

20171017_175932.jpg

20171017_174455.jpg

20171017_174826.jpg

20171017_175140.jpg

20171017_174645.jpg

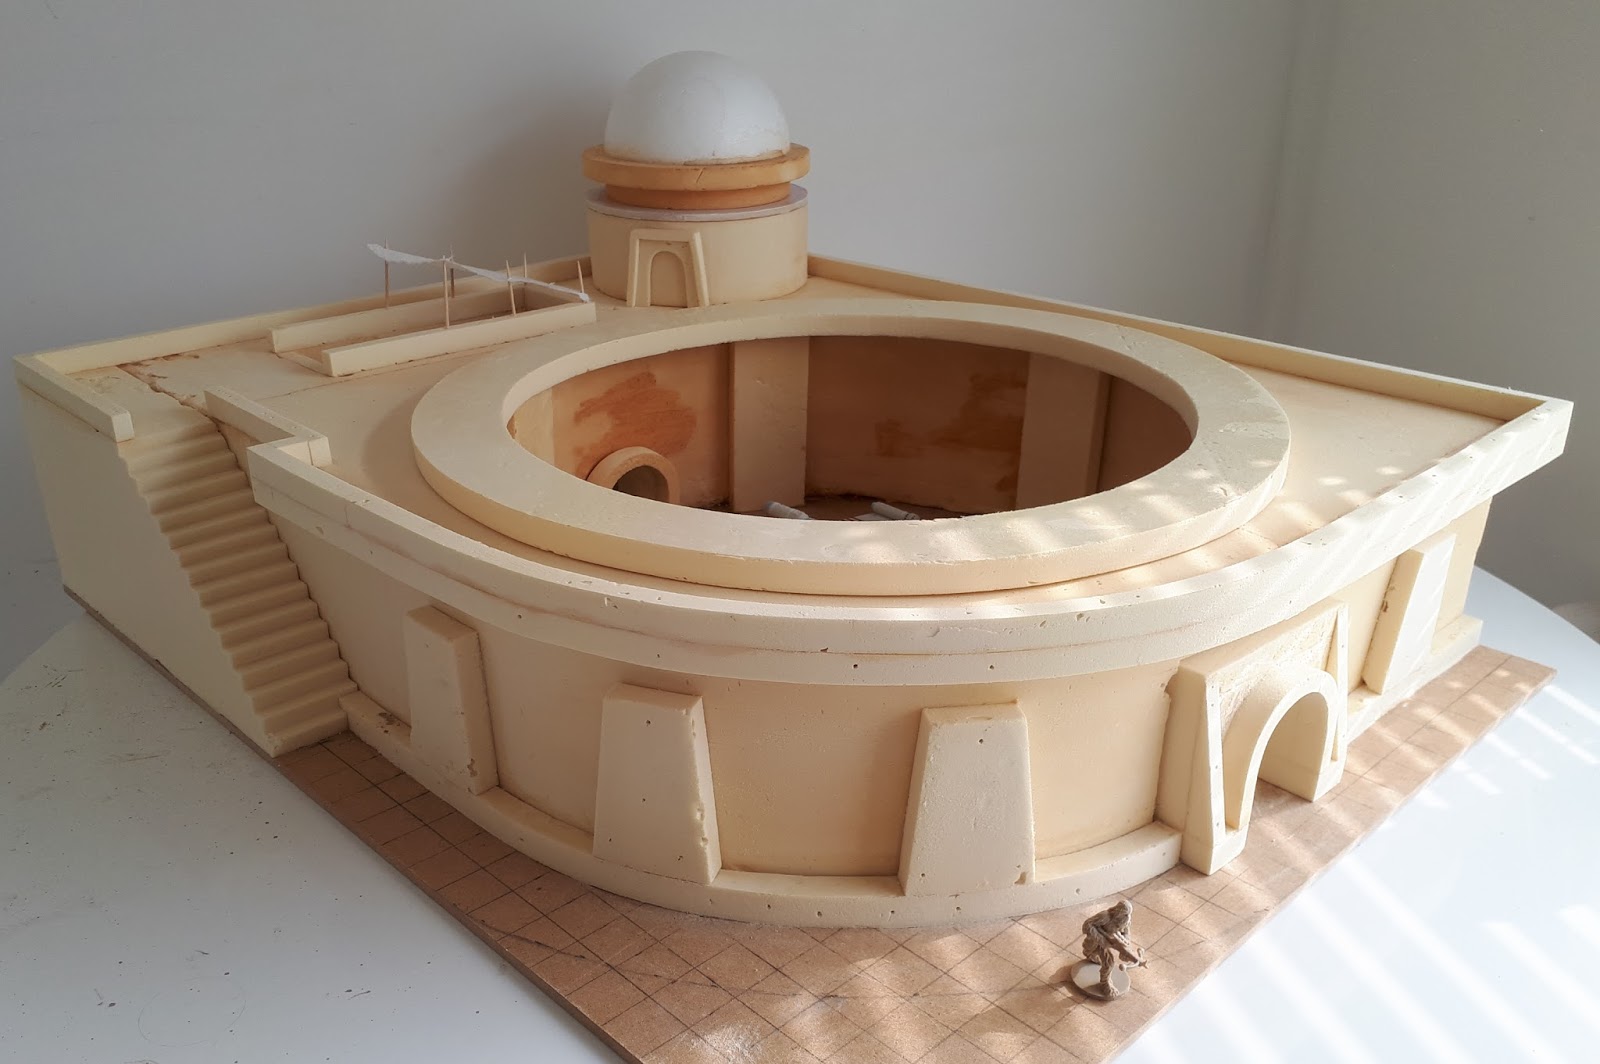
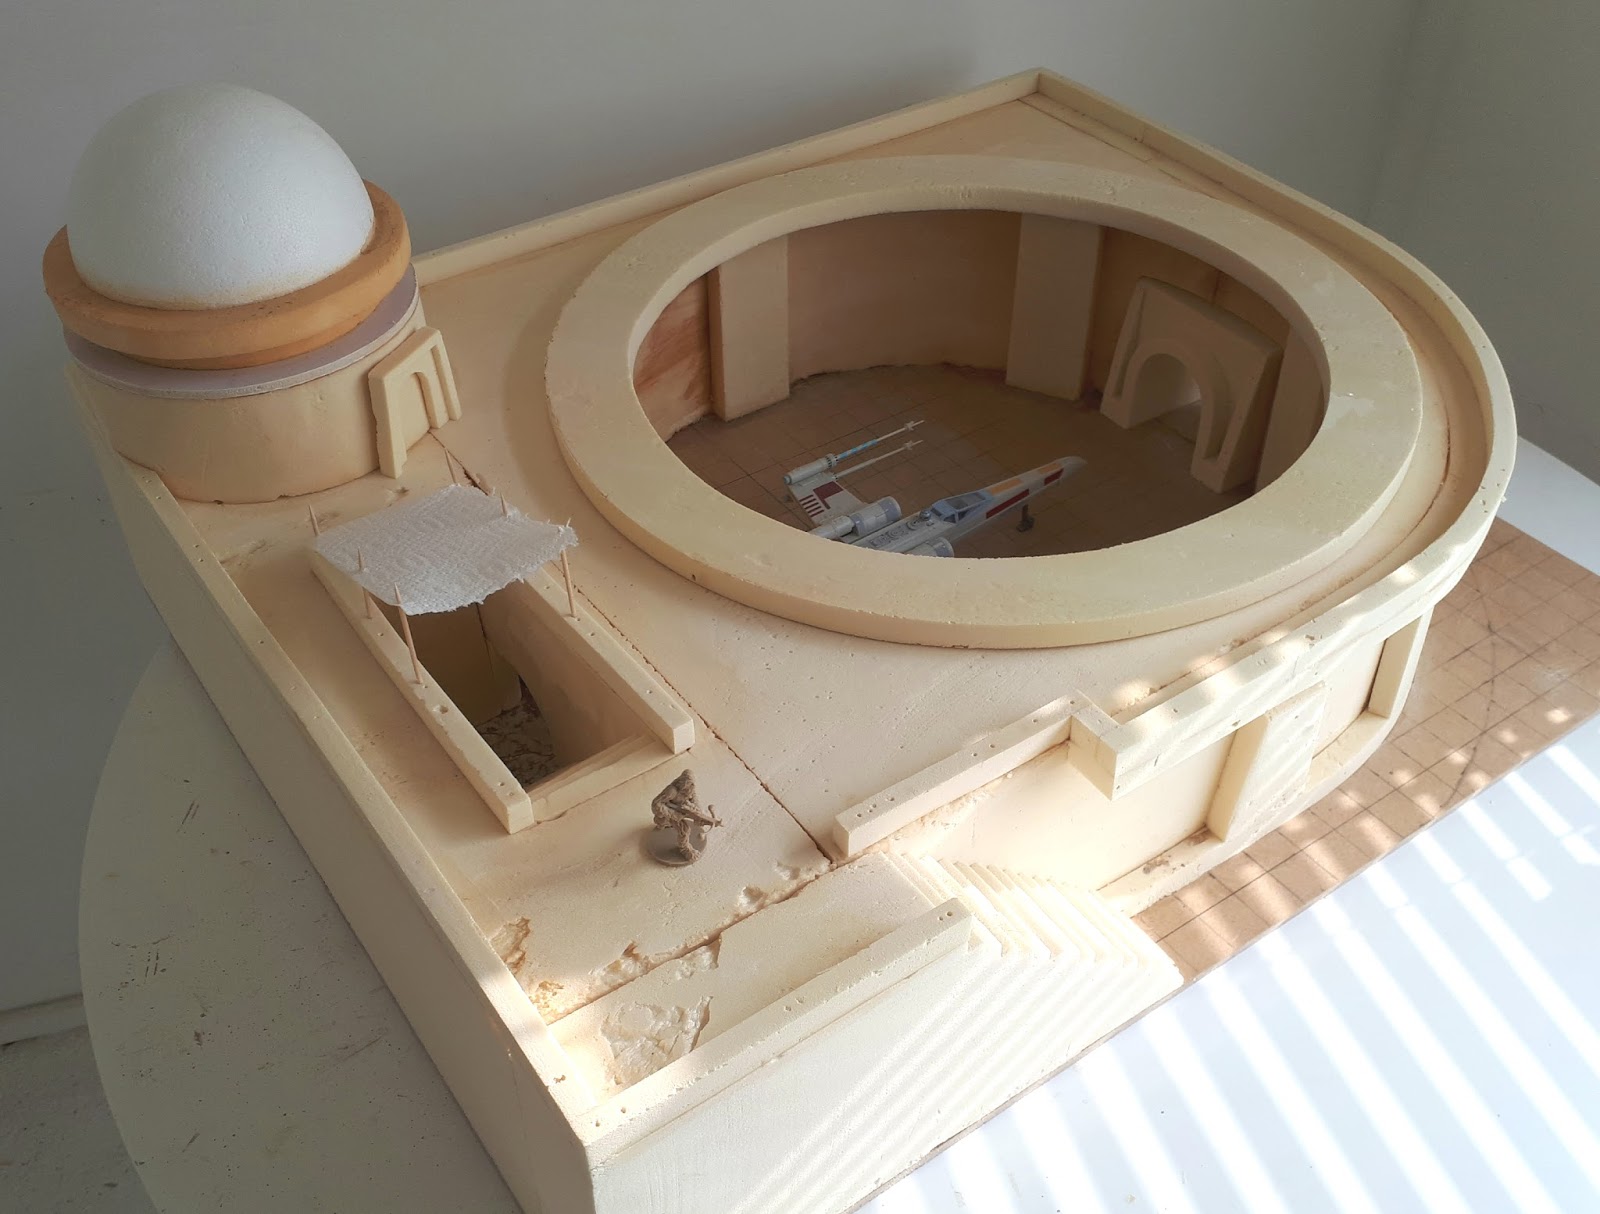
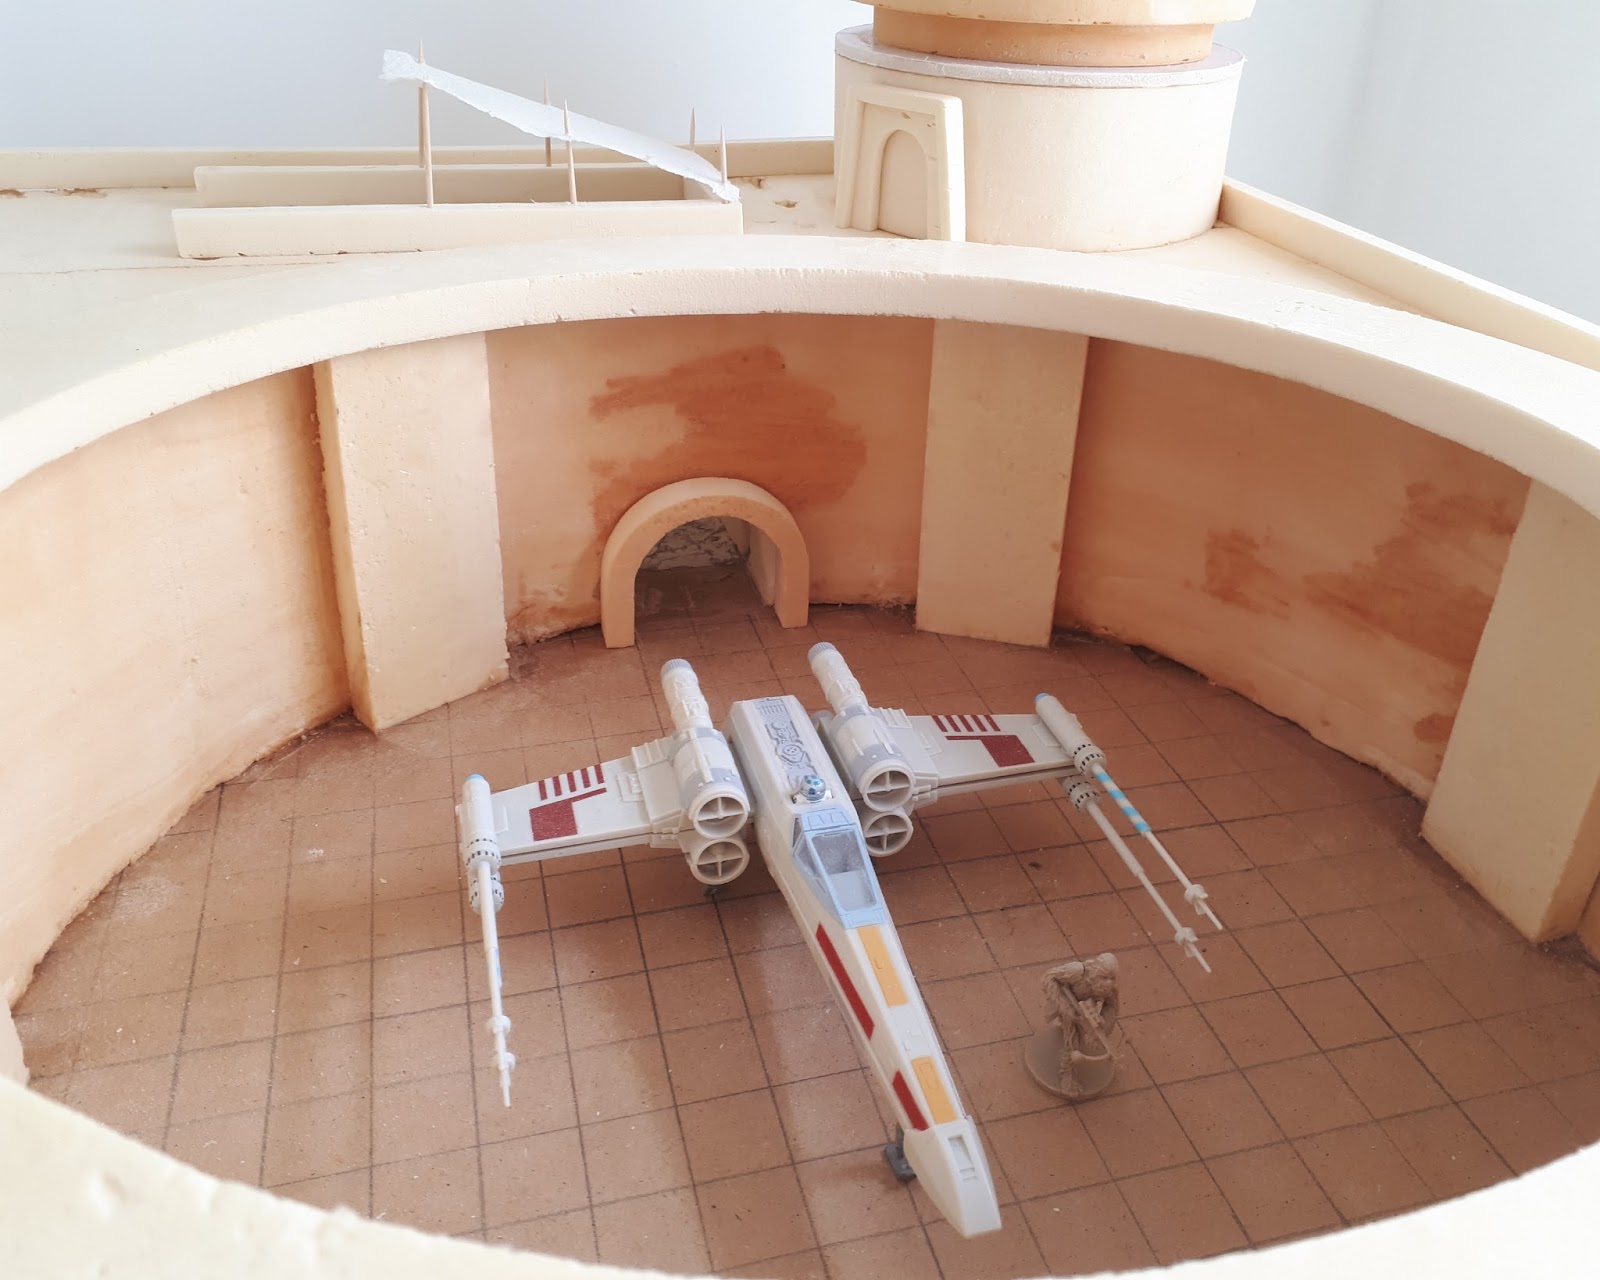
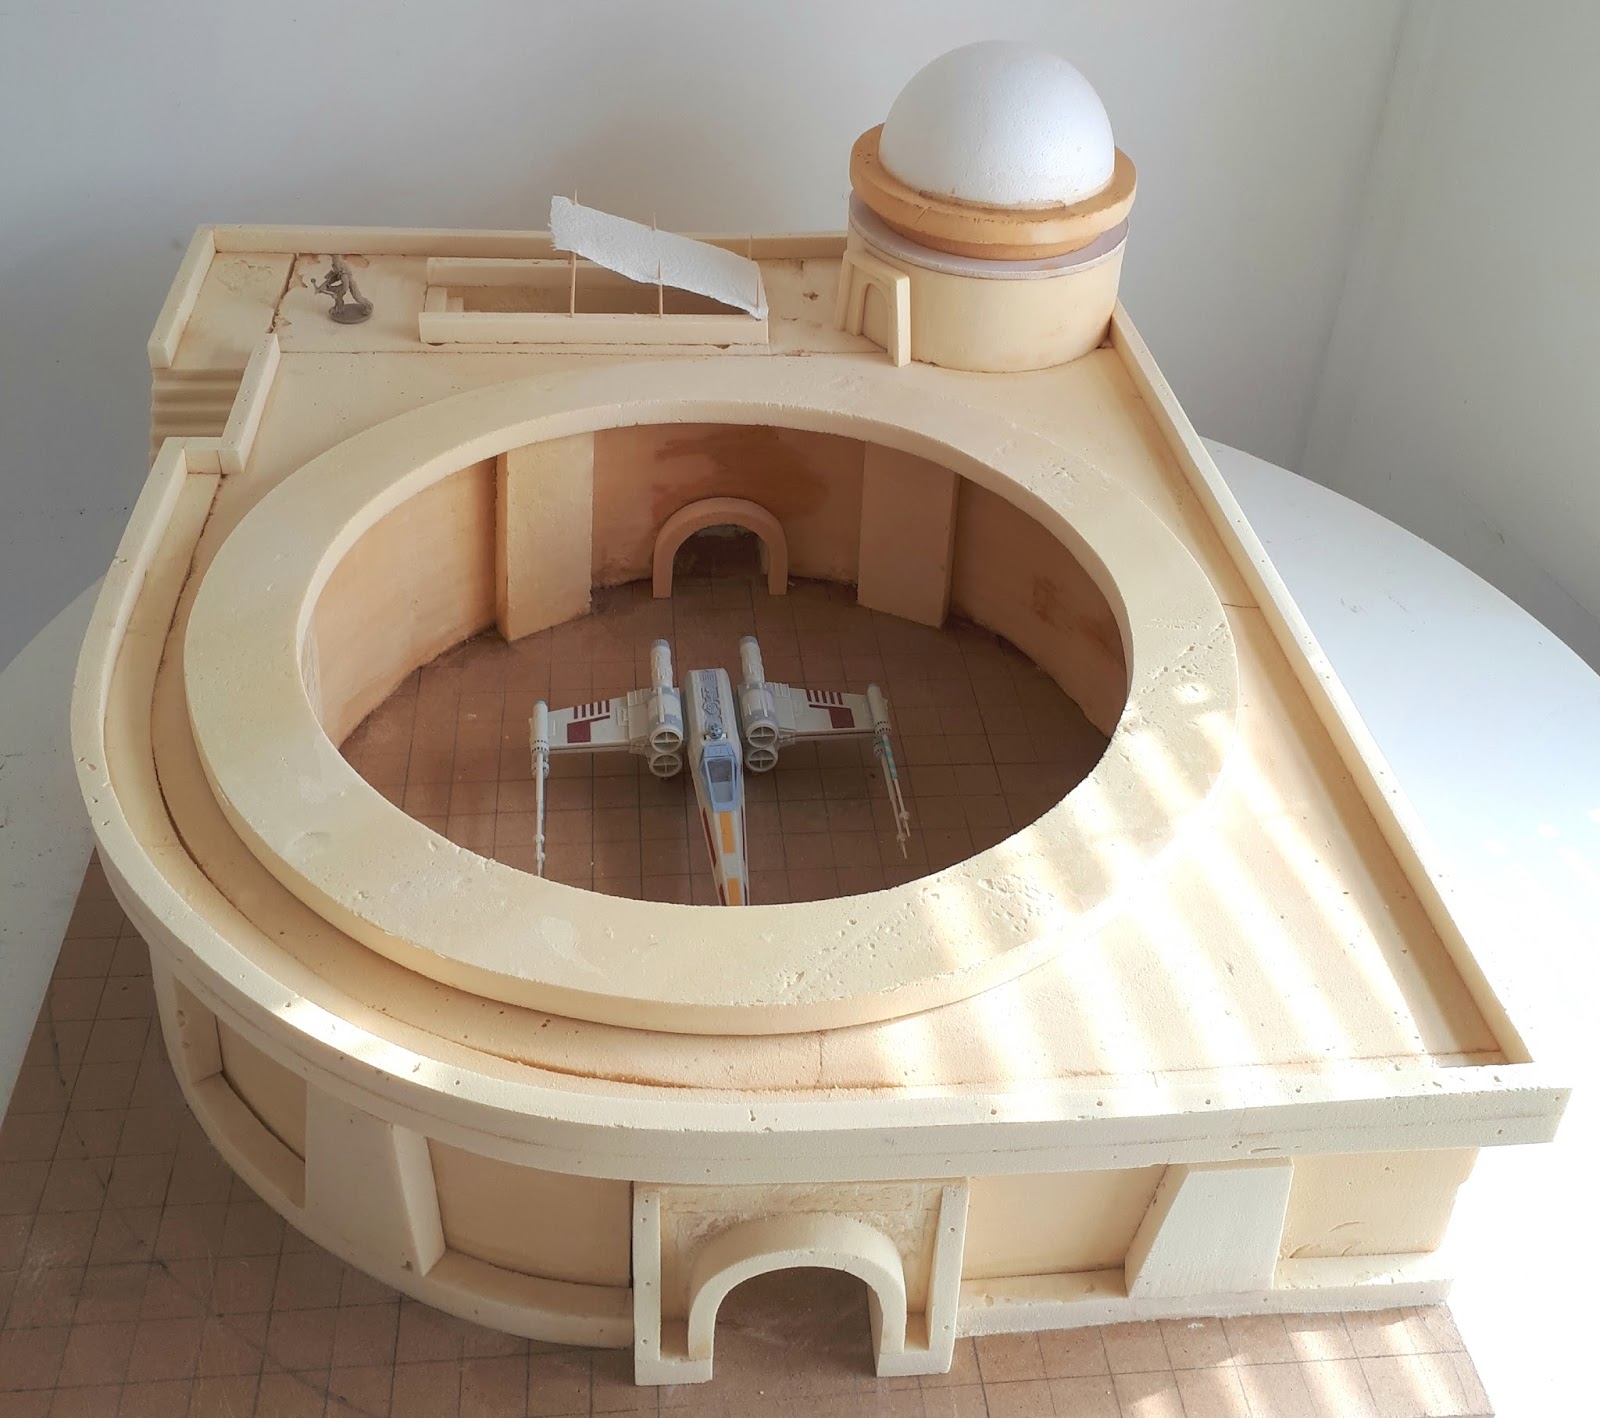
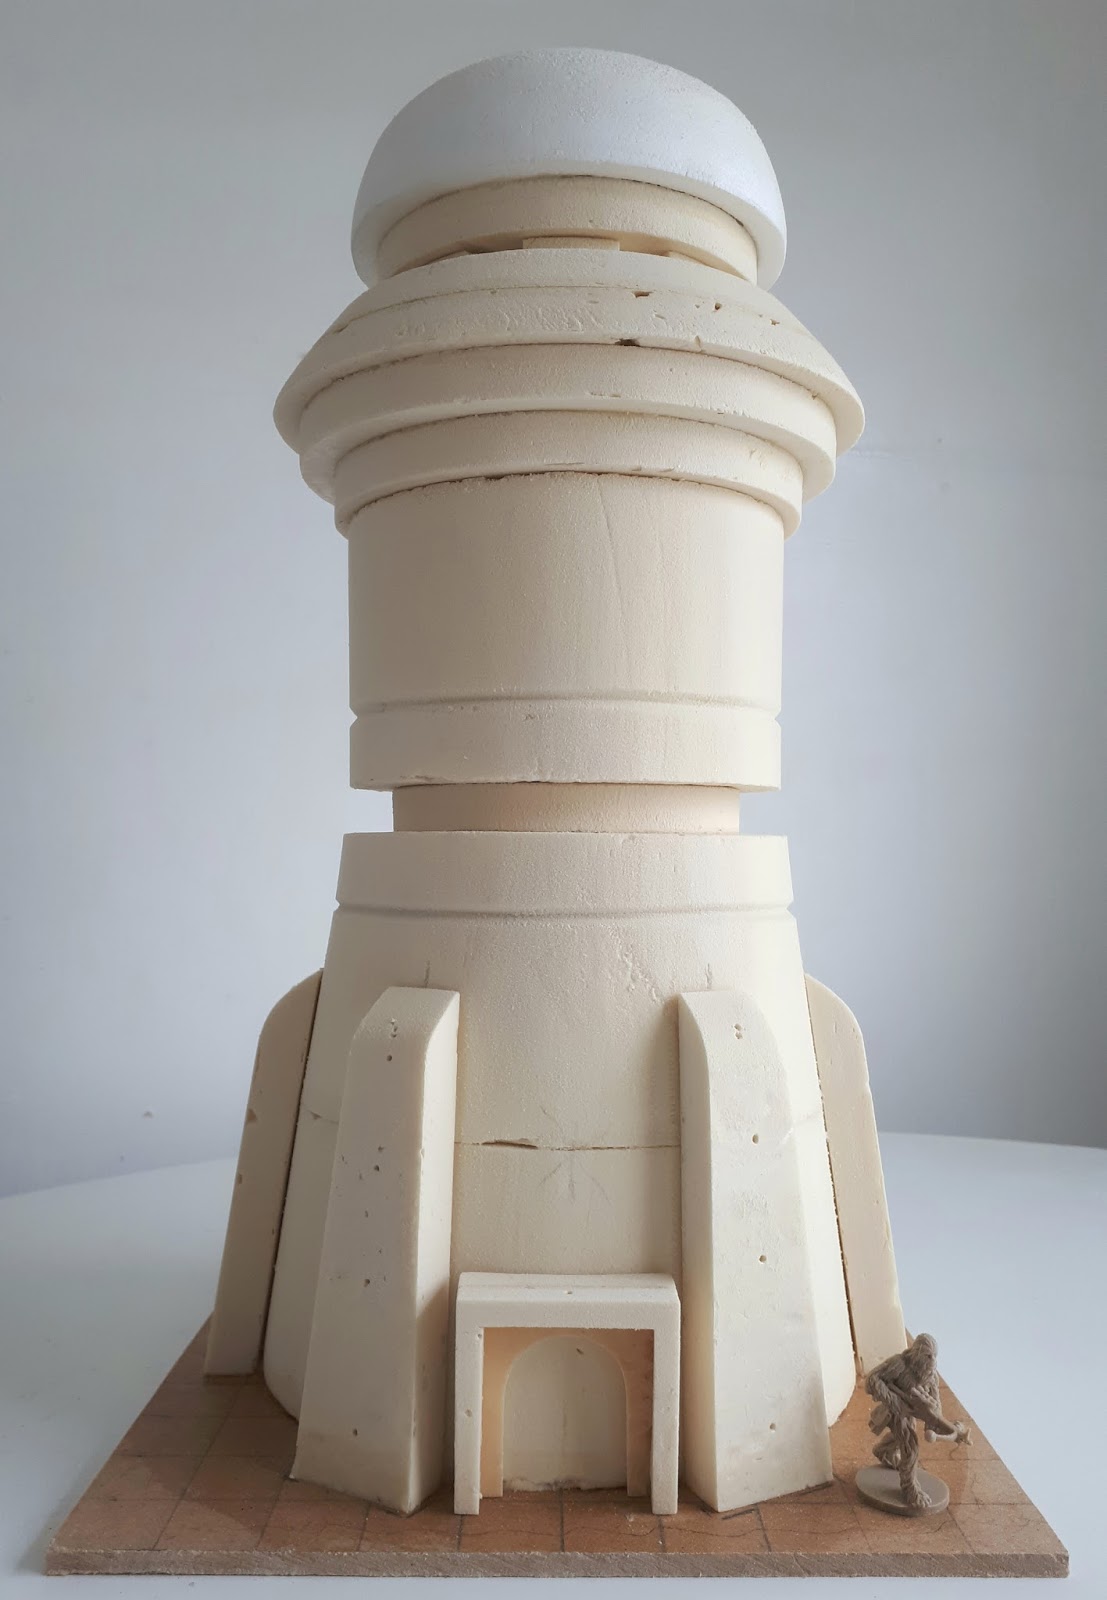
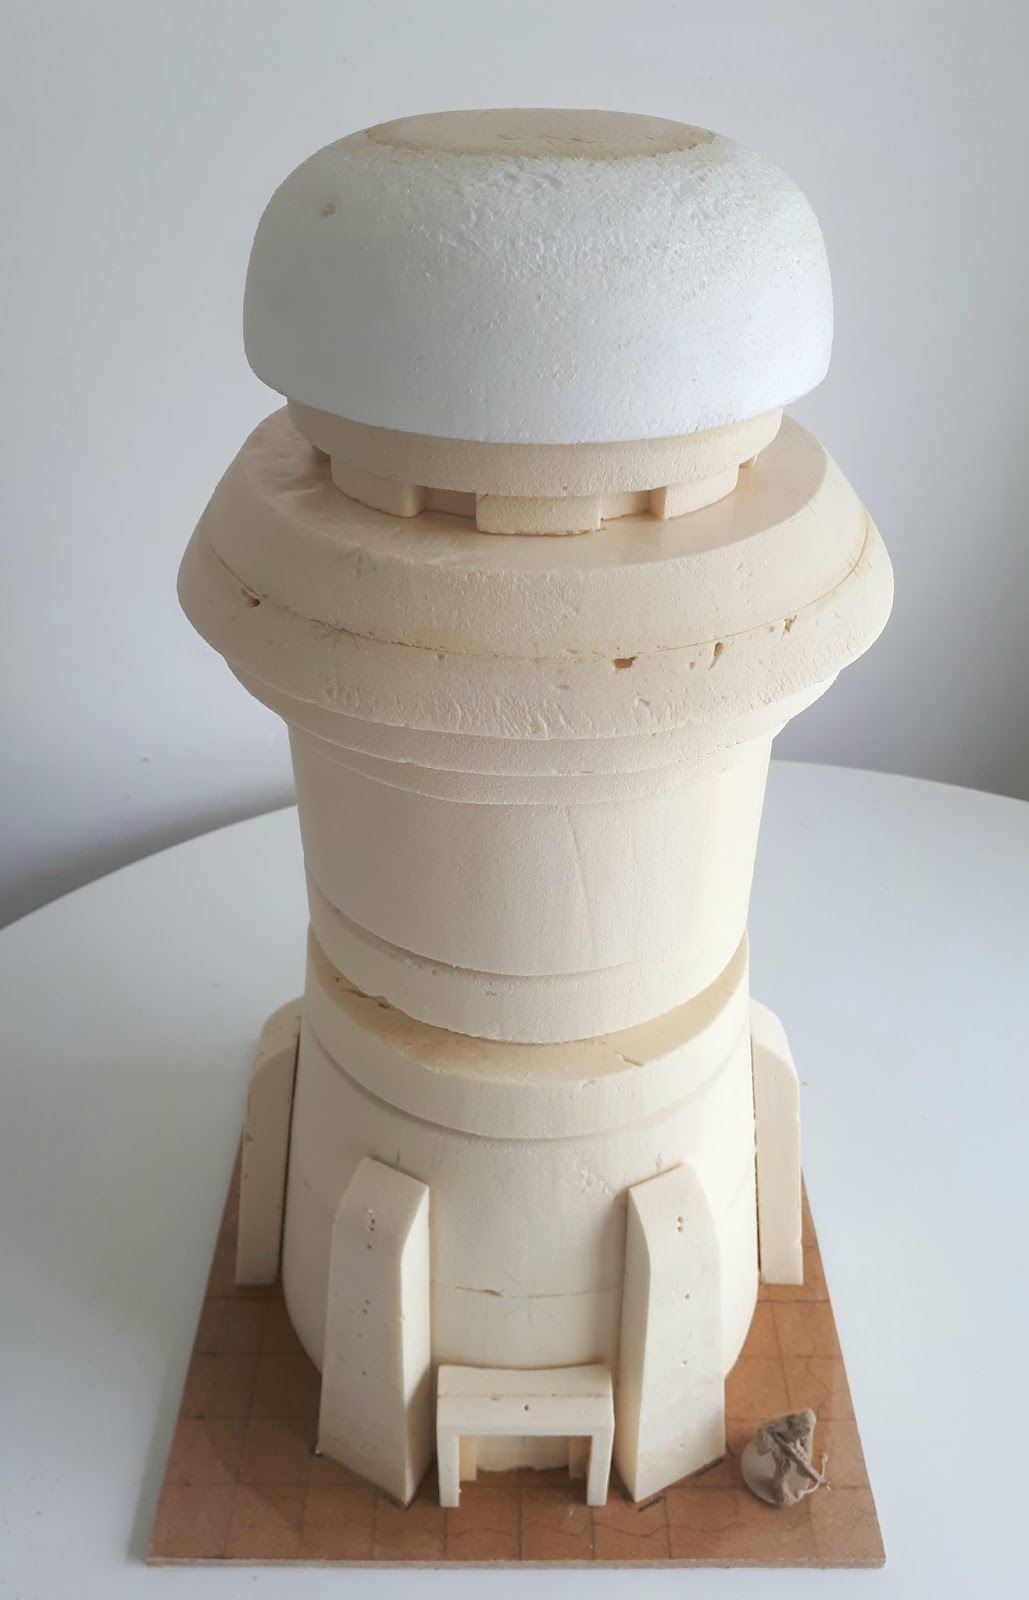
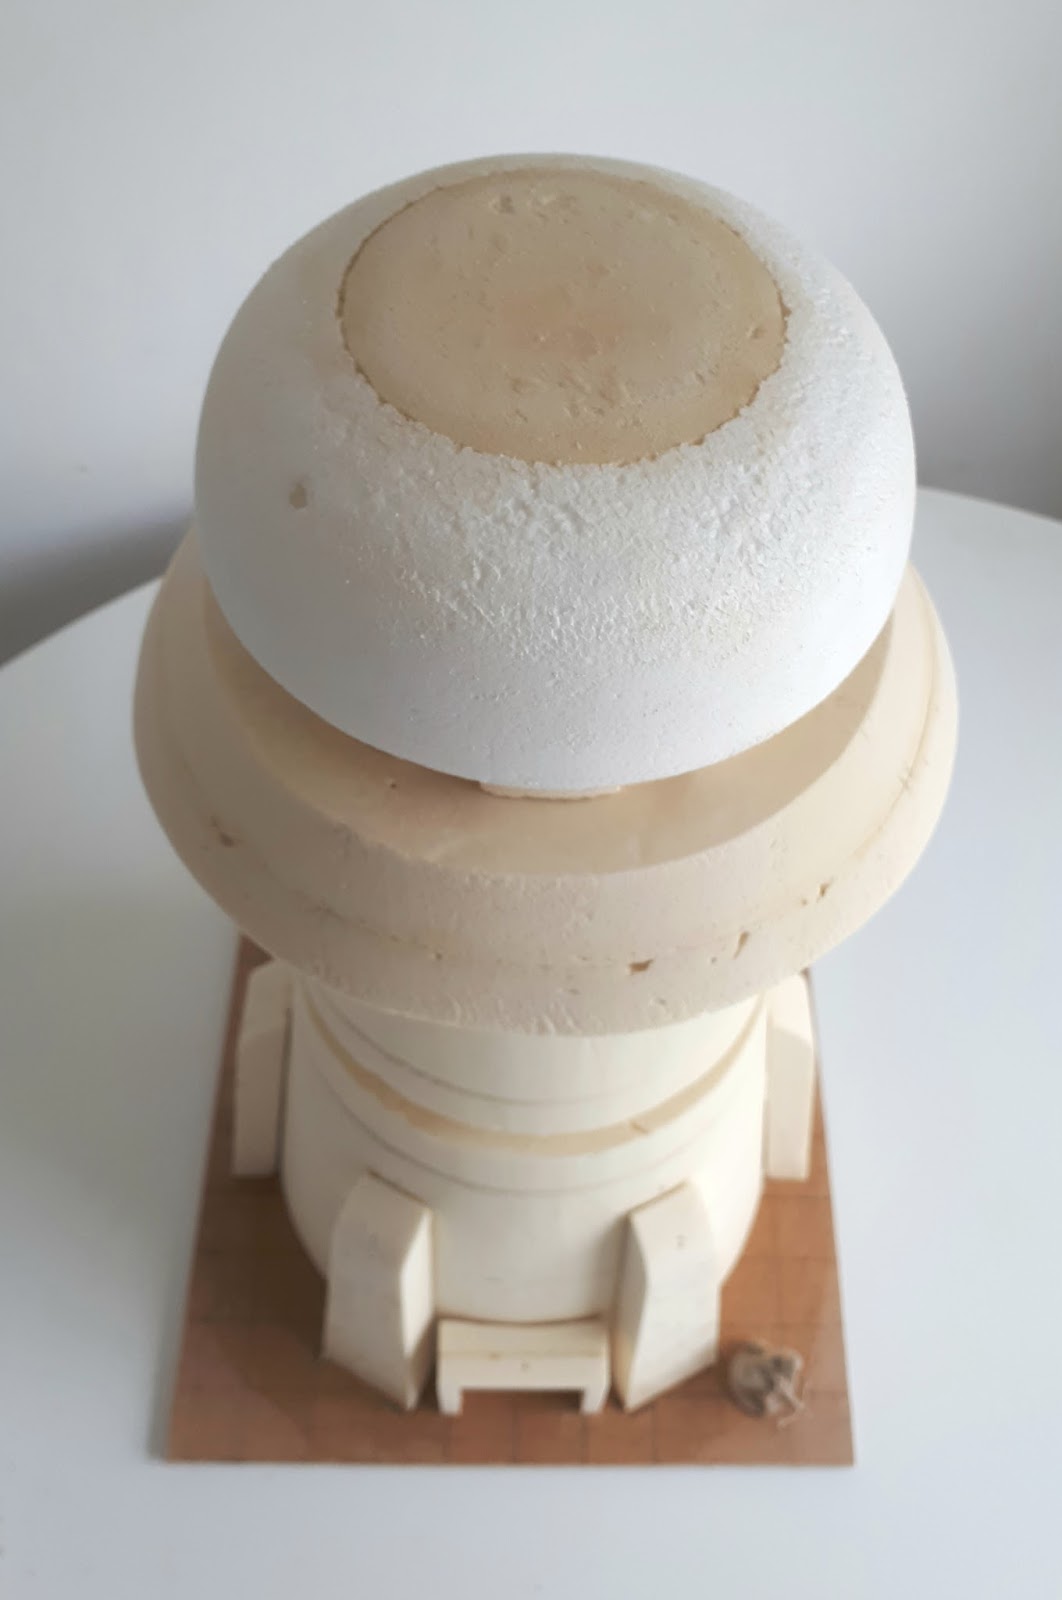
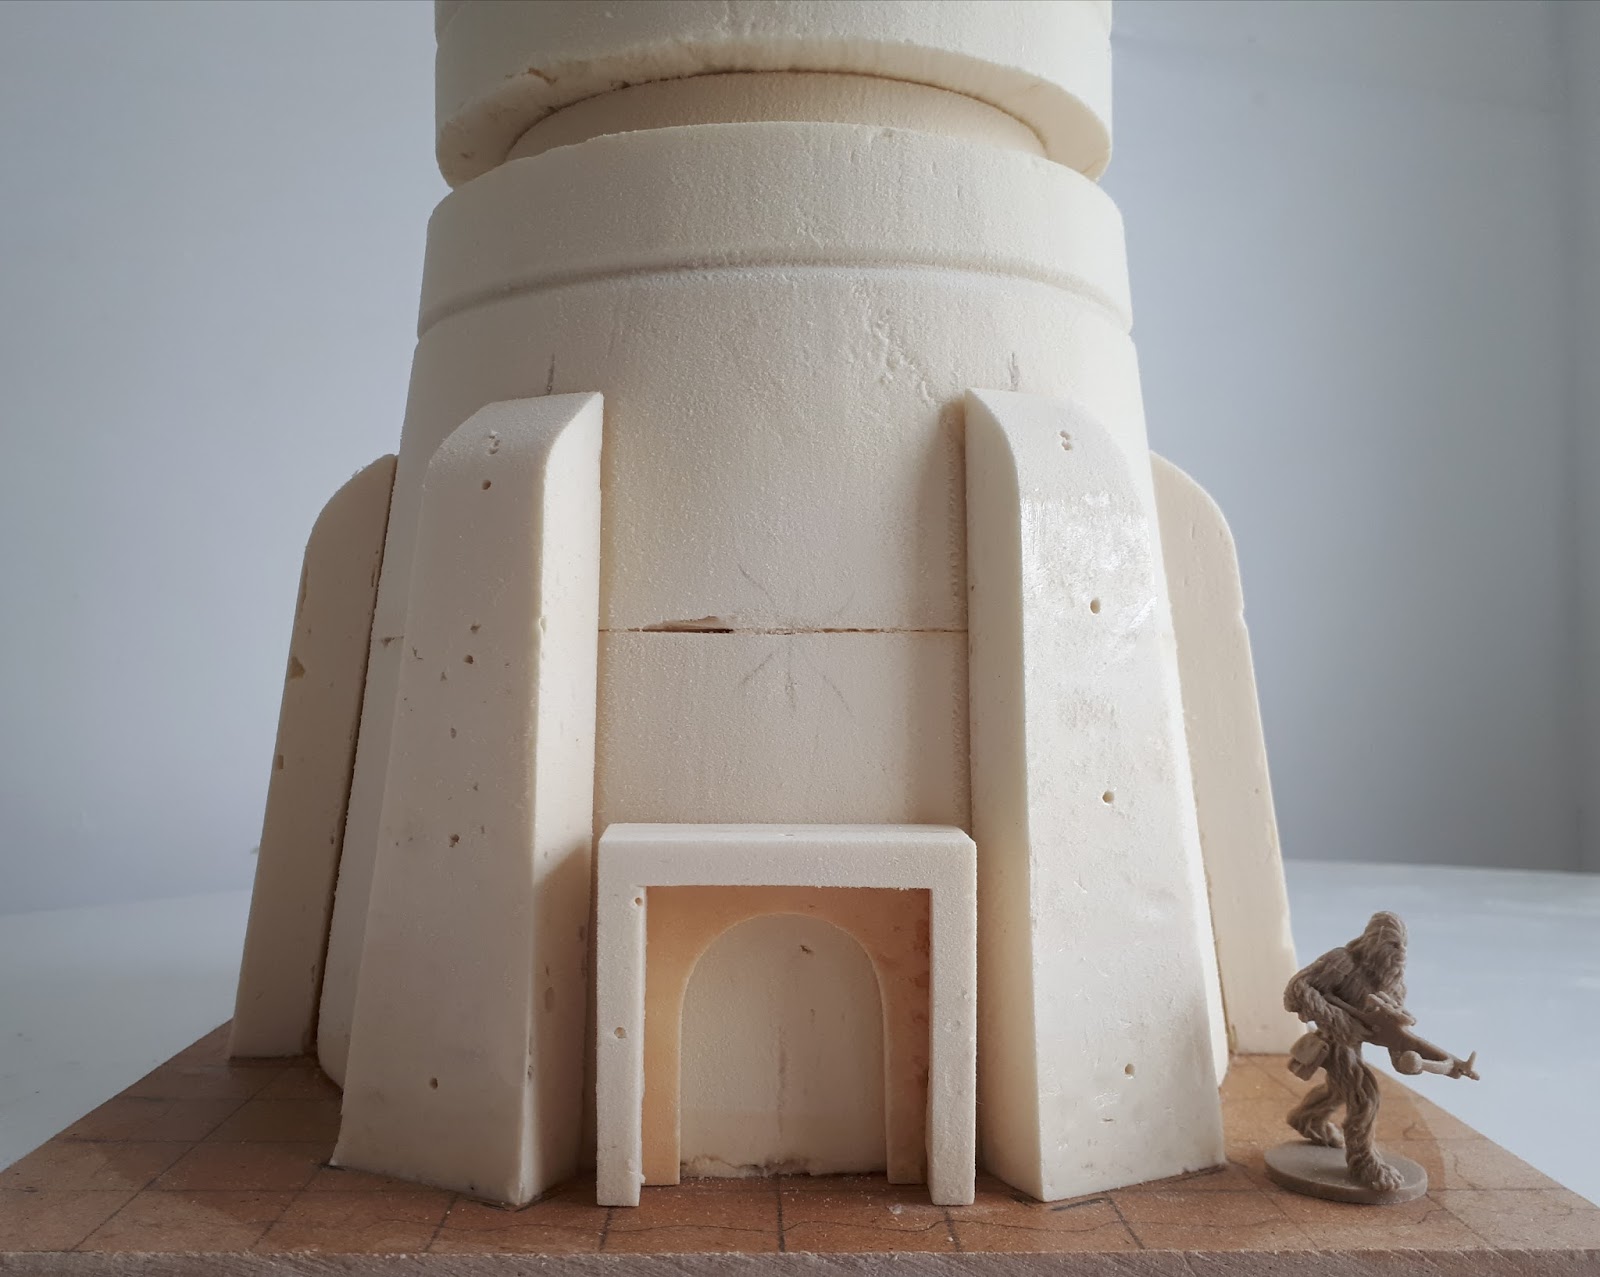
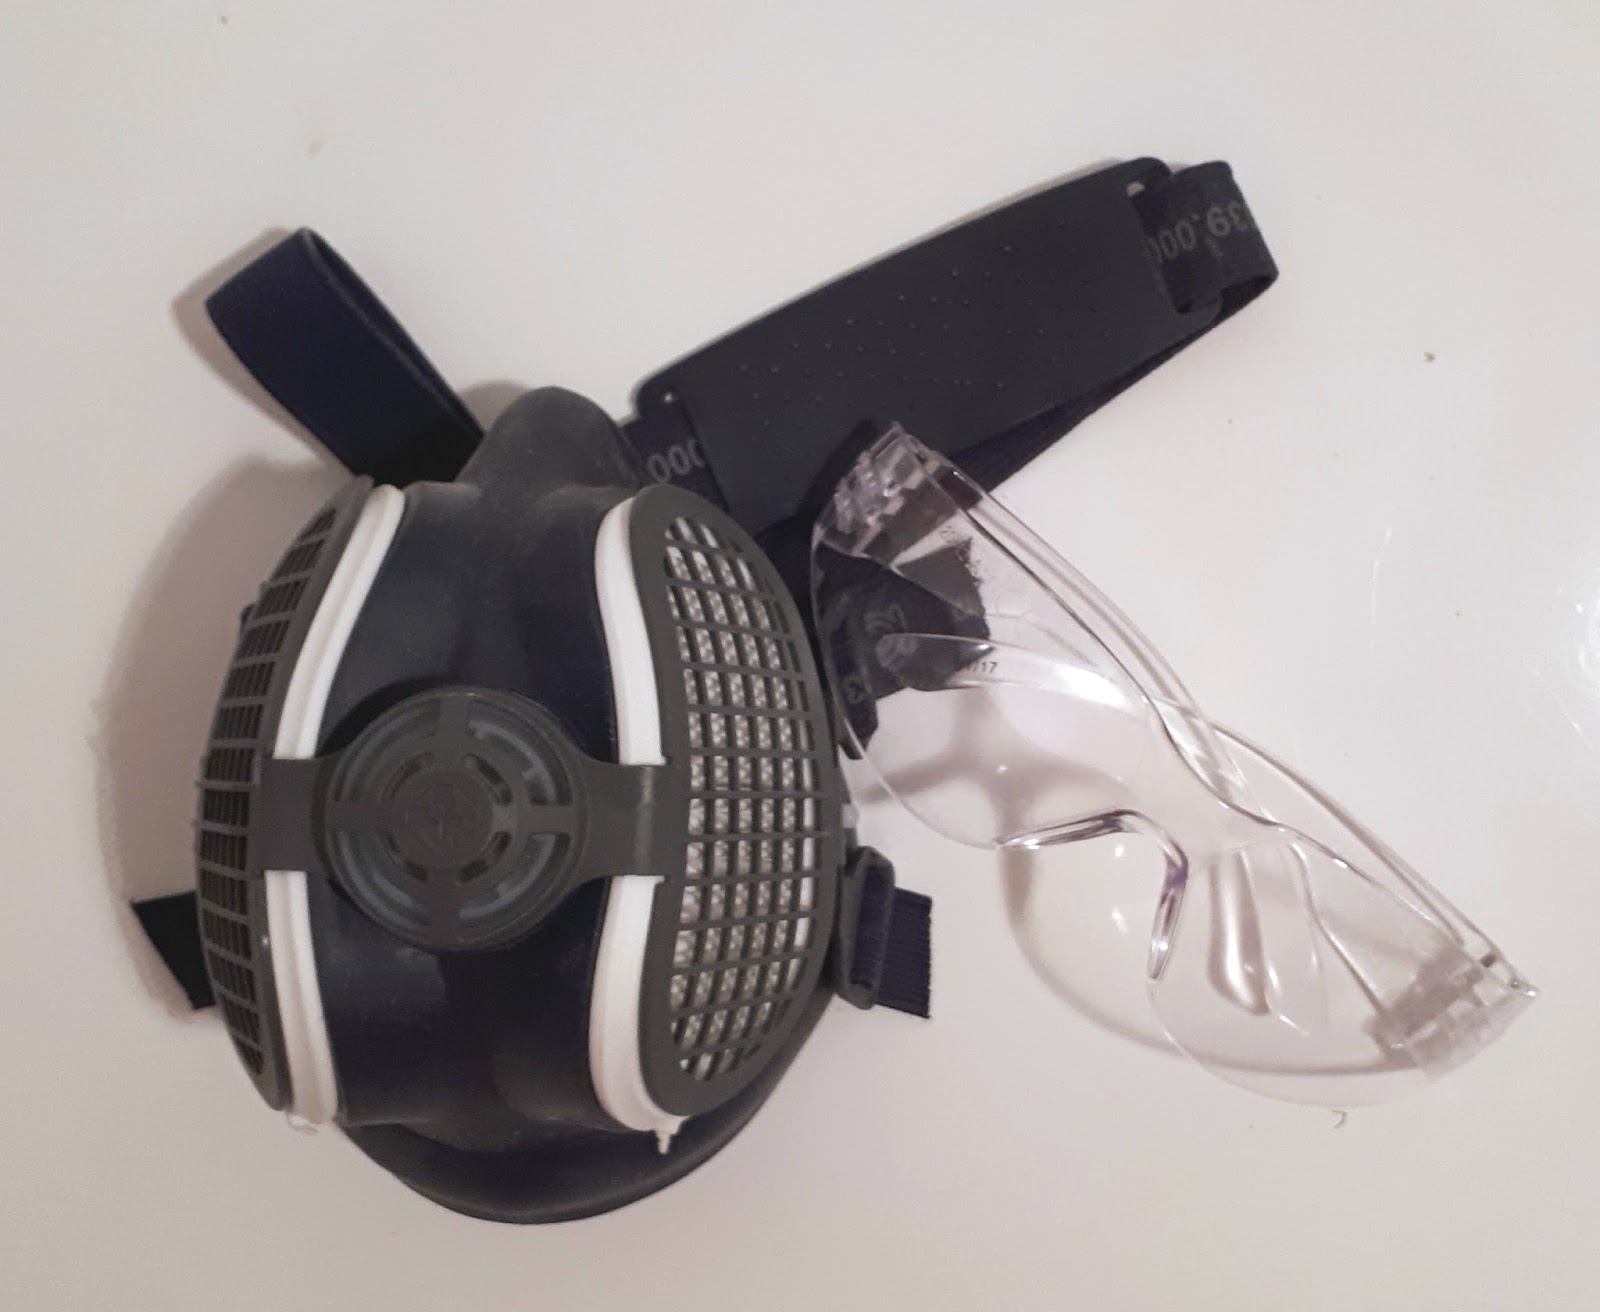
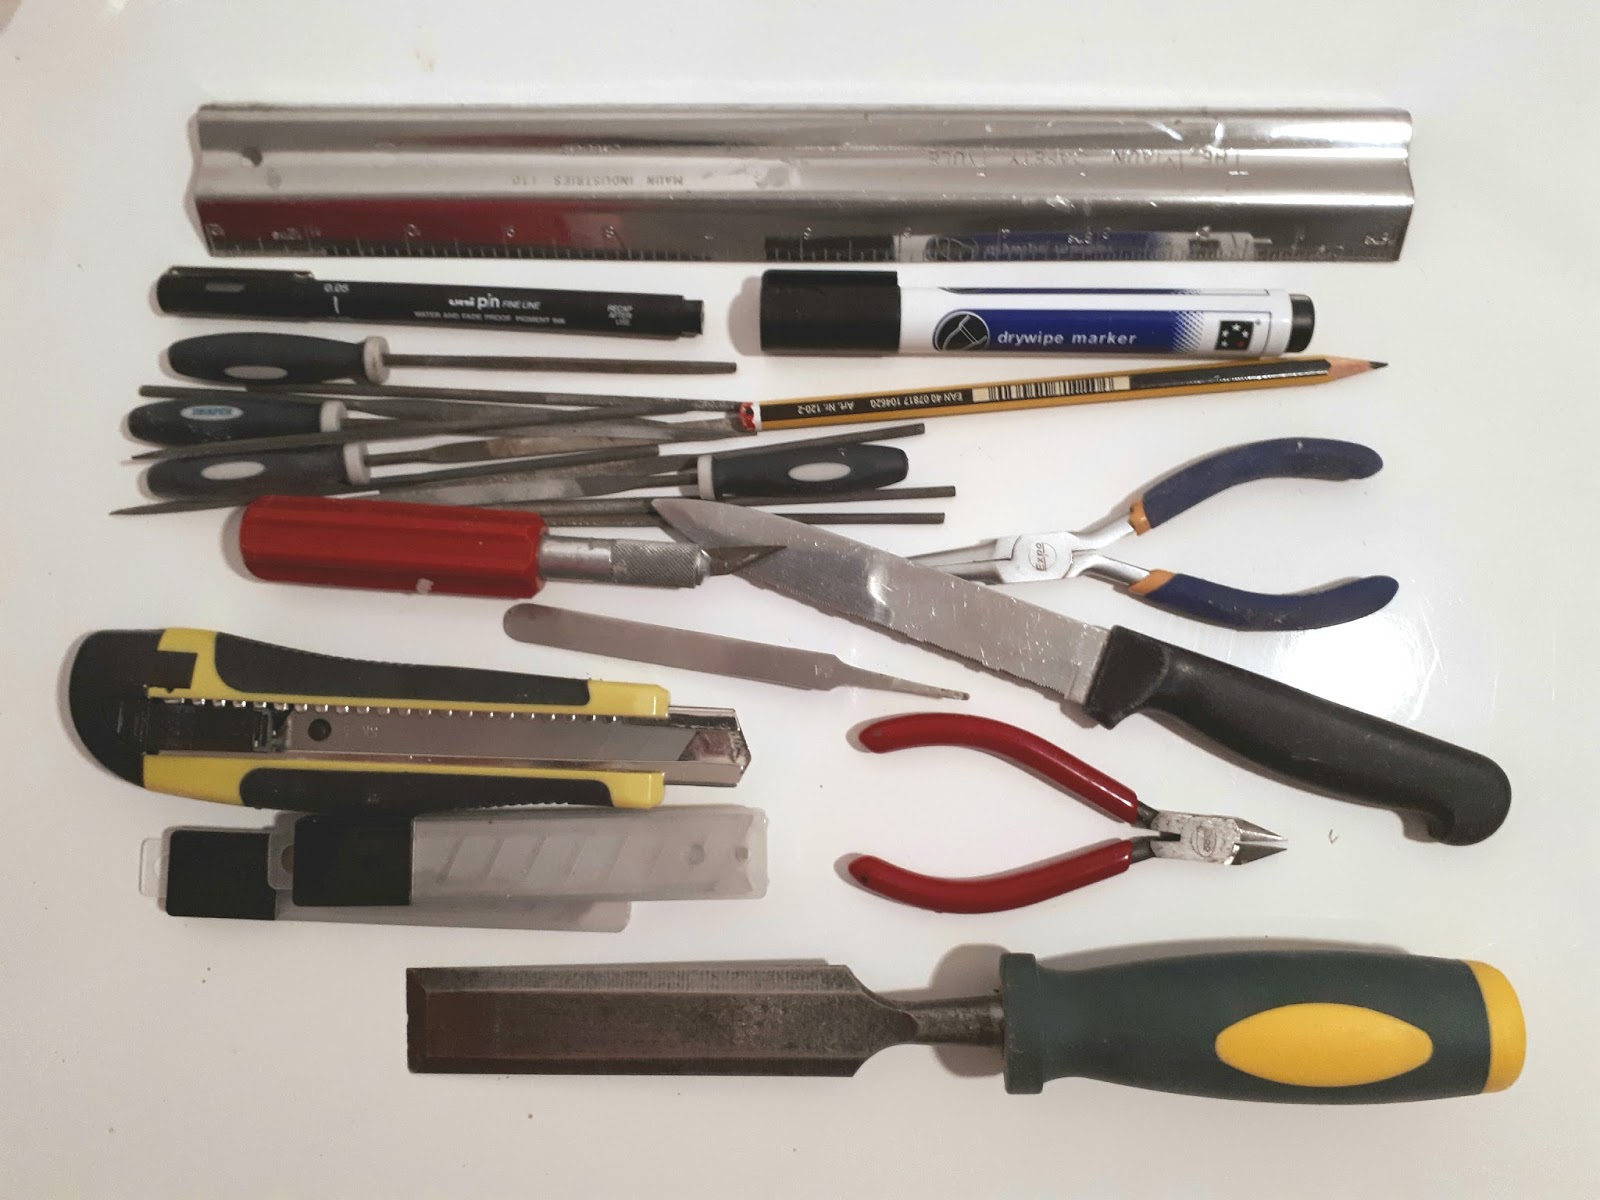
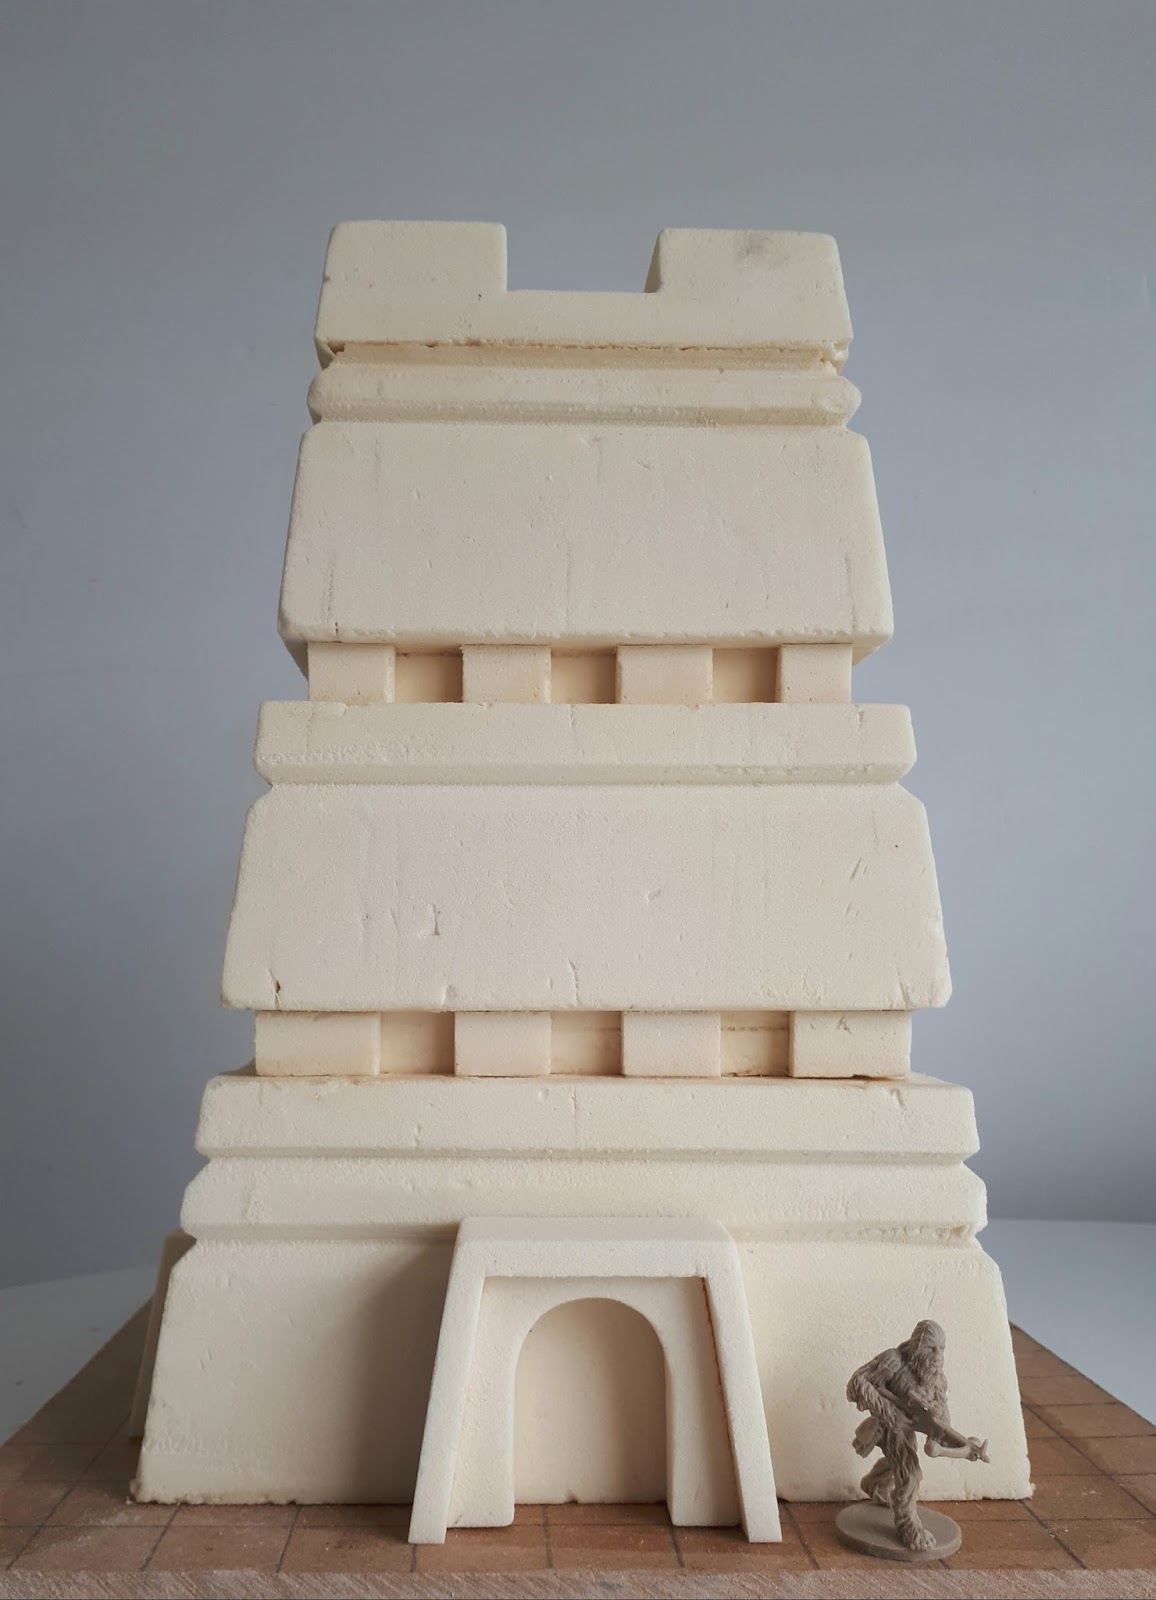
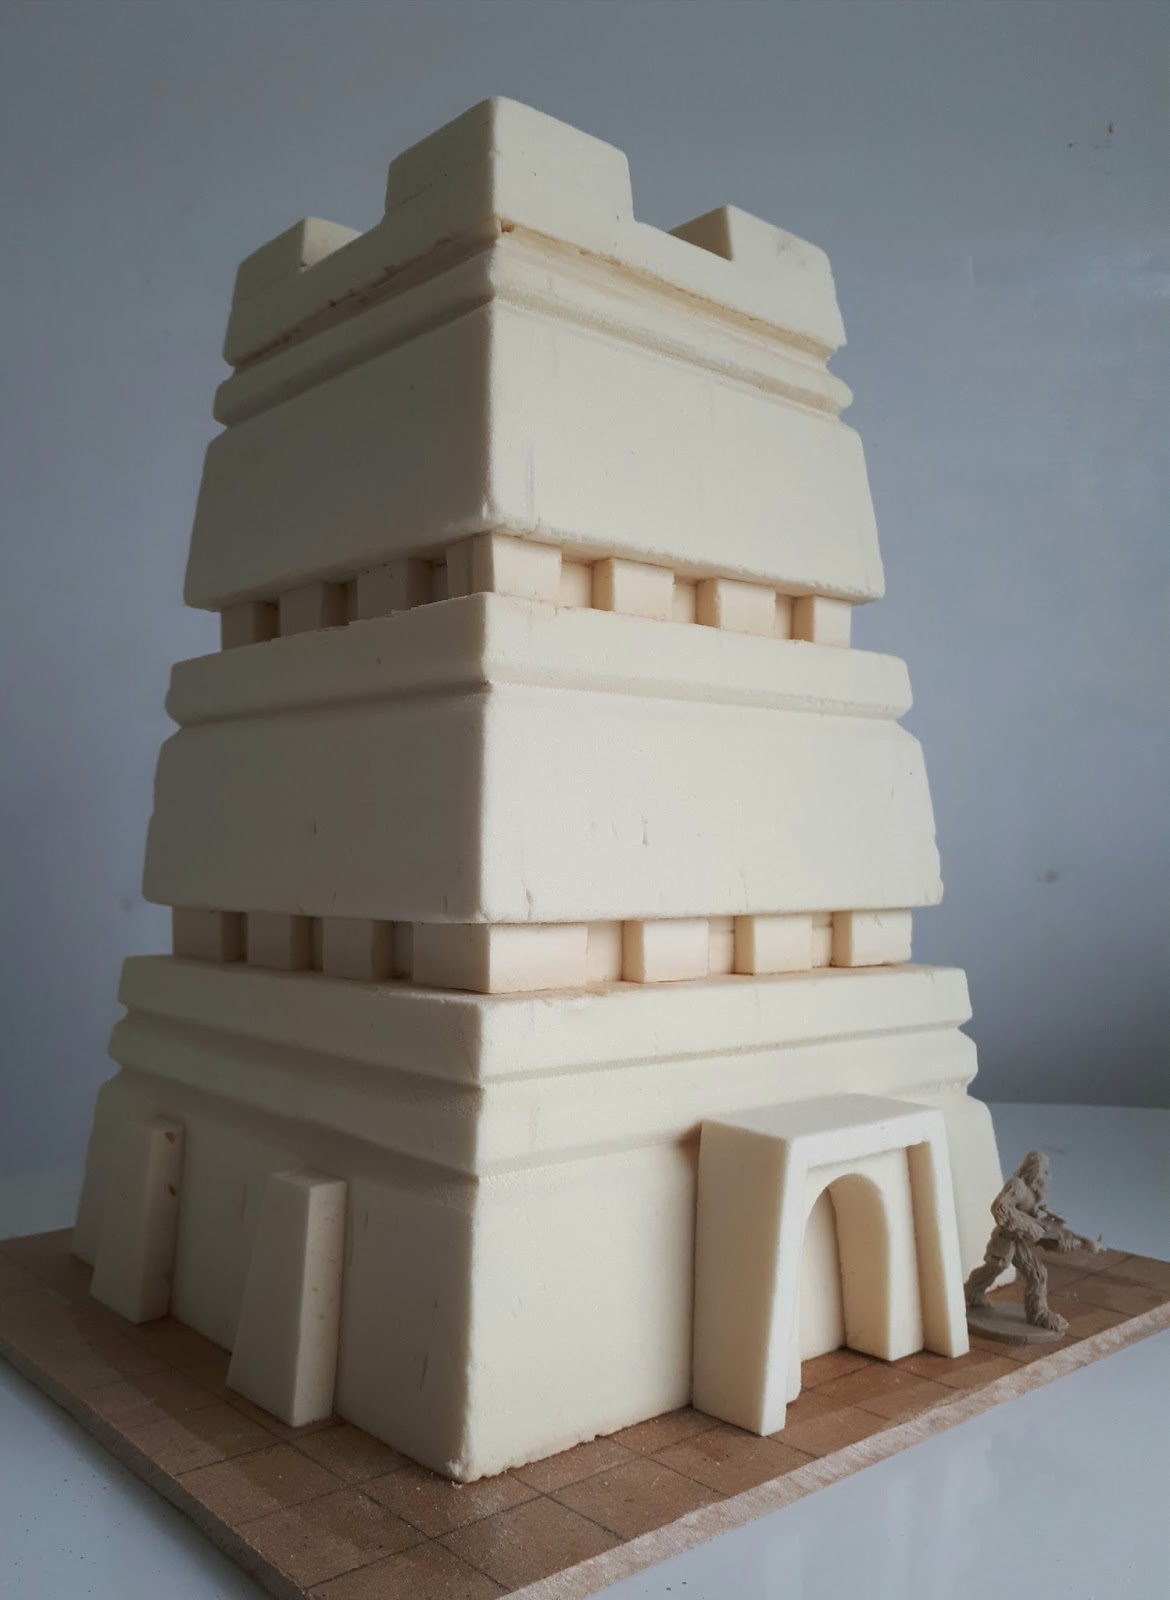
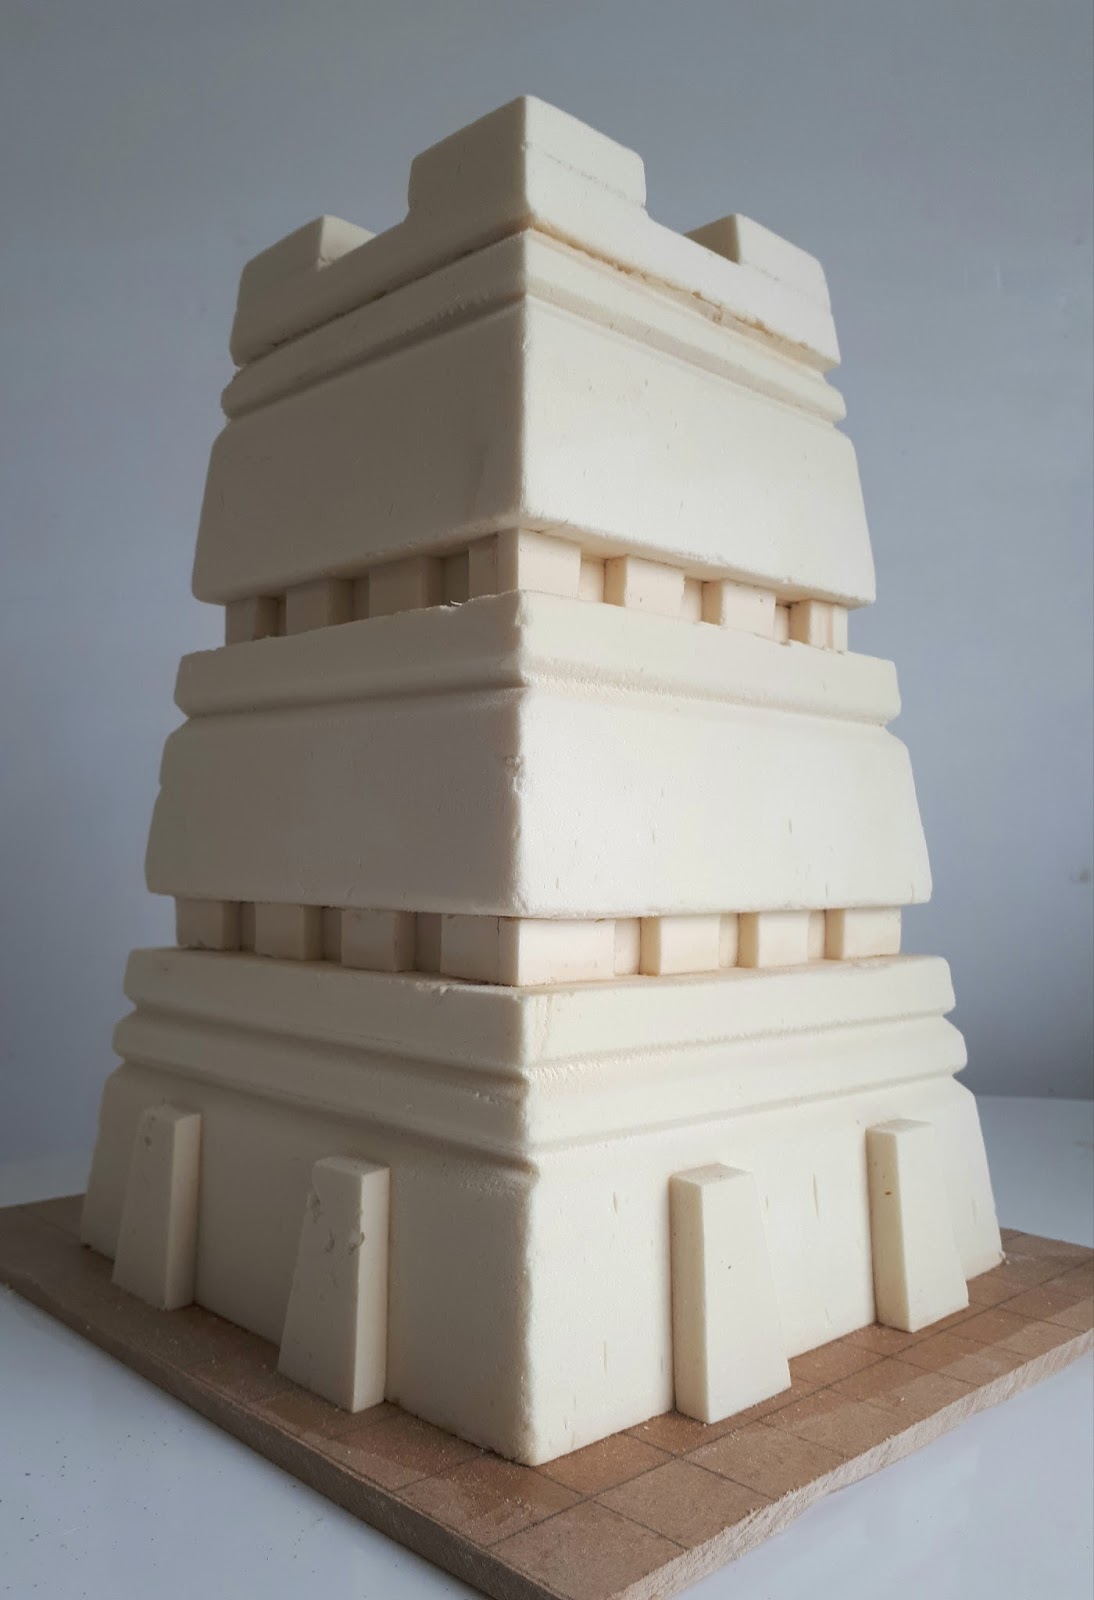
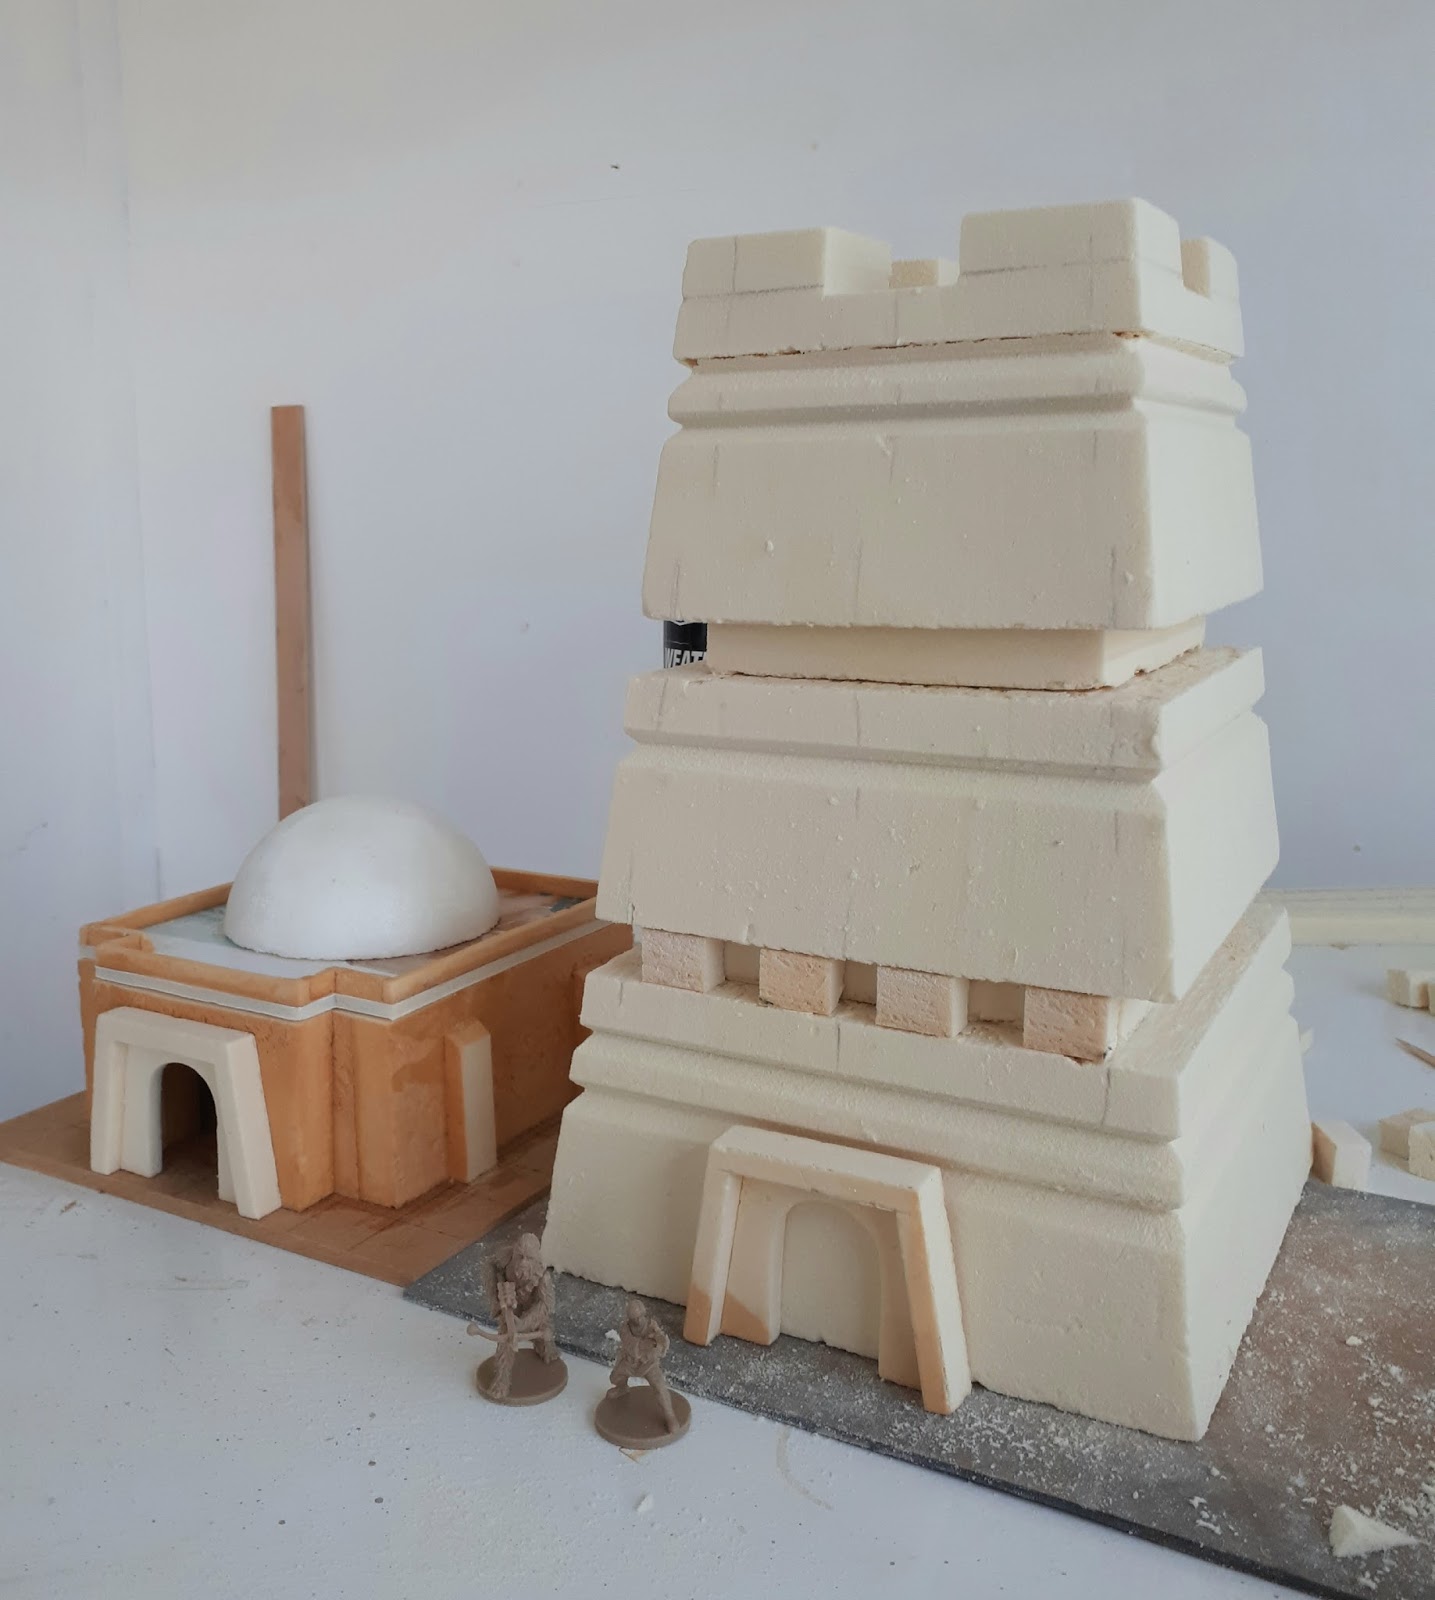
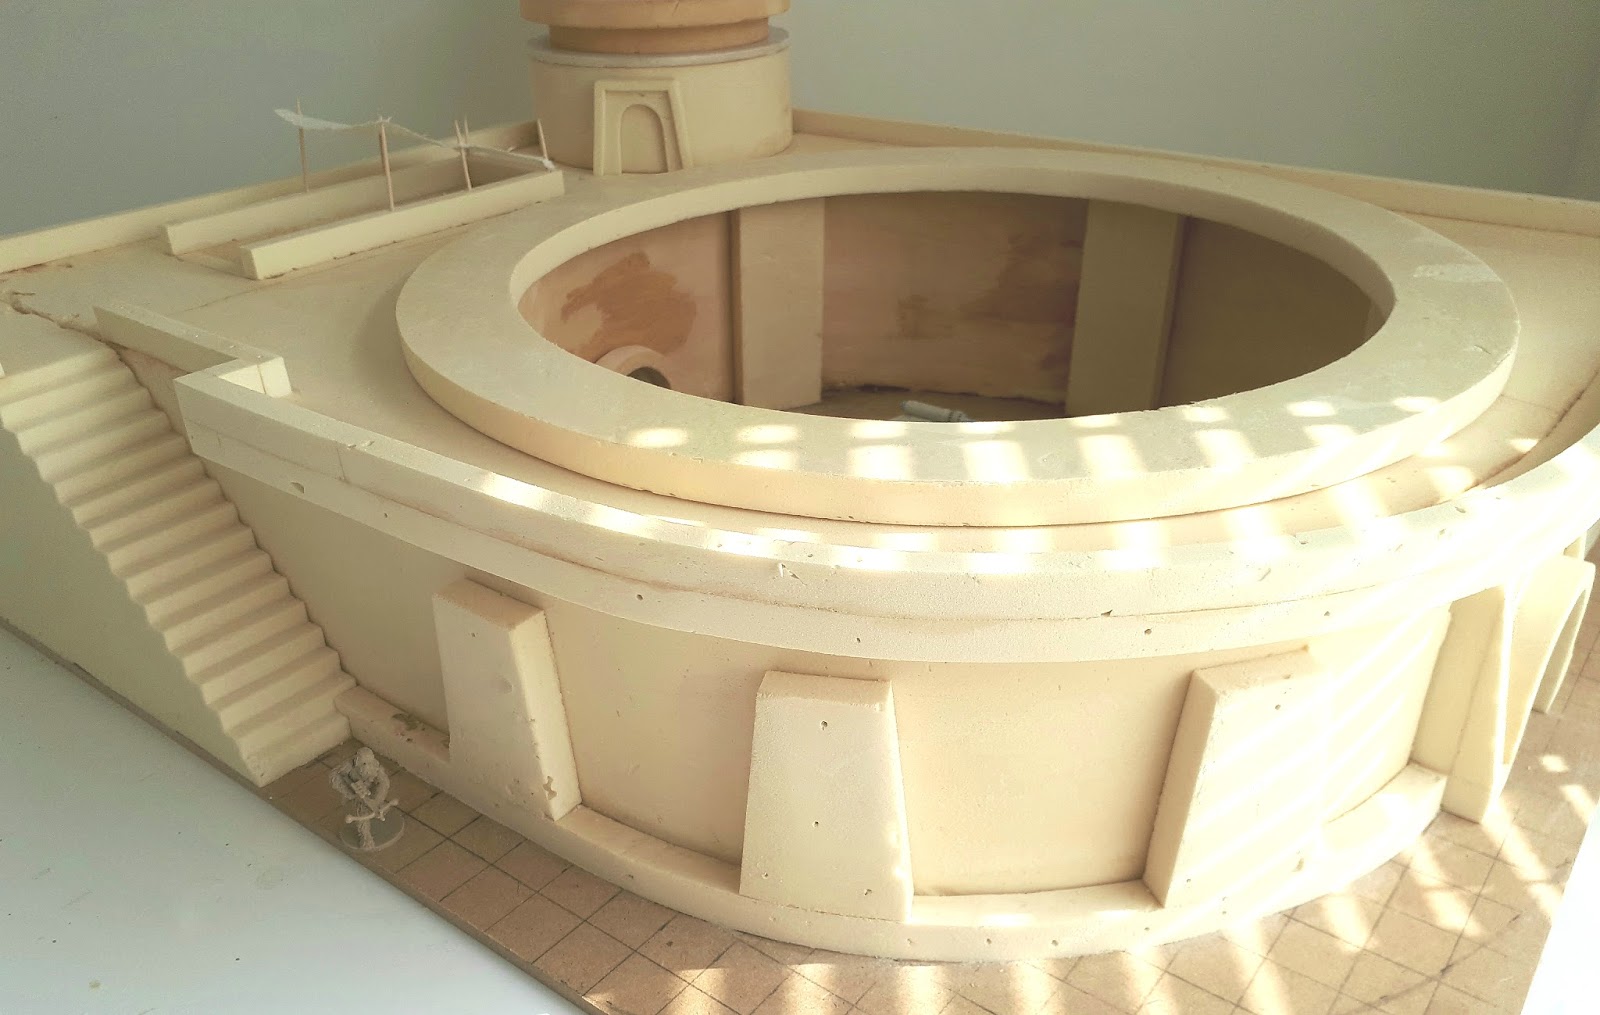
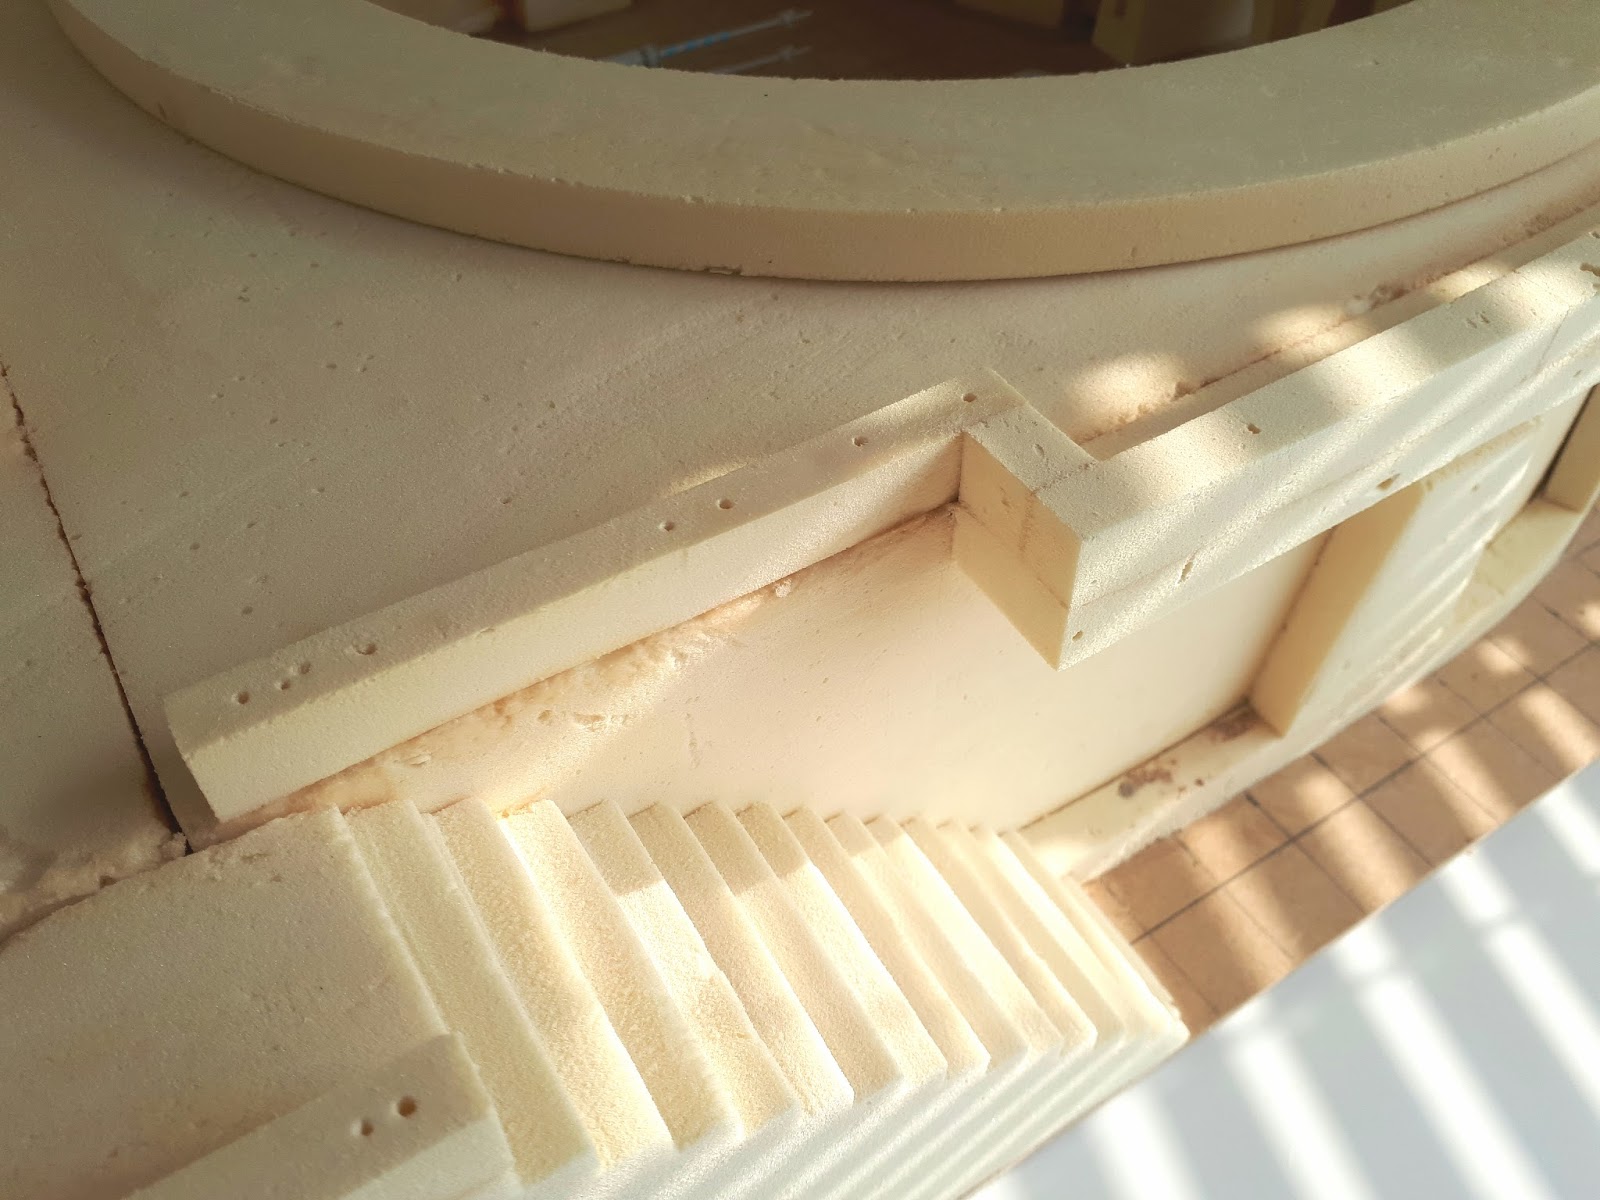
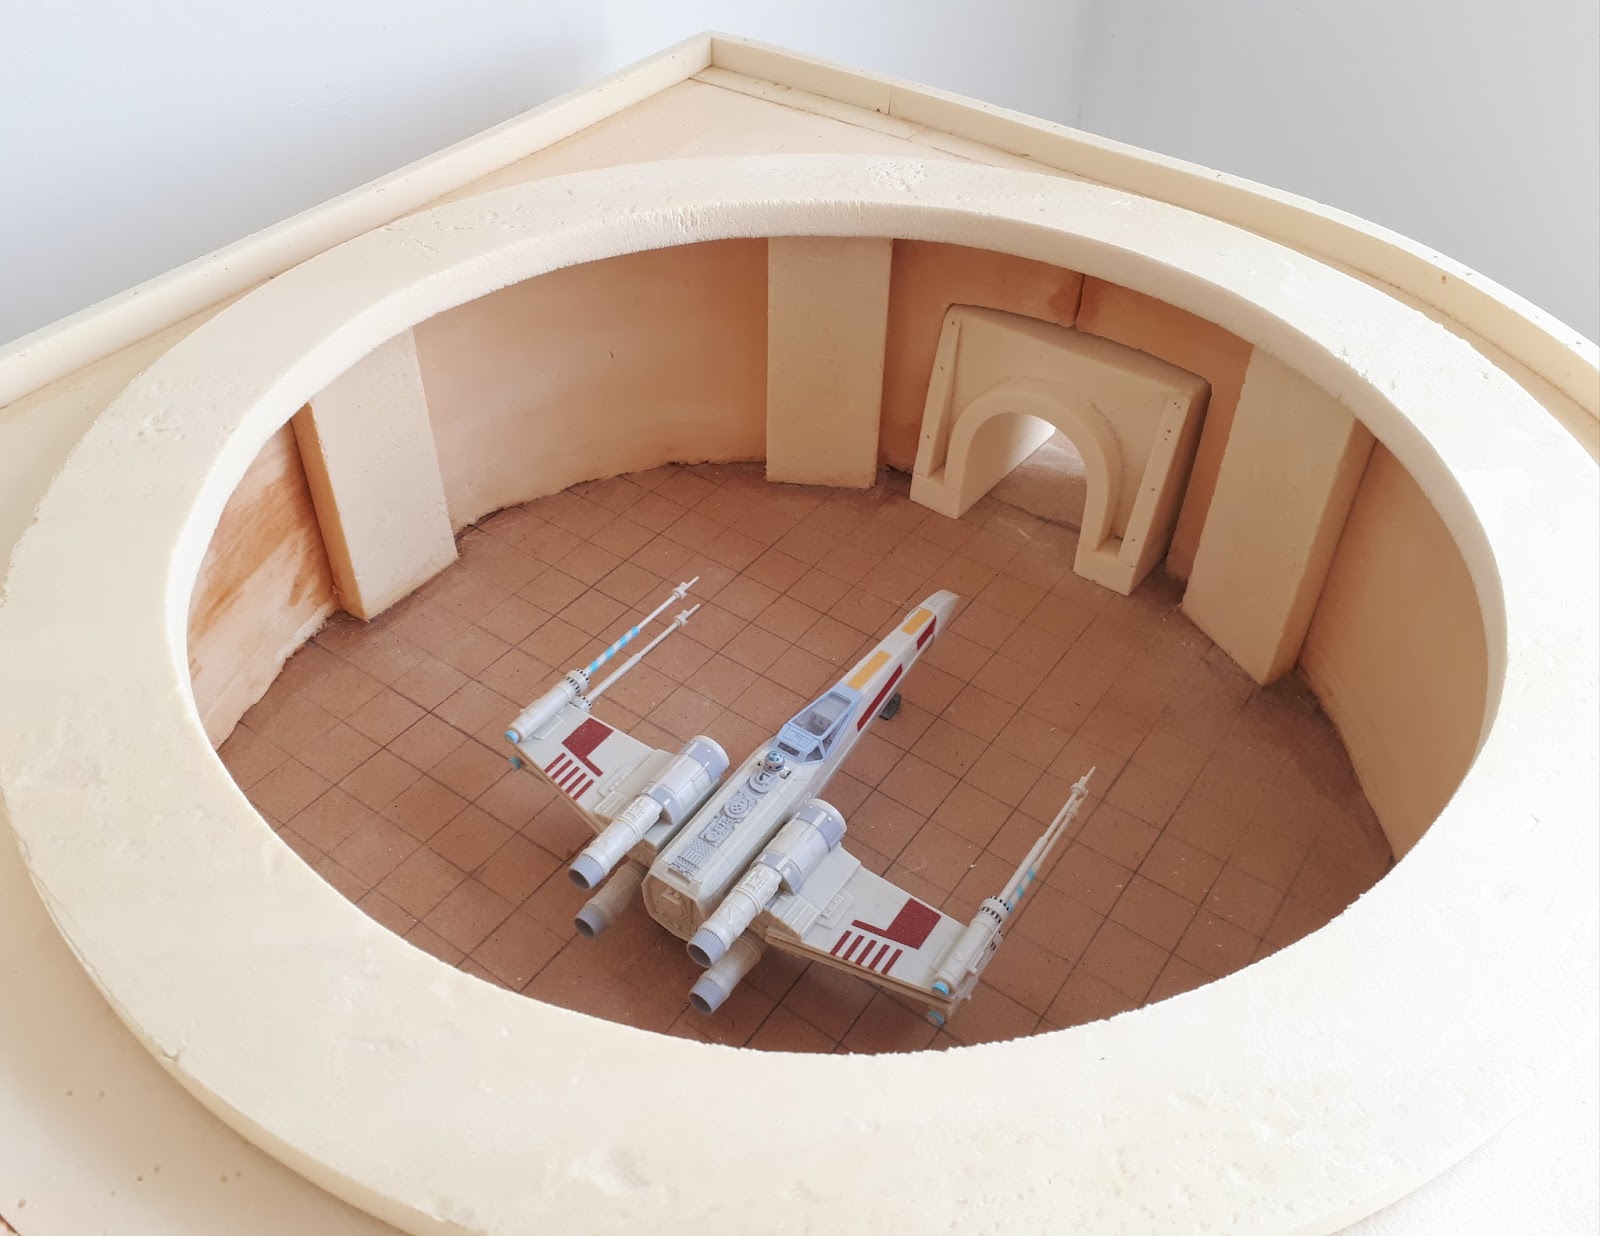
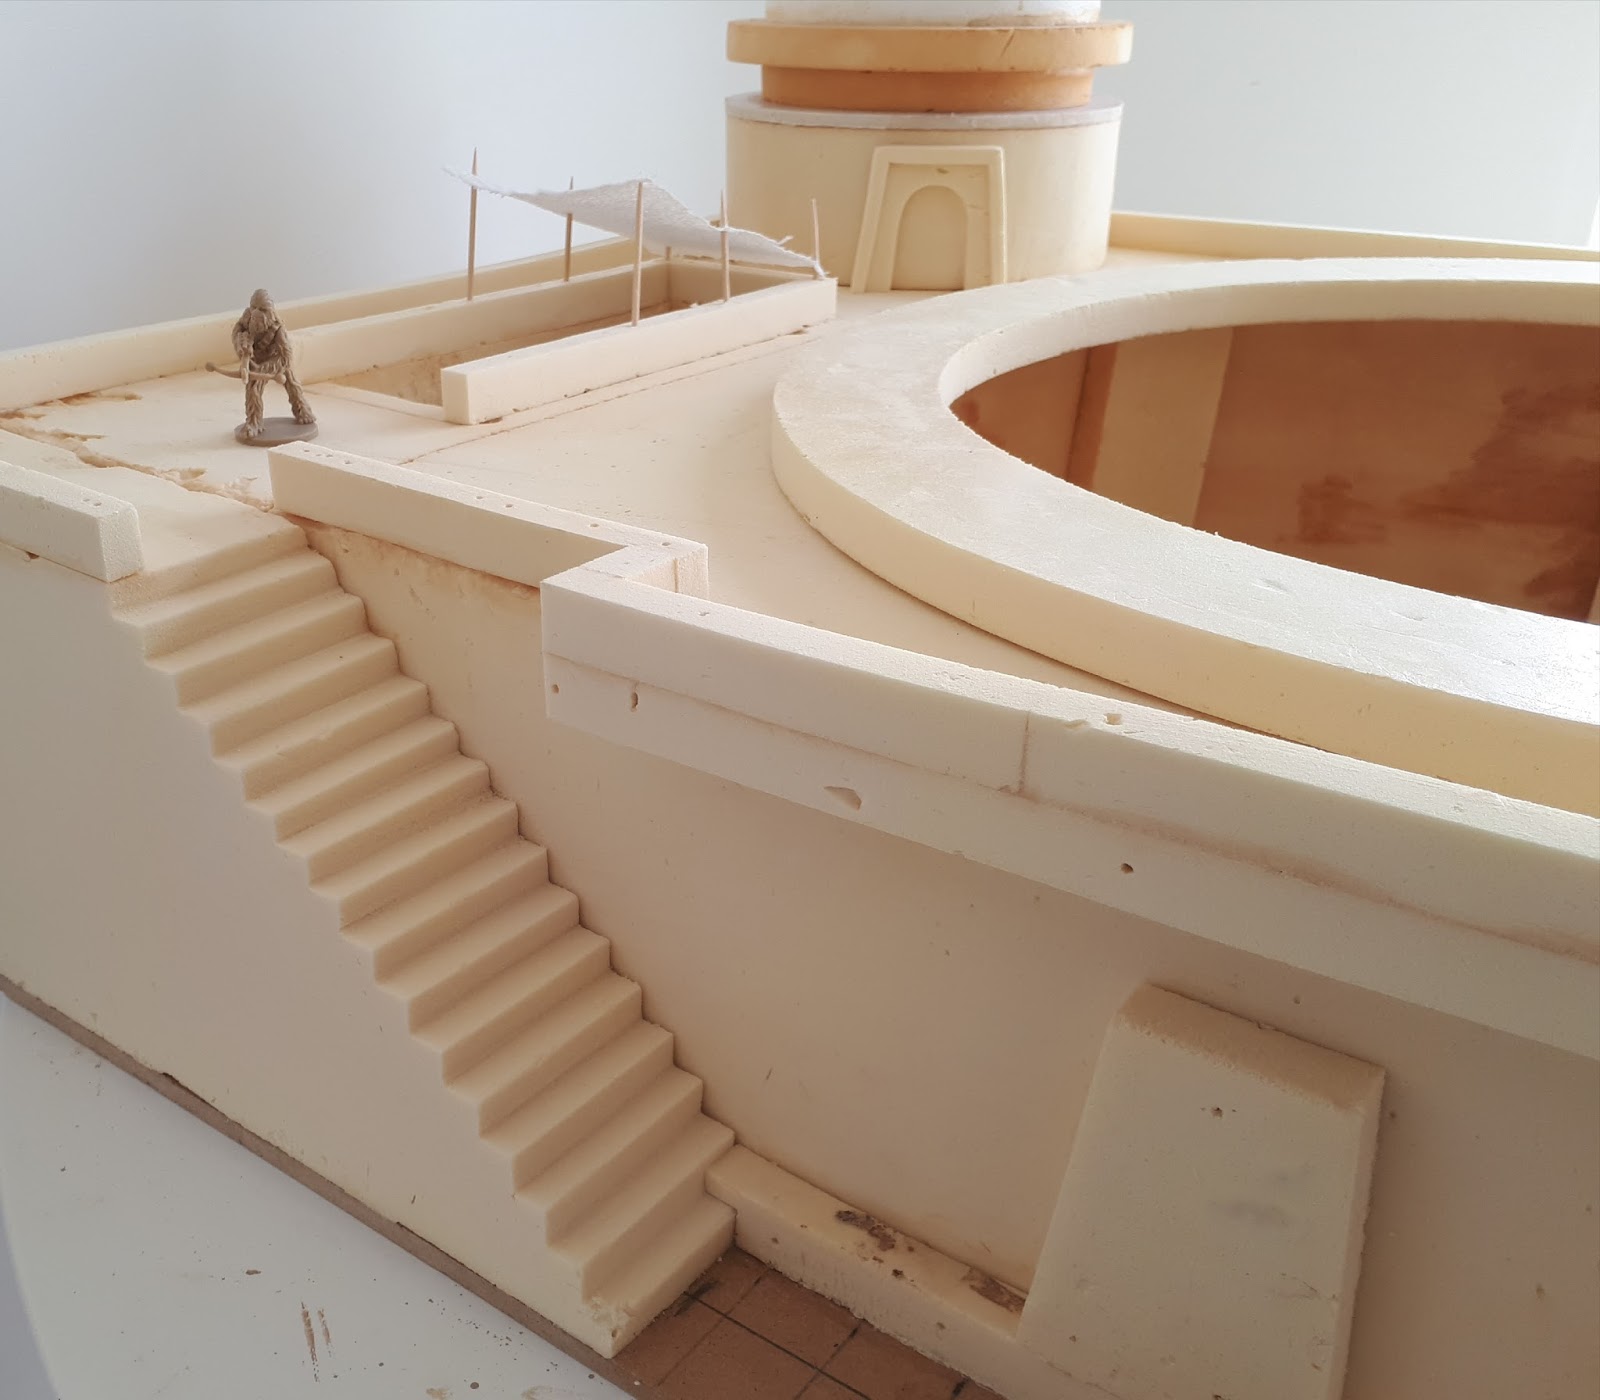
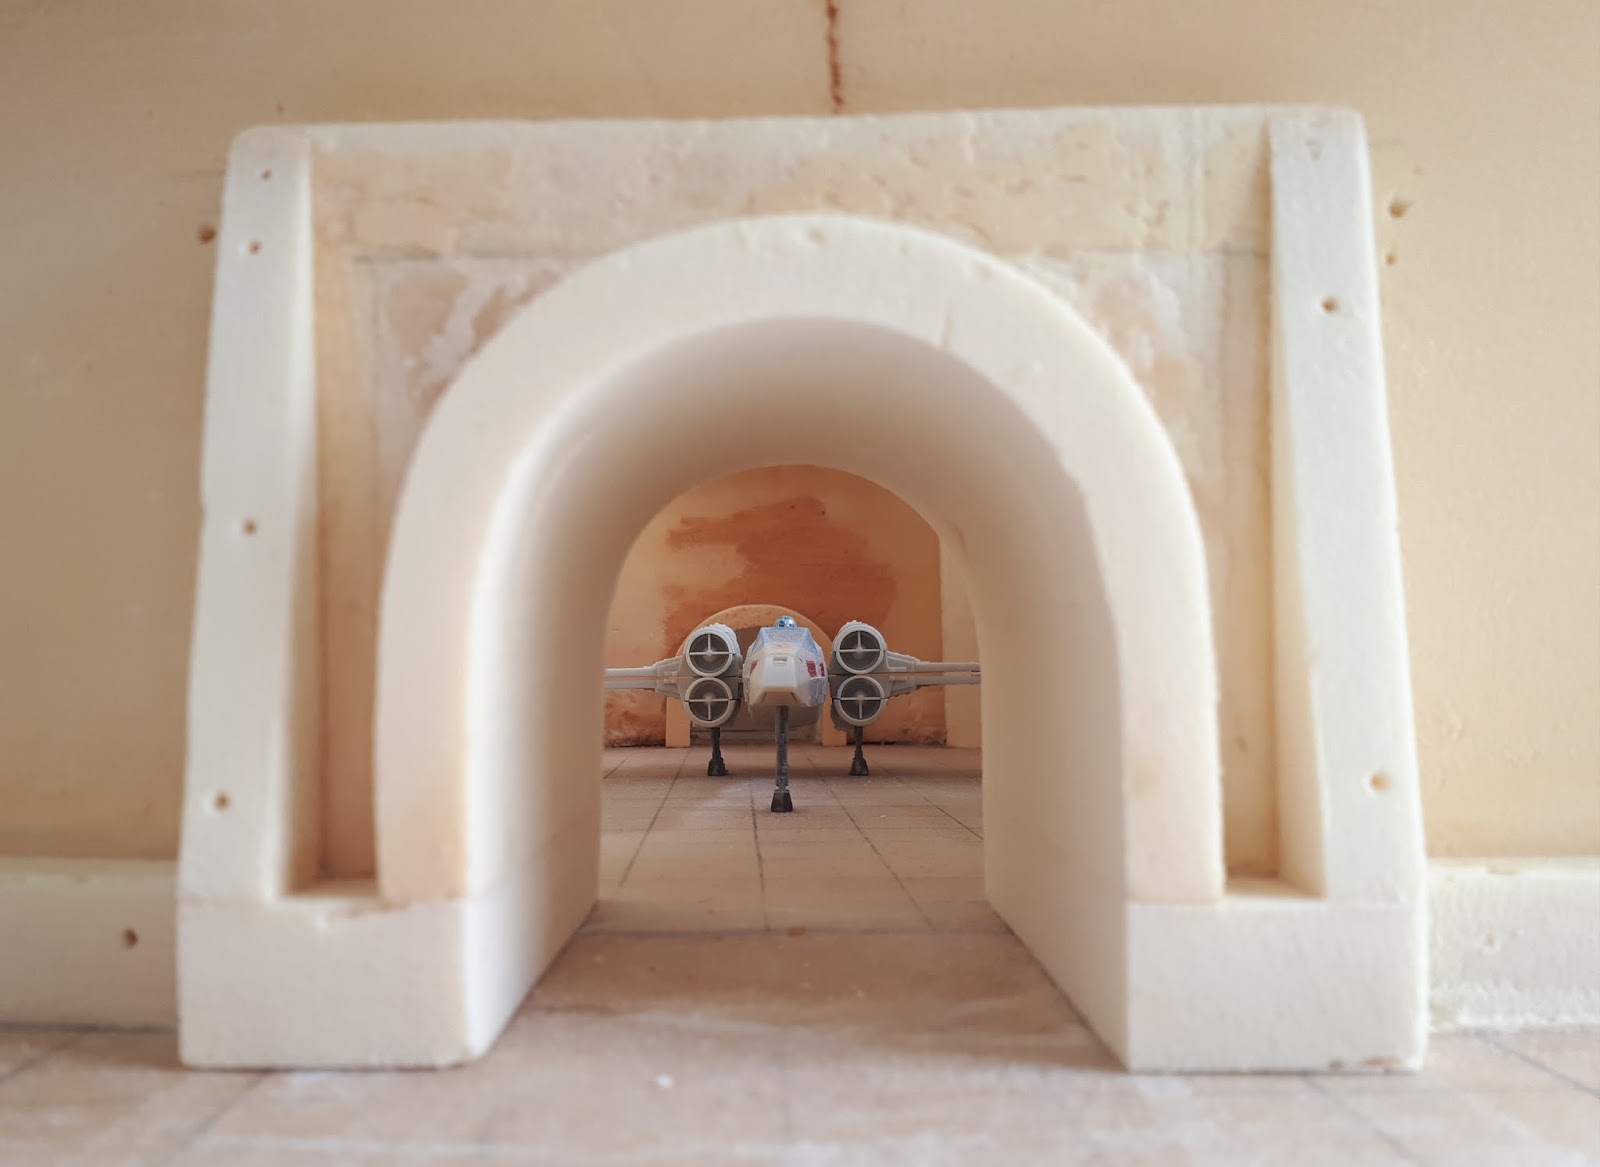
The spaceport was constructed out of standard insulation foam. I find it more useful for sanding and shaping than pink / extruded polystyrene. Great curves! Just remember to wear a good quality respirator when working with the stuff!

20171017_173307.jpg

20171017_174310.jpg

20171017_174205.jpg

20171017_173540.jpg

20171017_174230.jpg

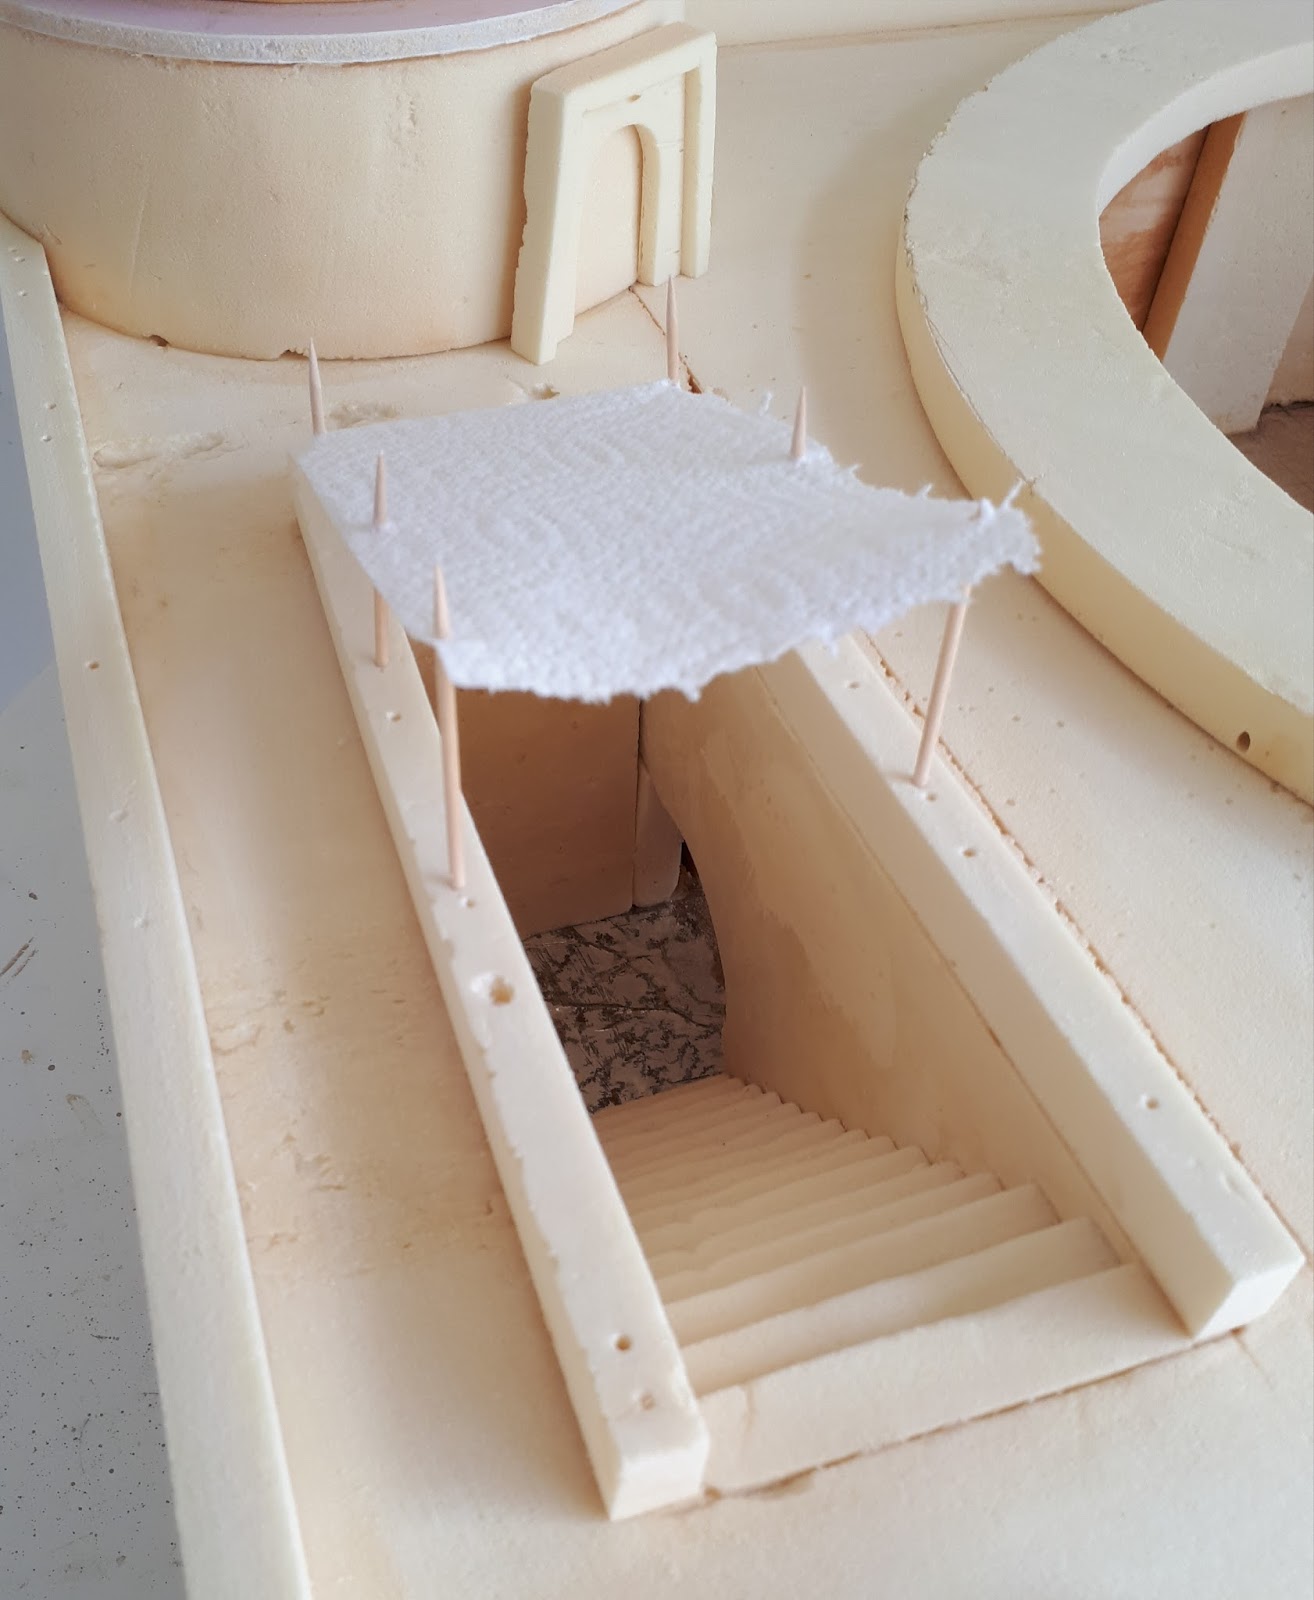
The tissue paper canopy above the stairwell is just a proxy to give me an idea of how it could look with one modelled in.

20171017_174405.jpg

20171017_174901.jpg

20171017_175726.jpg

20171017_175808.jpg

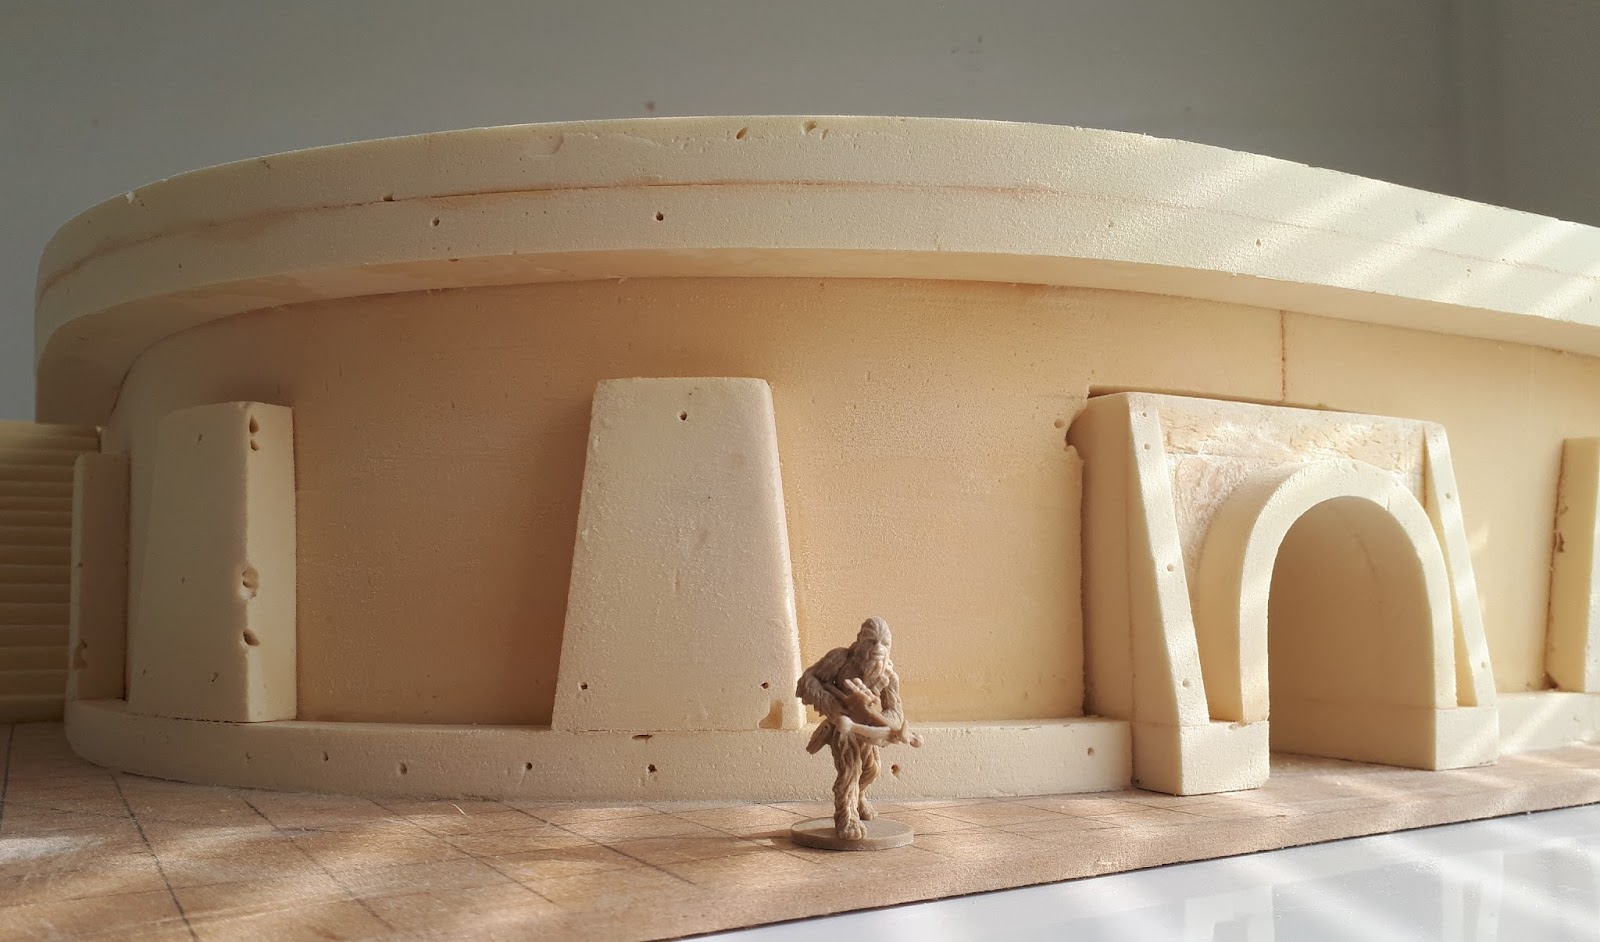
The next step will be to model up some plasticard doorways and other gubbins... the landing bay in particular will benefit from piping and some fixtures and fittings to bring it to life...

Hope you like the work so far. Happy to answer any questions, cheers :)

Looks awesome!

Wow!

(puts me in mind of the Rebel Depot on Tatooine from Star Wars Battlefront)

Idea for landing bay gubbins:

An access ladder for the X-Wing

Red5.jpg

And a work platform for the technicians:

SEA005.jpg

(a loading hoist for the droid might be too bulky for the available space)

Looks great!

Awesome stuff

8 hours ago, ABXY said:

Wow!

(puts me in mind of the Rebel Depot on Tatooine from Star Wars Battlefront)

Idea for landing bay gubbins:

An access ladder for the X-Wing

Red5.jpg

And a work platform for the technicians:

SEA005.jpg

(a loading hoist for the droid might be too bulky for the available space)

That's a cool idea! Would look great and can be used as cover or blocking terrain. Thinking some plasticard rodding...or at a stretch, tooth picks (cut and sanded) could be used to form the framework... ill have I have a little play around to see what could work. I have some crates and bits from TTCombat which I'll scatter in there too. I'd like to add some sort of servo/maintenance droid. Not sure if there are any models that may suit?

Also, a portable power generator - like in the bottom left of the below pic - with a power conduit/coupling.

3395488172_a84a3de3a5_b.jpg

13 hours ago, ABXY said:

Wow!

(puts me in mind of the Rebel Depot on Tatooine from Star Wars Battlefront)

My thoughts exactly. That is one of my favorite maps. I am working on a Death Star interior map but the Rebel Depot and the Goazan Badlands (Cargo Map) were my next inspirations for a map. My thoughts were to make a huge Depot but leave the top open as the interior area of the building would be a big part of it, not just the docking bay.

This has got to be my favorite structure built so far. This thing is totally amazing.

I've been working on a tower. A nice big one :D

20171017_182212.jpg

20171017_181432.jpg

20171017_181619.jpg

20171017_181528.jpg

The inspiration for the design came from the building you can see in the back right of this picture;

Mos_Eisley.png

I made the building in 3 stages; top, middle and bottom, sanding and smoothing the foam until I was happy with the design and fit. Wood glue is used to attach the pieces together and works really well on this type of material.

20171017_181956.jpg

To make the domed top, I cut away and sanded the polystyrene half-ball to around a third and then filled the resulting hole with some spare foam, sanding the piece down to create a smooth transition. I'll use filler to address any gaps and once a base coat is applied it should tie the model together.

Just ... wow

Very talented. On the landing pad ... how many smaller pieces making the larger structure? Are you using any sort of tool to help sand or all by hand/paper?

The Tatooine gaming table needs a few moisture vaporators...

20171018_194008.jpg

20171018_194320.jpg

20171018_194740.jpg

I considered a number of different materials with which to build the vaporators and the one that provided the best solution was.... Lego!

20171018_194641.jpg

A selection of plasticard and bits from the trusty bits box were used to add final detailing :)

4 hours ago, Dash Two said:

Just ... wow

Very talented. On the landing pad ... how many smaller pieces making the larger structure? Are you using any sort of tool to help sand or all by hand/paper?

Cheers Dash Two!

The landing pad was constructed out of two main blocks of 6 inch depth insulation foam. I drew out the main shape of the landing area itself directly onto the block and carved out the inner landing pad circle. Take your time at this point because it's easy for the foam to crack if you go at it too vigourosly. Once you've got the rough shape in place, switch up to a retractable bladed to achieve finer a d cleaner cuts, finally switching to a sanding block to refine and clean the finished surface. Depending on how vigourosly you sand, you can actually remove quite a bit of foam quite rapidly, or equally, achieve delicate detailing results.

The second block was shaped and attached to the back. This is the block that contains the inner stairwell. This was carved separately and glued into place. The stairs on the side of the building are also a separate piece, as is the tower building on the top

4 hours ago, Dash Two said:

Just ... wow

Very talented. On the landing pad ... how many smaller pieces making the larger structure? Are you using any sort of tool to help sand or all by hand/paper?

I've been using the following tools and equipment to make the buildings;

20171018_192432.jpg

One of the most important bits of kit to use is a respirator! These are available in most DIY stores and start around £15 - £20 for the cheaper ones. They're invaluable for insuring you don't inhale the dust particles that come off the insulation foam when cutting and sanding. I also have a hoover next to me to help clear up all the bits and pieces that collect on the work desk. Alongside the respirator I also recommend wearing eye protectors to help limit the dust particles getting in your eyes...

20171018_191754.jpg

Sanding wise I use a 3M sanding block / loose sanding paper and a handy sanding stick! - Basically sand paper glued to a 1cm depth ruler like length of hard wood. This has proved invaluable for the majority of sanding I've done, providing great control and enabling large flat sweeping sanding, the ability to shape good quality curves, as well as used for more accurate scoring or angled sanding...

20171018_191958.jpg

In terms of cutting, the retractable knife has done most of the leg work. The foam can blunt blades pretty quickly so it's worth stocking up on extra blades. Other knifes and saws are also handy for bigger cuts where initial accuracy isn't needed. I also use a chisel for gouging out unwanted foam as well as smaller files for tidying up any small details, for example, around the door frames...

20171018_192218.jpg

Cocktail sticks and bamboo skewers have proved really handy for pinning foam pieces in place whilst the glue drys. The rolling pins come in handy for wrapping sandpaper round for creating curves in things like the underside of doorways and for keeping unruly jawas in check ;)

Edited by TUZ
Pic removal

These are all awesome!

The precision is impressive. Did you perhaps study architecture at University level? The model reminds me of the kind that would come out of our Architecture/Landscape Architecture department.

----------------------------------------

Regarding painting, how do you prime this? Rattle cans would eat up the foam, wouldn't it?

The vaporators ... Occam's Razor via Lego.

Some basic parts and, then, small technical Lego pieces. Good thing I just donated a good 30-40 lbs of Legos to charity. Kidding, as it went to a good cause.

Just amazing work, as I am brand new at this and still figuring it all out.

Maaaaaaan! Phenomenal!!... Just keeps getting better.

I've made another tower for the Tatooine gaming table...

20171017_183634.jpg

20171017_183151.jpg

20171017_183249.jpg

20171017_183219.jpg

The inspiration for the design came from the model in the FFG demo table, which I believe in turn was inspired by the building in the middle of the SW movie pic below...

20171003_201010.jpg

Mos_Eisley.png

I like that the design stands out from the majority of dome topped buildings that are synonymous with Tatooine. It certainly has a 'castle tower' feel to it, which makes me wonder whether it's some sort of governmental or garrison type building...

20171017_183951.jpg

A wip shot alongside a smaller building for scale. Cheers :)

amazing work where do you get the foam from?

21 minutes ago, chriscook said:

amazing work where do you get the foam from?

Cheers! It's Celotex insulation board. It can be picked up from most DIY stores. There's probably quite a few other brands available, but it's the yellow, almost crumbly foam you're looking for. Extruded polystyrene (commonly known in modelling circles as pink or blue foam) is also excellent for modelling but has quite different properties due it's density (great for sharp, firm cuts etc. but less maluable for sanding purposes) ?

16 hours ago, Dash Two said:

The vaporators ... Occam's Razor via Lego.

Some basic parts and, then, small technical Lego pieces. Good thing I just donated a good 30-40 lbs of Legos to charity. Kidding, as it went to a good cause.

Just amazing work, as I am brand new at this and still figuring it all out.

:D You're right! Sometimes the simplest solution is the answer!

Lego is great for all kinds of modelling applications and works pretty well on these vaporators. I tried lots of different stacks of pieces to see which looked good and flowed well from top to bottom. I'm happy with how they turned out. They just have a base coat on them at the moment but when I paint them and add in some weathering, they should look the ticket ?

Absolutely brilliant work. I love this build more and more.

I too made moisture vaporators from Lego's and wood turnings. They are in a previous thread by Force Majeure as a building challenge.

16 hours ago, Force Majeure said:

These are all awesome!

The precision is impressive. Did you perhaps study architecture at University level? The model reminds me of the kind that would come out of our Architecture/Landscape Architecture department.

----------------------------------------

Regarding painting, how do you prime this? Rattle cans would eat up the foam, wouldn't it?

Many thanks FM!

I studied tech graphics, so maybe some similarities to the disciplines of design architecture. I very much enjoy model making and construction; it presents interesting challenges through design, and use of materials etc. And I find it really rewarding when the concept becomes a 3D reality ?

In terms of priming, I'll likely use a slightly watered down acrylic paint. As you say, the solvents in a spray can would likely eat into the foam (although non solvent / non foam eating sprays are available on the market).

I know from experience the foam will soak up the first few base coats due to its porous nature. But once I have a reasonable surface to work on, I will look to airbrush all remaining coats / details.

The other thing I'll do is add in fine sand and PVA into the base mix to provide a textured surface. I'll also experiment with some patch plastering, to try and emulate the look of the buildings in the movies.

Cheers :)

18 minutes ago, C3POFETT said:

Absolutely brilliant work. I love this build more and more.

I too made moisture vaporators from Lego's and wood turnings. They are in a previous thread by Force Majeure as a building challenge.

Fantastic work! Just had a look and they look great! (And you've made loads, awesome ?).

Love all your IA stuff as well :D

6 minutes ago, TUZ said:

Fantastic work! Just had a look and they look great! (And you've made loads, awesome ?).

Love all your IA stuff as well :D

Thanks, I just posted my Power Generator entry for the October Community Terrain Challenge. All made from "trash".

I am going full on for a totally interior build. I plan to have a modular Death Star/ Imperial Station that I can convert into a Star Killer Base interior by adding rock face walls. It will be constructed completely from foam core board and printed decals using Avery label sheets.

DS_LABELS_1.jpg

Edited by C3POFETT