Clear Bases 101: Picking, Cutting, Gluing

By Armandhammer, in Imperial Assault Painting and Modification

I’ve recently got the painting bug thanks to Sorastro (I’m pretty sure 90% of the threads in the painting forum start with this line, heh).

One thing I’m having difficulty pulling the trigger on is the idea of putting all the minis on clear bases.

1) First concern is picking the bases. The two most popular ones I’ve heard of is Litko and Applied perspective.

http://www.litko.net/products.php?product=SW%3A-Assault%2C-Clear-Base-Upgrade-Set-(36)#.WaOFStPysU0

http://www.appliedperspective.com/acrylic/product/imperial-assault-clear-base-pack/

Any recommendations between the two? Are there cheaper alternatives out there that work just as good?

2) Any tips when it comes to cutting minis off their original bases? Is filing required? What about more difficult minis like the massive figures/E-webb?

3) I’ve read a few posts mention that certain types of glue can “fog” up the base. What's the right type of glue? Will glue suffice or is it recommended to pin models?

I have purchased some of the acrylic bases from applied perspective. I have not attached any miniatures to them yet. I do have one of my imperial officers cut off of his base and need to finish painting him up so I can attach him. The glue that they recommend is an acrylic glue that way it won't fog up. I would also recommend putting like pieces of paper clip in their feet to give them some stability. The super glue and I'm also sure that the testors model glue will cause the acrylic to fog up. I have used the acrylic glue that I purchased from amazon. Which is great. I would recommend purchasing the tips so you can reduce the size of the nozzle for spreading the glue.

https://www.amazon.com/SCIGRIP-10315-Acrylic-Cement-Low-VOC/dp/B003HNFLMY/ref=sr_1_1?ie=UTF8&qid=1503925593&sr=8-1&keywords=Acrylic+Cement

Edited by supersayian

For cutting the miniature off. You can try to cut them off flush at the base. I have done it with the officer and it worked pretty well. You will have to file it down flat. Check out sorastros video on YouTube of Darth Vader. He removes him from the base and puts him on a scenic base. The next one he does is where he pins them.

Thank you for posting this; I was just looking around for clear bases and I was at the point of trying to figure out the size for the E-WEB technicians; the links above made it so much easier.

Oh, and looking at either link, they sell the recommended acrylic adhesive so you can just order it along with whatever bases you decide on.

Hi Armandhammer, I'll answer here the question you made in my topic about clear bases, because clear bases are the topic on this topic so I'll enrich the conversation made here.

I'm located in Europe so I don't know if some materials are aviable where are you from.

The bases I use are made by an italian team, you can contact them only by facebook, asking for the price chart, you'll see they are pretty cheap: https://www.facebook.com/magicworksgames/

I always remove models from the base after I paint and spray with a protection coat them, this way I do not risk to stain the bases, so you need to be extra careful removing the original bases, always cut your nails and ideally use a latex glove.

To remove model from the base I usually use a simple sharp cutter or modelling cutter, the sharpness is the most important thing, the sharper the blade is, the esier and safer is to cut.

Support the edge of the base on an anti-cut surface and support the blade at the base of the model where you want to cut, then bend the handle of the blade up and down with a gentle force, slowly the blade should begin to cut.

59bce34b16145_s-l225(FILEminimizer).jpg.29c4ab39ffe5cd864edf0d6d00a64803.jpg

Some minatures are a pain to remove from the base, like royal guards or AT-ST, I'll suggest in those cases to remove the base piece by piece with a pair of modelling nippers and a modelling saw.

59bce37cdd6e4_61dYm1a57gL._SY550_(FILEminimizer).jpg.96850a0ba9410e84b19248401f983546.jpg

Then you need to make a nice surface to glue, if you made a clean cut with the blade you do not deed more work, otherway use a modelling file to match imperfections.

The next step is the actual gluing, I use Loctite Super Attak Power Flex, always put the glue on the models, never on the bases. Put the glue in the central part of the surface you want to glue, this way you minimize the risk of foggig, who, by the way, may occur if some glue manage to spill out. All cyanoacrylic glues fog but there is no alternative as good, at least not that I know. Always glue all the parts who will stand on the base, like both feet, etc. , this will guarantee a much stronger grip. Press with a decise streght the model on the base for 10-15 secs, count them in your head, try to press near the parts you want to glue, for example above the shoes if you are gluing the foots. Do not press too hard or the glue can both spill out or the entire model may "slip" on the base ruining it whith the glue.

If some fog occurs, you can remove it when is still fresh using your own nail, try to push that at the base of the model do not try to remove it from the base by spreading on the whole base.

Now you ave your model glued, wait 24 hours before handling it, and keep in mind is GLUED to the base, not same mold as it was previously, so, despite the adhesion is pretty strong, always use extra caution managing it.

Edited by Sareth

Thank you for in the in-depth response Sareth!

- I've already purchased bases form Applied Perspective. But it's nice to see another source!

- Great advice when it comes to cutting. The rocking up and down motion is perhaps the safest and most effective method. I've had no problems so far with my stormtroopers! And this is coming from someone with very little hobby experience.

- I just finished chopping off a Royal Guard from its base and I fully agree...what a nightmare! Doable, but my fingers are still throbbing. A modelling saw might be a good investment for the AT-ST. I also heard something about dipping the mini in warm water to make the cutting easier

- My biggest worry is fogging. I've heard good things about E6000 and I'll post the findings once my bases arrive. If they don't turn out so well, I may have to look into your Loctite Super Attak Power Flex recommendation.

https://www.amazon.com/E6000-237032-Craft-Adhesive-Clear/dp/B004BPHQWU

Edited by Armandhammer

Hi Armandhammer,

I put all my minis on clear bases from applied perspective. In terms of fogging: I use a two component glue from UHU ( https://www.amazon.co.uk/Plus-Schnellfest-2-Component-Epoxy-Resin/dp/B00DED2HQA ). With this one I read fogging is impossible. And so far I can only confirm (finished 50 minis).

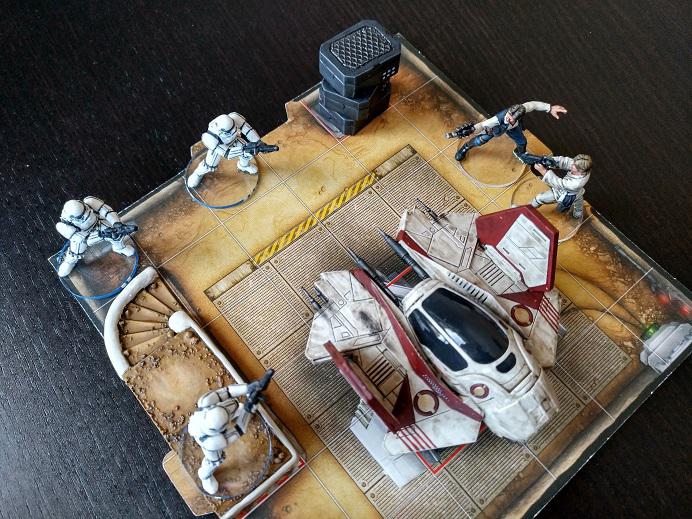
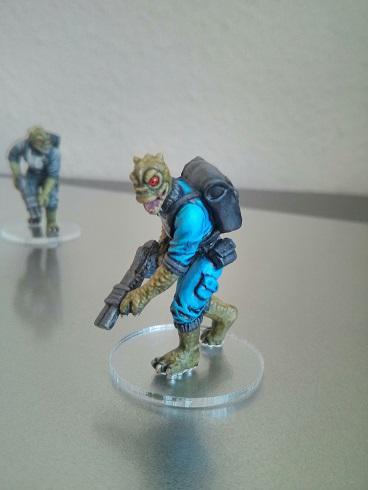
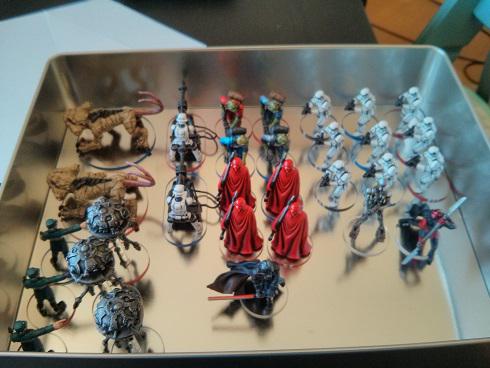
I also use very tiny magnets for the clear bases and put them below the feet of the minatures. It's a little bit extra effort but worth it. All the minis in the pic are based on applied perspective bases and have 4 magnets to make it easier to store (in my metalic box). Sorry for the quality (photos taken with my mobile).

IMG_20170523_095807_2.jpg

IMG_20170523_095735 (3).jpg

1367683023.jpg

1355443645.jpg

Those are some nice minis! Love it.

Is that Yoda's starfighter? It looks great too. Where is it from?

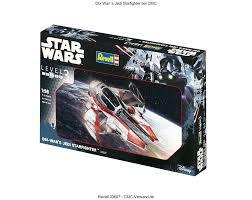
It's obi wan's star fighter. Or at least this was the starting point. Had to change it quite a bit to make it match to the 2x2 spaces and to still make it look attractive. I paid 7 Euros for the set. So affordable and I can only recommend to give it a try

images.jpg

With 7 miniatures fully complete, I decided to post an update on my clear base adventure.

A lot of what I’m covering can be found here:

Guide to Clear Bases

Like @Whitebubble , I purchased the bases from applied perspective.

Imperial Assault clear base pack

ojfn8o.png

Great communication on Facebook. Fast shipping. It’s worth mentioning that the 3 flight bases for the probe droids are no longer included (the product description is currently updated). I found the 3 notched leader bases unnecessary so I basically used them as practice bases.

Each acrylic base is protected and it can be a little frustrating to peel away the protective material but you get used to it after some practice. Just be careful.

I also got a bunch of …bonus tokens? I’m not sure if they come with every purchase or they were included as I was the one that brought up the outdated product description.

Either way: highly recommended!

I’ll reiterate @Sareth 's advice to use a rocking up and down motion. This makes things really easy when it comes to cutting. I know a lot of people are scared to go clear because they're afraid they might chop off the feet of the miniature but this step is surprisingly very easy. Even if the cut is uneven, you can usually file the feet down to make it level.

I purchased a modelling saw for harder to cut miniatures (looking at you, Royal Guards). A must buy. Bring on the massive figures!

Ah, the glue. With so many different of types I struggled quite a bit deciding which type to buy.

395cn.png

Testors plastic cement

Positives: Well…none!

Negatives: Didn’t stick, do not purchase for this type of job

Gorilla super glue gel

Positives: Easy to use. Leaves little mess. Instantly sticks

Negatives: I used this glue on my 3 standard stormtroopers. 2/3 dried quite well, 1 hazed (fogged) up around the feet. Hazing is real. That being said, from a tabletop distance it’s not very noticeable. I can’t see it being an issue mixed in with other miniatures.

It remains unclear (heh) as to why 2 dried nicely without hazing. Maybe it was the amount of glue.

I heard good things about having a portable fan blow on the bases while it dries.

E6000

Positives: Strongest bond. Sticks quickly. Blends best with the base

Negatives: Hard to work with. Stinks. Poison warning.

I love this stiff. Practically impossible to work with straight from the bottle (messy, stringy) but a ziplock bag and some scissors quickly solved that problem:

E6000 Tip

It’s important to note that E6000 comes with a few warnings (use google to find the material safety data sheet). Ultimately, follow safety procedures and use at your own risk.

Lastly, I’ve had no problem drilling into the bases. Something to consider for bigger models.

2ugffv6.png

The results:

mmz981.png

If you have any questions, or want to provide further feedback, please feel free to do so!

The future:

1) I'm looking for some epoxy recommendations from folks in the US/Canada (I can't find UHU in stores here)

2) I need flight stand bases for the probe droids and jet pack troopers (and who knows what else further down the line).

There’s a possibility of making my own.

probe droid clear base fix

As mentioned above, I’ve experienced no problems drilling into the acrylic bases. All I’d need is a clear rod of some kind. X-wing pegs, plastruct clear rods or maybe even a paintbrush cover.

I also found some pre-made flight stands:

LITKO 25mm circle base with 1.5 inch peg

Hawkwargames 20mm square base, 50mm stem

I’ve posted the hawkgames bases because I’ve received email confirmation that the pegs fit snuggly into the base so you don’t have to glue them together (good for storage/travel). The LITKO bases require glue.

Edited by Armandhammer

Hi Armandhammer,

The minis look really nice. I wouldn't bother concerning the glue. Just use what you have right now. They look really cool (even though I'm using UHU... It's not that convinient to use compared to what you are writing above).

I bought some flight bases from games workshop. But I basically just used the clear rod, drilled a hole in the applied perspective bases and glued them together. But I quite like the idea of using x-wing pegs which I have a lot.

Last comment to the bases. Wow! Seems like they changed the pack quite a bit. Mine were not protected and the bonus tokens look nice. Seems like I have to order a new one ?

Looking forward to reading from you once you proceeded with your minis.

Cheers

Happy Holidays! Thought I’d post a little bit of an update:

I decided to move away from E6000. No army is worth ones health and it was such a hassle to glue outside with a respirator on. The probe droids, the officers and the E-webb engineers were all glued to their bases using super glue. Follow these three tips for a cleaner look around the feet:

1) Less is more! Never apply straight from the bottle. Squirt a small amount on a surface and use a toothpick/paperclip to apply the glue in thin layers.

2) Applying warm air to the area seems to help (I used a blowdryer)

3) Even if white frost streaks or builds up around the feet, simply mix an equal amount of lahmian medium and ardcoat gloss varnish and apply a small amount to the area to help eliminate the frosting

Overall, I'm very happy with the results.

I was too lazy to purchase acrylic rods, so I used some extra X-wing pegs for the Probe droids. 9/64 inch drill bit gives the peg a nice fit but glue is still necessary.

Next up is the AT-ST and I’m not sure how take the feet off the base. Is it possible to saw right through it? Would it be easier to cut around it?

2wmjic8.jpg

1zqvyas.jpg

1916iv.jpg

I just took my AT-ST off its base; I clipped around the feet then used a grinding bit on my rotary tool to take off the height. Not too hard, but took a bit of time.

I only got lasered 25mm bases, so I've had to make my own larger ones from 3mm acrylic sheet from the hardware store. Yes, if you look really closely, it's visible, no I'm not too bothered.

I pin my guys, and use the kind of glue scale modellers use to attach airplane canopies. I think it's somehow lacquer based.

Edited by Parintachin

this thread is exactly what I was looking for. Thanks for sharing your experiences!

Try a rotary tool on the tough ones like Royal Guards, E-Webs and the AT-ST. Cutting wheel or just grind/sand it down to the bottom of the “foot.”