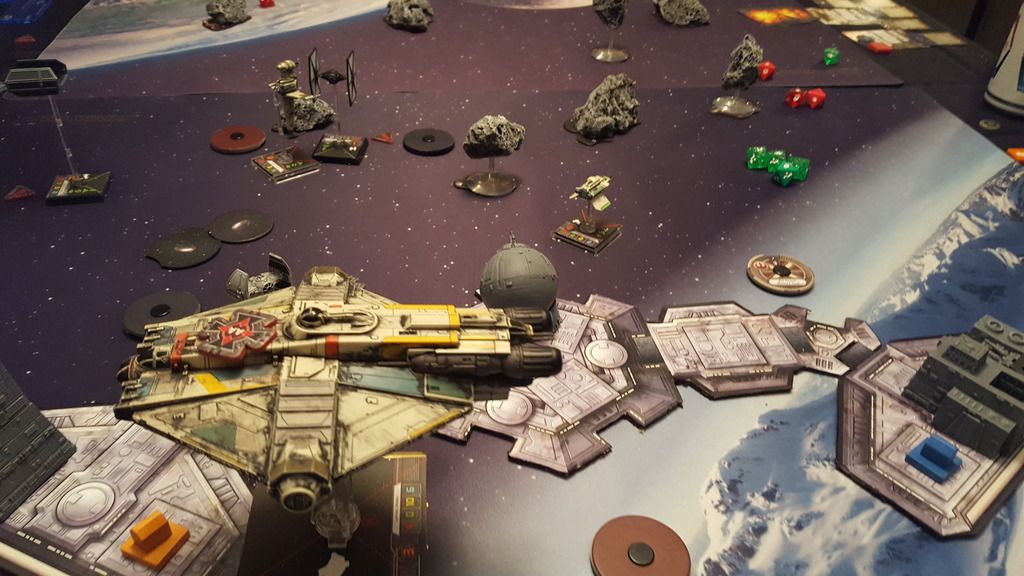
Epic Mission: The Rescue of Jyn Erso (In 3-D!)
Narrative: Rebel spies have obtained intel that the Imperials have Jyn Erso detained in a cargo container at an Imperial guarded Fueling Station. The Rebels desperately want to rescue Jyn in hopes that she can help the Rebels find her father; Galen Erso; the chief engineer of the Death Star. Luckily for the rebels, the Empire is unaware of Jyn’s true identity, so there is not a heavy presence of imperial ships nearby. Unfortunately for the rebels, there is more than one cargo container and they don’t know which one Jyn is in.
Special Setup Rules:
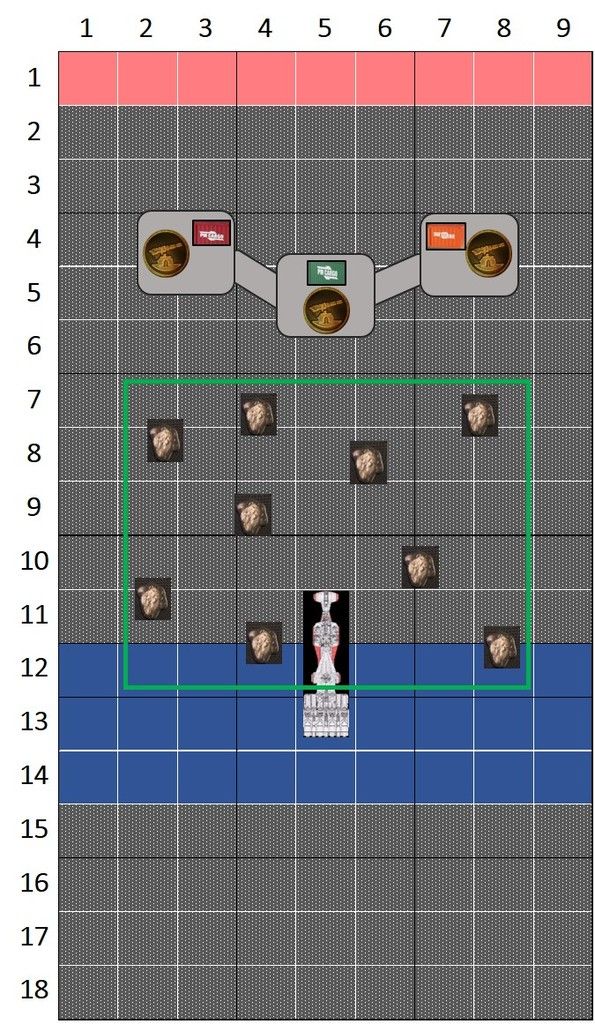
See Map:
1. This scenario is played on a 6x3 surface.
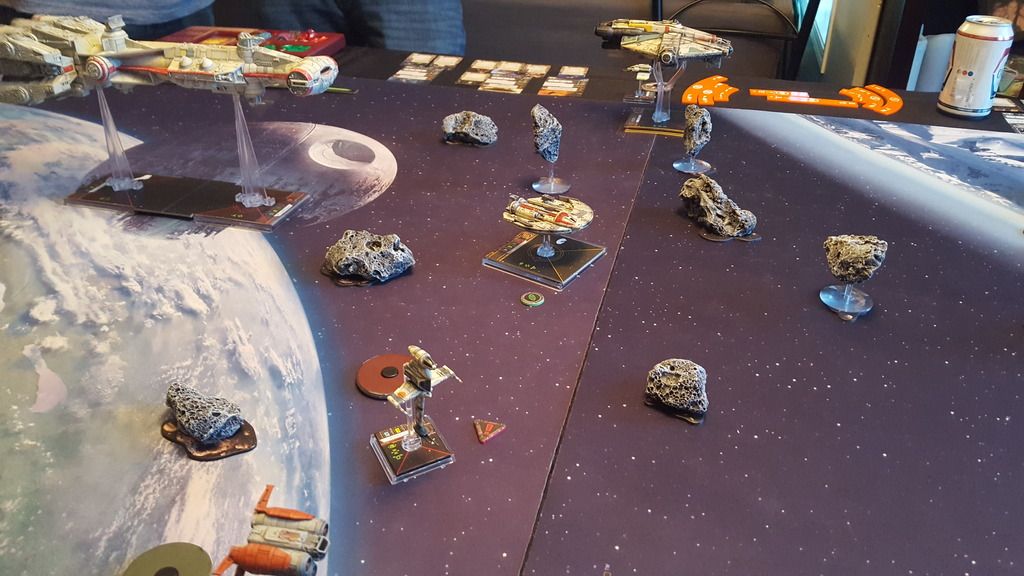
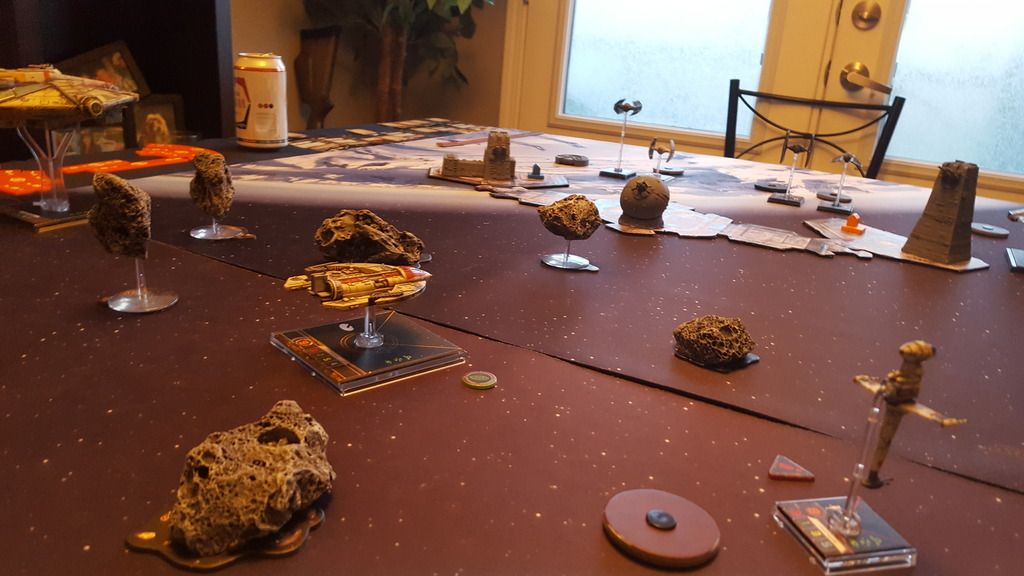
2. Rebel first place 3 asteroids in the green square. Then the imperials place the remaining 6 asteroids in the green square. Asteroids must be at least range 1 from other asteroids.
3. Deploy ships normally according to pilot skill and initiative. Rebels deploy 175 points in the Blue, Imperials deploy 150 points in the Red.
4. Place the three laser towers as shown on the map.
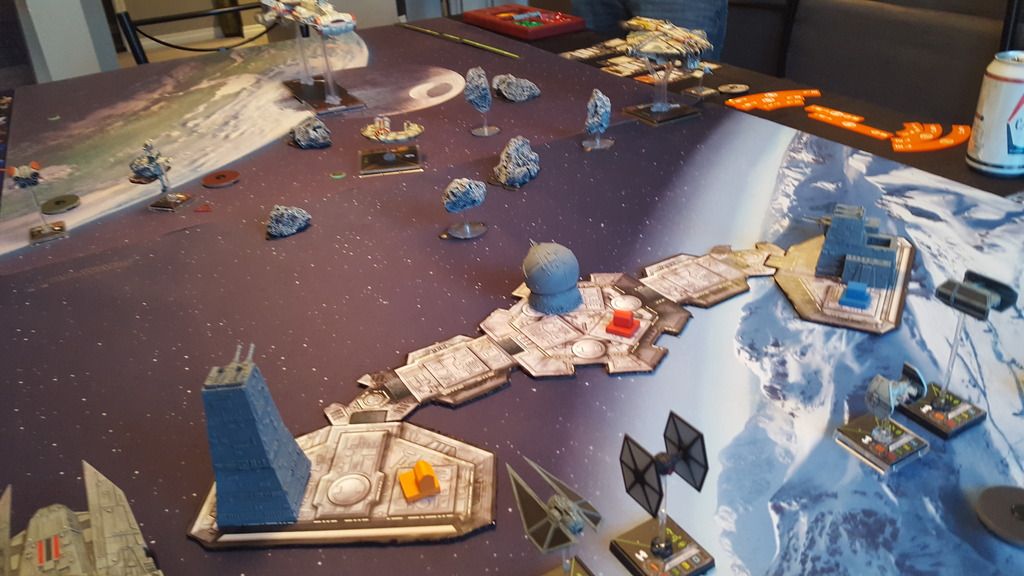
5. Place the three different colored cargo containers as shown on the map. (I’ve used the City Walls and Settlements from Catan to represent the cargo containers)
6. Place the Tantive IV as shown on the map.
7. Shuffle the Jyn Erso crew card and 2 other crew cards you don’t want to use in squadbuilding. Place them face down and cover them with 3 different colored markers that match the colors of the 3 cargo containers.
Special Gameplay Rules:
1. Capturing a container: A rebel ship may capture a container by having its ship base overlap the container, or its maneuver template overlap the container. The ship cannot have a focus or an evade token on the turn it captures the container. Then place the container on the Pilot’s card. If that ship is destroyed, place the container centered under where its ship base was. Imperials can only capture containers that were already stolen by the Rebels.
2. Middle Laser Tower: At the end of the combat phase the tower may fire once at any rebel ship at range 1-3. Range bonuses apply normally for attacker or defender. This tower has a 360 degree firing arc. The tower has 2 Attack, 0 Agility, 3 Hull, 3 Shields. Critical hits against the Tower are treated as a Direct Hit. If a ship overlaps a tower, use the same rules as overlapping another ship. Additionally, the ship that overlapped the tower rolls one attack dice to see if it suffered a hit or crit damage.
3. Side Laser Towers: At the end of the combat phase these towers may fire once at any rebel ship at range 1-3. Range bonuses apply normally for attacker and defender. These towers have a 90 degree firing arc (to check arc, you can use a laser and measure corner to corner of the tower). The Imperial player may rotate these towers 90 degrees once per round, after all dials have been placed. These towers have 3 Attack, 0 Agility, 3 Hull, 2 Shields. Critical hits against the towers are treated as Direct Hits. If a ship overlaps a tower, use the same rules as overlapping another ship. Additionally, the ship that overlapped the tower rolls one attack dice to see if it suffered a hit or crit damage.
4. Tantive IV: At the end of the combat phase the Tantive IV may fire once at any Imperial ship at range 3-5. Normal range bonuses apply for defenders. The Tantive IV does not move, use energy, abilities or actions. The Tantive IV has 4 Attack and can not be targeted by the Imperials.
5. Docking to the Tantive IV: If the rebel ship carrying a container has its base overlap the Tantive IV or its maneuver template overlap the Tantive IV, the container is considered secured on the Tantive IV. That ship will lose its action on the current turn and may then maneuver as normal on the following turn. That ship does not roll for damage if the base overlaps the Tantive IV.
6. Tantive IV Escapes to Hyperspace: The Tantive IV will escape to hyperspace if one of the following conditions occur:
A. It has reached the end of round 15
B. All rebel ships are destroyed
C. All containers have been secured
When the Tantive IV escapes to hyperspace, reveal the crew cards that match the containers that were secured by the rebels.
7. Raider Reinforcement: The Raider will enter the battlefield immediately when one of the following conditions occur:
A. One of the containers has been secured on the Tantive IV.
B. The rebels have all three containers in possession.
The Raider will enter the battlefield horizontally on the Imperial board edge. Move or rotate the Raider so that it is not overlapping any ships. At the end of the combat phase the Raider may fire once at any Rebel ship that is on the same map as the Raider. Normal range bonuses apply for attacker and defenders. The Raider does not move, use energy, abilities or actions. The Raider has 4 Attack and can turn one focus result into a Crit. The Raider cannot be targeted by the Rebels.
Objective Rebels: Secure as many containers as possible and dock to the Tantive IV to flee to hyperspace. The Rebels win if one of the crew cards revealed is Jyn Erso.
Objective Imperials: Prevent the rebels from securing containers. The Imperials win if none of the crew cards revealed is Jyn Erso.
Banned Cards: Jyn Erso Crew, Han Solo Pilot (HOTR), Dash Rendar Pilot, Burnout SLAM,
Disclaimer: I tailored this mission so that I could incorporate 2 mats, the 3D laser towers, the 9 3D asteroids, and the Raider/Tantive since I have recently added all of these to my collection. Feel free to tailor this mission to your likings and to your collection’s limitations (You could do this on a 3x3 and use cardboard for the towers/Epic ships.)
My intent of this mission was to balance it so that the rebels would likely get at least 1 container and possibly 2 containers secured. I would consider this mission unbalanced if the rebels secure 0 containers or 3 containers. (Of course that may happen regardless if someone flies poorly/perfectly). I welcome any suggestions and criticisms.
*Fun fact: This is the first time I’ve touched my Catan box since I discovered X-wing.
