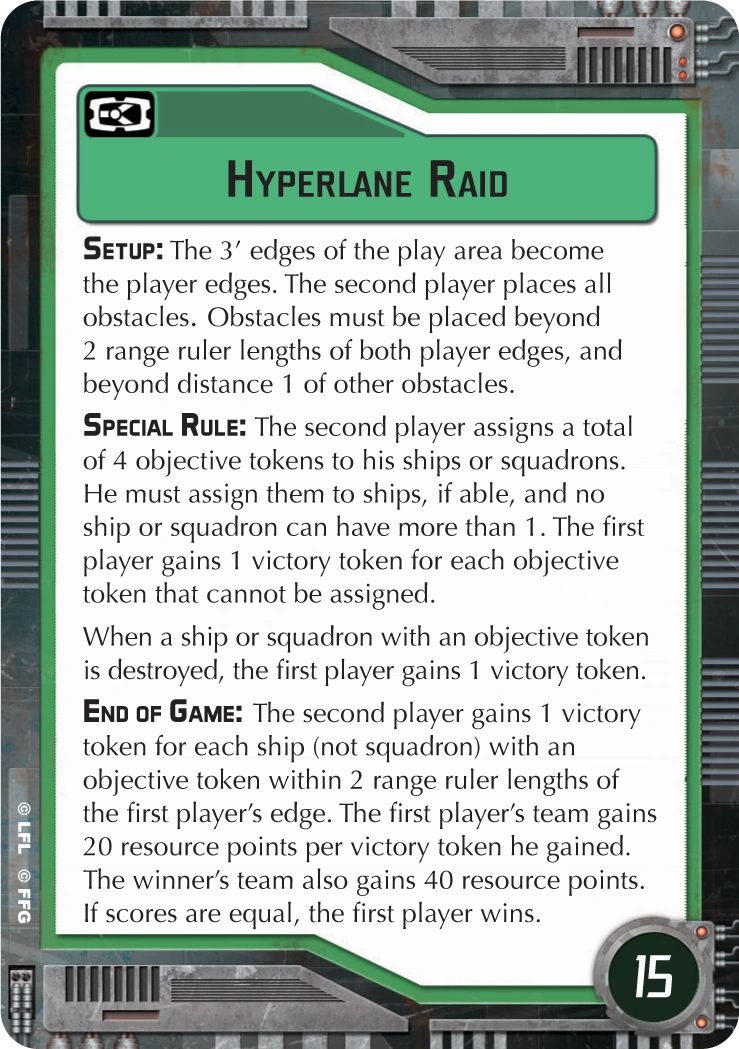
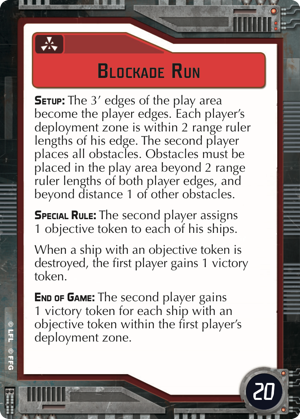
A very long time ago in a galaxy far away…… We had an objective. Actually we have an objective. Present tense. And plural. It’s objectives! And in a galaxy quite near to us…. It’s right in our living room. So without further ado we have : Blockade Run and Hyperlane raid. Two objectives that are incredibly awesome, but hardly ever get played because on is in the Assault objective category dominated by safer and easier to play objectives and the other is in the CC and also tragically flawed, which is a real shame, because they take a quintessential theme of Star Wars and translate it to our gaming table in a really awesome way!
But, in regards to how the game is played it may as well be ON ITS HEAD! Hah see what I did there. Anyway the reason you are reading this is to gain insight into this objective. The idea here is that somewhere buried deep inside this Dagobah Swamp of an objective there is a way to eke out a competitive way to run it. Because I love Sideways Armada, this is the objective I have played most out of all the new objectives we saw with the release of the Correllian Conflict. Based on that experience I have developed some strengths and weaknesses with this objective that I hope to point out to you.
Part I: The Thematic and Problematic Flaw
This applies to the Correllian Campaign version of this objective only, because as many of you probably already know this objective has been problematic. Launching the Correllian Campaign with this objective in dire need of Errata, I believe, played a large part in why the campaign felt so imbalanced. But in addition to the balance issues, this objective is also thematically flawed. Essentially, in the tournament version you are running the blockade, while in the campaign version, the Rebel only version, instead of running the blockade – a task so quintessentially rebel-y that you see it done dozens of times on the large and small screen, and the most iconic Rebel ship the CR90 is even CALLED the Rebel blockade runner- you are forcing the Imperial player to run the blockade. This it makes it feel like you are playing this objective in some weird alternate universe. I understand the rebels hitting a hyperlane shipment, but not a hyperlane shipment consisting of the Empires biggest and baddest gunships. It’s silly. However, the recent FAQ document did change this objective to be a little more favorable to to the rebels because the imperials automatically lose if they don’t engage. This fixes the serious flaws with the objective from a balance standpoint, but only adds to the egregious thematic problems that exist in what is supposed to be a series of thematic games of Armada. Now you are raiding a heavily armed Imperial fleet that must attack you or you will magically acquire resources. Anyway, moving on!
Part II: Basics
It’s important to note that at first glance the objectives seem similar between the Red and Green variants, however that couldn’t be farther from the truth. This stems from the fact that in the Red version you will always be second player, and in the Green Version you will always be first player. This means that all the things that benefit you in the Red version will work against you in the Green version.
Basics: Obstacles
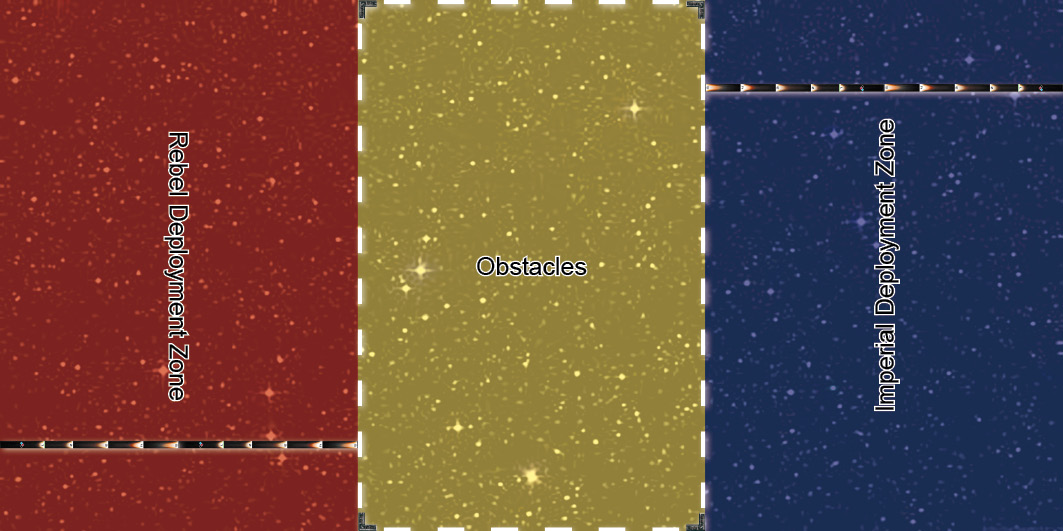
Here we have a diagram of what the deployment zones look like. In both variants of the objective the second player places all obstacles. In Fat Armada, this is a pretty big advantage, but if you look here in Sideways armada one thing that should stand out is how deep the deployment zones are. Each one is a full third of the play space. Obstacles can only be placed in the yellow area, meaning the obstacle distribution is going to be pretty dense and the second player is going to be able to create some pretty extreme choke points. It turns a big advantage even bigger if you are able to use it to your advantage. HOWEVER, be careful of telegraphing the lanes you are going to attempt to run. If you clog one path and leave half the board open, you are begging the enemy to deploy in the clear and force you to run over the rocks or into front batteries. In the green version of the objective, the Rebels are assaulting and thus have first player so you are giving the obstacle deployment advantage to the Imperial player.
Basics: Tokens
Next up is the token placement. In the Red version of the objective notice that tokens are unlimited. Technically you could run Ozzel and 16 Gozantis for a potential score of 320 points. Dodonna and unarmed transports net you 420, meaning you could lose half your transports and still get a 10-1. Note. I don’t recommend running naked flotillas for this objective simply because there are no other objectives it can score on and no one would pick Blockade run against that fleet. In the Green version, tokens are limited to 4 and they don’t go on your fleet. Remember, the rebels declare the assault so the tokens go on the Imperial fleet.
PLEASE NOTE SOMETHING VERY IMPORTANT! IN ORDER TO SCORE THE SHIP MUST BE ENTIRELY WITHIN THE DEPLOYMENT ZONE TO COUNT. If any part of the base hangs out of the zone, it doesn’t count. This is to prevent ships from sneaking one peg in and counting. This means for slow ships like the Victory Star Destroyer or Home One MC80 you will need to be entering the deployment zone by at least turn 4 or 5 to reliably score them. Since they are speed 2, this pretty much means you need to start them on the deployment zone line and run them straight ahead max speed for them to count. This is also known as, don’t take Victories or MC80 home Ones with this objective. In the end you tally up the number of victory tokens in the opposite deployment zone and add them to the score for second player. There is no way for the first player to score points from the objective, which is an advantage you should not forget about. In objectives like Fire Lanes or Superior Positions you might be able to score points, but that total is going to be offset by your opponent scoring points as well. If you can find a fleet that can reliably score more than 4 ships in the endzone, then Blockade run might be a huge sleeper objective for you.
Part III: Leveraging the Objective
Now we get to talk about how to leverage the objectives to your benefit, or if you find yourself in a situation you are playing your opponents Blockade run objective how to mitigate it.
Leverage: Obstacles
First off let’s start with the most obvious advantage- You get freedom to place obstacles! This is almost as good as making your opponent deploy before you, if you have a well thought out plan ahead of time to capitalize on it. If you just drop them willy nilly then it will more likely hurt you than help. For instance, I played an awesome opponent at Worlds who used Blockade Run and deployed his objectives in what looked like a haphazard cloud. Until you looked at closer and it ended up being 2 parallel lines lines. This allowed him to deploy on the clear side, but have a clear path for all his ships to shift to the opposite side of the play area to score, forcing my ships to turn around over the rocks to cut them off. I will repeat it multiple times, but this objective favors someone who comes into the game with a plan like that immensely.
Leverage: Unfamiliarity
You can force your opponent to play a completely different style game of armada. So it might take some of their pre-scripted plans away from them and force them to play off the cuff against your pre-formed plans. It is likely if your opponent picks this from your objectives they do it because they have one or more items in their fleet that they think favors them such as a big battery ship like an Imperial Star Destroyer or an MC80 that they feel they can use to turtle with those big guns, force you into arc, and then blow your small ships away with first activation. You need to be prepared to face this strategy and have a fleet that punishes it.
Leverage: Scoring Potential
Don’t take this objective without a plan to score! This seems obvious but is super important. This isn’t contested outpost, you have to work for those points whether you are running the Blockade or making the Imperials run yours; you can’t just sit there! This means you need an aggressive fleet with lots of ships who are going to be able to score lots of points by being able to dodge a big nasty arc and slip in behind.
Part IV: Mitigating this Objective
If you are first player and looking to select this objective from an opponents list, know that at the start your opponent is going to be forced to make moves. They will need to act. If you react to their plan, you might play into their hand. However, if you strike out and dictate tempo they will suffer. Because it is overwhelmingly likely you are facing some sort of MSU, their margin of error is relatively low. If they lose a ship or two it can put them in activation trouble and reduce their scoring potential. Their ships that live, on the other hand, will probably score. The goal is to pick an overlapping fire zone and convince them to fight there. Leaving a ship behind as a trailer is super important so you don’t get a 0 def token 0 shield 1 hull admonition scoring points on you. Lastly, only commit the fire you know you will need to take out a ship. You can’t have one ISD cover both board edges, and they may attempt to run both of them and split you, be ready for it.
Part V: Altered Value Components
Items that are good in regular Armada gameplay will typically retain value, but there are a couple of components that the change in board layout increases in value, while a couple for you to avoid at all costs.
Altered Value: Imperials
Increased Value:
Imperial Class Star Destroyer- Big front arc, speed 3, decent navigation chart mean this is a good option for offense and defense in this objective. Also, giving your opponent the choice between killing the ISD or the 3-4 MSU that tag along with it to score is a tough choice. If they go for both, most likely you can force them to achieve neither which is the goal. Make the ISD a fat target, and even if they get it they only score the 20 objective points, allowing you to make up ground by scoring 80-100 on top of whatever ships you manage to take out.
Raider- Flexible nav chart and useful front arcs make them also very deadly, especially in an MSU type list where you can more easily predict where you opponent will be to put multiple raider front arcs in range at once. If you use them, try to hit with mutliple at a time, because they are not strong enough to handle heavy return fire.
Gozanti-Class Assault Carriers – A bit of a dark horse here, the red dice out the front will actually come into play on the thin play area, and you can fit a fair number of them into a fleet to increase it’s scoring potential. An ISD with 3 combat Gozantis hugging it’s flanks can be a pretty deadly little wolf pack, and the more bases you pack into a Blockade run fleet the more scoring potential you give yourself. However, make sure the other objectives you pick also can use those batteries, like Fire Lanes.
Decreased Value:
Interdictor. Grav shift rerout has some interesting and fun things to play around with since you get to place all the objectives and could drag an entire asteroid field right into your opponents deployment, but it is a huge amount of points tied up in a ship that is slow. You need lots of bases to score points, and the Interdictor hampers that.
Altered Value: Rebels
Increased Value:
Bright Hope- No brainer for this one. You are going to be taking them on the nose more often than not, so why not tank up one of your scoring ships?
Nebulon B- The long play area makes it much harder for someone to flank them. Especially since you control all the obstacles, you can set up nice safe lanes to protect Nebulons from threat.
MC80 Liberty- The Rebel ISD equivalent. However, they don’t quite give the same board threat that an ISD does because of the reduced hull. Note that they are blocked easily because of the less than ideal movement chart as well. Your mileage may vary with these ships.
CR90- Excellent nav chart? Check. Front facing guns? Check! Great upgrade slots for adaptability? Check.
Decreased Value:
MC80 Home One- With the need to be pointed forward for scoring purposes and slow speed these will get blocked from the front and destroyed every time.
Increased Value: Upgrades
Expanded Launchers- Expensive, but turns side arc black dice ships like MC30’s and Gladiators into double arc beasts, and makes Raiders a threat you simply cannot ignore. As an aside, External Racks are going to make much of the same impact at a fraction of the cost. A swarm of Hammerheads with External Racks and scoring tokens racing across the board is going to be scary. Lots of damage and lots of scoring opportunities, which is what you need to be successful.
Spinal Armaments- Adds extra dice for your long range threats like Nebs, ISD’s, or liberty’s.
Devastator- The front arc limitation isn’t as limiting any more in this play mode. Doesn’t mean it is an auto win, but I have played with it and if you can give yourself a way to self-strip tokens (IE Vader) it can be very effective in making the choice to attack the ISD or the MSU even harder.
Engine Techs- They let you scoot that last little distance into the zone, get off a blocker-clearing double ram, or push a tight turn to prevent shooting off the board edge if you hop into the zone too speedy.
Nav teams/Admiral Madine- Help to dodge dangerous front arcs while setting up your own shots.
Chart Officer- Gives you the option to just soak up a rock. It might even help obstruct you for a critical turn. Remember since you place all obstacles, if you have a plan to use this, you can practice it and get way more worth out of it than the 2pts would normally allow.
Titus- This can really wreck your opponents plans to turtle. Making their ISD deploy at speed 2 can force it to move out of the deployment formation. Or reducing a ship to 2 that they plan to have hop over an asteroid can give them a tough choice to take a damage or waste commands and positioning. Another upgrade the pre-planning afforded to you by this objective can allow you to leverage into a benefit that far outweighs the cost.
Fighter Coordination Teams- With the increased map distance, if your plan involves squadrons with 2-3 speed consider multiple copies of these, or risk your squadrons not getting into the fight till too late.
Entrapment Formation- Turn 6 you want to dial in a CF to clear a blocker, but need speed 3 to reach the zone, entrapment is there. It’s niche, and it’s tied to a speed 2 ship, but potentially the pelta assault with engine techs and entrapment formation could find a use. If the Pelta was speed 3 this would be excellent, but if an Engine Tech Pelta isn’t essential to your fleet, don’t try to add it just for this objective.
Part VI: Suggested Fleets and Strategies
There is no shortage of fleets that you can use to leverage this objective. As long as you have a plan to score, you can run Blockade Run with just about anything. That said, I have pulled just two types of fleets that I think might enjoy heightened success by running this objective.
Interesting Fleet Picks: Imperial
The classic CLONISHER fleet. This is one that hasn’t really seen the sun since it was the fleet that broke Aramda way back in the day. If you didn’t twitch a little at the mention of it, the Clonisher fleet features a Gladiator kitted for destruction with Demolisher, Intel Officer, Ordnance Experts, Engine Techs, and Expanded Launchers. Add to that 5 Raiders each with expanded launchers or a mix of Expanded launchers or APT’s. Screed was the Admiral to guarentee extremely consistant rolls after Orndance experts. Unfortunately this fleet fell by the wayside as bomber swarms got bigger and easier to control. However, since raiders have gotten a signifcant buff against squads in the form of Kallus and Flechettes, a modernized version of this fleet including Flechetes on a few Raiders might be enough to allow your fleet to hop over the bomber ball and put enough board between the two of them to score points.
Interesting Fleet Picks: Rebel
On the rebel side of the coin, and I hate myself for even suggesting this, but the CR90B Ramstrosity fleets work pretty well for this objective. It lets you control obstacles to shepherd the fleet where you want to ram the snot out of them, and then lets you slip the flaming wrecked CR90’s into scoring zone for extra points. Additionally, Cracken TRC MSU fleets can get very tanky and fly super unpredictably, while Mothma MC30's are very difficult to kill if flown well and can lead to big damage and big scores.
Fleet Building Note:
If you are going heavy squadrons, this might not be the objective for you. You need ships in order to score, and squadrons eat into the points you could use to put ships into your cap.
Additionally, for either side, if you are running a MSU fleet and encountering a lot of rival MSU’s that are limiting the point gain from most wanted and causing a lot of 6/5 type games, this might be a fair replacement to increase that scoring margin.
Part VII: Objective Synergy:
Because you have to select 3 objectives, a good chunk of the strategy for Armada is that you cannot pick your objective and tailor a fleet to it in a vacuum. For instance, this is the reason why the flotilla spam will not work. If you build to capitalize on just this objective, then your opponent will pick another and put you at a disadvantage. Let’s assume we want our opponent to run Blockade Run and we aren’t using it as a deterrent, which means we need to find two other objectives that at a glance APPEAR to be more threatening.
For our Defense Objective I typically end up with Contested Outpost or hyperspace assault. Contested Outpost generates a bit more threat as far as scoring goes, but an MSU fleet can typically take the one less deployment in stride and dropping an Expanded Launchers Demolisher or Admonition in behind a fat target is enough to scare someone away from this objective.
For Navigation, things get a little stickier. Interesting choice is Navigational Hazards because you can build in some synergy regarding obstacle protection. If you pick navigational hazards and bring a Chart Officer on your ships, for instance, you plain out prevent one round of potential scoring for your opponent, which against an MSU fleet going speed 3 or more is typically all they are going to get. If they have any speed 2 ships you will be set up to score really big with this objective and cripple their ships at the same time. Plus, the chart officers help a TON in making your maneuvers in Blockade run’s congested board very unpredictable. It’s a win win here. Just don’t take it without preparing a way to deal with obstacles, because if they block one of your fragile ships on a rock it could go south very quickly. Other picks are Intel Sweep or Superior Positions, however, be careful because typically the fleets I find successful for Blockade run do not run strategic.
Part VIII: Conclusion
Blockade Run and Hyperlane Raid take a committed approach from fleet building, on through deployment and into gameplay. However, because of the ability to set up all the obstacles you can practice exact maneuvers and go into a match with unparalleled preparation that can turn this objective into one that truly limits loss and can lead to good scores.
For Hyperlane Raid, make sure you remember the changes from the tournament objective and have a way to capitalize on your first player advantage, because 99% of the time picking this objective means you are willingly marching your flimsy Rebel ships straight into those nasty ISD front arcs protected by obstacles.
All that said, I hope all enjoyed learning about these objectives as much as I enjoyed talking about them. Sorry this is coming so late, but thanks to @BiggsIRL for being a dude who does stuff.
Edited by BrobaFettFormatting