[HotAC] - Battlestar "Pallas" (HotAC Variant) played

By JayDestroyaC, in X-Wing

Happy Star Wars Day everyone!

I thought I'd share with you a few pictures of what I spent the Star Wars day with. Took half a day off and celebrated with watching movies 4-7 and giving a shot to a HotAC variant, I think @Stefan designed, Battlestar "Pallas".
It basically plays exactly like HotAC but you have a Gozanti Transport as your mobile base and you use it in missions as well. It looked very promising after I read into the rules and missions so I thought I will give it a try.

I will post Questions and/or Feedback about the Missions as well, marked in green .

So I made up 3 pilots, got my 90x90 table ready with my DIY star pattern cloth and here we go.

It is a period of fierce space battles. Many pilots have been shot down. Many more have died.
In the ATURI CLUSTER, a peripheral system without much presence from either side, some pilots have been
interred in a secret Imperial prison.
A small group of daring pilots is sent to rescue the prisoners. Just before the mission starts, an Imperial
GOZANTI Assault Carrier docks at the prison. The rebels devise a daredevil new plan...

Mission 1: Flying school
While flying a standard training mission, a small patrol of TIE fighters is interrupting your exercise. Instead of
following standard protocol to disengage and flee the area, being the hotheaded jocks that you are, you
decided to take on the enemy despite not being exactly in the most combat-fitted craft ever devised by the
Alliance. You’re pretty sure you’ll cover yourself in glory with this stunt.

Standard 3x3, in open space (no asteroids, etc.)

Mission Objectives:
Destroy all enemy craft.
Bonus:
If no player ship is shot down, gain 2XP.
If no player ship takes hull damage, gain 3XP.

Rebel Setup:
The Rebel players start in vector 7 in a Z95 Headhunter outfitted with Assault Missiles. They cannot use their
starting ships for this mission.

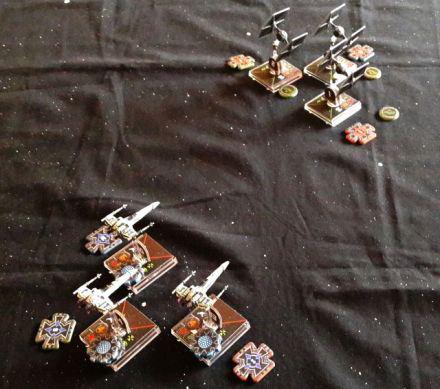
Fair enough, so I got 3 Z-95 with Assault missiles against... 2 waves with 3 TIEs each, let's crash them boys.

Turn 1

mission01_turn01.jpg
We bank in to engage, nothing happens.

Turn 2

mission01_turn02.jpg
First salvo distance. TIEs moved first so they all got evades, group decides not to spend unmodified missiles on 3 AGI + Evade for fear of the missiles being wasted so normal shots exchanged, Z-95 hit for nothing, left most takes 2 shield damage. Oh boy. What a start.

Turn 3

mission01_turn03.jpg
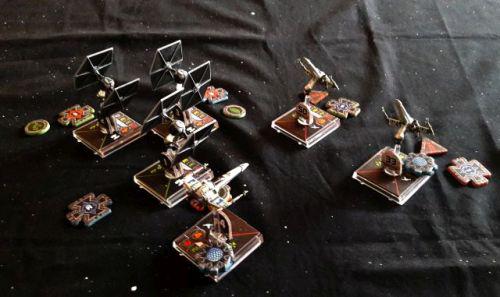
Left and right wingmen do a koiogran, middle on hits the brakes in hope to still be in distance 2 for the missile shot. TIEs zoom past, at least only shots for us this time, rewarding us with a generous 0 damage again. Oh boy.

Turn 4

mission01_turn04.jpg
New hostile fighters on the radar, left and right wingmen do a 1 straight to clear the stress, middle one now koiogran. TIEs mess up their formation flying and bump into each other a lot. Yay! Some distance 1 shots with no focus tokens for the TIEs means we manage to kill a TIE outright.

Turn 5

mission01_turn05.jpg
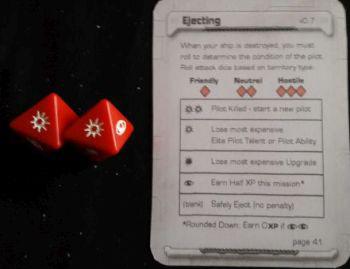
Koiograns again for the left and right wingmen, since we move last TIEs in front of us bump again so they're set up perfectly for another Range 1 barrage. Unfortunately the second squadron closes the distance fast for 3 range 1 shots which come with very hot dice. The lucky middle Z-95 does not survive. He didn't do a single damage yet, so no xp, no contribution to the fight at all and dice results were just laughable until now. Let me name him Lucky right here and now here comes the eject roll...

mission01_turn05eject.jpg

... goodbye Lucky it is.
A permanent character death on the first mission? That guy shouldn't have put on his red shirt when the day started.

Turn 6

mission01_turn06.jpg
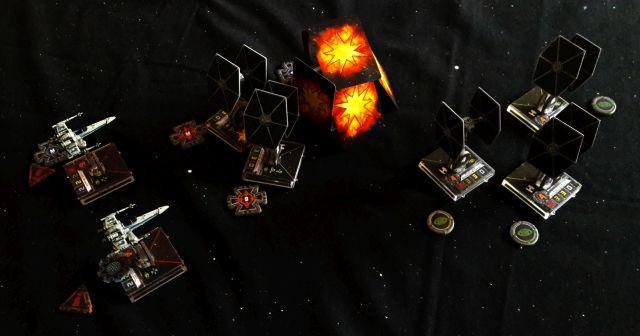
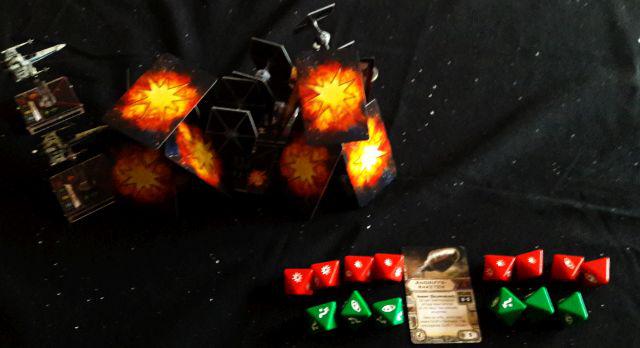
Straight 1s from the 2 remaining Z-95 and a gigantic bump-fest of all remaining TIEs make the double use of Assault Missiles practically mandatory. Finally the dice come in hot for us for once and 2 TIEs go up in flames, all the other ones have only 1 HP left. Meanwhile both Z-95 are down on 2 hull, no shields left.

Turn 7

mission01_turn07.jpg
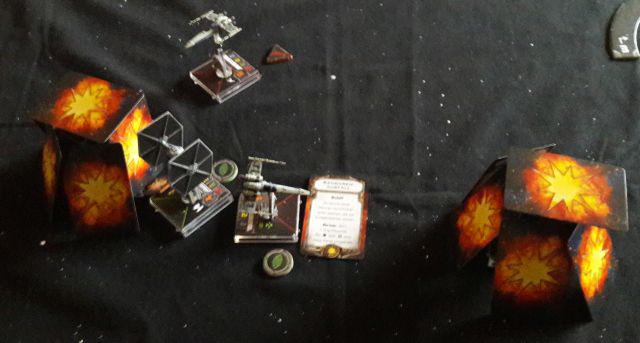
Another koiogran for the left Z-95 and a very unlucky defense roll for the bumped TIE ensures his death, meanwhile the right wingman follows the koiogran'd TIE and after surviving the fire with a sensor array critical hit, firing back ensures another dead imperial.

Turn 8

mission01_turn08.jpg
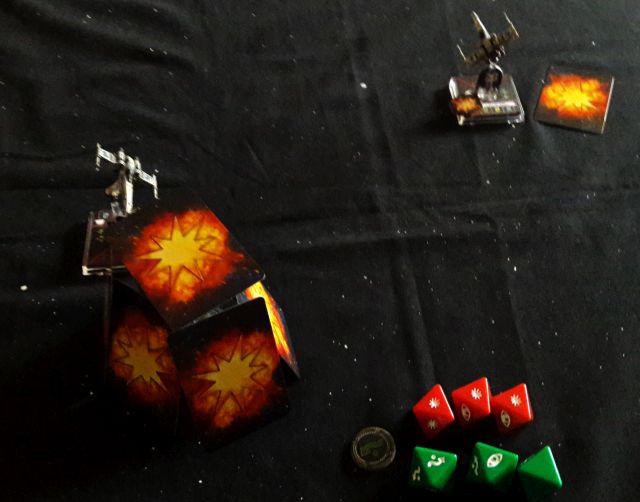
Right Z-95 tries to flee and succeeds in repairing the damaged sensor array while the left one does a perfect prediction of the TIE maneuver to ensure another distance 1 shot to clear the stage.

So far so good, at the start I thought I'm gonna end up so dead because the AI had so hot dice everywhere it was madness but it evened out in the end and managed to pull off a victory in the end.

[Questions / Feedback]
- A pilot that dies, has to eject in this mission as well and roll 2 dice?
- What if he dies like Lucky did?

- Will that cost the team experience?
- Do I have to make up for that destroyed Z-95? Buy a new one?
Mission01_Turn07.jpg

Mission01_Turn08.jpg

Mission01_Turn01.jpg

Mission01_Turn02.jpg

Mission01_Turn03.jpg

Mission01_Turn04.jpg

Mission01_Turn05.jpg

Mission01_Turn05eject.jpg

Mission01_Turn06.jpg

Edited by JayDestroyaC

Onwards we go, going on a 2-part Mission next:

Mission 2: Covert Ops
An officer calls you in, voice dripping with sarcasm. “Pilots, we are very thankful that you are undertaking this
highly dangerous mission.” He then gets much soberer. “As you know, we lost some of our pilots recently.
Those who survived the loss of their crafts where interred at the Morraj Interment Center. We want you to
rescue them. You will have weapons and tools concealed on your bodies, will let yourselves be taken captives
and infiltrate the prison from within, freeing the captives. This requires you to get shot down and captured.”
A smirk shows on his face. “Something you should be good at.” Sober again. “We know from intercepts that
an Imperial Assault Carrier with some TIE Fighters is on its way to the prison. You will commandeer this craft
and rendezvous with a transporter at a remote location seven parsecs away.”

Mission Objectives:
Get shot down. The players win when all their ships are destroyed. They may
voluntarily eject and thus self-destruct as an Action.
Bonus:
Every time a turret is destroyed, the active player gains 1XP.
Every time a minefield is destroyed, the active player gains 1XP.

Haha, I love it already that getting shot down is part of the mission to get captured.

Rebel Setup:
The Rebels set up their ships in the rectangle created at range 2 or less of the bottom and right edge of the
game area.

Imperial Setup:
The Alpha Squadron is placed docking to the Docking Station. Every subsequent squad is also spawned
docking.
[Question / Feedback]
- What does docking mean? Should the TIEs align with the end of the Docking Bay?
- Or should they just start inside the docking bay (That's how I played it)?
- A little more clarification on the starting setup would be nice on this.

Obstacles and Emplacements:
Mines
The mines are hostile only to the rebel players.

Mission End:
Do not remove any obstacles, emplacements or other stuff from the board. Only remove ships. The next
mission will be played on the same board. The more emplacements and minefields the player destroy, the
less they must fear in the next mission.

Sounds good so far, let's dive right in... hmm wait. With what?
[Question / Feedback]
- Which ships may the pilots take here?
- Do they choose a starting ship NOW? Because up until now it was only Z-95 in the first mission, so no need to choose a ship yet.
- If I got shot down in the first mission, do I have to buy that Z-95 again?

I chose to give everyone an X-Wing for starters, with no upgrades, so let's dive in.

Turn 1:

mission02_turn02.jpg
Starting out in the bottom right corner of the map, everyone just does a straight 1 and tries to get some mines off the board first. TIEs deploy from the docking bay and are upredictable as ever, doing a 3 turn to the left, have to keep them in check so they still have some options and don't automatically fly off the board next turn.

Turn 2:

mission02_turn03.jpg
We see some miscoordination on alliance side with banks of various length, middle X-Wing bumps but it really has no further effect on the ensuing battle. Front X-Wing gets obliterated because the TIE dice come in ultra hot, all 3 TIEs come in with 3 natural hits, no dice mods needed. Rebel pilot manages to do some damage in return fire before going up in flames. By the way this is the guy who should replace Lucky. I'm starting to see a pattern here.
The other 2 Rebels manage to mop up the damaged TIE and kill off another one in a single shot. Giant ball of flames at the right end of the map there.

Turn 3:

mission02_turn04.jpg
This turn spawns another trio of TIEs from the docking bay, going out full speed ahead. A lot of fire is exchanged which immediately kills off another TIE but leaves the X-Wings without shields and partially damaged. This is going south fast, guys.

Turn 4:

mission02_turn05.jpg
This turn sees the end of the rebel engagement. The lower x wing gets shot down by the following TIE on the right, the upper X-Wing gets shot down by the bazillion turrets mounted on the stations. They both manage to take out another mine though. (as you can see it's all a blur :P)

[Question / Feedback]
- Do you have to roll for ejects for the pilots? (I didn't as it was explicitly stated that you have to get shot down)
- Do I have to pay for the wasted fighters with xp again?
- Maybe a little clarification on the mission page would be good that getting shot down will not bring a penalty in this mission (or it does?) and if the shot down fighter has to be bought again or not?

Well, honestly I thought this would go a bit more smooth with more kills for my side, but well I managed to take out 3 mines and 3 TIEs. Not too bad I guess? Maybe fielding something different here would have been better. Maybe A-Wings instead for more agility dice.

Edited by JayDestroyaC

Mission 3: Escape!
While sirens are blaring, smoke fills the corridors. You and the captives are making their way to the Hangar,
where the „Pallas” Carrier is docked. Your hearts sink as you notice the extensive damage due to some fuel
explosion nearby. The ship, however, looks like it could still fly. As fast as you can you usher the captives
inside the bulky hull, run up the ramp and close the hatch. Now, let’s hope that there isn’t too much
resistance on the way out...

Mission Objectives:
1) The „Pallas” and all players need to leave the mission area. Jumping is only
possible in the green zone.
2) The Pallas must not be destroyed.
Bonus:
If Alpha Squad is destroyed, every player gains 1XP.
For every destroyed shuttle, gain 2XP.

General setup
The board is not set up fresh for this mission. Instead, it is taken over from mission 1. Emplacements and
mines destroyed in mission 1 remain destroyed in this mission. Damage for emplacements and minefields is
taken over.

The Jump zone
The jump zone is at range 2 from the left and at range 3 from the lower edge.

„Pallas” setup
The „Pallas” is set up with its aft bordering the dock. If this would make her overlap a minefield, immediately
resolve the damage and then remove the minefield. The „Pallas” has only 6 hull and 0 shields, plus 1
additional shield per player above 1. It has zero energy. It has no upgrades or weapons and cannot perform
any actions.

„Pallas” energy
The „Pallas’” engine is damaged. At the beginning of every round, the „Pallas” loses one energy. If this causes
the “Pallas” to drop to zero energy, it takes one damage. If the “Pallas” loses energy but is already on zero, it
takes two damage.

Player ships
The players all fly standard TIE fighters with their usual pilot level. They start the game docked to the
„Pallas”. Getting shot down or not making the jump infers no penalty – it is assumed that the players will be
able to make their escape and rendezvous with the “Pallas” later.

Mines
The mines are hostile every ship, including the “Pallas”.

Turrets
The turrets can’t discern between TIE fighters and will fire at the TIE they’re closest to. They ignore the
„Pallas”.

Alpha, Beta and Gamma squadron AI
Alpha and Gamma are tasked with stopping the „Pallas”. Alpha’s TIE Advanced uses Strike AI, while the TIE
use Protect AI for the TIE Advanced. The TIE Advanced has an unlimited supply of Ion Pulse Missiles. If the
“Pallas” gets ionized, it only moves one straight this turn. Beta squadron is tasked with retaking the „Pallas”
and will only shoot at the player ships, using Strike AI to close to the „Pallas” as fast as possible (always use
the highest possible number of the chosen bearing). It will try everything it can to stay out of the front path
of the „Pallas”. Once in range 1, the Shuttle will only use the 1-maneuver of every possible bearing. If the
Shuttle’s ever overlaps the „Pallas”, it docks and the „Pallas” is boarded and captured, in which case the
players lose the scenario.

Delta Squadron
This squadron is set up in the vector closest to the players.

Whoa what a lot of information, there's a few questions here that need to be clarified:
[Question / Feedback]
- Jump Zone: Does the Pallas need to just touch the jump zone to be able to try to jump to hyperspace, or does it need to be fully inside the zone?
- Pallas Setup: Would be nice if a picture of the spawn location and direction of the Pallas would be included on the mission map. I'm not sure what docking with the aft means. Sideways parallel to the docking bay? Or perpendicular? I played it sideways attached the whole side to the docking bay. Not sure if that was a good idea though :)
- Pallas Energy: It states that the pallas starts with 0 energy, which would immediately take another 2 damage from the energy clause. Is that intended? I played it "at the end of the turn, pay 1 energy" instead.
- Mines: Just a missing word I think, hostile towards every ship?
- Turrets: Will the turrets only fire at the closest TIE Fighter or any TIE, so also the Advanced and Interceptors? I played it only targeting standard TIEs.
- Alpha, Beta, Gamma AI:
- What does Alphas Advanced in Range 1 do? Fire primary weapon at the Pallas?
- Alpha standard TIEs have Attack Rebel TIEs, use Evade Action on Advanced I assume?
- Beta Squadron is just a Shuttle, what has top priority: Taking fastest maneuver to the pallas or swerve for mines/obstacles? I played it as swerving has higher priority to pallas targeting.
- Gamma Squadron AI is not noted, and the spawning table says Arrival Vector of Gamma is 'Special' yet nowhere noted where it spawns.
- Delta Squadron spawns closest to whom? What is the closest vector when rebel TIEs are all over the place?


So then, off we go. Trying to get outta here.

Turn 1:

mission03_turn01.jpg
Here comes the TIE Advanced with 2 wingmen. I drew an advanced with Advanced Targeting Computer, but then again the mission states that it will always attack with Ion Pulse Missiles anyway so not sure what to make of that. Anyway the wingmen speed ahead no protect action is possible. Exchange of fire leaves damage on rebel and imperial TIEs.

Turn 2:

mission03_turn02.jpg
TIE Advanced speeds on, hits the Pallas with Ion Pulse MIssiles. Rebels converge to try to get hits on the Advanced, and succeed, leaving it on 1 hp with a crit that applies a stress token, this is very good so the TIE ADvanced will not be able to get another Ion Missile Shot off next turn because no free target lock. The Imperial TIEs do nothing. Turrets only hit rebel TIEs this time.

Turn 3:

mission03_turn03.jpg
Sees the entrance of the Shuttle, it swerves to escape the mine. Rebel TIEs converge to blow up the advanced but not before he managed to do 3 damage to the pallas with his main gun.

Turn 4:

mission03_turn04.jpg
Good lord. TIE Interceptor Elite with 2 additional shields comes in and would probably manage to mop up everything. It's a autothrusters/stealth device/expert handling ace with ps4 and 5 total hp. Yea I'm not gonna do a single damage to that ever. One rebel TIE gets instantly obliterated by the Interceptor, the Lambda shoots straight 3, Rebel TIEs koiogran around. There is still hope.

Turn 5:

mission03_turn05.jpg
Yikes. The Interceptor speeds up, obliterates another rebel TIE, another imperial TIE comes back for the other rebel TIE and damages it. Rebel TIEs attacks go poof against the superiority of stealth device and hot evade dice of the Interceptor. And then we have another round of turret fire which comes in guns blazing hot and totally destroys the rebel TIE. So we have one thing left. The pallas speeding with maximum to try to get to the jump zone.

Turn 6:

mission03_turn06.jpg
Eek. Interceptor turns around and follows the pallas because of lack of a better target. Turbolasers seem to have learned how to aim and blast the imperial TIEs out of the game. Pallas takes another damage and is down to 1 hull. It spends an energy to stock a hyperspace token and rolls for ... a hit and a focus. Failed.

Turn 7:

mission03_turn07.jpg
Do I need to finish that story? Pallas goes down in a pile of flames as the elite will put another 3 natural hits and 1 crit through.

[Question / Feedback]
- I'm not sure if the Interceptor Elite is a bit too good for this mission and maybe a normal Interceptor without elite would do already, but maybe I was just unlucky.
- I don't think putting the turrets to aim for anything and not just TIE fighters will make a (huge) difference. The turrets in my game did mostly no damage at all except for the last round.
- For the next mission, how do I get my ships back? How do I select what I start with in the pallas? Just anything?

Phew. Well then. 3 Missions done, had good fun! Looking forward to continue playing on, seems like a good HotAC variant, probably just needs a bit polishing with upcoming questions in the missions, thank you @Stefan !
Hope you guys enjoyed my writeup so far, will add replies to this when I get more missions done.
Sorry for the bad picture quality :(

Edited by JayDestroyaC

I have tears of joy on my face that you play this and give it such a detailled review! Thank you very much! Onwards to your questions.

Quote

[Questions / Feedback]
- A pilot that dies, has to eject in this mission as well and roll 2 dice?
- What if he dies like Lucky did?

- Will that cost the team experience?
- Do I have to make up for that destroyed Z-95? Buy a new one?

- I ditched the dice-rolling completely. When you get shot down, you lose between 5XP and 7XP depending on the territory (6 for neutral, 7 for hostile territory).

- So you cannot die permanently (except that when you play hardmode, the game is over when the Gozanti gets downed).

- Only the penalty, if you play with losing XP. In BSP, the larger XP losses come from the penalties of losing the mission itself.

- No, since you don't fly it again. You still need to pay the 5XP, just for balancing purposes. I'll clarify this in the doc.

Congratulations, by the way. I lost the first mission every **** time, always going into the second mission with zero XP :D

-------------------------

On to the second mission.

Quote

[Question / Feedback]
- What does docking mean? Should the TIEs align with the end of the Docking Bay?
- Or should they just start inside the docking bay (That's how I played it)?
- A little more clarification on the starting setup would be nice on this.

Docking always means like it's explained in the original HotAC rules. You place the TIE squadron in such a way that two ships touch the docking bay entrance, with the other two in formation. Just look at the diagram that Josh Derksen provided in the original rules, it works the same way there. I'm going to write a referral in the document.

Quote

[Question / Feedback]
- Which ships may the pilots take here?
- Do they choose a starting ship NOW? Because up until now it was only Z-95 in the first mission, so no need to choose a ship yet.
- If I got shot down in the first mission, do I have to buy that Z-95 again?

I only now realized this is not at all clear from the rules. I added a sentence. You now use your starting ships, upgrades and all. So your X-Wing coudl have equipped an additional 5XP worth of upgrades. I might change this, what do you think? As you say, it's pretty nonsensical to choose a starting ship before the first mission anyway. Perhaps only choose it after the third mission and earn the XP towards it in the meantime? Would need to award a bit more than currently, of course, but it'll make for a more natural progression *headscratch

And no, if you're shot down, mission accomplished. Wait until your last squadmate detonates and proceed to mission 3.

-----------------

Quote

[Question / Feedback]
- Jump Zone: Does the Pallas need to just touch the jump zone to be able to try to jump to hyperspace, or does it need to be fully inside the zone?
- Pallas Setup: Would be nice if a picture of the spawn location and direction of the Pallas would be included on the mission map. I'm not sure what docking with the aft means. Sideways parallel to the docking bay? Or perpendicular? I played it sideways attached the whole side to the docking bay. Not sure if that was a good idea though :)
- Pallas Energy: It states that the pallas starts with 0 energy, which would immediately take another 2 damage from the energy clause. Is that intended? I played it "at the end of the turn, pay 1 energy" instead.
- Mines: Just a missing word I think, hostile towards every ship?
- Turrets: Will the turrets only fire at the closest TIE Fighter or any TIE, so also the Advanced and Interceptors? I played it only targeting standard TIEs.
- Alpha, Beta, Gamma AI:
- What does Alphas Advanced in Range 1 do? Fire primary weapon at the Pallas?
- Alpha standard TIEs have Attack Rebel TIEs, use Evade Action on Advanced I assume?
- Beta Squadron is just a Shuttle, what has top priority: Taking fastest maneuver to the pallas or swerve for mines/obstacles? I played it as swerving has higher priority to pallas targeting.
- Gamma Squadron AI is not noted, and the spawning table says Arrival Vector of Gamma is 'Special' yet nowhere noted where it spawns.
- Delta Squadron spawns closest to whom? What is the closest vector when rebel TIEs are all over the place?

- Just touch. Most of the time, you'll need more than one attempt at jumping (not being able to take the Focus action really hurts), and if you'd need to be inside the zone, you'd fly of the board in a hurry.

- No, the aft is the short side that's not the fore ;) I'll update the image, though I feel I should restrict the jump zone to the left side anyway. Right down is too easy. What do you think? I did lose the mission to boarding by shuttle once, though.

- ****, that's not intended. I change this to the end of the round as you suggested.

- Yes, word was missing. Added!

- Good point. Also clarified, you played it right.

- I never encountered the issue with the shuttle and the mines. Clarified it so that the shuttle ignores them for maneuver selection. The damage is neglectible, and I want it to be a danger for the players.

- The spawning vectors got caught up in a rewrite. Gamma now spawns in 7, and Delta simply in 4-7 (random).

Quote

[Question / Feedback]
- I'm not sure if the Interceptor Elite is a bit too good for this mission and maybe a normal Interceptor without elite would do already, but maybe I was just unlucky.
- I don't think putting the turrets to aim for anything and not just TIE fighters will make a (huge) difference. The turrets in my game did mostly no damage at all except for the last round.
- For the next mission, how do I get my ships back? How do I select what I start with in the pallas? Just anything?

- Nah, you're absolutely right. I changed it to a standard squad of Interceptors. Still enough to really, really hurt.

- Yeah, but if they don't, you don't need to shoot at them in mission 2. :) But I could take that out.

- Oh dear, it's only stated in the flavor text. You get your ships, upgrades and all. I'll state it explicitly in the mission text. ****, these first missions are a mess...

- I also added another thing which I inexplicably forgot: no one besides the TIE Advanced shoots at the Pallas. So if it doesn't get boarded or explodes because of the energy/ion pulse damage, it won't be destroyed.

Again, THANKS! That was very valuable allready. I'll be ready soon to publish version 1.0 of this; if you like, drop me an email at [email protected] and I send you the current doc, which includes some revisions already.

Edited by Stefan