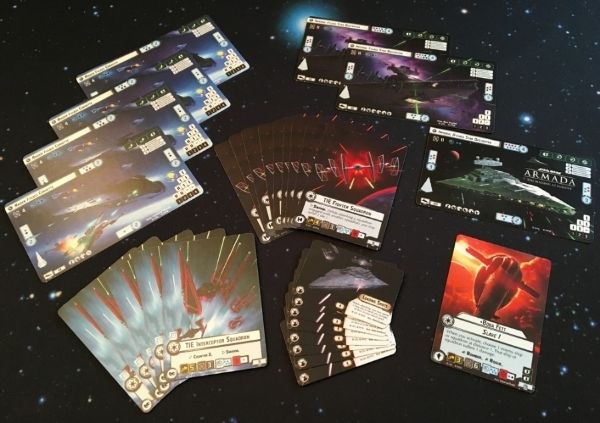
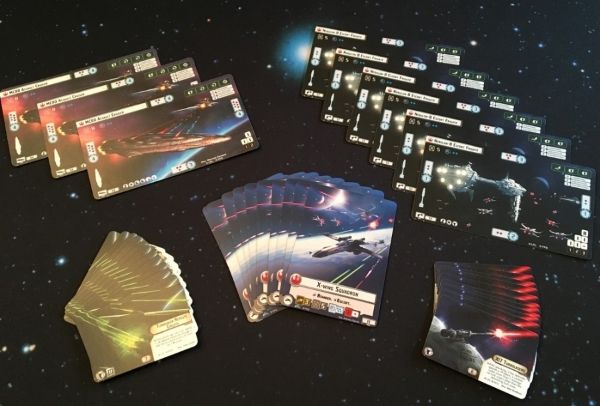
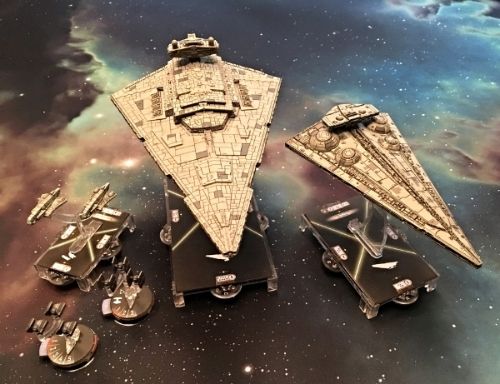
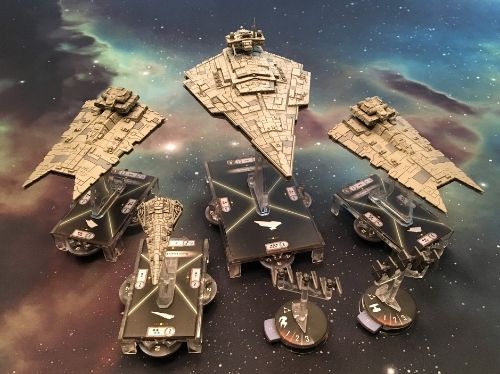
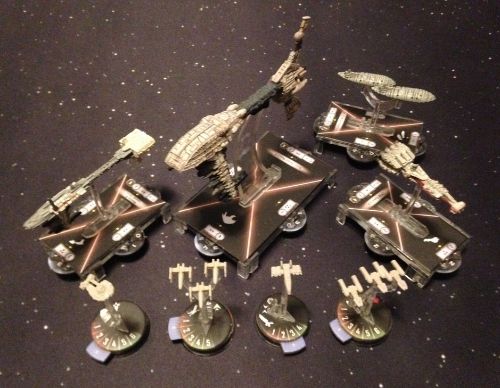
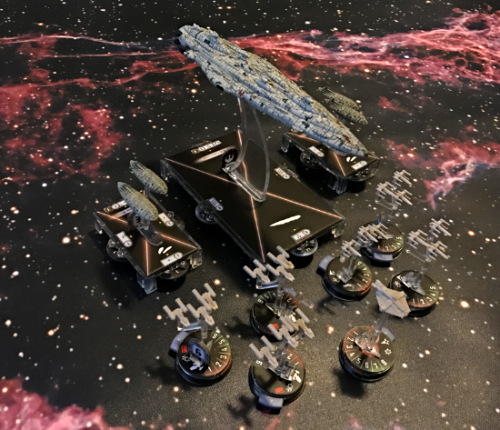
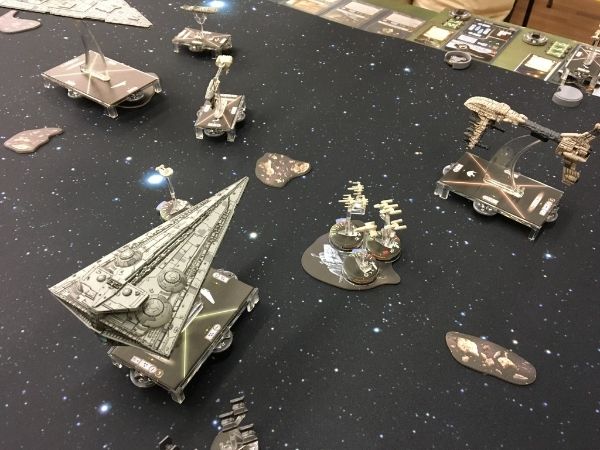
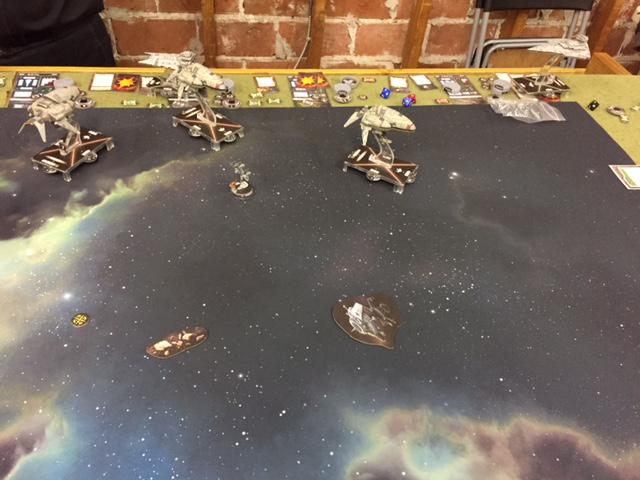
[Portland] Red Castle Games' CC Campaign (Updated 4/2)

By Yipe, in Star Wars: Armada Battle Reports

THE CORELLIAN SECTOR IS UP FOR GRABS!

Happening right now, in the Pacific Northwest…

It is a time of civil war. Six players have assembled to battle over the fate of Corellia and its surrounding planets – three for the rag-tag Rebel Alliance and three for the ever-oppressive Galactic Empire. Who will prevail?

I'm going to record our Corellian Conflict campaign on this thread, updating it as we go. This should prove to be an interesting experiment as all six of us are brand new to Armada, with zero tournament experience and little knowledge of popular fleet builds.

Both of our Grand Admirals had existing collections prior to starting this campaign, but had played only a handful of small games to learn the rules (2-3 games each at 200-300 points). The other four participants had never played Armada before and bought into it specifically to join this campaign. This has given us a nice balance for our two teams – 1 amateur and 2 rookies each.

I'm excited to see how our players improve in skill and how they decide to expand their fleets as the campaign progresses. Now, let's meet our teams! Oh, did I mention some of us decided to show up in costume?

TEAM GALACTIC EMPIRE

85b2f8e5-f104-404e-98f3-aad5307e3783_zps

Screed, Vader and Motti at their 20th High School Reunion. Gooooo Jackboots!

Darth Vader played by Grand Moff Matt (that’s me!)

Admiral Screed played by Jonathan

Admiral Motti played by Matthew

TEAM REBEL ALLIANCE

[++Picture redacted under the Selfie Loyalty Act, Section G2-1838.5++]

Mon Mothma played by Grand Admiral Erik

Admiral Ackbar played by Andrew

Commander Sato played by Peter

Edited by Yipe

HOUSE RULES

We instituted a series of house rules to use for this campaign. Some of our house rules were in response to discussions I read on these forums, others were implemented because we're new to Armada and still building up our collections.

1. Fleets start the campaign at 300 points, with 1 upgrade card allowed per ship and up to 100 points in squadrons.

2. Fleets are capped at a maximum of 400 points on turn 2, with 2 upgrade cards allowed per ship and up to 134 points in squadrons. Rebuilt fleets start at 300 points and a limit of 1 upgrade card per ship.

3. Fleets are capped at a maximum of 500 points on turn 3, with any number of upgrade cards allowed per ship and up to 167 points in squadrons. Rebuilt fleets start at 400 points and a limit of 1 upgrade card per ship.

4. Squadron point limits are based on the maximum fleet points allowed for that turn, not on individual fleet sizes. For example, on turn 2 a fleet may have up to 134 points in squadrons even if its total value is less than 400 points.

*5. Planets are selected in the following order:

Imperial (Corellia)

Imperial

Rebel

Imperial

Rebel

Imperial

Rebel x4

6. Fleet lists are secret until after assaults are launched. After all assault pairings have been made, fleet lists become public. Once the campaign turn is over, fleet lists become secret again. On the first campaign turn, teams reveal their chosen Commanders before assaults are made, but they do not reveal their fleets.

*7. The Hyperlane Raid objective has been changed. The Imperial player does not score the 40 bonus resource points for winning the battle unless they have at least 1 ship in the Rebel's deployment zone.

8. Players receive +5 Refit Points for writing a battle report. They receive +10 Refit Points if their report contains pictures of the battle.

*The Rebel Grand Admiral had multiple options for each of these house rules and selected which to use for the campaign.

Edited by Yipe
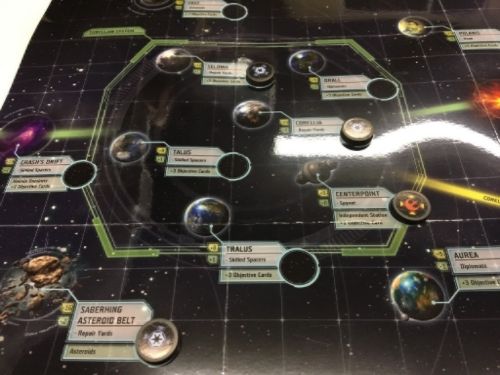
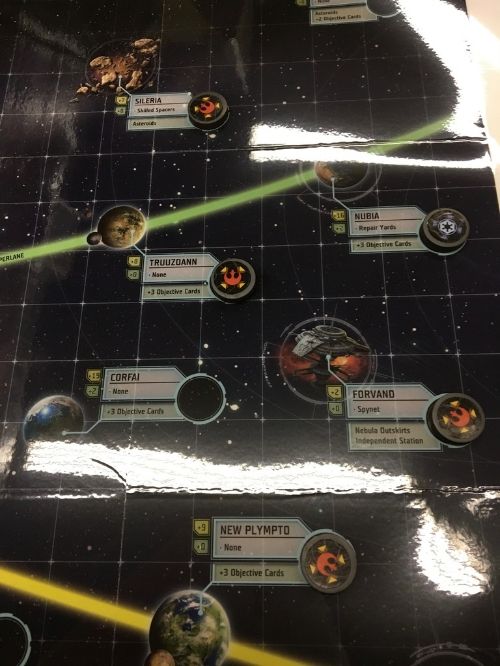
OUR CAMPAIGN MAP

097d37a8-9460-42ca-a2bf-5ec3879fb837_zps

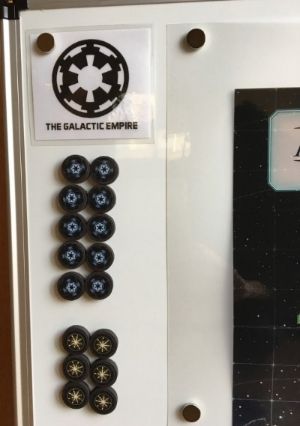
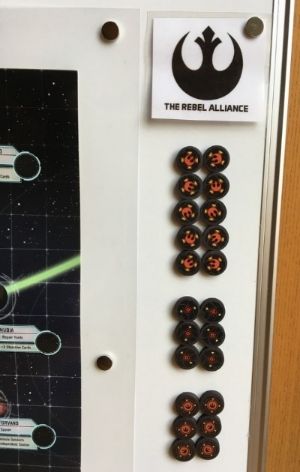
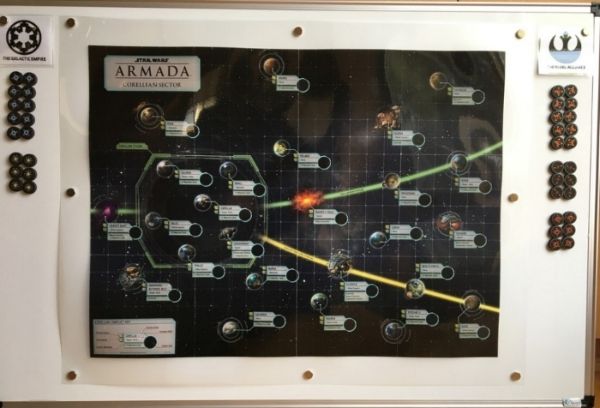
Following the how-to advice on these forums, I laminated our map, bought a magnetic dry erase board and put the campaign stickers on magnets so we could move things around easily, as well as replay the campaign if we wanted. It worked out well.

eb5907d1-05f1-45ef-ab79-a332189fdb18_zps

230c4a1e-e3ab-4bea-a83f-bede29400ae7_zps

I used neodymium/rare earth magnets to hold the map in place, and then purchased .75" ceramic magnets from Michael's craft store for the stickers (they come in packs of 50 for $7.99). I was worried these cheaper quality magnets would leave a chalky residue over everything as I've read some ceramic magnets do that, but they're clean and fit over the planet location markers perfectly.

78b23ab7-d395-4e3e-b888-8201486b66d5_zps

IMPERIAL STARTING PLANETS

Corellia (+20 resources / Repair yards)

Nubia (+16 Resources / Repair Yards)

Saberhing Asteroid Belt (+16 Resources Repair Yards)

Selonia (+12 Resources / Repair Yards)

IMPERIAL STARTING ECONOMY

4 Bases (+100 Resources)

4 Planets (+64 Resources)

4 Repair Yards (+20 Refit Points)

164 Resources / 50 Refit Points per turn

84f423d1-a2a4-43df-9284-8ca80ce00cbd_zps

REBEL STARTING PLANETS

Centerpoint (+5 Resources / Spynet)

Forvano (+2 Resources / Spynet)

New Plympto (+9 Resources / – )

Raider’s Point (+4 Resources / Spynet)

Sileria (+7 Resources / Skilled Spacers)

Truuzdann (+8 Resources / – )

REBEL STARTING ECONOMY

3 Bases (+75 Resources)

3 Outposts (+15 Resources)

6 Planets (+35 Resources)

1 Skilled Spacers

3 Spynets

125 Resources / 30 Refit Points per turn

Edited by Yipe
INTERGALACTIC SWAG

No contest would be complete without prizes. I've been looking forward to playing in an Armada campaign for a long time, and for the last several months I've been collecting promos and other goodies to give away. Here's what's up for grabs!

04995d44-6c49-4676-9d73-8514b5c0ec94_zps

d98ac8d5-dc3d-4015-9a25-9b351d812447_zps

340dfc07-5a11-4c3b-910d-84e27732330e_zps

The big prizes are 2 full sets of acrylic command tokens with 5 of each command type. We plan on meeting only once a month as everyone leads busy lives, so I'm hoping to bolster my prize pool before the campaign is over. My goal is to hand out some swag each time we meet, and then award special prizes for successful base assaults, for the first player to hit 500 points, etc...

Edited by Yipe
THE CORELLIAN PACIFICATION FORCE – TURN 1

ALTERING THE DEAL (300/300)

622f361b-bcc1-4da5-8b19-d182981a5acb_zps

Summary: The Imperial's outside-the-box fleet, it does not have an equivalent on the Rebel side. This build leverages Vader's re-roll power to get the most out of the ISD-II's brutal front arc, and employs dirty tricks with the Grav Shift Reroute to gain an advantage on the battlefield by manipulating obstacles in order to score points. The Interdictor, named Beguiler , acts as a meat-shield and secondary damage dealer. It is often supported by the Gozanti's Comms Net for a steady stream of repair tokens.

Due to the Dark Lord's high cost (accounting for a full 12% of this list's total points), I risked going into turn 1 with only a token fighter screen. The TIE Fighter and TIE Advanced are there to serve as a 1-turn speed bump (or 2 turns if I'm lucky) in order to slow down enemy bombers while the ISD goes to work. Note: Vader refuses to hide-n'-ride on a lowly Gozanti. He paces the bridge of his Imperial Star Destroyer in style and chokes out random crew members when things don't go his way!

Commander: Darth Vader

Assault Objective: All
Defense Objective: Too
Navigation Objective: Easy

[ flagship ] Imperial II-Class Star Destroyer (120 points)
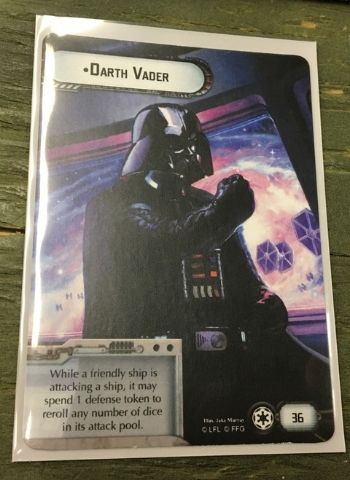
- Darth Vader ( 36 points)
- Gunnery Team ( 7 points)
= 163 total ship cost

Interdictor-class Suppression Refit (90 points)
- Grav Shift Reroute ( 2 points)
= 92 total ship cost

Gozanti-class Cruisers (23 points)
- Comms Net ( 2 points)
= 25 total ship cost

1 TIE Advanced Squadron ( 12 points)
1 TIE Fighter Squadron ( 8 points)

SCREED'S SCREAMIN' SHYRACKS (300/300)

82d70d96-b487-4a9c-b19a-df72a65ab803_zps

Summary: The Imperial's close-range multi-ship build, it uses Screed's ability to trigger the fleet's ACMs and APTs to deliver debilitating face-up damage on the enemy. The VSD-I, named Despoiler , holds the center of Screed's line while the pair of Gladiators do the heavy lifting. Finally, the Instigator provides some additional fighter cover and acts as a flanker or objective ship when needed. On the Rebel side, the closest equivalent to this list is Mon Mothma's fleet. Both are fast, have 4 ships and firepower upgrades. Screed's list does pack a harder punch, but only if it can cover the distance .

Similar to Vader's list, Jonathan also brings a micro anti-fighter screen to counterstrike enemy squadrons or block them for 1-2 turns. Taking a page out of Vader's book on "Perfecting Your Dark Lord Persona", Screed maintains order from the bridge of his Victory Star Destroyer and tosses in random executions to catch any spies that may have infiltrated his ranks.

Commander: Admiral Screed

Assault Objective: You Will
Defense Objective: Need More
Navigation Objective: Bothan Spies

[ flagship ] Victory I-Class Star Destroyer (73 points)
- Admiral Screed ( 26 points)
- Assault Concussion Missiles ( 7 points)
= 106 total ship cost

Gladiator I-Class Star Destroyer (56 points)
- Demolisher ( 10 points)
= 66 total ship cost

Gladiator I-Class Star Destroyer (56 points)
- Assault Proton Torpedoes ( 5 points)
= 61 total ship cost

Raider-I Class Corvette (44 points)
- Instigator ( 4 points)
= 48 total ship cost

1 TIE Interceptor Squadron ( 11 points)
1 TIE Fighter Squadron ( 8 points)

ROLLING THUNDER (300/300)

Summary: The Imperial's dedicated bomber build. This fleet relies on Motti's hull bonus to keep the ISD alive long enough for Major Rhymer and friends to destroy whatever gets in their way. The Raider provides effective close-range AA for the ISD and acts as a secondary anti-ship threat, while the Gozanti's Bomber Command Center ensures maximum damage from the 4 bomber squadrons. The direct equivalent to this list on the Rebel side is Commander Sato's fleet.

Commander: Admiral Motti

Assault Objective: Precision Strike
Defense Objective: Fighter Ambush
Navigation Objective: Superior Positions

[ flagship ] Imperial I-Class Star Destroyer (110 points)
- Admiral Motti ( 24 points)
- Boosted Comms ( 4 points)
= 138 total ship cost

Raider-I Class Corvette (44 points)
- Ordnance Experts ( 4 points)
= 48 total ship cost

Gozanti-class Cruisers (23 points)
- Bomber Command Center ( 8 points)
= 31 total ship cost

1 Maarek Steele ( 21 points)
1 Major Rhymer ( 16 points)
1 Tempest Squadron ( 13 points)
1 TIE Bomber Squadron ( 9 points)
1 TIE Advanced Squadron ( 12 points)
1 JumpMaster 5000 ( 12 points)

Edited by Yipe
THE CORELLIAN LIBERATION ALLIANCE – TURN 1

MOTHMA'S MACHINATIONS (299/300)

584be0d1-2039-4ec6-94a0-31377cc36182_zps

Summary: The design goal of this fleet is cost-efficient firepower. It also includes defensive measures – notably Mon Mothma and Repair Crews – in order to outlast the enemy in a long-range shootout, at which it excels.

A jack-of-all-trades build, this list includes a speedy flanker, a heavy cruiser to carry the center and an effective mini-bomber wing that doubles as an anti-fighter screen. The Imperial fleet that is most similar to this list is Screed's Screamin' Shyracks, though Mothma's Machinations has more teeth invested in the squadron game and specializes in red dice, whereas Screed bets on black. Note the custom 3D-printed Assault Frigate to match the look of the Nebulon-B. Very nice!

Commander: Mon Mothma

Assault Objective: Reckless
Defense Objective: Aggressive
Navigation Objective: Undisciplined

[ flagship ] Assault Frigate Mark II B (72 points)
- Mon Mothma ( 30 points)
- Enhanced Armament ( 10 points)
= 112 total ship cost

Nebulon-B Escort Frigate (57 points)
- Slaved Turrets ( 6 points)
= 63 total ship cost

CR90 Corvette A (44 points)
- Turbolaser Reroute Circuits ( 7 points)
= 51 total ship cost

GR-75 Medium Transports (18 points)
- Repair Crews ( 4 points)
= 22 total ship cost

1 YT-2400 ( 16 points)
1 Y-Wing Squadron ( 10 points)
1 HWK-290 ( 12 points)
1 X-Wing Squadron ( 13 points)

ACKBAR'S AMBUSH (298/300)

Summary: The Rebel's most aggressive fleet, it goes all-out on anti-ship firepower with almost no fighter protection. This high risk, high reward list relies on the AFMK II's abundant shields and hull to weather incoming fire and melt anything it wants in return with a combined 16 red dice out of 3 side arcs. There is no comparable fleet on the Imperial side.

Commander: Admiral Ackbar

Assault Objective: Is It A Pitfall?
Defense Objective: A Decoy?
Navigation Objective: Or A Ruse?

[ flagship ] Assault Frigate Mark II A (81 points)
- Admiral Ackbar ( 38 points)
- Enhanced Armament ( 10 points)
= 129 total ship cost

Assault Frigate Mark II A (81 points)
= 81 total ship cost

Assault Frigate Mark II B (72 points)
= 72 total ship cost

1 YT-2400 ( 16 points)

SATO'S SPECTRES (298/300)

4a80fe06-b7ba-47fa-b945-1bab8015481e_zps

Summary: The opposite of Ackbar's triple Assault Frigate fleet, this list goes all-in on squadrons and then uses Sato to get the most out of the MC80's dangerous side arcs. With 2 rogues and Hera Syndulla's ability, all 7 squadrons can easily move and attack in a single turn. Combined with a total of 6 bombers and a nearby Bomber Command Center, this list should seriously damage any small to medium ship on the board with only 1 activation. The Imperial counterpart to this list is Motti's Rolling Thunder.

Commander: Commander Sato

Assault Objective: Stay
Defense Objective: On
Navigation Objective: Target

[ flagship ] MC80 Command Cruiser (106 points)
- Commander Sato ( 32 points)
- Boosted Comms ( 4 points)
= 142 total ship cost

GR-75 Combat Retrofits (24 points)
- Bomber Command Center ( 8 points)
= 32 total ship cost

GR-75 Combat Retrofits (24 points)
- Comms Net ( 2 points)
= 26 total ship cost

2 X-Wing Squadrons ( 26 points)
3 Y-Wing Squadrons ( 30 points)
1 Hera Syndulla ( 28 points)
1 Rogue Squadron ( 14 points)

TURN 1 ASSAULTS

1. Commander Sato attacks unoccupied Vagran. Admiral Motti defends!

2. Darth Vader declares a Show of Force at unoccupied Xyquine II. Mon Mothma defends!

3. Admiral Ackbar assaults the Imperial base at Nubia. Admiral Screed defends!

Edited by Yipe
TURN 1 – ASSAULT ON ORBITAL DROID FACTORY!

cae6e225-3284-430c-b2da-a557945d612d_zps

Will this be the last battle for Nubia? Or the first of many?

LOCATION: Nubia (Imperial Base)

FIRST PLAYER: Admiral Ackbar (Andrew)

SECOND PLAYER: Admiral Screed (Jonathan)

OBJECTIVE: Base Defense: Ion Cannon

REBEL FLEET LIST: Ackbar's Ambush! Turn 1

IMPERIAL FLEET LIST: Screed's Screamin' Shyracks Turn 1

While patrolling the Industrial Automaton droid factory orbiting above Nubia , Admiral Screed’s Victory-class Star Destroyer detected a raiding fleet of three Assault Frigates emerging from hyperspace.

7c5fe147-a13a-4e2d-8bad-e0428a213891_zps 7c5fe147-a13a-4e2d-8bad-e0428a213891_zps 7c5fe147-a13a-4e2d-8bad-e0428a213891_zps

Come on baby, do the conga!

The heavy cruisers dropped out of light speed in a nearby asteroid and debris field. Screed immediately radioed the planetary ion cannon defense network on Nubia to begin firing into the asteroids. He then ordered his fleet – consisting of the Demolisher (a Gladiator-class Star Destroyer), the Shirker (a second Gladiator-class Star Destroyer), the Instigator (a Raider-class Corvette), a squadron of TIE Fighters, a squadron of TIE Interceptors and his flagship, the Despoiler – to head towards the asteroids and engage the Rebel scum.

Upon the Imperial fleet’s approach, the first AFMk II to exit from the asteroids was hit by the planetary ion cannon. (Due to faulty electronics, another Assault Frigate was also hit – this should be investigated immediately.)

086a67ca-c3d6-4592-bfc9-22fca35e9871_zps

[ Grand Moff Matt's Note: Jonathan and Andrew misplayed the Base Defense: Ion Cannon objective. They fired all 3 objective tokens each turn instead of only 1.]

Being closest to the enemy, the Demolisher and Instigator moved in to engage. Long range shots were fired from both sides, mostly damaging shields. The ingenious captain of the Demolisher continued to press the engagement with the lead AFMk II, shooting, moving and shooting again as he went.

SW%206_zpszsucp6mx.png

The battle heats up as Demolisher takes a pounding!

Damage was being fiercely inflicted upon both ships when a second Assault Frigate emerged from the asteroids and bombarded the Demolisher with its broadside turbolasers. This attack decimated the Gladiator’s defenses and forced her out of the fight.

c4c9724c-8373-439f-b1de-c982b6d59c8e_zps

Screed can only spare 2 TIE Fighters.

While the Demolisher was being demolished, the TIE squadrons engaged a rogue YT-2400 freighter looking to make a bombing run on Screed’s flagship. The YT-2400 shot down a few TIE pilots but the light freighter was no match for 2 squadrons of Imperial fighters. They returned fire and damaged the YT’s primary motivator, crippling it.

SW%202_zpsr76ltqui.png

Speed 4? Let's get out of here!

The Instigator’s AA batteries easily polished off the the drifting YT-2400, and then the Raider attempted to assist the overpowered Demolisher . However, fearing a collision, the Instigator’s spineless captain sped his ship away from combat, never to return. He has since been… dealt with.

Admiral Screed slowed his Star Destroyer and fired a long-range barrage at the Rebel Assault Frigates. While closing the gap, a lone asteroid went undetected by the Despoiler’s proximity warning sensors and it flew into the admiral’s ship. (All crew have been instructed to disregard any rumors that Screed flew into the asteroid. This is false. The admiral is much too skilled of a pilot to spend two turns dealing with something as simple as navigating past an asteroid.) The asteroid pummeled the Despoiler , delivering a critical hit to her engineering quarters that breached the hull and killed half of her repair crews.

e7e0cc83-4a1e-4a37-b88b-a8c743b39fdb_zps

Asteroids do not bother Screed.

The lead Rebel Assault Frigate, now crippled, continued firing at the admiral’s ship with its long-range laser batteries while moving away from combat to avoid taking further damage. The second frigate pressed the attack while also keeping its distance from Screed’s ship, and then destroyed the squadron of TIE Fighters with its anti-fighter gunnery. Screed managed to severely damage all three enemy ships and prepared to deal a fatal blow to one of the Rebel’s heavy cruisers when a lucky shot critically damaged his flagship, sending the crew into a panic.

SW%204_zpsmifasf26.png

Concentrate all firepower on that Star Destroyer!

The crew abandoned their battle stations and fled the ship. To make matters worse, the third Assault Frigate, captained by none other than Admiral Gial Ackbar himself, finally exited the asteroid field.

30aba1df-f043-42af-81be-2b0cd6c81761_zps

Critical Hit!

Despite being bombarded by three ion cannons, Ackbar fired several powerful broadside attacks into Screed’s flagship, dealing catastrophic damage to the already burning Star Destroyer. Screed had no choice but to abandon the battle and let the droid factory and shipyards at Nubia fall to the Rebels.

SW%205_zpslfponspx.png

Next time won't be catch and release, Ackbar!

During the encounter, the captain of the Shirker behaved suspiciously. He made an unexpected stop at the space station in orbit around Nubia. He took an unusual amount of time to enter the battle, and despite having Admiral Ackbar’s flagship in his forward firing arc, let the Rebels penetrate the planet’s defensive perimeter. Upon returning to Imperial-controlled space, Screed ordered the execution of the craven captain under suspicions he was a Rebel sympathizer.

FINAL POINTS: Rebels 191 – Imperials 16

RESULT: Rebel Victory!

The Rebels destroyed the Imperial base at Nubia and placed a Presence sticket at that location.

SCARRED REBELS (8 pts): YT-2400

SCARRED IMPERIALS (75 pts): Despoiler (VSD-I), Demolisher (GSD-I), TIE Interceptor Squadron, TIE Fighter Squadron

VETERAN REBELS: Admiral Ackbar's Flagship (AFMk II A), AFMk II B

VETERAN IMPERIALS:

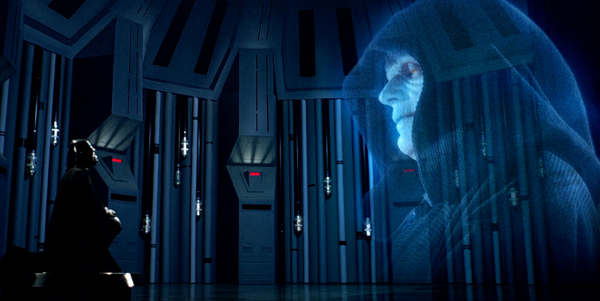
A Dark Side Post Script: After the failed defense of Nubia, Admiral Screed received a holo-transmission from Lord Vader, Supreme Commander of the Corellian Pacification Force. The Dark Lord's message was brief but to the point...

9fa05af0-d460-431e-b52d-40fa9c6b7b04_zps

"Don't fail me again, Admiral."

Edited by Yipe
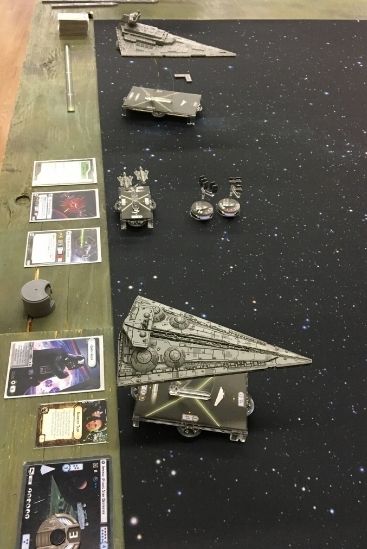
Great report and initial write up. Wonderful use of pics as well.

Red Castle is my local shop. Matthew in fact taught me the game. Perhaps we can get in a game in at some point.

Beautiful write up. Look forward to seeing more

10 hours ago, Grujav said:

Great report and initial write up. Wonderful use of pics as well.

Red Castle is my local shop. Matthew in fact taught me the game. Perhaps we can get in a game in at some point.

Thanks! And Red Castle is the best, they've been very supportive of Armada.

I'm definitely up for a game, and the Imperial team needs some practice. Would you like to be a sparring partner with Team Empire? I messaged you my contact info.

Also, our next campaign game is on Sunday, April 9th at 3 PM. Feel free to stop by and check it out.

10 hours ago, Drakkars said:

Beautiful write up. Look forward to seeing more

Jonathan wrote the battle report while I provided the pics, formatting and Vader's post script.

I really like Jonathan's writing style – fast-paced, enough details to let you know what's happening without getting bogged down and a touch of self-depreciating humor . I chuckled aloud at the bit about overlapping an asteroid 2 turns in a row. Screed shines through as a character here and I hope Jonathan keeps up this "Screed is infallible" motif.

Right now I'm working on my battle report for my turn 1 game between Vader and Mothma. I hope to have it up by the end of the week.

TURN 1 – INNOCENTS TARGETED IN IMPERIAL REPRISAL!

7e669969-0b34-4fe1-aea6-88a979c0de95_zps

Will Mothma save the stations at Xyquine II from Vader's wrath?

LOCATION: Xyquine II (Unoccupied)

FIRST PLAYER: Darth Vader (Matt)

SECOND PLAYER: Mon Mothma (Erik)

OBJECTIVE: Show of Force

REBEL FLEET LIST: Mothma's Machinations Turn 1

IMPERIAL FLEET LIST: Altering the Deal Turn 1

STORY: The Rebel attack on Nubia was swift and hard – a surgical strike with a fleet perfectly designed to breach the planet's defensive weaponry . Admiral Ackbar had routed Admiral Screed and his infamous "101st Screamin' Shyracks" and taken over Nubia’s orbital droid factory. It was a serious blow to the Empire’s grip on nearby Corellia, and threatened to further destabilize the entire sector.

As a Jedi, Vader had fought alongside Admiral Ackbar during the Separatist-backed civil war on Mon Cala . Ackbar was an expert tactician, but he could not have planned such a bold move without a greater strategist to advise him. No, Vader sensed someone else was guiding the Rebel Alliance here, someone with a long-term vision to wrest control of Corellia from the Empire and sow the seeds of rebellion across the galaxy. Not trusting the local governors to handle this matter, Emperor Palpatine sent his apprentice to the Corellian Sector with orders to find and destroy this unknown Rebel commander.

Vader’s reply was short and left no doubt as to the outcome, for he knew the price of failure.

45468949-ffe4-4bed-af8c-ee7c665e7672_zps

“So be it, my master.”

Vader needed to draw out this mysterious Rebel commander through a merciless demonstration of Imperial strength – a Show of Force that would threaten the very civilians the Rebel Alliance intended to liberate. If he could use this engagement to also quell any dissident whispers in the region, even better. After all, manipulating the enemy into a confrontation while simultaneously destroying their hopes was the Sith way. But for this trap to work, he had to find the proper bait.

“Captain Kirro, contact the Beguiler and set coordinates for the hydroponics lab orbiting Xqyuine II. We will find the Rebel’s grand admiral there.”

“Are you sure my lord? There are so many uncharted planets in the Xyquine System.”

11afca38-f0db-41e2-bd0f-469ea192b1b6_zps

This is my angry face. Oh, waitaminute…

“Yes, Lord Vader! Right away, Lord Vader!”

STRATEGY: I declared a Show of Force on turn 1, and chose the unoccupied Xyquine II in hopes of building a base there to secure another Repair Yards for my team.

My goal was to score a full 120 resource points from the Show of Force special assault to give the Empire an economic boost going into turn 2. As the most iconic Imperial ships tend to be very expensive, I felt we needed the dolla bills, y’all. And while taking Darth Vader as my commander is awesome for thematic reasons and all-around campaign evilness, he had eaten up a big chunk of my fleet’s meager 300 points (not to mention the Imperial Star Destroyer he has to fly around on). I couldn’t even bring a proper fighter wing to escort the Dark Lord, so I needed a cash injection and quick.

To help me score the full monte, I took Gunnery Team as the upgrade for my ISD-II. This would let me target a station and a ship in the same turn. I then went with the Grav Shift Reroute on my Interdictor to help move the station(s) and other obstacles into more advantageous positions. Finally, I took a Gozanti with Comms Net to offset my low activation count and feed tokens to my more important ships as needed.

I knew I couldn’t match the speed or firepower of a Rebel swarm, or withstand a constant barrage of squadron attacks from a dedicated bomber build, so my only hope was to kill both stations as quickly as possible and then get out of dodge.

STORY: Three Imperial vessels dropped out of hyperspace and into orbit around Xyquine II – Vader’s Imperial Star Destroyer, a Gozanti-class light cruiser named the Sanctioner and the Beguiler, an Interdictor-class support ship with experimental technology.

bc70a36e-64b3-46be-90db-be739cf13870_zps

The Sith party bus just rolled in. Let's get this thing started!

Vader ordered his ships to target the hydroponics labs but told them to hold their fire. He wanted the workers onboard to signal the Rebel Alliance for help and thus spring his trap. It wasn’t long before a mishmash of Rebel ships emerged from hyperspace to defend the pair of unarmed stations.

“Lord Vader, there are senatorial markings on the Rebel’s modified heavy cruiser. It is Mon Mothma’s personal ship, sir!”

99568db0-79a0-40a3-a06e-2e0500c435d4_zps

Vader is jealous of your bling, Senator.

So, Senator Mothma was the treasonous mastermind behind the growing insurrection in the Corellian Sector? Even across the expanse of space, Vader could feel the hatred welling up within her. She sought vengeance for the murder of her friend Bail Organa and the destruction of Alderaan. But the Dark Lord of the Sith also knew a thing or two about revenge, and it was now time for the Empire to strike back after their calamitous defeat at Nubia!

“My lord, the Rebels have brought more firepower than we anticipated. We are outnumbered and do not have enough fighter squadrons to defend against their bombers. Should we retreat?”

“Retreat? In our moment of triumph? I find your lack of faith disturbing, Captain. Instruct the Beguiler to engage its grav shift device and drag the hydroponics laboratories toward our fleet. It’s time I altered the deal.”

PLACING OBSTACLES: Erik placed both stations in the center of the setup area next to the edge of his deployment zone, as well as 3 asteroids. I placed the Grav Shift Reroute token within distance 3 of each station and 2 asteroids, giving me control over most of the obstacles on the board.

55342723-dfbe-437a-b15f-e16e90fe7252_zps

Final position of the stations and asteroids after being grav-shifted.

FLEET DEPLOYMENT: Erik out-deployed me 4 to 6 so I wasn’t going to bother being too sneaky with my ship placement. I put the Interdictor angled slightly right and pointing toward the center at speed 2, deployed the Gozanti parallel to my board edge in a position to activate my squadrons or spit out repair tokens to the ISD and Interdictor, and finally placed my ISD on the far left at speed 3. My plan was to run Vader’s ISD up the lefthand side, destroy the center-left station early and then hook hard to the right in hopes of firing on the second station as the game wrapped up.

b0c1ead2-d68b-4394-ae83-ea1f804b5498_zps

Imperial Deployment

I didn’t realize it at the time, but Erik had a brilliant plan to catch me out. What appeared to be a simple split deployment was actually designed to create a death-trap for me in the center. He placed the Assault Frigate and CR90 in opposite corners pointing forward, with his Nebulon-B deployed in the middle heading straight toward my Interdictor. He kept his mini-bomber squadron together with the AFMk II and the lone YT-2400 flying cover for his Corvette and GR-75 Transport.

c407fed1-293a-400b-b2ef-ab4b6bc045ca_zps

Rebel Deployment

35f3d901-57e2-4399-9262-3f1141a19a44_zps

Check out that custom AFMk II!

fbb7555d-17f3-48d6-8384-00a70d722862_zps

The board is set. The pieces are moving.

I used the Grav Shift Reroute token to move the center-left station diagonally forward and farther to the left, and I moved the center-right station directly ahead to bring it closer to the Interdictor. I pushed 1 asteroid closer to the AFMk II to hinder its approach (without success I might add). Unfortunately, I made a mistake with the second asteroid. I moved it in between the stations and toward the Nebulon-B hoping to jam up Erik’s ships if we ending up brawling over the stations, but this decision would end up hurting me a lot more than him.

GAME TURN 1: The ISD moved ahead rapidly at speed 3, putting the center-left station within red dice range next turn. The Beguiler headed straight for the center-right station while Sanctioner crept along the board edge within Comms Net range.

a33587be-d3ab-4f1d-a76b-b9d7922e1e90_zps

LUDICROUS SPEED!

Erik started angling his AFMk II and CR90 toward the center of the board, with the Corvette increasing in speed. This is when I realized Erik’s devious plan – he was going to avoid the ISD if possible while all 3 of his combat ships would cross like an X in the center. This would bring their combined firepower to bear on the Interdictor. Ouch!

f0681093-6ed0-4c10-aabc-45a6f3b84072_zps

All wings report in.

STORY TURN 2: The forward turbolasers on Vader's flagship opened fire on the hydroponics lab, searing through the supports on Greenhab 5 and exposing it to the vacuum of space. Darth Vader's gunnery crew had trained rigorously under the Dark Lord and quickly reacquired their next target – a Corellian Blockade Runner! Concentrated laser fire scored the Corvette's engines, causing a fire onboard the ship.

“Sir, should we reduce our thrust? We may run into the Rebel ship or the orbital station and suffer damage to our hull.”

Vader pointed a gloved hand at Captain Kirro as he spoke. “Hull damage does not concern me, Captain. Continue with our current speed and course – I want Mon Mothma’s cruiser, not excuses!”

GAME TURN 2: The ISD maintained speed 3, inflicted 3 damage on the station from long range and then I used Vader’s re-roll ability to vaporize the CR90’s side shields and put a Compartment Fire critical hit on it. This meant Erik could not reliably trigger his Turbolaser Reroute Circuits as the Compartment Fire prevented him from readying his defense tokens. The ISD then rammed the CR90, leaving it with 2 hull points. Erik, however, activated his Rebel Transport and used its Repair Crews upgrade card to remove the critical hit from his Corvette which brought the TRC back online.

What the camera sees...

fc3efa04-03f5-4e3c-91be-3662152b2d13_zps

What I see.

92b3daf9-97d8-423f-86e3-5b428913f96e_zps 4361e864-8010-4308-b81f-60d38731bc23_zps

STORY TURN 3: “Captain Kirro, target the station first. I want its destruction to be the last thing those traitors see before I annihilate them.”

“As you wish, my Lord.”

Vader’s flagship fired on the hydroponics facility at point-blank range. The structure blew apart in a hail of twisted metal and glass, with debris showering the Star Destroyer’s bridge. Darth Vader watched as his ship’s turbolaser batteries swiveled to lock onto the Corellian Corvette and the Blockade Runner vanished in a fiery explosion.

Last-minute escape pods jettisoned from the station and Rebel ship. Using the Force to toggle the Star Destroyer’s weapon guidance controls, Vader shot down each of the fleeing pods.

“All too easy.”

Meanwhile, the Sanctioner launched its TIE squadrons to strike at the enemy’s fighters before they could make a bombing run on the Beguiler . They shot down a few X-Wings but could not stop the Rebel squadrons from advancing on the Interdictor. The Y-Wing and YT-2400 struck vital points on the Beguiler with their proton torpedoes, seriously damaging her. The Interdictor’s shield control specialist was temporarily knocked unconscious by an electrical surge and wasn’t able to contain the bombers’ crippling damage. The Rebels followed up their successful bombing run with a concentrated barrage of devastating laser fire from Senator Mothma’s flagship. The Beguiler was now burning.

GAME TURN 3: I activated the ISD first and put 8 hits on the station which destroyed it. I then used Vader’s ability to fish for an accuracy to lock down the CR90’s redirect defense token. Even with Mon Mothma’s forced re-roll at close range, the ISD inflicted enough damage to destroy the CR90.

Erik activated his Assault Frigate with a Concentrated Fire command and targeted the Interdictor. He rolled well, wiped out 5 shields and put a damage card on it – all from long range. Yikes!

The Gozanti activated my TIE Fighter and TIE Advanced, but I rolled poorly and Erik’s X-Wing survived with 3 hull remaining. In return, his 4 squadron’s made a devastating assault on the Interdictor which took it down to 3 hull. This was partly because I mistakenly forgot to use a contain token that resulted in the Interdictor suffering an extra damage from the “Structural Damage” card.

3b2a9517-6ca2-4002-9e76-74d6ed6d8dd8_zps

Wrapping up the turn, I activated the Interdictor last and it double arced the Nebulon-B’s side hull zone, wiping out its shields and putting 3 damage cards on it.

d3f0325b-bbe7-473a-8cc3-95340a53f8d2_zps

STORY TURN 4: The TIE squadrons continued their vicious dogfight with the Rebel’s X-Wing escort, but there was one Rebel pilot among them they could not best. His name? Corporal Maximillian Sterling !

ea6f4bf9-cc48-45f2-a7be-0b6d04ee95f6_zps

Veritech X-Wing Ace Extraordinaire

GAME TURN 4: I activated the Interdictor first and it resolved yet another Repair command, this time discarding a damage card and repairing a shield. It then destroyed the Nebulon-B and put 3 more hits on the last surviving station which brought it down to half health. Five more hull to go! Could I do it with a nearly dead Interdictor and 2 turns left to play?

Miraculously, the Interdictor survived this turn with 1 hull point left, even after overlapping an asteroid and ramming the AFMk II. However, the TIE squadrons could not finish the wounded X-Wing and it flew off to safety with 1 hull on its squadron dial. In response, my fighters were quickly dispatched by the HWK-290 and YT-2400.

STORY TURN 5: The battle over Xyquine II was winding down as the Rebels prepared to retreat, but Vader had yet to engage his primary prey – Mon Mothma! Before departing the fight, the Senator’s Assault Frigate was aiming to land a killing blow on the mortally wounded Beguiler , which was leaking coolant from its reactor core and leaving a trail of burning wreckage in its wake.

The Dark Lord could not allow Senator Mothma the satisfaction of destroying one of his ships – hope is a powerful tool for rebellion. Therefore, Vader instructed Captain Kirro to ram the Interdictor and destroy it first! Thus ended the Beguiler .

Vader then turned his attention to the last surviving hydroponics facility. The Star Destroyer’s fore batteries opened fire on the helpless station and annihilated several of its greenhouses. Darth Vader then strode off the Star Destroyer’s bridge as he instructed Captain Kirro to dock with the station.

“Prepare a boarding party. I will deal with any survivors… personally.”

star wars one spoiler vader rogue

GAME TURN 5: With the ISD still moving at speed 3, and the Interdictor backed up by the Assault Frigate, I had no choice but to ram my own ship, which killed it! True to character, Vader will go to any lengths to avoid giving the Rebels an advantage.

The ISD destroyed the second station, did negligent damage to the Assault Frigate and took shield damage in return as the two ships passed by each other.

STORY TURN 6: Seeing their chances for a moral victory slipping away, the Rebels made the jump to hyperspace to fight another day, leaving Vader’s mission to silence the Rebel’s grand admiral unfulfilled.

FINAL POINTS: 154 Imperials – 112 Rebels

RESULT: Imperial Victory!

The Imperials scored 120 bonus resource points from the objective and built a base on Xyquine II.

SCARRED REBELS (51 pts): Nebulon-B Escort Frigate, CR90 Corvette A

SCARRED IMPERIALS (55 pts): Beguiler (Interdictor Support Refit), TIE Advanced Squadron, TIE Fighter Squadron

VETERAN REBELS:

VETERAN IMPERIALS: Darth Vader's Flagship (ISD-II)

Edited by Yipe
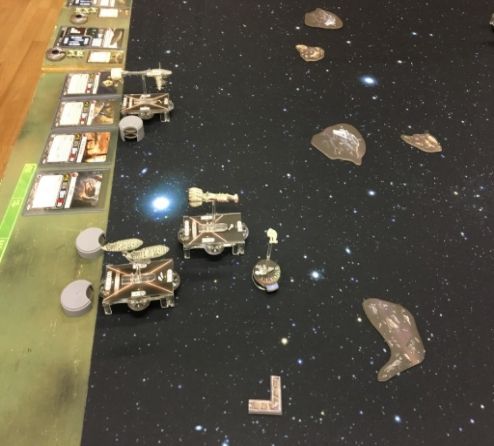
These are fantastic, please keep these going.

12 hours ago, Karneck said:

These are fantastic, please keep these going.

I'm glad you're enjoying our battle reports. Thanks for taking the time to read them!

I know my Vader vs Mothma report was long, but hopefully that wasn't too big of a deterrent. I tried to break up the wall o' text with pics and artwork to make it more readable.

We're still missing the highly strategic Battle of Vagran from turn 1. Unfortunately, both those players are suffering from that dreaded curse called "real life" so I'm not sure it's going to get a write-up. I bribed my players with +5 Refit Points for writing a summary of their game, and +10 Refit Points if they included pics. We'll see if that was enough of an incentive.

Out of all the Corellian Conflict groups in Portland, we are definitely the "campaign in the slow lane" so there may be a lull before I post the next battle report. But have no fear, Jonathan and I will definitely be adding to this thread with the further adventures of Vader and Screed! (Screeder?)

Edited by Yipe
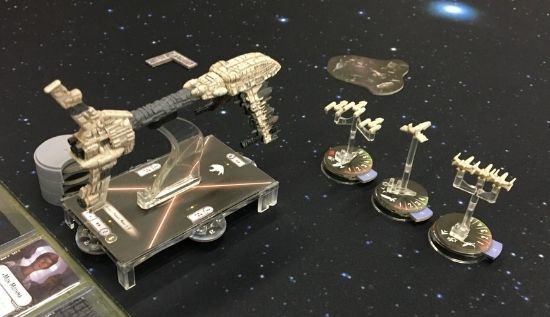
TURN 1 – REBELS ATTEMPT RISKY RELIEF MISSION!

07890ccd-dfed-455b-a869-4a48179c50ed_zps

Will Sato stop the viral outbreak on Vagran?

LOCATION: Vagran (Unoccupied)

FIRST PLAYER: Commander Sato (Peter)

SECOND PLAYER: Admiral Motti (Matthew)

OBJECTIVE: Superior Positions

REBEL FLEET LIST: Sato's Spectres Turn 1

IMPERIAL FLEET LIST: Rolling Thunder Turn 1

After Darth Vader's merciless Show of Force in the Xyquine system, the spark of resistance fanned by Ackbar's daring assault on Nubia was fading fast. As news spread of Vader's slaughter aboard the hydroponics stations orbiting Xyquine II and the harsh sanctions imposed on that planet including an increased Imperial presence in the form of a new detention center citizens across the Corellian Sector began having doubts about supporting the Rebel Alliance. They wanted freedom from the Empire's authoritarian rule, but at what cost?

d0c4053d-bf28-4bef-8ee9-646bd4f1ffce_zps

Mon Mothma's future residence.

Mon Mothma needed a win, not only to improve her chances of military success, but to use as propaganda to sway other systems to her cause. The Senator knew that "h earts and minds" were just as important to the liberation of Corellia as raw firepower, something she hoped the Empire didn't understand . All she needed now was a chance to show the Rebellion was willing to help those who were in trouble regardless of the risk, and perhaps get some good HoloNet video while she was at it.

Fortunately for Senator Mothma, the galaxy is full of suffering. A viral pandemic on Vagran presented her with the picture-perfect opportunity to win over support from key politicians on Corellia. Entrusting Commander Sato with her fleet's most powerful ship – an MC80 Battle Cruiser – Mon Mothma sent him (and a full holovid crew) on a medical relief mission to help the plague-ridden citizens of Vagran.

Image result for avatar pentapox gif

Not Pentapox! We're doomed.

Sato's orders were to escort a pair or GR-75 transport ships carrying medical supplies to Vagran, set up field hospitals on the planet's surface and distribute vaccinations to the local populace. Unbeknownst to Sato, Admiral Motti's carrier fleet was on maneuvers nearby as part of a system-wide quarantine...

[++TRANSMISSION CORRUPTED++]

[++THIS FILE HAS BEEN SLICED BY REBEL HACKERS++]

[++ATTEMPTING DATA RECOVERY++]

... with each commander cautiously engaging the other, no lasting damage had been done to either side. However, Sato was unable to break through Motti's blockade of Vagran before both of his cargo transports carrying the vaccine were destroyed. He was then forced to withdraw or risk losing his flagship as well. Sato's failure meant the people of Vagran would not receive the medicine they so desperately needed, and the Rebel Alliance would not have their public relations victory to foment a populist uprising on Corellia.

4088055b-027b-4020-aee0-3138a72832b5_zps

The GR-75 transports crash and burn, along with any hope of curing the sick on Vagran.

While little real damage had been inflicted upon the Rebel fleet, Motti's reconnaissance squadrons did gain valuable intelligence on the enemy's disposition. [ Grand Moff Matt's Note: Matthew scored 10 victory tokens from attacking the rear hull zone of Peter's MC80 for a total of 150 bonus points.] Hopefully this information would aid Lord Vader in his hunt for Mon Mothma, at least that's what Motti planned to say in order to hide the fact that he let Sato escape relatively unscathed.

In the aftermath of the battle, Vader insisted Motti send down a battalion of his engineers to construct a base on the mineral-rich yet disease-stricken planet, but the Admiral balked at exposing his men to some unknown and reportedly lethal virus and therefore refused.

FINAL POINTS: 241 Imperials – 112 Rebels

RESULT: Imperial Victory!

SCARRED REBELS (41 pts): x2 GR-75 Combat Retrofits, x2 Y-Wing Squadrons, X-Wing Squadron,

SCARRED IMPERIALS (40 pts): Raider-I class Corvette, Tempest Squadron, TIE Advanced Squadron, TIE Bomber Squadron

VETERAN REBELS: Hera Syndulla

VETERAN IMPERIALS: Maarek Stele

Edited by Yipe
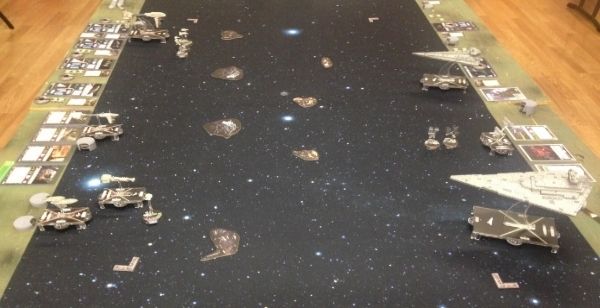
TURN 1 AFTERMATH

CAMPAIGN POINTS: Rebels 3 – Imperials 1

VICTORIES: Rebels 1 – Imperials 2

REBEL PRESENCE TOKENS PLACED: Nubia

REBEL REFIT POINTS (per player): 35

REBEL RESOURCE POINTS (per player): 42/42/41

The Rebels received +5 resource points from our "Guess the Imperial Admirals" game. These bonus points can be divided between the 3 Rebel players as their Grand Admiral sees fit.

IMPERIAL BASES BUILT: Xyquine II

IMPERIAL REFIT POINTS (per player): 50

IMPERIAL RESOURCE POINTS (per player): 81/81/81

The Imperials received +5 resource points from our "Guess the Rebel Admirals" game. These bonus points can be split up by the Imperial's Grand Moff however he wishes. In addition, Jonathan (Admiral Screed) received +5 refit points for his battle report and Matt (Darth Vader) received +10 refit points for his battle report.

Fleets are now secret again until our next campaign day which is scheduled for Tuesday, April 4th.

Edited by Yipe
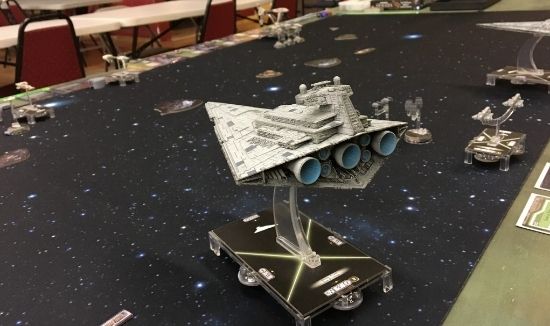
TURN 1 OUTTAKES

Here are a few pics that were left on the cutting room floor...

0c8d743f-d0d6-4e65-ac62-603484691171_zps 2d657450-961a-4603-8dc8-323a2fdfa892_zps

Even Darth Vader needs practice at being a badass Sith Lord.

8a2402b6-f47e-4564-a5ee-93d08ad335e1_zps

The Dark Lord can't help himself – he 's no fun at parties.

306c0c32-b1b2-4df0-951f-12b2f57ad6ce_zps

Heading the wrong direction down a one-way street. Vader missed the Do Not Enter sign.

9bfa83a0-458f-4850-9cf4-d08f73a6d8ff_zps

Erik showing off his awesome Litko accessories. Mothma is all about the shiny!

26f6c9f0-8916-4da7-bcec-b57a066eb8ed_zps

The Interdictor gets taken out to the Rebel woodshed.

Edited by Yipe
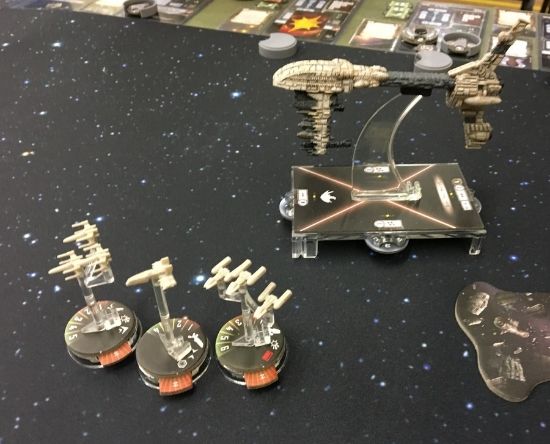
These 3 beauties prevailed in what could perhaps be the final victory for the Rebels. As the Imperials' insurmountable horde overtakes the Rebels with overwhelming odds and numbers. It may be this lone shining moment for the Rebels on Nubia to remember them by. It is however the victors that write the record books.....
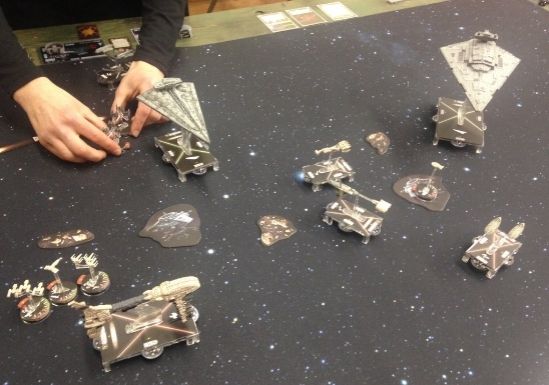
conga armada.JPG

Edited by Victarion
picture

Victarion,

I doubt that your triumphant assault of Nubia on turn 1 will be the sole Rebel victory for this campaign. It was a gloriously bold move that paid off in spades, yet I'm certain more victories are in Ackbar's future.

Overall, turn 1 was a wash in my book. Your destruction of Nubia seriously hurt Team Galactic Empire, but the bonus points from my successful Show of Force helped balance things out. While we earned more resources than Team Rebel Alliance, our fleets suffered higher casualties. Furthermore, Motti's victory over Sato gained us no long-term strategic advantage so that win didn't tip the scales in our favor.

Right now I feel like each team is well balanced compared to the other, both in terms of fleet composition and power level. Anything can happen on turn 2, and that's just the way I like my campaigns!

I can also assure you that we are worried about facing each of the Rebel fleets on the battlefield, err, in the vacuum of space. They all have their own strengths and weaknesses, though Ackbar has shown only strength so far. Perhaps Vader will test your Mon Calamari wiles this round?

I know the Emperor is displeased with his Sith apprentice for allowing Nubia to fall into the Rebel's hands. But we will have it back. Oh yes, we will.

Edited by Yipe