31st Stabilization Task Force After Action Reviews (AAR)
CC - 1
AAR 1-1 is included in this opening post, 1-2 onwards will be linked here at the top for ease of navigation.
AAR 1-3 Show of Force, Polanis
--
31st Stabilization Task Force After Action Review (AAR) 1-1
Froz Incident
Beginning Brief:
Rebel incursion into the Correllian sector is underway. Reports indicate multiple bases and outpost have been established on a handful of worlds. Initial reports of a Rebel hyper lane raid over Selonia in the Correlian system suggest a significant disruption of the systems economy. Weaponized Mon Calamari starships were reported in the area. Rumors suggest an open large scale attack directly against Imperial forces may be imminent.
The Correllian sector's diplomatic league appears to have been subsumed by the Rebellion. Several massive Rebel propaganda efforts appear to be targeting the Corfai & Polanis systems. Moff Jerjerrod and the 31st Stabilization Task Force has been dispatched to ensure that Froz, the lone diplomatic league world not to be openly propagandizing for the rebellion, remains loyal.
31st Stabilization Task Force Order of Battle:
Commander:
- Moff Jerjerrod
Battle Line:
- Victory II Class Star Destroyer with Gunnery Teams (Flagship)
- Victory I Class Star Destroyer with Expanded Hanger Bays
- Raider I Class Corvette with Ordinance Experts
- Gonzati Class Cruiser Flotilla with Bomber Command
Fighter Wing:
- Major Rhymer (TIE/sa)
- TIE Bomber (TIE/sa) x3
- Zertick Strom (TIE/x1)
- Tempest Squadron (TIE/x1)
- TIE Defender (TIE/d)
- TIE Phantom (TIE/ph)
- Lambda Shuttle (T-4a)
- Jumpmaster 5000 Long Range Scout
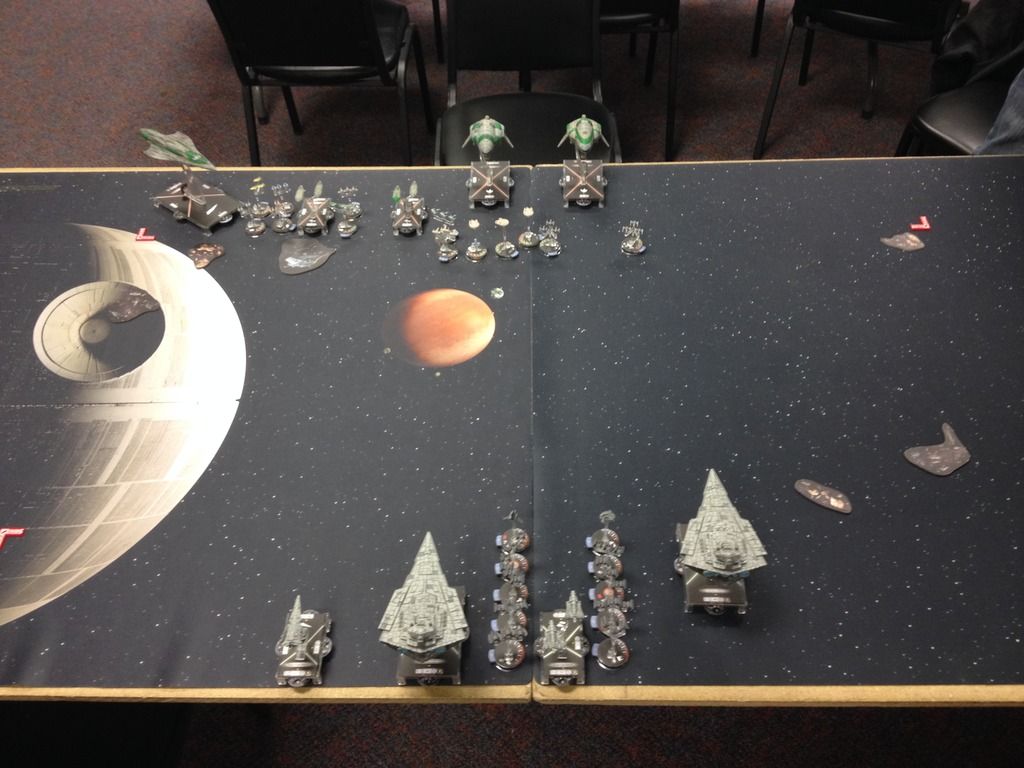
Initial Situation:
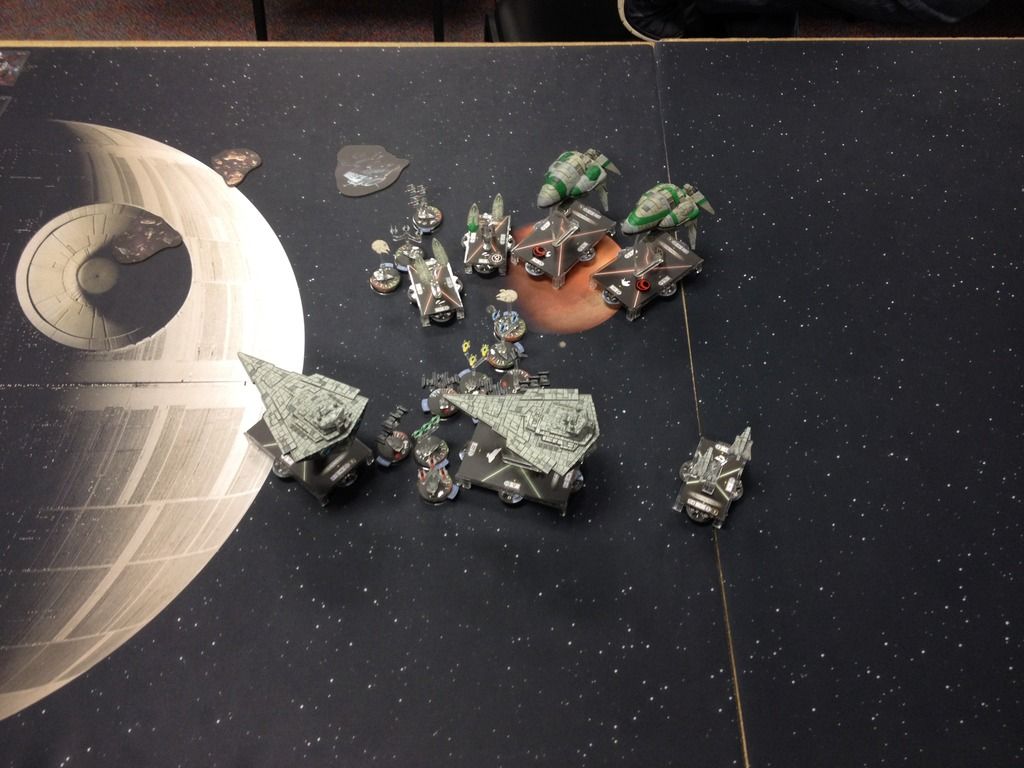
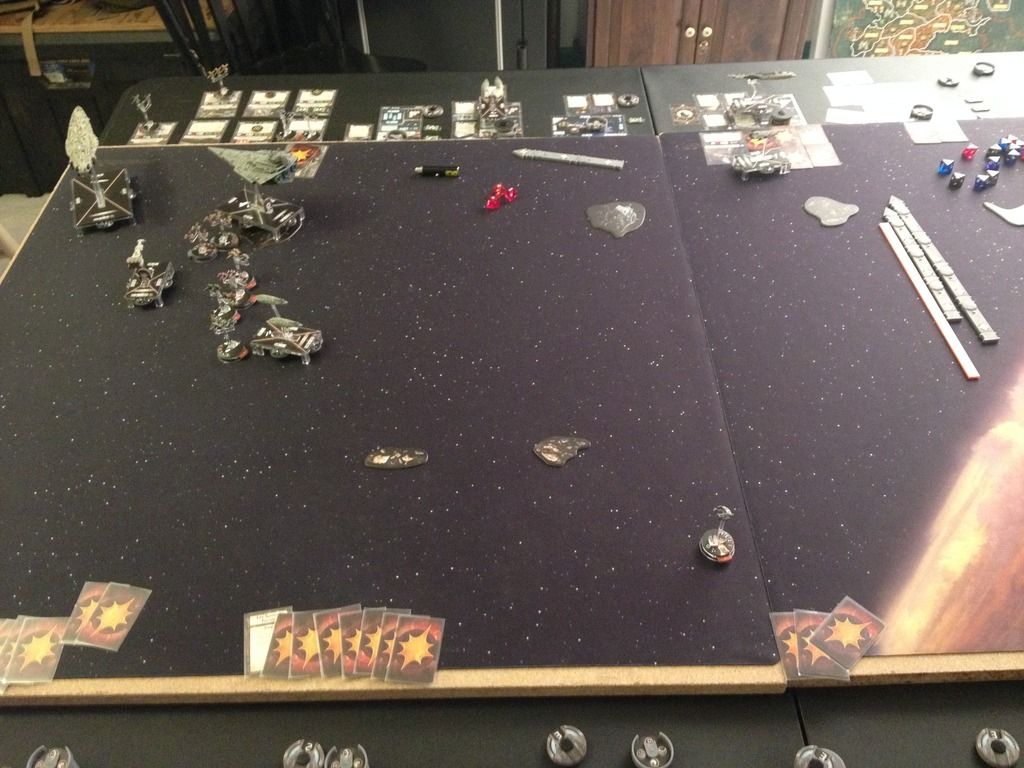
Upon exiting hyperspace the 31st's initial system scan showed a strong Rebel presence around Froz. Further scans indicated that the local planetary defense ion cannons had active targeting beacons strung along the central approach to the planet. Post battle report from local authorities indicate they had been 'seized' by traitorous elements of the local security forces.
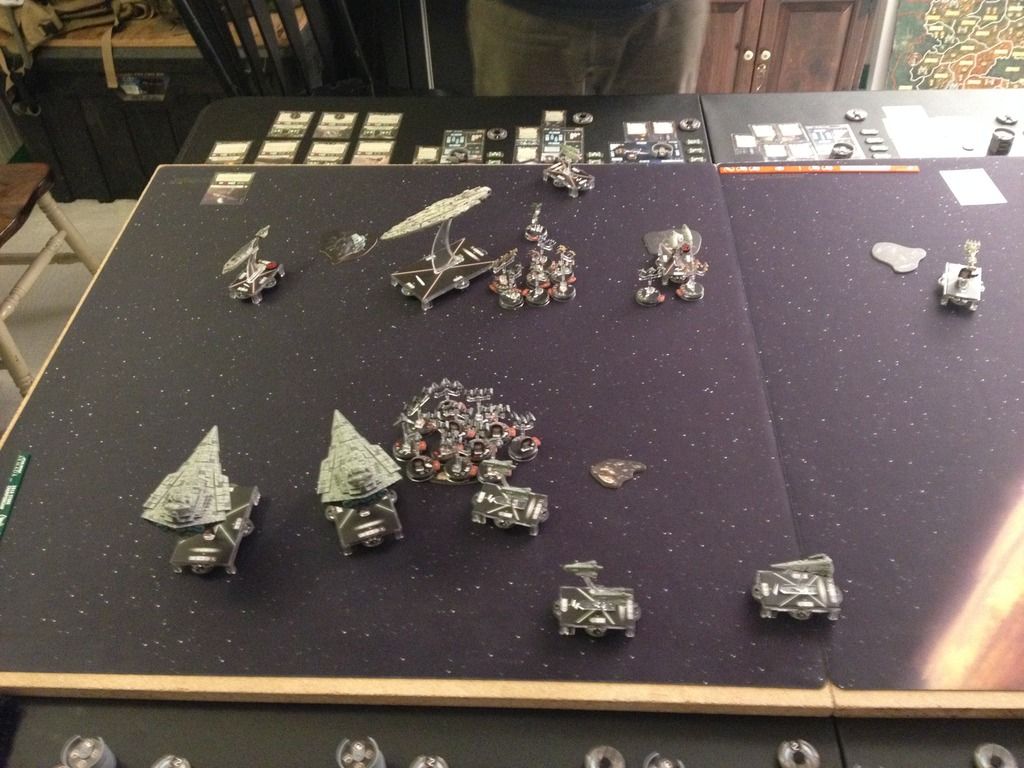
The majority of the Rebel fleet was in orbit around Froz in the upper left quadrant of the combat zone. A lone Assault Frigate was separated from the main body in the upper right quadrant.
Orders were issued to destroy the lone frigate before advancing to ensure Froz's safety and security, in an effort to defeat the Rebels in detail.
The 31st formed up with the Fighter Wing leading from the lower center followed closely by the Gonzati flotilla. The Raider corvette was returning to join the Gonzatis after a sweep of the lower left quadrant. The Victory I and II Star Destroyers flanked to the right of the squadron ball.
Upon entering engagement range the lone Rebel frigate turned out to be a sensor decoy. The unified Rebel fleet slowly advanced out of Froz orbit in the upper left quadrant. It's an ambush.
Rebel Fleet Order of Battle:
Analysis provided by Imperial Intelligence following review of Imperial sensor logs and debris evaluation. Report supplemented by Imperial Security Bureau 'interviews' with local populace.
Commander:
- Commander Sato
Battle Line:
- MC80 Battle Cruiser, Mon Karren
- Assault Frigate Mark B with Electronic Countermeasures (ECM)
- Assault Frigate Mark B with Electronic Countermeasures (ECM)
Fighter Wing:
- A-Wing Interceptor (RZ-1) x4
- Green Squadron (RZ-1)
- E-Wing Escort Starfighter
- X-Wing (T-65b) x2
Battle Report:
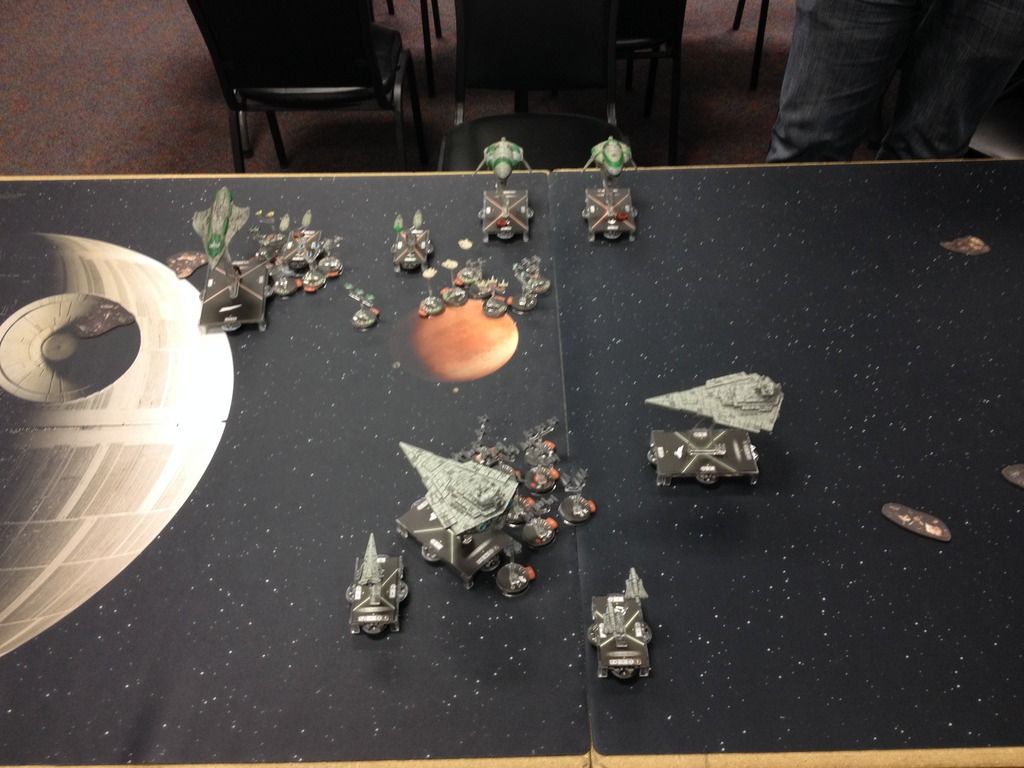
Upon discovering the Rebel subterfuge and treasonous planetary defense grid, the 31st Stabilization Task Force advanced at a slow but steady pace towards the central combat zone. The 31st aimed to split the central and right most Ion targeting beacons. The fighter wing providing close space patrol (CSP) and prepped for bombing runs in advance of the Task Force.
The Rebel fleet slowed to a halt in high orbit with their fighters slowly advancing toward the Imperial force.
The 31st continued to advance into the central region. The Victory I leading the way with the flagship Victory II moving into a trailing/right flanking position. A minor collision between the Raider and the Gonzati flotilla delayed its advance putting the smaller vessels in trailing leftward position. The fighter wing led by its anti-squadron detachment now stretched from the trailing Gonzatis all the way forward of the Victories
The Rebel force remained stationary while its fighters continued their slow movement running from the upper right quadrant to the upper central region.
The treasonous planetary ion cannons fired two salvos at the lead Victory I taking down part of its shields & exhausting its defenses. However, only minor damage was done. The 31st began to pivot towards Froz and the Rebel fleet, with the fighter wing its screening advance.
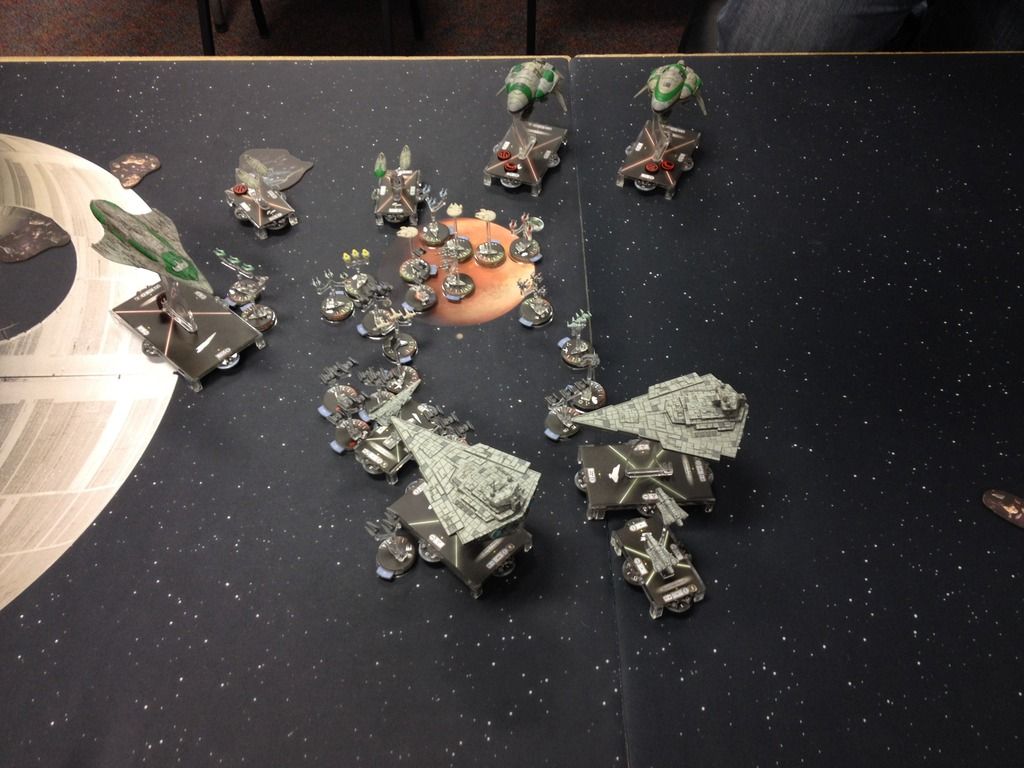
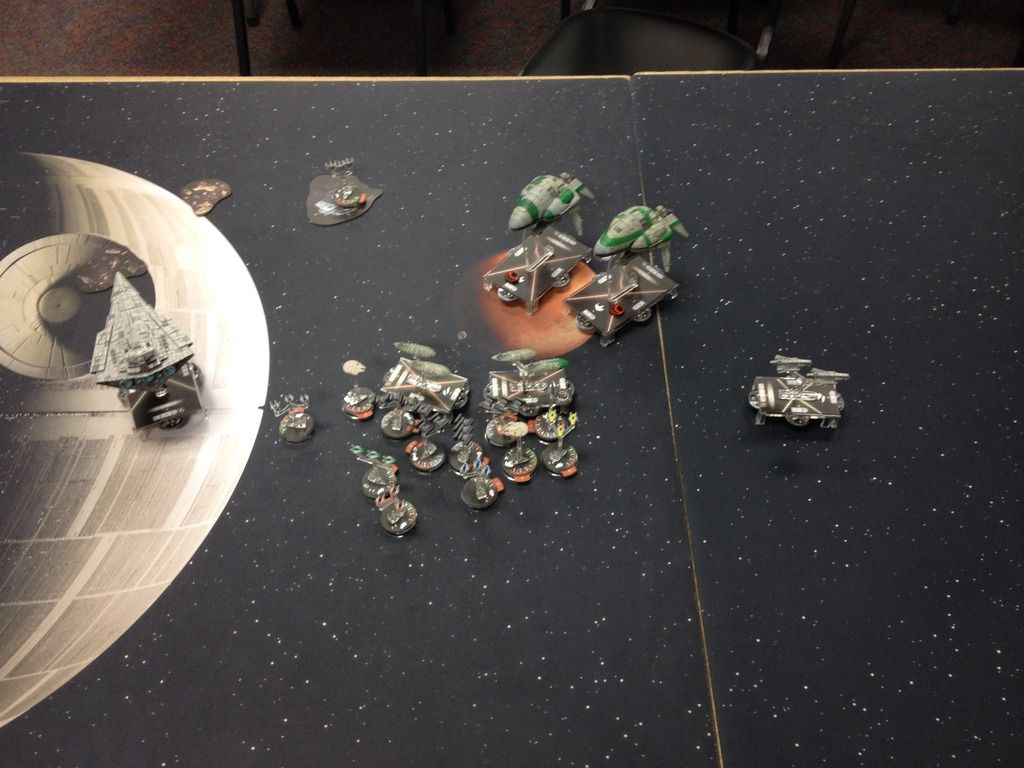
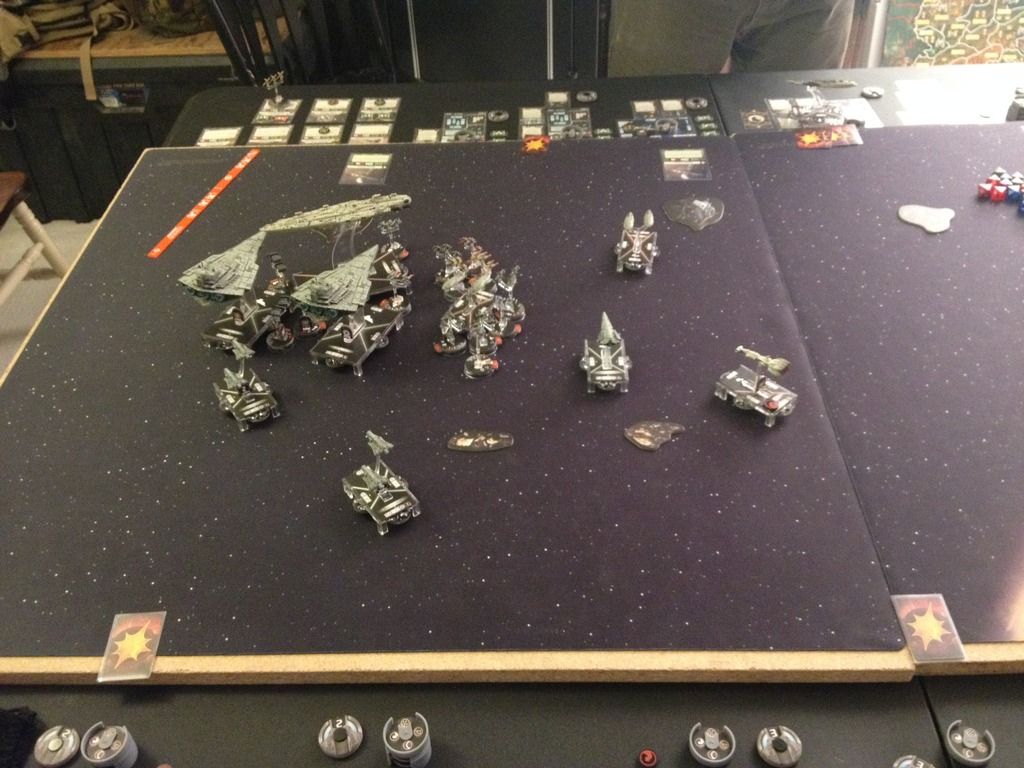
The Rebel fleet finally began to initiate their engines. An Assault Frigate began a slow movement parallel to the upper limit of the combat zone from right to center. The Battle Cruiser began a 45 degree advance toward the Imperial task force, with the final frigate taking a wider flanking maneuver coming down from the upper left quadrant. Several squadrons of A-wings backed up by an X-wing began to intercept the Imperial screen.
Following guidance from the Star Destroyers and the flotilla, the Imperial escort & interceptor squadrons, led by Zertick Strom, began destroying the Rebel fighter incursion. Several key commands where relayed though the accompanying Lambda shuffle. Anti-squadron fire from the Victory I and Raider provided flak. The Victories began to angle towards cutting off the upper frigate's path while the bomber force, under Major Rhymer's command, prepared for their attack run on the same frigate. The Raider continued to move into the center of the combat zone to cover the fighter wing, while the Gonzati flotilla trailed between the Raider and Victories.
Staggered Rebel fighter incursions continued to delay the fighter wing, but the first long range missile strikes from the TIE/sa Bombers began impacting the upper frigates starboard shields. Tempest squadron was key in both distracting and destroying several A-wing squadrons. Also, of additional note the TIE/d Defender prototype squadron performed exemplary in both its escort & bombing duties.
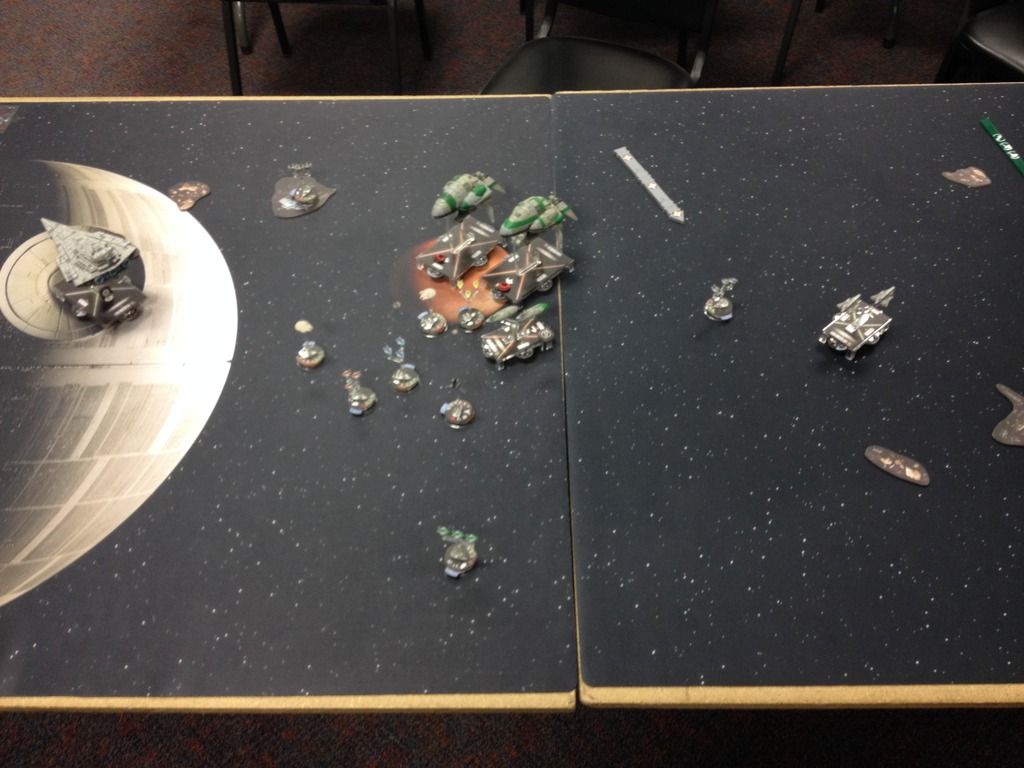
Long range ship to ship fire began to be exchanged between the Victory I and the upper frigate. The Raider corvette, having assisted in covering the fighter wing, was now in the unenviable position of starring down the long range turbolasers of the battle cruiser and other frigate. Pushing maximum power to engines it dove between the battle cruiser and the beleaguered upper frigate, clearing the kill zone. The Gonzati flotilla began evading to the right in order to stay out of range of the oncoming Rebel guns.
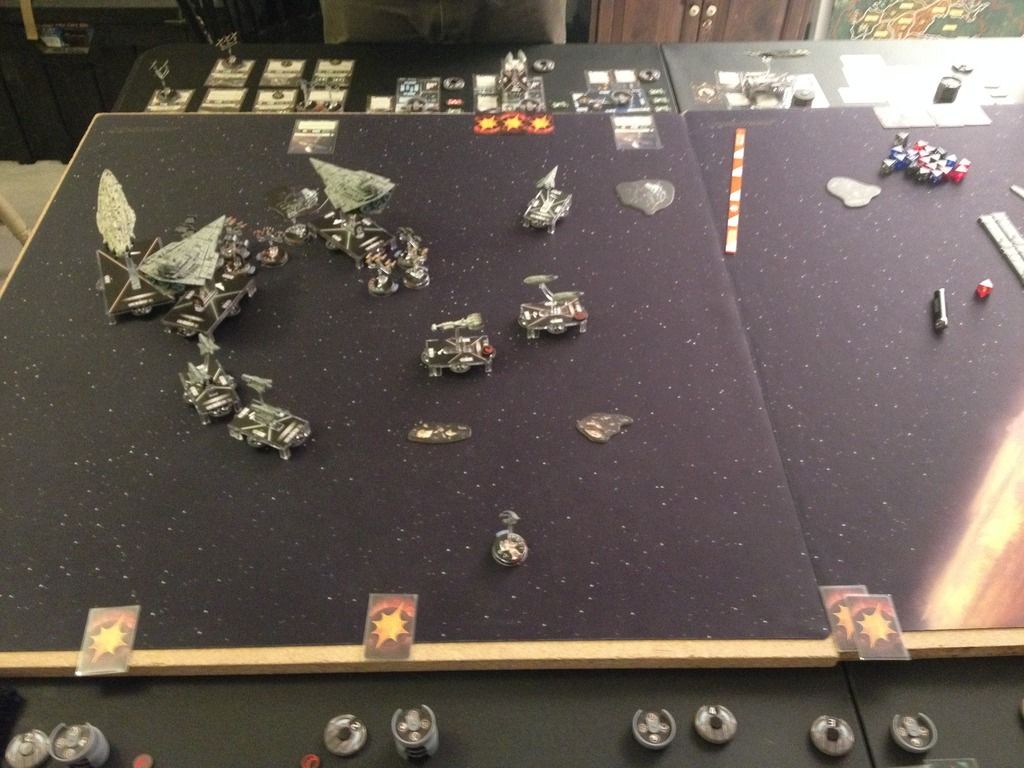
The Rebels advanced firing anti-squadron fire. Strom's TIE/x1 Advanced fighter was destroyed, but not before his successful ejection. The TIE/ph Phantom wove through the fire to eliminate the last Rebel squadron, the E-wings.
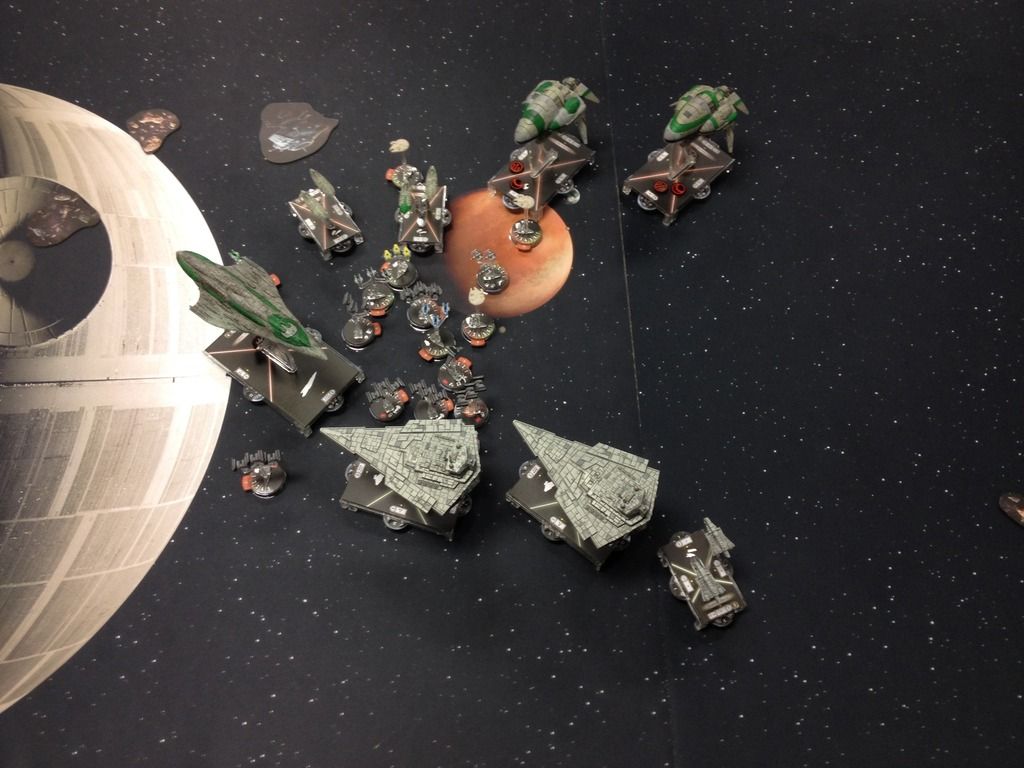
Combined fire from the Victories and Rhymer's bomber detachment destroyed the upper frigate. The kill shot provided by the TIE/d Defender squadron.
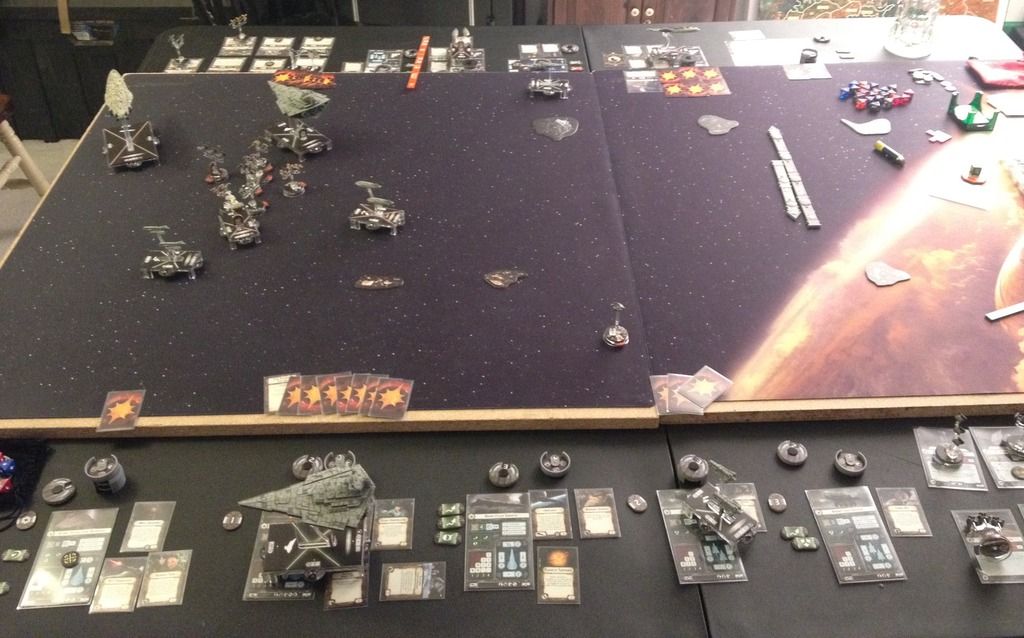
The remaining Rebel fleet fled into hyperspace following the conclusion of the engagement. The 31st Stabilization Task Force moved into Froz orbit securing the planet, and the last 'loyal' part of the Corellian diplomatic league, from further Rebel influence.
Post Battle Situation:
With the Rebel fleet drive off, the abandoned traitors manning the planetary ion cannons surrendered to local security forces. Imperial Security Bureau (ISB) personnel backed up by a stormtrooper detachment took custody of the traitors and they are currently being 'questioned'.
Imperial Intelligence in conjunction with the ISB and stormtrooper legion have begun re-stabilizing Froz. The 31st has moved into 'protective' orbit over key population centers in case of further Rebel aggression. Current debate between interested parties and commands regarding the need to establish a more permanent Imperial presence is underway.
Award Recommendations:
Tempest Squadron for exemplary combat service.
Recommendations & Concerns:
With heightened Rebel presence on the sector, it is becoming clear that---
[iSB tripcode Whiskey Tango Foxtrot]
--Unauthorized access logged--
--Continued access denied--
ISB Stormtroopers alerted, do not move, do not resist.
Edited by IndomitableUpdate