Strategies or Tactics anyone?

By Beatty, in Star Wars: Armada

Learning the upgrade cards just comes from playing, after a while there are some standard configurations that are run on certain ships.

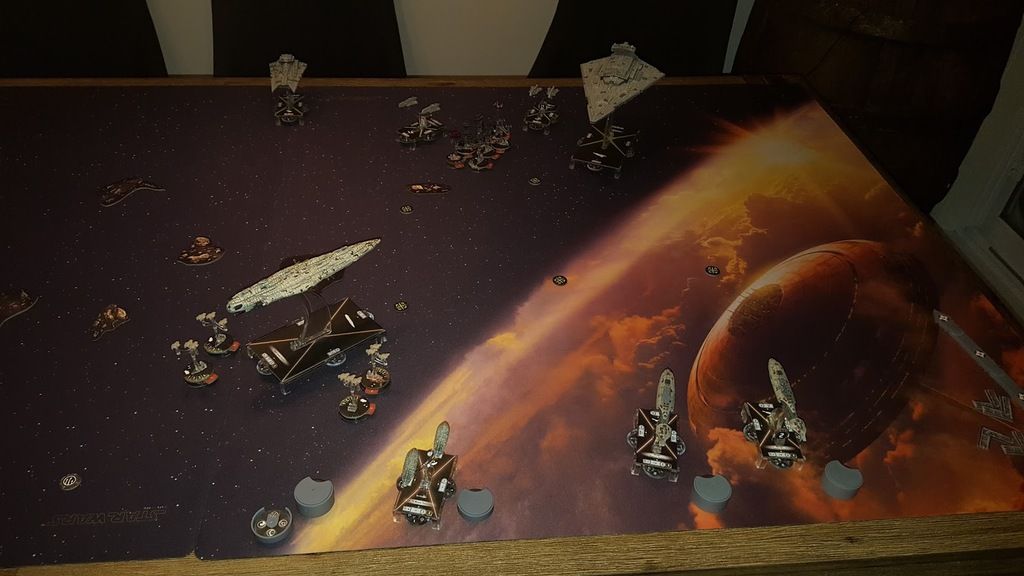
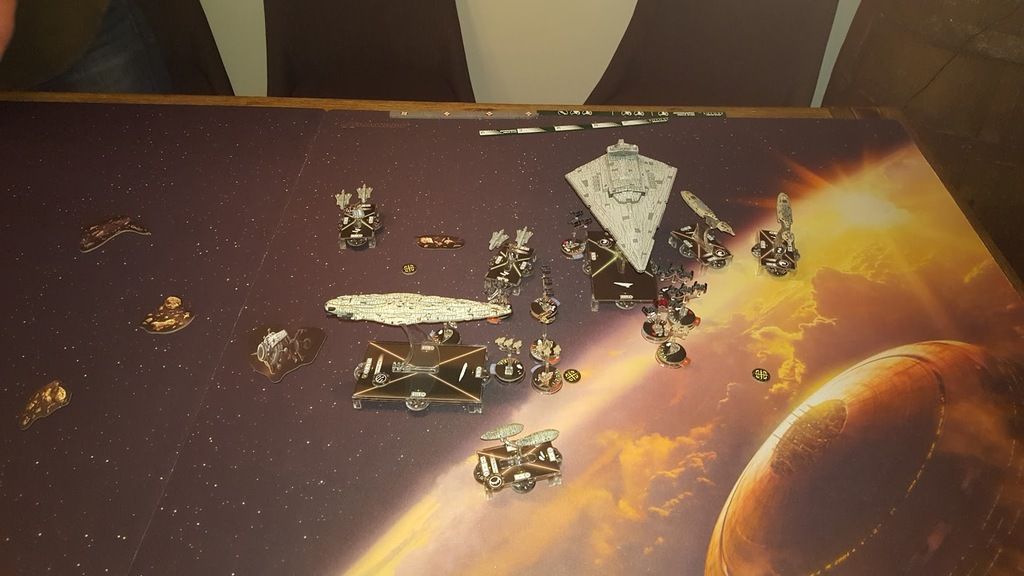
I try to use obstacles and the edge of the board to dictate how my opponent comes at me, especially if I am losing the activation advantage. Placement of obstacles become key going second while not having activation advantage. Running the edge of the board adds risk to ships going speed 4 when trying to avoid certain arcs. The downside of running the edge of the board is that they know where you are going and since they have to come to you, you might not get the big win. I am just trying to reduce their possible routes to my fleet.

jerjerod is going to make predicting flight path difficult, having that 45 degree turn on first yaw is going to be powerful.

I will definitely try that about opponent movement. When you are moving your own ships though, how do you force an opponent to let you shoot at them? With the activation order, I feel like it is possible for me to perfectly predict where a juicy target will land, have all my ships aimed to fire at him, and then have him jump out of arc on his first activation, which I hate lol

So you are able to perfectly predict one of his movements. Now predict where he will jump to, and leave a nice present for him on the doormat. Thats why I say get to the point where you can predict every move turns in advance. Additionally, it helps to just block the bugger in. Blocking is underrated in Armada, but you can outright stop certain ships from moving.

Only under rated because it's shoot then move, so you have to survive a shot at close range. Not a ton of ships that can do that, or that actually want to except ISDs.

Probably the best way to block would be to put 3+ (including blocker) in the front arc of your target so your opponent has to choose what to shoot at. I'd say block with a flotilla, but a single Acc and close range is not hard to get so you will likely die, and your target is getting away. Anything with can absorb 6 damage. plus a ram, would be good for this. And then it has to have an escape path that doesn't put it close to anything that can shoot it.

I also think blocking isn't a direct tactic because bombers are adding a lot more damage on top of a direct attack. A Vic can activate 3 squads, so with BCC, let's assume you take 3 damage. Now you are taking 3 blues, 3 reds into, hopefully, the same arc the bombers just hit. With LS, you can easily dish out 4-6 damage, plus a crit and Acc.

So 7-9 damage into CR90s, Glads, Raiders, Neb side arcs, even a shot at a weakened MC30 will die to sustained fire like that. Plus the ram damage.

Blocking is just hard to pull off against high priority targets. Blocking flotillas though, that's fun and easy. I like to watch them get stuck and die.

Thanks guys!

I did ask a couple times about upgrades but I would either forget or I would not know off the top of my head what they did, and I feel stupid having to ask to read the card or have it read to me :/

I will definitely try that about opponent movement. When you are moving your own ships though, how do you force an opponent to let you shoot at them? With the activation order, I feel like it is possible for me to perfectly predict where a juicy target will land, have all my ships aimed to fire at him, and then have him jump out of arc on his first activation, which I hate lol

If he's got first activation, then you've got to allow that in your reasoning, because one of the benefits of first player is the ability to place a ship in what would be harm's way, and then move it before it is really threatened.

Here are some thoughts on predicting movement:

1. Ships moving at speed one are insanely predictable. Of course, most ships aren't usually moving at speed-1, but in some circumstances, they will be, and that makes it easier to figure out where they'll be.

2. Ships moving at speed two are easily predictable.

3. Really mobile ships that move at high speeds are hard to predict. You're often better off letting your opponent activate them and then deciding where you need to be relative to them.

4. Ships moving at speeds with little yaw are easy to predict.

5. Ships that need to reach a key position to target one of your key ships are easy to predict even if they are fast and maneuverable.

The third concept takes us into activation-advantage as a key concept. If you've got more activations than an opponent, you can stall out with inconsequential activations and then start placing after you've seen where some of his key ships have moved. That's why you see people taking 4 activations almost perforce, and 5 or more in some lists. Its almost going to be impossible trap highly mobile speedy units that activate after you've activated.

On blocking, outside of a Rieekan list, I typically don't do much with blocking. With Rieekan, you know the ship is sticking around even after the opponent shoots at it and kills it. That gives you an incredible amount of flexibility in keeping a Defiance on a double arc with a key target. At that point, you only need one ship to block, then move another up next turn if you have to. Beyond that kind of blocking, the opponent has to almost give it to you, for example, by maneuvering poorly so that he doesn't have an escape route.

On blocking, outside of a Rieekan list, I typically don't do much with blocking. With Rieekan, you know the ship is sticking around even after the opponent shoots at it and kills it. That gives you an incredible amount of flexibility in keeping a Defiance on a double arc with a key target. At that point, you only need one ship to block, then move another up next turn if you have to. Beyond that kind of blocking, the opponent has to almost give it to you, for example, by maneuvering poorly so that he doesn't have an escape route.

Well two mc30s at blue range can block an isd I. If they are admonition and foresight, whats the issue!

With all the crazy Off-Topic threads on the main forum I thought I'd ask if anyone wanted to discuss something about the actual game play. Anyone have a Tactic or Strategy they'd like to share? Something to actually bring us back together as a community?

(I'd share one I was thinking of but it has to do with Squadrons so I think I'm going to save it until the forum calms down on that topic.)

Close-speed.

It's a concept I've been working on though I have to perfect it with any kind of mathematical precision or broad application.

Basically it's the sum of 2 ships' speed dials that are moving more or less on the same axis towards one another.

I find it most useful for establishing the survivability between encounters with an ISD 2 (and, now, Liberty or even Neb B with the next expansion)

For example, I want Close Speed of 5 on my MC30's when I'm going toe to toe with ISD2. I can allow close speed 2 or 3 on Admo depending on engagement range to allow for an additional turn of nose-to-nose shooting or if I want to try and block.

If I'm expecting the ISD to change speed, I need to have nav tokens or commands banked in order to re-establish the engagement speed I want, which is to say, to be able to bounce through front arc and land in side arc at a nice button hook angle for subsequent double tap.

Edited by Rocmistro

I keep trying to do a dreadnought strategy (typically ISD loaded with upgrades) with a fighter screen and some ship support.

It doesn't work. :(

At least not against the typical fleet builds out there these days. Despite several incarnations I just can't get it to work. I think my mindset is still stuck in Wave 2 strategies because I haven't been able to make any tournaments and learn from them.

So my strategy tip for this topic is "don't do a dreadnought strategy".

Probably doesn't help that the only person I've been able to consistently play against at my FLGS is a very competitive player with leagues more skill and practice than me. He tends to just crush my fleet before I can get anything working and I feel I'm not learning much on how to improve.

Edited by Derpzilla88

I've had a vague idea in my head for a bit, but haven't had the time or energy to actually do anything about it yet (holidays, kids' insane schedule, my insane schedule, ankle hurts, lack of sleep, etc etc).

I want to write an article along the lines of "Questions you should ask yourself" during each step of the game: deployment, your turns, etc. It'd be more of a guide on how to think and what to remain aware of, than a guide advocating any specific tactic or strategy....I've always found those a little limiting due to the enormously flexible nature of the game.

It would be directed more to beginners and medium level players, rather than the top level (because you guys don't need a guide :).

Any interest in something like that? Or if someone else wants to take this idea forward you're welcome to it......otherwise I'll try to get some time over the holidays to draft something up. Maybe. If my ankle exercises don't take up all my free time. ;)

I think it might have been mentioned above, but I feel it's something not used enough so I'll mention it again and by itself.

When going 2nd, in order to moderate the first players activation initiative you must threaten two targets. Sometimes that means setting one of your ships with two good targets, though you need to be reasonably sure that ship will survive that first players first activation.. or the other way is to obviously put two of your ships into threat range of an enemy target each.

You maybe can't beat the first activation initiative, but you can make trades.

This also means that having two hammers in your list might be more effective than one sledge hammer.

Edited by homedrone

Thanks guys!

I did ask a couple times about upgrades but I would either forget or I would not know off the top of my head what they did, and I feel stupid having to ask to read the card or have it read to me :/

I will definitely try that about opponent movement. When you are moving your own ships though, how do you force an opponent to let you shoot at them? With the activation order, I feel like it is possible for me to perfectly predict where a juicy target will land, have all my ships aimed to fire at him, and then have him jump out of arc on his first activation, which I hate lol

I find people all too eager to explain the awesome cards they have equipped. Make them think you're actually interested in their list and they won't be able to stop explaining it to you. People are egotistical and LOVE to monologue like the villain in a comic book. :P

Thank you again guys for the suggestions :) Great advice here.

@Maturin, that sounds like an awesome idea! It would certainly help me a lot, anyway. :)

I think the thing that confuses me the most is how to position my ships so that I can actually shoot. It seems like basically, I need to play very defensively (at least in comparison to how I would play in a game like Infinity or Battlefleet Gothic). That is, I need to 'force' my opponent to move his ships into range/arc of mine so that, when my turn to activate comes, I can shoot at his ships before moving away. Correct?

So I guess what I run into is this problem:

Say my opponent has first activation and has an ISD, a Glad, and a VSD. I have an AFmk2, CR90, and Neb (for the sake of argument). Opponent's got his ships all lined up straight, as do I.

1. Opponent's activation, he activations his Glad. Nothing is in range, so he moves it towards the middle of the table. My turn. Now what? If I move forward, I will be in range of his Glad's guns (if he activates his Glad first next turn). Do I just sit back? Do I try to maneuver to the sides, around the Glad, and avoid it?

2. For the example: let's say I move my AFmk2 forward and to the side of the Glad at speed 2. So that he's out of black range but I am in red range. Next turn he moves the Glad behind me into my back arc. I can get a couple shots, but probably is not my best solution. But unless I just keep running away he's going to keep chasing with the Glad.

That's the sort of scenario I'm trying to avoid/deal with. It's easy enough to 'dodge' ships...but eventually I have to be able to shoot at them too lol.

I've been having issues with getting good attacks with my MC30s as second player. My problem is that I was so afraid of the ISD's front arc, I flew past his flank, but couldn't get a black range shot next round before he moved away.

So my main question is: besides admonition, can a MC30 survive an ISD2's frontal arc shot at medium range without getting one-shotted? Because from what I experienced, I need to be in med range to become a threat after the ISD made his move, but if I'm already on the flank, the ISD can just fly away from black range.

Edited by Sybreed

Thank you again guys for the suggestions :) Great advice here.

@Maturin, that sounds like an awesome idea! It would certainly help me a lot, anyway. :)

I think the thing that confuses me the most is how to position my ships so that I can actually shoot. It seems like basically, I need to play very defensively (at least in comparison to how I would play in a game like Infinity or Battlefleet Gothic). That is, I need to 'force' my opponent to move his ships into range/arc of mine so that, when my turn to activate comes, I can shoot at his ships before moving away. Correct?

So I guess what I run into is this problem:

Say my opponent has first activation and has an ISD, a Glad, and a VSD. I have an AFmk2, CR90, and Neb (for the sake of argument). Opponent's got his ships all lined up straight, as do I.

1. Opponent's activation, he activations his Glad. Nothing is in range, so he moves it towards the middle of the table. My turn. Now what? If I move forward, I will be in range of his Glad's guns (if he activates his Glad first next turn). Do I just sit back? Do I try to maneuver to the sides, around the Glad, and avoid it?

2. For the example: let's say I move my AFmk2 forward and to the side of the Glad at speed 2. So that he's out of black range but I am in red range. Next turn he moves the Glad behind me into my back arc. I can get a couple shots, but probably is not my best solution. But unless I just keep running away he's going to keep chasing with the Glad.

That's the sort of scenario I'm trying to avoid/deal with. It's easy enough to 'dodge' ships...but eventually I have to be able to shoot at them too lol.

I think you've hit the chess match of the game. If you can lay out the problem here, we can start asking ourselves what kinds of things solve problems like this?

Let's look at the possible activation sequences in the example you describe:

Your opponent is first. You both have three ships. That means you get last activation. You've got red dice. Your ideal dream plan is for you both to start out of range. Then he activates and moves into your red range. You activate and take shots from red range and move and stay in red range. You get shots, he doesn't. The next round occurs, and he takes red dice shots and moves up further. This is a bit inexact because in the scenario you describe, he's got a lot more expensive stuff than you do, so you really cannot fit it head on, except for the Nebulon-B that really can take trade itself out effectively with a larger ship.

Some of this is hard to describe unless we're really looking at the table specifically during a match.

To build on what Vergilius said: don't be afraid to take fire. Just try to make your return fire more effective.

He shoots at red range at you, and moves up. You shoot at red+blue range back, and ideally stay at blue range. He shoots red&blue at you and moves up. You shoot black and ideally move out of his big arc.

That's the ideal situation. Won't always happen, but just give more than you take.

Several ships working in concert can really capitalize on this if you can get them to concentrate fire on one target.

Thank you again :)

I have a couple games next week...Ill try to write battle reports and hopefully have some more precise info for you guys :)

I've been having issues with getting good attacks with my MC30s as second player. My problem is that I was so afraid of the ISD's front arc, I flew past his flank, but couldn't get a black range shot next round before he moved away.

So my main question is: besides admonition, can a MC30 survive an ISD2's frontal arc shot at medium range without getting one-shotted? Because from what I experienced, I need to be in med range to become a threat after the ISD made his move, but if I'm already on the flank, the ISD can just fly away from black range.

I consider MC30 as second player one of the most interesting challenges in the game right now. I love the MC30, specifically the MC30T, but don't love huge bids, so I run into this a lot.

First, your specific question: it depends very much on upgrades. Assuming an ISD2...

An ISD2 with leading shots and XI7, I consider one of the hardest counters to the MC30. In that front arc, assuming he has the option of the follow-up ram, he only needs to push push out 7 damage after your evade; 6 with a crit might do it anyway, if the crit is Structural (almost 25% chance of pulling SD). That's not a high bar for an ISD2 with Leading Shots. If he didn't bring XI7, the outlook is much better: he has to push out 10/9+ram/8+SD+ram, which is quite a bit harder.

Mitigations you might bring for your MC30 are Admonition, Foresight, Lando, Mon Mothma, AP, and ECM. Admonition is fantastic in all cases, but is unlikely to save you on its own. Mon Mothma is very nice to target-remove a double or crit. Foresight+MM has great potential, but if he brought XI7 the effectiveness is neutered significantly (no double redirect). And let's face it: he brought XI7. Lando is probably your best single defense in this scenario: targeted rerolled reds are fickle. And on the ISD2, you reroll *everything* that's not a blank or acc (more complicated decision if he has no crits showing or something), then you selectively evade after that to dump that one double that came back. ECM is trash in this scenario: ISD2's should reroll for straight damage against MC30's, not for accuracies. AP will similarly only save you if he didn't bring XI7. Which, he did.

The best mitigation you can bring to this fight is Lando+title. Either title will let you stack a second round of two rerolls (or straight die elimination) on top of Lando, which stacks the odds heavily on your favor. This combo without MM puts you in the range of ~70% chance not to get one-shotted at medium range; MM ups that by another 10-15%. It's been awhile since I did this math, but it's close enough.

So the bottom line:

XI7+LS vs Lando+title+MM: worth the risk for a good return shot

XI7+LS vs Lando OR title+MM: worth the risk for a really killer shot

XI7+LS vs anything else: don't do it unless you have a plan to prevent the ISD's shot entirely (last+ first activation, that sort of thing)

LS vs any mitigation: likely to survive, 50/50 if you've taken little relevant damage (hull or facing shields)

LS vs no mitigation: still probably worth it, depending on the board state

No ISD upgrades vs any mitigation: cowboy up unless your luck is bad

I'm getting long-winded here, so if anything wasn't clear just ask. :)

I've been having issues with getting good attacks with my MC30s as second player. My problem is that I was so afraid of the ISD's front arc, I flew past his flank, but couldn't get a black range shot next round before he moved away.

As for this piece: this is just the same issue that every other ship has with going second, only on hard mode. The MC30 is very unforgiving of missed predictions, the ISD has a huge death zone that you have to avoid, and the ISD is pretty maneuverable in the hands of a skilled admiral.

All that said, you can do it. You need a combination of a few things to make it happen. Multiple existential threats to the ISD is a big one: 2+ MC30's can easily force an ISD into the danger zone. Ideally you will set this up with enough flexibility that whichever one he dodges can circle around for follow-up shots behind him in later turns. An MC30 makes a great Nope Zone to push an ISD into your dirty B-wing swarm. TRC90's can make a whole field of Nope right behind the MC30T, forcing the ISD to either slow down and eat blacks our speed up and eat reds.

The biggest thing to keep in mind is how you're going to show yourself down once you're engaged. MC30's kill and die by positioning, even more so than most other ships. Your nav commands are critical. Nav tokens are a huge boon too. Shrimp really want to close at high speed to take as few unanswered red shots as possible, so you're probably wanting to charge in at 3 or 4 (unless the other guy does the charging for you). This creates two issues: you don't turn on a dime, especially at speed 4; and you really want to stay close and in position on your target. An almost-dead ISD is worth nothing to you. This is where I preach that self-discipline is huge to successfully flying MC30's. Unless you have some **** good reason to close slowly or really have to re-vector fast, you have to bank that nav token on turn 1. You won't want to, especially if you're blasting out the gate at speed 4, and there are exceptions, but... just, seriously, do it.

Sorry I kind of sidetracked this into Ard's MC30 show. I'm done now. :)

I'm going to print out those two MC30 comments and pull them out every time I play an MC30

Ok, there are some things you should be doing to make your play easier at the start of every turn.

Look at your opponents ships, and answer these questions:

Where are his ships going to be at the end of the turn? (Which will have nav commands?)

What are they trying to achieve, are they targeting a particular ship of yours?

How can you move so that you have multiple ships focused on one of theirs next turn?

Once you have mastered that, and its by no means easy. Take it all the way back to the first deployment, and when they place a ship, ask yourself where that ship will be on turns 3, 4, 5 and 6.

Its like chess as Verg says. Constantly challenge yourself to work out your opponents moves. If they cannot surprise you they cannot beat you.

Bit behind the times on this post, but I thought I'd just emphasise how much Gink's advice on this helped my game. If it helps, I try to add an extra mental step into the planning step of each round; before I set my command dials, I look at his ships and try to answer the above questions, and then plan my commands around it. Sometimes it's more complicated than others, particularly with ships with 3 dials, but taking that moment to step back and work out what he's doing usually helps me to better respond.

If it helps to simplify the questions to make it a three-step process, look at each of your opponents' ships / balls of squadrons and ask yourself the following: 1) Where is it going?, 2) What is it doing?, and 3) How will I counter it?.

I don't always remember, but it's noticeable that when I do, I play much better, and when I don't, I usually end up out-manoeuvred or simply caught out.

Actually I was hoping for some suggestions in a thread like this :)

I havent played Armada for a year. Next month my FLGS is running a big CC event. I was hoping for some suggestions on a few things: if I should just start a new thread let me know :)

1. I hate spam lists. IE 4 Glads, 6 CR90s, a bajillion b wings and no other fighters...is it viable/possible to run a mixed fleet?

2. I love the concept of the Interdictor...but how on earth does one use them?

3. In the last tournament I played, I got absolutely destroyed by a guy running the same fleet as me (2 AFmk2, 1 MC30, 2 CR90, 3Awings 3Bwings). He just outflew me, and I realized I have a hard time wrapping my head around the shoot THEN move activation order. I have no idea how to set up for it. Ive played a lot of TT games, and most of them turn based...but they were always move THEN shoot. Can someone teach me what I should be doing? It kinda seems like this game is very focused on defensive tactics...how do you fly aggressively when you move AFTER shooting?

:)

Again, late with this post, but I thought I'd throw in my two penneth's worth on fleet design that kinda responds to the first two questions. If you're playing on a regular basis, you'll find that different people have different approaches to what they bring each week: some people will bring a different list each week, often being experimental and looking to have fun; other people will bring exactly the same list week in week out, with only the odd tweak, because they know how to play it and they enjoy doing so. Neither is right or wrong, but I personally find the first tiring and the second uninteresting.

So I try to go for a balance between the two. Every few weeks, I try to come up with a new list doing at least a relatively new thing. I bring it along, I throw it at my opponent, and I see how I feel about it. Unless I hate it, I then usually go home, reflect on how I played and tweak that list; it's normally pretty obvious what worked and what didn't, and I look to improve it for the next game. I then bring the edited list the following week and see how it goes the second time round. Normally by that stage you've got a feel for the fleet, and you can make a decision as to whether to further refine it or to scrap it. Once I have a list I like, I make sure to keep a copy of it, but I do try to move onto something new after two or three games. I then try the original list again periodically, just to remember how I used it and to test it against new ships etc.

I think if you get a balance of building anew and improving existing lists, you get a balance of both creative and developmental thinking that I find keeps me engaged and helps me get better.

I mention this, because, in response to your first two questions, I think the answer is that both can work, but it takes practice and development. The sheer variety of ships and squadrons that we have available now means that a huge range of different combinations will work: I too am not a huge fan of spam lists (largely because I find them boring and not exciting to look at!), and find that often the best fleets I've come up against have used a diverse range of ships for their different strengths. And with regards to the Interdictor, my go-to fleet for a game I want to be competitive in is a combination of an Interdictor, two Gladiators and a fighter-bomber wing, so I'm confident they can be used! I actually find the Interdictor a very versatile platform, but it takes a while to realise that it can't be relied upon to bring the heavy firepower. And the only way to work that out is through practice and refinement.

Hope that helps!

I've been having issues with getting good attacks with my MC30s as second player. My problem is that I was so afraid of the ISD's front arc, I flew past his flank, but couldn't get a black range shot next round before he moved away.

As for this piece: this is just the same issue that every other ship has with going second, only on hard mode. The MC30 is very unforgiving of missed predictions, the ISD has a huge death zone that you have to avoid, and the ISD is pretty maneuverable in the hands of a skilled admiral.

All that said, you can do it. You need a combination of a few things to make it happen. Multiple existential threats to the ISD is a big one: 2+ MC30's can easily force an ISD into the danger zone. Ideally you will set this up with enough flexibility that whichever one he dodges can circle around for follow-up shots behind him in later turns. An MC30 makes a great Nope Zone to push an ISD into your dirty B-wing swarm. TRC90's can make a whole field of Nope right behind the MC30T, forcing the ISD to either slow down and eat blacks our speed up and eat reds.

The biggest thing to keep in mind is how you're going to show yourself down once you're engaged. MC30's kill and die by positioning, even more so than most other ships. Your nav commands are critical. Nav tokens are a huge boon too. Shrimp really want to close at high speed to take as few unanswered red shots as possible, so you're probably wanting to charge in at 3 or 4 (unless the other guy does the charging for you). This creates two issues: you don't turn on a dime, especially at speed 4; and you really want to stay close and in position on your target. An almost-dead ISD is worth nothing to you. This is where I preach that self-discipline is huge to successfully flying MC30's. Unless you have some **** good reason to close slowly or really have to re-vector fast, you have to bank that nav token on turn 1. You won't want to, especially if you're blasting out the gate at speed 4, and there are exceptions, but... just, seriously, do it.

Sorry I kind of sidetracked this into Ard's MC30 show. I'm done now. :)

yeah, my opponent had the exact build you described (XI-7 + LS) and had all the tokens he needed because of Tarkin. When I got in close to get a shot at turn 2, he used his token to go speed 3 and flew away. I evaded his front arc, but only fired 4 blues and 4 reds at him (ackbar), so I ended up doing minimal damage (blanks). I went on the flank, but I really feel I should have flown right in front of him in order to force at least 1 shot (but he would have been more than happy to ram me). I'll try to post pictures of what happened, it might tell you how the match went and what I did wrong! But it definitely felt to me that I played too safe with the MC30s and should have gone for the front arc. Gunnery teams did not really help in my decision though.

edit: By the time my MC30s turned back in threat range, the match was over.

edit: I still won the match 8-3 thx to Ackbar MC80 wrecking everything in its way, but the MC30s did absolutely nothing xD

Edited by Sybreed

My general advice for any wargame:

At the beginning your turn, look at your opponent's force and decide what you would do in their place. Then, make sure your own actions don't leqve you vulnerable to those choices.

For Armada specifically (that hasn't been listed already):

Think through obstacle placement. If you have a brutal facepunch fleet like a loaded Avenger and Demolisher, you probably actually want the obstacles on your side of the table. That way you have time to clear them and line up on targets.

An ackbar list probably wants them strung out from left to right in the mid map. Trying to get your opponent to approach funky through the gaps so you can engage piecemeal.

Ships with large individual attacks are better off in an obstruction-heavy zone than sandpaper fleets. One die lost out of 8 in a single attack isnt a tragedy. The 3 CR90s returning obstructed fire lose 1 die each out of their 3. Their returning 9 dice became 6.

Look for what benefits your fleet design.

I know that this is a relatively sore topic with some, but I am really excited for some new combo interactions with the almost literal dozens of new squadrons we're about to get.

Little ones like Rudor and Decimators or Rudor and YV-666s or Rudor and Bossk (Basically just Rudor and X)

Hera with Wedge and Luke going at the end of the Squadron phase.

I was planning on pairing Hera with two Scurgg's to form an independent bomber wing that can threaten ships at b-wing levels without command (rogue) or Intel (grit)

so Ard or Ginkapo (or any MC30 expert), here are some pictures of the match:

Turn 1 after a few moves (well the MC80 and one Gozanti moved). Don't forget I'm 2nd player.

20161219_203441_zpsedpe2yhk.jpg

Turn 2:

The first MC30 moved in range to the ISD, but the ISD hasn't moved yet

20161219_205529_zpspd5r14r0.jpg

Beginning of Turn 4 I think:

20161219_211352_zpsqwsrq5qi.jpg

1 MC30 is in perfect position, but ISD will move first

Turn 5-6

20161219_220247_zpsq83dfr27.jpg

MC 30s are making a turn, but will arrive too late to do anything. MC80 took out Demo (by one-shotting it, thank you Ackbar/Defiance) and 1 gozanti plus a few bombers.

Side note: The flotilla had repair crews. It repaired 4 damage cards total on the MC 80... not bad!

Edited by Sybreed

I'm curious what the final result ended up being. If it was hiding somewhere in your post, I apologize for missing it.

My guess if you've got Intel Sweep tokens on the map. Which ship is the Intel Sweeper? And it doesn't look to me like any ship is particularly well positioned to pick up the tokens. That's one objective that if I take it, I always aim to pick up the points. There's an odd number of tokens, and second player ought to have positioning. The opponent either concedes a 7-4 minimally, or they are forced to come to your position. That by itself can be a difference-maker in whether you get double arcs.

The biggest thing I see is that you want more of a 1-2 punch with those MC30s. MC30s get 1 or maybe 2 good attacks off in a game. Its ok if those occur in a sequence. Its very difficult to get them off in the same turn, though it might be possible with that ISD if you've got one trailing and the ISD is forced to activate and come into black range of both of them.

I'd probably fly more head-on with it and just eat a shot, as Ard discussed above. You have to know exactly whether you can eat the shot or not. That's where his chart is useful. With an MC30 set-up like that, you are absolutely gunning to drop that ISD. Now, I've been running a one-MC30 list, and getting it set-up on a double-arc and then zooming off while other ships pummel that ISD is often enough. I'd think two double-arc shots in sequence really ought to drop it to the point that one good MC80 blast would finish it.

So basically, you can and should fly them more aggressively. For that matter, you can possibly look at putting them both in threat range, and if he activates and kills one, the other can open up on him. I'd personally rather go for the 10, which is threatened by this kind of play, but its perfectly doable to ensure you do get a double-arc drop on that ISD. From there, your Ackbar-Defiance finishes him off.

Does that help? I'm sure Gink and Ard will also add helpful suggestions.