Watercolor and the Imperial Star DURstroyer

By DUR, in Star Wars: Armada Painting and Modification

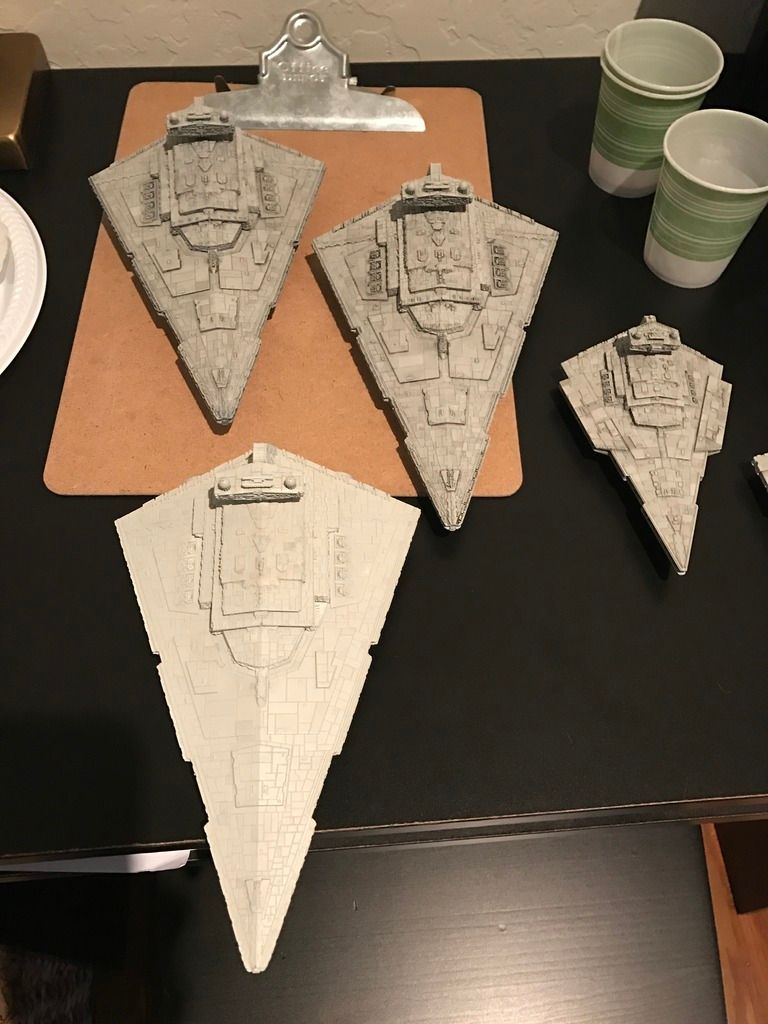
Thought I'd make a quick little tutorial for those who want to know how to do the whole watercolor grey look for Imp ships.

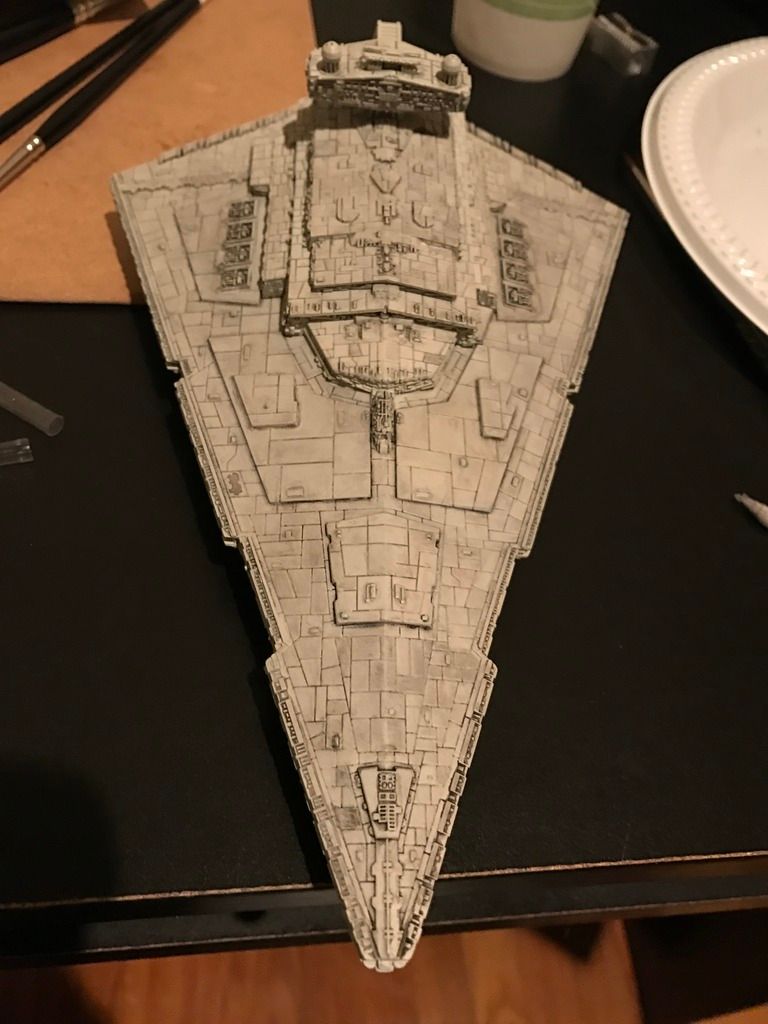
First, you start with an airbrushed grey: I like using Testor's Camouflage Grey, acrylic, shot through my airbrush. Note: I also preshade using white, black, and grey primer but this isn't that necessary if you master the watercolor modulating technique- more than anything else I was just seeing if I could do that as a shortcut.

001_zpsocpewt9k.jpg

Next step is to put in the major, bold lines for the big sections. I use a brush and ivory black watercolor for this: 002_zps8obqtz6v.jpg

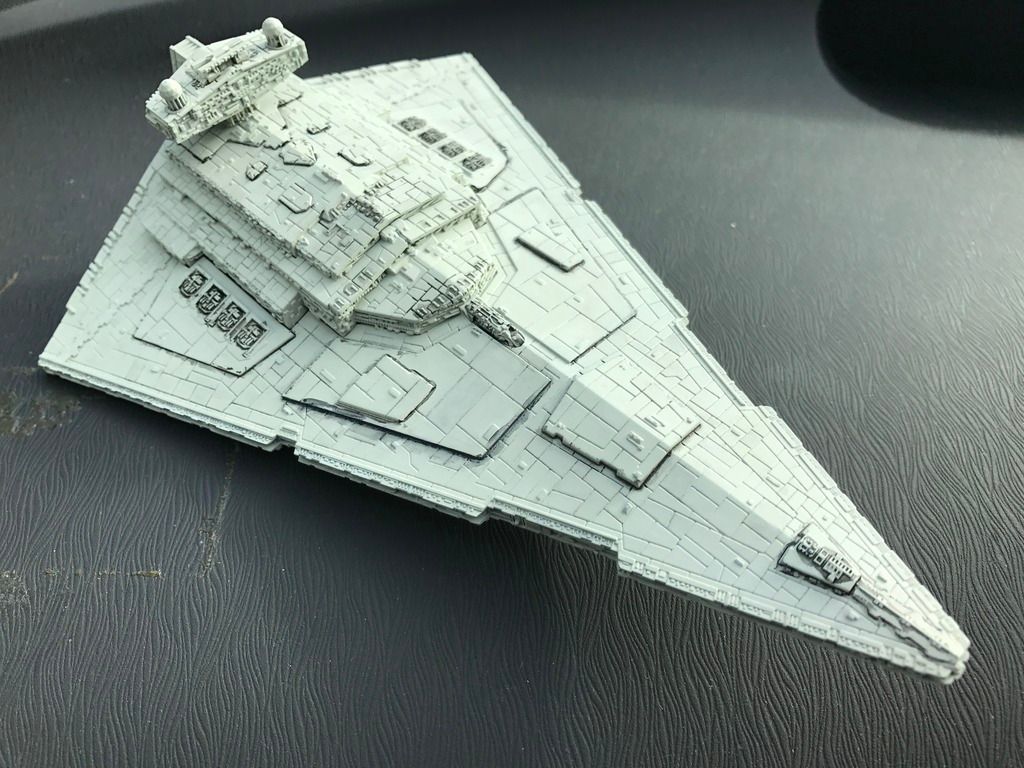
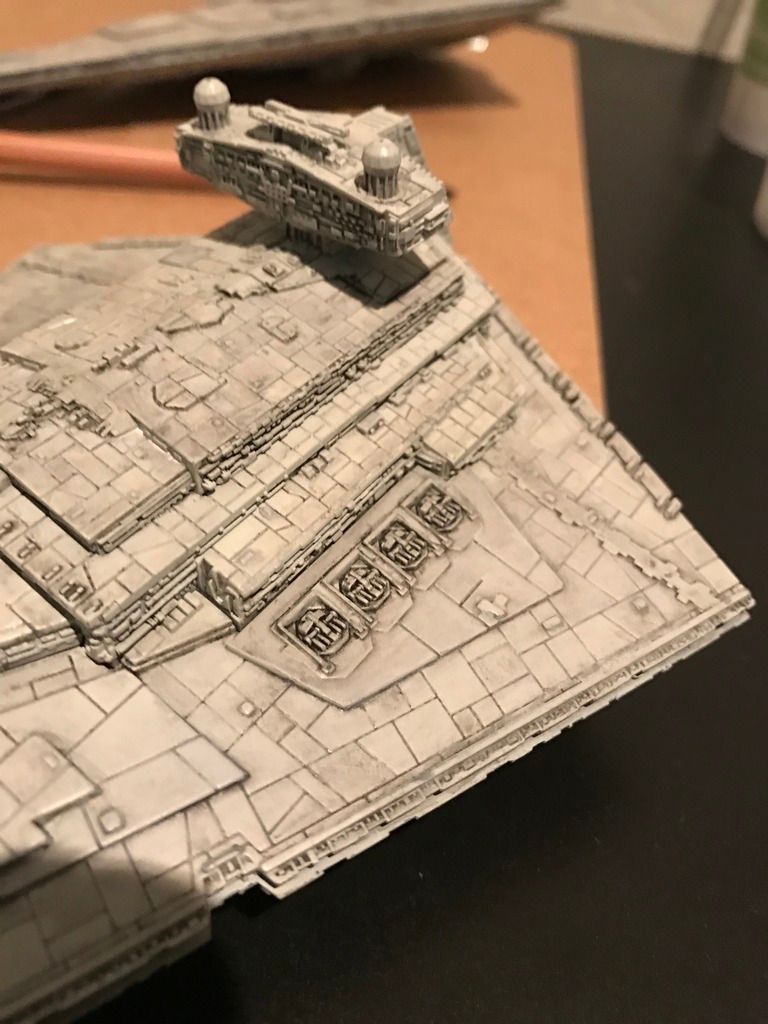
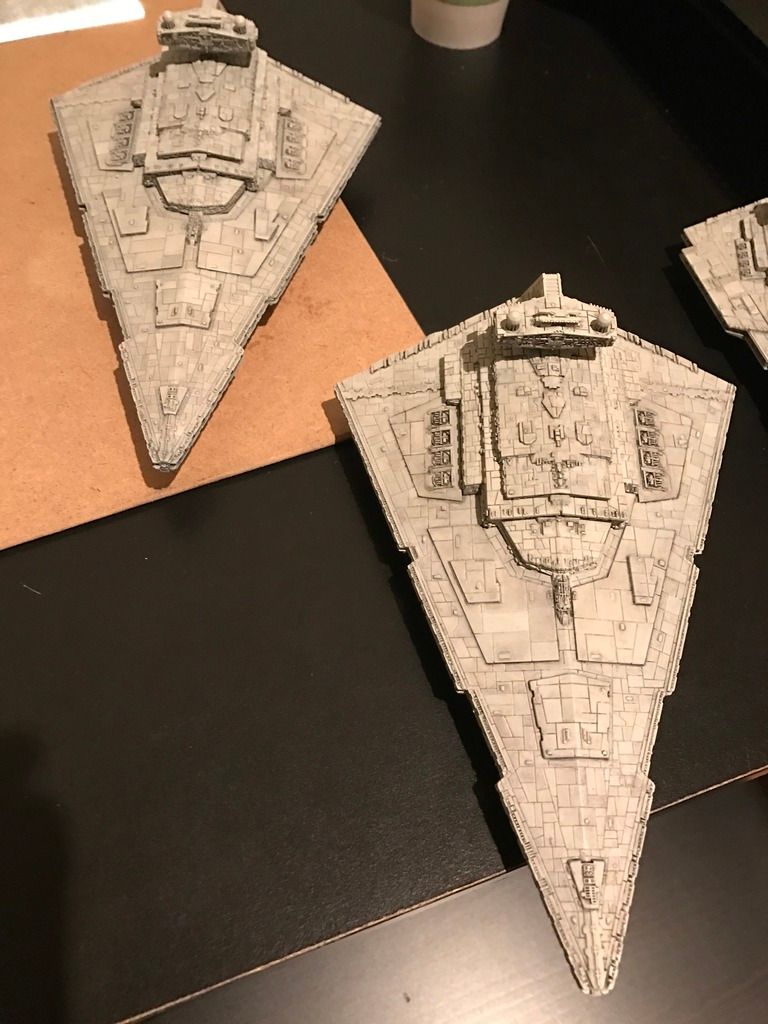
Then, I rub off the excess using my finger/and or a damp, less linty napkin. I then break out the watercolor pencils (brown and black) and start coloring some panels in:

004_zpsbil2h1qd.jpg

The bottom gets some love too!

006_zpsedhps0zq.jpg

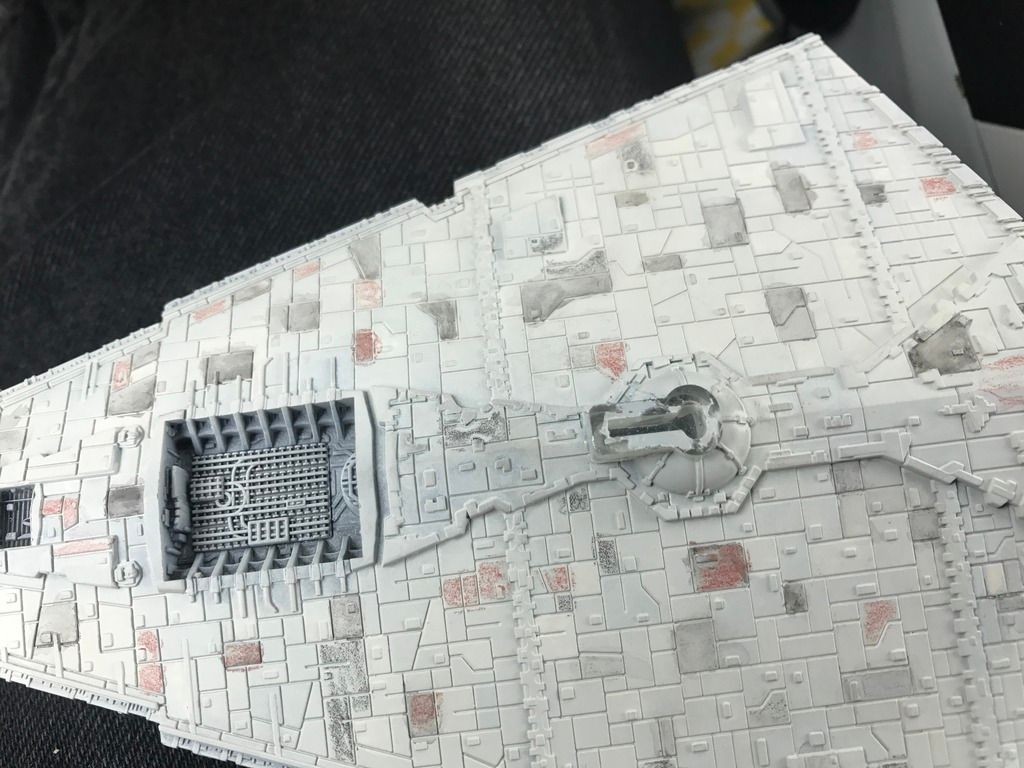
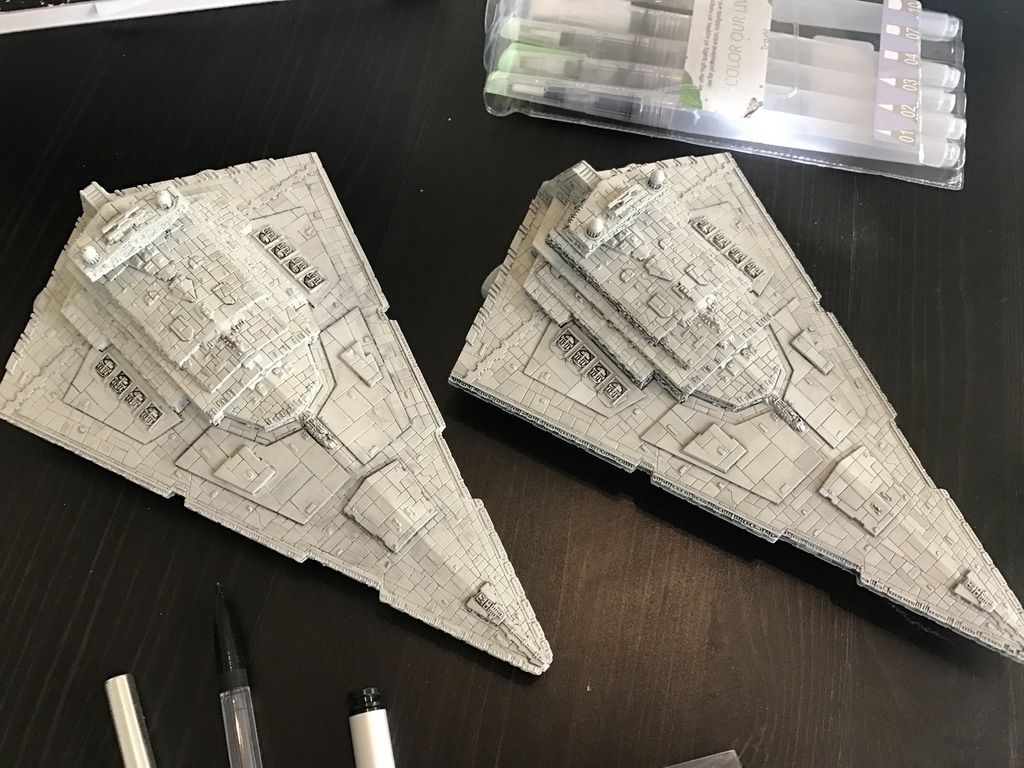
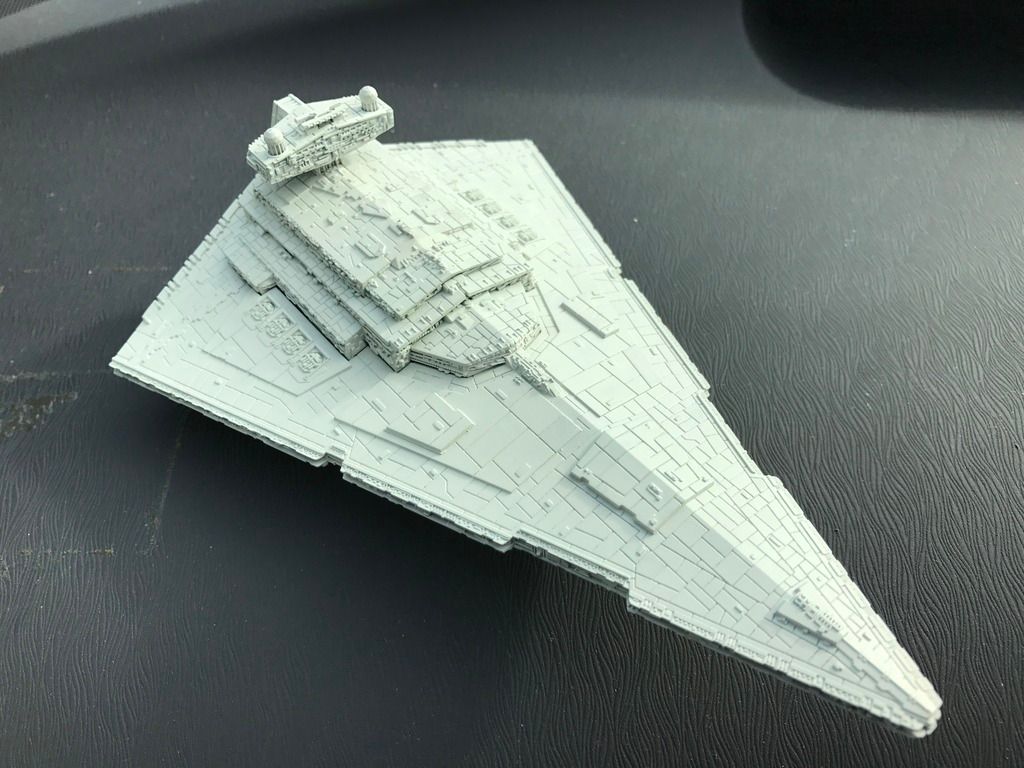
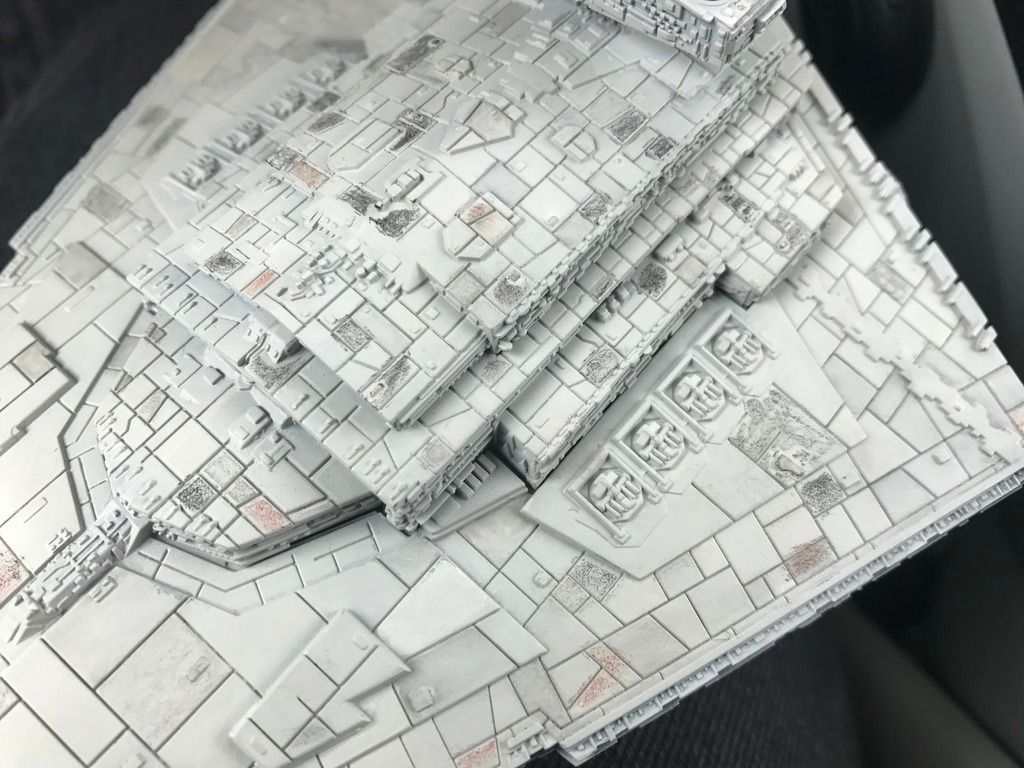
You can see in the pictures that I've also started doing the next step, which is smudging. I take a paintbrush and just barely get it damp- I load up on water and usually touch it to a piece of paper to get off excess water. Using this damp brush, I "paint" water over the pencil until the pencil look is gone. Sometimes, if I want a different level of opacity/intensity, I'll use my finger to rub off some of the dry pigment before hitting it with water.

Edited by DUR

After a combo of spongey q-tip, finger, and slightly damp brush to get out that pencil-y effect, your ISD should start looking something like below:

002_zpsami9iw4j.jpg

From this point on, it's just fine tuning. The next major step is take a brush with a good tip and relatively large reservoir and start tracing the panel lines with wetted water (I use oxgall + water). The goal here is to pull out the pigment that's seeped into the cracks: normally, you'd actually want this to happen with a model but FFG's panel lines are way, way too wide/deep. I clean out my brush (Raphael 8404 size 1 in my case), dip in wet water, paint this water over a line or two, then dab the brush on a napkin or paper towel on hand to remove the water. I wash out the brush, dry on napkin again, and then suck out the liquid I just painted into the panel line. I can then take this and dump it on a panel to darken it, or just swish it out in my water cup to clean up. This not only decontrasts the panel line, it also helps add definition between the shades of the panels themselves.

If you need further panel line decontrast, I use china white watercolor turned into a very light wash that I then dump into the panel lines. i started doing this on the aft port side of this ISD. The following picture is a close up.

003_zpsraifwu9s.jpg

After this, it's just cleanup, which will be detailed at a later date.

Edited by DUR

I hate edge highlighting. I mean, I love how it looks- there's a certain scale effect only replicable by these kinds of highlights, but I hate doing them. So, I took a lazy approach- I bought a nice white watercolor pencil and I use that on the edges- it keeps the line super tight and fine. Also, if it's too strongly contrasted, just rub it down a little with your finger- using a high quality pencil (such as Derwent) will drastically help in keeping that line uniformly translucent/fadeable. Below is probably just 20 minutes of work:

IMG_0561_zpslqngwcvq.jpg

I also like to examine the destroyer under multiple lighting conditions and adjust as appropriate. One thing to keep in mind, the panel lines in the raised "castle" section of the ISD really ruin the look- because of the size of these lines relative to the height difference, it creates an optical illusion that makes the ISD look kind of fractured, like the Thing from fantastic four. To counteract this, I strongly recommend extra-decontrasting for these areas- the china white watercolor wash will do wonders here. Revise revise revise, they say, is the secret to writing: the same applies for watercolor weathering! The beauty of this method is its so easy to correct/adjust. I like to use foam applicators that are damp with water if I ever need to reset a panel: just mask it off using post it notes to prevent the cleaning from intruding on panels you like!

006_zpseg4okgz6.jpg

You can see the ISD on the right's starboard wing looking a little ill-defined- I may have decontrasted the panels a tad too much. I'll probably add back some pigment on a couple panels and remove some of my white wash so that the lines just become apparent. Of course, if you like that look, just add more whitewash to the rest of the ship! Be sure to leave the contrast in places where the raised blocks of the ship are really meant to pop.

002_zpsz25mfa5l.jpg

You can see in the above photo where the white wash or the black pigment pooled too much. I'll go back with a spongy tip applicator to clean those up. Another tip: the behavior of watercolor is very different depending on how long it's been "drying." You can use this to your advantage- if I want to remove more pigment, I'll keep the area moist for a while before hitting it with my brush to suck stuff out. If I want to leave pigment in the recesses for a wash, I'll paint it sloppy, let it dry, then use a damp sponge in quick motions over the top- the watercolor takes time to loosen up, so I'll only pull off the top layers that are getting moistened first.

I just need to finish the edge highlights on the ship on the right and clean up the guns with a damp sponge and I'll call this one "good enough."

Hope this helps someone out there!

Edited by DUR

DANKE SCHÖN!!!!

Thanks for the tutorial! I got some pencils the other day and gave this a go and I don't think I did it correctly. Now, I see I was likely using too much water on the brush.

Updated the second step!

I wish I had more time to paint, but thankfully this type of weathering/painting lends itself to spurts: I'll try to work on a few panels at a time when I have a spare 5-10 minutes and just work my way around the entire ship.

Here's a "halfway" comparison shot I took on a cloudy day when I finally got some decent lighting- the finished ship is on the right, in progress on the left, just in case you can't tell. It really is a matter of being OCD and finely tuning all the details.

071_zpsavwqxdvc.jpg

Tutorial is actually complete! Whoop!

005_zpscck9hroo.jpg

Two down, last one to go! Yes, that is the exact same basecoat color as all the other ships in the picture: the weathering is what brings down the brightness and gives it that grey, dirty, starwarsy look. The guys on the RPF forum that have talked to the ILM guys said as much: almost everything in ANH was nearly white, but its the weathering that greyed everything down.

Nice tutorial for a method of painting I've not seen used on miniatures.