[CR-90 campaign] The Point of No Return

By heychadwick, in X-Wing

OK....after thinking about it, here's what I like for Imperials:
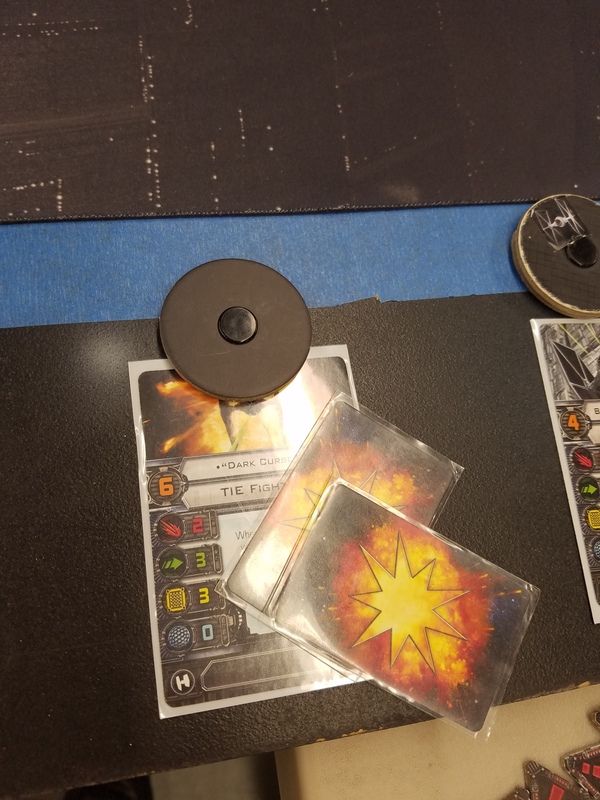
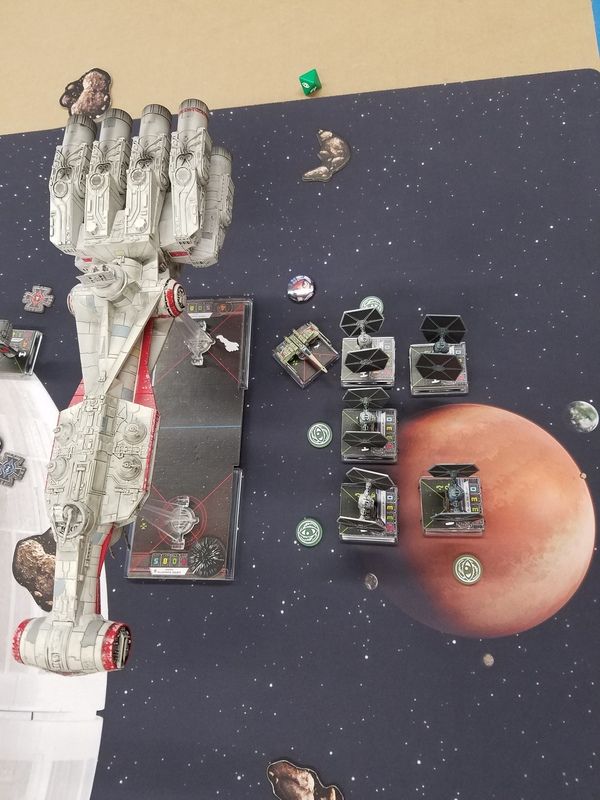
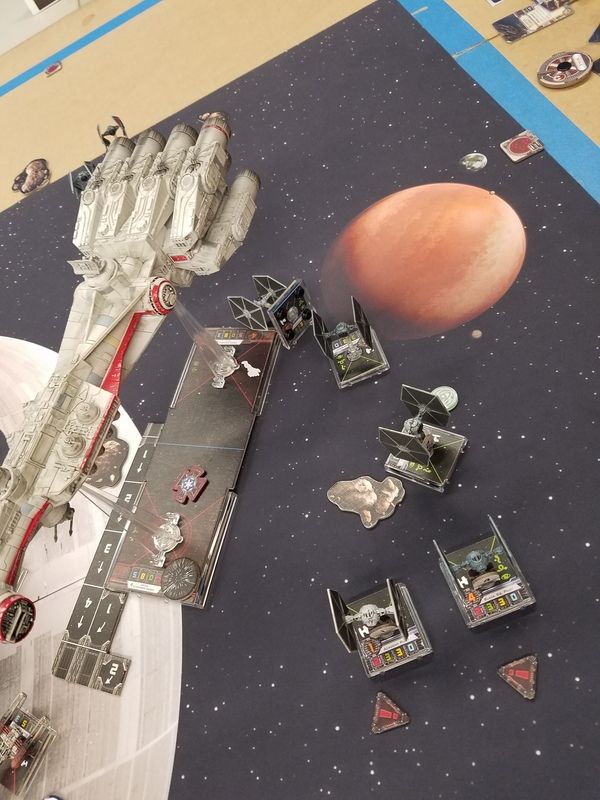
Storm Squadron Pilot (23)
Cluster Missiles (4)
Accuracy Corrector (0)
Guidance Chips (0)
TIE/x1 (0)
Storm Squadron Pilot (23)
Cluster Missiles (4)
Accuracy Corrector (0)
Guidance Chips (0)
TIE/x1 (0)
"Chaser" (14)
"Night Beast" (15)
"Dark Curse" (16)
Total: 99
This list has two ships that I love, the Tie Advanced and the Tie Fighter - both Wave 1 ships. I don't feel like I've gotten my fill of Tie Adv. after the fix. I first just threw in the generics with no missiles and figured that they can save their actions for defense and just fire away at the satellites. Their high Agility combined with the Shields should help them get to the target. I had points left over and threw in the Cluster Missiles, because....why not! Threw on GC for free.
As for the Tie Fighters, they get some action economy with Chaser and Night Beast. I figure they can do an Evade or something to help keep them alive. Dark Curse is in a class all his own, so he stays alive. I figure having some ships with better chances of living would be good.
Need to think of some Rebel lists...

Thought about putting anything on the Black squadron pilots? I think you can give them EPTs. Adaptability, if nothing else, is a good buy.

OK....so we ran this last week. I should go ahead and post it up. Here is the list that I ran:

Storm Squadron Pilot (23)
Cluster Missiles (4)
Accuracy Corrector (0)
Guidance Chips (0)
TIE/x1 (0)
Storm Squadron Pilot (23)
Cluster Missiles (4)
Accuracy Corrector (0)
Guidance Chips (0)
TIE/x1 (0)
"Chaser" (14)
"Night Beast" (15)
"Dark Curse" (16)
Total: 99
I didn't take Adaptability on the Black Squadron Pilots as it would make things unfair.
J-bot took:
Wedge
Blue Squadron B-wing w/ Flechette Cannon
Dagger Squadron B-wing w/ Ion Torpedo
Green Squadron Pilot w/ Cluster Missiles, Auto Thrusters, and VI
Setup:
20161110_183119_zpsaxudlhy2.jpg
I rushed forward 5 Straight for the first turn. No shots. I then moved most of my guys the same speed, but there was one or two 3 Banks towards specific satellites. My evade dice were pretty crap at this point. I couldn't dodge much of anything. Maarek Stele was hit by the Ion Torpedo, but only took a single hit. Single Turbo Lasers and the other B-wing did manage to knock him down to 2 Hull. The B-wing even fired the Flechette Cannon and caused him to be stressed. So, moving forward 1 and no actions.
I did manage to fire at the satellite near him and blew it up with the missiles from Maarek Stele. That caused a critical on the rear. It was....Structural Collapse! Two hits on the front section. So...feedback from the satellite caused structural damage to the CR90 and blew up 2 hull in the front!?!?!?
20161110_193127_zpse21yws4z.jpg
The guys in the middle went up, but the CR90 then used reinforce on the satellite in the middle. I got my Cluster Missiles off, but rolled so bad on both, I had to use Accuracy Corrector. The reinforce token blocked 1. I think he managed to roll at least 1 Evade. I had other shots from the Tie Fighters, but couldn't hit. I also had all the enemy fire at Dark Curse at long range. I rolled terrible and he was down to 2 Hull.
20161110_190543_zpscikpxkax.jpg
My guys on the far side of the board kept moving towards the far satellite unmolested. It was one Storm Squadron and 2 Tie Fighters that should be enough. At this point, I knew I needed to split my fire as much as possible or that Reinforce action was going to ruin the game for me.
Closer to me, the B-wing swung towards the middle, which surprised me. I was ionized and moving forward, it would've been perfect to get in R1 and just fire away. I guess he figured he would concentrate on the middle and blast me. So, this meant there was a giant bumpage in the middle. Maarek and the Tie Fighters just fired at the CR90 as I didn't have anything else to shoot at. I hurt it. The CR90 answered back by destroying Maarek Stele.
20161110_193123_zpsuggwhep4.jpg
The middle was heavy with bumpage. Lots of firing back and forth. Dark Curse died. A Storm Squadron died. I could've lite up Wedge at R1 with 2 ships, but spent one attack at the CR90. One guy did fire at Wedge and did knock him into hull with one shot. I probably could've easily killed him, but did fire at the CR90.
20161110_190555_zps0qzhf5fc.jpg
I spend a turn destroying the rear section of the CR90. My far 3 guys hurt the far satellite, but didn't kill it as he put on a Reinforce token. I think I had another Tie Fighter die in the middle.
20161110_201223_zpsy31prnxo.jpg
After this, it was all down hill for the Rebels. He couldn't do a Reinforce action, so it was just a matter of getting shots. As for the far guys, one Tie Adv. did a K-turn to finish off the last hull on that guy. The rest of them moved towards the satellite just past the front of the CR90. The rest of the guys close to me zipped towards the far rear of the ship. It was hard for the Rebels to turn around and get much of a shot at this point. I destroyed the farthest satellite and the one that was closest to me and closest to the Rebel side of board. There was one left that was near the front of the CR90. I rolled bad and didn't kill it that turn. It was easy the next turn to just turn around and destroy it. The Rebels didn't even get to kill another Satellite.
We talk about this mission in this episode:

So...I am going to be playing this mission tonight and I need to have some thoughts on it. I should've done this a lot sooner!

Mission T3b: "Punch It!"

With the CR90's hyperdrive badly damaged, the crew scrambles to make repairs. A group of Rebel fighters arrive, announcing that they have intercepted an Imperial transmission that contains information vital to the survival of the Rebellion. Suddenly, an Imperial ambush springs into action! To protect this information, the Rebels beam the transmission to the CR90 - just as the Imperials engage!"

Mission Setup

Rebel: CR90, 80 squad points; the Rebel player cannot field more than one unique ship, any large ships or unique Upgrade cards.

Imperial: Colonel Jendon with ST-321 and Flight Instructor, "Backstabber", Turr Phennir with Veteran Instincts; 150 squad points. The Imperial player cannot field any other unique Ship or Upgrade cards.
When the Imperial player builds his squad, he must build three groups. Each group must contain one of the unique ships, and each group has an allotment of 50 squad points for others ships and upgrades.
The play area is 3' by 4'.
The Imperial player places six asteroids in the play area. He must place each asteroid beyond Range 2 of either of the neutral edges and of each other asteroid. Then, the Imperial player places one of his groups within Range 1-2 of the Imperial edge.
Then, the Rebel player places the CR90 and all of his other ships within Range 3-5 of the Rebel edge; he must place the CR90 parallel to the neutral edges and beyond Range 2 of the neutral edges. Then, he chooses either the fore or aft section and places the hyperdrive Mission card near the chosen section's Ship card. Then, he places one hyperdrive token on the hyperdrive card.
Then, the Imperial player places two scope tokens in the play area. He must place one scope token along the Rebel edge and one scope token along one of the neutral edges. He must place each scope token flat against its edge of the play area.
The Imperial player has initiative.
Special Rules
  • Incoming Waves: At the end of Round 2, the Imperial player chooses one of the scope tokens. Then, he chooses one of his remaining groups and places its ships at Range 1 of the chosen scope token. Then he removes that scope token. At the end of Round 4, the Imperial player places the ships from his remaining group at Range 1 of the remaining scope token. Then, he removes the final scope token.
  • Hyperdrive:The hyperdrive card has an energy limit of "5". During the "Allocate Energy" step, the Rebel player may allocate up to four energy tokens from the aft section of the CR90 to the hyperdrive card. At the start of the End phase, the Rebel player takes one attack die for each energy token and for each hyperdrive token on the hyperdrive card, and he rolls those attack dice. For every two Hit results rolled, he places one hyperdrive token on the hyperdrive card. For every two Focus results rolled, he removes one energy token from the hyperdrive card.
  • Unstable Engines: When the CR90 is dealt a faceup Damage card, the Rebel player removes one energy token from the hyperdrive card.

Mission Objectives

Rebel Victory: The hyperdrive card has six hyperdrive tokens. Alternatively, destroy all Imperial ships.
Imperial Victory: Cripple the CR90 section whose Ship card has the hyperdrive card near it.

So....the first question....can you spend squad points to give upgrades to the named pilots? I wouldn't think so. The last mission stated that you could spend squad points to give the 4 Black Squad Pilots an EPT. If it doesn't say you can give further upgrades to ships, then I don't think you can. That makes it...interesting.

What do you guys think?

Seems really hard for the rebels. Does the 80 squad points include upgrades for the CR-90?

I was thinking Y wings with bombs to lay a minefield between the imperials and the CR-90. But with 80 points you don't get much.

3 rookie X wings and a Tala?

Yeah, the Rebels always seem to have a really bad time in all these missions. The CR-90 and all it's upgrades don't count in the 80 points you get. I have to admit it's pretty hard to think about what the Rebels would want to bring. You want cheap, but you need stuff that can do damage. Maybe a Z-95 missile swarm? Four Ordnance Z-95's might be OK. I'm not sure, though, as the Imperials have so many ships. I don't think it would be a good idea, unless they were Assault Missiles.

X-wings wouldn't be a bad idea, but you can't get 4 of them for 80 points. Three X-wings and then 1 Z-95?

As for the Imperials, I need to come up with a good idea. I will probably go thematic instead of utterly nasty.

Lambda Group = Bunch of Tie Fighters? They would work well with the Lambda. Maybe some V1's? The titles give them some defense mixed with their offense and the Lambda will be hard to kill.

Tie Group = definitely want to go with some Tie Fighters here. Probably just some Black Squadron w/ Crackshot to get through Reinforce. Or some mix up to 50. Maybe try to get them as a flanker?

Turr Phennir Group = Hard to not want to go with Interceptors. Could always do some generic ones with Auto Thrusters to help stay alive. Don't require PTL. Kind of want to do it without PTL as it's overplayed. I'm also wondering if maybe this group would be good as some Tie Bombers? Need to blast the ship before it gets away. Tie Bombers at the end might come in and push it over the edge. Smash that section that needs it. It might be too much, though.

You can't give the unique pilots upgrades, no.

The problem with trying to lay a minefield is that the Imperials come from 3 directions, and as you say you're at a severe point deficit.

This scenario is actually a little tougher for the imperials than you might expect. If the rebels put the hyperdrive card on the front section, they can turn away from the side and rear attack groups and make it hard for the imperials to line up their shots. Biggs is key to prolonging the CR90's survival. If you hold out long enough and keep the imperials from getting enough shots on the front section, this becomes a close game from what I've seen in testing so far.

So my analysis so far is that this is easy to screw up as the Imperials. Make sure you are ready to attack from all angles. If you can't hit the front section, burn down the rear so that you can deny reinforce actions on the front, and make sure you angle for a good attack on the front.

As the Rebels, put the hyperdrive on the front section, and deny shots as long as possible to buy time for your hyperdrive fix. Max out the hyperdrive's energy as soon as possible. Use biggs to give the CR90 a few more turns.

As for the Imperials, I need to come up with a good idea. I will probably go thematic instead of utterly nasty.

This would definitely have my support.

As the Rebels, put the hyperdrive on the front section, and deny shots as long as possible to buy time for your hyperdrive fix. Max out the hyperdrive's energy as soon as possible. Use biggs to give the CR90 a few more turns.

What would you consider to be a good list to use for Rebels? J-bot might just take any suggestion.

Hmm....thinking of what Phil said about the challenge...and the idea of Biggs, I'm tempted by this list:

SQUAD 1

Colonel Jendon (26)
Flight Instructor (4)
Baron of the Empire (19)
Crack Shot (1)
Concussion Missiles (4)
Guidance Chips (0)
TIE/v1 (1)
Baron of the Empire (19)
Crack Shot (1)
Concussion Missiles (4)
Guidance Chips (0)
TIE/v1 (1)
Total: 80
SQUAD 2
"Backstabber" (16)
Black Squadron Pilot (14)
Academy Pilot (12)
Academy Pilot (12)
Academy Pilot (12)
Total: 66
SQUAD 3
Turr Phennir (25)
Veteran Instincts (1)
Royal Guard Pilot (22)
Push the Limit (3)
Royal Guard Pilot (22)
Push the Limit (3)
Total: 76
Jendon will work with the V1's to use their missiles and to give them a Focus. The V1's will have a TL and Evade (hopefully) and then get a Focus, too. Probably use the ordnance to blast Biggs to pieces as soon as possible.
Backstabber will throw out more ships to use as the Imperials will need bodies on the ground.
With the last squad, I just kind of liked the idea of some Tie Interceptors. I don't usually use them. With 50 pts, it's a bit hard to really do more than what I did. I couldn't do PTL and Auto Thrusters. I figured it was better to do PTL on them. These guys will come in late and try to do some damage to the ship. It's either that or to load out two Tie Bombers. I guess an alternate would be:
Turr Phennir (25)
Veteran Instincts (1)
Gamma Squadron Pilot (18)
Plasma Torpedoes (3)
Extra Munitions (2)
Seismic Charges (2)
Long-Range Scanners (0)
Gamma Squadron Pilot (18)
Extra Munitions (2)
Homing Missiles (5)
Guidance Chips (0)
Total: 76

My standard answer to everything... Prototype with proton rockets and guidance chip. Okay, you won't beat the hoarde but you can get to the Imperials fast and maybe cause some havoc and buy time for the corvette.

Maybe.

I don't think 80 points can slow down the Imperials long.

I played this last week with the above list (not the optional at the bottom). If you want to hear the podcast episode with this (complete with dramatic reading of background) go here:

http://shuttletydirium.podbean.com/e/episode-32-1480992848/

J-boat happened to take something like this:

Biggs Darklighter (25)
R4-D6 (1)
Integrated Astromech (0)
Gray Squadron Pilot (20)
Twin Laser Turret (6)
Gold Squadron Pilot (18)
Blaster Turret (4)
Maybe got the Astromech wrong?
NOTICE: We did play the mission wrong. We thought once you convert the energy on the hyperdrive card, we had to remove all energy. We didn't know they stayed. So....that makes a significant difference.
I placed the asteroids and waited for him to place CR90. Then, I put one spawn point near the side board that the CR90 was closest to.
V1's with Jendon went first to try to blast the front of the CR90. He put target on front of CR90.
20161201_180824_zpslw1zdaat.jpg
On Turn 2, we moved in range of shooting. Both V1's had TL's. They opened fire and did max hits on the CR90. Crack Shot ignored the Reinforce. So, after one round of shooting I removed all shields and did 2 hull damage. The shuttle removed a bunch of shields.
20161201_182708_zpsawqozy6l.jpg
Tie Fighters came in right on target. I had them in formation and ready to fire away!
20161201_183210_zpsubwynise.jpg
The Tie Fighters rolled forward as slow as possible, but even that was close. They all grabbed a Focus. Biggs banked towards the Tie Fighters and bumped. CR-90 replenished Shields. Everyone opened fire and did a good amount of damage. Shields were taken down on the rear of the CR-90. Biggs lost all Shields and one hull due to multiple shots. Shield hits on the front of CR-90. On the other side, I think I hit the rear CR-90 some more, but not much. Biggs did 2 hull points on one Tie Fighter. Oh, Biggs got a crit where if he bumped, he took damage.
20161201_184031_zpsds1v42qd.jpg
The other side had one V1 who had done a K-turn last round, and who was also hit by the Ion Turret. I had forgotten about that when I picked dials. I planned for one V1 to move forward and cause the 2nd to bump it, but stay off the asteroid. I was fine with this. Well, I only got to move 1 forward and didn't clear stress as I realized I was Ionized. Then, the other guy did his full move and ended up on an asteroid! More bumpage with the Lambda.
20161201_185843_zpsl1adak7u.jpg
He then got Ionized and had to run 1 forward the next turn.
20161201_185848_zps0holfm8j.jpg
My Tie Fighters were short of maneuvers as I was going to ram the CR-90. So, we just did a sharp turn and opened fire at what they could see. With this I took out the shields and did more hits on the CR-90. Biggs did a K-turn and had shots. He managed to take out a Tie Fighter with 1 hit and 1 crit (direct hit!). I did do one more hit on Biggs. The rear of the CR-90 was hurt, as well.
20161201_185900_zpsiqhng3xg.jpg
I was about to run into an asteroid and worried that the CR-90 was going to turn, so I did some K-turns and banks away and such. Biggs moved and bumped, so he was destroyed. The CR-90 turned and smashed one Tie Fighter.
20161201_191014_zpsxvadcpus.jpg
Tie Interceptors came on board at full speed and Boosted. They got in range of the rear of the CR-90 and opened fire.
20161201_191442_zpszw9zgom4.jpg
It was unmodified, but I got enough hits through. The last hit to destroy the rear of the ship was a CRITICAL HIT! The crit was Structural Collapse, which causes 2 damage to the front of the ship. So....the rear was destroyed and did the last bits of damage to the front of the ship! The front was destroyed now. Game over.
20161201_191451_zpsijzanzce.jpg
It was really rough on the Rebels.

Time to finish this! I think J-bot won one of them. So, he gets at least one free upgrade for the CR-90. I'm sure he'll take a modification. I would.

Mission T4: Minefield

Having joined forces with the Alliance, the CR90 must navigate an Imperial mining operation to deliver the transmissions and Tibanna gas to the Rebel base.

Mission Setup

Rebel: CR90, 100 squad points; the Rebel player may equip the CR90 with one free upgrade for each mission he won

Imperial: 240 squad points; when the Imperial player builds his squad, he must build four groups of ships. Each group has an allotment of 50-70 squad points for ships and upgrades.
The play area is 3' by 6'.
The Imperial player places six asteroids in the Imperial half of the play area. He must place each asteroid beyond Range 1 of each edge and beyond Range 1 of each other asteroid.
Then, the Imperial player gathers all of the dud charge tokens and two active charge tokens, plus one additional active charge token for each mission he won during the campaign. The Imperial player chooses one of these charge tokens and places it facedown on one asteroid; he continues assigning one charge token facedown to each asteroid until all asteroids have a single charge token.
Then, he places six scope tokens in the play area. Each scope token must be flat along a neutral edge and beyond Range 3 of each other scope token.
Then, the Rebel player removes one scope token from the play area for each mission he won during the campaign. Then, he places the CR90 within Range 3-5 of the Rebel edge and beyond Range 2 of both neutral edges. Then he places all of his remaining ships within Range 1-5 of the Rebel edge.
Then, the Imperial player chooses the group of Imperial ships that costs the fewest squad points and places those ships at Range 1 of any scope token.
The player who won the most missions has initiative.
Special Rules
  • Explosive Charges: At the start of the End phase, the Imperial player may choose and reveal one active charge token. For each ship at Range 1 of that token's asteroid, he rolls three attack dice. That ship suffers all damage (Hit) and critical damage (Critical Hit) rolled. Then, the Imperial player removes the chosen charge token and its asteroid.
  • Probing the Field: If a small or large Rebel ship overlaps an asteroid, reveal and remove the charge token assigned to it from the play area. If it is a dud charge token, there is no effect. If it is an active charge token, the asteroid is also removed and the Imperial player rolls three attack dice. The overlapping ship suffers all damage (Hit) and critical damage (Critical Hit) rolled.
  • Blockade: At the start of the End phase of Rounds 1, 3, and 5, the Imperial player takes the unplaced group that costs the fewest squad points and places its ships at Range 1 of any scope token. Then he removes that scope token from the play area. If there are no scope tokens remaining when a group must be placed, the Imperial player places the group at Range 1 of the Imperial edge.

Mission Objectives

Rebel Victory: The CR90 flees off the Imperial edge of the play area.
Imperial Victory: Destroy the CR90.

As the Imperial, I'll have 2 Squads to put out at the beginning. I'm thinking that one squad will probably be Tie Fighters to help be a lot of different targets for my opponent to fire on. I can engage the CR-90 or escorts as I want. I figure the Rebels might go with Ordnance Z-95's or something like that. My second squad can either be more Tie Fighters or maybe some Tie Interceptors. I'm looking at either 4 Tie Fighters or 3 Interceptors per squad.

I want one squad to be 2 Tie Bombers with ordnance. I figure maybe they come in last and are a last ditch effort to blast the heck out of things.

That leaves squad 3 as the thing to really think about. I am tempted to go with more Tie Interceptors, but wonder if maybe a Tie Defender with /D title might not be a bad idea? I could get one and an Academy.

how would Seismic Torps work (from a rebel perspective) against the Asteroids with the charge tokens on them?

obviously this limits the amount of damage ordnance the rebel gets but then can take out a massive risk of "will it kill my entire squad" or would you leave the charge token in play whilst removing the roid its on? (thematically it makes no sense but reasons!!)

Heychadwick, just go with the highest PS, Generic Phantoms, you know you want too!!

Edited by taulover55

Oh, Seismic Torpedoes would be really good! The only issue is you have to have a craft that fires Torpedoes (as opposed to cheap Z-95 Missiles). That would be really interesting. I would say that the bombs also blow up for anyone in range. Maybe just one or two Torpedo ships? You might not need many to clear a path.

As for me using Tie Phantoms. I have an answer for you, but it's cloaked (if you use the white background).

Hell $@#&ing NO !!!!!!!!!!!!!!

Edited by heychadwick

Oh, Seismic Torpedoes would be really good! The only issue is you have to have a craft that fires Torpedoes (as opposed to cheap Z-95 Missiles). That would be really interesting. I would say that the bombs also blow up for anyone in range. Maybe just one or two Torpedo ships? You might not need many to clear a path.

As for me using Tie Phantoms. I have an answer for you, but it's cloaked (if you use the white background).

Hell $@#&ing NO !!!!!!!!!!!!!!

if i was J bot i'd head into it with at least one of these bad boys

Gold Squadron Pilot Y-Wing
Targeting Astromech/R2 Astromech (2)
Seismic Torpedo (2)
Flechette Torpedoes/Extra Munitions (2)
Twin Laser Turret (6)

Maybe two depending on how i was feeling. TLT gives the Consistent damage and R2 sorts out stress by giving more greens, or Targeting astro still gives you a t/l if needed.

Failing that i'd go all Warden squad on you but i know the thematic side of it would suffer then!

As for imperials, the Tie swarm is always a favorite, but i also love the Tie D with Tractor beam just for giggles.

Edited by taulover55

I'd go with Ion Cannon on the Defender for it's use on the CR-90. The Tractor Beam wouldn't do anything for that.

Personally, I'd go Targeting Astromech for the free TL, even if you bump. I'll point him towards this thread. He's seeing Rogue One now.

I forgot about ion and energy denial/drain

I don't play epic stuff much, I have seen the cr90 for £60 and am tempted with it even if it just sits looking pretty on my desk

Epic is fun. I'd recommend it. Just make the changes we recommend for the missions.

How many wins are you going to assume for the Rebels? I'm going with 1 rebel win (mission 1) and 2 Imperial wins (missions 2+3)

Rebember, you get free upgrades on the CR90 if you won missions. A big help!

Edited by Babaganoosh

We covered this in the podcast and I haven't had time over the holidays to do a type up. I can just show the results, at least.

Rebels were Biggs, Y-wing, and 2 HWKs.

20161222_170008_zps3qiqcbtq.jpg

Ties rush forward

20161222_170012_zpsbsud2i1q.jpg

bumpage

20161222_171442_zpst8z3lbxi.jpg

better picture

20161222_171448_zpsk1bvq0xp.jpg

CR90 takes out a Tie!

20161222_171652_zps4ink9mto.jpg

Tie Interceptor meets Torpedo

20161222_173439_zpsovqzphqo.jpg

Tie Fighter meets CR90 up close. Does a point of damage. Found out we were doing rams wrong. If a small ship hits an epic, it's just a bump.

20161222_174152_zpsokzaxprq.jpg

Tie Bombers come in. They melt the front.

20161222_174920_zpsyuewl6ci.jpg

After melting front shields, one Bomber drops bombs out front, but gets run over.

20161222_180532_zpsyubr8ckm.jpg

Different side of action. Bumping Interceptors try firing at Biggs

20161222_180538_zpsklfz3lsw.jpg

Tie Defenders /D show up. Y-wing takes the mines instead of the CR90

20161222_182722_zpspnhzca6a.jpg

20161222_183143_zpsttv8i8nn.jpg

Ywing not run over

20161222_183406_zpsicx8sl3m.jpg

Oh, it was ionized...

20161222_184011_zpslrxg3ofg.jpg

Black Squad leader run over

20161222_184443_zpsioux9ig3.jpg

Biggs Down

20161222_185000_zpsnkwai9v8.jpg

Will ionized HWK hit the CR90?

20161222_185003_zps22brksmv.jpg

With Defender be run over by CR90?

20161222_185322_zpsit1hkxti.jpg

No! Both are saved by bumps, but just barely as the CR90 moves past. Also, Interceptor down.

20161222_185949_zpscpvkqpzn.jpg

CR90 rear section blown. That was the last section. Ship dead.

20161222_191526_zpslphfasux.jpg

Wow, nice map!

That battle looks so one sided with all the Imperial ships. Really makes you wonder how the designers really expected the corvette fit in with its cost and relatively squishy setup.