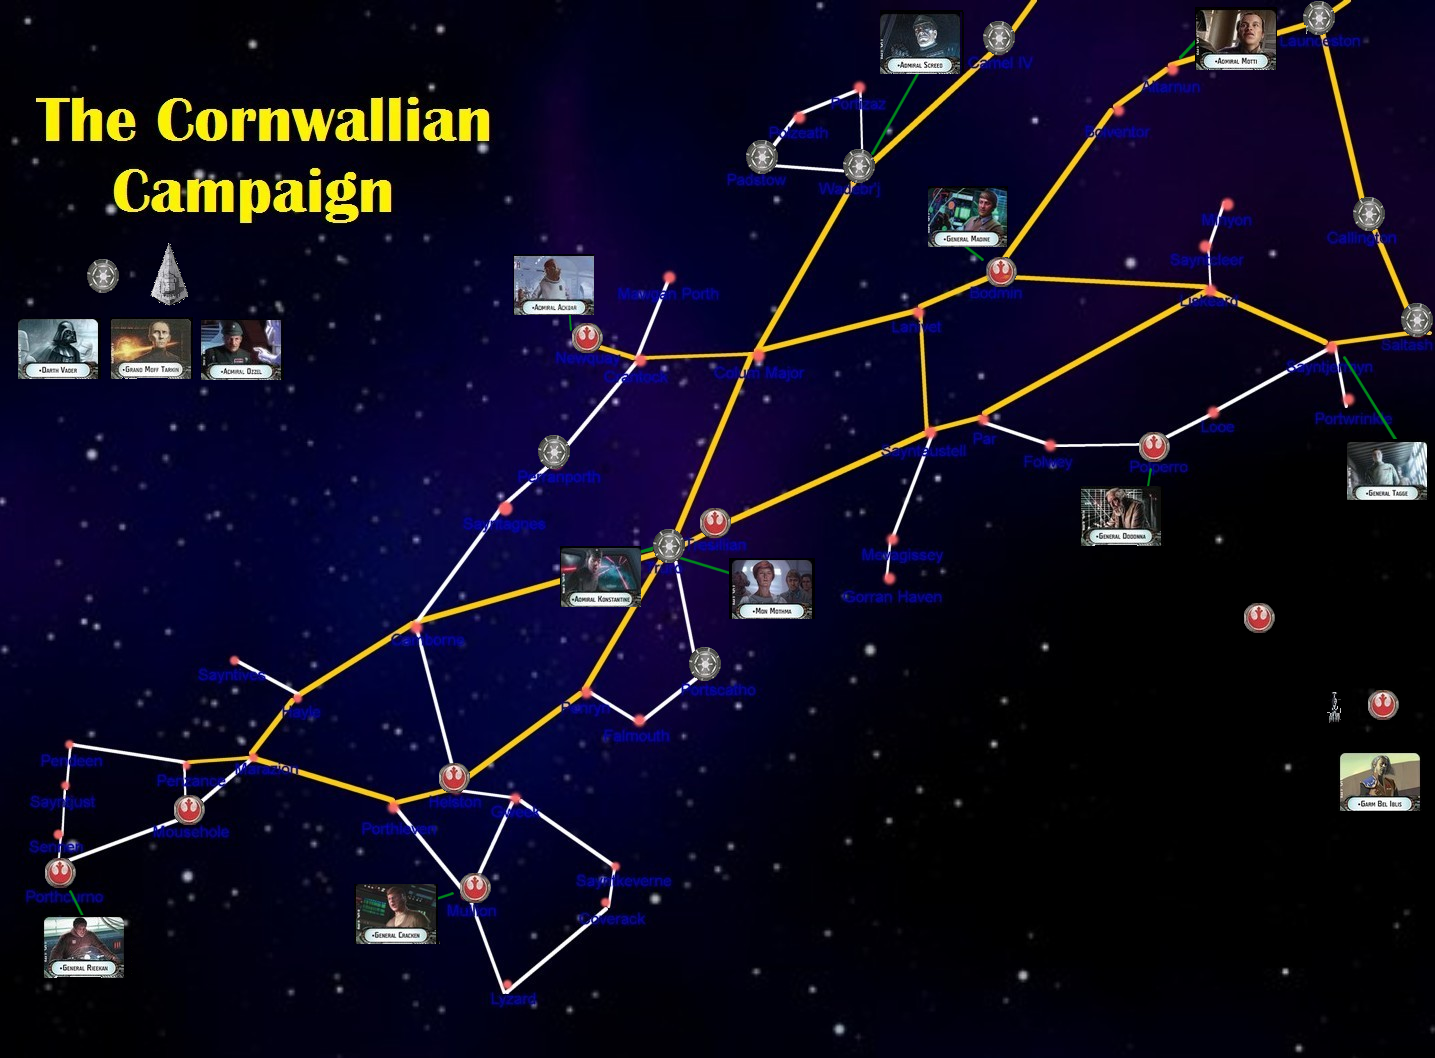
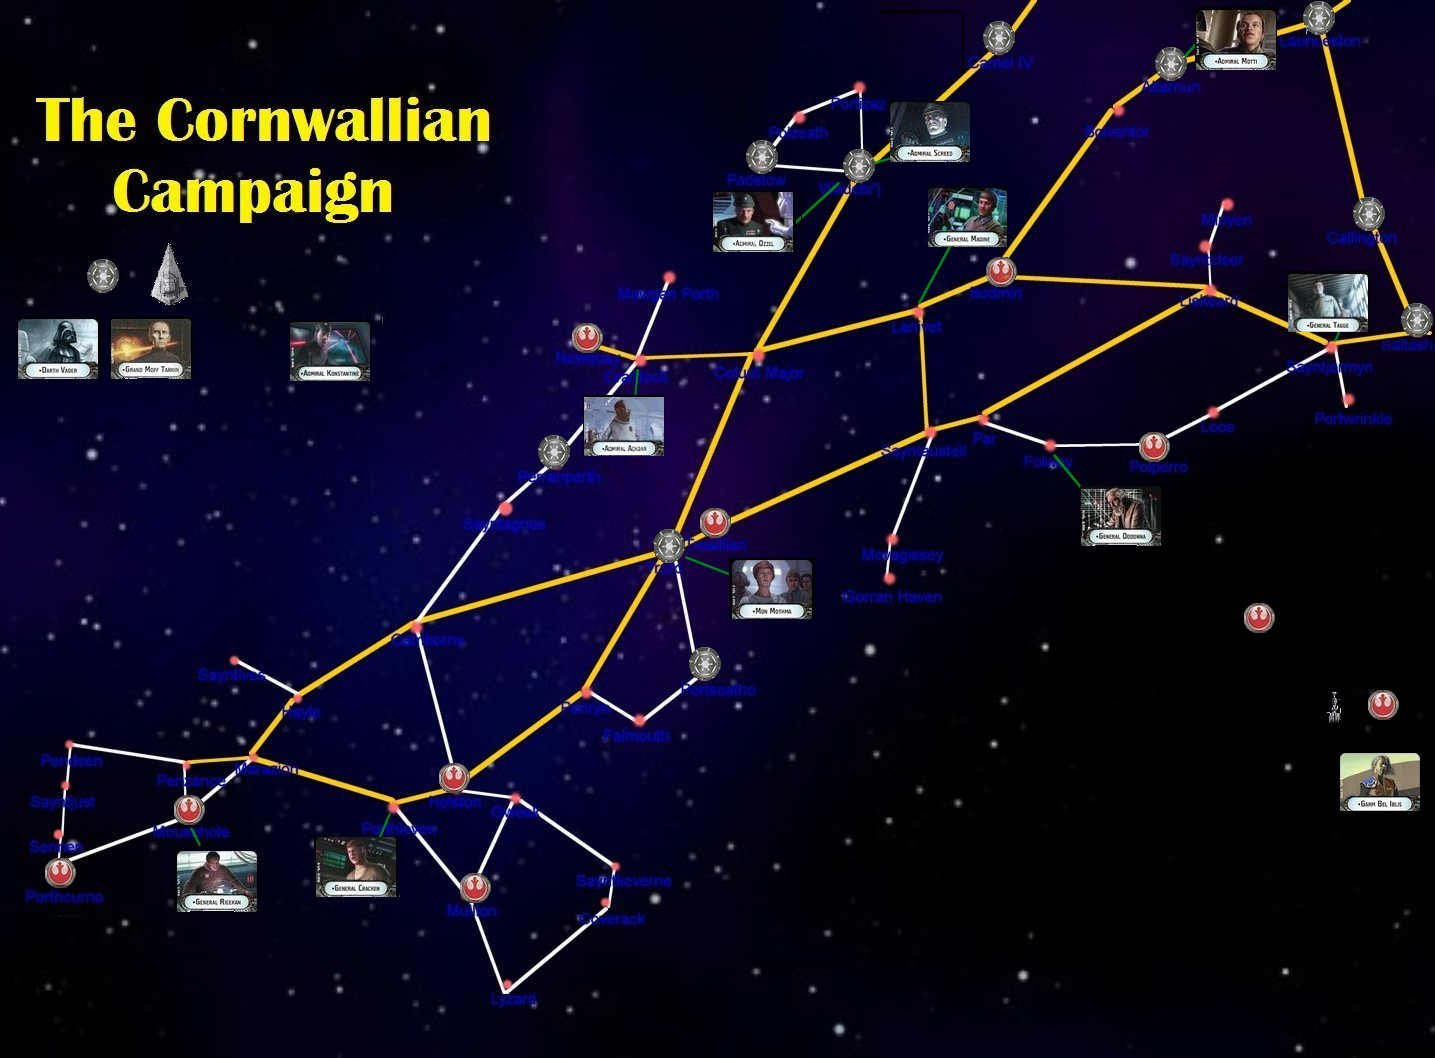
The Cornwallian Campaign
The Emperor Palpatine has dissolved the Imperial Senate, handing direct control to the Regional Governors. This shocking news is followed by the terrifying information that Alderaan has been destroyed. As an act of revenge the Rebel Alliance (striking from hidden base) destroy the Death Star. In response to this provocation, insult, and defeat, many systems have resolved to reject the Imperial Rule and have acted decisively to join the Rebel Alliance.
Cornwallia is such a cluster of star systems – rebellions have broken out over a dozen worlds, and the small Imperial Garrisons have been overrun or besieged. Governor Moff Barracu has been trapped with his small fleet in the regional capital system of Truro. Rebel forces are gathering strength throughout the cluster, building ships and recruiting crews.
An Imperial Taskforce has been dispatched to restore order and crush the incipient rebellion…

Fleets / Forces
A Fleet consists of a Commander with a variety of units (ships and squadrons) assigned to their control. Fleets may perform actions.
Units with no Commander present in a system are called a “force”. A force may make no actions, but will defend itself if attacked.
Only one unique title or character is allowed per fleet / force. In the event that two fleets combine in a system, only one of the unique titles or characters will be retained – the other will revert to standard.
For Example: Admiral Screed has a fleet with Demolisher. Admiral Tarkin also has a Demolisher in his fleet. If the two fleets were to enter the same system, only one ship would remain as Demolisher – the other would revert to an untitled Gladiator, and remain as such for the rest of the game.
Fleets and Forces may NOT have more squadrons than the total number of the Squadron value of the fleet allows (counting Expanded Hangar Bays). If there are more squadrons present than can be accommodated, the excess squadrons are removed.
For Example: A fleet that has three Assault Frigate IIB’s may have up to nine squadrons present. A fleet with a Gozanti Cruiser with Expanded Hangar Bays may have up to three squadrons present.
Commanders
Commanders must be assigned to a ship. No two Commanders can be assigned to the same ship. If there are two Commanders in the same system, they cannot both take the same action.
Only one Commander of each type may be present on the Campaign map at a time. Commanders may be recruited like any other unit or upgrade, including Commanders previously destroyed in battle.
Each Commander may make one action per Campaign Turn.
Actions
There are four actions available to each Commander per Campaign Turn.
- Move
Fleets with a commander present may attempt to move to an adjacent, connected system.
- Systems connected with a yellow line have well established “Hyper-Routes” – the movement succeeds automatically.
- Systems connected with a white line have less established “Hyper-Routes” – the movement succeeds on the roll of a blue-die. Imperial forces may move on the roll of a hit, Rebel forces may move on the roll of a hit or crit.
- Fleets may attempt to move to any non-adjacent system by making a “long jump.” A long jump succeeds on the double-hit roll of a red die.
Fleets that enter a system with an opposing force present will fight a battle.
- Recruit / Build
Commanders may attempt to call local forces to their assistance. For each adjacent Politically Controlled system, roll a blue die. On a hit, gain 25pts of units. On a crit, gain 50 points of units. On an accuracy, no units are gained. Total the results of all die rolls, and add unit(s) to the value or less of the total to the fleet of the commander.
Commanders may not attempt to Recruit in the same system twice in succession.
- Prepare Defences
Commanders may construct and arm local Space Stations as fixed defences. Up to THREE Armed Space Stations can be constructed in any system. Armed Space Stations have a hull value of 12, Command 1, Squadron 4, and Engineering of 3. They are armed with 4 red and 2 black die, and have an anti-squadron value of 1 blue. Armed Space Stations may fire all of their weaponry at 1 ship target, or divide the dice between as many ships as desired. Armed Space Stations may not fire at Ships and Squadrons in the same turn. All LOS is traced from the centre of the station – the station has a single fire arc of 360 degrees. Armed Space Stations have THREE brace defence tokens. They may not have any upgrades.
- Assert Political Control
Commanders in a system may attempt to influence the local planets to support their faction. Systems are either Rebel, Imperial, or Neutral. Political Control is useful for Recruiting new vessels, and for bases of supply and retreat.
Roll a blue die – on the result of a hit, the System changes Political ties by one position – Opponent control systems become neutral, neutral systems become controlled by your faction. On the result of a crit, roll another blue die – if it comes up as a crit again, the system moves in the opposite direction – neutral systems become controlled by the opponent. Opponent controlled systems remain the same.
Battle
When two opposing forces are in the same system, battle results.
The force defending the system is the second player, and chooses a mission for each colour type. The force entering the system is the first player, and chooses blue, red, or yellow mission sight unseen.
If both forces entered the system in the same Campaign Turn, the force with the smaller number of points present has the initiative choice to be first or second player.
- Units that are destroyed in battle are removed from the game – unique titles and characters may be recruited again.
- Units that are at less than half hull strength or fly off the board are out of the game for one Campaign Turn – if their fleet is attacked again in the following Campaign Turn, these units may not appear in the battle.
- If a Commanders ship is not available due to damage or flying off the board, the Commander may relocate to another unit if available.
At the conclusion of the battle, the victory points are tallied, and the losing player has a choice:
- If the battle was lost by 2 or less tournament points (ie, 6/5 or 7/4), the player may elect to remain in the system with all remaining units in order to make an action again the following Campaign Turn. If they do not, the player may elect to retreat.
- If the player lost by 3 or more tournament points they must retreat. All remaining units are immediately moved to an adjacent system which is either Politically Friendly or Neutral, and where there are no opposing forces present. If there are no such systems available, all the remaining units are considered destroyed.
Setup
The Imperial Forces begin with Political Control and 200 points of units in Truro.
They also have Political Control of Camel IV, Launceston, Callington, and Saltash, with 2000 points of units divided between forces and fleets in these systems as desired.
The remaining systems are randomly divided – for each system, roll a red die. On a Hit, the system is Politically Controlled by the Rebels. On a double hit, it is Politically Controlled by the Imperials.
The Rebels begin with 1000 points of units divided between any Rebel Politically Controlled systems in the remainder of the cluster.
Victory
After twelve Campaign Turns, each system on a yellow Hyper-Route is counted – if one side has Political Control over at least ten systems, and at least five more than the opposing faction, they are considered to have won the game.
If neither side fulfils that condition, the game continues for another six turns, and so on, until one side fulfils the victory conditions.