LED-Lit Raider, Gozanti, and Decimator

By BenderIsGreat, in X-Wing Painting and Modification

So over the course of months, I've been drilling and lighting and learning things along the way. There's more exposition on my blog, so I hope you'll learn from my (horrifying) mistakes, and your ships will be even prettier than mine.
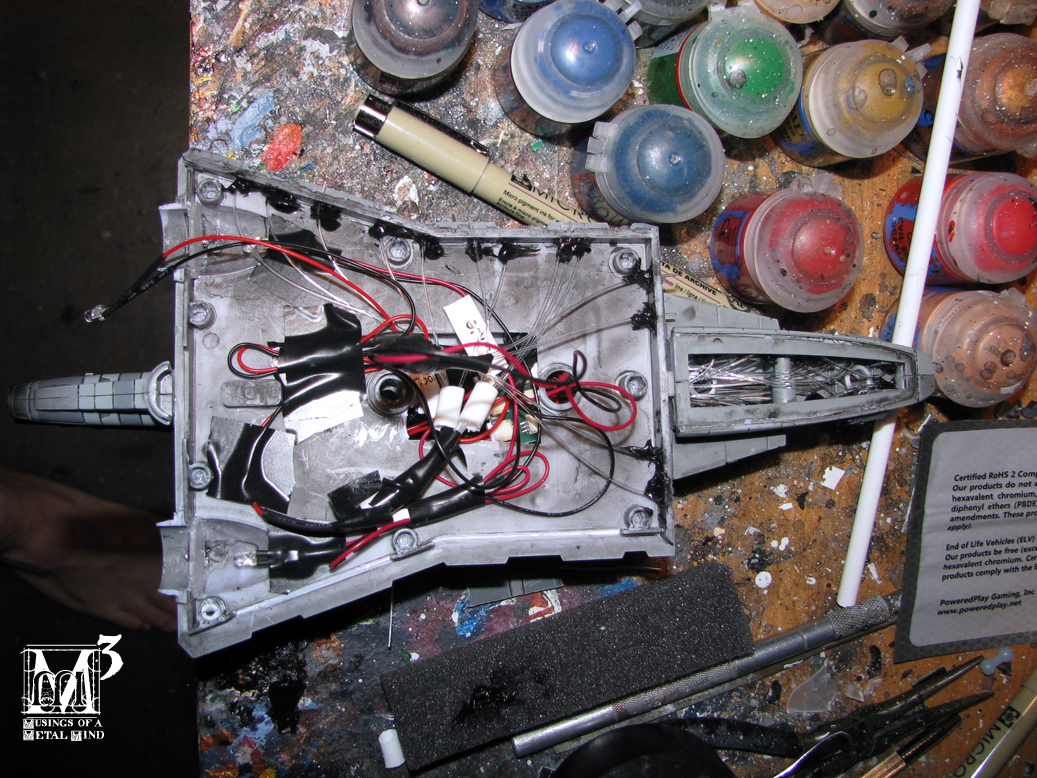
Raider:

raiderFront.jpg

raiderRear.jpg

raiderLit.jpg

Lessons learned: Pull the TIE mounts off (grabbing the bas, not the panel) before levering the top and bottom hull pieces apart. Also, use silicon to hold the fiber optics on, not CYA glue.
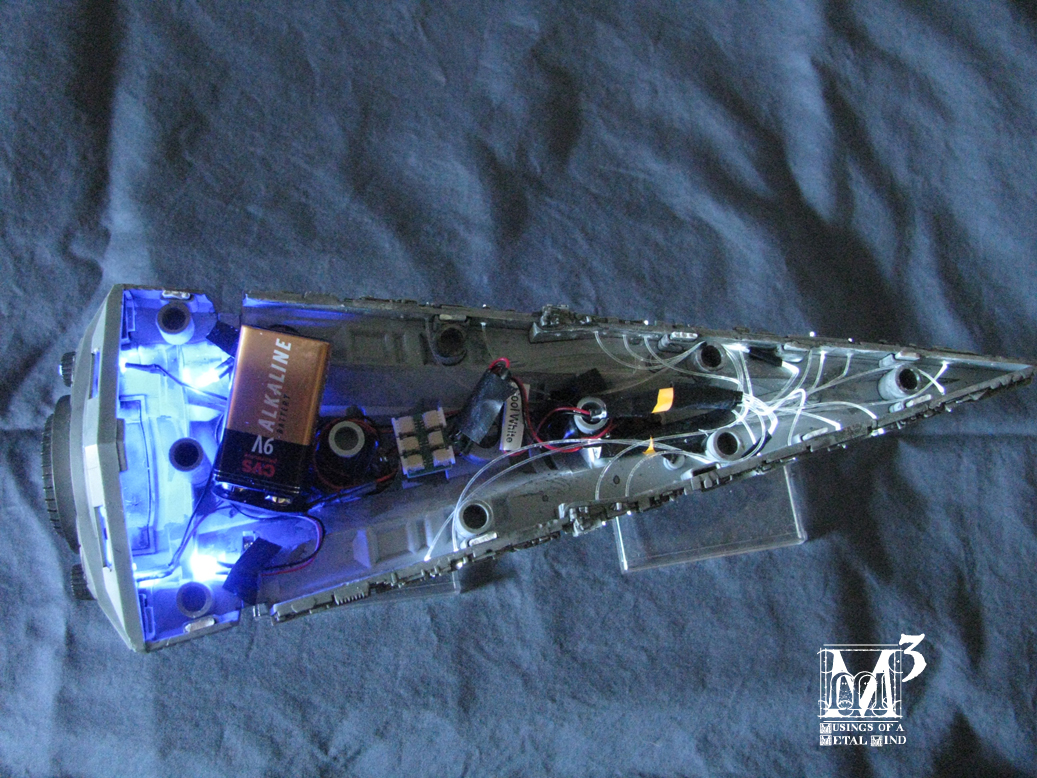
Now the Gozanti:

GozantiFront.jpg

GozantiRear.jpg

GozGuts.jpg

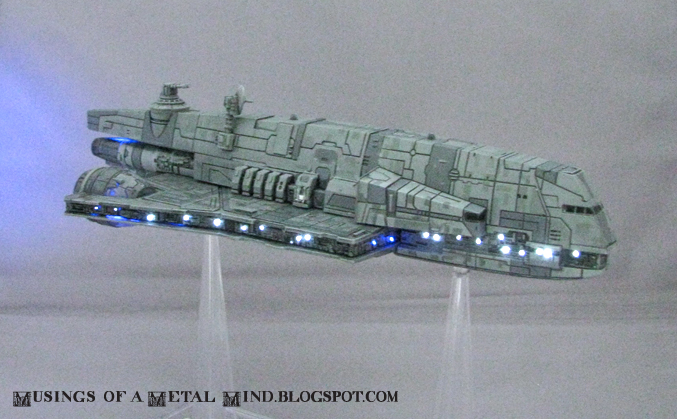
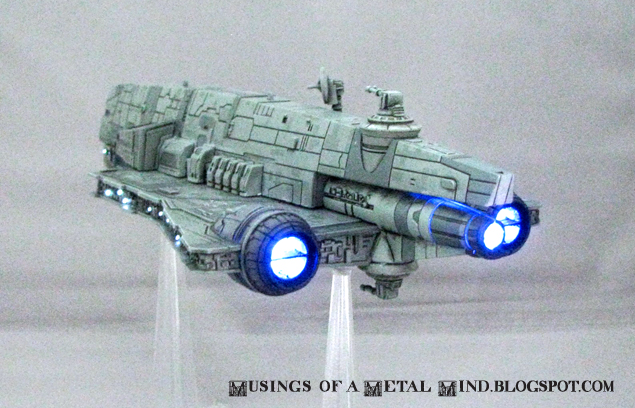
Lessions learned: Run the fiber optics up into the tale hull; keep as few wires in the flat hull as possible. also, paint the insides of all three engines, as the plastic is deceptively thin. Yes, there is also a lip on the top AND bottom of the lower hull, which you'll have to partially trim away . Use silicone to seal in your FO, and it'll be way prettier than "Mr. Nine-FO-per- -Side" Raider up there.

The Decimator:

deciFront.jpg

deciBack.jpg

deciInnards.jpg

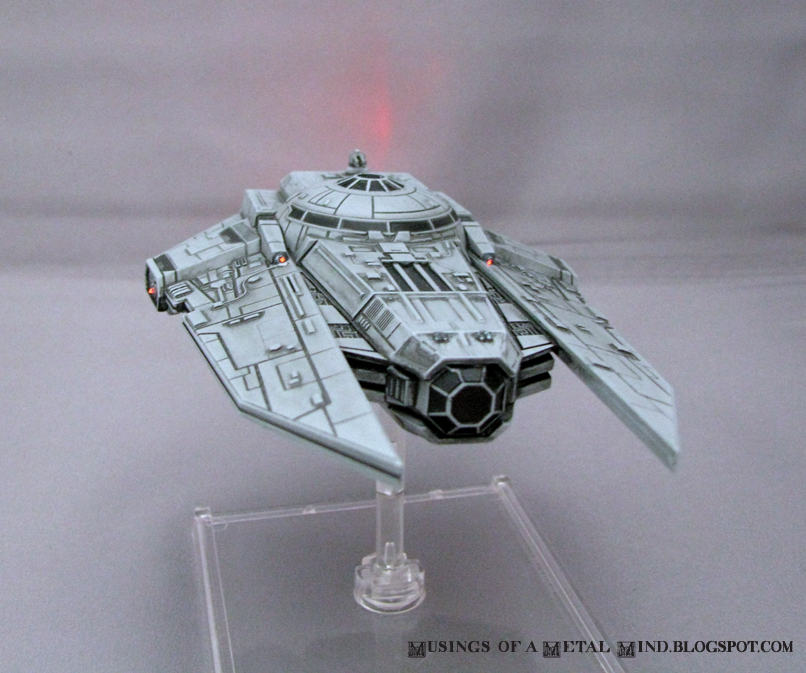
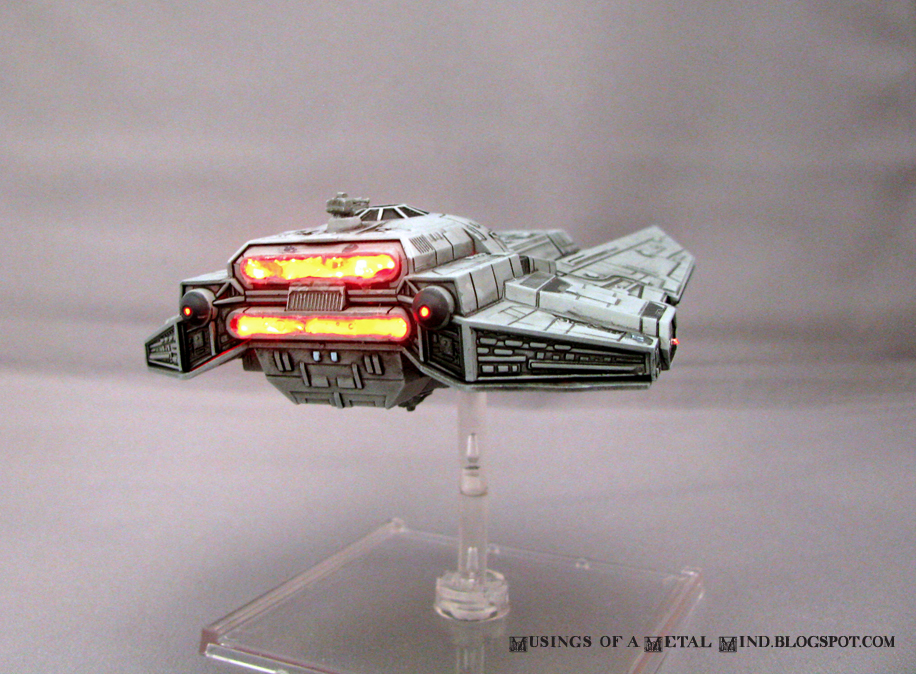
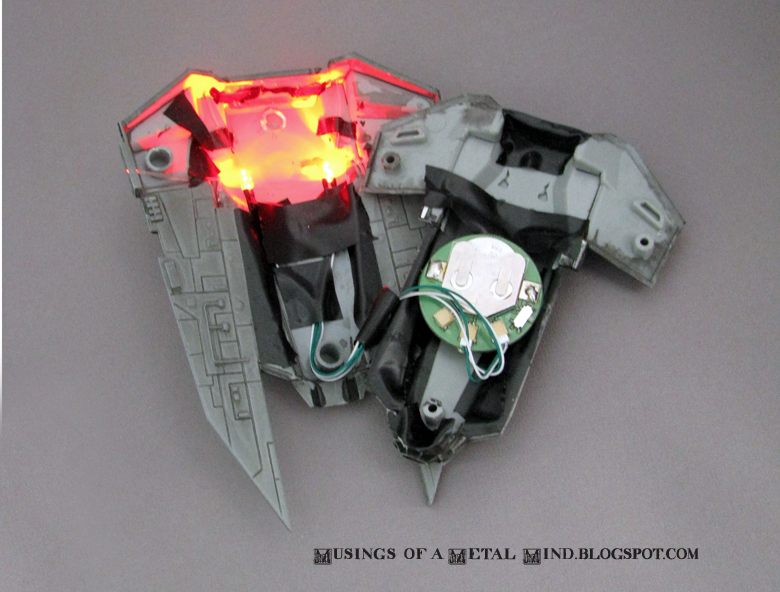
Lessons learned: Deceptively easy to take apart, although you'll get some light spillage afterwards if you're not careful.

For more, check out my blog post at http://musingsofametalmind.blogspot.com or just feel free to ask questions here. I don't pretend to be an expert, but boy did I learn a lot from doing these.

Great job! LED lit ships really do take things up a notch in my opinion. Have you made all the ships so they can be disassembled in future so you can replace batteries? Or whats the plan there?

I'm out of likes, but these are amazing!

Great job! LED lit ships really do take things up a notch in my opinion. Have you made all the ships so they can be disassembled in future so you can replace batteries? Or whats the plan there?

Yep, as you can see, they can all be disassembled, though I dread having to do it to the Gozanti because of all the wires crammed in there.

Oh ok I thought those were in progress shots! One artist I know who used to make ships that came apart fixed some magnets in place to hold them together. Although now it seems he's switched to some sort of USB rechargeable battery which is a neat idea I guess lol

Do you have any pics of the Gozanti without the lights on?

What do you have in the engines to diffuse the light?

What did you use to drill the holes for the fiber optics?

I ordered parts to do basically the exact same thing you've done and should have them in hand in a week or so. So far I've taken it apart and have drilled out the engines, mostly - I still need to clean up the holes on the main engines... making a clean hole without destroying the middle separator is hard.

Edited by Klutz

In order:

- No, I don't, but aside from all the cutting and drilling it's just a regular Gozanti. I drilled the running light windows wherever it looked good; mostly where there was s little plastic chunk to shade them from above.

-To diffuse the light in the main drives, I used circles cut out of the lids of Dentyne Ice gum jar lids, available in any CVS. You could also use plastic from a gallon milk jug, but I didn't have one on hand, so.

- Yeah, those vents on the engines a real pain. I don't know how I'll manage the ones on the Ghost.

Great job! LED lit ships really do take things up a notch in my opinion. Have you made all the ships so they can be disassembled in future so you can replace batteries? Or whats the plan there?

Yep, as you can see, they can all be disassembled, though I dread having to do it to the Gozanti because of all the wires crammed in there.

Oh ok I thought those were in progress shots! One artist I know who used to make ships that came apart fixed some magnets in place to hold them together. Although now it seems he's switched to some sort of USB rechargeable battery which is a neat idea I guess lol

Was he the guy that put it in a Tantive? It's an amazing idea that would save a bundle on batteries.

So I worked on my Gozanti this weekend and got the LEDs for the engines mostly in place.

However, I encountered a problem - the model's plastic is so thin in some parts that the blue light shines through!

Any tips on how I can stop the light bleeding through?

I'm thinking of painting the insides black, but I'm not sure if that'll be enough.

Use some putty?

So I worked on my Gozanti this weekend and got the LEDs for the engines mostly in place.

However, I encountered a problem - the model's plastic is so thin in some parts that the blue light shines through!

Any tips on how I can stop the light bleeding through?

I'm thinking of painting the insides black, but I'm not sure if that'll be enough.

When I did my Falcon painting it black did the trick. Usually I put my LED's in opaque plastic tubes and seal them and the fiber optics in with electrical tape (in case the LED goes bad, you can remove it easily). If it's a broad, flat area lining it with electrical the does the job too.

The one problem that persists (well, besides the overstuffing) with my Gozanti is the smaller central engine. I can't seal it because I want to leave it take-apart-able in case the LED goes bad, so there's this crack along the top and bottom where light bleeds through. I may take it apart again later to add a thin strip of tape to cover the crack on the top and bottom.

Edited by BenderIsGreat

Great job! LED lit ships really do take things up a notch in my opinion. Have you made all the ships so they can be disassembled in future so you can replace batteries? Or whats the plan there?

Yep, as you can see, they can all be disassembled, though I dread having to do it to the Gozanti because of all the wires crammed in there.

Having just finished stuffing mine full I know that pain.

Hey man, I was just looking through this as I start to tear apart my Gozanti, and saw on your blog that you were looking for advice on the CR-90. I got quite a bit of how I did it detailed out in my old thread: https://community.fantasyflightgames.com/topic/183353-rookie-repaints-by-khyros/

Also, may I suggest migrating to a rechargable battery? That way you can seal everything up for good!

Great thread! Lots of useful stuff in there.

Question, does the battery have port on one end where it connects to the board, and one on the other where the recharging cable plugs in?

Edited by BenderIsGreat

Hey man, I was just looking through this as I start to tear apart my Gozanti, and saw on your blog that you were looking for advice on the CR-90. I got quite a bit of how I did it detailed out in my old thread: https://community.fantasyflightgames.com/topic/183353-rookie-repaints-by-khyros/

Also, may I suggest migrating to a rechargable battery? That way you can seal everything up for good!

Great thread! Lots of useful stuff in there.

Question, does the battery have port on one end where it connects to the board, and one on the other where the recharging cable plugs in?

That battery is awesome. Sadly they discontinued it in favor for a larger version (which doesn't fit in models). It was a 3500mAh version of this: https://www.amazon.com/Aukey-PB-N37-5000mAh-Ultra-Portable-Smartphones/dp/B015E363IK/ref=sr_1_1?ie=UTF8&qid=1471976349&sr=8-1&keywords=aukey+lipstick+charger

There are several things that made me go to this particular model. First this is no on/off switch, you plug in your phone (or in this case flip the switch to complete the circuit of LEDs) and the battery provides power. That's something I struggled to find in other models. Secondly, there's both an in and an out port, the in is to charge, the out is to provide charge. So it works great for having a set of charging cables dangling at all times, while having the LEDs plugged in at the same time. You can actually charge it while it's on as well.

Note, it looks like this might be an acceptable alternative battery to what I used:

https://www.amazon.com/Anker-PowerCore-Lipstick-Sized-Generation-High-Quality/dp/B005X1Y7I2/ref=sr_1_fkmr1_1?ie=UTF8&qid=1471976496&sr=8-1-fkmr1&keywords=lipstick+charger+3500mah

Absolutely stunning work!

My Pelta came in too. You can check out the initial pics at my blog. Out of deference to their IP, I shan't be posting it here.

Maybe the odd gaming table shot.

Next up I'll be working on painting the solid block of Pelta, and trying to light the Ghost and an Outrider.

My Pelta came in too. You can check out the initial pics at my blog. Out of deference to their IP, I shan't be posting it here.

Maybe the odd gaming table shot.

Next up I'll be working on painting the solid block of Pelta, and trying to light the Ghost and an Outrider.

From Russia with Love, by any chance ?

Da, komrade. Shhh! Do not tell Mouse KGB......

Only found out the other day, that some of his stuff is available as 3D-printable files on TurboSquid...I'm in the process of painting up the YT-1000 that I printed at the weekend...not sure the Pelta is there, but the Nebulon is ;)

Only found out the other day, that some of his stuff is available as 3D-printable files on TurboSquid...I'm in the process of painting up the YT-1000 that I printed at the weekend...not sure the Pelta is there, but the Nebulon is ;)

You have a 3D printer? Lucky you. :) What kind and how much was it? What the materials costs like?

I might be down for his Nebulon, at least. Gonna save some cash and wait till after I get my Pelta painted and mounted.

I'd been looking at the XYZ daVinci Jr for some months, then saw that Herowannabe used one to produce his HotAC tiles...by which time the price had gone up from around £230 in the summer to £280+ :( ...but then Amazon had one of their price drops a couple of weeks ago to £225, so I snapped one up...they're back to £275 again, now :mellow:

The PLA filament is moaned about a lot online, as the spools are 'chipped' so you're tied-in to using XYZ's stuff...but it still seems reasonable to me - £23 for 200m of 'natural' - I printed a Ghtroc 690 today a bit smaller than the Falcon [but probably at higher quality than necessary], which used just over 20m, so about £2.50 worth, I guess...took 11.5hrs to print, so not sure how much the electric bill was :huh:

...another complaint about the chipped spools is there's nearly always some left over when the chip says zero, but I'm thinking about getting one of the 3d-pens to use that up, for doing freehand 'greebly' work on mods & scratchbuilds ;)

Can't remember how much he charges for the Nebulon plans, but I think it's made up of half-dozen [or more] parts like your Pelta, and if each takes the best part of a day to print [with the chance of something going wrong], maybe his charges for the complete models aren't unreasonable :unsure: - I still fancy his Action IV, but don't want to commit and then have FFG issue one as the Scum Epic :rolleyes:

Cheers

Edited by ianmiddy

Hello, I'd like to add lighting to my Decimator. I checked your blog post and you mentioned " Pulling her apart was made easier by an online source". Do you happen to have a link to that source. I'm very nervous about trying to pull mine apart, and any detailed instructions would be very appreciated. Thanks.

Hello, I'd like to add lighting to my Decimator. I checked your blog post and you mentioned " Pulling her apart was made easier by an online source". Do you happen to have a link to that source. I'm very nervous about trying to pull mine apart, and any detailed instructions would be very appreciated. Thanks.

For some reason the article is down, but the image I used for a guide is still out there in the ether. You can get a pretty good idea of where the seams are and where to pull:

2986186_orig.jpg

Saw this and I thought, "-(ಠ﹏ಥ)"

Majestic.