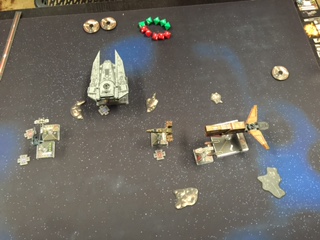
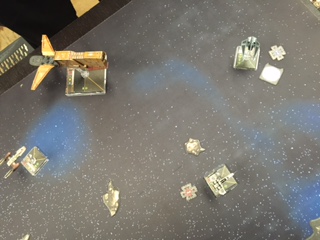
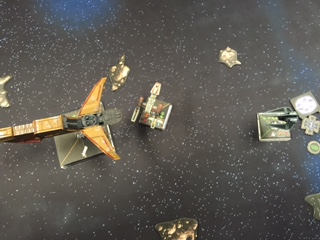
No Good to Me Dead Reports

By NoGoodtoMeDead, in X-Wing Battle Reports

Hi everybody! In order to sate my unending desire to talk about X-Wing too much to my friends, I figured I will channel that enthusiasm into some reports. I am an absolute n00b, and my game this week reinforced that to me. Hopefully I can learn and progress! I started a bat rep blog, which will contain substantially the same posts.

This Tues, I traveled to my LGS for X-Wing league night. While I typically play with my more limited group of friends, an odd-number meant that I was matched up with one of the local players--a quite skilled, quite friendly fellow named Will.

The lists:
I ran a Dash/Poe list, which I refer to as my Po'Das'cita list. ...like pobrecita, get it? No? Well fine.

This was comprised of:
YT-2400
-Dash Rendar
-HLC
-Outrider
-Kanan Jarrus
-Push the Limit
-Engine Upgrade

T-70 X-Wing
-Poe
-PTL
-Autothrusters
-R2-D2
-Weapons Guidance

I'm not sure exactly what his full list was, but it included:

TIE Defender
-Vessery
-tie/x7

TIE Adv. prototype
-Inquisitor
-Autothrusters
-TIE/v1
-proton rockets

TIE Adv. prototype
-Rudor
-Autothrusters
-TIE/v1
-Proton Rockets

I know there was a PTL in there, and a VI, and some other stuff. Ultimately, his list worked in such a way that all of his ships had an evade, focus, and TL just about every turn. I thought this list was pretty brilliant, and I don't think I've seen this particular combo on the webs yet.

We each had 99 pts, and rolled off for initiative, which he took. We placed asteroids in the center of the field, in a little band stretching towards each of our right hand corners. We both set up in our right hand corners, and moved straight out along our respective right board edges, circling one another for 2 turns.

Dash turned in through the asteroid field and exchanged fire with Vessery at R3. No damage. Poe trailed in behind. I maneuvered Dash poorly into his right corner (my far left corner), and he was able to move into R1 with Vessery and the inquisitor. Rudor trailed behind out of range of Dash, and an obstructed R2 with Poe. Proton Rockets went off on Dash, who was unable to return fire. Poe lost a shield, and failed to wound when returning fire. Poe tried to skirt through the middle of the melee and break out the other side, which he more or less did. In the meantime, he R2-D2'd back to full health, but Dash was really already in pretty big trouble.

Dash tried to sprint down his board edge (left to right on the far end of the table from me). Vessery and the Inquisitor followed, while Rudor split off to chase Poe. He read me like a book, and never lost a shot on me. I was burning through my actions, trying to boost and focus, spending my focuses defending, and making unmodified, R3 attacks on autothruster-protected, often-focused defenders with 3 AGI.

Dash continued hemorrhaging wounds as he turned up my right side of the table edge and tried to sprint back towards me. Vessery and the Inq. coasted along behind, casually, and finished Dash off without ever even losing a single shield, or breaking a sweat.

Poe tried to blow past Rudor, but Rudor caught him at R1. Poe fired first, spending his focus to turn to eyeballs into hits, removing a shield from Rudor. Rudor caught him with a 5 dice Proton Rocket, dealing two hits and a crit: direct hit. With one hull point left on Poe, and having inflicted ONLY ONE SINGLE SHIELD'S WORTH OF DAMAGE, I called it.

Thanks to Will's very strong list building, his ships were always decked out with evade/focus/target lock. Because of that, his ships, at most, would miss with one die. Almost always, he would hit with all of his dice. Again, I don't think that was good luck, I think that was a smart list.

I did not fly very well at all. Will pointed out that I did not make use of the asteroids very well with Dash. I am admittedly gun shy of flying directly into the asteroids, but he was right: I should have tried to drag his ships through the asteroid belt. Instead, I mainly cruised around the far edge of the map, which allowed him to coast along on the inside of the map, in a tighter turn, and keep me in his sights.

I also didn't focus fire at all. I was committed to trying to get Poe behind his squadron to chase. That did not work out for me. I'm sure that Poe would have been annihilated, had he tried to joust, but I obviously needed to be more creative and efficient about getting Poe into the fight sooner, and putting 7-8 dice on any one of his targets, rather than just 3 or 4, which he easily dodged.

I also did not use Poe's ability at all. I frequently would spend the focus to turn 2 eyeballs into hits, rather than hold onto it for the defensive boost. I never used weapons guidance at all, which was a waste. I have seen the r5-p9 build with Poe, and yesterday's game was a convincing illustration to me that it is a more economical use of Poe.

Lastly, it was good illustration of auto-thrusters as a counter to turret based ships. I mean, wow. HLC usually seems pretty reliable to me, but it literally did not deliver a single hit last night. This was, once again, largely attributable to the fact that he always had an evade handy, and I never focus fired, AND I rarely had a TL or focus available. So I was rolling a straight up, unmodified 4 dice. Usually that meant 2-3 hits. With his evade token and auto, that meant he had 2 dice to get one evade. If he held onto his focus, it was all-the-more easily attainable for him.

While it was certainly very humiliating and frustrating, it was a good lesson for me, and Will was a very sportsmanlike competitor. If I had it to do over again, I would have tried to double back with Dash, using those hard 1 turns/boost/barrel roll, rather than try to outrun Vessery/Inquisitor. All that did was keep me in his arc, and let him activate autothrusters.

Anyway, I hope to be diligent with my batreps, and keep learning a thing or two in reflection.
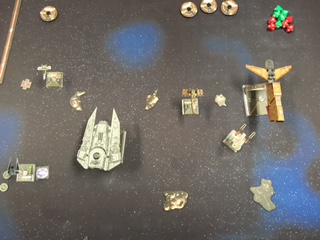
Keep practicing, obviously. I know that feeling of wanting to talk about X-Wing all the time.

In between your face-to-face games, check out Heroes of the Aturi Cluster, you can easily play it solo with 2-4 ships.,and there are tons of podcasts with great content to feed your addiction.

Check out Major Jugglers post, the pinned one on the first page, for a ton of resources.

With super Dash, I found target locks to be invaluable to keeping at range 3 at all times. Use it to measure distances to your opponent's ship and if you are outside of range 3, you can't TL so you can barrel roll or boost to get in range 3. If you are close, TL helps you know how far you should go to get back to range 3 with again a barrel roll or boost.

If you are in sweet spot, then just take a focus with your PTL. Kanan's white maneuver stress clearing ability works so perfectly with PTL Dash.

Thanks for the replies, guys! I will definitely be downloading Heroes of the Aturi, and that pre-boost/barrel roll Target Lock will be crucial. It would have definitely helped me avoid my last major defeat, which I will post shortly!

B/B-Dash vs. Latts/Palob/Drea

Squeezed in a Saturday night game vs. my pal JT.

I was running a B/B-Dash list, comprised of:

YT-2400

-Dash

-Kanan

-Outrider

-Engine Upgrade

-Push the Limit

-Mangler Cannon

B-Wing

-Blue squadron pilot

B-Wing

-Blue Squadron Pilot

----99 pts

JT was running an interesting little manipulator build, comprised of:

YV-666

-Latts

-Weapons Engineer

-K4 Sec. Droid

HWK-290

-Palob

-Blaster Turret

-Recon Spec.

-Moldy Crow

Y-Wing

-Drea Reanthal

-Twin Laser Turret

-BTL A4

-R4-B11

------100 pts

My understanding of his list was that it's really designed to steal evades and focuses and reduce target agility. As I didn't have any evade actions, I thought: this is a favorable match up for me. And really, it was, but I dropped the ball! Here's how.

I've never run a B-wing before, but I'm slowly working towards collecting a BBBZ list. Presently, I have 2, so I did (and do) want to start getting some practice in with them. Fielding 2 means that I have to reduce the typical 58 point dash down by at least 2 points. I have been wanting to see how Mangler fairs on dash, so this was a good opportunity!

For initial set up, we place the asteroids/debris in a loose cloud in the middle of the board. It leaves a tight alley on my left board edge, and a pretty big open swath on my right. the B's are placed first at PS2. All of his ships are PS5, then Dash goes down last at PS7. I placed the B's in my left hand corner, angled in at a 45 degree angle. He placed all three of his ships directly across from them in the far left corner. I place Dash towards the center of the board.

What I'm thinking now is: I will joust with the B's, slowly advancing up the left board edge. Hopefully, they will strip enough shields and last long enough that I can swing Dash in behind and clean up. I am thinking that I really want the attention to be on the B's at first, and that their dials are too limited to allow me to really do any fancy flying, so let's just get them into range and see what happens.

First turn: B's bank towards his ships, his ships all move straight towards me. Dash sprints out in the middle of the board, and boosts over into R3 of Latts, and they trade fire--some bad rolls and Dash takes two shields. The scrum brewing on my left is not in range yet. He's amassing focuses on Palob. Back to dials.

Second turn: B's move 1 straight ahead. Not in TL range yet, so they focus. His cavalcade advances, coming into range with Palob and Drea. They each target lock a different B wing. Latts brings up the rear, and Dash moves in behind him. So I have a choice here with the B's: Drea or Palob? I look at the TLT, and I look at the 8 total HP/shield, and I think: Drea. Let's get her while we have the firepower on the board. I think this decision, seemingly so innocuous, and so early, was my downfall. I strip Drea's shields--nice. Vulnerable to Mangler crits now! Good start. I plink away at Latts with Dash, making good progress. Drea and Palob elect to focus fire on one of the B's, and they do some good damage. I am already impressed by the B's heartiness, though.

Third turn: I am thinking that I need to prevent another focus-fired attack on my injured B. Let's charge ahead and block. I set dials for straight ahead red-4's. Dash is going to coast along behind, focusing on Latts. The blocks work! Kind of. I stop Drea and Palob in their tracks. I am able to take some pressure of of my injured B. Unfortunately, Drea still has the unwounded B in her arc, and Palob has a pile of focuses, and is able to shoot the injured B, even though she is out of arc, with the blaster turret. Latts also has a shot on the B's.

I make another mediocre choice. I am thinking that Latts is my real target priority, for some reason. So I elect not to shoot at Drea and Palob and fire the B's and Dash at Latts. That's working out pretty well, and Latts is low. My injured B now has 1 HP left, and my less-injured B is down 1 shield. Palob is uninjured, Drea still has 5hp, and Latts has maybe 4 HP.

So now I'm looking at the board. My B's are stressed from the red-4. I'm going to have to push through the blocks, but I can't K-Turn or anything, and Latts is positioned so that I can't even hard turn toward the middle, either. 2-straights it is. They're going to be out of the fight this turn.

Latts turns in towards the middle of the board: he's not going to have a shot. Drea K-turns. Palob makes a hard 1 or 2 towards the middle. Dash coasts along, safely, behind Latts.

Palob and Drea finish off one of the B's, and reduce the other to 1 HP. He forgot to do something here--I think it was to steal the B's focus. If he'd asked, I probably would have let him "undo" that, but he doesn't, and I don't offer, so, the B lives. The B's shoot at nothing. Dash shoots at Latts: blank-blank-focus. I don't have any focus, I took TL. Re-roll: blank-blank-hit. Latts rolls one die: evade. Shoot.

So, now it's just a B with 1 HP, and Dash with a couple shields missing. Dash is behind Latts, so I'm not real worried about him. The B is going to die, for sure, from Drea, but Drea is going to have to stick on that side of the board. I'm realizing at this moment that Palob is Dash's only real threat, with that blasted blaster turret. Latts is pointing towards my far right corner already. I think: Well, let's draw Palob away, try to kill him, then I can arc dodge these other bozos. Problem is, Palob is in pretty good position. I'm not going to be able to get out of range of his blaster this turn. I head for my right hand corner. I shoot at Palob, and do a little damage. Drea kills the B. Palob shoots at Dash. Latts reduces my AGI to 1, and Palob has a TL and a focus, or some such. He shreds Dash pretty good: hit and a crit: direct hit. Yikes. 2 HP left with Dash.

Well, I've stepped in it now. Still, my plan could work. I veer down deeper into my corner and boost. I can't tell if I'm out of R2 or not. It's close. I can do the smart thing: barrel roll and make sure in in R3, safe from the blaster, or I can be a cocky idiot, assume I've made it, and take a TL. TL it is.

I shoot first, do solid damage, but Palob still has 1 HP. He survives to shoot back. 3 dice: hit, hit, crit. Dash rolls to evade, 2 dice: blank, blank. Game over. 2nd game in a row with no kills. Ouch.

Another good learning experience, for sure. I think that if I had focused on Palob first, that actually would have been it. He's pretty easy to kill, he's the only thing that had a 360 arc, AKA: the only thing that could really consistently threaten Dash. If I had it to do over again, I would not have shot at Drea with my B's that first round, I would have shot at Palob, and every opportunity thereafter, and I would have had Dash fire at Palob from behind the turn that they were blocked, rather than Latts.

Not sure about the decision to Joust with the B's. I actually think that probably was still the right call, had I made better target priority decisions thereafter.

What do YOU think?

Yep, jousting with the B's seems like the right call to me. And I agree with your after-battle musings on target priority as well. Keep up the good work!

REMATCH!!! B/B-Dash vs. Palob/Drea/Latts

JT was kind enough to allow a rematch this past Tuesday. I learned from my mistakes, and was able to end my streak of losery. No Good to Me Dead Reports was there, with pictures this time!

But first, a Haiku.

Blue Squadron Pilot
Set thy thrust on course to joust
T - L - T, snuff out.
Lists are identical to last game: Blue Squadron B x2, plus Dash with Mangler, VS. Palob, Latts, and Drea scum list, designed to steal focus and evade tokens and reduce AGI.

We place the asteroids in essentially the inverse of last game, with a lane on the right edge, and more open space on the left. I place the B's together in the right corner. He places all three of his ships in the opposite corner (the far left from me). I think his goal is to swing in wide, and try to make sure that they can head off Dash wherever he goes.

In response to this, I place Dash next to the B's in my corner.
*Pics were taken at the end of each turn. In the future, I think I will take the pics at the end of each movement phase, so you can see what shots were lined up.

IMG_0005.JPG

Once again, I want the B's to be the first focus. I set the B's dials for a diagonal move towards his ships. I set Dash for a straight 4. He brings all of his ships straight out. Dash ends up on some Debris. I could boost into range of Drea, but I don't really want to commit dash that hard this early, so I stay put.
IMG_0006.JPG
I continue with Dash into the corner, looping around behind, and push forward with the B's on their diagonal course. He begins to swing his ships in towards me, dodging the debris. We've got one little exchange here between Dash and Drea. I take a shield off of Drea. I'm thinking: Great. After last game, all I want to be doing is 1) focus firing, 2) killing Palob, and here I am shooting at Drea again.

IMG_0007.JPG
The B's continue on. Blue B has to do a little bank in to avoid the debris, then he barrel rolls right. Red B takes a focus. Dash loops around the back. JT orients his ships towards the B's. He sprints forward with Drea into R1 of Blue B. All of my ships have a shot at Drea. Palob has a R3, single dice shot, and Latts is in range of my Red B, but not Blue. Palob misses with his die-he has a TL, but doesn't want to burn it on a single red vs. 2 green. I really don't want to shoot at Drea, first, but I've already started on her, and I don't want to pass up the R1. With TL and Focus on Dash, I strip her last shields and squeeze a crit through: Drea has to skip her next attack. Good luck for me. The B's shoot last, and finish her off.

IMG_0009.JPG
Palob and Latts continue forward, Dash 1-banks around behind, takes a focus and TL on Palob. The B's move up into R1 of Palob. My squad focus fires Palob, multiple crits go through: Palob goes down, but not before finishing off Blue-B.

IMG_0010.JPG

It's an unwounded Dash and a slightly wounded B against Latts. We circle each other for a few turns, but Dash is able to get behind Latts. Latts flops around like a wounded manatee for 2-3 turns, but then it's lights out: Rebel redemption!!


IMG_0011.JPG
I missed a couple turns in here, picture-wise. There was a k turn by the B, and some hard turns from Dash and whatnot.

IMG_0012.JPG

Reflection: I think that Drea entering into range of my entire squadron without any backup was really opportune for me. JT noted that Drea is the punch of his list. The dice broke my way getting that crit through on Drea. He also suffered from not getting the chance to focus fire due to range issues. Bottom line, this game underscored what I already knew: focus firing is imperative. I also was able to use my offensive modifiers much more frequently, which, again, underscores what I already knew: you cannot rely on the naked dice to get the job done. You have to have dice modifiers available. Lastly, JT and I both agreed that we tend to underestimate crits. Whether it's an ill-timed blinded pilot, or a direct hit, they are going to cause you problems. I was quite impressed with Mangler cannon, as a result.

Anyway, It was nice to win one! It had been awhile!
Edited by NoGoodtoMeDead

Nice work on the revenge win. B-wings like to joust, but they like coming in from the side even more. By having a 90 degree arc-offset, it makes it much harder for opposing ships to continually focus on 1 B-wing. Against the list you were just versing, I would Joust with Dash as a distraction (turning away after the first R3 shot to not die) whie flying the Bs through the rocks from the side. Your opponent should recognise your "mistake" and chase after Dash, while your Bs can use their actions more offensively.

I love the continuous BatRep structure in this thread. And your reporting style is great, even without the pictures.

Much obliged! I will keep 'em coming. They are certainly helpful to me as opportunities to reflect.

I like that tip about the B-wings coming in from the side, and baiting with Dash. I did feel after that last game that we both just flew straight at each other, more or less, and I was asking myself--was there a strategy there or did I just roll some dice.

Don't stop, pics help with the after-action review. Nicely done.

It's a good read. Well written, nicely descriptive and it's quite easy to build a mental picture of the battlefield. (Although the pictures are a nice addition.)

So definitely keep these up.

My tactical musings are thus:

The most important thing you can do is focus fire. What you need to do (especially with b-wings) is reduce the amount of incoming fire as quickly as possible, target priority is less important than getting all your guns on a single target.

I think the target priority in that third game was about right: Drea & Palob are about the same value (Drea with that setup has quite a high damage output vs low agility ships so she should definitely be killed quickly) And since you're planning on taking Dash into the late game Latts is definitely the ship you want to leave for last because Dash can fly circles around Latts.

Jousting can sometimes feel like lining ships up and rolling dice, especially if the opponent plays into the joust.

The tricky bit(s) are forcing the joust when an opponent doesn't want to go head to head, and reorienting after the first pass. (If you're lucky the opponent will fly straight into the joust and there won't be a second pass.)

Keep up the good writing

Last night, I returned to one of my old favorites--the decimator. My opponent was once again the scum-loving JT. He was fielding what he called his, "TLT and re-rolls" list, but which I would call the "dregs of scum" list.


But first, a haiku.


Oh sweet victory.


Why art thou so elusive?


Don't cry, Chiraneau.


My list:


Decimator


-Chiraneau


-Predator


-Engine Upgrade


-Rebel Captive


-Ysanne Isard


Phantom


-Whisper


-Lone wolf


-Fire Control Systems


-Advanced Cloaking Device


----------100 pts


His list:


YV-666


-Slaver


-Dengar


-Hot shot blaster


z-95


-N'Dru


-Lone wolf


Y-Wing


-syndicate thug


-Twin Laser Turret


HWK-290


-Spice Runner


-Twin Laser Turret


-------------100 pts.


We roll off for initiative, and I win. There is a tie here between N'Dru and Whisper, so I am glad to take it. We place the asteroids as we more or less always do: basically in lines in front of our opponent's board edges. The only real strategy that I can say I employed here was to add only asteroids, no debris. It seems to me that bumping debris with Whisper is more devastating than bumping an asteroid, so that. Otherwise, I am never quite sure what I should be doing. All of his ships go down first, except for N'Dru. He places them in a loose mob in the far right corner. I place Whisper in my near left corner. He places N'Dru immediately opposite. So I have to decide where the Decimator goes. I don't really want to be cramping Whisper's lone wolf, but I am thinking: I don't really want to wade into the three other fellas, let's pick off N'Dru and clear one side of the board. I orient Chiraneau to fly through a little alley towards N'Dru.


IMG_0977.JPG


I try to slow pedal for a round. Whisper doesn't have any 1's apart from the hard turns, so I do a 2 bank with him and cloak. (Also: I lost my cloak token, so I used a bomb token instead). Chiraneau I set for a 2 straight. He is also slow pedaling, and sets all of his guys for slow straight maneuvers. When I see that, I boost forward with Chiraneau's engine upgrade. No shots yet.


IMG_0978.JPG


I am already not liking this. I can see that the scum posse on my right is going to come into range. Two TLTs, and a Dengar-enhanced YV-666, all firing at my AGI 0 Decimator. Perfect. Still, a bad plan is better than no plan: focus fire at N'Dru. I set the decimator dial to bank around behind the posse, and I bank Whisper towards N'Dru to joust. He slow pedals N'Dru straight forward at Whisper. The scummy cavalcade cruises into range. With the Decimator, I check to see if I can boost left to clear the YV-666. I can't, so I TL on N'Dru. Paranoid about jousting with Whisper, I take an evade. Both of my ships fire at N'Dru: nothing. He focus fires on Chiraneau and starts peeling away shields. The YV may or may not be in range--it is super close. I bump the YV when checking. Well, crap. Having impaired the result, I defer to him. All told, he puts 7-8 hits on Chiraneau. All of those re-rolls vs. no agility: Not good.


FullSizeRender.jpg


I honestly have no idea what I'm thinking this turn. NO IDEA. I set both of my dials for 2 straights. I decloak with whisper, and I must have moved forward, though I can't recall. I honestly have NO CLUE what I thought was going to happen. None. The result: the posse forms up on Chiraneau's tail, and I...block N'Dru with Whisper. *Facepalm* No shot=no cloak. Internally, alarms are going off. My blood pressure sky rockets. I am such. an. idiot.


Well, I haven't actually done any damage to N'Dru yet, and it's become apparent that the TLT's could be a problem, so Chiraneau shoots at the HWK, and strips him down pretty good. The HWK shoots at Whisper, and I lose her two shields. Everything else is out of range of Whisper. PHEW. Oh, but they're in range of Chiraneau. They blast the ever loving crap out of Chiraneau, and he's done. So, I have a half wounded Whisper, and he has N'Dru, Slaver, and Thug at full health, and a half wounded Spice Runner. I should just quit now, maybe we can get a second game in. Sigh.


FullSizeRender_1.jpg


I set Whisper for a 4 Straight. Let's try to get her out of here. She zips forward and cloaks. Ahh. In addition to being invisible, she's also hiding behind a rock. Not the empire's proudest moment, but she's no good to me dead afterall, and we live another turn. Hooray.


IMG_0981.JPG


I am 90% sure that the right move here is a 4 straight off the board edge, but I decloak right, and then do a 2 right turn, book it towards the far right corner, and cloak. The sweet solace of oblivion beckons from her left. Just a twitch of the joystick, and it's all over. Sweet relief. Spicy the Spice runner gives chase. This is probably the best day of his life: some no-name, low life criminal, mopping up on high ranking Imperial Pilots in his crappy little HWK 290. He's chasing a phantom right now, and the phantom is fleeing as fast as she can. He's thinking, "If my pops could see me now! Told you I ain't a nobody! WHOOO! YEAH YOU BETTER RUN!" He can't quite finish her off though, and we live another turn.


IMG_0983.JPG


But the life of a spice runner is brutish and short. Whisper takes a second to gather her senses. We decloak straight 2, and do a 3-K turn. Not today, oblivion. Spicy turns right, right in front of Whisper, and gets T-boned. Lights out, Spicy. No one is in range to return fire, so we live another turn.


IMG_0984.JPG


N'Dru is inbound. Decloak left, * 2 bank left, clear stress, fire at N'Dru, cloak. Lone Wolf is saving my skin, and I take no damage from the slaver. *edit: no decloak here. I was not cloaked, because I was stressed.


FullSizeRender_2.jpg


Decloak left, bank 2 right. N'Dru K-turns, and just about catches me, but he doesn't. I just barely have a shot on the Y-wing. I deal no damage, but am able to re-cloak. More fire, but I'm getting 5 dice from range of the slaver, and from the obstruction on the Y-wing. With rerolls, I am good.


IMG_0986.JPG


Decloak straight 2, Hard right turn 1, barrel roll back towards N'dru: Block. Whisper is brawling. She takes R1 shots at the thug, recloaks. She takes fire from the thug, and fire from the slaver, and she takes a hit. Down to 1 hull point, but still alive.


IMG_0987.JPG


Decloak left, 2 right turn, Focus. A sinister, internal laugh emerges. "No shots on me this turn!" I am thinking. Whisper unloads on the Slaver with 5 dice, lone wolf, and a focus. Awesome. OOPS he's got a hot shot blaster! I take fire, but with 4 AGI and a reroll, proceed unscathed.


IMG_0988.JPG


I believe I missed a few rounds of photography in here, and I unfortunately cannot recall the specifics, but I believe that N'Dru hit that asteroid in front of him and exploded. I begin to say, "But sir, the odds of successfully navigating an asteroid field are..." JT smiles at me, but I can tell he's thinking about strangling me. Next turn: Whisper turns right, focuses. R2 shots at the thug: dead. No shots from the slaver, and no more blaster turret.


FullSizeRender_3.jpg


Whisper follows a long behind the slaver, stripping hull. He's got one HP left. The Slaver is desperate to get Whisper in his 180 arc. Hard 2 or 3 right turn. A cloud of debris, likely from the riddled corpse of Spicy's HWK rolls in, unexpectedly! "BOSS, LOOK OUT!" says some space-racist low life working for the Trandoshan slaver. The pointed, beaky hull of the HWK smashes through the control bridge window. Roll for damage: Crit. Game over: victory, Whisper.


IMG_0991.JPG


Reflections:


I basically wasted the decimator! I love that ship but don't know how to fly it well. I suspect that I probably should have just let whisper deal with N'Dru, and perhaps should have tried to plink away at the posse. I'm still really not sure that would have worked out much better. I have absolutely no idea why I tried to block with Whisper that one turn at the beginning. Goodness.


Edit: Reflecting on the photos, I feel like my biggest mistake with Chiraneau was in turn 2. That's where he's pointing 45 degrees towards the left board edge. I had him bank right, but I think I should have banked left. That would have put me out of range of the Posse for at least a turn, but still would have let me focus fire at N'Dru.


JT, as always, was gracious in defeat, and did not make me feel like a scumbag. He does inquire: What should he have done to stop Whisper?


Let me have your thoughts!


Edited by NoGoodtoMeDead

Wow! That last report with Whisper was crazy. Good job on all the write-ups. Look forward to more.

Nice work with whisper!

My thoughts (probably to be taken with a pinch of salt) are that whisper engaged a little too slow, and chiraneau engaged a little too fast.

I've played similar(ish) lists to this with rebels, and my preferred way of handling it is to slow roll the bigger ship whilst the little ship goes for the flank.

The enemy can then either choose to ignore the little ship (in which case; bonus damage), or try and deal with the little ship (in which case the big ship gets to "sneak" up on them).

Regardless of any mistakes made with chiraneau, your flying with whisper was on point.

On Jt's behalf (and this is where my advice becomes a little less grounded in personal experience) it looks from the report like he pursued whisper a little too aggressively.

What might have worked a little better is if he'd let you run away out of range, and taken a turn or two to regroup his ships. The odds of killing whisper become a lot better if you can come at him with a united front.

Excellent advice! That was my conclusion as well. I think that when the decimator was right here:

IMG_0978.JPG

...that I should have banked left. That would have kept the decimator out of range of his little cluster for at least 1 more turn.

Freakin' Parakitor sent me an acrylic cloaking token in the mail, after reading that I lost mine! Incredible!

Swarm of B's!

JT and I faced off again this past Tuesday night at our lgs, Titan Games. He was fielding the now-familiar Latts/Drea/Palob list that focuses on stripping focuses and evades, and reducing AGI.

I was fielding:

B-Wing
-Dagger Sq. Pilot
-Fire Control System

x3

B-Wing
-Blue Sq. Pilot

------100 pts

He fields:

YV-666

-Latts
-Weapons Engineer
-K4 Sec. Droid
HWK-290
-Palob
-Blaster Turret
-Recon Spec.
-Moldy Crow
Y-Wing
-Drea Reanthal
-Twin Laser Turret
-BTL A4
-R4-B11
------100 pts

IMG_1099.JPG

Asteroids go down in a loose cloud in the middle, leaving fairly ample space around the edges. All of his pilots are PS5, while I have 3 PS4 and a PS2. This is my first time running the list, and I went back and forth for a bit debating whether they should be deployed in a block of 4, 2 blocks of 2, or just willy nilly. I opted for 2 blocks of 2, as seen above. He set up all three of his ships in the corner directly across.

IMG_1101.JPG

First turn. I resolved that I didn't really want to just fly straight at him. Tactically, I think that probably would have been fine, but I just didn't want to fly straight at him and roll dice. I opted to fly left, and TRY to bring him through the asteroid field. He slow rolls straight out, and begins amassing foci on Palob.

IMG_1100.JPG

Turn 2. We both keep flying straight. It's apparent to me that he will not be taking the bait, and instead will just fly safely around the asteroid field. Touche.

IMG_1102.JPG

Turn 3. Alright, well this is silly. He has a decent pursuit angle, and I am not confident that I do not want to be trying to double back on him through the asteroid field. So I K-turn with the Dagger/Blue pair, using the B-wing's nifty 2-k. I do a 2-right turn with the other two, barrel rolling with the first to avoid the asteroid, which causes a bump from the second. Not a big deal, but it was the first of a series of bumps. Meanwhile, he starts banking in, and gets a double Target Lock on each of the Dagger/Blue B's. The good news is, those 2 are in range of Latts, and have him in their arc. This is good. 6 red dice on Latts, and only 3 from him in response. The dice go my way, and I hung 4-5 hits on him, and lose only a few shields from the Blue Sq. Pilot. My Dagger Sq. picks up a TL from Fire Control System.

IMG_1104.JPG

Next turn, everything cruises into range. I TL with one of my left Daggers, and the other bumps again. There was not a single arc-dodging attempt on either side all night. My 2 Daggers on the left bump again. Drea is in range now. Palob is technically in range, but not with his blaster turret, so it's just one red die from him. He focus fires the Blue Sq. Pilot to death, but my right Dagger is in R1 of Latts, so I've got 10 dice back at Latts, with 2 TL's, so Latts goes down. Drea is really quite a beast, though.

IMG_1106.JPG

We close in awkwardly. The B's have a weird dial. Drea is really pumping out the hurt. I start focus firing her down. Drea pulls up into R1 of a full health Dagger. First shot with primary: Hit-Hit-Crit. Roll evade: nothing. TLT's for 2 more hits. Palob with the blaster turret: hit-hit-crit. Roll evade: nothing. "How many hull does your B have left?" JT asks. I count the number of cards. 1, 2, 3. "Oh. He's dead," I mumble. "What'd you say?" he asks. "HE DIED," I say, louder than I mean to. JT gives me a sympathetic, slightly disappointed, fatherly look that I have seen from him many times. It says, "I'm sorry that your toy died, Austin, and I'm also sorry that you are a MAN-BABY." Only 1 B has a shot on Drea this turn, but it's R1, and it's enough to finish her off.

IMG_1107.JPG

I have a full health Dagger, and a heavily wounded Dagger, and he has a full health Palob. Despite their clunky flying through the scrum, the B's have come out in good position, right on Palob's tail, but Palob is able to easily dispatch the wounded Dagger. Still, I've got a good pursuit angle, and full health, and the HWK is not going to be doing any fancy flying. There is an opportunity here to try to slow down, hang in R3, where he can't shoot back. Ultimately though, I think I have the upper hand in a slug fest. Thus, I try to just follow Palob along, replacing her footprint with each move, like I've read to do, and...it works!

IMG_1109.JPG

JT is looking for a creative solution, but the HWK can't really offer it at this moment. He anticipates that I will anticipate HIM going hard right, which is true. I don't expect him to go left, because there is not much board over there. So he goes hard left, zooming right up to the board edge! But the B coasts along slowly, implacably, like Michael Myers.


IMG_1110.JPG

Palob is in trouble here though. He didn't shake the B, but worse: now he's up against the board edge. All dressed up in a snazzy brown suit with no where to go. The black hole of oblivion beckons, and Palob vanishes like a little scummy Nancy!


Edited by NoGoodtoMeDead

From reading the earlier posts (will go back and read the others at some point) it seems to me that you need to make sure your guys are hitting the same target (so focus fire as discussed) but also in the same round.

I try to engineer it so my ships are always engaging for the first time in the same round (some sound advice from last year's Nordic Champ).

It takes practice (I'm still learning) but when you have ships with stacked tokens it really helps to push the damage through.

Thanks for the response, BCooper--that's absolutely a great point. Especially in that cursed vessery/rudor/inquisitor matchup. Had to have both ships targeting a single enemy, or I was never going to get through those tokens--which is exactly what happened. haha!

New bat rep coming shortly: I straight up ripped off "That's no moon" podcast's Bossk/Kath list. Soooo much fun. My opponent just picked up the Veterans pack, so he was running a bomber/defender/dark curse/omega leader list or something like that. Actual batrep to follow shortly!

Party Bussk vs. TIE Medley

Faithful readers! This last week, I had the pleasure of straight-up ripping off "That's No Moon" Blog's "Party Bus" Kath/Bossk list (which you can find here: http://www.thatsnomoon.info/blog/revenge-of-the-crit). Man is it fun. I may call it the "Party Bussk" list.
This list is comprised of:
YT-666
-Bossk
-Dengar crew
-Zuckuss
-4-LOM
-Mangler Cannon
-Veteran Instincts
-Engine Upgrade
-Inertial Dampeners
Firespray
-Kath
-Push the Limit
-K4 Security Droid
-Glitterstim
-Engine Upgrade
I squared off against my old nemesis, JT. He was running a TIE medley, which was heavily influenced by his recent purchase of the Imperial Veterans box, and his desire to use those models immediately.
His list was comprised of:
Countess Ryad.

Dark Curse

Omega Leader

TIE Bomber, with 2 different missiles, plus extra munitions for each. I will supplement when I have the full list.
As usual, my photography leaves much to be desired, as I frequently forget to take pics between rounds. This was my second attempt with the Party Bussk list. The first result was a crushing victory over a TIE swarm...tainted by the after-game realization that I had been firing the Mangler out of Bossk's auxiliary arcs! If you aren't familiar with the Party Bussk, it is designed to force crits through, and then take advantage of Bossk's ability to cancel a single crit result in exchange for 2 hits.
He has initiative. We place the asteroids in a fairly tight clump in the middle of the board. Being a tactical imbecile, the grandest strategy I can muster is to set up a little race track, where I plan to circle around the outer board edge. All of his ships went down first, I believe, with Ryad on my far left, the bomber just right of center, and Omega Leader and Dark Curse on the far right. I resolve to try to pick off Ryad first, and discreetly point both of my ships directly at her.
I ease forward on the left flank. Ryad promptly turns and flies away, and the rest of his medley advances straight out.
Not quite fast enough, Ryad. Kath and Bossk drift into range. The dice started off extremely hot for me. I soak up some stress on Bossk to force a few hits through. I have multiple crits, but Ryad is still shielded. The end result is that I strip her three shields away. JT returns fire with Omega Leader, and plinks a shield off of Bossk.
I have a series of pretty lucky maneuvers. Bossk and Kath are extreeeemely close to one another, but my estimates pan out, and I don't bump. Ryad K turns. I believe Ryad was out of range, so Bossk and Kath elect to light up Omega Leader. The bomber drifts around in right field, chasing a butterfly, humming to himself. His comm-link is on mute. Ryad and Dark Curse are screaming into their mics, "BOMBER WHERE THE F--- ARE YOU. WE ARE DYING OUT HERE," the persistent beepbeepbeepbeepbeep of their consoles reminding them that they are not long for this world.
Ryad and Dark curse are putting some good hits on Bossk. The harrowing-flying continues (missed a pic here). Not only are Bossk and Kath still incredibly close to each other, now they are close to the board edge. "RACE TRACK, remember? Just keep turning right, you idiot!" screams Kath. Bossk holds up his 3 fingered claws in front of his face. He's seen human children discern right and left this way. No thumbs. Crap. Is it...this way? Kath's stream of curse words indicates to him that right probably was the other way. Bossk gurgles apologetically. Dark curse has taken a few random hits. Bomber is blissfully, ignorantly unscathed, but is finally aware of the firefight. He is now unleashing a barrage of missiles and torpedoes, and Bossk is down to just a few Hull, while Ryad is at 1. Next turn, Bossk and Kath shoot first, killing Ryad before she can shoot. The remaining TIES finish off Bossk.

IMG_1123.JPG

So it's down to a full health Kath, a full health bomber, and Dark Curse with a single HP left. Kath's main concern at this moment is whether or not she can find her way back to the base alone.

The Bomber waves off in the opposite direction, while Dark Curse coasts in behind. For a turn, the TIES are safe in Kath's blind spot.

Kath's space phone buzzes in her pocket. she fumbles to get it out for a second. *annoyed sigh*. Boba text.
BOBA: Where r u?
KATH: Oh hey, omwb. Just finishing up.
BOBA: Duuuude. You're not done yet? n00bs. SMH LOL.
KATH: Yeah, The Bussk got pwnd. LOL. Idio--
[bAM]. Debris cloud rolls in while Kath texting while flying. She easily could have cleared the debris with a 2 straight, instead of a 1 straight, but she wasn't paying attention. So now she can't boost, which means she can't get DC in her arc. She takes a round of free fire from Dark Curse.
Alright, pay attention. Kath pulls out in front, but she can't modify anything on DC, so there's not much she can do, apart from roll the dice. All the luck that I had previously has dried up. She is rolling 1 hit, max, and DC is shrugging it off, no problem. Kath isn't losing much in return, but he's getting some through. I've still got Glitterstim, though.
We drag on like this for awhile.


I pop the glitterstim, finally, and it just works out that I catch a couple of eyeballs in there, and that finishes him off. DC lasted way too long.


IMG_1132.JPG

Bomber fires his last fusillade, and it doesn't get the job done. Now it's just a naked bomber, with 2 red dice, chasing Kath, with 4 red dice out of her rear arc. It's pretty ideal for Kath--she can green maneuver around, focus/evade with PTL, while Bomber doesn't have much of a choice other than to follow. There are a few fairly anticlimactic turns, and that's all she wrote. Thanks to That's No Moon for the extremely fun inspiration! I may end up dropping EU and Dampeners on the big guy. Also may try to swing it such that Bossk fires after Kath (might run Boba instead), so that there's a better chance that the shields have been stripped for crit'ing.


What are your thoughts? What was the bomber's best move?
Edited by NoGoodtoMeDead