Tutorial - My take on cloaking

By Polda, in X-Wing Painting and Modification

Finally decided to repaint my Phantom and I took some pictures as I am going along (it's about half-way done in the last example).

Obviously if you repaint a Phantom you're going to make it either cloak or de-cloak.

Normally this effect is painted as a large lightning bolt that goes around the ship. I like painting mine as a "wave" of sorts.

The steps below are written with a full body repaint in mind. If you want to just paint the cloak effect just use some torn masking tape to define your visible areas and prime/flick white paint over the rest.

Since I'm hopeless at video-editing you're gonna have to do some reading.

With that in mind, let's get started.

1. Prime the ship black

Not much to add here apart from - skip Vallejo Spraycan primers. They suck. HARD. Use Tamiya Fine/Army Painter or Citadel primers.

27670983811_e168f7ab50_o.jpg

2. Add stars

This can be done in two simple ways:

a) wear gloves, spraypaint white onto your fingers and flick the paint onto the mini

b) hold a spraycan nozzle facing up into the air above the mini and press the button for a fraction of a second to make the spraycan spit

Try both on a piece of cardboard first. See which one you can control better.

27467540740_8d63eaf40d_o.jpg

3. If you you're repainting the whole thing - paint the visible hull

Thin layers, this took about three or four layers to get the paint to cover this well. Watered down layers of paint will not obscure the fine detail.

You define your transition in this step.

I wanted to do some highlighting on the greebling behind the cockpit so I chose a smaller area to be cloaked.

If you are not sure about painting canopies and the solar arrays OR just want the engines painted - flip it around and cloak the front.

27670983621_b5a1252a94_b.jpg

4. Drybrush dark blue (or whatever color you want the effect to be)

Again, pretty simple here. Take some paint onto and old, small brush, wipe most of it into a paper towel and then wipe whatever remains on the brush onto the model.

27711500856_513d7e25bb_b.jpg

5.
Drybrush some more - lighter colours this time

Here I used Vallejo Andrea Blue and Vallejo Sky Blue just because of how bright they are.

Focus these on a smaller area around the visible/invisible hull border.

*Note: I also washed during this step for no particular reason.

27670983821_9b7878cbeb_b.jpg

6. The main de-cloak effect

Start with bright blue (Vallejo Deep Sky Blue)

Paint short horizontal brushstrokes, starting over the visible hull.

27670983371_db01fecd14_b.jpg

To the same, again starting your brushstrokes over the hull. Do it with white, and in shorter brushstrokes this time.
Aim to end your strokes in the middle of the blue layer underneath.
27467540400_8387077480_b.jpg

7. Add lightning bolts

I like to keep this minimal.

Use a small, old brush to drybrush your bright blue in very small amounts on the hull area and some on the invisible parts. Don't overdo it.

Paint some random short lines with the bright blue to make up your lighting bolts.

Then paint white lines right over them (keep these narrower).

Don't worry too much about these not looking great from up close. They'll look exactly right from gaming distance.

27467540510_ca19425f57_b.jpg

8. Fix the transition if you find the gradient has too much contrast.

You can use a blue glaze (Citadel Gulliman Blue) and paint it in small amounts on top of and around the transition to tint all parts of the effect with blue pigment.

Hope this helps.


Here's an alternate example with more lightning and only white layer of horizontal brushstrokes for the main effect. This works nicely on large hull areas like the mist hunter.

25828431250_b9d50c743a_c.jpg

Edited by Polda

This is great, thanks so much for sharing - and especially with the explanatory 'drawings', not always easy to understand what people are trying to explain just by looking at photos of the model WIP...

Cheers!

These are very nice! I like your take on the transition: very slick. The addition of the close-ups really helps illustrate what's going on in the area between cloaked and decloaked.

This is great, thanks so much for sharing - and especially with the explanatory 'drawings', not always easy to understand what people are trying to explain just by looking at photos of the model WIP...

Cheers!

Agree with this

I'll only add that, though Mist Hunter is my favourite of the two, they're both great.

These are very nice! I like your take on the transition: very slick. The addition of the close-ups really helps illustrate what's going on in the area between cloaked and decloaked.

Glad you like it! Definitely wanted to avoid this:

Bs13i6LCcAAvwCf.jpg

Edited by Polda

Argh stop tempting me to paint, that looks great.

Argh stop tempting me to paint, that looks great.

One of us. One of us. One of us. One of us. One of us. One of us. One of us. One of us. One of us.

I mean I have been painting I just finished my FoW army, I just haven't done anything with x-wing yet.

Any more toots (tutorials) like this that anyone is aware of?

Not that I know of but thanks for bumping this one up, hadn't seen it yet

if there are more tutorials we should make an index of those :)

I wish I had more knowledge to create tutorials with. I think I did a tutorial for fixing gummy Saw's Renegades X-Wings once but that's too old to be useful by now (with the new Saw's pack likely having properly glued minis)

I second the notion of creating an index for tutorials like this one. I likewise had no idea that this one was out and about, and it's very, very good! Big thanks to @Polda for creating, and to @Force Majeure for bumping it back up!

Well shucks. Looks like I have to create a Tutorial Showcase!

Nicely done mate.. Those pics were cool too.

Hey, great tutorial. I just wanted to add an alternative to your stars technique that I've used on a bunch of boards and models, on black background.

  • Get an old used toothbrush (or a new one if you don't want to recycle), and some white paint.
  • Put a little of the white paint in a shot glass or on a palette, (optionally: water it down/thin it out if you need to, but not too much).
  • Run the bristle ends of the toothbrush through the paint.
  • Wipe the paint off the toothbrush for a good ten seconds onto either a paper towel or a piece of cloth.
  • Hold the toothbrush in your palm, brush head upward and back towards you like a joystick.
  • Hold your hand about five to 15 centimetres (two to maybe six inches) away from the model.
  • Place your thumb at the top of the brush end, and run it down the bristles to "flick" them forward towards the model.
  • You should see a nice cloud/mist of paint spray into the air, and land on your model like stars.

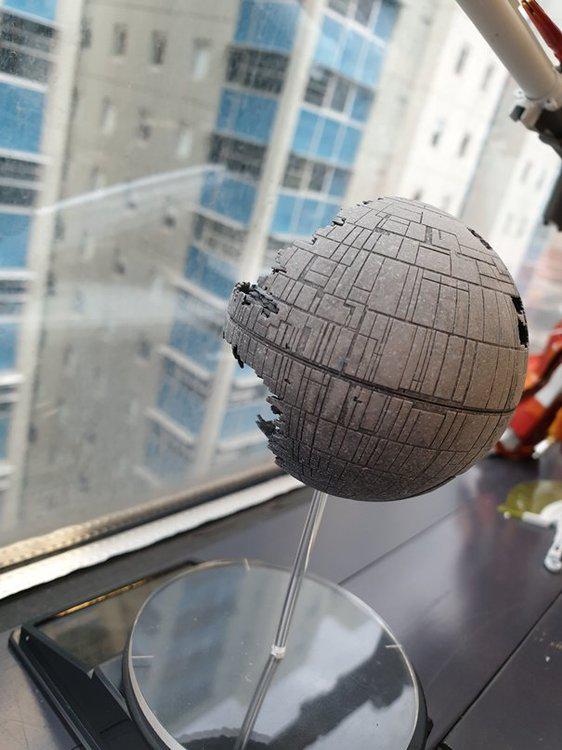
For bonus points, you can use it on some models to represent windows where the scale works, and even use different colour paints like I have here on my Bandai Death Star 2.

20191230_113348.jpg

20191230_113342.jpg