Hi all, so I played my first Regionals this weekend, and thought I'd tidy up the pics I took. Ended up playing around and labelling with graphics to post to my gaming group (to explain movement and attacks etc, each round.) But thought it was a cool way to give something to my pics. (Forgot a couple of opponents fleet totals though).
Placed 17th of 22 just missing out on top 16, so I was pretty happy with that as a first go, it ticked my goals of:
- Try not to come dead last
- Don't get tabled!![]()
- - -
My final list. 4 activations, in fast, create chaos, Motti commands from a decent distance. Great fun, although suffered not having gunnery, could have given me just a bit more damage.
388/400
"Argh! Space Triangles!"
(Flagship)
Raider I-class corvette (68pt)
- Admiral Motti
Victory I-class Star Destroyer (82pt)
- Captain Needa
- Turbolaser Reroute Circuits
Imperial I-class Star Destroyer (127pt)
- Intel Officer
- Ordnance Experts
- XI7 Turbolasers
Gladiator I-class Star Destroyer (77pt)
- Intel Officer
- Ordnance Experts
- Demolisher
Aggressor
Firespray-31
- - - - - - -
Most Wanted
Contested Outpost
Dangerous Territory
- - - - - - -
- - - - - - - - - - - - - - - - - - - - - - - - - - - - - - - - - - - - - - - - - - - - - - - - -
Game 1:
- - - - - - - - - - - - - - - - - - - - - - - - - - - - - - - - - - - - - - - - - - - - - - - - -
Motti (388) vs Motti (383)
(Kessel)
Round 1:
- - - - - - -
Faced off against a 3 ship Imperial list, under cutting my initiative bid of 388pt with a 383pt.
So I played second player, Him choosing my Contested Outpost.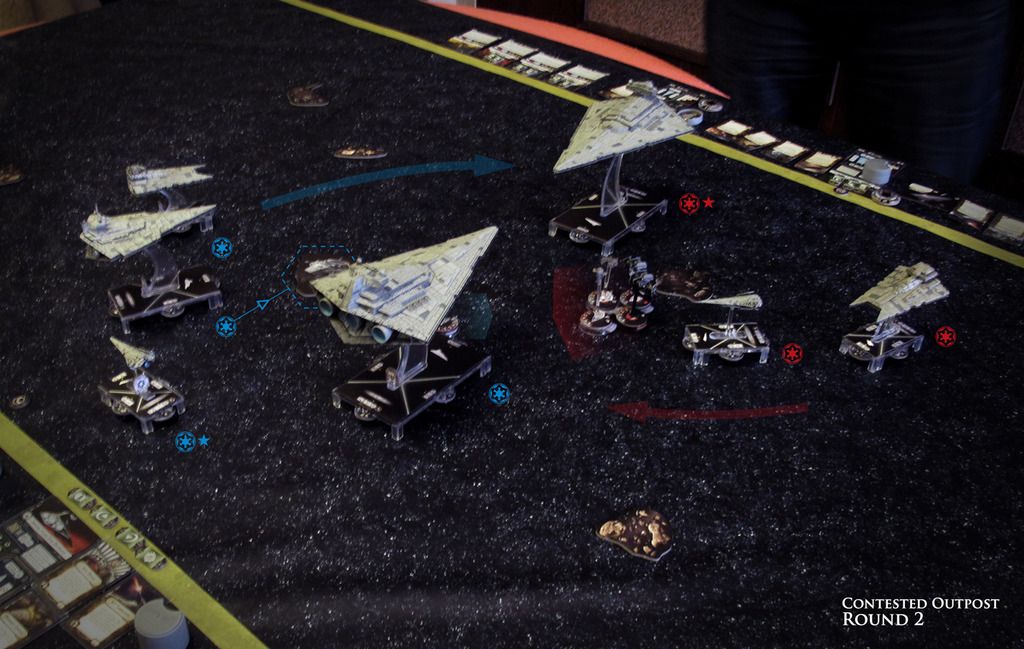
Round 2:
- - - - - - -
Close Range ISD straight up the middle with Intel Officer and ordnance.
The Victory moving forward at speed one to capture Outpost. (Manage to hold it for 4 turns and 80pts in the end.)
Demoliser flanking on the left sniping on approach (Flying beyond front arc).
Admiral speeding away at speed 4 on his command Raider.
Opponents Raider and Demo on the right flank of my ISD (sniping on approach). His mini Rhymerball coming in with an my Aggressor and Firespray-31 firing at Darth Vader's Tie.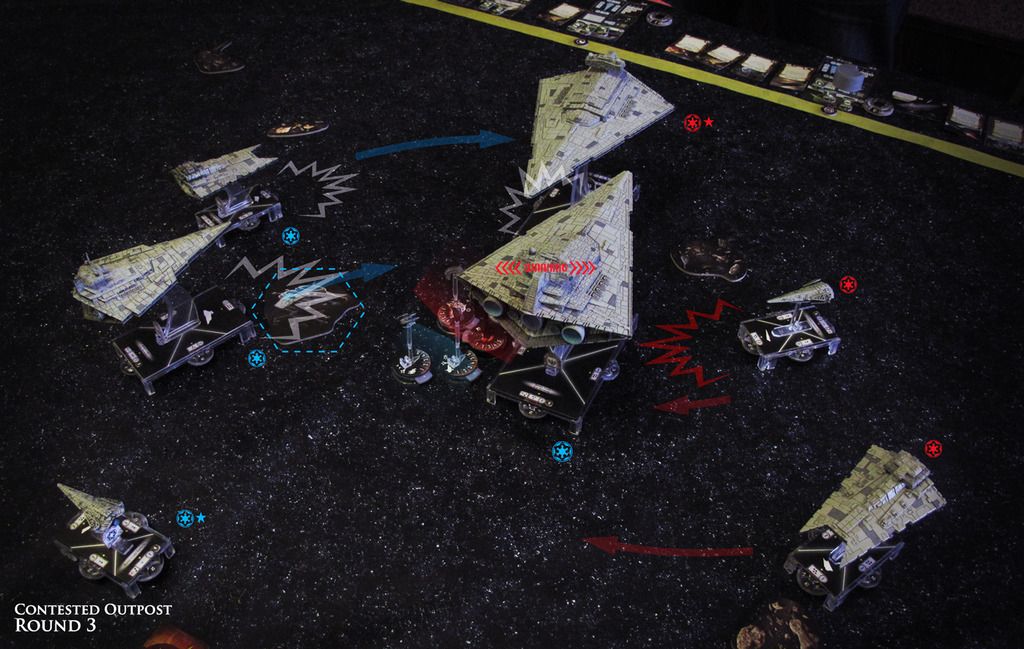
Round 3:
- - - - - - -
Both ISD's throw hideous amount of damage at each other. His Raider also coming in on the right and scoring an insane hit.
My ISD removing all his shields and inflicting a few hull damage but ending up heavily damaged from the exchange, and explodes due to the focused fire. His Demo had no shots.
Victory still holding the outpost and focusing its snipe shoots at the ISD alongside the my Gladiator doing the same (Narrowly missing a devasting close range shot opportunity by about 1mm! My Admiral getting the hell out of dodge and beyond any ship or squad range.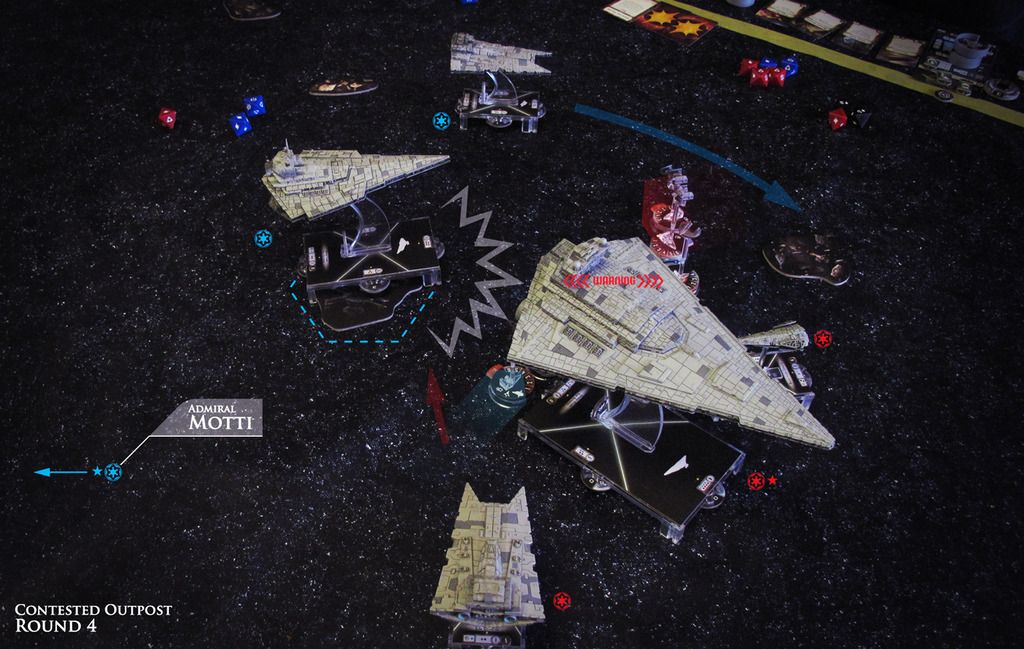
Round 4:
- - - - - - -
My Victory having moved up last round no has a double arc on the back of his ISD. Both shots (one with concentrated fire) fire into it, leaving him with 2/3 hull left with no defences and on the run at speed.
Darth Vader falls to focused squad fire from the Aggressor and Firespray, and move to engage his others.
My gladiator runs down the side flank chasing the burning ISD.
Round 5:
- - - - - - -
His Demo finally joins the battle curving up to attack the Victory at close range. Leaving it heavily damaged but still alive to claim the outpost (his ISD out of range).
Victory Fires back at his Demo, but only from weaker side arc, for a few damage. My Demo continues to flank to cut off ISD's escape, get in a snipe for for 2 damage.
Motti safe from any harm.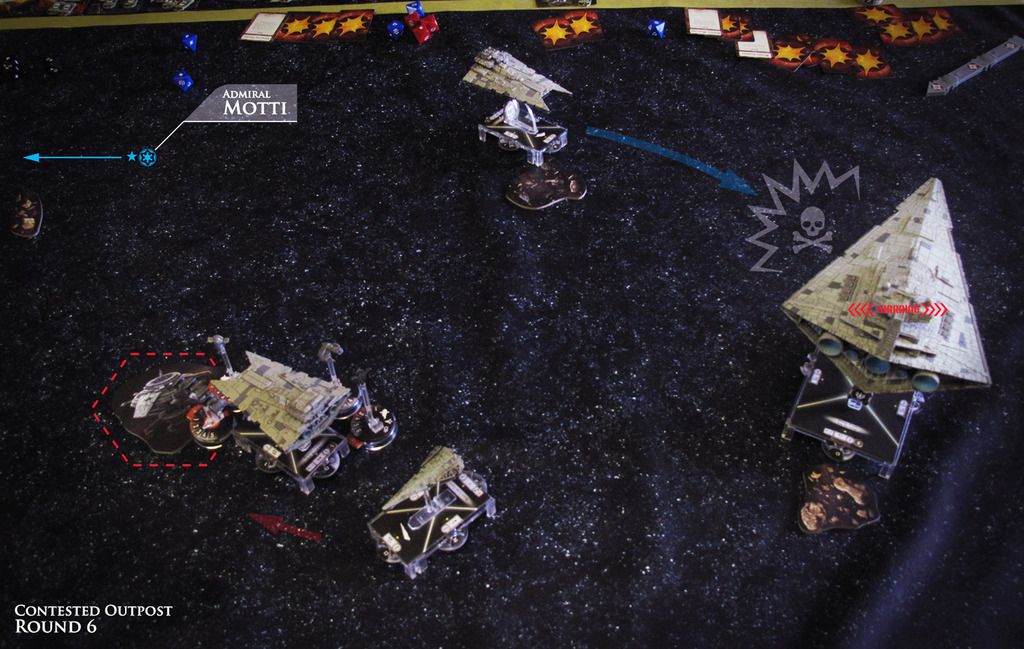
Round 6:
- - - - - - -
Victory finally goes down and concedes the outpost. Gladiator on its last turn earns the 1 damage at long range to pop his ISD, winning me the game by 29pts (A 5-5 Win). Final scores
Me: 272pt (80pts from Outpost hold)
Opponent: 243pt (20pts from Outpost hold)
- - - - - - - - - - - - - - - - - - - - - - - - - - - - - - - - - - - - - - - - - - - - - - - - -
Game 2:
- - - - - - - - - - - - - - - - - - - - - - - - - - - - - - - - - - - - - - - - - - - - - - - - -
Motti vs Ackbar
(Dagobah)
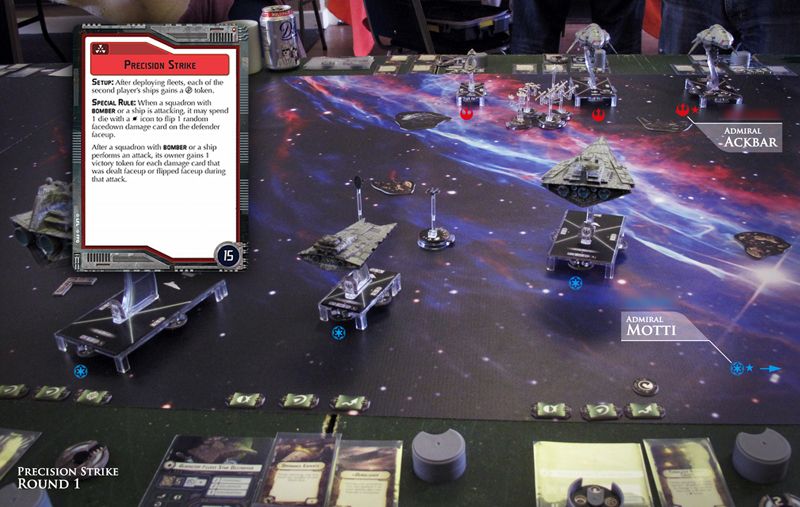
Round 1:
- - - - - - -
Gained initiative playing Precision Strike. With my ships activating first against the Rebels.
My first activation tempting his MC30 out, Demolisher manages to gets some shots in on it before moving into position to annihilate it before it got a chance to fire at the start of round 2.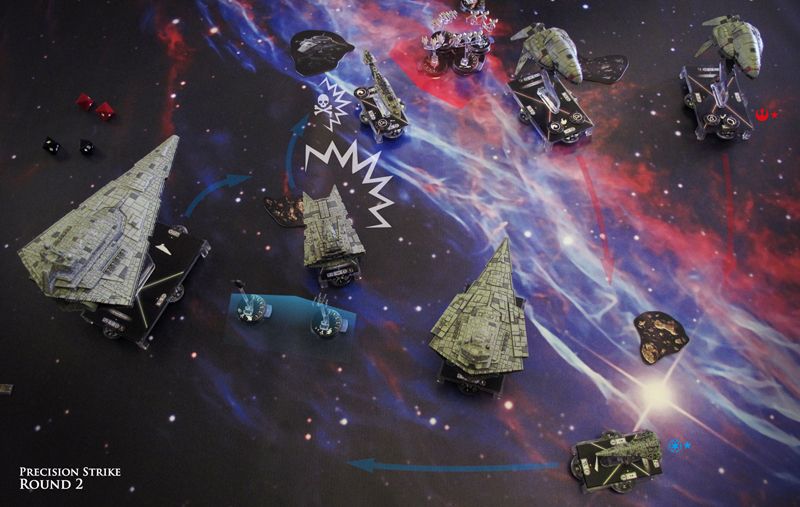
Round 2:
- - - - - - -
With the MC30 down, the Frigates flanked on my right to bring their broadsides to bear.
ISD Is forced to bank to try and cut them off in time. (bad deployment).
Victory exchanges some long range fire with the Frigates.
Demolisher take a counterattack from one Frigate at long range, as well as some rebel squadron orders
(with intel).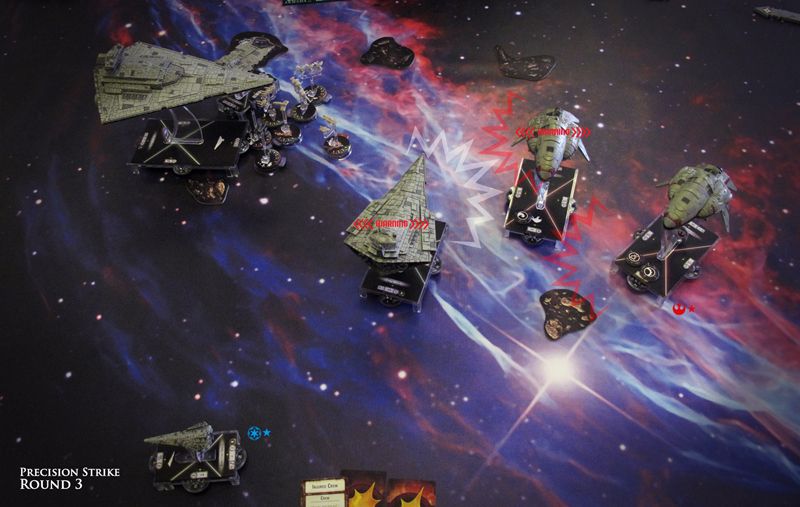
Round 3:
- - - - - - -
Demolisher breaks off, and unfortunately is set off course by asteroid fields, and is unable to rejoin the engagement for the rest of game.
Victory trades fire with the first Frigate, causing heavy damage, but is outgunned, while the ISD floors it to reinforce.
Motti legs it in the Raider.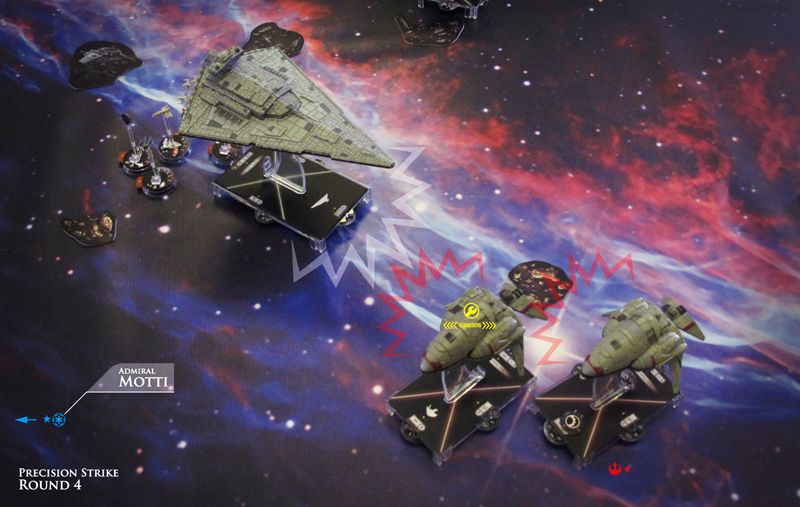
Round 4:
- - - - - - -
Victory goes down, as ISD comes into range. Fires at damaged Frigate, but not in close enough range for heavy guns. Frigate repairs, fires and jumps my front arc.
Here is where the plan fell apart due to Imperial blood lust ![]()
My greed for extra firepower against the Frigate meant I threw in 1 concentrated fire command, against my "Only Navigate commands" (extra yaw value, and adjust speed) - for the ISD. I failed to realise how close to the edge I was getting, due to murderous tunnel vision! This cost me the game.
His Frigates continue to swirl.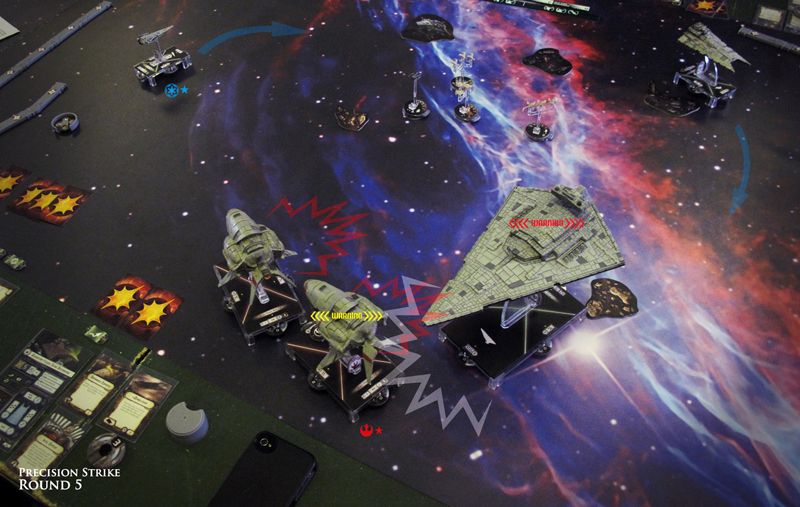
Round 5:
- - - - - - -
My ISD unloads heavily into Ackbars flagship, causing critical damage, but only 2/6 on his main hull.
Ships exchange fire, and move.
Then… I have to move, I have a navigate command to slow to 2, but it's just not enough. My left corner is 2-3mm over the edge.
Round 6:
- - - - - - -
Rest of our ships activate, one shot at Motti from front of a Frigate, 1 hit that is evaded. Game comes to a close.
So, straying from the plan cost me this one…
(7-3 Loss).
Me: 187pt (60pts from Objective Strikes.)
Opponent: 288pt (?? from Objective Strikes)
- - - - - - - - - - - - - - - - - - - - - - - - - - - - - - - - - - - - - - - - - - - - - - - - -
Game 3:
- - - - - - - - - - - - - - - - - - - - - - - - - - - - - - - - - - - - - - - - - - - - - - - - -
Motti vs Another Ackbar)
(Alderaan)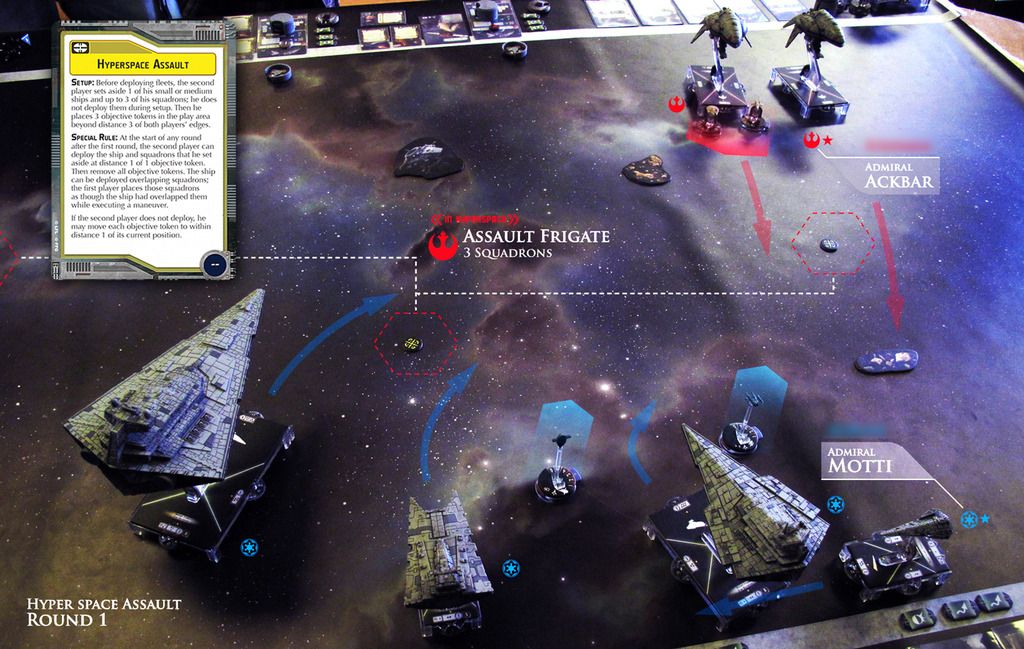
Round 1:
- - - - - - -
Gained initiative, facing some tough objective choices, I chose Hyperspace Assault, which was a mistake, I could have gone a lot worse than it did, but think maybe it was a poor choice made me deploy poorly, trying to spread my bets covering all hyperspace points, instead of a closer faster formation on the right.
He takes an Assault Frigate and 3 Squads into Hyperspace (Luke, Wedge, Y-Wing).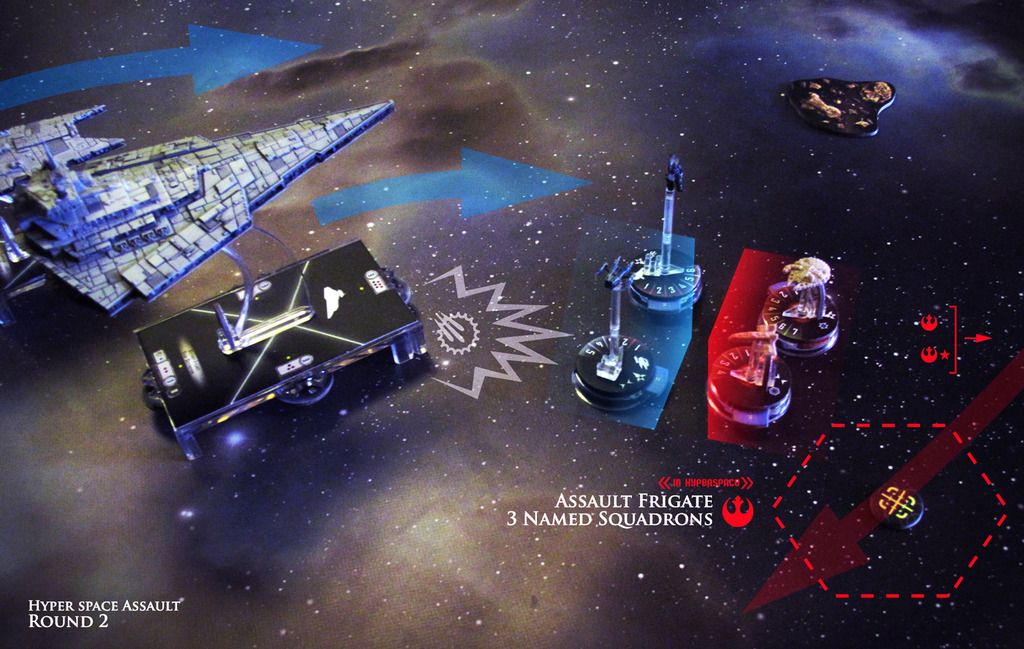
Round 2:
- - - - - - -
I turtle up a bit, but my line is spread just a bit too wide, leaving the ISD out on the line for too long.
Our fighters exchange fire, my Rogues vs Han Solo and Jan Ors. Some anti squad fire coming from the Victory.
Motti runs the back line, wary of the jump point ahead.
Round 3:
- - - - - - -
Hyperspace deploys behind gunline and within mid-range of Motti. Not good.
I activate Motti's Raider, with a nav and a nav token and punch it from Speed 2 to 4, and jump past long range of his Frigate.
Frigate Activates, no shot on Motti, but send sends Luke and a Y-Wing after the Raider. 1/2 Damage. The Frigate fires its left arc at the Victory's rear.
Demolisher speeds up, snipes at inner Frigate alongside Victory, Victory takes counter fire
ISD Speeds up to get in line.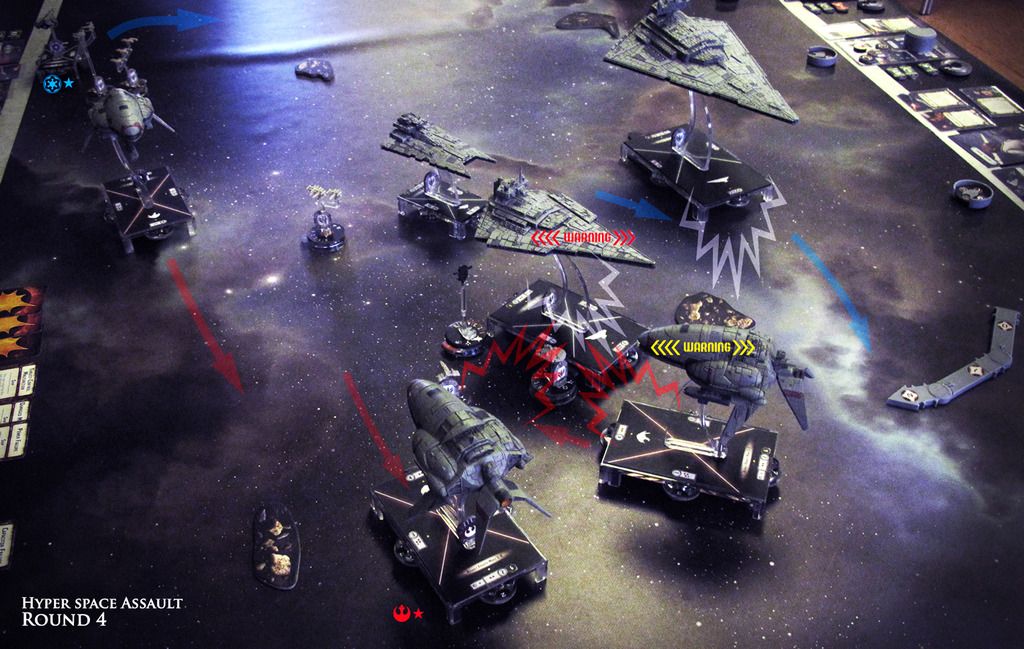
Round 4:
- - - - - - -
Victory activate first, but double arcs Ackbar instead of damaged Frigate. Wrong call, should have continued focus on inner frigate. Moves and rams Frigate to a damage each. Is then taken down in return fire.
Demolisher runs over an asteroid in order to snipe and fire again on the Frigate, but still not enough, plots a retreat trajectory due to heavy damage.
Motti, now well out of range.
Jan Ors is taken down by my Firespray. 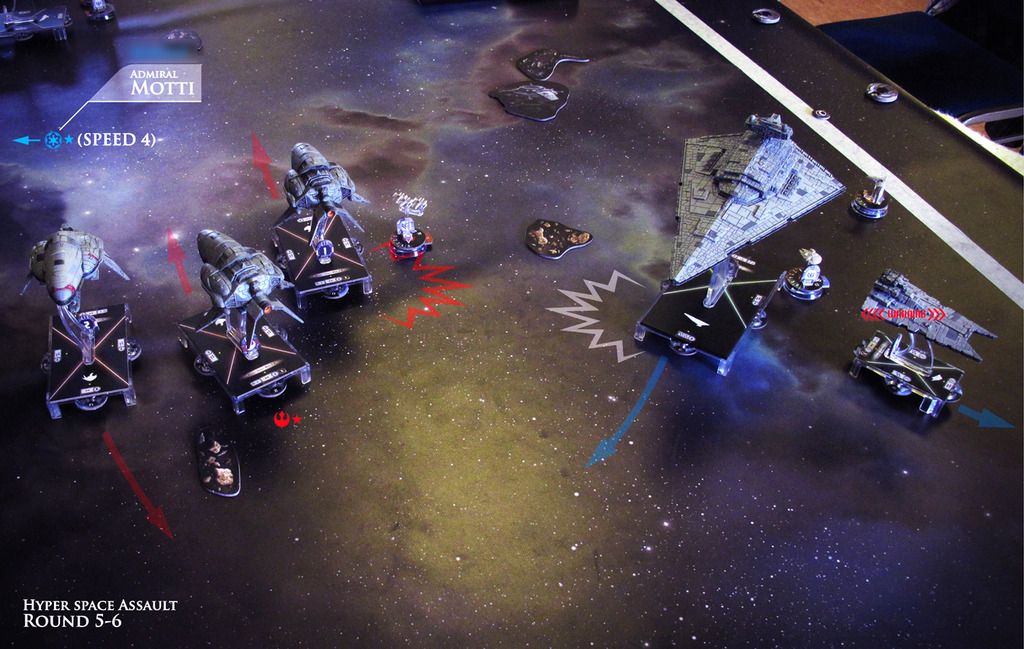
Round 5-6:
- - - - - - -
Most ships out of range, Frigate and ISD exchange some parting final shots at each other in round 5.
- - -
My line was too spread out to get a kill which could have brought it back a little. But a great, thought out game with my opponent.
(7-3 Loss).
Me: 19pt (Kills: Jan Ors) -
Opponent: 116pt (Kills: Victory, Aggressor)
- - - - -
Overall, really glad I dived in and came along, was great day, really enjoyed it, learnt a lot (Gunnery, don't stop navving on a ISD at speed 3!), and saw some cool lists. And also these insane encounters…
4 Way ISD Tango…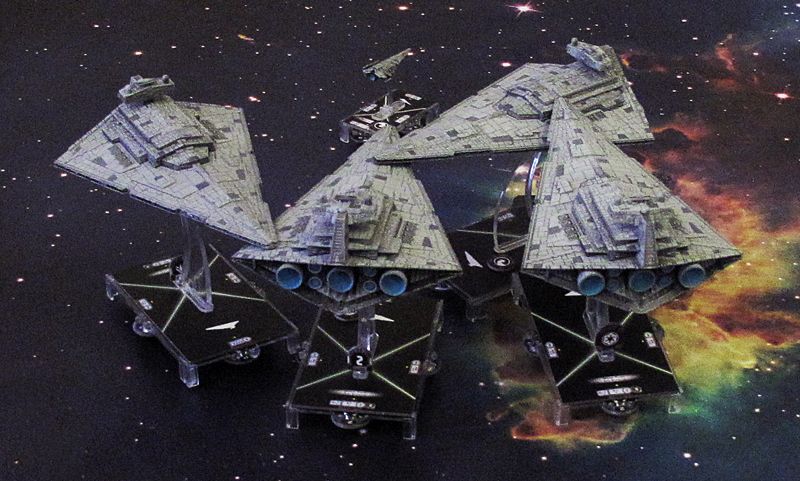
Insane 7 (or 8?) Raider swarm list. Jesus…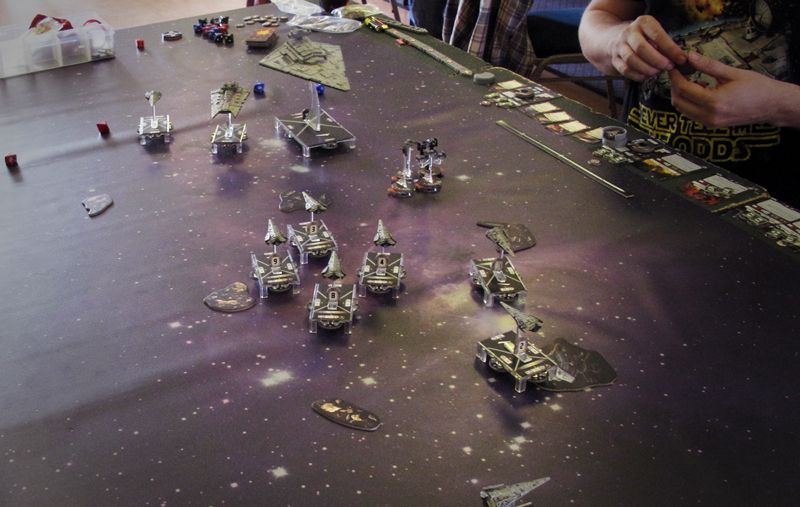
Flying ISD I Intel is awesome fun, and bar a couple of silly mistakes, I'm glad with how it went. Great day put on by Kirton Games, and was awesome to finally play some new opponents from around the UK. Glad I dived in ![]()