Middy's simple repaints & mods

By ianmiddy, in X-Wing Painting and Modification

I'm trying to express how amazingly cool those add-ons are, and I'm failing. In addition to being a nice conversion job, it's also incredibly thematic. Not to mention the cool idea of things being shot off the corvette when it gets damaged.

Or simply putting bits onto it to represent what equipment it has. Engine booster? 4th engine. Fill the hardpoints? Put the two side guns on. If you have a backup shield generator, you could put the cargo module on it. Comms Booster? Slap the extra antenna on there.

I don't think I want FFG to make anything quite that complicated as a kit. But it would be amazing to have some custom kits with built in spaces for magnets. And it wouldn't be tournament legal, but if there was a "community standard" for its specs, it would be awesome for casual play.

Have to admit, I have gone a bit 'magnet mad' since starting the container carrier...although, oddly, not been fussed about using them for the bases to make the models pose-able.

I guess FFG did make a start on the 'add-ons to match cards' thing with the Gozanti, since you can add/remove/replace the twin-laser hardpoints and antenna easily ;)

Have been thinking about doing some replacement turrets for the Goz to give Quad lasers, or on the CR-90 main turrets, but not got around to it :huh:

...as for the ultimate [for me] magnetised hull-pieces Epic combo, my Deci-Raider has been waiting nearly 6mths for some progress, but other ideas keep getting in the way...and it needs a bit of a 'leap-of-faith' to chance ruining the Deci with whats involved...hopefully soon :unsure:

Cheers for the kind comments...it was quite satisfying to get the add-ons to work as well as they did...hopefully I can get the thing base-coated soon if the weather improves a bit! ;)

Edited by ianmiddy

I remember when " Rapid Prototyping"

As it was called then, was extremely expensive !

I worked for Bocsh as Model Design Engineer years ago.

Our department would spend well over a Million pounds a year

On concepts, made from the SLA and SLR material.

We looked into getting a printer back then....For the measley sum of half a million pounds.

And now,

You can print models at home.

Amazing.

I'm actually astonished at how far the technology has come in the last 20 years.

Compared to when I use to work with it and how unbelievably expensive it was.

To how readily available, and how cheap it is now.

And that you get to make any ship you want !

Wonder what the next 20 years will bring.

I do have a question for you Ian.

How brittle,fragile is the material now ?

Back then, the SLA was pretty tough but very grainy. And the SLR was very smooth but would shatter like thin resin.

Interested to know if the dexterity and strength has improved.

All the best.

Barry.

Wonder what the next 20 years will bring.

Assuming that we can find a way to create the energy and raw materials while reversing the ecological harm that we've already done, we're heading for a golden age.

I'm reading repots about laboratories that are looking into ways to "print" food. FOOD! Not to mention things like leather or concrete.

And while it's true that fossil fuels have caused the human species to kickstart the 5th Great Extinction in Earth's history, we are on the cusp of replacing that energy source with things like wind, solar, and wave- energy sources with their own, much smaller, dangers.

I'm dead serious: the next 20 years will determine if we continue on the path to infinite resources, or the path to extinction. It feels weird to say that we are on both paths at the same time- but from what I can tell, we seem to be.

Sorry for the tangent. I'm both excited and terrified about the next 20 years or so. I hope we start making the right decisions.

How brittle,fragile is the material now ?

Back then, the SLA was pretty tough but very grainy. And the SLR was very smooth but would shatter like thin resin.

Interested to know if the dexterity and strength has improved.

Certainly not the best person to answer this, Barry, as I'm really only dipping my toes so far and I'm sure there are chemists and engineers on here far more able than me to offer a technical response, or who have been using their machines longer & with more materials like Herowannabe and tjkopena...but...

...I'm frankly amazed at how tough the PLA prints I've made are, considering it's from a refined 'natural' resource and is supposed to be biodegradable - an early print I started of a YT-2400-sized ship failed after a few mm, but the outline was all there and so I kept the thing as a kind of coaster - after a while the edges started to curl, so I was going to bin it anyway, thought I would just snap it in half & be done...fat chance! However, the graininess you describe is still there with this material, I think - not sure what resin prints are like with their finer detail, but I think generally things have improved but still suffer in the fashions you describe...

Will admit that I've not tried hitting anything with a hammer to try a shatter test, but I suspect that might have more effect...I believe ABS is supposed to be more 'flexible' in that respect, but my printer is only a cheap one so can only use PLA. Certainly the early prints I made I was convinced I would need a high 'infill' proportion expecting that large volumes would otherwise 'collapse', but tjkopena has shown me that's not the case (take a look at his Nebulon frigate in this post: https://community.fantasyflightgames.com/topic/237014-molokh-gambit-narrative-campaign-w-extensive-custom-components/#entry2542255 - I believe that is at 20% infill, and could maybe have got away with less...)

As both of you have said above, wonder what the coming years will bring...I still find it hard to believe that my phone has thousands of times the computing power of the first 'portable' computer I used nearly 35yrs ago [it was the size & weight of a sewing machine] or is capable of running databases that then used to sit on mainframes occupying massive air-conditioned rooms...I look at these 3d printers and see a similar cycle in prospect, but even more compressed...already the price of the resin-based machines capable of far better resolution & quality than mine are available just over the £1k mark, so who knows what a few years will bring...

...as with all these technologies, you have to decide when to jump on the wagon, and accept that what you buy is already outdated as you open the box...but if you can have fun playing with it anyway, why not ? ;)

As PP says, we're on the verge of another golden age, providing we don't c0ck it up! My only regret is I almost certainly won't be around to see the wonders to come - I always hoped to see man on Mars, having been born the year man first left the earth, but not sure that's gonna happen :rolleyes:

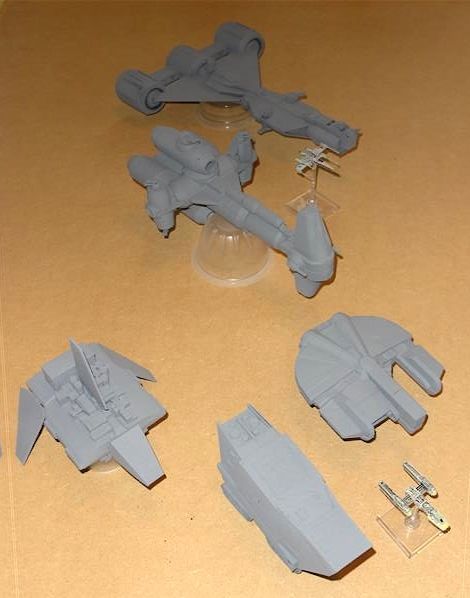
Decided it was finally mild enough [and windless] to risk putting some primer down on the latest stuff off the 3d 'production line':

Some have been seen before, but without any/full priming:

DSC02160.jpg

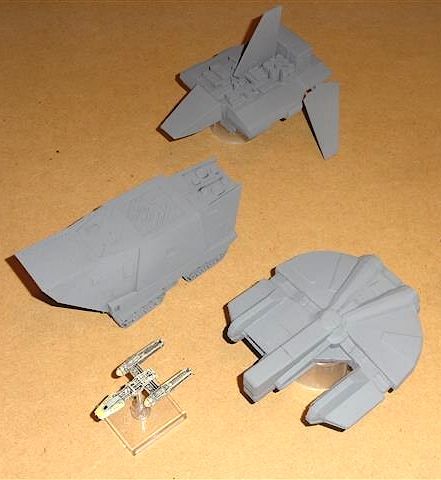
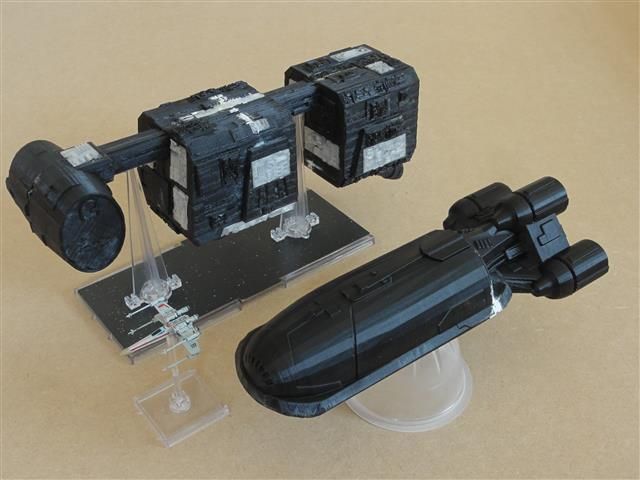
Back to front, Consular class (Charger c70 retrofit), Hammerhead plus R1 mods, Ebon Hawk, Hondo's Sentinel and Sandcrawler.

Smaller stuff - got a "Lars Homestead" dome & vaporators or Cantina plus some desert mesa terrain to go with the sandcrawler...Hondo's shuttle will be a challenge in weathering [i can but try, lol] and the Ebon will probably get something like its 'normal' paint scheme [although I never knew it 'in-game' so not too fussed]:

DSC02157.jpg

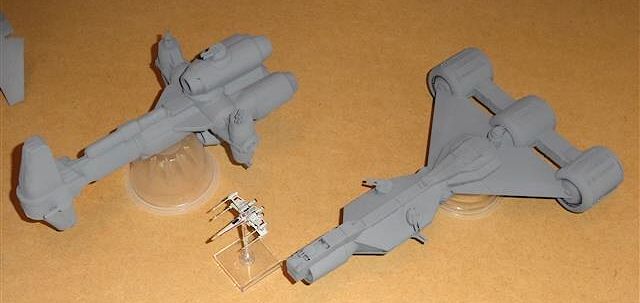
Epics...guess the Hammerhead needs to be Rebel after R1, but not sure about the Consular - could do a Hutt scheme, perhaps:

DSC02156.jpg

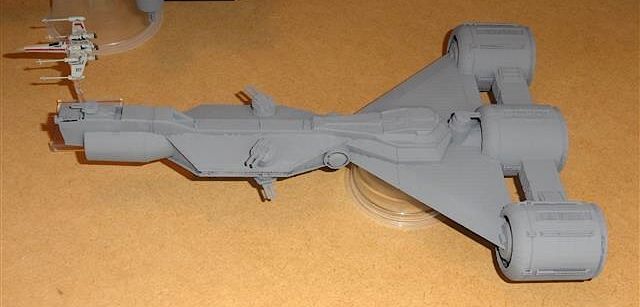
As Barry says, primer does tend to show up all those areas that need further tidying! :

DSC02162.jpg

Concealing that join-line of the engine add-on is gonna be a bit tricky :unsure: :

DSC02163.jpg

Too much to paint ! - so the printer will take a bit of a rest during Jan/Feb, maybe just work on the idea of replacement bits for the CR90 & Gozanti like different comms arrays or turrets :huh:

Cheers

They are looking great Ian.

If you want a good filler for filling fine seem lines.........the primer paint you sprayed them with.

is perfect.

spray a bit of paint into a top or plastic lid.....keep spraying until you get a build up of paint.

then let that pool of paint go off !

Takes about 20-30 minutes and it will go thick and gloopy.......now you have a thick filler.

I do this a lot, you can apply it with a cocktail stick, over fill the seam line.

then wh

Edited by Barry Harker

Thanks for that tip, Barry...I got some Mr Surfacer 1000 and have tried that, but I think it may be too fine for some of the seams [and I have to use it outside as the fumes are poisonous to tropical fish!]

...will give the gloopy primer a go - the Ebon Hawk in particular has a noticeable seam where the two halves are joined.

Cheers ;)

Everything here is looking great!

Thank you for posting your work. It's great being able to see the progress from the start of the thread to your latest models. All those freighters are looking really nice. :D

I'm excited to be able to print miniatures at home someday soon. Once the cost gets low enough for me to justify buying in.

Once I've got a good cheap 3D printer and a passable VR set up at home I'm doomed though... ;)

Thanks Again for Posting!

I'm excited to be able to print miniatures at home someday soon. Once the cost gets low enough for me to justify buying in.

Watch out...it does become rather addictive!

I intended to stop printing ships this month and next...and I actually managed it for a couple of weeks - I started printing 54mm D&D characters instead !

...but then, today, I decided I wanted some fighters to go with the scum DP-20 and YV-100 I'd been painting...so 4 Z-95's rolled off the production line... :wacko:

Got to say Ian..........Would be nice to see some of those new models

with a coat of paint ! :P

Ha Ha

be interesting to also see what colour you choose to do the Hammerhead in.

All the best,

Barry.

Got to say Ian..........Would be nice to see some of those new models

with a coat of paint ! :P

Ha Ha

be interesting to also see what colour you choose to do the Hammerhead in.

All the best,

Barry.

I know, Barry, dragging my heels! :rolleyes: Lots waiting to be primed, but it seems way too cold to do it outside at the moment, and can't do it indoors because of the fumes...

...I have actually got most of both the DP-20 & YV-100 done in a Red/Grey scheme, with some metallic detailing on both and rust on the latter...but they both need something to give them a bit extra, but can't decide what :unsure:

The Consular class has got its basecoat down and will be a simple scheme, the "Ryshue Star":

Ryshue_Star.jpg

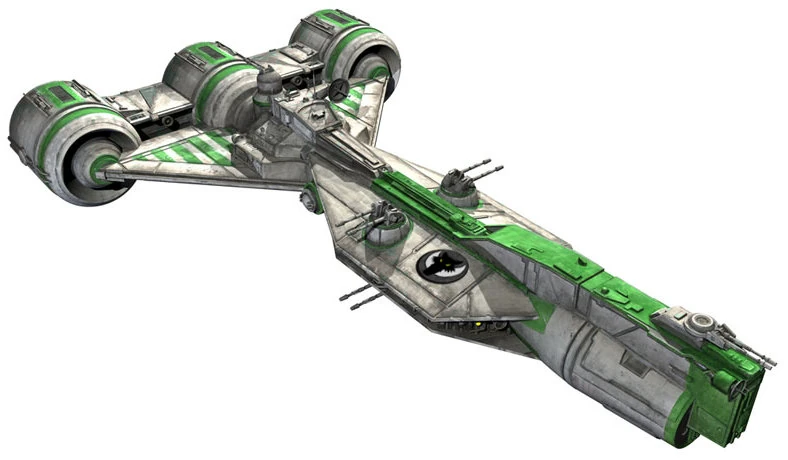
Will probably do the Hammerhead as "P2" from Rebels:

P2_BTS.png

...as only seen one detailed shot of the Rogue 1 ship "Lightmaker" and can't work out if it's supposed to be one of the "Rebels" three ships or not...but the schemes seem fairly similar :huh:

Well, that's the plan at any rate...but such things never survive contact with the enemy paintbrush :D - and I'm away from home for all of Feb, so unless I get one or two finished next week, nothing much from me until March :blink:

On 3/12/2016 at 4:55 PM, ianmiddy said:

One of the reasons the Jr was so long being finished is my new compulsion to 3D-print anything and everything I can get models for, so here are a few of the ones currently WIP:

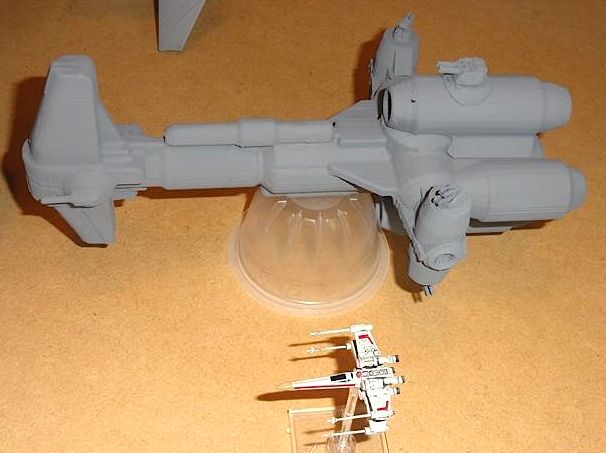
Again, not a popular ship on here - I've seen it called "a coffee cup on a bog roll on a shoe box" [and that's one of the kinder descriptions], but whilst FFG drag their feet producing a Scum Epic to go up against the CR-90 & Raider, I decided to have a go at a DP-20 - took over 30hrs to print in 4 sessions, and then greebling & turreting-up, but I'm pleased with it so far...just hope I can do a decent paintjob :unsure: :

DSC06985.jpg

DSC06986.jpg

Please share the STL file of this one !!!!!!

Also where do you get all your greeblies? I'm finding my scratchbuilds looking a little bare at the moment, a problem I often see with scratchbuilds, because Star Wars ships, especially big ones, generally have LOADS of greeblies, and a lot of detail, that you just can execute with plasticard alone.

Hi, Dinobaldi - fairly sure the DP-20 used Crazyewok's design on Thingiverse:

Starwars Correlian Gunship

I split this in half horizontally and assumed top & bottom were symmetrical, then chopped the result at the mid-point of the 'main' turret to give me 4 pieces that would then fit on my limited print bed - did get some warping, so when assembled it did need some heavy filling [I used Milliput].

There is a similar design by Dantesgift:

Corellian DP-20 Gunship

but I've not tried that one out, just kept a copy in case I want to try another model at some point.

Hope this helps ;)

35 minutes ago, thespaceinvader said:

Also where do you get all your greeblies? I'm finding my scratchbuilds looking a little bare at the moment, a problem I often see with scratchbuilds, because Star Wars ships, especially big ones, generally have LOADS of greeblies, and a lot of detail, that you just can execute with plasticard alone.

They were some of the first things I made STL's for, as that was one of the primary reasons for getting the printer :rolleyes:

Some of the long, thin strips are based on one of my first designs in Tinkercad playing around with random geometric shapes and curves...when I printed them at a couple of millimetres wide, the detail all rather merged into blobs - but purely by chance they worked well as greeblies, so I just printed a few dozen as some of my earlier print tests when I was trying to sort out my bed-height problems :huh:

For the larger 'plate' pieces, I used the "EM_Plate" pieces from Metaform3d's incredible:

Discovery from 2001 (XD-1)

...imported into Tinkercad and all but the top surfaces removed using "Hole" blocks - then got variations on their surface appearance by "filling" them up to different levels with solid blocks - kinda like the effect you see on the hills surrounding a reservoir in a river valley filled to different depths, if you get my meaning :blink:

...and, finally, because I have 'unusable' filament left over on all my spools, I got a 3d-pen and have used that for 'filling-in' gaps between the various printed plates in a random fashion - makes for quite good looking pipework, if a little "Giger"-ish like Aliens :unsure:

Hope this helps - if you want some actual STL's I can send them - unfortunately I used up almost all my 'attachment' allowance on the pics in my first post in this thread :(

Cheers ;)

Edited by ianmiddy

I do have access to a 3d printer, but probably not the time or inclination to print greeblies out. I was hoping you were just goign to point to some kit or other that has a lot of good stuff in it :P

9 minutes ago, thespaceinvader said:

I do have access to a 3d printer, but probably not the time or inclination to print greeblies out. I was hoping you were just goign to point to some kit or other that has a lot of good stuff in it :P

Ah, afraid not...you're probably best asking Barry H or MacrossVF1, as I gave up modelling for many years until 12mths or so ago, so I'm completely out of touch with the more recent kit ranges, and have next to nothing in my 'spares' box as a result - hence the printer...sorry! :(

no worries

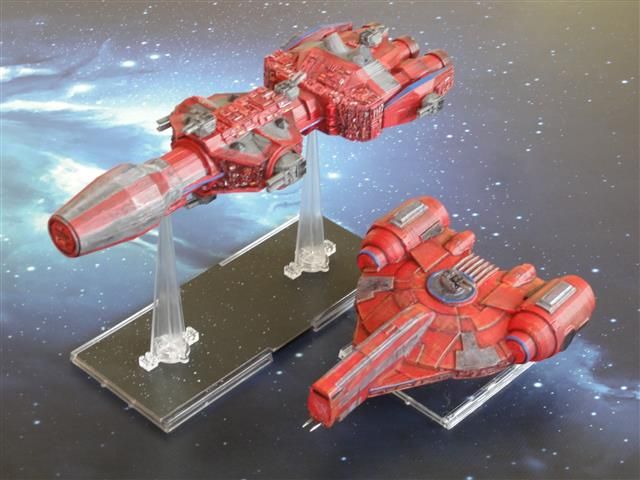
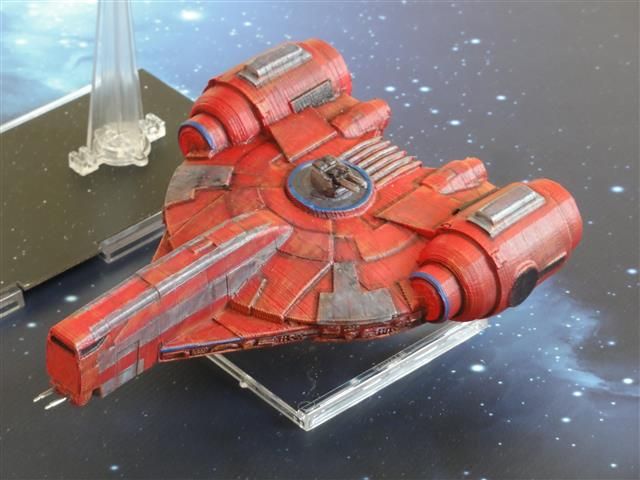
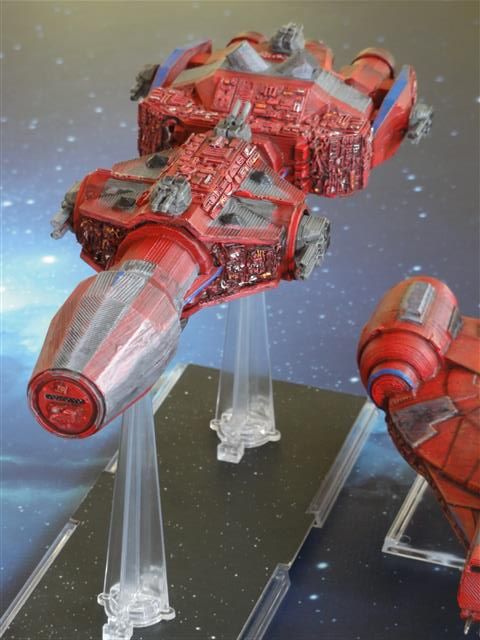
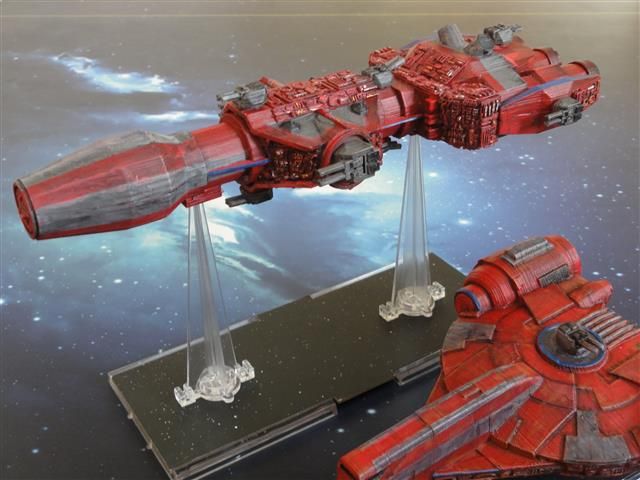
Finally happy with the way these look (well, I guess - useless at doing engine glow, hence no rear shots! :( ):

DP20 & YV100:

DSC02417.jpg

DSC02419.jpg

DSC02420.jpg

DSC02422.jpg

Reds are a little darker IRL, and I've still to paint the escorting Clone-wars Y-Wings and Z-95's to match.

Edited by ianmiddy

...and now the latest Epics off the 3d production line, a Mobquet and CSS-1 Shuttle...just need a windless day to prime and get their basecoats down:

DSC02423.jpg

Edited by ianmiddy

I haven't tried engine glow on huge ships, but generally, it's not too hard. This won't likely win awards & can be refined, but is the basic process I use on small ships:

1. Paint the inside of the engine nozzle the color of your choice, magenta, cyan, orange, green--as long as it is fairly vibrant on it's own.

2. While it's still wet, add a tint of that color (just add white until it's 3 or so shades lighter) in a concentric shape (Think of a target. You are starting with the largest circle and then painting the next smaller circle, and so on.)
You want the first and second colors to co-mingle.

3. Also while still wet, but not runny or sloppy, add white to the center. At arm's length, your eye usually doesn't care if you've tinted the white a hair or two. It's the contrast to the original color you laid down to the white that gives you the illusion.

And that's it.

If anyone has another method they like to use, please chime in. I'm always willing to learn a new technique.

29 minutes ago, Force Majeure said:

I haven't tried engine glow on huge ships, but generally, it's not too hard. This won't likely win awards & can be refined, but is the basic process I use on small ships:

Thanks, FM - I will certainly give this a try if & when I revisit these and the other Epics I've been working on...but, for now, anything smaller than the 'block' paintwork on these and others I've yet to finish is being done with acrylic pens, as I've still not got full feeling/control back in the fingers of my right hand and fine brush control is...problematic :rolleyes: ...and, unfortunately, pens don't lend themselves to blending unless you don't mind ruining them :(

So, for the moment, the engine exhausts are just plain yellow...I would consider trying decals of a glow, but more often than not, the engine exhausts are where the 3d-printing 'artifacts' are at their worst, so they wouldn't sit/adhere properly...

Cheers ;)

Well, your ships look marvelous as you've painted them! I wouldn't have guessed about your hand.

I have my eye on that CSS-1 shuttle you just printed. Hopefully the weather gets better so you can get to it!

1 minute ago, Force Majeure said:

I have my eye on that CSS-1 shuttle you just printed. Hopefully the weather gets better so you can get to it!

Have to say, it's one of the best results I've had printing...really quite smooth with hardly any printing artifacts, and only needed a little filling between the two pieces...and now just about the right size compared to the other Epics [except the Goz], so much more convincing than the smaller [moulded] version I've got to replace the Core set card...

...although not sure how well the movements available on the original will translate to Epic movements for running the scenario :unsure:

Calling these two finished...tried having a go at engine glow using my go-to acrylic pens, and then blending using Iso-alcohol, but not massively successful :unsure:

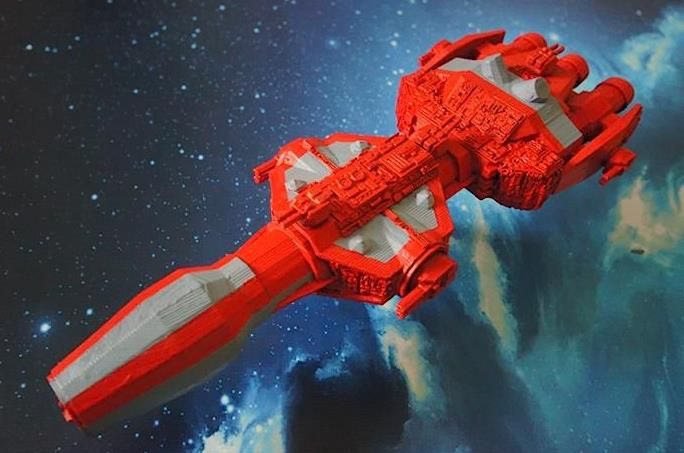
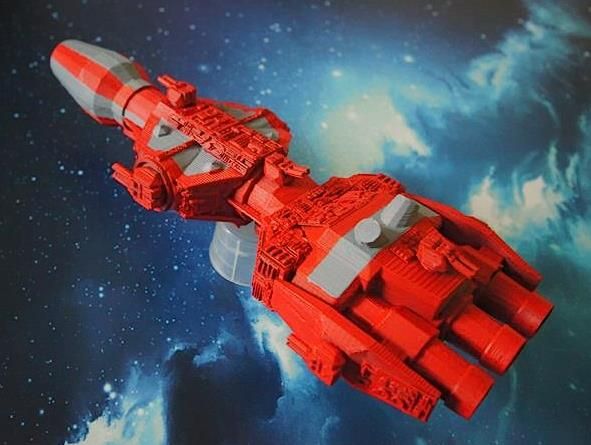
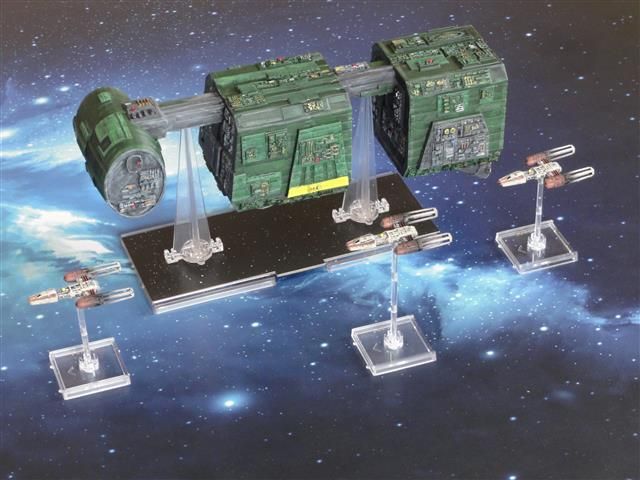
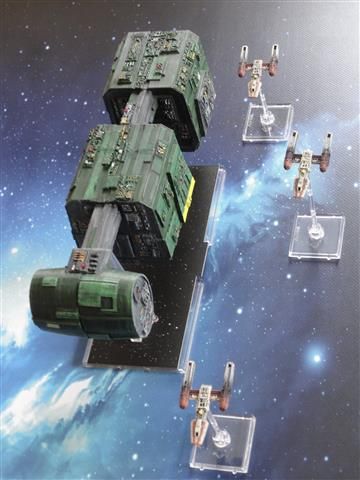
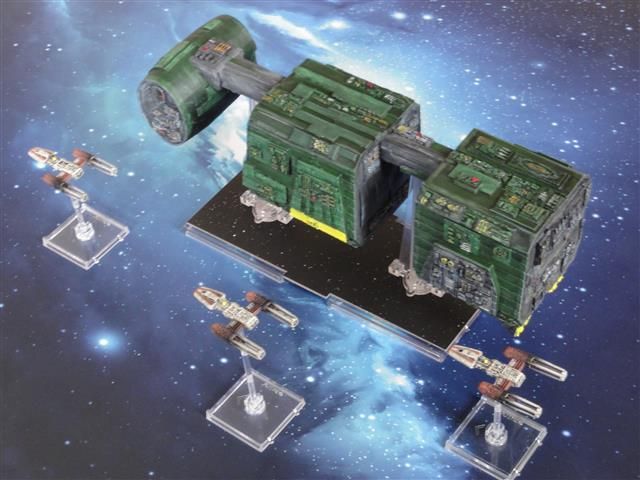
Mobquet - the green went a bit darker than I'd hoped for after wash, so tried to bring back some highlights with Iso, and then drybrushing both green & grey...oh well, it will do as a scum version of the GR-75 using Marinealver's kit, if I can ever get an Epic game:

DSC02475.jpg

DSC02477.jpg

DSC02478.jpg

Edited by ianmiddy