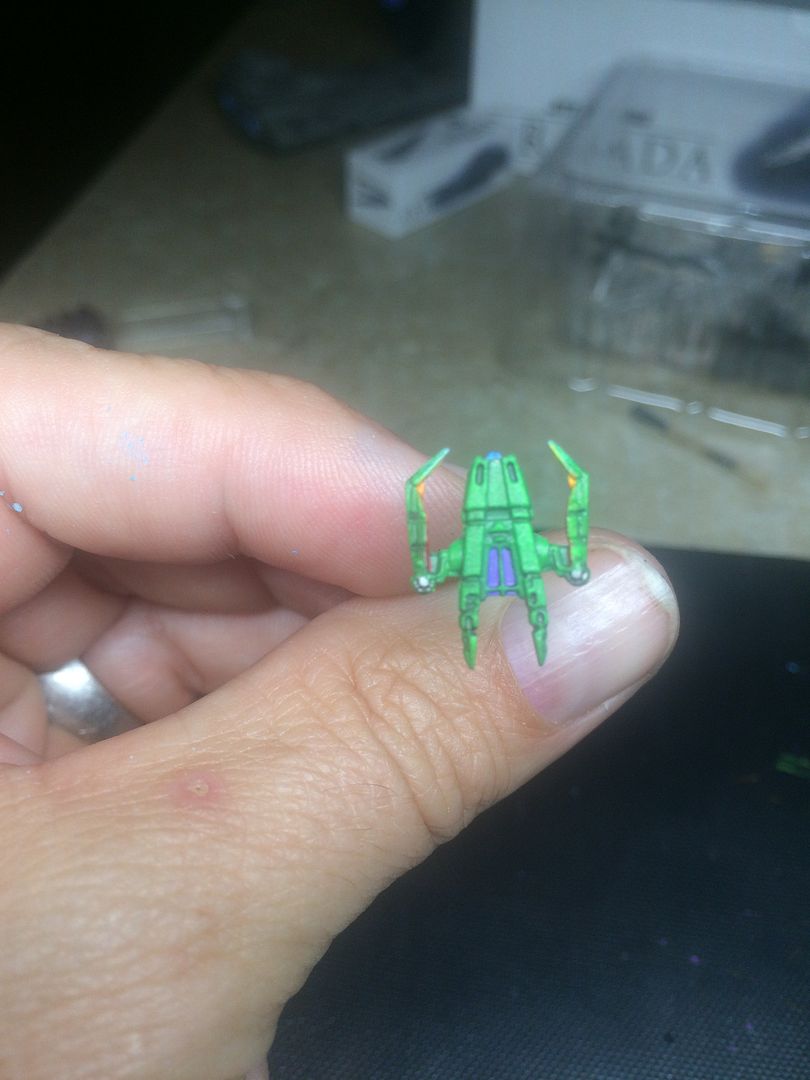
My go at tiny spaceships

By WGNF911, in Star Wars: Armada Painting and Modification

What sticks do you use to hold the squads while you paint them? I tried coffee stir sticks, but they aren't snug enough fit.

BTW, the painting is awesome. Ill be posting some of my squads up here when I get a few more done....

Edited by moodswing5537

What sticks do you use to hold the squads while you paint them? I tried coffee stir sticks, but they aren't snug enough fit.

BTW, the painting is awesome. Ill be posting some of my squads up here when I get a few more done....

I swear by Johnson and johnson cotton buds / q-tips (the blue ones), they are just the right size once you snip the end off

Edited by 54NCH32

What sticks do you use to hold the squads while you paint them? I tried coffee stir sticks, but they aren't snug enough fit.

BTW, the painting is awesome. Ill be posting some of my squads up here when I get a few more done....

Thanks! I use plastic Q-tips, pull the cotton off, cut it in half, then I very carefully cut 1 slit (1/4-1/2") on the non-cotton side of the half-stems and that is where you stick the ship.

The plastic Q-tips are hard to come by it seems. I found a bunch at Publix if you live in SE US, otherwise, every grocery store, pharmacy or superstore you walk into, swing by the beauty section. If all else fails, I'll consider sending you some.

This is JD, btw so we got plenty of Publix down here in B-ham...lol. Thanks for the tips guys. Ill look first thing. These a wings won't paint themselves

Oh yeah! Hey JD. The other 2 essentials are a magnifying glass and good light. Otherwise, you'll go blind.

Recently …

yclUcBW.jpg

AIjhpmd.jpg

gq2xLMN.jpg

K2V7M1z.jpg

ru870bJ.jpg

vVvkZHD.jpg

UDMsUJR.jpg

The Mando Corvette Crimson Blade and the Aggressor Preying (vice praying) Mantis. Both WIP.

Edited by WGNF911

That Corvette is BEAUTIFUL !

That Corvette is BEAUTIFUL !

Thanks!!! I got the idea from an XW repaint someone did and added a few things; primarily the mythosaur skull.

Oh wow, I hadn't caught that! Nice Job!

The Preying Mantis

Inspiration:

65J2W2c.jpg

TZOydM3.jpg

The Ship:

UDMsUJR.jpg

mHbFFVj.jpg

r7sE6yp.jpg

GPy9HxB.jpg

NRNaD5Y.jpg

Edited by WGNF911

Another Mando Vette, the Crimson Blade

pjgng9U.jpg

hwiUMv4.jpg

3dJe3hg.jpg

pMtlCth.jpg

m1ySbNK.jpg

TEAwDij.jpg

ahsWafT.jpg

Edited by WGNF911

Sorry Ladies he's already taken! ;)

Sorry Ladies he's already taken! ;)

Took me a bit; good one! :-))

The Lunar Crescent ( unless y'all can think of a better name)

KyBsiP3.jpg

VVoW4Uu.jpg

eX1t9eX.jpg

fxsOZrE.jpg

tK09dXx.jpg

Edited by WGNF911

Decided to redo Fel and Saber Squadron

zVsMbU5.jpg

tIAh7fX.jpg

Edited by WGNF911

Redid a Raider to join the Green Arrow fleet. Not sure if I like this or the VSDs paint job better. Happy with the way it turned out.

T9ll9bL.jpg

2JofudN.jpg

cNqvVFS.jpg

pSfBzvn.jpg

3yJi1MJ.jpg

KD3xLPm.jpg

c5OFntM.jpg

Edited by WGNF911

Adding a little something to the Gladiator. I like the side hangars the best. I don't think I like the orange bridge.

tRjwDuu.jpg

jtXDVBS.jpg

SziUAM5.jpg

Edited by WGNF911

So that's where the bridge actually is. I've been wondering where it was for a while now.

So that's where the bridge actually is. I've been wondering where it was for a while now.

You would think that with one large main hangar, two auxiliary hangars that these things would be the Imperial pocket carrier or there would be a version for that. A GSD3 perhaps?

THat raider looks.... fabulous... :rolleyes: :lol: I like it, especially the ventral part. Very nice details on the Gladiator too ;)

Thanks!!!!

I washed the Raider in the purple degreaser which took off the factory wash. Afterwards, I put a single, light coat of Testors gun metal (dark bluish sort of color and yes, enamel) making sure I got it into the creases and panel lines. Then I did a heavy dry-brush covering the surfaces but keeping it out of the panel lines with GW Ledbelcher (I think that's the name, I'm not at home) which is much brighter. I left the ledbelcher off of the ventral engine portions and the solar panels, those are the gun metal. Did a very thin wash with flat black over the entire model which flatened the ledbelcher a bit and brought out the panel lines. Then details (neon yellow for bridge, chrome for engines with a pin washing, medium grey for the "engine straps" dry-brushed with a light grey, medium green with grass green highlighting and finally put a single, light semigloss lacquer coat over it.

I forgot to mention that I popped off the 3 panels and glued them back on when painted.

Edited by WGNF911

I agree the raider looks slick.

Did some experimenting with glaze and metallic medium. The aux engines are the subjects. Engine 1 is the top left, 2 the bottom left, 3 is top right and 4 bottom right. I know it's hard to see with a cell phone camera but which looks best. Here is what they were hit with

1: straight Vallejo metal medium

2: 1 drop metal medium with 2 drops glaze medium

3: 1 drop sky blue with 2 drops metal medium

4: 1 drop sky blue, 1 drop metal medium, 2 drops glaze medium

MOK2ZRx.jpg

BTW, all the aux engines started with a paint job similar to the 3 main engines.

Edited by WGNF911

Looks fine don't you think?

Self criticism with painting is something you have to learn to unlearn. You hold the thing 2" off your eye and know every last shake, bump and missed dab of the brush. No one will ever take your work and hold it under such scrutiny, so learn that if it looks nice the rest of us will be impressed.

Very true and thanks. Perfect is the enemy of good enough haha. But, I'm experimenting with glazes and metallics and thought an already finished engine would be a good subject. I'm thinking engine 2 is probably the best effect. #4 would be second. What do you think?

Edited by WGNF911