How do I start painting?

By MonkeyInSpace, in X-Wing Off-Topic

So, I've never played a miniatures game before and have really gotten the X-Wing bug. Looking at some of the pictures of how people have customized their ships is really impressive but I have (literally) no idea where to start. I have googled the subject and found a few ok guides , but nothing that really starts at the basics and was hoping someone could answer some basic questions.

1. What brand of paints should I use? I have read "Citadel" a few times but would love recommendations on what works really well on X-Wing miniatures

2. What colors should I start with? I don't have endless pockets so don't want to buy a collection but if I'm looking to start by weathering and adding different highlights, what should I get? A red, a white, a gray? Any shades you guys have used that you'd specifically call out?

3. Do I need to add a coat when done, or is that dependent on the paints? I've read Testors a few times, is that the 'best' brand for this?

4. Do I need to clean/prep the models first?

5. Are there some brushes that are better for this than others? Which ones should I start with?

6. I don't have a LGS and don't know of a model shop close by so would be looking to buy online and would love recommendations on different sites.

If anyone has a guide they think is very strong, I'd love to see that.

Thanks in advance,

Inspired Monkey

Edited by MonkeyInSpace
Okay

quick guide.

1st, get some old micro machines ships, practice on them. Your first few ships will be awful.

You'll need:

Kitchen towell, clean water, some brushes ranging from '1' size (large areas on ships like this) to '000' or smaller for lines and cockpits etc.

Acrylic paint and inks. This is water soluble when wet but dries water proof. Its easier to control than enamel and doesnt destroy your clothes or carpet if you spill any and need to clean up. Its also kinder on brushes.

Also get good brushes, cheap brushes will 'split' quickly and make it hard to pain straigh lines.

Ok, take your ship and wash it in warm soapy water. That will remove any finger grease, mold release agent etc etc

When its dry:

Choose a 'base coat', the main colour of the ship and paint directly over the FFG paint. If you're canny you might want to 'mask' the cockpit or engines with masking tape or plasticine to keep them the 'factory' colour.

Let that dry. Then take an old tile or plate and put some of the base coat on it, while its wet mix in a lighter shade of the same colour. Eg add pea green to dark green. You can lighter the shade with white but unless you're lightening grey or beige you risk making it look washed out and pale. (ditto using black to darken shades just makes it murky looking).

when you've got a shade a few steps lighter dip your biggest brush in it, make sure it works right into the brushes bristles.

Now wipe it off with kitchen towel, you should be leaving the residue of the paint in the inner brushes. If you flicked the brush over your hand you would see it colur the skin but not the folds in your skin. Lightly brush this over the base coate model and you'll see the lighter shade adhere to the edges and raised parts of the ships creating artificial highlights and weathering. This is called 'drybrushing', best google it for a good tuturial.

Now you've got a shaded ship, lets stick to one colout for starters, say you've painted a z95 mid green.

If you're adding any detailing if its a dark shade just paint the stripe/band whatever straight on. If its a large area you might want to take a brush and add a slightly lighter shade of the contrast/accent colour to any hard raised endges like the leading edge of a wing.

If you're painting red, orange, yellow etc over a dark colour paint it in white first, its always better to use two or three thin coats than one thick one so just be patient.

Once you've got it painted 'clean' in the colours you want you then need to wash it with an oily looking 'grime' to get that FFG look. I use a 50/50 mix of acrylic black and water. Get it to the consistancy of semi skimmed milk and one the model is *totally* dry brush it on liberally then quickly wipe it off with tissue or kitchen towell. The runny black will remain in the creases and hollows and put 'carbon burn' streaks in random places.

One other tip, if you use a metallic shade or colour like silver for engines use seperate water and brushes or you can find the flecks of metallic paint contaminate your non metal colours.

Oh and other answers to the questions.

I'd use foundry acrylic. its better than citadel by far. Its also much cheaper per millitetre and the pots last for ever and there is more choice of colour.

I've worked for both foundry and citadel and hands down foundry make better paint.

Colours, well i'd go for a selection of greys and light browns. Some red, yellow and orange for stripes and markings. A nice strong blue for the same and some black and beige for 'dirtying' up ships.

You probably know this but always paint under a daylight bulb or in daylight as most house lighting will thrown too much yellow in to what you're seeing and what looks great at 8pm painting in your living room will look really off in daylight.

Those are good suggestions there. However, I'm going to suggest something slightly different that works well when it comes to X-wing. Instead of covering the whole model in a base coat, using a wash (thinned down paint that settles in the recesses) over the basic paintjob can get you started really quickly. It brings out all the details, defines edges ect, and will instantly make the model feel far less flat.

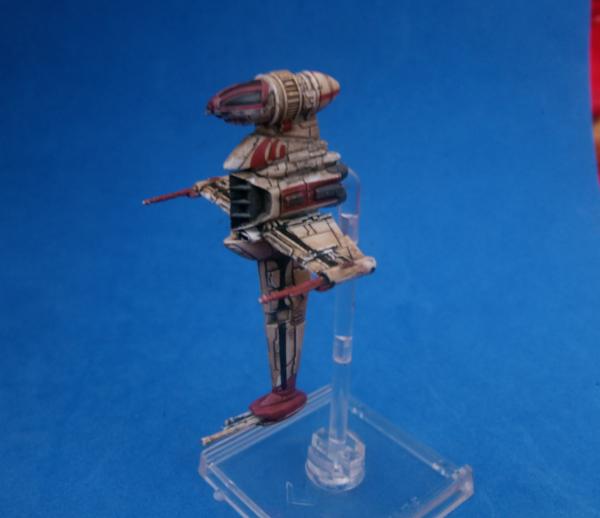
The paint I suggest here is Smokey Ink from Vallejo's Game Colour range; mix that with a bit of water and cover the whole model in it as your first step. This is what it did to a Rebel Aces B-wing, just that wash over the basecoat and already you can see it has brought out all the detail:

765927_sm-Ffg%2C%20Repaint%2C%20Star%20W

After that, you just want to go over all the panels in a colour of your choice, leaving the wash showing through in the recesses to accentuate them. As mentioned above, use thin layers to not obscure the detail. Then do the same for the markings/colourings you want to add.

The last thing you want to do is weather the ships. This means adding damage and grime for that 'real' feel that is so much of the charm of OT Star Wars. The easiest way to do this is get some black or silver (or both) paint on a piece of sponge, dab it on a tissue until there's only a little left on the sponge. Then, dab it on the leading edges of wings, around engine intakes, anywhere you want some damage.

And with just those simple steps, and some practice, you'll be well on the way to good results!

As far as brushes go, I'm going to go against the advice above and say just buy some cheap-ish ones from a art/craft store, no need to be spending more than about £1.50 a brush at most really.

As above, having a good light source and a comfortable, practical place to paint are essential. Anything from a dedicated paint desk to a lap tray, whatever works for you best.

Good luck!

For paint I will throw Army Painter into the ring. The paints are of good quality (not top, but they do reach Citadel) and for what they are pretty cheap.They also offer a nice starter set that still serves me well, as you can get away with mixing most colors.

Some examples.

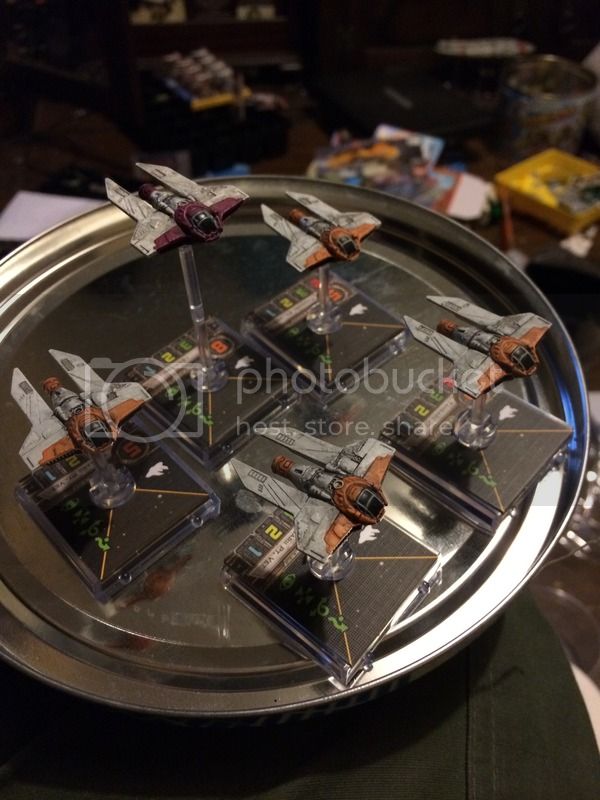
These scyk were painted with foundry arctic grey and brushed up with arctic grey 'light' (the matched highlight shade). They then had 'german army camo orange' painted on the front edge. (cockpits were masked).

The orange was shaded with citadel 'gryphon sepia' and then a watered down black wash put over the whole lot and wiped off.

(obviously serissu in the centre was done with a purple shade, cant recall which one off hand)

photo%201-2%202_zps5rjvnn7f.jpg

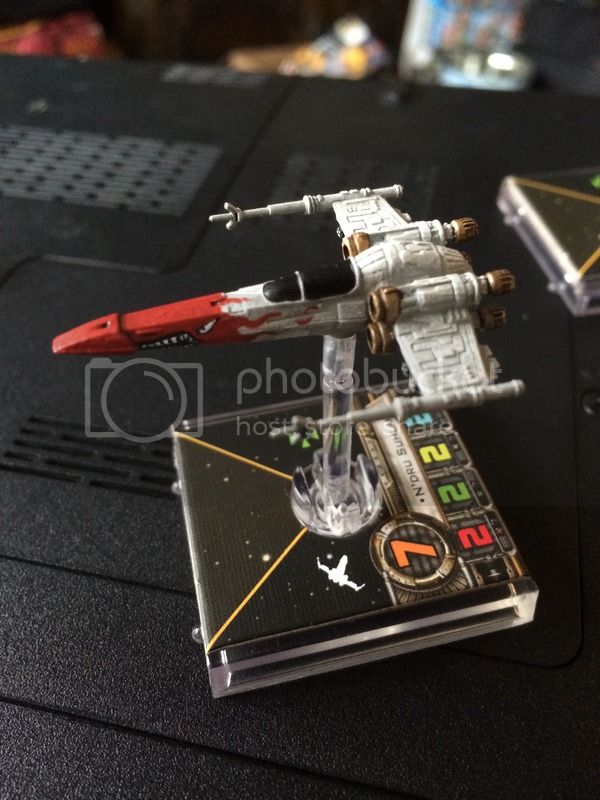
Here Ndru is done with the same arctic grey to white drybrush and thin coats of 'british red coat' to do the nose and flames. Engines are foundry 'gold' with a foundry brown metals wash.

I've not grimed this one as i didnt want to risk 'murking up' the red

Z953_zpsdhmjnemv.jpg

This here is a semi repaint. I find the stock y wing looks very flat and insipid so i repainted the cockpits and nacelle ends with grey layered up to white and then added a more defined golden yellow, again putting gryphon sepia in the creases. The turret guns are picked out in black for more definition and the astro mechs have a blod of colour... otherwise they are factory paints as the bodies on these look fine.

ywimgs_zps6688c0d4.jpg

Lastly a HWK painted to match my Z95 reb swarm. Again shaded grey raised up by addingwhite and drybrushing, a tiny bit of green added as the FFG z95 has a slightly green tinge. Matched the blue as well to accent it and a golden yellow 'beak'.

Gryphon sepia again on the 'beak' and a thinned black wash on every thing else

IMG_36251_zps5d9d1bc7.jpg

IMG_3615_zps68d08203.jpg

Stop bragging, Gadge :P

Hehe, im actually a *very* average painter.

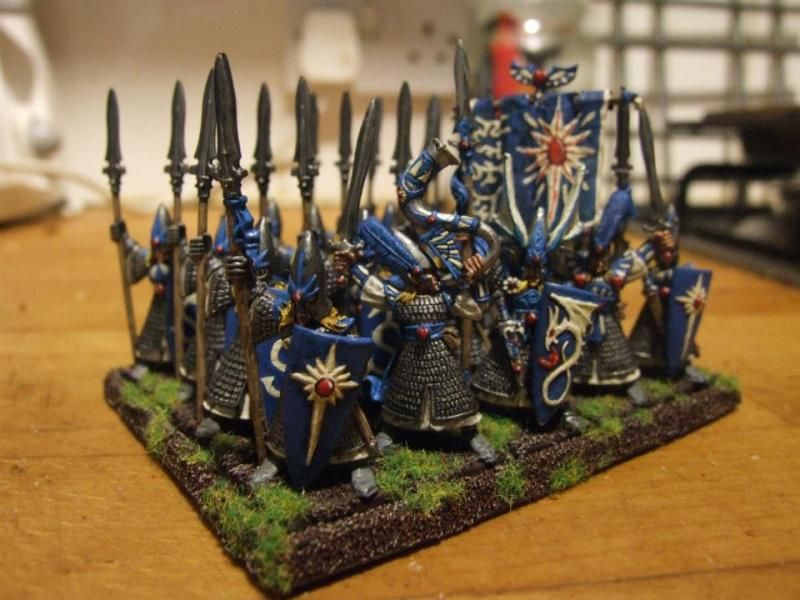
My wife on the other hand is sickeningly good. She'd not painted a mini since the 90s when she had some high elves when she was about 12. We stripped them down and i explained to her how to drybrush, how to three layer shade, ink wash etc etc.

This is the FIRST unit of figures she ever painted

535800_10151443312321539_967818732_n_zps

Basically about as good as my painting after 25 years at it in the two weeks she spent doing say 30 mins a night on them.

The only thing I'll add to the excellent advice given above is brush soap. Works well to clean ths paint out of ghd bristles, keeps the bristles from drying out and lets you 'point' the brush before storing it.

One other thing I found useful is to dampen your brush with water before beginning to paint. You don't want it to be sopping wet just damp. This helps prevent paint from wicking up the bristles towards the ferrule. If it dries there it will cause the bristles to splay out. This ruins the brush for detail painting. No more nice point.

One thing that can help with the above and ONLY with acrylic paint (unless you're a masochist) is sucking/licking your brush tip between applications, you can use your tongue to roll the brush tip back into a perfect 'spearpoint'.

Acrylics non toxic and it wont hurt you and its a fairly neutral taste unless you're using citadel 'foundation' paints which taste horrendous.

I think I'll stick with the soap. :-)

Stoneface, on 18 Jan 2016 - 09:31 AM, said:

Gadge, on 18 Jan 2016 - 08:36 AM, said:

One thing that can help with the above and ONLY with acrylic paint (unless you're a masochist) is sucking/licking your brush tip between applications, you can use your tongue to roll the brush tip back into a perfect 'spearpoint'.

Acrylics non toxic and it wont hurt you and its a fairly neutral taste unless you're using citadel 'foundation' paints which taste horrendous.

I think I'll stick with the soap. :-)

you sound like my cell-mate.

Thanks for all the replies. Going to read, digest, and possibly come back with more questions. Very much appreciate all the help!

Creative Monkey

There's some good vids on YouTube, both in content and ease of viewing, concerning painting minis with acrylics. Unfortunately you have to weed out the hard to watch ones. They cover the use of retarders for airbrushing and flow improvers for brushing. The flow improvers help eliminate brush strokes. With X-Wing minis that shouldn't be a problem unless you're going to repaint large or huge ships.

I just realized I never came back and said thank you to everyone who pointed me in the right direction on this thread. I took the leap and have painted a few ships with varying degrees of success. Below is my first completed project - a black & orange Poe - got lots to learn and will keep on going but again, thanks to everyone for setting me on the path.

2016-01-26%2012.00.06_zpsk4rft7eb.jpg

2016-01-26%2012.01.21_zpszty6etgk.jpg

2016-01-26%2012.01.55_zpsw6axkydk.jpg

One thing that can help with the above and ONLY with acrylic paint (unless you're a masochist) is sucking/licking your brush tip between applications, you can use your tongue to roll the brush tip back into a perfect 'spearpoint'.

Acrylics non toxic and it wont hurt you and its a fairly neutral taste unless you're using citadel 'foundation' paints which taste horrendous.

Not all model paints are non-toxic, but you can accomplish the same thing with your rinse water and the crease of your palm.

I've yet to find a toxic acrylic paint but if you know one let me know and i'll avoid it.

I took the leap and have painted a few ships with varying degrees of success.

That's a very nice job, especially for your first one. I mean most people wouldn't feel bad about putting that on the table, so it's not like 'oh that's good for a newbie' it's a genuinely good job. The fact that it's your first would hint that you may find with some practice you can make some really nice looking stuff.

One thing I'd recommend though is some drybrushing and washing. Both of those are fairly detailed topics and you can find youtube videos and the like for more information.

Agreed, thats a very clean and tidy job. Much better than a lot of repaints i see.

As VanorDM says a bit of shading/highighting will really make it 'pop' , the point being that light hits small objects differently to huge ones so to make the ship look '20' metres rather than 2 inches' you have to artificially broaden the gaps between shades.

Drybrushing is easy but can make things look messy til you crack it so practice on a model you dont care about but its the quickest way of adding that 'contrast' and looks great on battle worn stuff.

a shading wash on the black will be pointless but try brushnig a little citadel 'nuln oil' over the dark grey engine parts and it will run into the grooves making them look both shadowed and oily/dirty.

Orange is a pig to highlight.. unless you're careful it can look very 'washed out'. I tend to work down with orange, starting bright (over a yellow underbase) and adding washes of orange, deepened with brown or red depending on how natural i want it to look but its hard to work with and there is a reason none of my hundreds of painted models are primarily orange :)

I'm even getting my mate to paint my poe dameron as i know i'll mess the orange up...

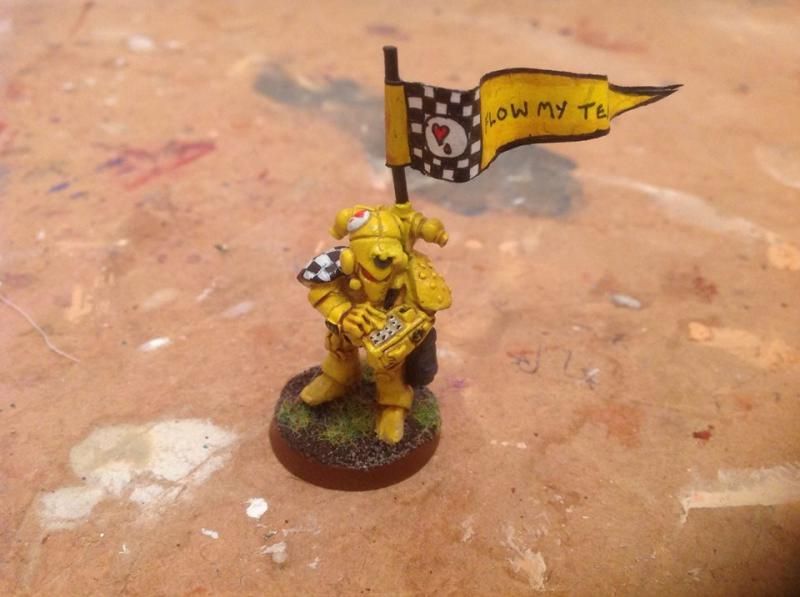
edit; if you ever , btw, find you're struggling with 'straight lines' or fiddly stuff you can cheat and use a waterproof 0.01 technical drawing pen. I use these all the time for chequer designs etc or writing.

this is not the best example but you'll get the idea...

lamenter_zps8de9497b.jpg

This model was a test piece to try to learn new skills as i find yellow very hard to paint and also white and black checks difficult. I was happy with it but decided against doing an entire army of them, i love the 'lamenters' colour scheme but it would have driven me crazy doing 60 of these.

Edited by Gadge

Getting a good brush is crucial. You need one with a fine enough point. Use a good brush cleaner and take care of your brushes. They are invaluable to doing well. I used to paint Warhammer minis and never did care for the Winsor Newton Series 7 brushes as I found their points to be too thin for 28mm, but they might be perfect for X-wing ships.

The Artist's Brush Cleaner is what you need.

Getting a good brush is crucial.

I agree. I've used craft paints for a long time. Sure there's better ones out there, but get really nice results with mine and I'm not that serious about it.

But one thing you really want to splurge on and get the best possible one is a brush. A good brush makes everything else so much easier.

I've yet to find a toxic acrylic paint but if you know one let me know and i'll avoid it.

I believe that some of the alcohol based metallics aren't great. Also some of Vallejo's yellows and oranges contain cadmium which is a heavy metal. This can be very toxic. The colors containing it should be clearly marked.

I only use Foundry paint, im pretty sure non of that is toxic as i used to work there :)