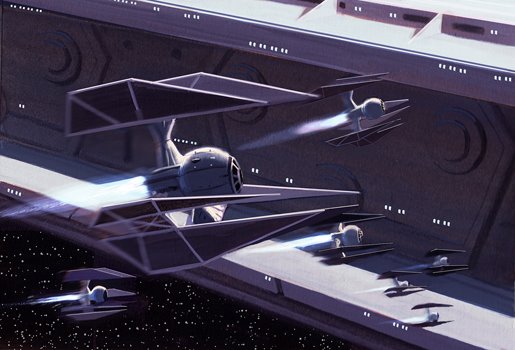
There’s a lot of hate and a lot of love for TIE Defenders. There’s also been a lot of talk recently thanks to the official revealing of the Mk2 Engines, and hopefully a lot more people trying these ships out. It’s no secret that a lot of love for the Defenders comes from my direction, so I thought I’d share what I find good about the TIE Defender in hopes that people trying them out might have somewhere to start from when they’re trying to figure the ship out for themselves. Finally, I tend to fly Defenders armed almost always with HLCs. The following thoughts will be most applicable to that sort of Defender, perhaps also Defenders with control cannons will find this useful, and maybe even Defenders flying with Primaries only could find some of this relevant. Some of the following are observations, some are tactics, some are just anecdotes from experiences I’ve had playing TIE Defenders.
So, here’s why I think the TIE Defender is good:
-Lots of power in a small footprint: The TIE Defender has excellent attack and defense for a small-based ship. I’ve seen it referred to as a large ship on a small base. This is particularly true with an HLC armed variant. The small size has a couple of significant impacts. First, it lets you concentrate power into a smaller area, creating a smaller target for your opponent’s ships to acquire an arc on. Second, it lets you have power in areas that larger ships might be denied, such as asteroid fields. You can leverage this with good asteroid placement. Despite the odd dial, I love an extensive, but loose asteroid field in the middle of the board. It forces formations to break up and it denies a lot of areas to large ships, while leaving your Defenders fairly free to maneuver if you’re careful.
-Low relative PS premium: An HLC armed Delta squadron pilot costs 37 points, upgrading that to PS8 in the form of Rexler Brath costs another 7 points. That additional 7 points is the same 7 points a that a Rookie Pilot pays to upgrade to Luke Skywalker, except it is a much more substantial upgrade on a TIE/D, because the Defender is carrying substantially more attacking and defending power. Some will argue than 37 points is already too much, and that 7 points just makes it more expensive. I say that each point of PS upgrade costs the same that it does on a lesser ship, but is worth more because the capabilities of the base ship are greater. Additionally, the named pilots do not appear to pay the customary 1-point premium for their abilities. I think even a 2-point upgrade to Onyx Squadron Pilots might have a lot of value. It gets you above the PS1 and 2 swarms, which is useful for arc dodging and killing them before they can shoot, and it also brings you out of the double-reroll for Predator.
-High AGI combined with high hit points: 6 Hit point behind 3 AGI is roughly 2 TIE fighters (actually a little worse). That’s the common argument against a TIE Defender’s durability. This is true, but somewhat misleading. For one, a TIE Fighter is typically flown at close range to maximize its attacks or block, and this puts it close range of more ships. A cannon armed Defender fights from longer range as much as possible. Its attack power is not diminished, and its defensive power is substantially increased, particularly against multiple weaker attacks. This is particularly noticeable against common filler ships from all factions that have only a pair of red dice. While 2 red dice are perfectly good at plinking away hit points on most large ships, they are often insufficient to reliably damage an AGI 3 ship, especially at long range. This allows an interesting targeting dynamic to take place. Low attack support ships are easier to ignore early on, allowing the TIE Defender to focus on higher priority targets. In contrast, many large ships or heavy fighter-like ships like highly upgraded B-wings suffer more from these numerous small attacks, and are punished more severely for ignoring them in favor of a main target.
It’s also important to note that the shielding of a Defender makes arc dodging less of a requirement. An aggressive player can press an attack, deliver significant damage, get unlucky on defense, and have the Defender alive at the end of the turn.
Finally, a Defender’s AGI and HP are not defending one, or even 2 or 3 low PS 2-dice attacks, they’re defending a high PS cannon shot. Obviously, this puts them firmly on the Glass Cannon side of that spectrum, but the durability they have is meaningful. TIE/lns are worn down at close range, often before they get to fire for a turn, whereas a TIE Defender is firing at long range, and is hitting at full power until the last hit point drops.
-All turns are available, even if 1- and 2-turns are red. The 3-turn can get you a lot of places you need to be, but sometimes you need that short, sharp little 1-turn to avoid an asteroid or stall your movement while some other ship whizzes by. In those cases, the 1-turn is something the Defender has in its back pocket. I end up using it about once every other game, I think, but when I use it, it’s great.
-Slow and fast moves: The TIE Defender has slower moves in the form of a 1-bank and 2-straight, and fast moves in the form of 4- and 5-straights and 3-turns and 3-banks. This range is useful for how the cannon-armed Defender fights. On the approach, 1-banks allow slow movement with a limited adjustment of firing arc. This is an especially handy move in a cluttered asteroid field. Combined with Barrel Roll, the 1-bank becomes very important on the initial approach turns. It lets you stall movement and effectively drift left or right, allowing you to put asteroids in the way of the Defender and formations of more efficient ships. The faster moves become important when ships get closer as the Defender transitions from a cannon run and attempts to dodge arcs and disengage before K-turning. The fast straights are also useful in a joust, as they can potentially move the TIE/D past a dense enemy formation to avoid getting blocked and hammered at short range with no action.
-White K-turn: The TIE Defender’s claim to fame is almost certainly the white K-turn. It is widely suspected that its high cost (relative to raw power) is due to this ability. There are a few levels to the utility of this maneuver. The most obvious utility is that you can K-turn and still get an action. That’s worth something, generally either extra damage to the target or reduced damage to the TIE Defender because of a Focus held to boost defense. You can also take risky K-turns. If you think you might get blocked, but don’t mind the place you’d end up if you are, you can K-turn anyway. There’s no stress cost, so you aren’t crippled and out of position next turn. Furthermore, you can perform the maneuver and have your full dial available to you on the next turn. Few ships, even ones that can get an action before the K-turn via Advanced Sensors can say that. You can K-turn while stressed, which is worth a lot against control lists. Most ships are in really bad shape if they get double-stress hammered by a Stressbot Warthog. The Defender can just K-turn behind it and kill it at leisure. You can also K-turn repeatedly over several turns. This has a lot of utility in close engagements and enhances your ability to increase dwell time in a particular region of the board, such as when you want to let another ship advance for a turn to build some distance between the Defender and the target. Finally, and perhaps most interestingly, you can threaten to K-turn. The mere presence of a “free” K-turn means there’s a whole new area you can attack from (and attack from at full combat power). Often the opposing squad must cover this K-turn or find themselves in a very bad position, opening up disengagement options that give you an advantage in later rounds.
-TIE Defenders are well balanced: The three broad categories usually used to describe ships in X-wing are Jousters, Arc Dodgers, and Turrets, with the general rule that Jousters beat Turrets, Turrets beat Arc Dodgers, and Arc Dodgers beat Jousters. TIE Defenders have a little bit of all of these functionalities.
As Jousters, they aren’t very efficient, but they do have strong stats. High Attack values (generally from Cannon slot upgrades) and high AGI values, combined with a high HP total mean that while they might not have raw efficiency on their side, they do require a lot of work to kill, and they’ll be doing serious damage until their last Damage Card is dealt. The high stat value combination has other advantages, as well. The high Attack (namely with HLC-equipped Defenders) allows them to overcome high defenses in ways that multiple weaker attacks could not. The high Defense value gives greater resistance to multiple low strength, but high efficiency attacks, allowing the Defender to focus on more threatening elements. The decent hit point total gives some resistance to very powerful attacks and Gunner-like effects. Letting a point of damage through is just part of a TIE Defender’s day, whereas many other AGI 3 ships must resist damage as much as possible. Consequently, this lets them focus their admittedly less efficient killing power on the most threatening targets, while limiting the effectiveness of other parts of an opposing list.
As Arc Dodgers, Defenders don’t typically have multiple actions and Boost, but they do have a fast dial, small base, and Barrel Roll. The fast dial combined with the small base means massed high-efficiency Jousters have a harder time predicting the TIE Defender’s final location and bringing multiple arcs to bear at optimal ranges. Barrel Roll gives you a chance to dodge an arc as an action, often while keeping your firing arc pointed at the Jouster.
As Turrets… well, let’s face it, they aren’t Turrets, they do have some of the advantages of Turrets, though. An equipped cannon upgrade allows them a larger section of the board where they have maximum effect, and the K-turn allows them to switch the direction of their firing arc and movement without penalty. These aspects combined dovetail with certain advantages of Turrets, in that Turrets can attack from any direction. Defenders can’t do that in a single turn, but they can easily switch their direction of attack from turn to turn. The large effective range also makes it more difficult for Arc Dodgers to escape their shots, and the white K-turn makes it difficult for Arc Dodgers to gain a positional advantage on them. The wiliest Soontir Fel can go from a great position to a crummy one in the space of a white K-turn.
Well, those are some initial thoughts. I encourage anyone interested in playing TIE Defenders to try them out in practice for a couple games before trying them against any serious competition. The positions a TIE Defender wants to be are so very often different from other ships. This is mainly due to the odd dial, and once you get used to it, you start to see opportunities in all kinds of interesting places.
 :lol:
:lol: