Epic Star Wars campaign

By Vomkrieg, in X-Wing

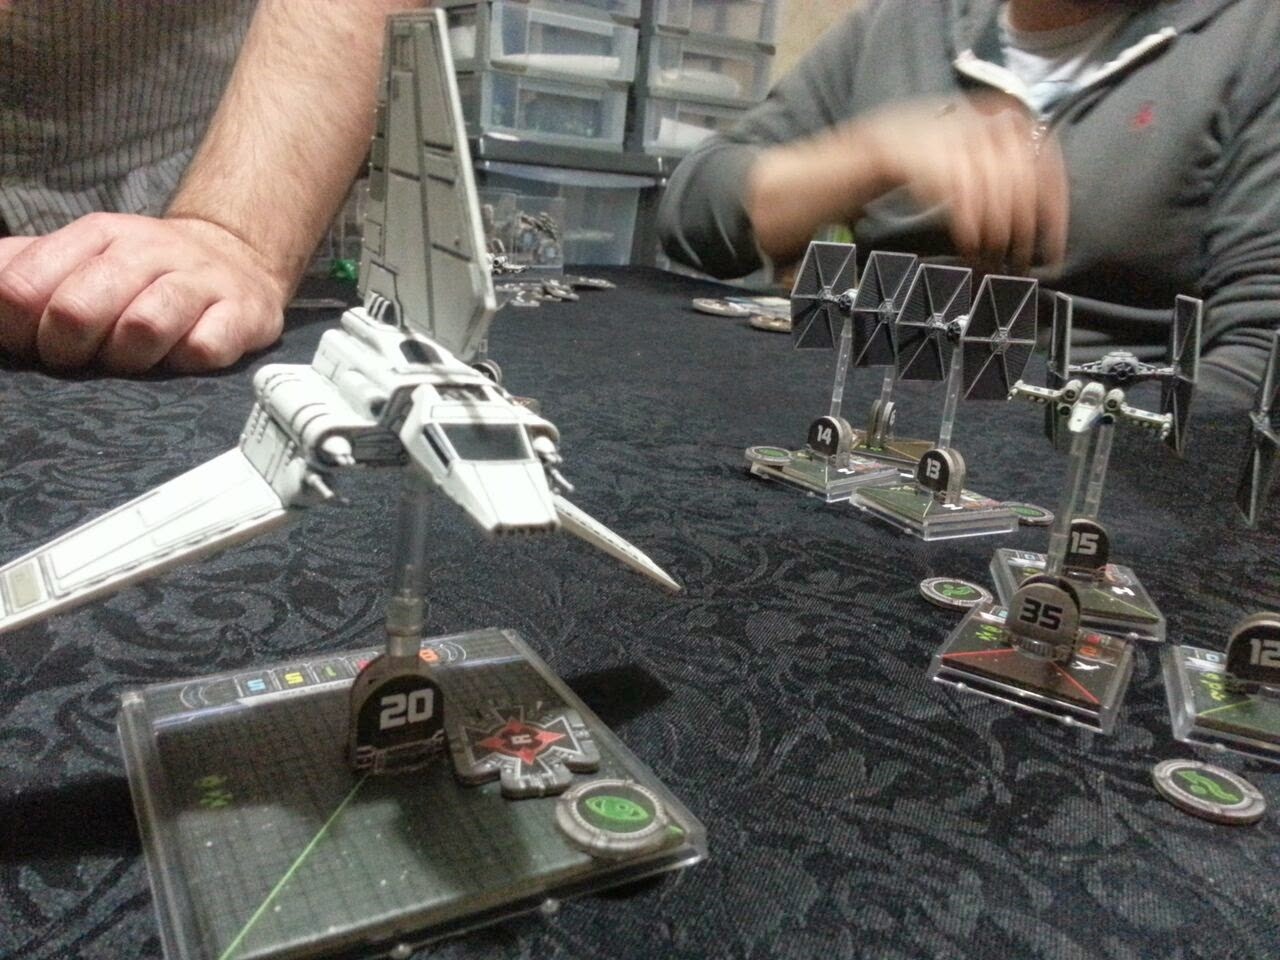
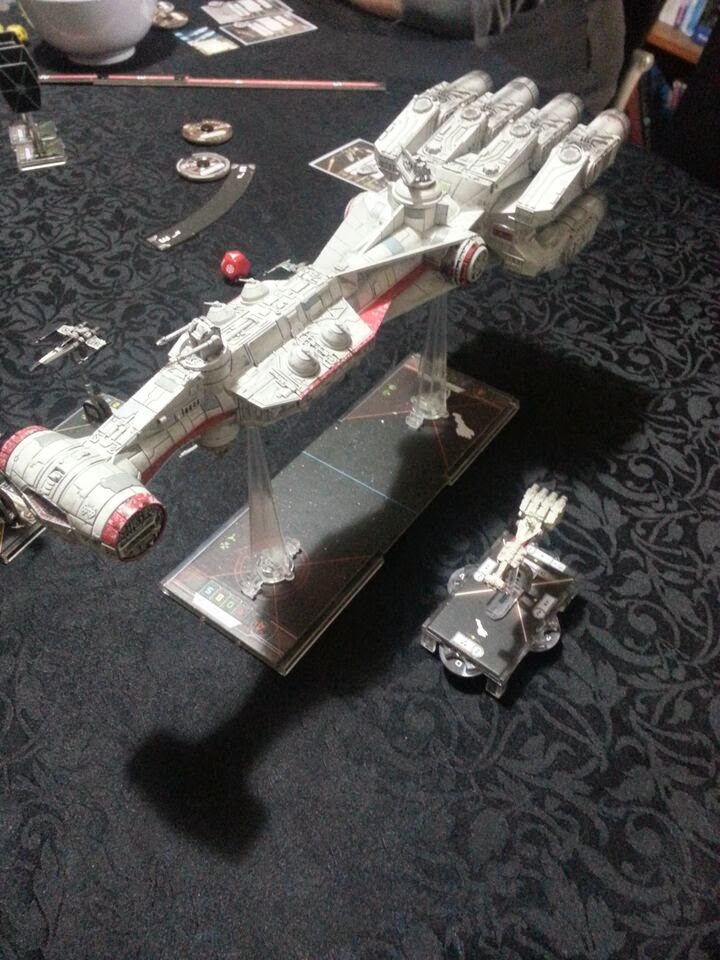
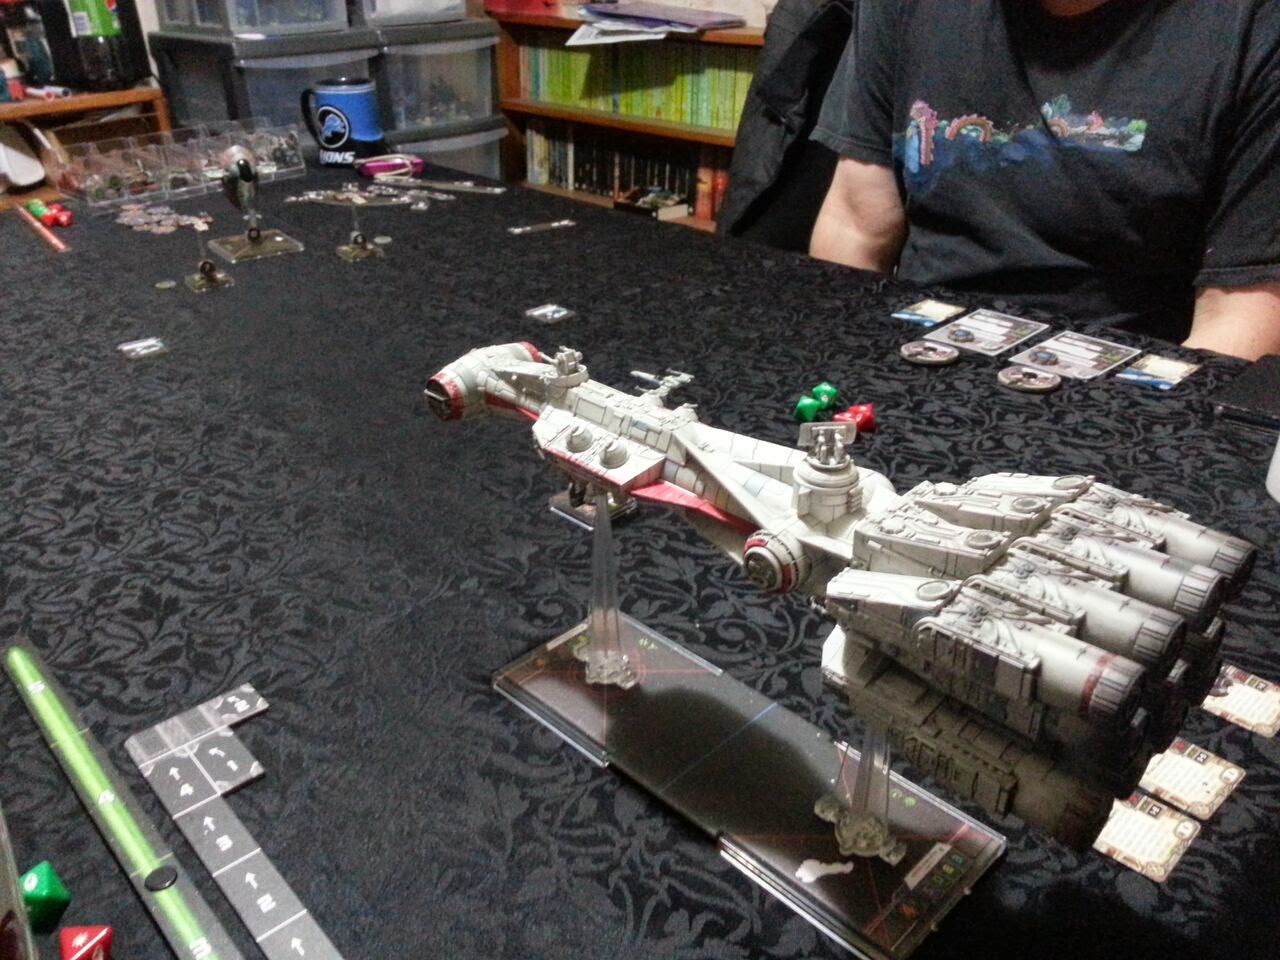
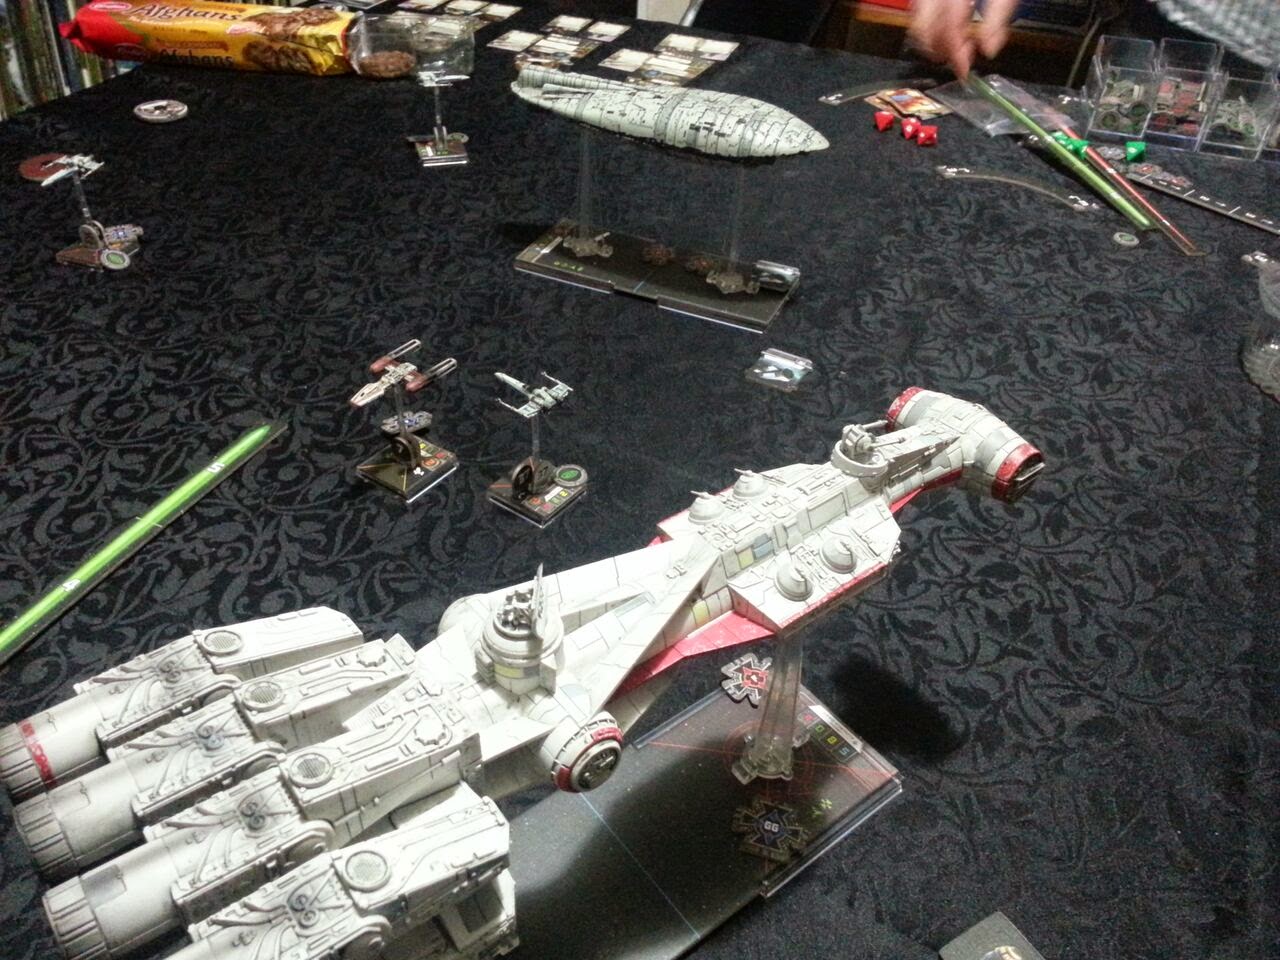
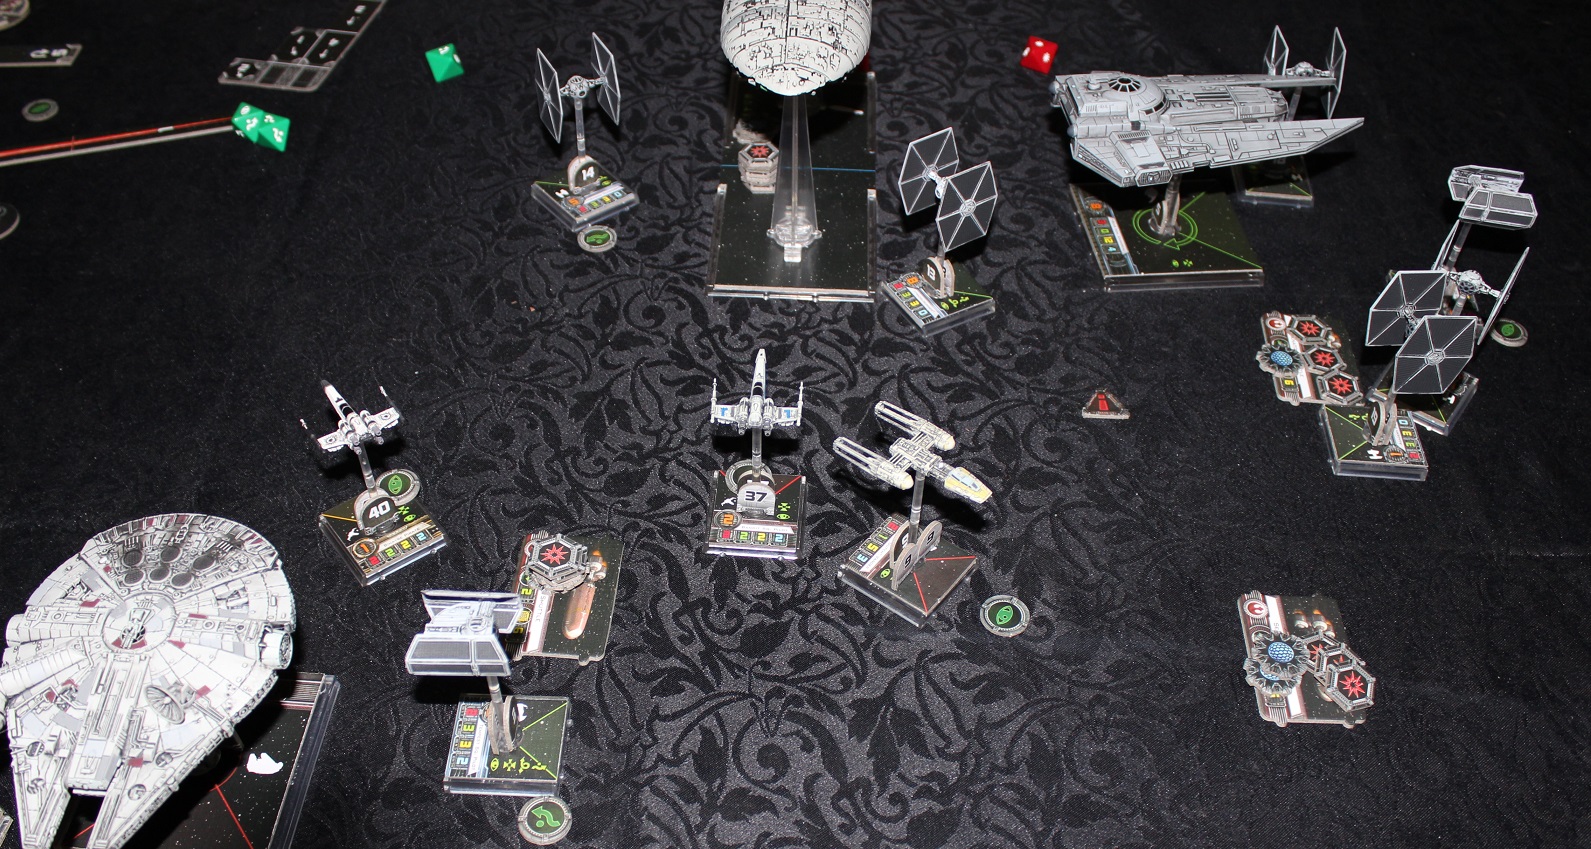
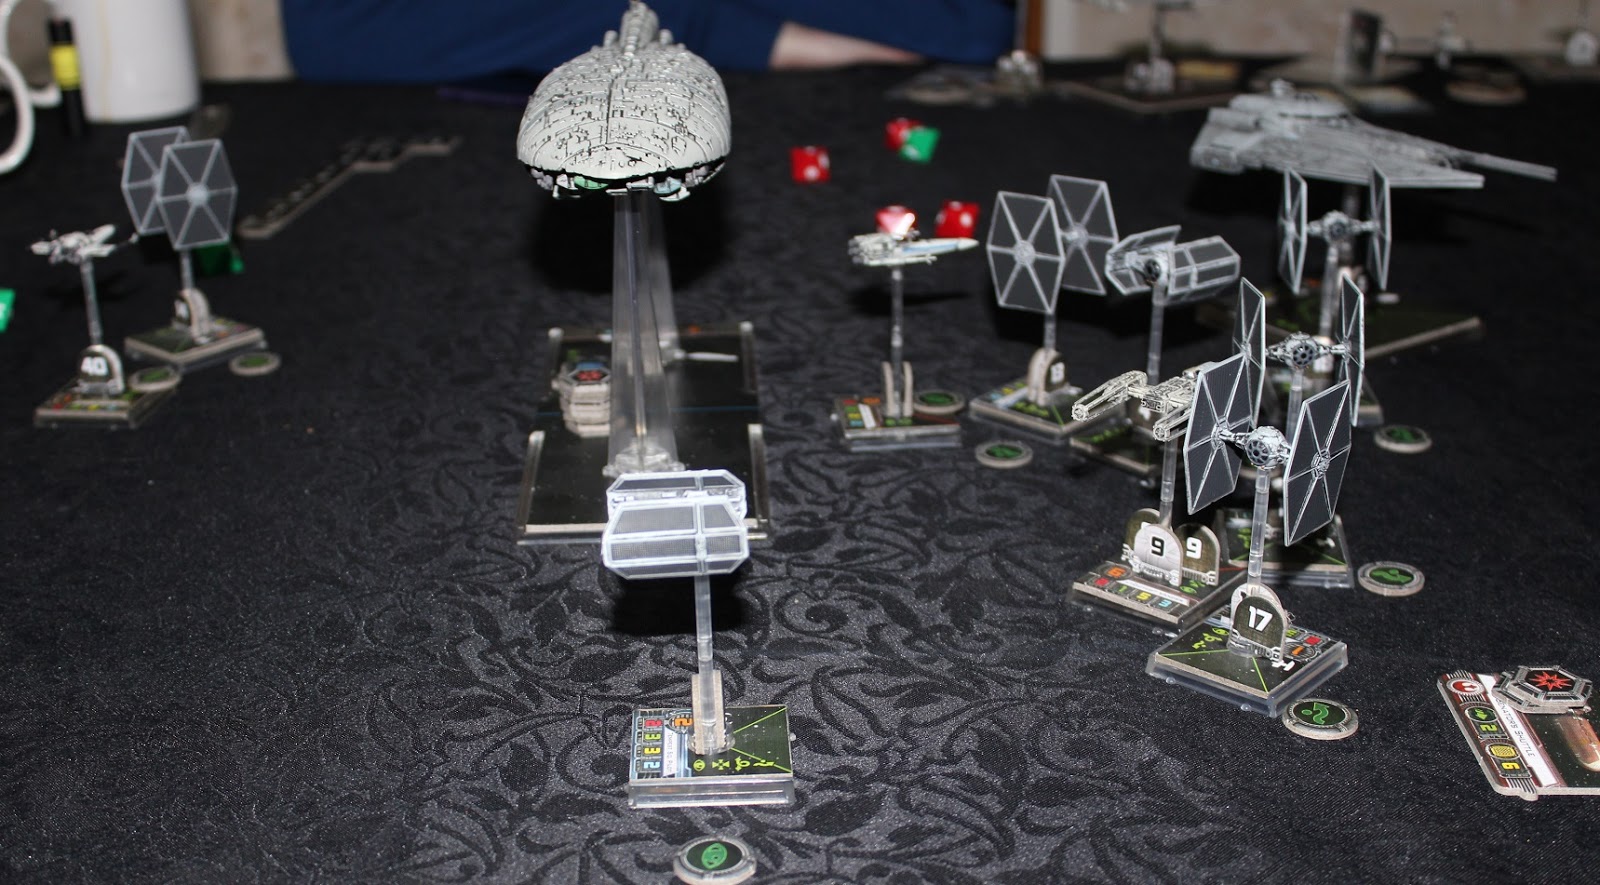
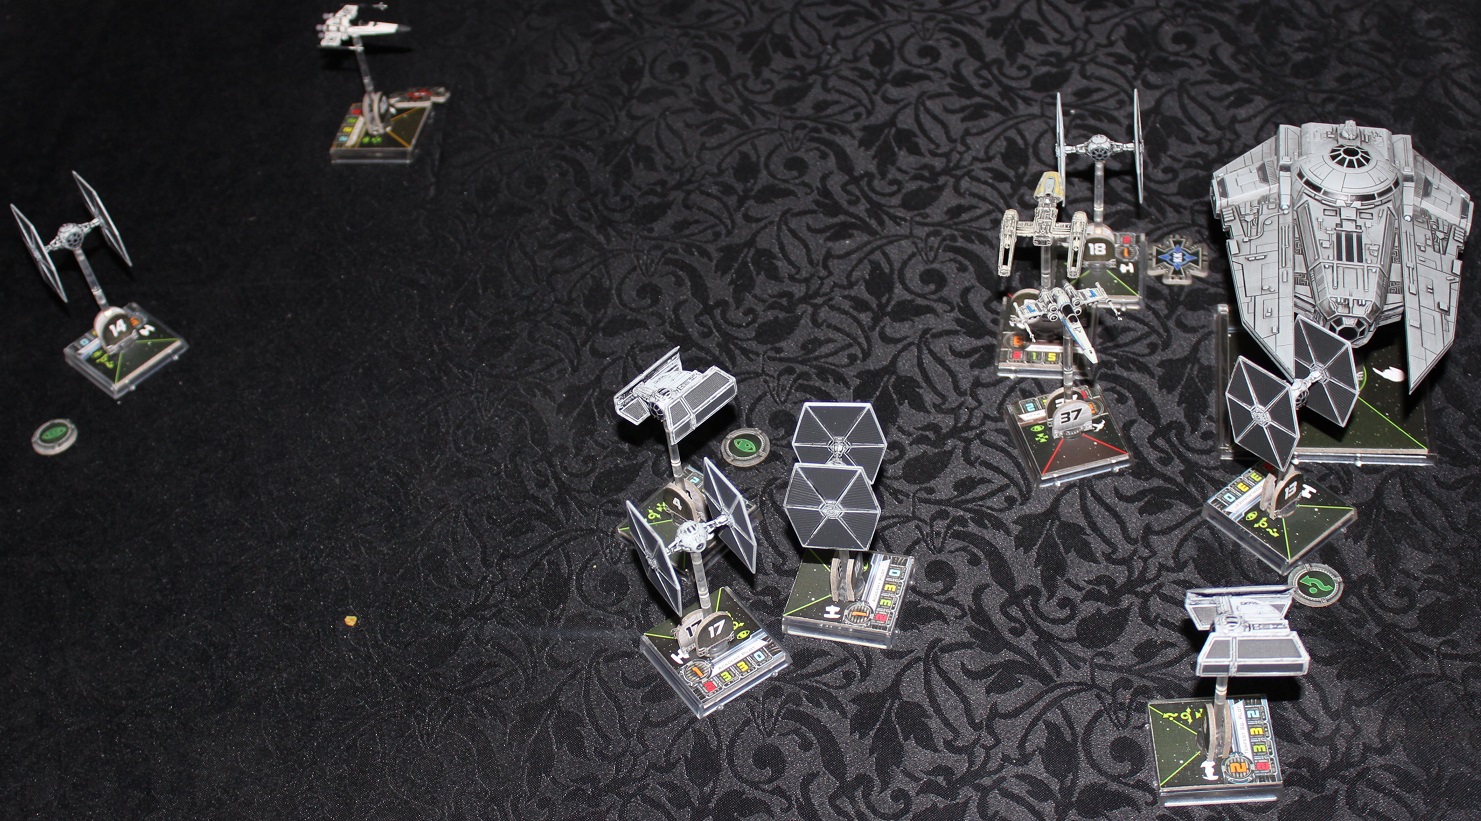
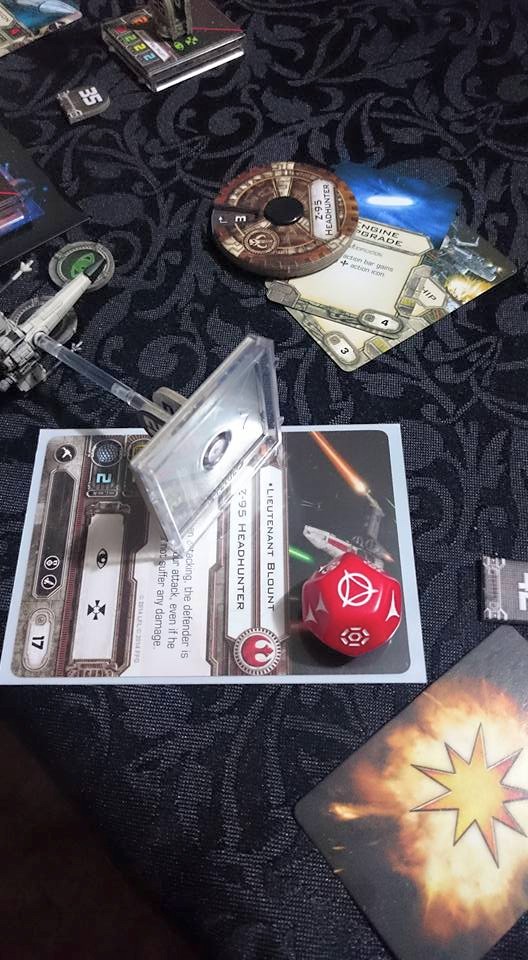
Howdy all, i've posted this information in the Armada and Age of Rebellion sections, but I thought you all may find it interesting as well if you hadn't seen it.

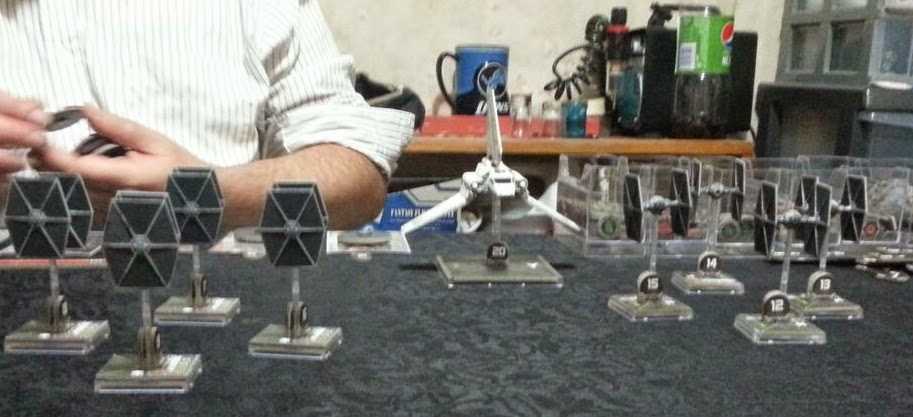
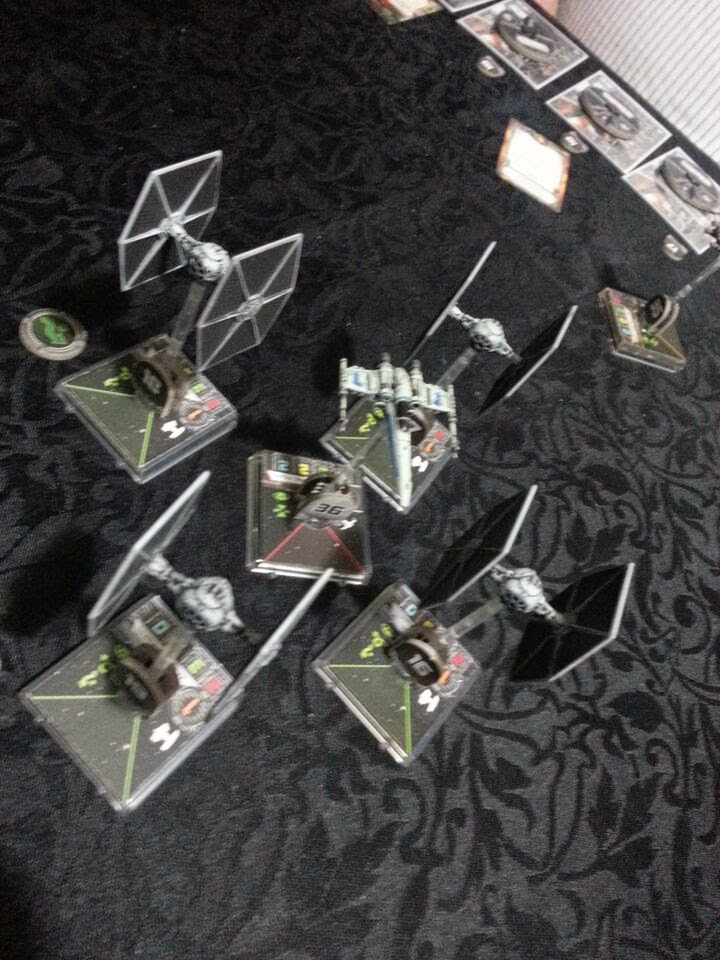
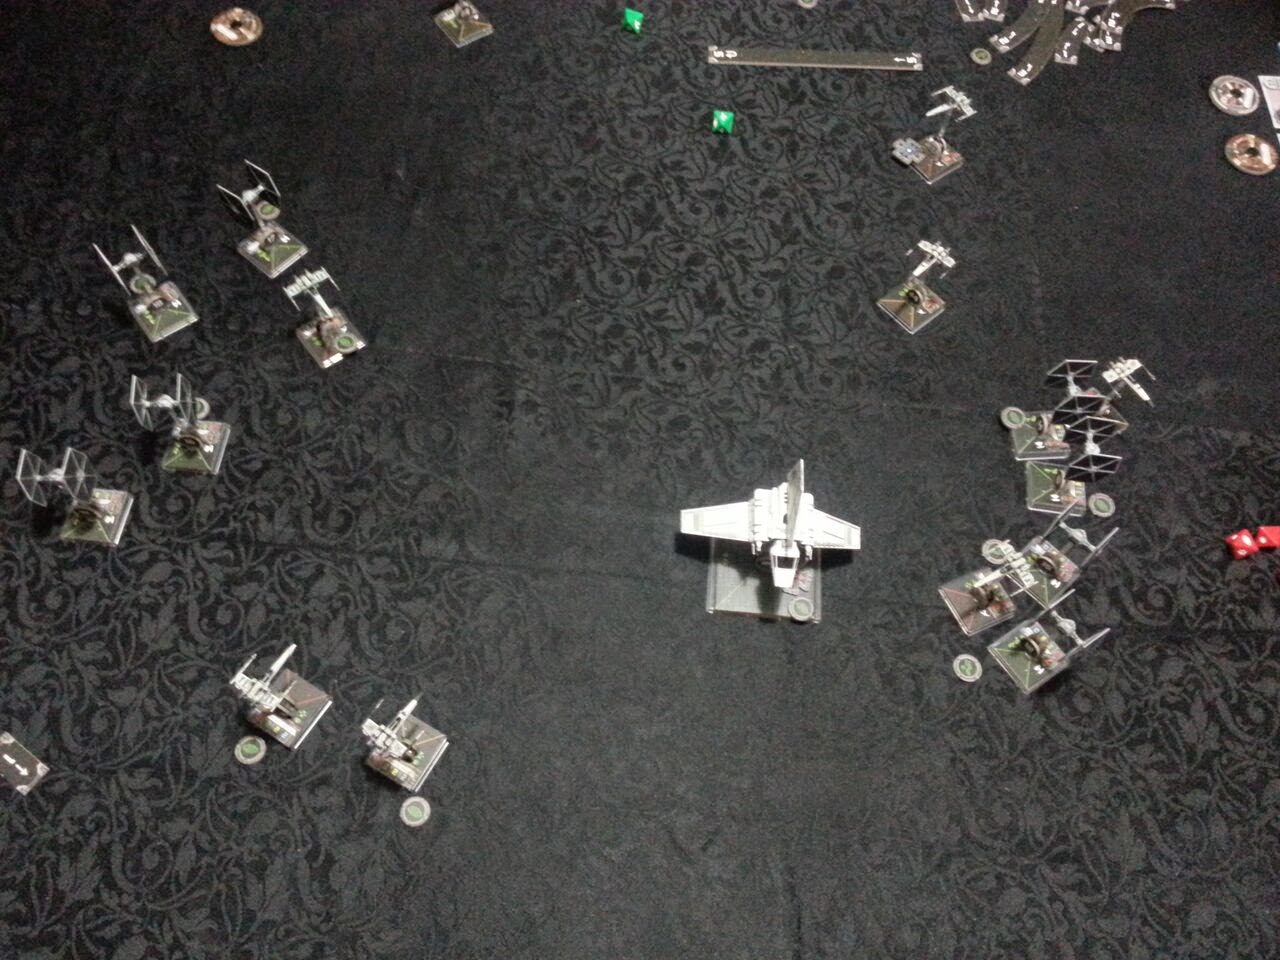
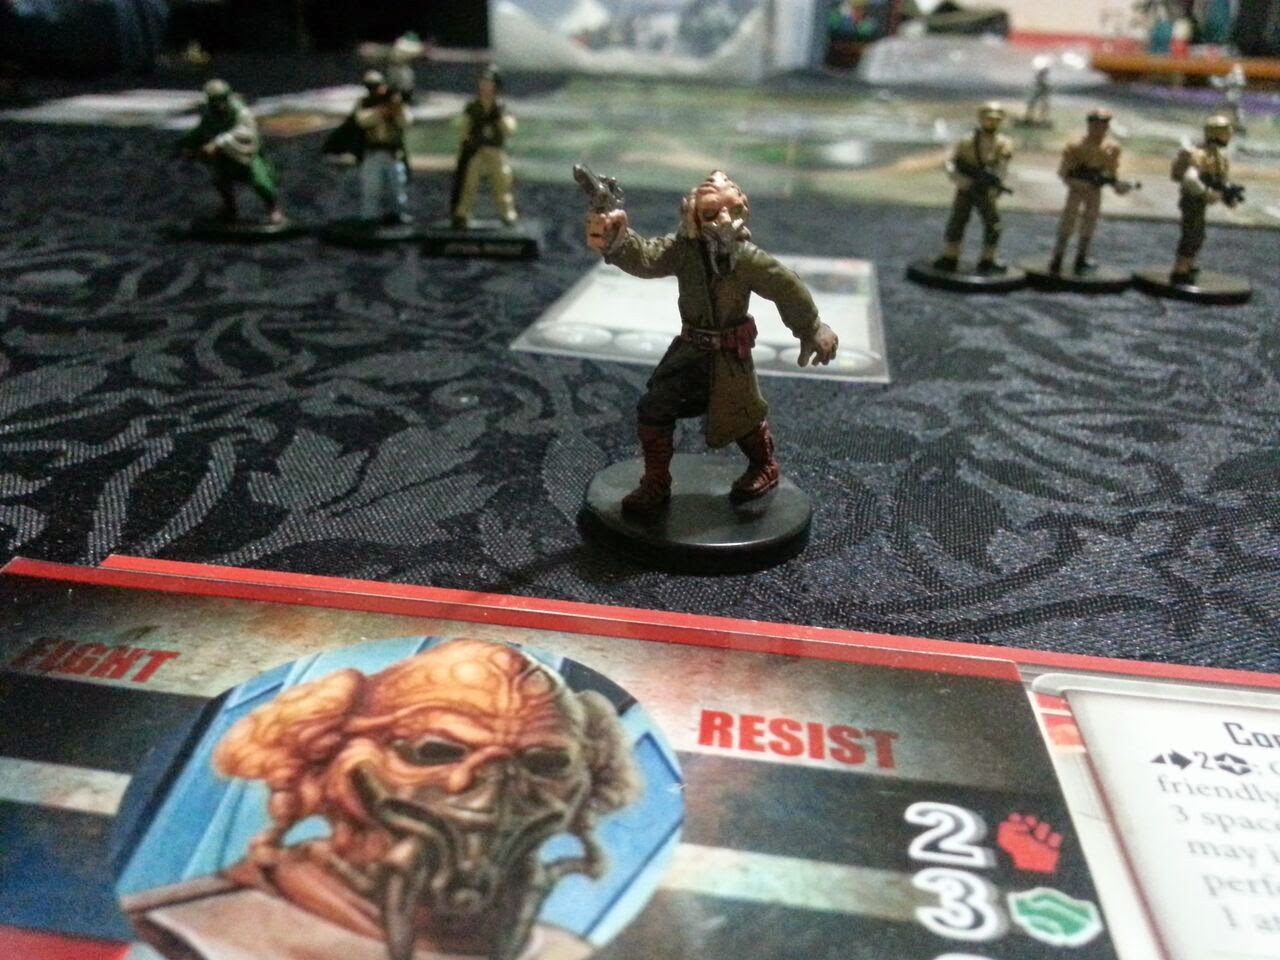
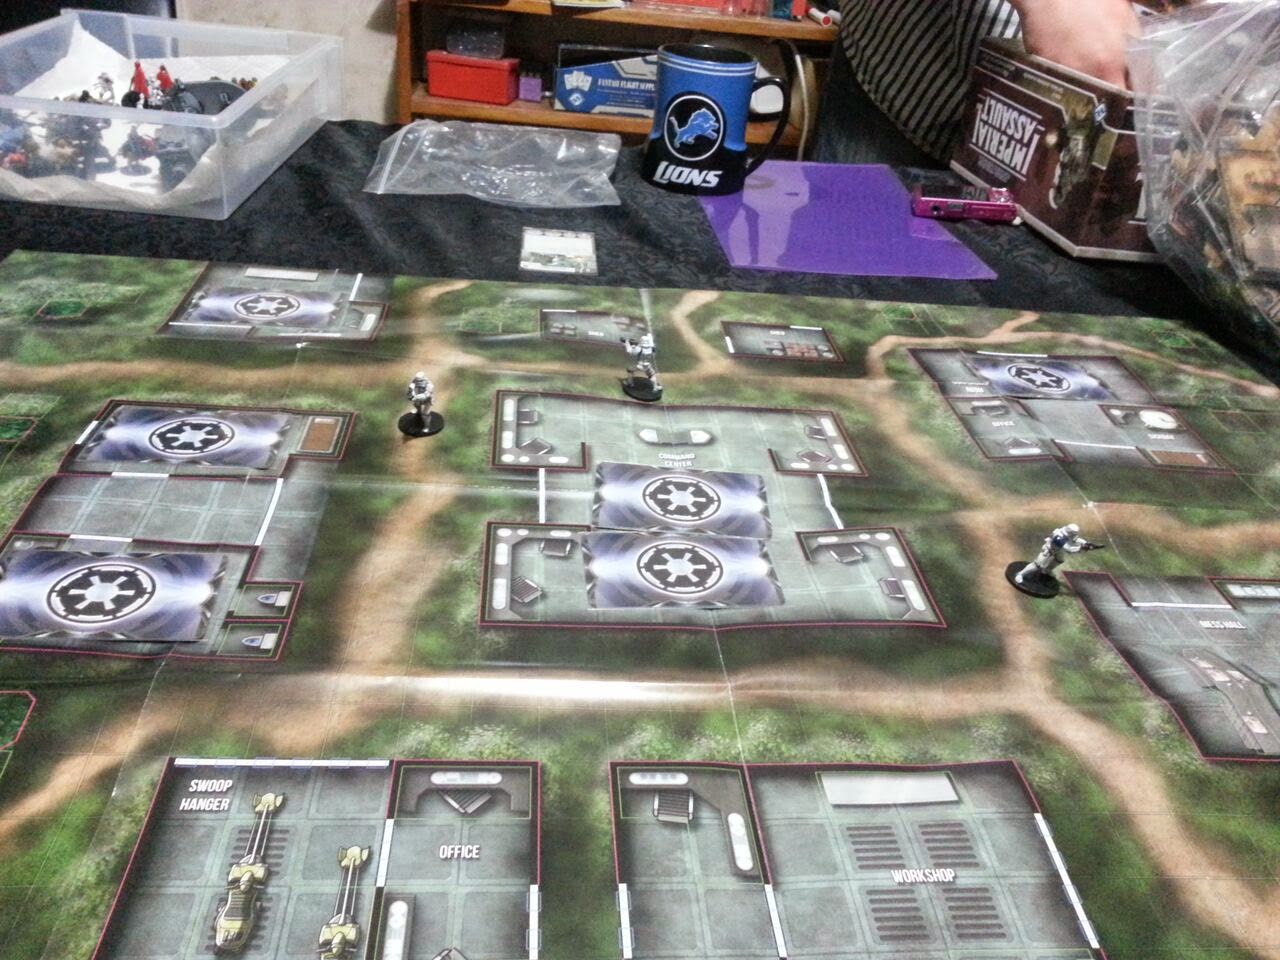
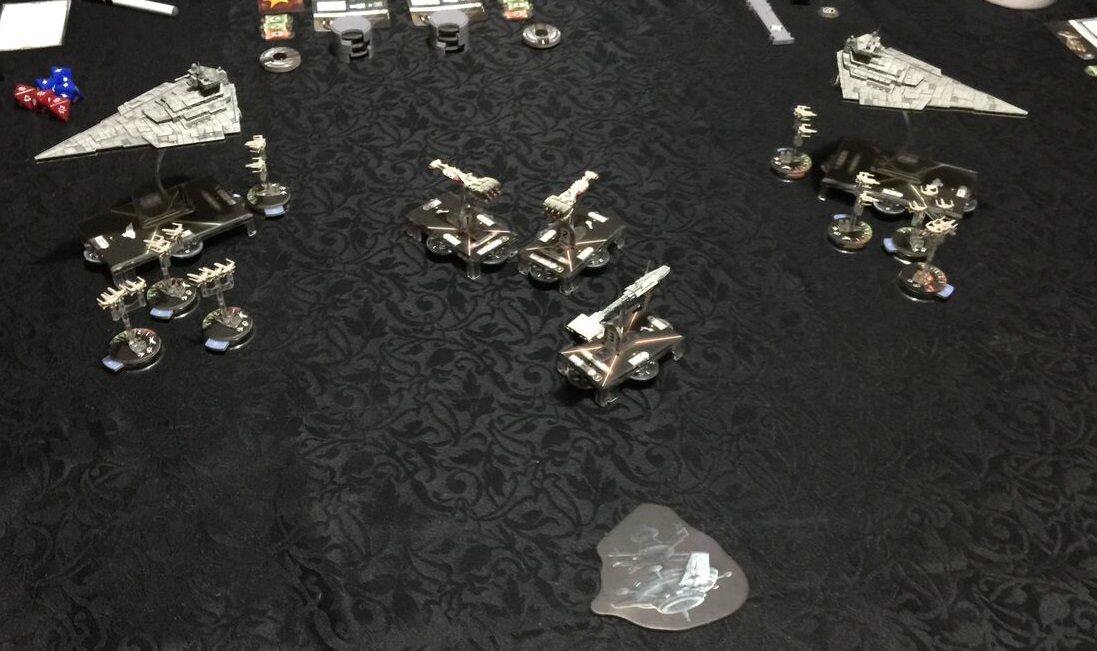
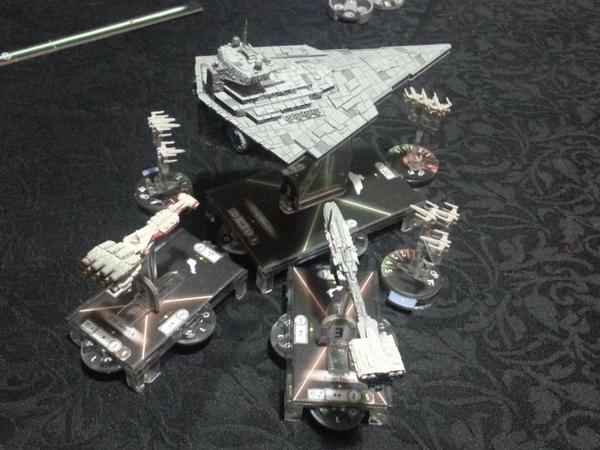
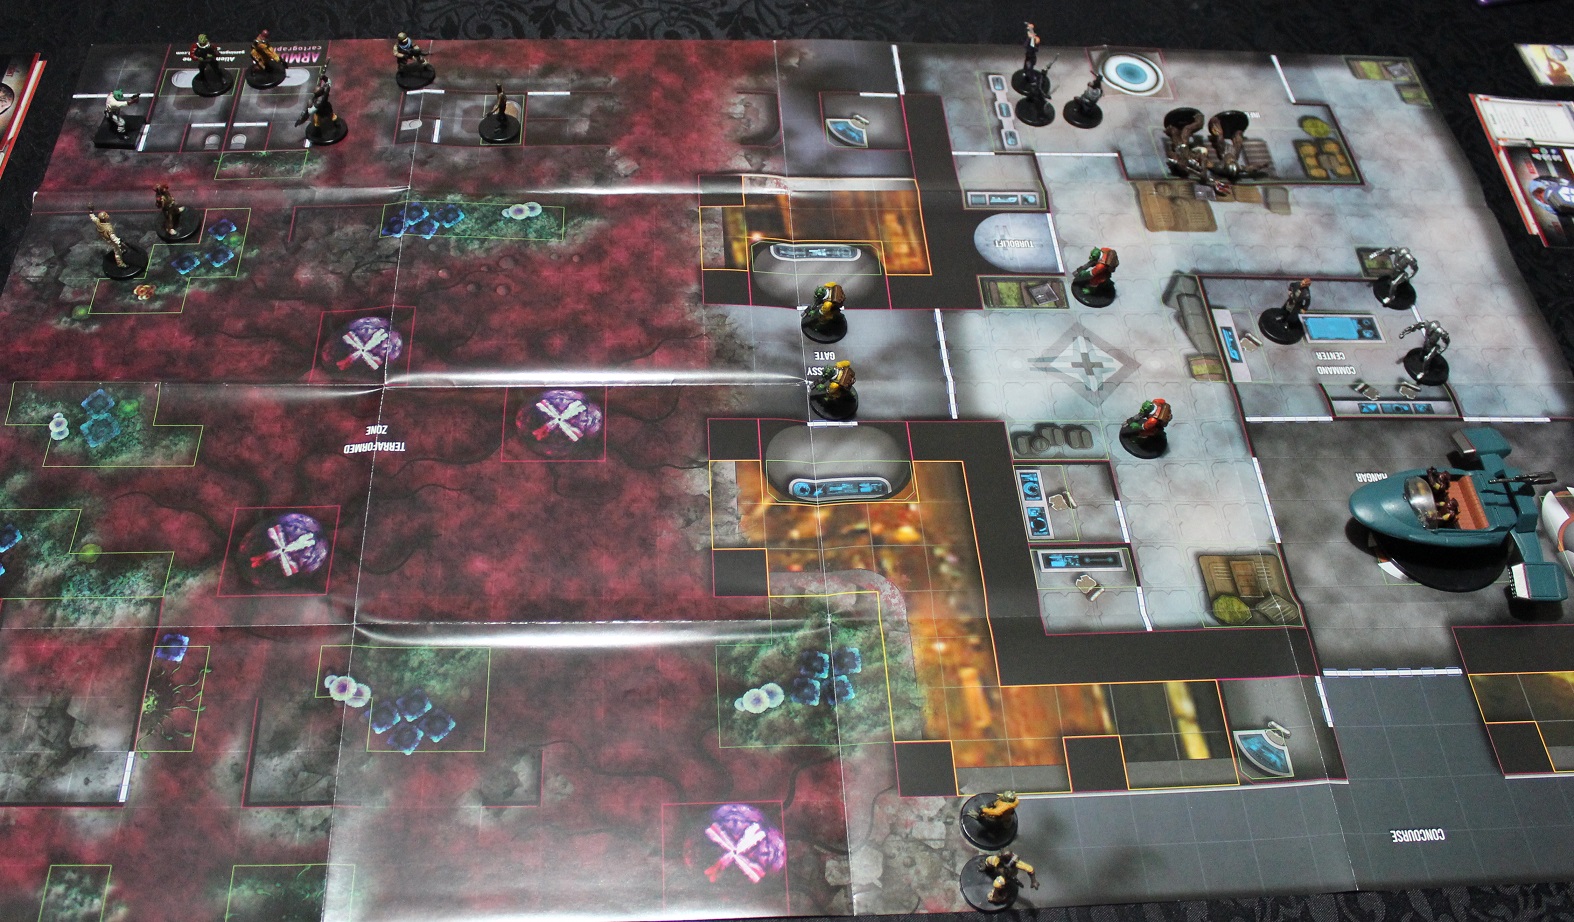
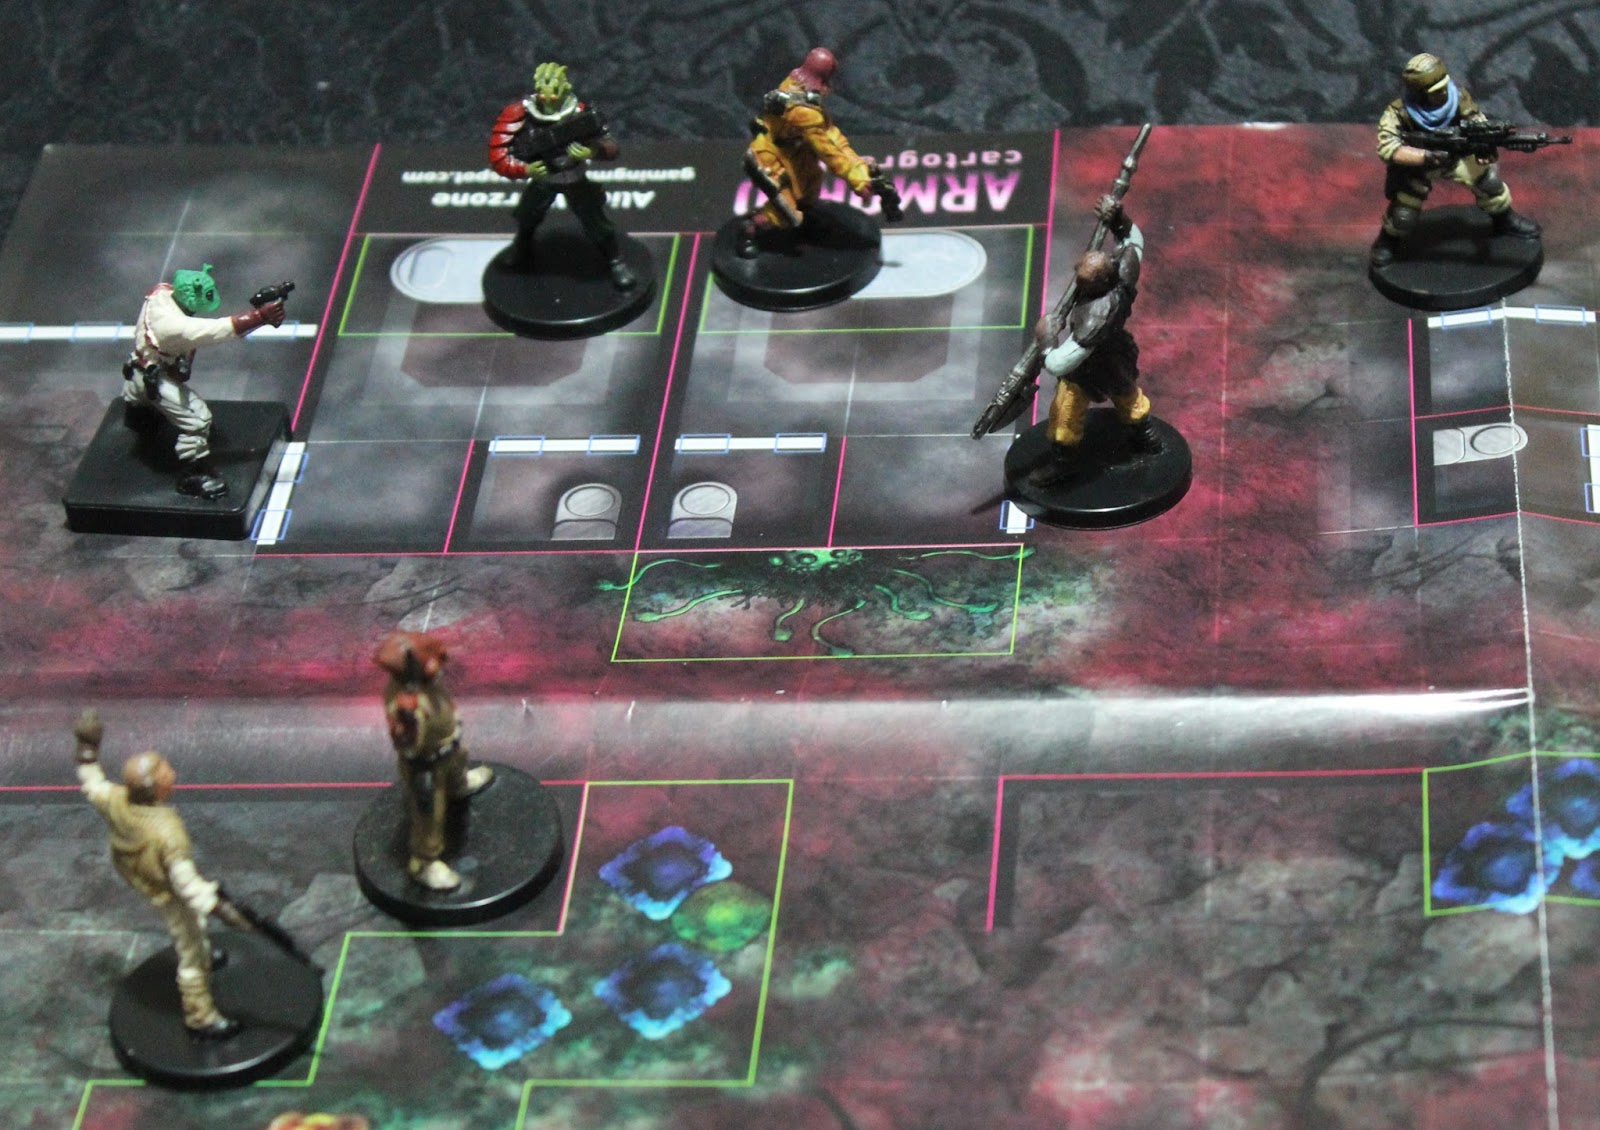
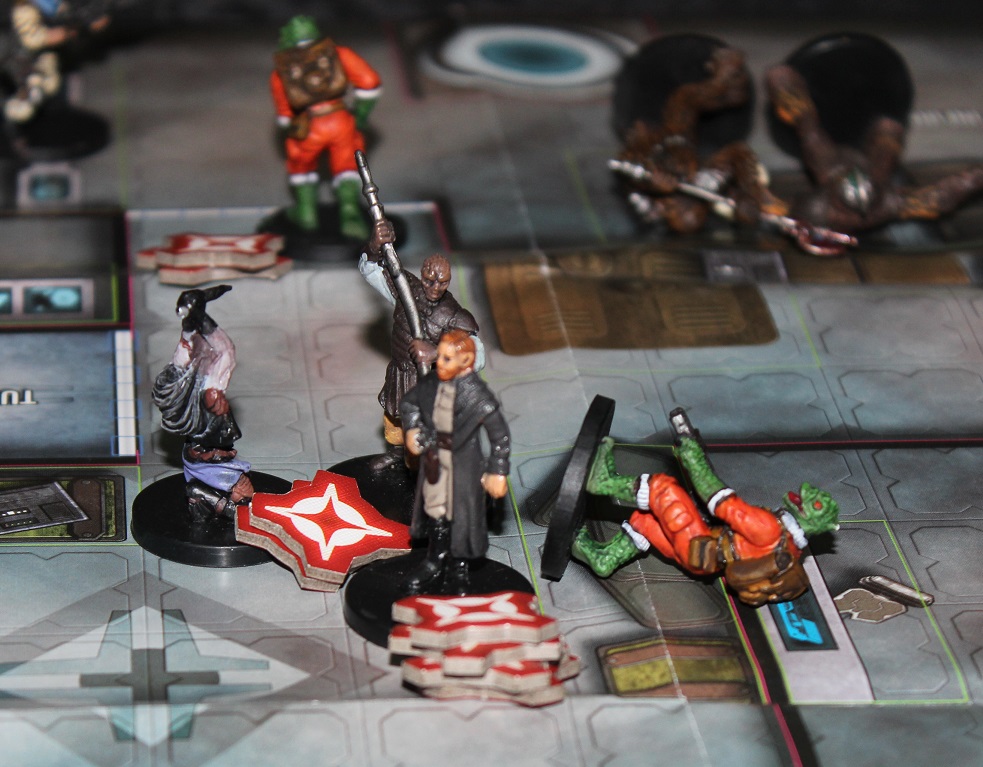
The short version is that i've been running a combined RPG/X-Wing/Armada/Imperial assault campaign. And i've designed a full set of campaign rules to go with it.

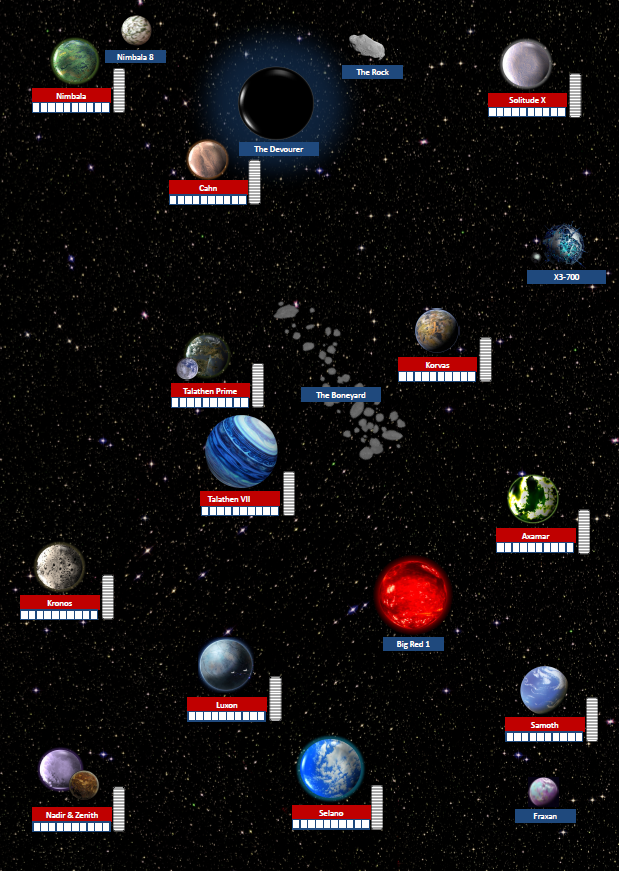
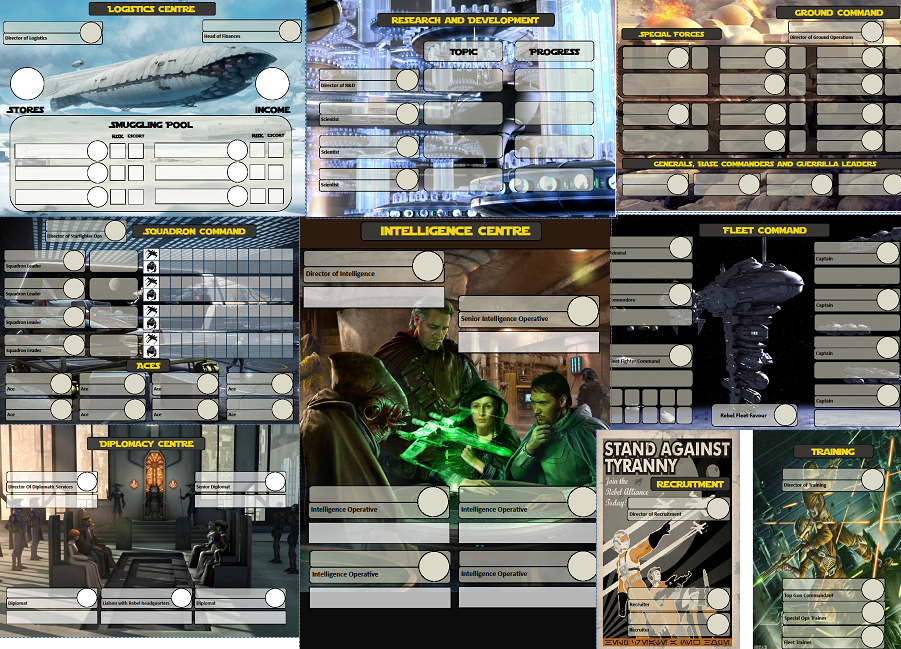
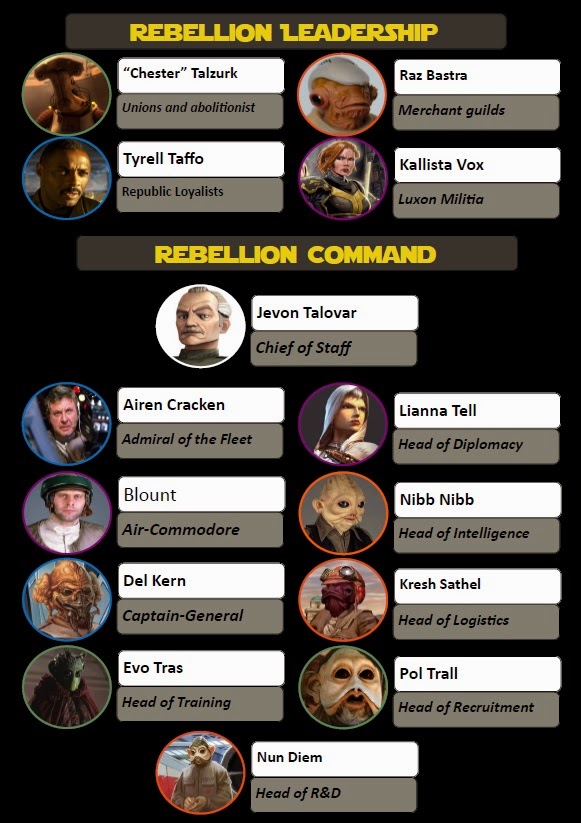
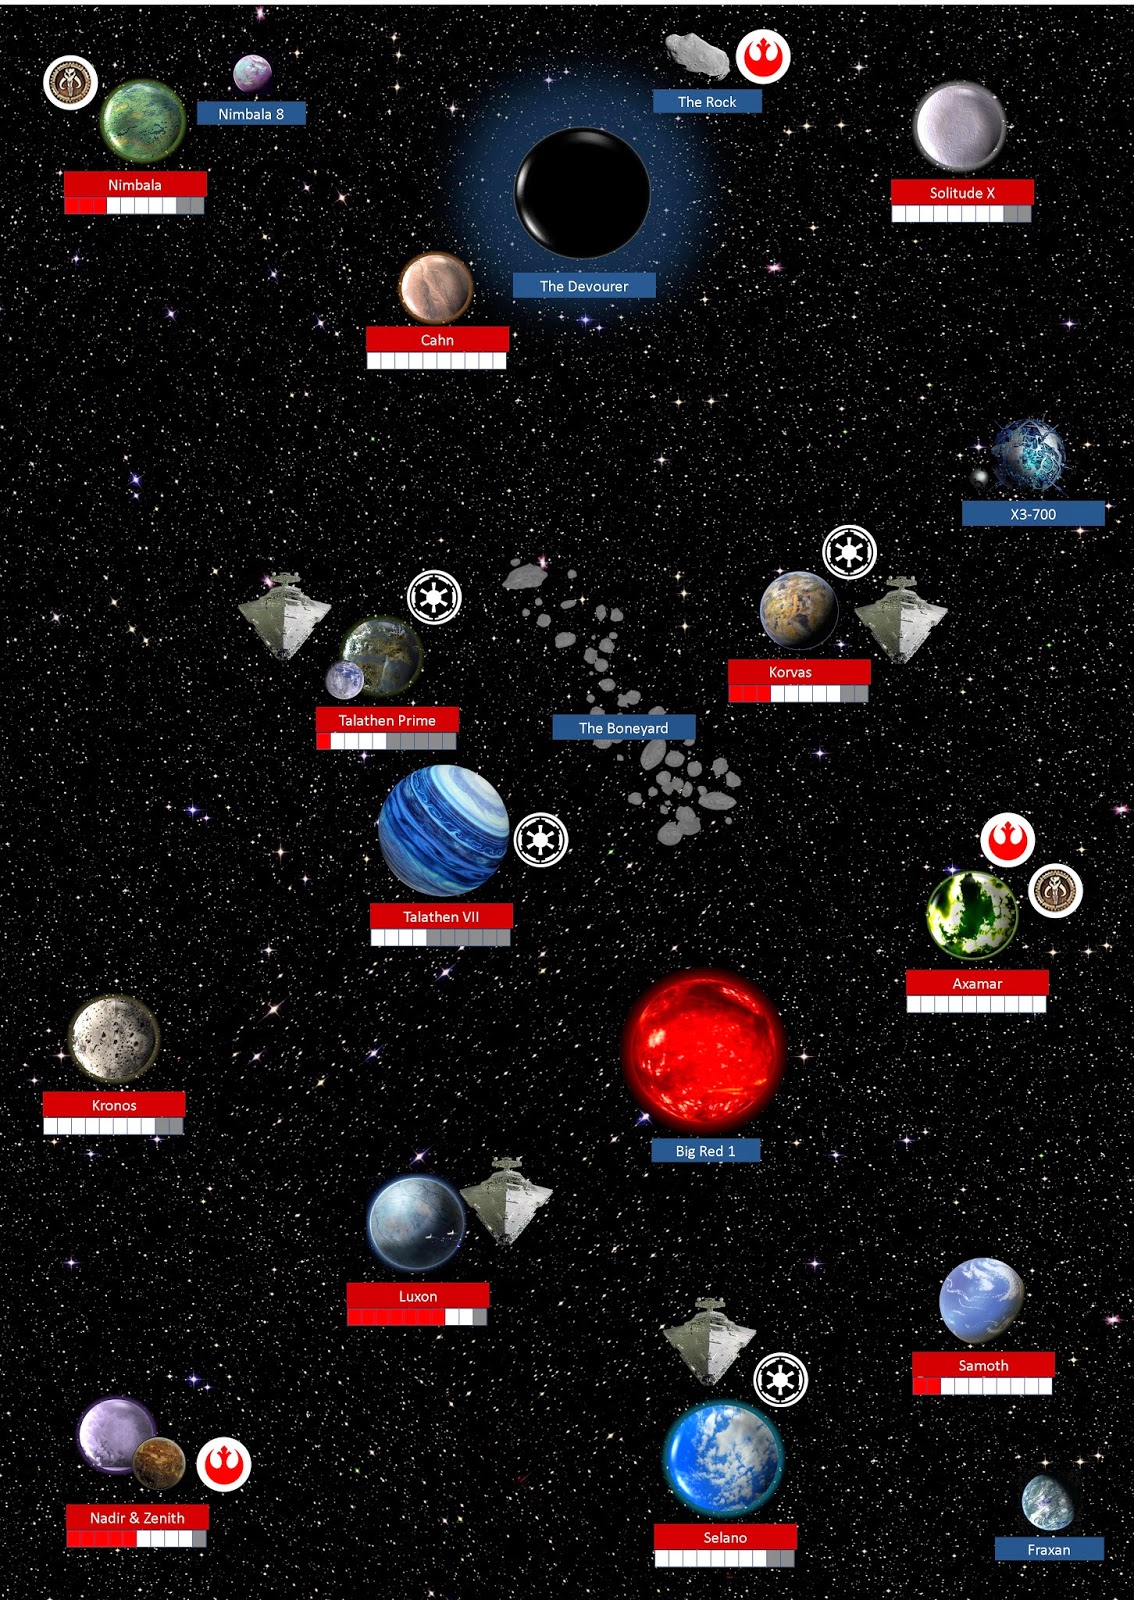
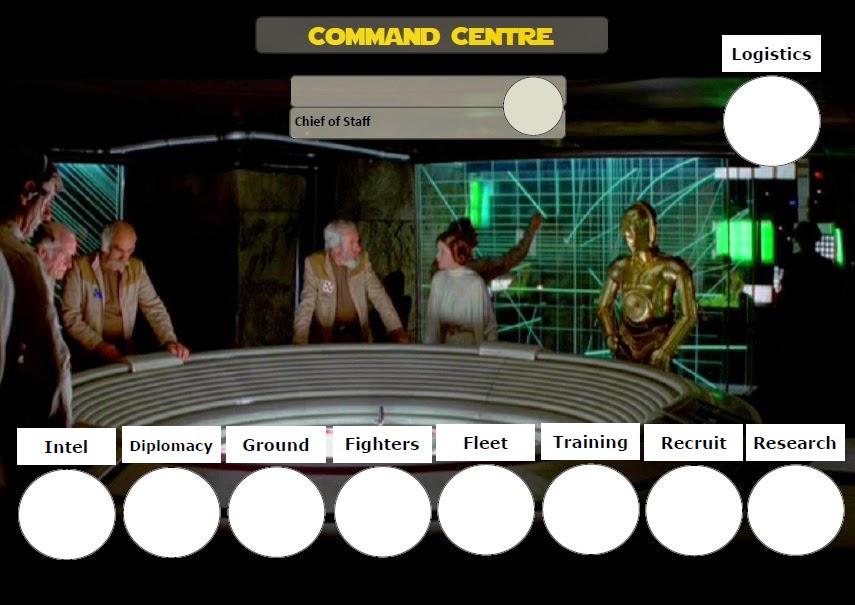
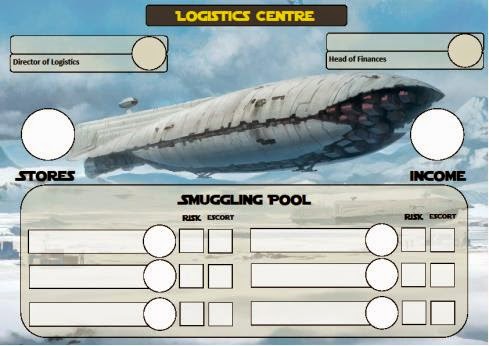
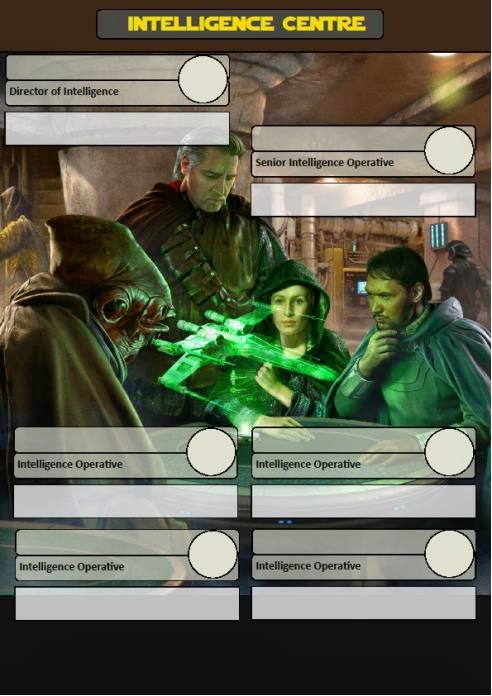
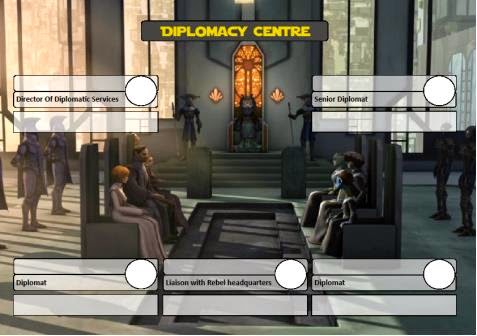
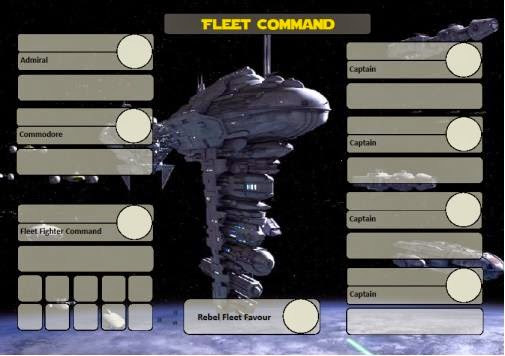
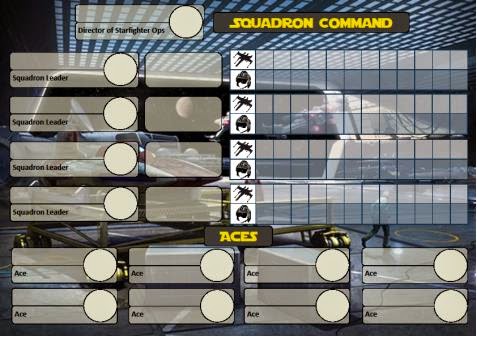
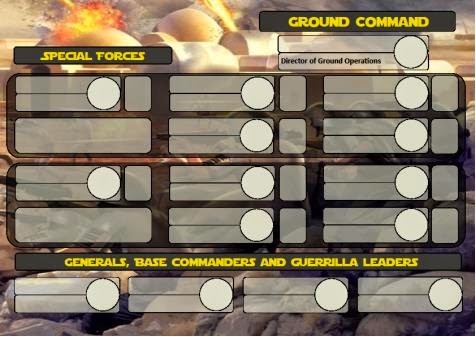
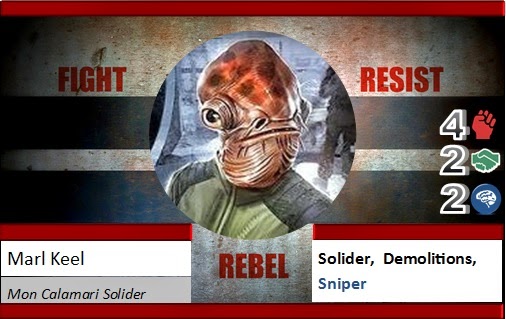
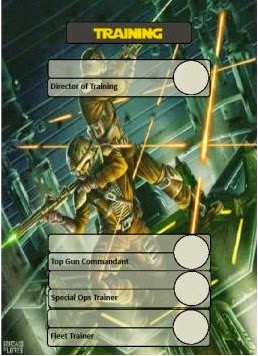
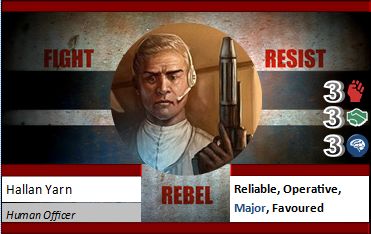
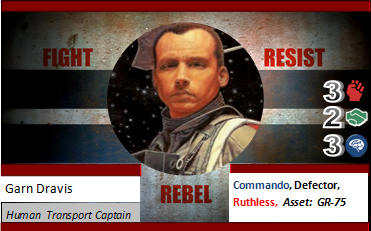
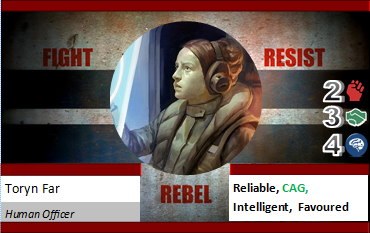
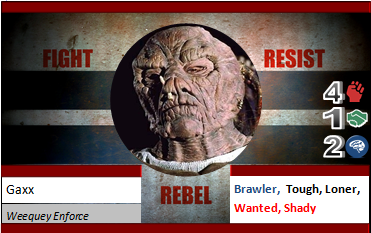
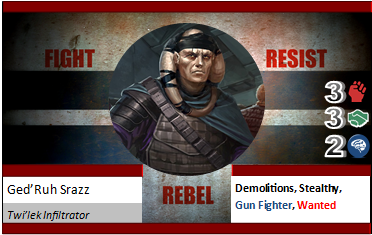
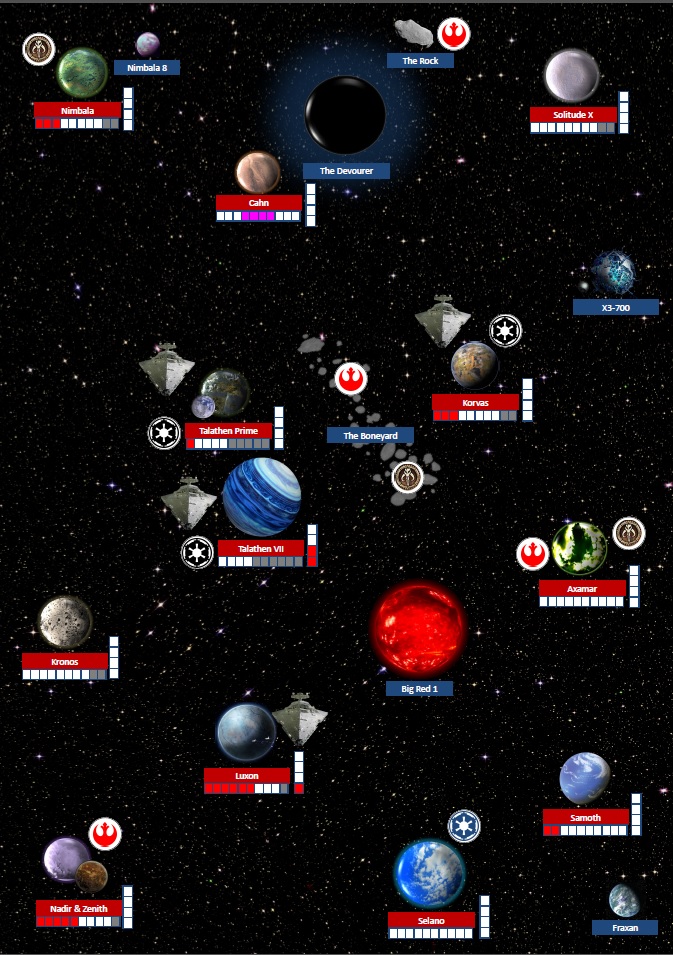
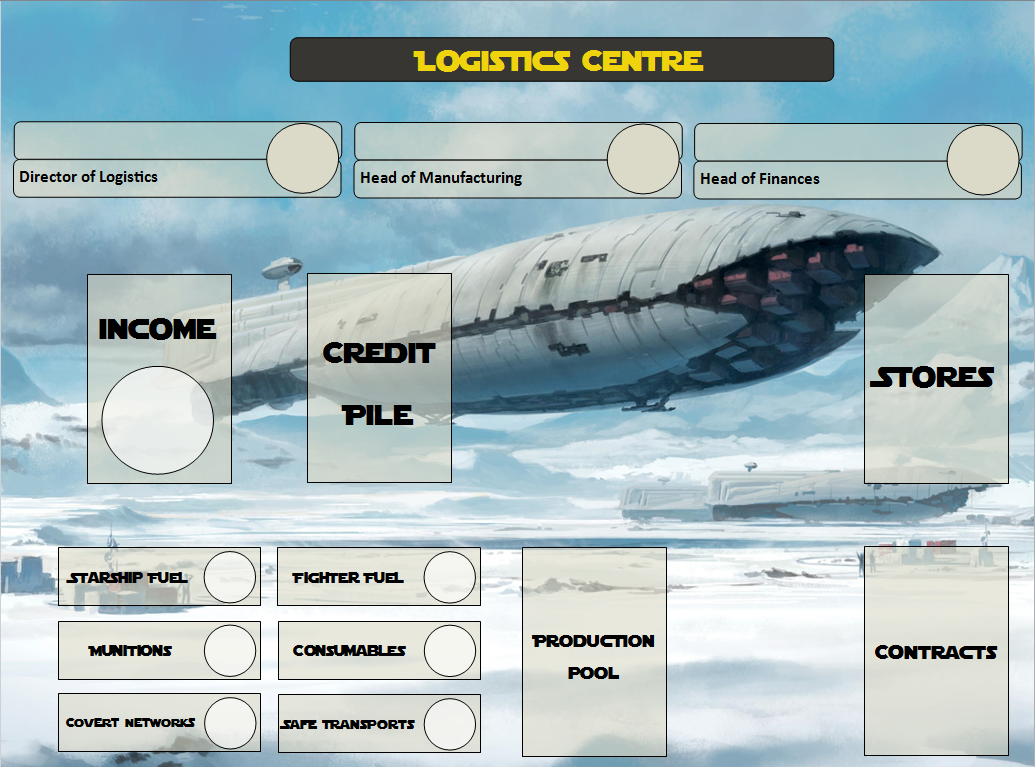
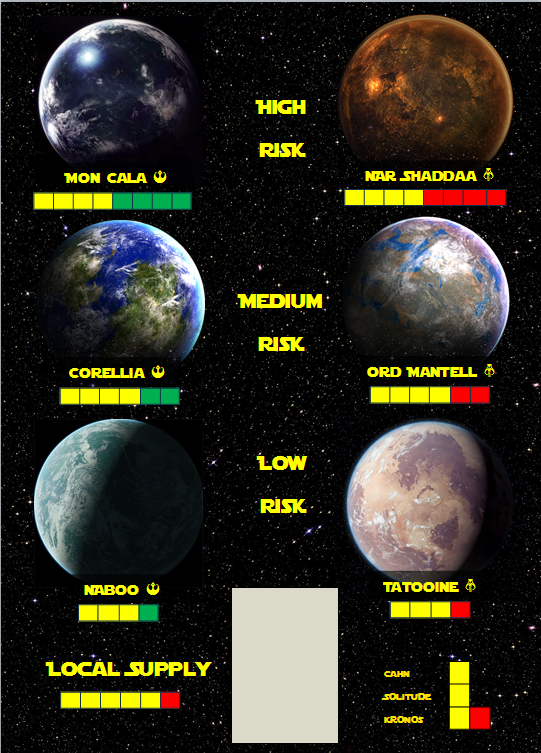
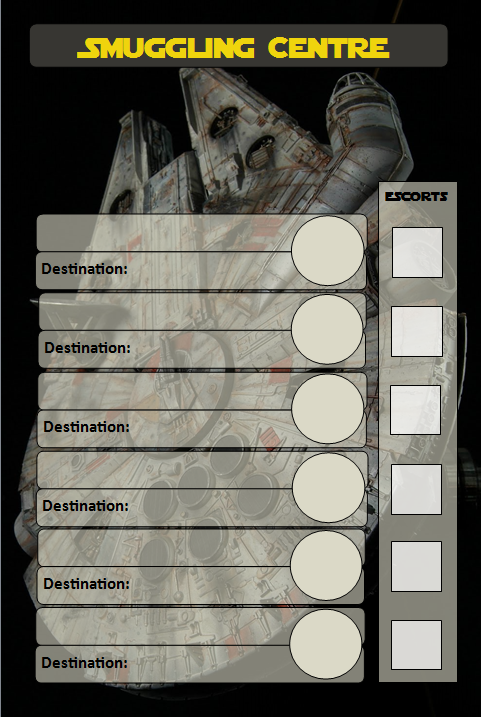
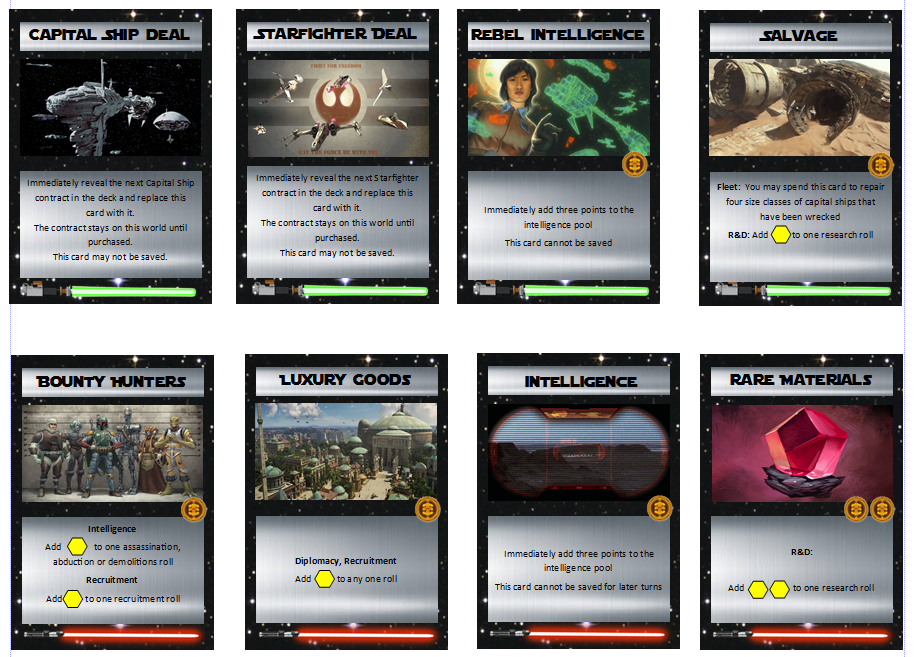
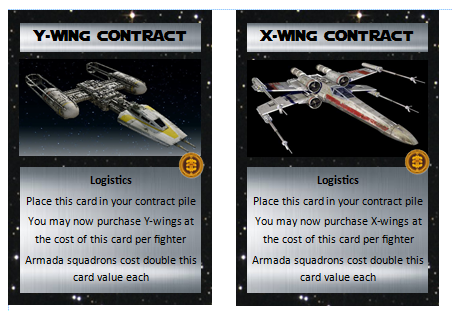
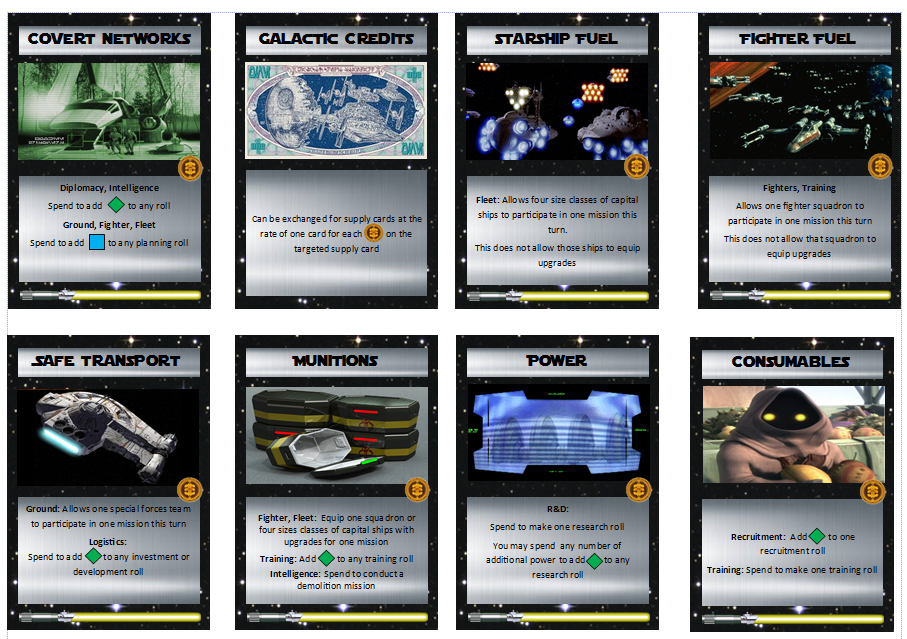
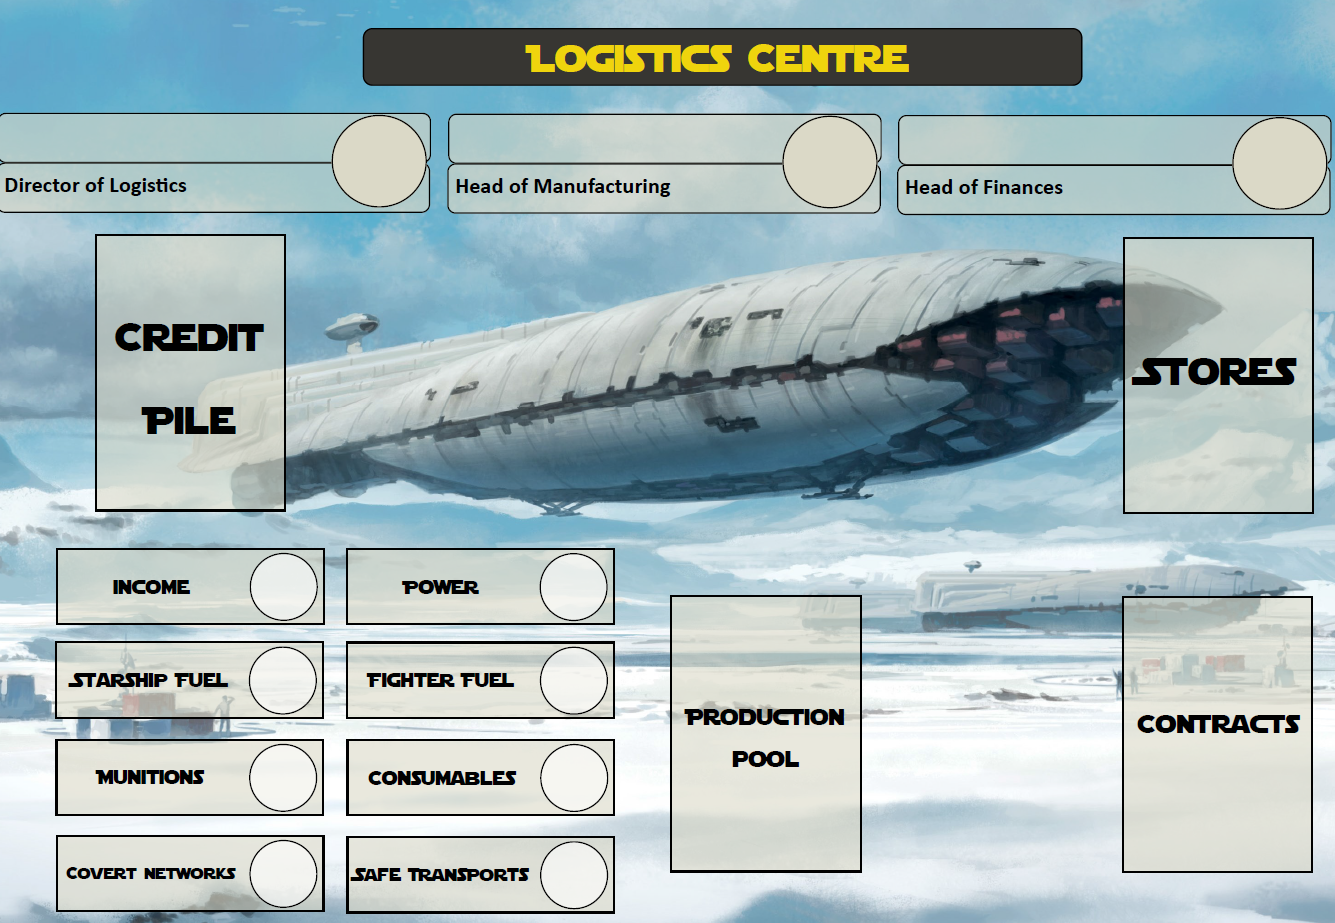
All of the files for this game are located here if anyone wants to use them for any reason. This includes the character cards, setting information, strategy cards and rules.

I'll put up the first few weeks posts in this thread as well.

There's a lot of information here, but if anyone wants to use anything I've developed for the campaign, feel free.

Edited by ithkrall

Epic Star Wars Campaign - The battle for Talathen Sector

Board.png The sector map, now in glorious A1 on my wall

I've been working on a massive project for a Star Wars campaign.

Many years ago, I read West End Games "Rebel Alliance handbook" and thought, "****, wouldn't it be cool to play a game as a rebel sector command, making all the decisions and fighting ground battles, space battles and doing spying missions and the like in one big setting.

It was always too complex to pull off in a role-playing game. Too fiddly to use those mechanics for all the different kind of fights and decisions involved.

Now, I don't have to.

With Armada, Imperial Assault and X-wing, I have the tools to fight space battles and skirmishes, all i'm missing is full scale military assaults, but "Onslaught at Arda 1" has game rules for those as well.

So I got my players together and we created the sector using shared world building. A "tourists guide" to the sector is available online if anyone wants to read it.

The idea is that the four players are playing different ideological factions within the rebellion with slightly different goals, and while they have a shared goal of defeating the empire. The intrigue and friction from having competing secondary goals should make for some excellent stories to be told. While they play the faction leaders, they will also be playing all the characters within their faction.

The "winner" will be the faction leader who accumulates the most "glory" from their actions in the fight against the empire.

Finally, I am playing the "Chief of staff", a rebel officer from rebel command who is neutral and acts as the arbitrator and administrator of the rebellion.

How it works

The core of the game is the minor NPC's that belong to each faction. Now, each character is introduced to the game and each faction bids on their services. Once a character joins a faction, their actions occur on behalf of the faction and earn the faction leader "clout" (which is used for bidding on new personnel) and "glory" which will ultimately decide the winner of the campaign


Montage.jpg

Some of the 100+ characters in the campaign. Note that some of the characters aren't the characters they may appear to be, I just used character pics that fitted characters I had in mind

Now, each character card is pretty straight forward. They have three stats. Martial prowess, social skills, and mental skills. Those values represent the number of green "FFG Star Wars rpg" dice they roll when doing a task. They also have character traits which boost rolls or provide other advantages.

In Lianna's case she is Diplomatic and Connected, Which means she will be rolling 2 green and 2 yellow dice on a diplomatic mission. She is also rich, which means when has financial power she can add to the rebellion cause. However, she is "wanted", so if a mission fails she is twice as likely to be captured.

Each charatcer is unique and has their own skills and strengths. And some are very mediocre, while others are skilled and amazing. Lianna is one of the better ones.

Each character is assigned, by vote, a job in the alliance. The job boards are below. Characters can be reassigned or fired later, it all comes down to voting from the faction leaders.


Right now, you are probably thinking "Holy cow, that looks a bit complicated".

Well, it is and it isn't.

During the planning phase we go through the boards one at a time and decide what each group is doing. What planets the diplomatic core are visiting, what engagements the fleet or special forces are taking on. We simply use the star wars dice mechanics to determine their success.

So, if someone fails a roll planning a fighter attack, well there will be more points of imperial fighters in the mission than if they had an excellent success. Starfighter battles will be fought with X-Wing, Fleet with Armada and Ground operations with Imperial Assault.

There is also a group of "player characters" who represent the heroes of the rebellion. While the faction leaders are like Mon Mothma, these characters are the Han, Luke, Leia and Chewie of the sector. And will be doing roleplaying game "special missions" each game turn.

Success on diplomacy will improve the rebellions standing on world and make missions easier, recruitment gets more NPC's into the alliance, training improves piloting and imperial assault skills, and R&D controls what upgrade cards are available. For example, at game start Squadron command only has Z-95's and a handful of missiles. They need to research, buy, or steal better equipment.

Intelligence rolls will determine what missions are available on the next turn. A failure might mean that some of them are going to be traps.


The idea is to have a rules structure that makes decision interesting, without bogging them down in detail.


Session 1 report.
Org%2Bchart.jpg

The first half of the session was spent rolling up the characters for the hero team. I'll tell you more about them after their first mission.

What we did do is bid on the first 16 NPC's available and assign them jobs in the Sector command.

The four characters at the top are the faction leaders, and their faction colour is in the circle.


How it all shook out was very interesting.

The faction of republic loyalists who are mostly interested in restoring the old republic gained control of the Fleet and Ground commands, setting themselves up as the military powerhouse of the rebellion.

The Luxon militia, a fiercely independent planet who want's sector independence from both the Empire and republic gained control of Fighter command and the diplomatic corp. A strong and balanced position.

The merchant guilds (who are secretly controlled by an AI) gained control of R&D, Intelligence and Logistics. A clear attempt to forgo direct military power and glory at the start of the campaign, but to focus on building the rebellion the way they want it.

And finally, the ecological union and anti-slavery movement grabbed Training and recruitment. In a clear effort to shape the people being recruited by the rebellion and to be the faction who decides who signs up.


The interplay, the wheeling and dealing and general political grandstanding in this first phase of the game was amazing to watch and incredibly enjoyable.

One NPC in particular, probably the single most powerful character in the first 16, who has a negative trait that he's a pompous git who earns half glory, failed to be elected to 4 different positions that he probably would have been better at than the person who finally got the job.

Comedy gold.

With the power structure sorted for the time being, next week we will begin the first round of planning and get into some missions shortly after.

The war for Talethen sector has begun.

Edited by ithkrall

The Battle for Talathen Sector - Strategy phase part 1

Last week I mentioned the overview of what the campaign would look like.

Well, we had our first strategic phase and conducted our first operation, which was great fun.


Here is the strategic map as it stands at the start of week one. (Click to enlarge).

The key is as follows. The colours below each planet represent popular support. Red for rebel and grey for imperial. Now, popular support will impact on how easy things are to do on each planet, but I haven't created "fixed" rules for that.

A lot of this game requires GM fudging and tweaking. That's because I don't want to lock everything in stone, but also because narrative missions need a bit more creativity than a fixed rule-set may offer.


The icons in circles represent major bases. For the rebels, it's their main base on Axamar, a fighter base on Zenith, a fleet base on "the Rock" and they are constructing a fall-back base on Nimbala 8. For the Imperials, the Moff's HQ is on Talathen Prime, the Fleet HQ is on Korvas, Imperial Intelligence on Talathen VII and the army is building a major base on Selano. There are also scum bases on Axamar and Nimbala.

The Star Destroyers represent where the Imperial Fleet has been sighted. The fleet cannot be everywhere, but missions conducted where the fleet is will have increased difficulty.

Not shown on the map is "heat". A scale that determines how focused imperial forces are on a planet. If the rebels hit the same planet over and over again, it's heat level will rapidly rise. Increasing the likelihood of them facing stiffer opposition. heat will decrease over time.


The plan As the Chief of staff I briefed the Rebel Faction leaders (the players) on the current state of the rebellion by pointing out details on the map.

I also mentioned our current resources. Two corvettes, a handful of intelligence operatives and guerrillas in disjointed cells, 24 Z-95 headhunters and not much else.

I put six possible missions on the strategic map, but reminded the players that they are only mission "ideas" and they can come up with their own.

Based on their current position and the lack of strength in rebel forces. The council decided to focus on building infrastructure first and conducting low-level sneak attacks. And deliberately chose not to "reveal" the rebellion at this stage.

Based on this plan, we moved on to the strategic stage.


A note on game phases The game proceeds in five phases.

  1. The Policy phase, where the faction leaders make high level decisions.
  2. The strategy phase where we use the job boards to make strategic decisions for the game.
  3. The operations phase where we fight X-Wing, Armada and Imperial Assault missions.
  4. The character phase, where we conduct a roleplaying focused special forces mission.
  5. The upkeep phase, where the strategic board is updated and the consequences of the players actions are noted.

The first Strategy phase - Chief of Staff

This was new territory for everyone, including me. I'd written up notes about what each job board could do, but I was willing to fiddle around with it as we played. This is all still a work in progress.


As the Chief of Staff, I keep track of resources, manage the turn and record the successes and failures of roles. I use handy "supply tokens" from Twilight Imperium 3 to do this. it's also my job to ensure that the overall "mission" outlined in the Policy phase is adhered to. In other words, a mission needs sign-off from me to go ahead.

My first call, was to logistics. Oh, and note that each check in the tasks below, unless mentioned, is at difficulty 2.


Logistics command overview.


Stores are replenished based on the income of logistics. The rebels started with 10 stores, and 2 income.

The director of logistics has three possible actions.

  • First, they may attempt a short term financial transaction, which adds a number of supply to the stores next turn equal to 4 for every success +1 for each advantage.
  • They may attempt a long term investment as well. Each success allows them to spend store equal to double the current income, to increase it by 1. Each advantage reduces this cost by one. (or, on a failure produces 1 supply for next turn)
  • Finally, the head of Logistics can support smuggling. Each success rolled on a hard roll adds an advantage dice to each smuggling attempt.

The head of finance can do the first two actions, but not the third.

A Smuggler in the smuggling pool picks whether they will do an easy, medium or hard risk run. Then, in combination with squadron command, they decide if any escorts will be provided. A light escort is 1 fighter, medium is 2 and heavy is 4. Escorts cost 1 supply point per twelve fighters, and if even 1 fighter is on escort duty, that squadron is considered "used" for the phase.

The formula for how much supply a smuggler generates is as follows

Supply = (Risk value*successes*ship modifier)+advantages rolled

The risk value for easy is 1, 2 for medium and 4 for hard. The ship modifier is 1 for a light freighter like a YT-1300 and 2 for a medium freighter like a GR-75.

On a failed smuggling run, the smuggler rolls the "evil red dice of despair". Negative results include being captured, being damaged, or being killed. Escorts allow this dice to be re rolled, at the cost of the escort taking the hit instead.

Supply points are needed for operations to be supported, or in some cases to happen at all. Fleet, ground and starfighter missions need support tokens to even occur. R&D also needs support tokens to make progress on developments. All other departments are hampered by a lack of support in the form of disadvantage dice.

NOTE: I HAVE COMPLETELY REWRITTEN THE LOGISTICS RULES AND THE NEW ONES ARE COMING SOON

Logistics command, as it happened.

Logistics command did not have a stellar turn. The head of logistics tried for a long term investment, failed and generated 2 supply. The head of finance made his roll and increased income to 3!

Then the sole smuggler, Roark garnet, flying without an escort failed his roll and rolled the red dice of despair. Instant death on the first roll.

Now, I could have let that go as it was. But I thought that as the first turn of the game, that was a bit harsh. So I simply had him critically wounded and removed from the game for a turn. That was the rebels "one freebie".


Logistics command now had to offer up supplies to the Chief of staff for the round. And, another little special ability of Logistics command is they can pick where half of these resources go. That represents logistics being able to control who gets what, while not giving them total control of the matter.

Logistics command put its resources into R&D and recruiting, as those areas of infrastructure are needed to develop the rebellion further.


Intelligence centre overview

intel.jpg

The intelligence centre is a relatively straight forward job board, with a few options for each operative.

Each Operative as the following options

  • Gather information (personal). Make an social intelligence roll to add to the intelligence pool.
  • Gather information (Slicing). As above, but a mental roll.
  • Misinformation. Make an intelligence roll and target a planet with heat. Heat is reduced depending on successes and advantages.
  • Targeted intelligence mission. Sometimes, specific missions will appear on the strategy map for operatives to undertake.
  • Sabotage missions.
  • Abduction/Assassinations.
  • Coordinate intelligence efforts. (leader only). Make a hard intelligence roll, each success adds and advantage to all other intelligence rolls

The intelligence pool is made up off all the "gather information" rolls. You gain 5 points for a triumph, 2 per success, 1 per advantage - 1 per disadvantage

  • Provide close intelligence to a planning roll in the form of an advantage dice (max 2) (Cost, 1 per dice)
  • Provide additional information to an A-team mission(1 point per clue)
  • Simple investigation of a specific topic (1 point)
  • Detailed investigation of a single topic (3 points)
  • Extensive investigation of a single topic (5 points)
  • Answer one specific question about a person or location (5 points)
  • Perform counter intelligence, allows a reroll of a "consequences" dice on a mission failure (1 point per reroll)

Even if no intelligence rolls succeed on a turn, some information will be available to the players each round. Some stuff doesn't require spies to find out after all.


Intelligence phase as it happened Two operatives, and the boss decides to focus on gathering intelligence. A good roll generating 1 triumph and 2 sucesses. Now I don't have the questions the intelligence leader asked for, because I've already changed how this system works from when he rolled. I was initially going to have it all done behind the scenes, but the ideas of questions and lines of inquiry increases interactivity in the game.

The second operative was sent on a sabotage mission to Nadir and Zenith to blow up some Tie Fighters scheduled to do a "Imperial day" parade. A reasonable success on that roll, but the players do not find out the consequences of missions until the "end phase".

Diplomacy Centre overview.


Diplomacy is a relatively simple job board compared to some of the others. One of the features of the diplmoatic board is that operatives here are always "at risk". Diplomacy requires meeting people and talking, so failed rolls can end up with diplomats being killed or captured.

Their options are as follows

  • Bolster support. Make a diplomacy roll to increase rebel support on a planet. Difficulty is determined by how strong the current support is. Moving a planet from 7 to 8 is harder than from 0-1. Only 1 point made me moved regardless of successes, unless triumphs are rolled.
  • Undermine support. Exactly the same process as above, but instead of improving rebel support, you undermine imperial support.
  • Targeted diplomatic mission. Sometimes, specific missions will appear on the strategy map for diplomats to undertake.
  • Gather information. Use a diplomacy roll to add to the amount of intelligence generated by the rebellion on this turn. Represents a diplomat focusing more on rumors than building influence.
  • Liaise with rebel HQ. (liaison and leader only, and only one per turn). Make a diplomacy roll to get support from Rebel HQ. These points can be spent later on ships and other resources.
  • Coordinate diplomatic efforts. (leader only). Make a hard diplomacy roll, each success adds and advantage to all other diplomacy rolls.

Diplomacy Centre as it happened

Well, there is only one diplomat in the diplomacy centre at the moment. Lianna, and she decided to visit Selano to undermine imperial support by pointing out that they are building a massive military base there, and that it can only mean bad things for the people of Selano.

Two triumphs, an additional success and some disadvantages later. And Lianna has completely undermined imperial support on Selano, and built up a little favor for the rebellion. The disadvantages manifest as "heat", as the imperials are suspicious that the people of Selano are suddenly given them the cold shoulder.

Edited by ithkrall

The Battle for Talathen Sector - Strategy phase continued

Continuing on from the last blog post, I'll talk more about the other strategic roles. Now we've already begun making changes based on the first rounds play through, which is great. I want every player to feel their decisions make an impact. I also want every strategic role to feel important in it's own way, not equal, but important.


Fleet Command Overview


The key to winning the title of "hero of Talathen sector" is to win glory. The easiest way to win glory is to lead and participate in military engagements. Needless to say, the commander of the rebel fleet has a good chance to earn a lot of glory.

This job board is pretty straight forward. Each character is assigned to a spot on the board, and the space underneath is the type of ship they command.

Fighter command is where you mark down what squadrons fleet command has available. Each space represents 4 stands of a type of fighter. At game start they only have 2 full squadrons of Z-95s, which i have "home made" rules for.

Now, the squadrons in the fleet are not the same as the one's at squadron command. I figured it would be terrible for the squadron commander to have built up several elite squadrons of pilots, only to lose them all in one armada battle. So the squads here are separate. Think of squadron command being the "rogue squadron elites" of the sector, special forces pilots who can do multiple roles, while the fleet guys are more "blue collar military pilots".

Another thing to note is "rebel fleet favour". This can be earned by diplomatic missions or sending the Talathen sector ships out of sector to help out the wider rebellion cause. I brought this in because I didn't necessarily want major fleet battles every week in the sector, and I wanted to keep the sector fleet quite small. But I also wanted the option of being able to bring in Mon Cal cruisers and the like for special occasions. Each fleet favour point can be spent to "borrow" 10 points worth of ships from the rebellion, so it will take a while for them to save up to deploy a mon cal squadron.

Actions for fleet command


  • Plan an attack. Pick a mission on the board or create one. Make a tactics roll and generate tactical points equal to 5 for a triumph, 2 per success, 1 per advantage - 1 per disadvantage. I'll explain how those points are spent later on
  • Support the rebel fleet. Generate fleet favor points equal to the class of the ship sent to support the fleet. 1 point for small base, 2 for medium based, 3 for huge base.
  • Drydock/service. All ships consume 1 supply point per size class when used. Putting the ship into drydock means you don't spend supply points on them.
  • Patrol/reconnaissance. Make a tactics roll, each success adds to the intelligence pool.
  • Coordinate fleet (Admiral only). Make a hard leadership roll, each success adds an advantage dice to each subsequent roll in fleet command that turn.
Spending tactics points in Fleet battles
  • Seize the initiative for the battle (3 points)
  • Deploy 2nd (1 point)
  • Pick flanking deployment zones (2 points)
  • Enemy ships start stationery (2 points)
  • No enemy reinforcements (3 points)
  • Enemy strength reduced (any number of points)
Fleet Command phase as it happened
At this stage, Rebel fleet command consists of two Corellian Corvettes and a couple of squadrons of Z-95's. Certainly not enough to take on a star destroyer squadron just yet.
The fleet commander took two actions, the first of which was to plan an attack on Nimbala Prime to attack czerka shipping and seize cargo. Two successes on this role mean't that the attacking force had superior numbers. However, it's worth noting that this battle was fought using X-wing instead of Armada as the deployed force was only 1 corvette.
The second action was to loan his second corvette to the rebel high command for 1 rebel fleet favour.

Squadron command overview

Like Fleet command, Squadron command is a great place to earn glory. Possibly the busiest strategy board, this may take a little explaining.
There are four squadrons, each with up to 12 fighters in them. The class of fighter gets marked in the top row. Z for z-95, X for X-wing and so on.

The bottom row is the pilot skill. Now i'm using a simple version of this where pilots have 3 classes. Rookie, veteran and elite. A rookie is the lowest generic pilot skill card for that fighter. For example, rookie pilot for X-wings or gold squadron for Y-wings. A Veteran uses the 2nd highest generic card for the same ship. So red squadron for X-wings and Grey for Y-wings. Yes, this means a pilot in an a-wing will drop skill from when they piloted an X-wing, but it's way easier to keep track of.
An elite has either a 3rd generic card if one exists, or if not they have a "pilot" skill upgrade slot for free. If they have no pilot skill cards available, they automatically get +2 pilot skill.
Aces can exist outside of squadrons, and are characters who have the "Ace" character trait that aren't squadron leaders. Aces can deploy on any mission the squadron commander approves and fly the fighter they are an ace in. This means they may have 1 ace in a fighter class that they have no generic fighters in.
Actions for Squadron Command

  • Plan an attack. Pick a mission on the board or create one. Make a tactics roll and generate tactical points equal to 5 for a triumph, 2 per success, 1 per advantage - 1 per disadvantage. I'll explain how those points are spent later on
  • Escort logistics command. Already mentioned under logistics command, but supplying even 1 fighter to this action means the squadron is "used" for the turn
  • Service. All squadrons consume 1 supply point a turn. Putting them on standby means they do not consume a supply point.
  • Patrol/reconnaissance. Make a tactics roll, each success adds to the intelligence pool.
  • Conducting training. Make a leadership roll, generate training points equal to 5 for a triumph, 2 per success, 1 per advantage - 1 per disadvantage. Results of training are outlined in the training section.
  • Coordinate Squadron operations (Director only). Make a hard leadership roll, each success adds an advantage dice to each subsequent roll in fleet command that turn.
Spending tactics points in X-wing battles
  • Seize the initiative for the battle (1 points)
  • Deploy 2nd (2 point)
  • Pick flanking deployment zones (3 points)
  • Enemy ships start scattered (3 points)
  • No enemy reinforcements (3 points)
  • Enemy strength reduced (any number of points)

Squadron command as it happened.
Lt Blout is a fine pilot, but he's a pretty rubbish commander as his first mission roll demonstrated. Multiple failures made for an extremely difficult mission where the rebels would be scattered and facing tougher forces than they initially expected.
The mission was to assassinate a ranking imperial officer on his way to Primm Station on Talathen VII.
The Rebels were headed into a tough fight, although we have a new word in our vocabulary now. "Blouting", to rush headlong into battle with no planning and care for risk or casualties.
Ground Command overview
Ground Command is the final of the "glory positions". You may also notice that we have four players and three positions that generate the most glory. This is by design :)
Special forces are set in two squads of five personnel. These are groups for imperial assault. There are six imperial assault skills in the game and they align with each of the six characters currently in Imperial assault. Only one NPC with a relevant skill can be assigned to each squad.

When a squad deploys to a mission, each NPC uses their associated Imperial Assault character class and gains XP to spend on skills equal to their characters "fight" rating.
Kreel.jpg Additional XP gained is added to the little box to the right of their character name on the sheet.
For example, Keel is a sniper, which means he gets the Bothan sniper character card and skill deck. He has a fight rating of 4, so he can spend 4 xp on imperial assault skills.
He also gets the starting "sniper rifle", additional equipment is unlocked through R&D, not through the normal process of earning credits.
Actions for Ground Command

  • Plan an attack. Pick a mission on the board or create one. Make a tactics roll and generate tactical points equal to 5 for a triumph, 2 per success, 1 per advantage - 1 per disadvantage. I'll explain how those points are spent later on
  • Conducting training. Make a leadership roll, generate training points equal to 5 for a triumph, 2 per success, 1 per advantage - 1 per disadvantage. Results of training are outlined in the training section.
  • Coordinate Ground operations (Director only). Make a hard leadership roll, each success adds an advantage dice to each subsequent roll in fleet command that turn.
  • Patrol/reconnaissance (Generals, Base commanders and Guerrilla leaders only) Make a tactics roll, each success adds to the intelligence pool.
  • Bolster/ Undermine support. (Generals, Base commanders and Guerrilla leaders only). As per the diplomacy rules, but only for the planet that the officer is deployed on. In addition, the difficulty is increased by one.


Spending tactics points in Imperial Assault battles
  • Seize the initiative for the battle (1 points)
  • Deploy 2nd (1 point)
  • Pick flanking deployment zones (2 points)
  • Infiltrators, can reveal inside enemy position (4 points)
  • Enemy forces passive at game start (3 points)
  • No enemy reinforcements (3 points)
  • Enemy strength reduced (any number of points)
  • Additional squad support (1 per squad)
  • Utility supplies (1 per supply card)


Ground command as it happened.

Ground command is in a sad state, like many of the rebellions current forces. Special forces only has three soldiers of reasonable skill, and one of them is a foul mouthed rodian gunslinger.

Not deterred by this, the amazingly uninspiring General Kern decided to pull off a daring raid on a Imperial base that was under strength due to the Imperial day celebrations. Despite boring his troops to death with a 237 slide PowerPoint presentation on the operation, he managed to plan the attack well. Rebel forces had ideal position to catch the Imperial personnel napping while they placed demolitions charges.


Recruitment overview

Recruitment is a very straight forward role with a lot of hidden potential in it. You see, while there isn't much glory to be had at the recruitment stands, you do have potential to influence the kind of people who join the rebellion, and have more "clout" to hire them when they become available.

Actions for recruitment


  • Recruit NPC's. Make a leadership roll to recruit NPCs. For each success rolled you can choose one characteristic that you want in the recruit pool. For example, Smugglers, which will mean at least one of the recruit pool will be a smuggler. A triumph allows for a powerful NPC with the requisite traits to be recruited. Advantages rolled add to your clout for next round.
  • Bolster support, As per the diplomacy rules, but the difficulty is increased by one.
In addition the head of recruitment decides on how bidding for new recruits will occur. Whether all the characters are revealed before the first bid, or one at a time. Also, whether it is an incremental or blind bid for the round.

It's a subtle power but one that might end up being quite influential.

Recruitment as it happened.

Pol Trall, the head of recruitment decided that special forces should be the focus on recruitment. And while he managed only one success on his recruitment roll, that ensures that at least one new solider will be available in the next round of recruitment. Something ground command sorely needs right now.


Training overview

Again, training is a very simple strategy roll with a tight focus. Also, like recruitment it generates a lout of clout as the people who train new recruits have an ability to influence them.

In and of itself, training doesn't do much. What it does is bolster the skills and abilities of other forces. Training is the only way to unlock elite pilot skill cards for X-wing and Crew Skills for Armada.

Trainers have only one option. To train people. They generate training points with a leadership roll points equal to 5 for a triumph, 2 per success, 1 per advantage - 1 per disadvantage.

A trainer may train a squad that has already committed to a training action. In that case, the points for training are combined.

Trainers other than the Director are limited to training units in their respective field.


Training points are spent as follows, an individual may be upgraded only once per turn.


  • Train civilian to be a rookie pilot (1 point)
  • Upgrade rookie pilot to veteran (2 point)
  • Upgrade veteran pilot to elite (4 points)
  • Increase special ops bonus XP by 1 (equals cost of new XP number)
  • Develop elite pilot skill card (2 points)
  • Develop crew skill for X-wing (3 points)
  • Develop crew skill for Armada (3 points)
Advantage's in these rolls add to your clout next turn. Unspent points also become clout.
Note that gaining a card only grants 1 copy of that card. To get 4 copies of "push the limit" you would need to spend 8 training points.

Training as it happened. Evo Tras talked a big game during his pitch to become head of recruitment about needing a modern military force that used guile and cunning rather than brute force. His first action was to train starfighter command, resulting in 4 pilots becoming veterans.


Research and Development overview


R&D is the final strategy board we will look at, and its another relatively simple job. New tech can only be researched from here, so if R&D doesn't do it's job, then everyone will be using blaster pistols and concussion missiles until the end of time.

There are four topics to research, Fleet, Ground, Starfighter and Special.

The first three relate to the cards used in Armada, Imperial Assault and X-Wing respectively. The special category is for the roleplaying game and any other random technologies I want to spring during the campaign.

The progress number is the total number of points rolled to date on that category. While I have no hard and fast rules written on exactly what techs open up at each level, it will be a guide. For example, proton torpedoes will be available for research before Advanced Proton torpedoes, and tier 1 imperial assault cards will be available before tier 3.

As before research points are generated as 5 for a triumph, 2 per success, 1 per advantage - 1 per disadvantage. Point unspent on a round stay available to be used later.

Also, if a scientist wishes to change topic. That information is swapped over on the sheet and progress is maintained.

All research rolls are intelligence rolls and require supply to be conducted.

  • New card for X-wing (cost equal to points cost of card, minimum 1)
  • New card for Armada (cost equal to points cost of card, miniumum 1)
  • New card for Imperial Assault (cost equals credits cost /100)

All costs are rounded in the players favor.

Note that gaining a card only grants 1 copy of that card. To get 4 copies of "ion turret" you would need to spend 8 research points.

Results from the "special" category will be decided on by the group, but should represent hard to get and costly gear in the role-playing game. Or, if for specific story related matters


Research and Development as it happened

Num Diem decided that ship technologies were going to be his focus and put a mammoth effort into the task generating 5 successes. During the resolution phase he will be able to pick out some shiny new toys for Fleet command.
His assistant Ghartoka (whom he hates as Num is a racist, and Ghartoka is a wookie), set to work on the "special" category, gaining two successes. When the A-team gets back from their first mission, he will have new toys for them.
Conclusion
Another mammoth post, but that's a lot of the core rules out on the table for people to look at. You will note that everything is designed to make progress gradual and each decision important. Spending all your research on Ion turrets and then never using turreted air-craft might not be a winning strategy for example.
Next week, ill have updates on the first three battles that took place. A fighter attack on an imperial dignitary, a corvette raid on czerka shipping and a daring raid into an imperial facility on Korvas.
Cheers!
Edited by ithkrall

Combat missions - Round 1 - Battle for Talathen sector.

Now before I go any further i'd just like to make a few things clear. I won't be doing detailed battle reports, because they take a lot of time and note taking. So it will be highlights

I'll also mention I didn't take any photos as my camera was at the office when we played. One of our players did the photos, so it's more of a random selection than if I had set out to write a full report.

How missions work in the Campaign

Well, considering this is a narrative campaign and not a "hard points" campaign, the missions can be quite varied in the balence of points. In some cases, the rebels will be out-gunned and over-matched, but have defined objectives. At other times they will have the element of surprise, so will be able to bring greater forces against the Empire.

I start off with a preconceived idea of how the scenario will work in my head and then modify it based on the tactics roll made during the planning stage. A good roll will make for an easier mission, a bad roll ups the difficulty considerably.

We now have proper rules for this, but these missions were done before I created those rules and were based on feedback from players. They said they wanted more control on how their planning shaped the mission.

Now these first three missions may seem quite easy, and that was intentional. The Rebellion in the sector totally had the element of surprise on their side, and I want to use them as tutorial games to remind everyone of the different rules. As the campaign goes on, the difficulty will increase.

I'm also keeping track of technology and escalation as the campaign goes on. For example, this round of missions takes place only a month or so after the Battle of Yavin, so I didn't want Tie Defenders and Phantoms making an appearance.


So, here is a quick rundown of the missions for round one.

Squadron Command - Assassination mission at Talathen VII

A high ranking imperial officer, one of the Moff's general staff was making a visit to Primm Station on Talathen VII for empire day.

The Rebellion caught wind of this and decided to send a headhunter squadron to hunt some heads. Now in order to keep things sane i'm limiting most starfighter missions to 8 ships. It's a good number to manage, while still giving each battle a "squadron level" feel to it. 12 will be the absolute upper limit for a big fight. There is also the practical limitations of only have 4 of most fighters.

So the Rebel squadron consisted of Lt Blout, 3 Veteran z-95's and 4 rookie z-95's. All armed with concussion missiles, the only tech card that Starfighter command has.

Due to a really bad planning roll, the Z-95's deployed first and scattered into pairs. Also, the Lambda shuttle carrying the target also had a person the rebellion didn't want to kill on it as well as the target ("rebel prisoner" upgrade) and the Tie's were upgraded from Academy pilots, to Obsidian squad.

The objective: Kill the Lambda before it escapes off the board edge.

Mission%2B1c.jpg

The Imperial plan was simple. Push the lambda shuttle ahead as quickly as possible, and try to engage each pair of Z-95's with 4 ties and destroy them bit by bit, or force them to break away and be out of position to hunt the shuttle.

As you can see on the right, even when flying in formation you can completely lose track of a fighter :)

My plan mostly worked, with the ties shooting down 3 Z-95s and forcing the z-95s to either park in front of their guns at short range, or lose pursuit of the Shuttle.


The shuttle nearly got away, on the last possible round to stop it, one Z-95 (I think Blout, or his wingman) got to get one last shot on it with it's shields down. The range ruler just touched range 3 and the concussion missile did the job.

Even though this was a "starter mission" the failure on the planning roll made it into a real challenge. Credit to the rebels, although they killed zero ties, they focussed on the one ship that mattered and killed that.


Fleet Command - Raid mission at Nimbala

The fleet commander was initially confused when I informed him that his Fleet operation was going to take place on the X-wing scale.

Then he remembered that I had the X-Wing corvette and got pretty darned excited about flying it into battle.

This was another objective based mission. The goal was to destroy the enemy fighters and knock out the freighters shields to make it surrender. Or to simply blow up the freighter, but doing so would mean they go less rewards.

The corvette was supported by 4 rookie Z-95s. Opposing them were two tricked out Y-Wings with droids, ion cannons and torpedoes, and a well equipped firespray.

Mission%2B2a.jpg

The Scum tactics were to have the freighter quickly pick up supply tokens off the board until it's shields went, then it would attempt to flee. While it did that, the fighters would engage the corvette and use ion cannons to slow down the headhunters.


Things looked good for a while for the scum, they had put some hits on the corvette and badly damaged/ionized the headhunters. Both Y-Wings had target locks, and while their shields were down they had been undamaged.

However, it is worth noting that the Corvette goes before a pilot skill 2 Y-wing. (turns out, i got that rule wrong.......)

As this was a "corvette a" I had given it some extra guns, and on this one round, they delivered. In 2 shots, he corvette did 5 damage to each y-wing, blowing them both out of the sky before they could fire torps.

With the Firespray out of position and badly damaged, I decided the freighter would surrender in the face of the corvette closing in on it.

Logistics command were particularly happy, as the GR-75 was undamaged and will make a valuable addition to logistics commands efforts.


Ground Command - Base raid on Korvas

Imperial assault is the game which i've done the most changes for. We are using somewhat of a hybrid of the campaign game (using chararacters and upgrades) and the skirmish game (not using threat, but using premade forces)

I may not have mentioned I picked up a bunch of Star Wars collectible mini's for dirt cheap a while back. This allows me to deploy LOADS of stormtroopers and also give players a figure that more closely matches the character they are using, rather than one of the 6 hero figures from Imperial Assault.

Here is the figure for General Kern (who was using Gideon's card as his template)


I also got, on special, a massive pile of Sci-Fi themed maps that work for the scale (at about $4US per double sided map). So instead of having to build a map using the Imperial Assault parts, I can just place a rebuilt map.

The Rebel Forces consisted of General Kern (Gideon), Marl Keel the mon Calamari sniper (Using the bothan cards) and Gooda Cheesa, a rodian scumbag (using the smuggler cards), they were backed up by two squads of three rebel troopers.

This mission was straight forward. Each of the three "characters" had a bomb charge, one needed to be placed in the armoury (North west building) and one in the Command Centre (middle building)

One squad of storm troopers was on patrol, but the base was not under alert. The cards placed face down represented different squads and models (stormies, e-webs and officers only in this scenario)

The Rebels deployed in two teams, with Kern and the squads coming from the south, and the Sniper and Gunfighter coming in from the west.

For a while, this mission seemed like it would be quite close. The elite stormtrooper squad gunned down a full squad of Rebel troopers and chased General Kern around the map.

However, the other rebel squad teamed up with Keel and Cheesa and started doing some real damage, blowing up the armoury and taking down two stormtrooper squads. The Sniper is also a perfect counter to the e-web and took it out with no problems.

There was a tipping point, when rebel casualties mostly stopped and they overwhelmed the Imperials. It's worth noting just how good characters are in this game.

With the base demolished, Kern and his men fled back into the Korvas forests.


Conclusion

Three missions and three wins for the Rebels, I expected them to win these missions as they were meant to be "training runs" but I was pleased by how close they were regardless. It mean't that I picked the difficulty close enough on the first attempt.

Next week, we start on the roleplaying game part of the round, where our players will be undertaking a clandistine operation at a resort on Samoth, that will have widespread implications for the future of Talathen sector and the wider rebellion.
Edited by ithkrall

End turn 1- Battle for Talathen Sector

End phase round 1

Well, we finally go through the first full round of the game. 1 week on planning/politicking, 2 weeks board gaming and 2 week role-playing. That seems like a pretty good balance for our gaming group and is keeping the content quite fresh.


Mission reports

Well the team conducted a number of missions, whether they were abstracted diplomacy/intelligence missions using the dice system, table top encounters using the board/miniature games or the roleplaying sessions.

  • Logistics generated four supply from investments to be used next turn
  • Intelligence forces sabotaged a "Empire Day" fly-by on Zenith, causing tie-fighters to collide midair during the parade flyover (2 Glory)
  • Lianna Tell had an amazing diplomatic mission to Selano, removing all imperial support and creating some rebel support (2 Glory)
  • Delta Squad attacked a military base on Korvas was bombed during the Empire day celebrations while it had a skeleton crew. (8 Glory for Leader, 2 for squad members)
  • A chief aide to the Moff was assassinated heading to Talathen VII for Empire day celebrations when his Lambda Shuttle was shot down by Z-95's. (8 Glory)
  • Czerka shipping was raided and a GR-75 stolen from Nimbala. (5 Glory, 2 Supply, 1 GR-75)
  • Alpha Squad conducted a clandestine operation (wishbone) on Selano, full report here . (10 Rebel fleet Favour)
  • Bravo Squad conducted a rescue operation on Fraxan to recapture Roark Garnet. During this mission misleading information about their location of the rebel base was planted. (Imperial focus shifted to Kronos)
  • Due to no operations being conducted on Talathen Prime or Luxon during Empire Day, rebellion support dropped on those planets.

Purchasing

R&D had 1200 credits to purchase supplies for Special Forces, and purchased an e-11 Blaster, Marksman Barrel and Combat coat. These are now available for any special forces mission
R&D also has 3 point to spend for the Roleplaying group, but we decided to spend those during the RPG session.
Training would normally purchase at this time, but we hadn't fulled formed the rules at that point. They upgraded four pilots from rookies to veterans.

Clout and the draft.

The Luxons and Repubnlican's entered this round at a major disadvantage. Not only had they not saved any clout from the previous round, they also earned less clout from having more people in "glory" positions, rather than behind the scenes pulling strings. As Commander of both Recruitment and Training, the People's movement player gained more clout than the others, also the Basra conglomerates player was in a close second.

Clout earned from turn one
Luxon Militia - 17 Clout
Republicans - 20 Clout
Bastra Consortium - 25 Clout
People's Movement - 32 Clout
Six characters were available. Recruitment had asked to find "ground pounders" so several were in the recruitment pool, as well as the captain of the GR-75 captured at Nimbala, and the operatives who coordinated "operation Wishbone".
The head of recruitment opted for all the recruitment pool to be revealed, as well as blind bidding.
Hallarn Yarn was considered by the group the top recruit in this weeks draft. With reasonable stats in all three categories, the reliable trait, special forces and spying skills, and the Chief of Staff's favour. He seemed like an excellent candidate for many jobs, and potentially a senior leader of the future.

The people's movement spent a lot of clout to secure his services.
Next up was Garn Dravis. The Basra Consortium said it was doubling down and the areas it already controlled and invested a significant amount to secure his services.
An unusual character, Garn is a average smuggler but a reasonable combatant. But the addition of a decent medium transport was what motivated the Consortium to procure his services.
Fenn Singnis is next up, a hero most of you will recognize from Imperial Assault. His character card reflects his persona in that game. He's a one man commando strike team, or an excellent addition to Special Forces.

The Luxon Militia, seeing a man who fit's their ideology to a tee, went all in on signing this man up to their cause.
Toryn Far has the distinction of being one of only four human females with speaking lines in the original trilogy. A smart character who excels at coordinating others actions, she would be an asset to any area, but excels at coordinating starfighter operations.

The Republicans spent their stack of Clout to secure her loyalty.
Gaxx is the most one dimensional character in this group, but he's really good at what he does. In Imperial assault, he uses the "wookie" cards and is a melee wrecking ball. Just don't expect him to conduct a fine tea ceremony.
The People's movement put in a modest bid for him. But considering that both the Luxons and Republicans were tapped out, it's not surprising he went cheaply.

Finally, Ged'Ruh Srazz, a Twilek who can hold his own in a fight, but who's specialty is blowing stuff up.

Continuing the plan of "doubling up", his services went to the Basra Consortium, who now have a strong grip on Intelligence and Logistics command.


Glory Scores for Round one

In addition to the rewards mention above, each player gets 1 glory for participating in a table top battle, even if they have no troops involved. It's a little "attendance bonus".

So final Glory Scores are

Bastra Consortium - 4 Glory
People's Movement - 6 Glory
Luxon Militia - 15 Glory
Republicans - 15 Glory

There is a clear split among the factions, with one group getting Glory now and banking it, and the others playing a longer game of building up their faction by getting more clout early on. I'm really interested to see how this shifts during the campaign.


End of Turn one!

Edited by ithkrall

Strategy phase two

Here is the sector board at the start of turn two. The changes to popular support have been made, as well as the addition of the "pink" colour to represent the growing "Devourer cult" on Cahn. The Devourer Cult is a doomsday style cult that worships the black hole in Talathen sector. They will play a roll in this story as it progresses.

The map was covered in mission icons, and the forces of the rebellion could only deal with about half the activity available. This is a planned feature, as the rebels cannot be every where and the Empire needs to have some wins :)

Assignments

Our new recruits received their postings, with Hallarn yarn being put in command of a special forces squad, supported by Gaxx and Fenn Signis.

Toryn Farr joined fighter command as a squadron leader, Ged'Ruh joined the intelligence services and Garn Dravis was posted to logistics command.

Overall goals

The Rebellion wanted to heat it up this turn, and hit some soft imperial targets with full force. Also of priority was stopping imperial investigations near the main rebel base on Axamar, and preventing the Empire from completing it's base construction on Selano

Strategy Phase

Alpha team: The player character group was assigned to investigate an imperial expedition to some ruins on Axamar. Their are rumours of lost Jedi temple sites on the planet, so it was deemed important to keep that information out of Imperial hands.

Logistics: Kresh, the director of logistics succeeded admirably in increasing the overall wealth of the rebellion while his finance officer, Tressk got some short term wealth by speculating.

Roark garnet lost some escorts during his smuggling run but brought home three additional supplies. Garn Travis, in his first smuggling run ever, brought home five supply points.

This gave the rebellion ample supplies to run all it's missions this turn.


Note: I have just rewritten the logistics system to be something quite different. We will introduce the new trading, manufacturing & smuggling card based mini-game in the next full turn of the game.

Intelligence: Nibb Nibb only generated one point for the intelligence pool, but was bailed out by Sly who earned five points. Six points was enough to support the actions this turn as well as ask for information on what a group of bandits are doing in the boneyard.

Ged'Ruh's first mission was to demolish the construction efforts on Selano. With 1 Success and 4 advantages, this mission should succeed with some interesting consequences.

Diplomacy: Lianna Tell attempted to open diplomatic relations with Solitude X in an effort to find out why the Empire is interested in them. While she did not succeed in creating a diplomatic station, she did find out a little about what the empire is after.

Fleet Command: Reports of Imperial ships using a relay beacon near a small asteroid cluster in deep space reached the rebellion from it's new spy in the fleet (Dana, from operation wishbone).

Mustering the full force of the Rebel fleet, as well as spending some fleet favour to obtain additional support, the fleet planned an attack. With significant intelligence support the Admiral made an excellent roll, generating 8 tactical points.

He spent those to hold initiative for the battle, to deploy second, and in flanking positions, and for the Imperial ships to start stationery.

Squadron Command: Lt Blout and Torryn Farr put their heads together and came up with a brilliant plan to attack the Imperial flight school on Fraxan. Their brilliant plan netted no sucesses, so the plan boiled down to "fly in and shoot them".

Typical Blout


Ground command:

General Del Kern worked with Hallarn Yarn on a plan to disrupt Czerka operations on Nimbala, while freeing twi'lek slaves from oppression. An amazing roll generated 11 strategy points to spend.

The ground operation will have initiative, infiltrators, deploy 2nd, cut off enemy reinforcements, and reduce overall strength of the defenders. Should be a cake walk.


Recruitment: An exceptional roll from Evo Tras generated four successes. He wants to recruit fighter aces, fleet officers, diplomatic agents and Ithorians. Chances are, he will get one of each in next turns recruitment pool.

Training: Another phenomenal roll generating 14 training points to be spent in the end phase. 14 points is enough for many X-wing pilot skill cards, crew cards, or a few armada crew cards.

R&D: Nun Diem turned his focus to Star fighter teach, generating 9 points to spend on X-wing upgrades. That's 2-3 good cards that can be added to the x-wing equipment pool in the end phase. Gartoka added two more points to the special category for the role-playing team to use.

End: An up and down turn for the rebels, a lot of amazing successes and a few non results. Still, they are set up well for the battles ahead, well, asides from the first report

Z-95's attack Imperial training grounds

With no successes on this roll, it was going to be a straight fight. 8 Headhunters, including Blout, with concussion missiles vs 6 Academy Ties and Snattercat, our named chiss hero pilot using the Darth Vader card and equipped with missiles, stealth device, accuracy compensation and Elusiveness.

In retrospect, I should probably have had a 7th academy tie as those missiles really do add up in points.

Our forces deployed opposite each other, with a small mine field in between. Turn one we drove towards each other and on turn two I banked the Tie fighters across the line of the mines in order to speed down the line and attack half the Headhunters while the others played catch up.

This seemed quite clever at the time, the problem is, it invariably left me at range 3 of the the headhunters, where they were at their most deadly due to their concussion missiles.


I mean seriously, compare these formations. The Tie's are moving in coordination, while the headhunters are sprawled around like a bunch of drunken baboons.

Yet, formation flying helps you little when target lock + focus concussion missiles are fired against ties. Still, no one could fire a missile on snattercat thanks to her amazing pilot skill and elusiveness.

Still, she did 8 points of damage in 5 turns of fighting, but not a single point of hull damage. Due to the irregular flight patterns of the headhunters, it was difficult for her to stay on one target without being exposed to fire from many other headhunters.

It's also worth mentioning how important pilot skill is. Having the headhunters fire first was catastrophic on many turns. A tie at range one of a headhunter exploded to a missile from another headhunter at range 3 on no less than three occasions.

In the end, Blouting, the act of rushing head long into danger and randomly turning with no care for formation actually defeated the empire. It broke up their formations and reduced it to a brawl, and invariably, when a tie had got good position on one headhunter, it was in perfect missile position for another.


Snattercat eventually called a retreat when the 4th tie fighter exploded from a missile, leaving the score Rebels 4, Empire 0.

Still, the empire has received it's first ship upgrade. Tie Advanced fighters, and the rebels will be seeing more of these in the future.

Edited by ithkrall

In addition, due to posting on the Age of Rebellion forums, we now have 3 additional groups doing commando missions and other actions in the sector. Each GM runs their campaign as they wish and sends back mission reports, which in turn propel the story. It's quite neat having cross pollination of ideas.

Also, our first RPG game session report is here

Edited by ithkrall

**** that looks fun

Good. Grief.

Fleet attack on deep space training station


After rolling a lot of sucesses on his planning roll, this was going to be a short and swift action. The empire has been well and truly caught with it's pants down, as the end of round two photo below shows.


I'd like to note that from here on in, the battles will be getting harder. The training period is over, so this should be the last "turkey shoot", unless the players roll exceptionally. From now on, an "even roll" on a planning mission will have them outnumbered and outgunned. it's only fair, they are the rebels after all.

2ux8eyEBYziFvSrbckbXK72xI5hfj3aQhmyaiKBQ


This missions fielded 8 stands of z-95s (3 Speed, 4 shoot, 4 hull, 1 red anti-ship, escort), A nebulon B support refit (borrowed from the rebel fleet), a CR90 and a CR90b vs two Victory I's with no fighter screen. It was never going to be a straight up fight, but I really wanted to test how the empire would perform in from such a terrible position.

cCVahGACgThH8syjeDKkyvriwSBmJAMsp1kMjcx2


The Rebels came in a lot slower than I expected, so by the time we got to engagement range, I had managed to swing both Star destroyers around, and found myself able to target two ships most rounds with side and rear arcs. I didn't manage a single frontal shot in the whole game :(


Splitting formation was a mistake, I should have turned both ships the same way at slightly different speeds. This allowed the rebel fleet to focus fire on one Star Destroyer. The poor guy on the right of this picture.

Accidentally, the Nebulon B crashed into the Victory on the right, which prompted us to go to the "ramming" rules.

As a result, this mission ended in a hail of ramming at point blank and fighter attacks against un-shielded quarters. I find it quite pleasing that I managed to damage each of the rebel capital ships, knocking down most of their shields and forcing some to use engineering orders.

CHsY18AUYAAB1fW.jpg


Still, a hopeless fight is a hopeless fight, and when the Victory on the right exploded, it was close to "go-home" time. So I called the mission a solid Rebel victory, even though one Victory managed to jump to lightspeed to escape.

Special forces free slaves on Nimbala

This was another massively successful planning roll, no reinforcements, open deployment for the scum forces, enemy troops reduced in number/quality and infiltrators ready to pop up from ambush. I set myself the goal of taking down at least one character before the rebels murdered everyone.

IMG_3123.JPG


The game used one of my many sci-fi maps. It's worth noting that imperial assault plays very differently in big open spaces, range matters so much more.


The czerka force consisted of two group of low level mercs (rebel troop stats), 2 elite trandoshans, 4 normal ones, A czerka boss (Elite Imperial officer), two super-battle droids (Elite Stormtroopers with no special abilities) and a landspeeder (E-Web with 8 move and no rapid fire).

As you can tell, i'm making a lot of adjustments to the game to fit the narrative story we are telling.

The Rebels objective was the prison cell holding wookie captives in the top right

IMG_3124.JPG


The Rebels were led by Hallarn Yarn (bottom right) who was using the Valiant Commander cards. The squad also contained Mark Keel, a Mon Calamari sniper (beside Hallarn) using the Bothan cards, Gouda Cheesa, a Rodian gunfighter (top left) using the gunfighter cards, Gaxx, a Wequey enforcer (right) using the Wookie cards and finally Fenn Signis (top right), using his own card deck and powers.


The rebels started off by kicking open the external barracks and murdering the people inside. I rocketed my landspeeder and Trandoshan's out to face the threat.

IMG_3126.JPG


And was suddenly ambushed by Twi'lek saboteurs out of ambush. Turns out the Rebel Saboteur's are really good at scragging things.


IMG_3128.JPG


Early on, I had some pressure on Hallarn and Keel with a tight group fo four Trandoshan blasting away with shotguns. Good use of Keel's mobility, Hallarn's orders and Gouda's insane short range firepower dealt with that threat.

IMG_3130.JPG

Meanwhile, Fenn and Gaxx decided to rush the prison complex and were met by gangsters and the battle-droids.

IMG_3132.JPG


It turns out the havoc fire and cleave make very short work of tightly packed enemy troops. In a short amount of time, the back of the Czerka forces were broken, but not before Gaxx was wounded.


IMG_3134.JPG


The elite Trandoshans rushed to defend their employer, and Gaxx smashed their face in with cleave and multiple attacks. Turns out melee is pretty damned brutal in this game and that the Wookie cards can make you into a tank that deals horrific damage...... I shouldn't be surprised. But this game went from feeling like a real fight, to a murderous blood splattered glee fest for the Rebels in two turns.


IMG_3136.JPG


The mission ended with the freeing of a large clan of wookies that were kept prisoner at the facility. In exchange for the transportation of the old, weak and infirm off world, the Wookie leader, Attatark agreed to return and help fight for the rebellion with some of his clan. These Wookies will join the recruitment pool in a few turns time.


That's it for the battle's this round.

As mentioned, from here on in, the difficult goes up. I deliberately made the first few turns easier because I know the games a lot better than my players. In story terms, it also represents the empire being unprepared in the sector for rebellion, but the loss of Wookie slaves, a training squadron and a STAR DESTROYER, will really wake them up.

Man, this is incredibly awesome. I wish you weren't on the other side of the world, as I'd dearly love a chance to participate in one of your games. Well done!

Those maps for Imperial Assault look neat, where did they come from?

Those maps for Imperial Assault look neat, where did they come from?

They are the "Armored Cartographers" brand, and I got them from Miniature market when they had a big sale. I think i got them for $6 US each, double sided.

Epic is too small of a word.

What an excellent idea for a game! I'm really enjoying your reports here.

New Logistics System

So' i've rewritten the logistics system for the campaign. the original system was quite abstract, and pretty damned bland. It didn't really give the 4X ( eXplore, eXpand, eXploit, and eXterminate) feeling to the campaign that I was after. You know, like civilization where you develop tech, build infrastructure, get units and kick butt.

So I completely reworked it into a card driven system that use's building, trading a resource management. The rules are below, and all the resources for the new system are in this folder.

Please note, that like most things in this campaign, this is entirely off the top of my head and has undergone zero play-testing whatsoever at this time.

In this article, i've posted sample cards. These are not all the cards in the deck, but all the common cards are there (with the yellow saber marking)

Here is the updated logistic command, note the new head of manufacturing job, and production areas, as well as contracts. Also, smugglers have been moved to their own board.


Logistics.png

Phases for Logistics command

1. Replenish supplies and income
2. Commander actions
3. Assign smugglers, escorts and make smuggling rolls
4. Purchase supplies
5. Assign supplies to chief of staff
6. End phase


REPLENISH SUPPLIES:

  • Place a number of “Credits” cards on the logistic board equal to the current income value
  • Then place basic resource cards equal to the manufacturing values for each basic resources in the production pool
  • Layout the trading map
  • Shuffle the common, illicit and rebel decks
  • Deal out facedown common cards equal to the yellow boxes on each planet, illicit cards equal to the red boxes, and rebel cards equal to the green boxes
  • Shuffle each planet deck and deal one card face up on top of the stack
  • Deal out cards as described above to the local supply. Add cards for the planets Kronos, Cahn and Solitude X if the Rebels have established a diplomatic station there and have more influence than the Empire on that world. Place these cards face up

COMMANDER ACTIONS:


The Director of Logistics, Head of Manufacturing and Head of Finances may do the following actions

  • Long term investment. Make a mental roll. You may then increase your income by one point. The cost of this improvement is the new income score in Galactic credits. This cost is reduced by 5 for each triumph, 2 for each success, 1 for each advantage to a minimum of one credit. The cost is increased by 5 for each despair, 2 for each failure, and 1 for each disadvantage. (Director, Finances only)
  • Short term financing. Costs one galactic credit to take this action. Make a mental roll. Gain galactic credits equal to (5 for each triumph, 2 for each success, 1 for each advantage) divided by two. (Director, Finances only)
  • Support smugglers. Make a hard mental roll. Each success adds one boost dice to each smuggling roll this turn, each triumph adds one skill dice to each roll. (Director only)
  • Improve manufacturing capacity. Make a mental roll. You may then increase your manufacturing capacity in one area by one point. The cost of this improvement is the new score times five in Galactic credits. This cost is reduced by 5 for each triumph, 2 for each success, 1 for each advantage to a minimum of one credit. The cost is increased by 5 for each despair, 2 for each failure, and 1 for each disadvantage. (Director, manufacturing only)
  • Enforced overtime. Make a mental roll. You may improve the production of an number of manufacturing areas by one equal to (5 for each triumph, 2 for each success, 1 for each advantage) divided by two. No area may improve production by more than one each turn. (Director, manufacturing only)


ASSIGN SMUGGLERS


  • Assign each smuggler in your smuggling pool to one planet. Only one smuggler may visit each planet per turn.
  • Consult fighter command on escorts. If a squadron is on escort duty it is used for this turn. This action does not cost any resource cards.
  • Each fighter assigned to the mission allows one reroll of the despair dice on a mission failure at the cost of the fighter being destroyed.
  • Make a smuggling roll, if you fail roll the despair dice and check the results. Then end that smugglers action. The difficulty is based on the wold visited, one for low risk worlds, two for medium risk worlds, and three for high risk worlds.
  • If you pass move to the next phase. For each triumph or two success rolled gain one galactic credit.


PURCHASE SUPPLIES

  • Players with rich characters now receive one galactic credit each. They may give this to logistics command and receive one clout. Or they may hold on to it and use it later.
  • Reveal all supply cards on each world visited
  • Purchase cards in any order.
  • You may purchase any cards from the local supply at the listed cost
  • You may purchase any cards from the production pool facilities at the listed cost
  • You may purchase any cards on successful visited worlds up to your ship carrying limit. Resolve immediately cards and contracts do not count towards this limit.
  • A HWK or Firespray can carry two cards, other light transports three cards, and a GR-75 five cards
  • Place all purchased cards into your stores
  • Rich players with credits may now purchase supplies from the local supply or manufacturing if any remain.


SUPPLY CHIEF OF STAFF


  • Decide which cards you are making available this turn and give them to the Chief of Staff. He will manage their expenditure in consultation with the command staff
  • Rich players may give their purchased cards to the Chief of staff or send them to the stockpile. They may not keep resources between turns.
  • Any cards you do not give to the chief of staff go into your stockpile and may be used again next turn. This includes unspent galactic credits.

resources.png

END PHASE

  • Any unpurchased cards from manufacturing go back to the deck
  • All cards unpurchased from local supply go back to their decks
  • All cards unpurchased from planets go back to their decks
  • Trade map is removed from the board.
Edited by ithkrall

This is some amazing work!!

The rebellion has had it's first real tragedy on the conflict, with one the of heroes of the rebellion falling in battle. There was much wailing and sorrow, and glasses raised in honour of their fallen comrade.

Round 3 - Planning Phase


No major changes occurred in the "job review phase" and the command team looked the same as it did on turn one. I suspect this will change in the near future.


Logistics Phase


We tested the new logistics system, and it seemed to work pretty well. Even though i forgot a couple of the rules. A few more tweaks will be made and I'll publish the full rules and card set for it shortly.

Logistics managed a good haul of resources, enough to easily power the planned operations this turn. Here is the new board that includes manufacturing.


Log%2Bboard.png


At the end of the round, the rebellion now has 1 production in all resources asides from Covert Networks and Safe Transports, and income is 8. I made some tweaks and gave them additional resources to make the system work.

Smuggling was a mixed bag. Roark managed to make a safe run to Naboo for supplies, Gran Dravis failed in his mission and was wounded (after losing some fighter escorts) and Oledeshu failed as well, before rolling the "steal victory from defeat result" on the fail dice.

So with enough resources to plan out our attacks, we moved onto the next phase


Intelligence Phase


A concerted effort was made by intelligence command to get as many intelligence points as possible for this turn to support combat actions. Both Nibb Nibb and Sly rolled well, generating a whopping 16 intelligence points.

Ged'Ruh was sent on a sabotage mission at Korvas, which was a trap. Resulting in a failure. Intelligence spent intel points to reroll the failure dice, and he ended up escaping unscathed.

Diplomacy Phase


The diplomatic core tripled in size due to new postings, meaning Lianna isn't working alone anymore. She successfully established ties with Solitude X and Gidd Lonn did the same for Cahn. The results of these new diplomatic ties will be mentioned in the end phase.

Our friendly Ithorian hippy force user, Jah, was sent to meet with a mysterious contact who had hacked into Alliance communications networks. He successfully met with this individual, who has maintained absolute secrecy, speaking through droids only. He has arranged a "conference call" with the leaders of the rebellion so that this mysterious source can explain why he wishes to ally himself with the republic, and why he is being so secretive.


Fleet Command


Hearing of Ged's failure to knock out the Drydock at Korvas, Fleet Command decided to go with the backup plan. Hit the Imperial fleet facilities with everything they have, and some borrowed ships. 5 points of fleet favour were spent to obtain the services of an Assault frigate, and 8 stands of Z-95's and 3 Corvettes sent in.


The rebellion threw intelligence points, and additional resources from logistics to make this work. And the planning roll was...... barely a success. For their efforts, they get to deploy 2nd.


Squadron Command


Full of Blountism's, fighter command decided to do a very dangerous mission. Blast through the blockade on luxon, hit some imperial ground targets, buzz by the cities to show the flag, and escape.

A reasonable roll on the planning made this very dangerous mission potential winnable. With Initiative, deploying 2nd, and enemy reinforcements cut off. Still, with no less than 6 victory Star Destroyers in system, this was going to be tough.


Ground Command


Del Kern decided to personally plan this mission after the People's Movement voted to remove him from command and replace him with their man, Hallarn Yarn.

The mission, hit a storage facility on Zenith that is holding old-republic era fighters, rumored to be an entire squadron of Y-wings. The plan requires them to infiltrate the facility, eliminate the guards, and get the pilots to the fighters for them to escape. Another reasonable planning roll see's the rebels with initiative, deploying 2nd and flanking, and the enemy with no reinforcements.


Other


Recruitment gained three successes, and wants to recruit Pilots, Smugglers and Fleet Officers.


Training got 12 points to spend on training skills


R&D got 8 points to spend on Fleet research.


Intelligence also wants to research other temple sites on Axamar.

X-wing - The raid on Luxon

This mission was a tricky one, and gave the Rebels some hard decisions to make. While they did their flyby of Luxon easily enough, as they were leaving a group of civilian ships, attempting to flee the bloackade, followed them.


They could flee at any time, but that would leave the civilians at the mercy of the Empire's fighters, mines and Star Destroyers.

round%2B1.jpg


The civilian ships were simply tokens with hitpoints on them. They could only move 2 ahead, or bank 2. Until the Commander gave the "all clear" order, in which case they could move ahead 4 or bank 2.


Victory points would be awarded if the civilian ships got within range one of the markers past the imperials and escaped. 3 for the GR-75, 2 for the YT's and 1 for the smaller ships. The Imperials only got VP's for killing freighters.


The mines in the picture were heavy duty anti shipping mines, that would only explode if a large base ship came within range 2 of them. Doing 2 dice damage per range band. What I didn't tell them, is that the Decimator could detonate them if it was within range 3 of them as an action.

round%2B2.jpg


The rebel fighters raced ahead and punched a hole in the minefield, but the decimator detonated one they didn't kill, taking out a headhunter and badly damaging another. At this point, the star destroyers began closing on the escapoe channel, represented by a pair of "targeting icons" from one of the large ship expansions. They started from the board edge, and moved in one range band each turn. (3 dice attack against anything in range)

round%2B3.jpg

The Rebels "broke and attacked" in an attempt to direct fire onto themselves and break up the tie formations.


In previous battles, the decider had been the concussion missiles on the headhunters, but in this battle, they were a non factor.

It was at this point that Blount was shot down by Imperial fire.

round%2B4.jpg


With the rebels slightly scattered, the right Tie squadron focussed on the YT-2400 and destroyed it.

round%2B5.jpg

From here on in, the rebels were outnumbered, and the focus became clearing lanes for the freighters.

round%2B6.jpg


It's worth noting that in this scenario, the Imperial's couldn't block the freighters movement, we used "Armada" style rules that allowed the player touched to move out of the way. We figured it was better than just "blocking" and it made the Empire have to focus fire.


It all came down to last round, as the Empire fired relentless on the GR-75 as it tried to escape. It limped accross the line with 2 damage boxes of its 13 left.


finale.jpg


And while the rebels won 6-3 in victory points, they paid a heavy cost. 5 Z-95's shot down. And when we made the casualty rolls for those pilots, Blount rolled last.

1465295_10154009082708625_12881897071942


Blount rolled a despair, which results in final character death. Blount was a real character in the campaign, a reckless foolhardy squadron leader who would shout "**** the torpedoes, full speed ahead". I guess this means in our game reality, he won't be the door gunner on the Falcon at Endor.

blount-260x260.jpg

Edited by ithkrall

Thanks Ithkrall - this continues to be a brilliant campaign. RIP Lt. Blount!

Blount in this campaign reminds me of Nelson a bit - heroic ship commander who leads a series of aggressive victories against long odds, only to die in the midst of his last great victory, establishing a tradition among the service that lasts a generation or more. I expect to see a lot of "blounting" happening in his honor going forward.

Edited by Levi Porphyrogenitus