Errant Driveyards - Imperial Fleet

By darkfortunex, in Star Wars: Armada

Hey guys and galls!

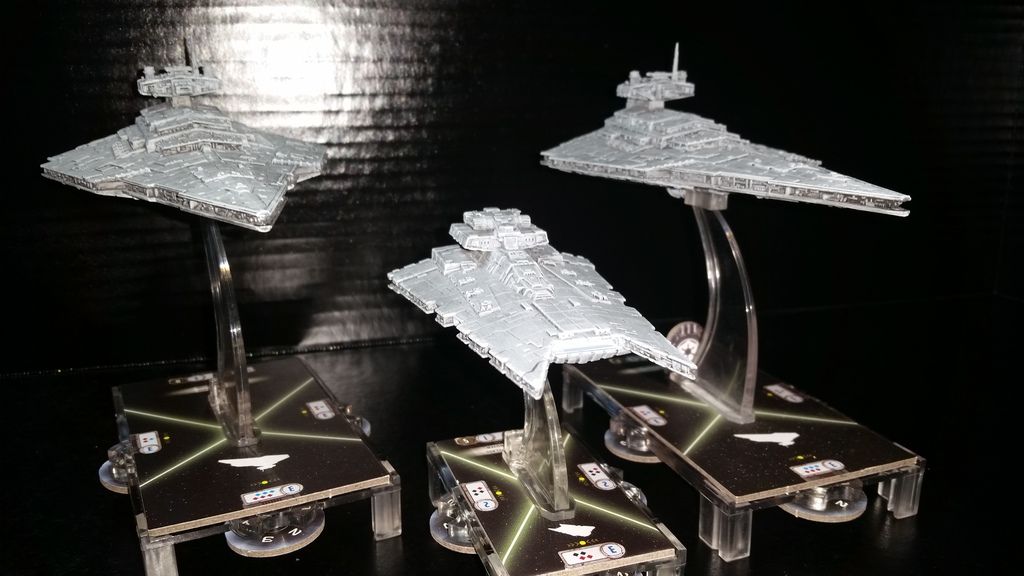
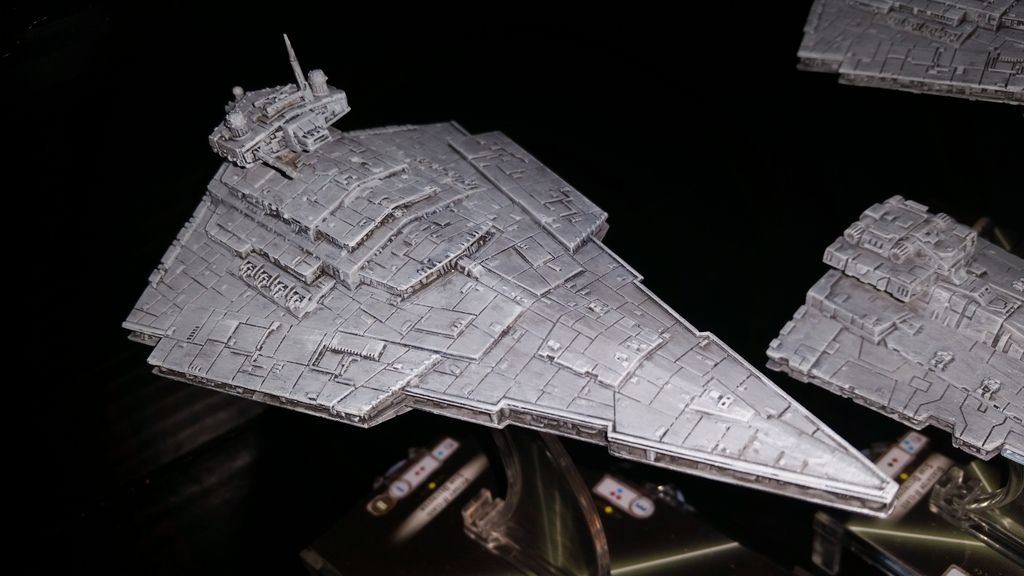
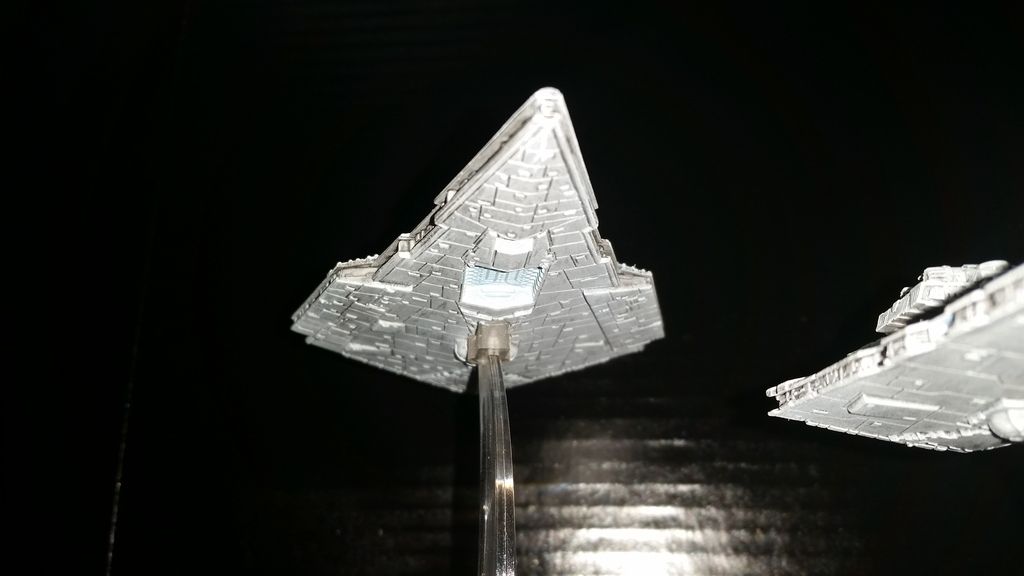
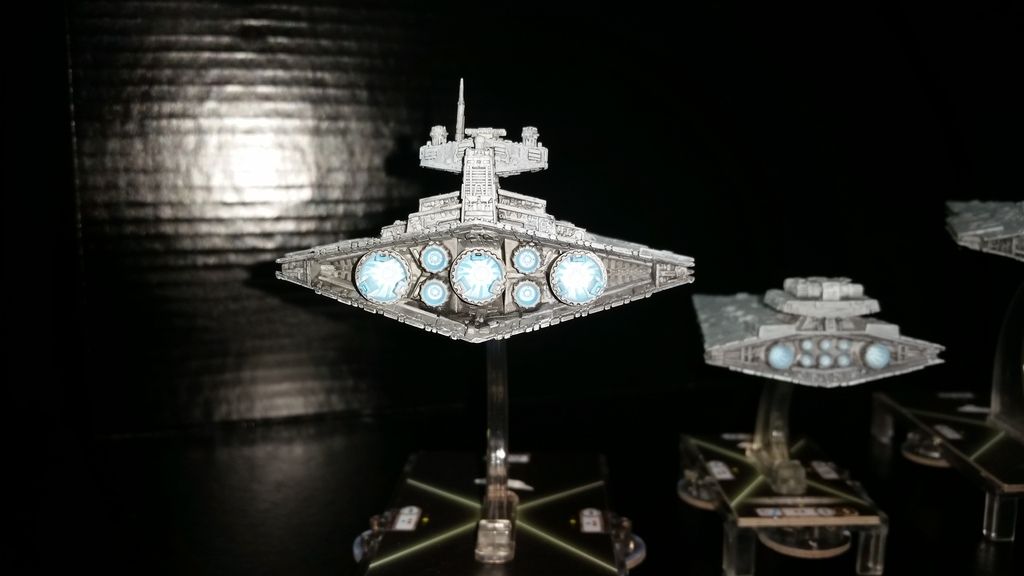
I figured I'd stop in and post some of my repaints. I hadn't originally intended to repaint my ships, but when I got the Gladiator a few days ago I realized that for my own sanity I would need to. I dont know about the rest of you but the Gladiator that I unpacked ended up a horribly different shade of grey then my Victory Star Destroyers. It almost seemed to boarder on a strange grey brown mix. Needless to say that prompted this redo. That and the engines and hanger bays for the ships. None of them looked all that great.

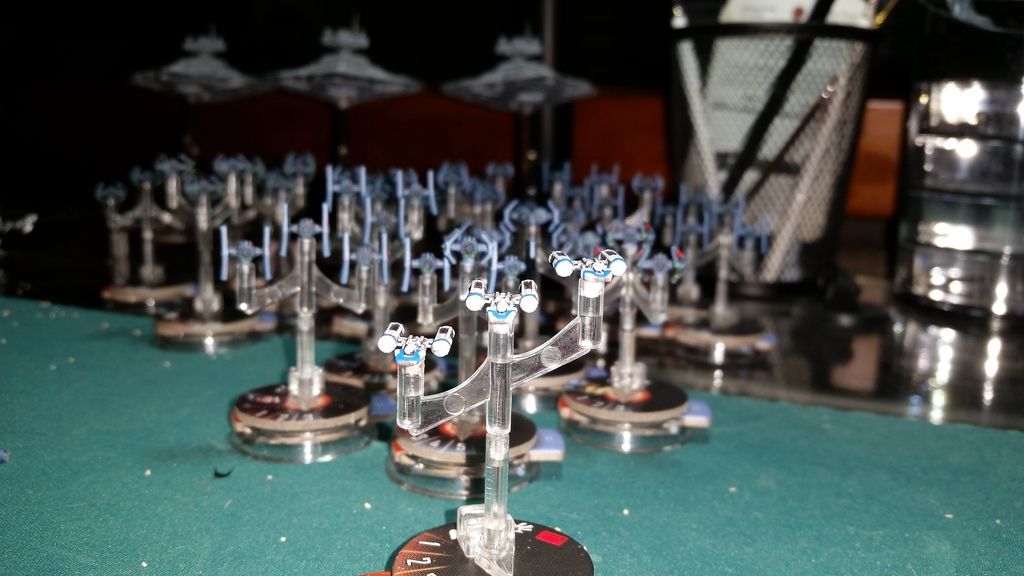
I intend to add more to the fleet, another Victory and Gladiator. All together right now, however its sitting at a two Victory Star Destroyers, a Gladiator, and 6 of each TIE Squadron (Interceptor, Advanced, Bomber and an addition 6 Fighters).

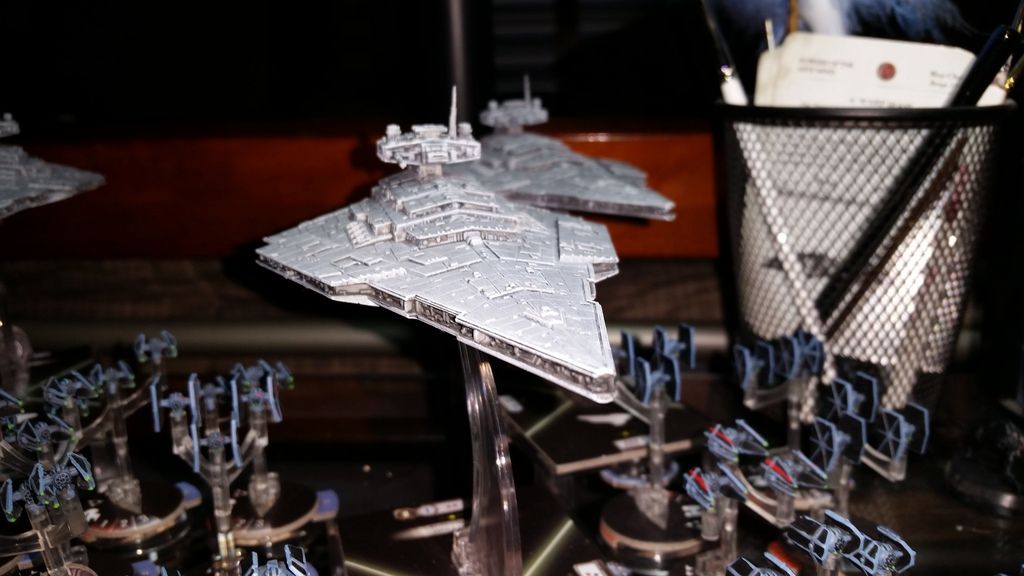
I didn't do anything really amazing with my Star Destroyers, instead I decided to bring them more in line with the Imperial Standard. So they aren't fancy but I think they look much better then their FFG painted counterparts. Anyway that's enough of me talking. Here are some pics, and a link to the Archive that has even more. Errant Drive-yards Gallery

Imperial Star Destroyers
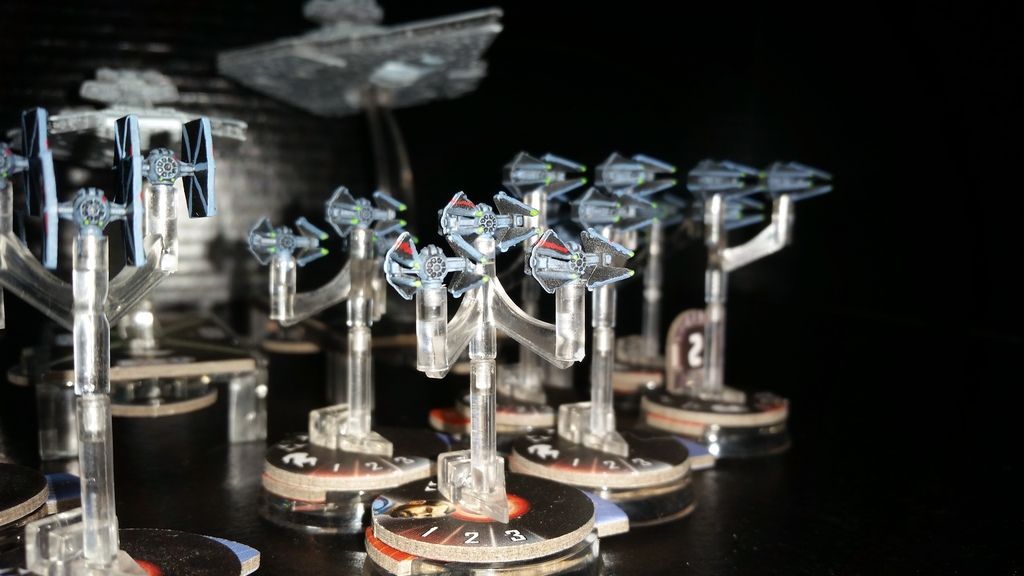
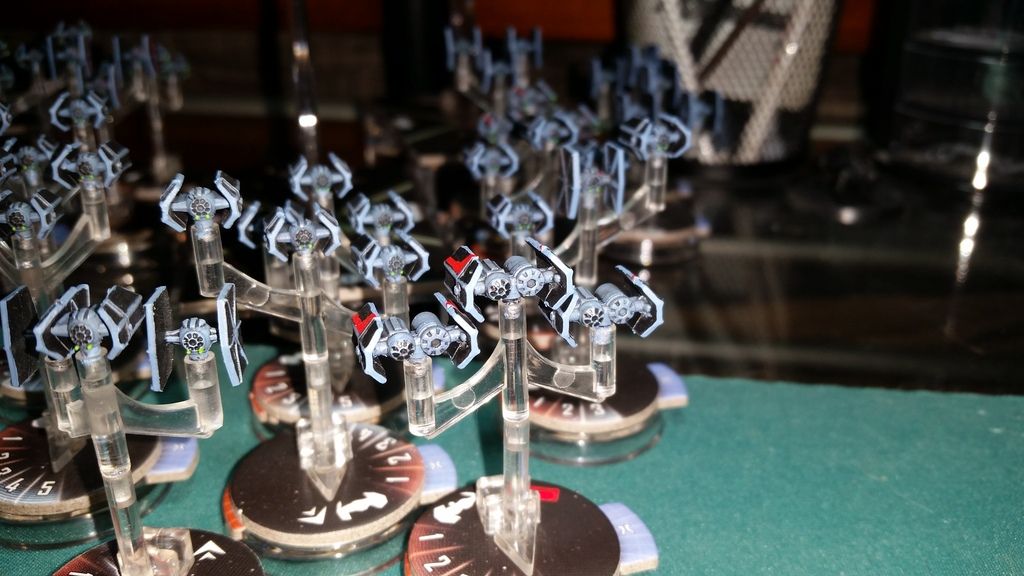
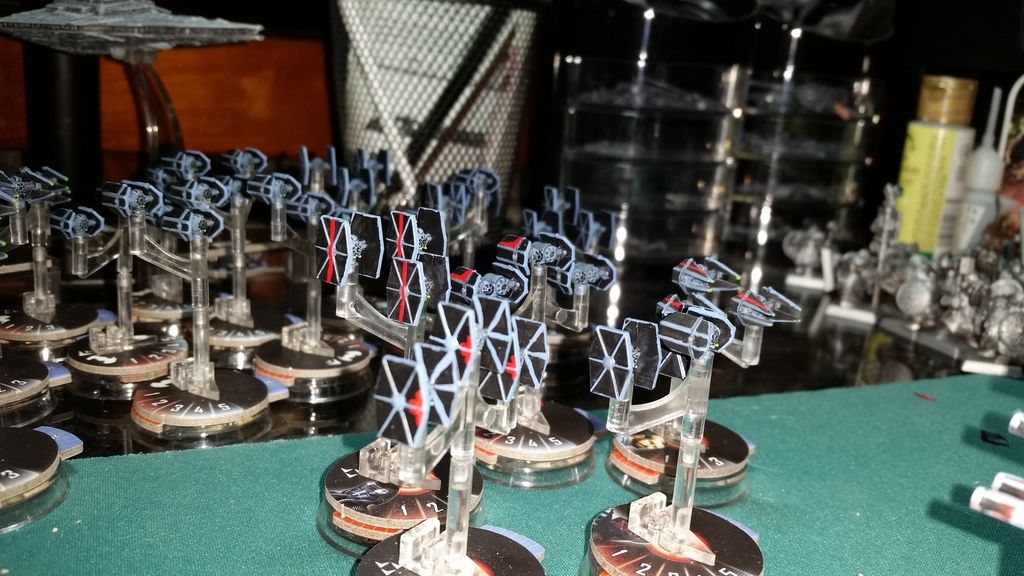
20150518_093938_zpscox5tgi1.jpg

20150518_094920_zpsferaoc2j.jpg

20150518_094234_zpskeff965v.jpg

20150518_094128_zpsyew2lfqi.jpg

20150518_094311_zpst77f8w6b.jpg

20150518_093611_zpsdb0ibpgq.jpg

Fighters

I've only painted some of my TIE's and my Squadrons of Interceptors but I think they came out fairly good looking. The TIE Interceptors are my personal favorites, both to paint and in general.

20150518_094643_zpsxvjgwbgc.jpg

20150518_094528_zpsirxjyfoj.jpg

Update

A new VSD has been added to the fleet along with a set TIE Advance's. So I convince a Rebel to let me paint one of his fights. Sadly I dont think he is going to out run the Empire. Picture bellow.

Edited by darkfortunex

I'm not the world's biggest fan of what you've done with the Star Destroyers, but HOLY CRAP THOSE FIGHTERS! Amazing work.

Very nice, finally some Star Destroyers that look like they are from the movies. :)

I really like the Star Destroyers, what color of paint did you use?

Hey! Thanks for the complements I'm glad you guys like them.

For the Star Destroyers I used this set of colors:

20150518_211553_zps8olshe3x.jpg

Its not the worlds most complicated color range or the most demanding technique but I personally think it produces a very good 'plucked from the movies' result.

My steps were this. I didn't prime the model as that would just create an unnecessary layer of paint that could cover that fine paneling.

Step One

Because that dark grey paneling could cause a strange disjointed coloring I took some Administrative Grey and covered the panels as best I could, then let that dry.

*Step Two: A

This one might not be required but depending on the look you are going for it could help. Repaint the whole of the Destoryer Administrative Grey. Now the reason of going over the paneling individually before repainting the whole is to give you another layer over those panels because chances are the first layer wont hide all that dark grey. You could perhaps subside this step with just going over the Paneling again to give some extra cover.

-or-

*Step Two: B

After getting the Administrative grey to cover to your liking on the panels, wash the ship over in Nuln oil. Making sure to get into those recesses and darken them up. This will be probably the longest process and the longest dry. Try to apply it as smoothly as possible but dont get to discouraged if wash tries to gather on the paneling. Just push it out as best you can and move on. Work at a good pace so you dont end up running over the same places again after they have dried, as this will leave nasty water marks if you do.

Step Three:

Once the Wash dries take your favorite or oldest dry brush and load it up with Administrative Grey. Work it into the brush on a towel and then begin brushing over the Star Destroyer. You will likely need to apply a good bit of force or go over the the area multiple times. However make sure you dont apply to much pressure or have to much paint on the brush or you will end up filling in those plate grooves and you really dont want that. Once that's finished it will probably look mostly done to you. Because I wanted to get a nice dark shading effect on the side of the ship I did not dry brush the broadside trenches.

Step Four

Take the Lothern Blue an apply it straight to the engines as you desire. Mostly its just to cover up any stray wash that might have gotten into the interior of the engines. Once that's done, water your blue down a decent bit and very lightly go over the hanger bay, just enough so its good a good light blue hue too it.

Step Five

Thin down (preferably with Lahmian Medium) some White Scar to the point where its almost translucent and runs kind of like Skim Milk. You will need a good bit of it. And start applying it like you would any other wash. When using it, I ran rolled my brush around the inner edge of the engines letting it pool at the bottom. Since its so wet it will take a while to dry so you might want to prop the Destroyer up on something so its engines are skyward. That way the wash wont pool on the side of the engines rather then the Center. Apply a similar idea to the hanger bay. Though you might need to wash the engines and the hanger bay several times to get the desired brightness. Ultimately that is up to you.

*Note: Because I knew Id be using this watered down White on more ships and Models in general, I took an entire Pot of Lahmian Medium and added White Scar till it was at the consistency of normal wash. You dont need to do that but, if you think it will help on other models I suggest it.

Last Step

Take your dry brush again and dab it with the Ulthuan Grey, and work it into the brush with a towel. Then just lightly hit the edges and hard points of the ship to give them a nice pop and contrast. Once that's done and dry, I would suggest getting yourself a nice spray can of Army Painter Mat Varnish and coating your completed Model. That way your work will be mostly protected and you can feel safe in taking it with you to play.

Final note:

Its not necessary to use these colors or paints to achieve this effect. Those are just the colors I and paints I used. In the few instances I used them, I've had good luck with Army Painter Paints and many people swear by Vallejo Paints as well (Though from what I understand Army Painter and Vallejo are different sides of the same coin, thought I could be wrong in that).

Anyway hope this helps. An thank you guys taking the time to comment on my models.

Edited by darkfortunex

Thank you for the detailed explanation! I'll have to give this a shot, the color on these Star Destroyers is far too dark and I'm glad someone has found a solution. I'll probably do my own little twist on it but the step by step guide will help a ton. Good work on these, I hope to see more of these as more Imperial ships are released.

And what color did you use for those TIEs? I'm looking to start doing mine and am in need of recommendations before my next shopping trip

And what color did you use for those TIEs? I'm looking to start doing mine and am in need of recommendations before my next shopping trip

Same. I'd been on the fence as to wether I wanted to do my Ties in grey or blue-grey. Your shots sold me on blue-grey.

Hey, thanks for the compliments. An I hope that guide works well!

As for the TIE's, I wish I had a clean answer. Had you asked me a week ago I would have but I found something out that makes painting them a little bit trickier for everyone else.

Unfortunately the issue is with the blue-grey color I used. I went looking for a color that would come as close to the movie representation as possible. I looked at several colors from both Army Painter and GW. Ultimately I settled on a color from the Army Painter range. However the other day I found out that the color I picked was actually mislabeled or some kind of Frankenstein color that got mixed and labeled a color it wasn't. The sad part is that color aberration was a perfect fit for my TIE's which makes me a bit sad.

20150519_081122_zpsdcl1y9wv.jpg

Anyway the color I used was labeled Uniform Grey from the Army Painter Range, however it is NOT Uniform Grey. Its actually closer to their Wolf Grey, but even then the two colors do not share the exact same shade. It is close, but not exact. Like I said it was probably a bad batch or a mislabel set, so if you venture out to your local game store you might get lucky to run into this older discolored variation of Uniform Grey. Which is how I ran into it.

However among the Citadel line of paints I found a color that is very close though it is a bit lighter then the one I use. An that is Russ Grey. It looks almost identical but tends toward a slightly lighter shade. Anyway up above you will see my color pallet for the TIE's. Its a fairly simple process to paint them as well.

Sugestion

You dont have to do this but it helps when painting the fighters, its an Idea I pulled from this forum and it works very well.

Find some plastic stemmed Que-tips and cut off one or both sides of the cotton tips. Then with your razor blade or hobby knife, cut a small slit in the side so that when you inset the fighters peg it slips right in without you having to struggle with it.

Painting

Step One

I have not found it necessary to prime my fighters with them being so small any extra paint can again lead to you losing detail. Taking my dry brush (mostly to save time) load it up with whatever blue grey color you choose and slightly go over your fighter till its covered. You only really need to focus on the body and the little struts of the fighter. Get a good cover on them and let them dry; which shouldn't take long at all.

Step Two

Once you have the blue grey down take the Nuln Oil and wash the TIE, pay particular attention to the window and the back engine depression and try and get a good bit of the wash in those places. Don't go to hard with the rest of the ship or else you might end up more black then blue. Once its covered to your liking and dried you can move on. An Alternate way of dealing with the windows is thin a little Abaddon Black and with a fine detail brush fill in each of the window depressions. However just applying a second coat of Nuln oil over window after the first if it wasn't dark enough can achieve the same effect.

Step Three

Once you got your wash done, take some Abaddon Black and get it on your brush and paint the panels. You dont have to be to careful but it saves some time if you do your best not to hit the struts and cover the blue. I also paint the interior of the panels black. You dont really need to worry about painting the interior struts in my opinion. The only time it might be strongly noticeable is on the TIE Fighters. Ultimately it just depends on how meticulous you want to be and how good you are at free handing straight lines.

Personal confession? I'm not that good at free hand straight lines.

Step Four

Take a normal brush and your Blue Grey color again and run it over the sides of the TIE's Panels that will cover stray black marks that might have gotten there after coloring the panels.

Final Flourish

This is personal design choice. Its ultimately up to you if you want to or not. Taking a little Moot Green on my fine detail brush I light brush it over the weapon numbs. Though not pictured above I also take some of that Evil Sun Scarlet on the fine brush and make little two little pin points of red on either side of the Engine depression. Lastly take that Evil Sun Scarlet and paint the special markings if you are doing an Elite squad. Not necessary but I like it. Lastly varnish them to protect the paint from wear and tear.

Anyway I hope this helps out as well. I'm in no way a master painter like some, and I still learn new things every day but these are the steps and idea's that have worked for me.

Edited by darkfortunex

Sounds good. I really have to stop avoiding painting my ties lol.

Edited by Wes Janson

Nice I did exactly the same thing to my Star Destroyers, just havnt painted the engines or hangar bays yet.

Also painted my TIEs almost the same way. Your stuff looks great. Glad I am not the only one who gave Fel his stripes. I did not give howlrunner or Mauler any markings simply because they didnt ahve them in the movies. Dat OCD.

Any plans to do your Rebel ships?

I really want to do some Rebel ships an though I bought a Core Set, I've just traded away my Corvette and Frigate for another Victory.

Right now I'm trying to convince my LGS owner to let me paint his Assault Frigate and Fighters. He doesn't want to break his boxes right now though, just in case someone is looking to buy them. I really want to paint one of those Assault Frigates though.

Really like your work :) and a definite fan of the Tie Blue. Most definitely will use as reference in future work :)

Thank you for sharing!

Update.

20150525_091953_zpspuhhzgw4.jpg

My finished TIE Advanced Squadrons.

20150525_091930_zpsrjrh93er.jpg

My Named Bomber

20150525_091911_zpsfud0ykjh.jpg

Lord Vader, I'm still a bit unsure if I want to have him with TIE Fighters to denote his importance.

20150525_091858_zpspt6fjzbo.jpg

My finished Elite Fighters.

20150525_091517_zpspwgikcdw.jpg

20150525_091548_zps3tudybkv.jpg

Finally convinced a Rebel friend to let me paint one of his Fighters.

20150525_091429_zpshoq7lszb.jpg

Sadly I dont think hes going to escape...

20150525_091353_zpspvqubho2.jpg

There are also more shots hanging out in the gallery linked on the first post.

Looks like you touched up the trenches with something?

Very nice. I love that the results look closer to screen models than what FFG gives us (nice as it is). I'll have to save your technique and try it on my ships!