Painting & Washing: First timer seeks advice, Awseomeness

By R22, in Star Wars: Armada

Well with Wave 1 delayed I now have some time to look into painting miniatures for the first time. I realize there's a painting subforum but I figure this gets more traffic and I've seen some stuff posted here so...

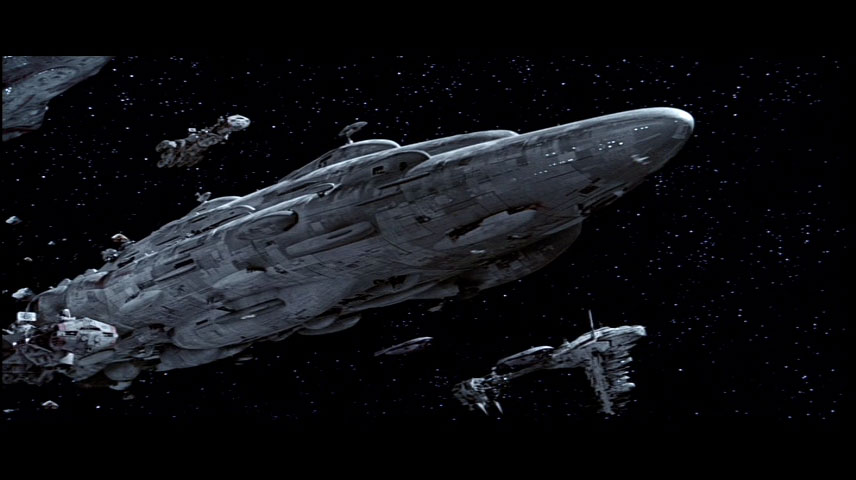
Anyway, completely new. What do you recommend in terms of starting tools, brands, protips and hacks? What exactly is washing and can you point out any other resources online? I'm really hoping to pain the Home One up differently since the white feels to stark to me, looking to give it more of a faded metal blue hue. Likewise I want to paint a couple CR90's and Neb-B's a different stripe, instead of red, as well as giving the Neb engine's a touch up.

Finally, any thoughts on battle damage? Blast burns, charring, etc? Things to give duplicate miniatures a little character to help distinguish them? I'd be thrilled if we could turn this into a general show off and tips thread for everybody's benefit...

Knowing what I now know I would recommend:

A good 1 or 0 brush, I also have a preferance for sable over acrylic, the main trick in buy a brush is to wet it and test it. Make sure it forms a nice point. Note: ask for a cup of water from the store staff if they don't have one handy. For brushed a good 0 will actually form a very nice point and do some fine details. If you can get a 000 for very fine details but 75% of the time that 0 will be your go to brush.

For paints I would recommend GW or Vellejo ranges. If you are painting the ties you may only need an off-white and black. You can add shading with an ink wash and either a black or light brown would suffice. For X-Wings you may end up with a pale gray, blue, red and black. With the black or light brown ink.

You will also need a disposable cup or an old cup for water and a pallet. I can recommend a see through page protector with a clean sheet of paper to serve as a pallet. Some paper towels (from the kitchen) and some news paper for spills and splashes.

---

Advice:

Don't dip your brush in the paint and then paint from the pot. Move the paint onto your pallet and add some water, thin the paint down to "milk like" consistency. It may take some practice to get it right, but the paint should go on nice and even and not be too thin as to see through it or streak. I usually give my brush a quick clean off here to avoid any paint drying in the metal part of the brush.

Run the tip of the brush into the paint on the pallet, spin the brush in your finger tips as you do. Then remove the paint that will form outside the brush tip, do this by painting a line on a piece of paper and rotate the brush to reform the tip. Once you do this the paint will come out of the tip like ink in an old metal/feather tipped pen. Which makes the line even and as thin as you can ever get it.

Keep in mind you have to learn how to do this, you will improve with practice.

When you are painting you'll see all the little shakes of the hand and errors, odds are very few people will ever look at a model as close as you do while you paint it, so don't sweat the little errors.

Keep in mind too that the Tie Fighters and X-Wings are very small. So unlike a perfect scale model paint job you are just going to try and get the impression the person looking at it gets. A dot of red and then a smaller dot of the hull colour will look like Howrunners pentagon unit marking. You'll go blind trying to do anything more.

With the ink wash don't brush it everywhere, dab it on using a poke-poke motion of the brush and if it goes where you don't want it dab it back up with the brush or a bit of paper towel. Control where it goes. Once dry you can paint over the parts where the ink probably shouldn't be.

Keep your brush clean, replace your painting water more often than you would like. I keep a little sqeeze bottle of clean water and spill a little on my pallet rather than use the dirty water.

If you don't have a large supply of paints you may find you have to mix up your own colours. If you do it may be worth making a wet pallet for yourself. Get a small storage box ( This is my choice box.) then put a few layers of kitchen town in the bottom and a sheet of baking paper or wax paper over. Then wet it all with water so that everything is wet, rinse off the excess water and you are done. I have had paint keep for quite some time on this, even to the point where the colours seperate.

Ok, professional painting advice here. Read what he says and understand most basic painters don't always go to that level but if you want to become a good painter it is always good to start off with good habits.

I was going to suggest Nuln Wash with GW and Vellejo for metallics. His suggestions on brushes is dead on even though I tend to use little more than 0 and 00 for brushes unless I am dry brushing.

Wow, thanks fellas. What purpose does washing serve?

A wash will basically run into the cracks and help to define the depth of the detail, (kinda helps to make the armour plates pop and such), usually a darker colour will be used than what was on the raised section to help the definition of the shadows.

So is it just a darker color, like grey, mixed with water and lightly applied everywhere?

It's usually a very watered down mixture of a color several shades darker than the one you are primarily working with, but black or dark brown are the normal go to colors.

GW nuln oil is very good. I did a 50/50 mix of nuln oil to water to fix the frigate in my game box.

I actually don't lightly apply it. I go pretty liberal with it as it'll run into the recesses anyway. Ink washes I do differently but a regular acrylic wash is kind of slathered on and then worked of of the high points where I don't want it.

36it8Oih.jpg

Edited by Mauser101

Any advice on shading? Blast marks or burns? Want to make the ships look like they've some history, especially the Rebel ones.

I also think it would be neat to do up some CR90's in a more crisp look as Imperial ones someday.

The wash is for the shading. With these models for any extra work I might think of using some weathering powder (lots of companies make them, I use Secret Weapon) to do a little carbon buildup around the engines but that's a bit advanced. These models are a bit small to bother with any really complex techniques as you won't see it on the table anyway.

Edited by Mauser101

I'm looking to make the MC80 more steel/grey than the white it comes as. Compare:

swm13-layout.png

mc03.jpg

So would that just be a wash with a slate blue or something?

Shading is a generic term for applying a darker colour into the recesses and folds of a model.

Highlighting is adding a lighter colour to the areas that would be light by the light source.

There are at least three washes that I use, which are a fairly easy way to get a shading effect:

1. A good old ink wash like say the Nuln Oil I like the dab-dab approach for it and then maybe a quick drybrush or painted on highlight if needed.

2. A pin wash uses an enamel (oil paint) and some thinner. You apply the thinner over the whole model and then apply the wash to the creases and folds and watch capillary action take over.

https://www.youtube.com/watch?v=LfsFGZbiDLM - I watched this at work with no sound.

3. A Filter is a wash that is quite thin and the idea is to alter the colour underneath slightly. Some thin gray or blue would give random panels a different look.

In reverse to get a highlight you can paint the raised areas directly. https://www.youtube.com/watch?v=uG9LGTs2kPw

Alternatively a dry brush is pretty easy. You just pick a lighter colour, if you are painting a wide open area like the destroyer you may use a flat brush and just get the tips in the paint then wipe all the paint off on a paper towel. Then you just flick the ends of the brush over the model and slowly the paint will come off onto the raise panels and such.

as a novice model painter, knowing how to do washes and dry brushing can make your model look great. A steady hand, and the experience of knowing what will happen when you apply the brush.

A good practice for dry brushing is the outer edge trim of the tie fighters, then one you have that try the trim on the inside the outward facing solar panels. I found with a "1" brush I could bridge my brush over 2 of the raised pieces of trim and get both, while not touching the solar panels. For practice with washes, the Cockpit widow is a great area. Just make sure to dry brush it from Down to up after wards and don't apply it too heavily or it will bleed out.

You got 18 little models to practice with, by the end you will either be frustrated, or more confident to do it again. (my biggest frustration was dropping the **** mini's)

But when you look at the models, think about painting it from the inside out.

My steps when painting the TIE fighters:

  1. Primer coat, non-enamel flat (A must to get your paint to stick)
  2. Base coat for the solar panels (inside and out) black
  3. Base coat for the hull and connectors (grey)
  4. Dry brush on the outside interior trim on the solar panels (grey)
  5. Fine detail freehand for the inside trim on the solar panels (yea i suck at this so badly, this was so hard, but it was good practice) Grey
  6. a light coat, or dry brush on the edge trim of the solar panels (grey)
  7. A wash on the solar panels between the trim to sharpen the edges of the trim (Looks great!) black
  8. a wash on the hull, for the deep parts (cockpit, hatch, connectors, rear) black
  9. Dry brush highlight on the hull and minor touchup of the ball (A lighter shade of grey)
  10. Touch up where needed (black or grey)
  11. Fine detail for the laser cannons and engines

Almost done with my TIE fighters, should have pics up this week

You got 18 little models to practice with, by the end you will either be frustrated, or more confident to do it again. (my biggest frustration was dropping the **** mini's)

I would recommend 3 things, drill a tiny hole, and glue in a paper clip that you can bend to a shape you desire. Glue the model to a nail with a large flat head, use super glue and you can twist to remove the model, then maybe file off the excess goo. The that plastic handle q-tip idea posted elsewhere, cut off both ends, widen one end (put in some hot water to help).

With any of these you could get a piece of packing foam and insert the other end of the nail, paper clip of q-tip into the foam to hold your model up while it dries. When using the 16 step painting of the tie fighter process I take them off between steps and put them into the foam as done, so you end up with a handy reminder of what has been done.

Any recommendations for paints/supplies via Amazon?

Oh, and Wash vs. Primer vs. Paint? Definition and purposes? I think I have wash down from above.

Hey, just wanted to pop in and say thanks for all the tips. i painted last night using this thread and a couple from the subforum. (ill post some pics once i figure out how)

Oh, and Wash vs. Primer vs. Paint? Definition and purposes? I think I have wash down from above.

Primer is a special kind of paint designed to stick to bare surfaces. Its job is to make it easier for the other paint to stick to your figure. Usually you can get it in white, grey, or black, but there are other colors out there, too. White primer tends to brighten, while black tends to darken, and grey tends to make colors flatter.

Blast marks or burns? Want to make the ships look like they've some history, especially the Rebel ones.

I wouldn't do that. Burns and blast marks would be repaired so you wouldn't likely see them. I think the over all 'dirty gray/brown' most Rebel ships are give that rag-tag appearance on it's own.

You wouldn't, but he wants to.

What I do for that is either take an old brush (or new one after I've roughed it up a bit) and clip it down to a fuzzy, frayed nub and use dry-brushing to just splotch on a blast mark with a bit of black by pressing the frayed nub to the model and just gently dragging it a little bit from the point of contact. To get fancy for "metal" objects like ships I'll do that with bit of metallic color (whatever steel-like color you have on hand) first, and then repeat over it with a bit of black with a smaller brush and a bit less paint, starting in the center of the mark I already made with the metallic and dragging in the same direction.

You can get dead-on hits by essentially poking at the model with the frayed brush in much the same manner.

Some people use air brushes the same way, but I like normal brushes because it gives a kinda chaotic, haphazard look to the mark like something violent hit it.

If you are really dairing, you can use a model knife or drill to gouge out small chunks where the blast mark will go, but I wouldn't recommend that on these models. However the effect can be nice

This guy did some in a similar manner:

https://www.flickr.com/photos/adumas02/5269009391/

Edited by Deathseed

Blast marks or burns? Want to make the ships look like they've some history, especially the Rebel ones.

I wouldn't do that. Burns and blast marks would be repaired so you wouldn't likely see them. I think the over all 'dirty gray/brown' most Rebel ships are give that rag-tag appearance on it's own.

what about a fleet on the move that encounters a force or is needed before it get get to a shipyard. you can fit it into the lore of your battle one way or another.

You wouldn't, but he wants to.

The way I read the question was if , not how . So I responded accordingly.

what about a fleet on the move that encounters a force or is needed before it get get to a shipyard. you can fit it into the lore of your battle one way or another.

That's fine, but that's also a given situation that isn't always going to be true. The fleet may be right out of drydock somewhere and not have suffered any damage.

I generally don't care for painting something based on an action it may or may not of been involved in, like painting blood on a sword or something.

I agree with not making ships so specifically historical that they are limited to a narrow scenario. But I also think ships develop cosmetic wear and tear, especially the Rebels. Right now the FFG miniatures come with different color hull painting and faded red paint. But I'd imagine you'd still see some other discrepancies. Plus, while on deployment, I imagine ad hoc repairs are there too.

So I don't mean major blast scars, just little pick pockets to distinguish them. One of the things Star Wars did so well when it first came out was that it gave us a "future with a past," instead of ships with perfect gleaming hulls they looked lived in. I think that's great.

Many of the ships enter the atmosphere, so you will get scorch marks and exhaust stains and such. As they can be berthed on a planet maybe even dirt swipes where the rain causes dust streaks and rust stains.

Just like a car, some cars are waxed every weekend and others are washed once every decade.

If you take a look at the millennium falcon or many of the x-wings you can also see that this happens in the movie ships too.

I also find it part of the fun of painting, adding rust, dust and grime.

GW and Vallejo paint sets are the ones I've been recommended so far. Anybody got a set they can recommend? I'm just looking for some basics.