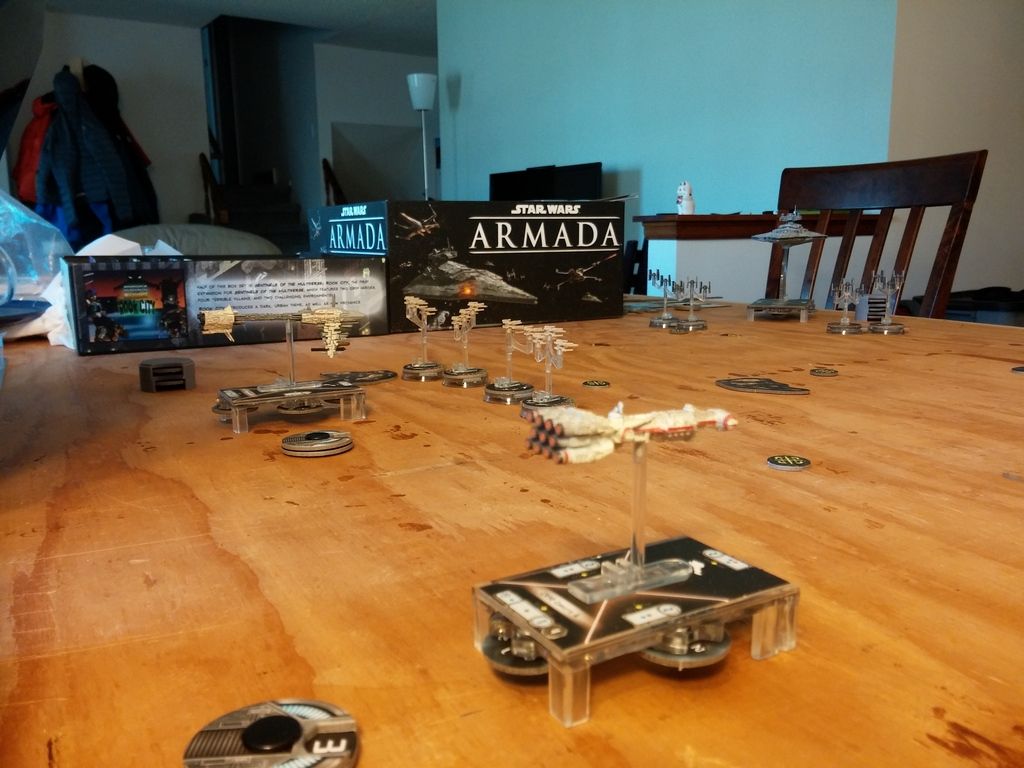
Hey all, posting up a core-set only bat rep to give people some idea of how the play goes. Didn't have an appropriate sized playmat so I just sectioned off part of my board game table.
Imperial Forces:
VSD Mk II (85)
- Grand Moff Tarkin (38)
- Gunnery Team (7)
- Enhanced Armament (10)
Cive "Howlrunner" Rashon - Obsidian Squadron (16)
Tie Fighter Squadron (8)
Tie Fighter Squadron (8)
Tie Fighter Squadron (8)
Rebel Forces:
Nebulon-B Escort Frigate (57)
- General Jan Dodonna (20)
- Navigation Team (4)
CR90B Corvette (39)
- Overload Pulse (8)
X-Wing Squadron (13)
X-Wing Squadron (13)
X-Wing Squadron (13)
X-Wing Squadron (13)
Objective (Random)
Intel Sweep - Collect the most objective tokens to gain 75 points at the end of the game.
Board Setup:
Several debris and asteroid fields clutter the middle of the board. Imperials have initiative and have already accepted that they will lose the objective match....but will still try to secure two of them just to slow the rebels down. Deployed in the corner at max speed to try and cut through the majority of objectives and trade shots at the rebel ships trying to get away with the intel.
Rebel corvette deploys far right just shy of max speed to try and snag the far objectives and then come in on the VSD's flank. Neb-B front and center with X-wing support to snag the middle objectives and try to strip some shields off of the VSD and support Anti-Aircraft defense support for the X-wings.


Turn 1
Star Destroyer surges forward and cuts right. Grand Moff Tarkin and an Engineering command dial start pilling on the command tokens. Two tie squadrons flys right to try and shepherd the X-wings to the front of the VSD.....but end up in the Neb's starboard arc and will take a ton of flak-fire the next turn.
"Howlrunner"' and her escort squadron move ahead of the VSD with an escort and engage the leading pair of X-wing squadrons and deal heavy damage to one of them. Now they are counting on initiative and a banked squadron token (from Tarkin next turn) to bring 3 squadrons of TIE's to bear on the X-wings....sadly this won't end well for them.
All capital ships are in position to snag an objective.

Turn 2:
VSD banks a squadron token as planned chucks a concentrated fire at the Neb-B and long range and damages the forward shields. Flak-fire is pathetic at best and does nothing to enemy fighters.
All of a sudden realizing that the Neb-B is probably sitting on a Squadron command, the VSD panics and burns the squadron token to activate Cive's escort and dump a boatload of damage into the second X-wing squadron.
Neb-B in fact does have a squadron command and "Howlrunner" does her best to avoid the incoming X-wings. She tries her best and it does take 2 squadrons, but Obsidian squadron goes down in flames.....Grand Moff Tarkin was not on his game at predicting the enemy.
Neb's forward gunners perform fantastically, but the VSD braces for impact and redirects damage to adjacent shields causing very minor damage overall. This will be the theme of the game, the VSD's crew works hard at redirecting damage to neighboring shields to tank a ton of damage.
On the plus side, the frigate's AA fire is devastating and puts heavy damage on the flanking TIEs. However General Dodonna was a bit aggressive and miscalculated his speed. The Nebulon-B collides with the VSD, damaging both.
Corvette swings around and lines up for a run on the VSD. Remaining X-wings engage the TIEs.
Rebels have 2 objectives secured


Turn 3
VSD cuts it's speed and begins replenishing it's shields. The TIEs are screaming for revenge at Obsidian squadron's fall and a squadron command dial rips through the X-wings. Supported by the VSD's flak-guns, 3 X-wings go down while the main batteries of the star destroyer annihilate the forward shields of the Neb-B and cause a critical hit (discarding the Neb's evade defense token).
The CR90B finally gets some shots that do some heavy damage (redirected to the VSD's starboard shields) and trigger's an Overload Pulse leaving the destroyer with all of it's defensive tokens exhausted.
Despite taking a hell of a beating, the Neb-B is able to deal damage in kind and drops the VSD's port shields. AA fire tears apart two tie squadrons. No collision this time, the neb is able to flank around into the rear arc of the destroyer.
Rebels have gained two more objectives and easily claim the 75 points.
Turn 4
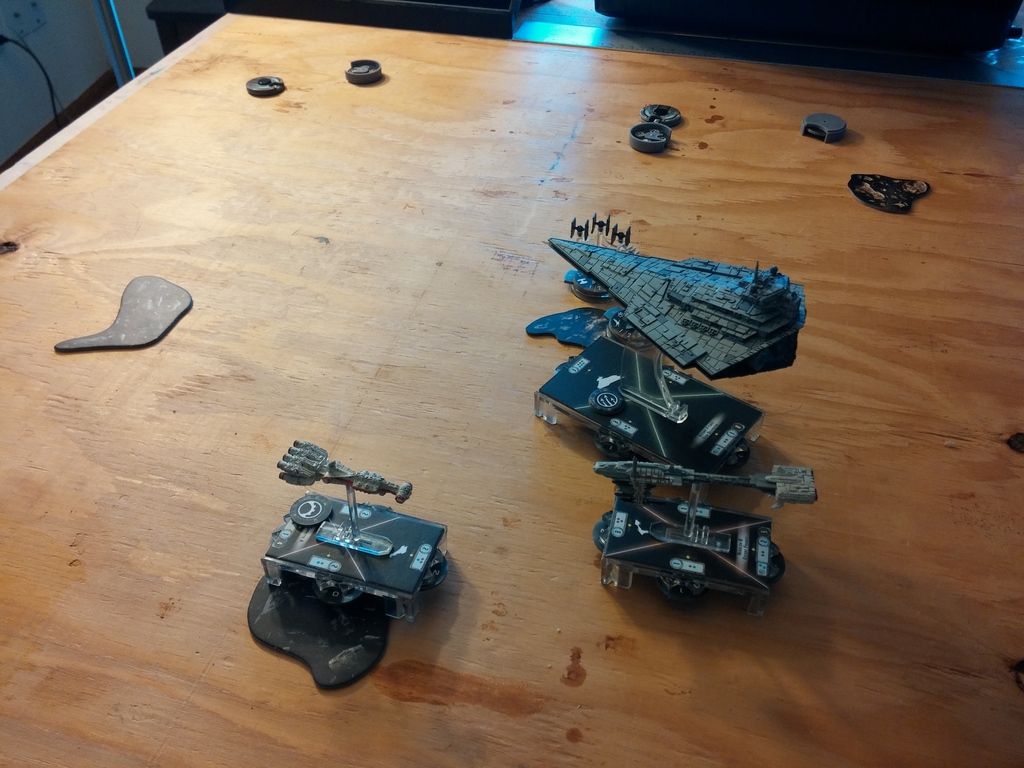
VSD brings back all of her starboard shields and pours fire into both the Neb and CR90B. Corvette is hurting, but manages to redirect damage to the port shields. Neb-B takes another critical hit (can't shoot at obstructed targets).
The rebel capital ships work hard to bring down the star board shields, but the brace and redirect tokens of the star destroyer are too effective, not a single shot lands on the hull. However for the first time, all of the VSD's shields are down.
Last TIE fighter goes down the the X-wings position themselves for a torpedo run.

Turn 5
Once again the VSD replenishes all of it's starboard shields. And starts chewing away at the Neb-B and tries to snipe the approaching bombers (failing to do so).
Bombers whiff completely and don't manage to land a single torpedo despite the VSD having no forward shields.....I guess the flak-fire was too distracting.
The Neb-B is nearly dead and desperately trying to figure out a way to run away and put as much space between itself and the VSD....sadly it cannot do so as no matter what happens they will be in the VSD's front arc....or end up on top of a debris field and will take damage.
The previous turn's manuever effectively screwed the rebels over as there is no way the Neb-B can survive. They try their hardest to hit the VSD, but the amazing engineering teams of the start destroyer keep bringing the shields back to full-strength whereever the Neb-B can draw a bead.

Turn 6
As predicted, the Neb-B goes down in a hail of fire and the VSD's anti-starfighter gunners can't seem to land a hit on the X-wings.
Deciding that it's time to cut their losses, the Corvette accelerates and runs away along with the surviving X-wings.
Final Score
Imperials: 120 (Ships + Fighters destroyed)
Rebels: 115 (fighters destroyed + objective)
Narrow win for the Imperials...those pesky rebels may have gotten away with the intel, but the loss of General Jan Dodonna made up for the loss of information to those terrorist scum.
Lessons Learned / Thoughts
Nav Team on the Nebulon-B was a waste of time....never was used. Dodonna's Pride (Title) is required; the rebels never managed to land a critical hit on the VSD so Jan Dodonna's ability and Dodonna's Pride would have helped a ton.....is it worth getting rid of Pulse Overload? I'm not sure.
Neb-B has amazing anti-starfighter ability. The ties got shredded by it. Overall the Rebels probably focused one turn too long on the objectives (at least the CR90B did) and probably should have tried focusing the VSD more.
Tarkin is stupid amazing and make the VSD nigh indestructable. Toward the end of the game all the VSD needed to do was spam the engineering command and gain the engineering token from Tarkin. Replenishing 3 shield points a turn was just too hard to deal with. You NEED to focus on one fire arc as the rebels, preferably on a flank as the redirects are just brutal. Hard to do in a core-set only game, but much easier at standard point levels.
As for VSD I + Dominator versus VSD II, I'm not sure. The medium-ranged blue is nice to have, and helps with those pesky defense tokens, but the black dice can be good and the dominator ability giver you nearly as much teeth as the blue dice at the cost of shields......which whoop-dee-doo don't particularly matter if you're spamming engineering commands.
Gunnery team can be nice, but was honestly only ever use against capital ships once...otherwise it was against a captial ship and fighters...and the single AA die from a VSD is pretty lackluster against X-wings. Not nearly as devasting as two blue (or even just one blue) against Ties.
"Howlrunner" is awesome but needs some for-though. She will get focused down because her ability is just so good. Ties can hold their own very well with the squadron command, however. The re-roll allowed 3 tie fighter squadrons to focus fire down 3 X-wing squadrons that had previously been damaged.
Still need to work on how to use X-wings better. They have so much potential, but getting locked down by TIES is just brutal. 4 squadrons just simply isn't enough and at higher point games you will definitely need more of them.
First game with objectives and obstacles. Both add a lot of depth to the game and make it so that even if the rebels can't bring a VSD down, they still have a decent chance at winning (as evidenced by the 5 point margin). If even just one more X-Wing squadron would have survived, the rebels would have one the game.
Hope everyone enjoyed the battle report!
