Card Tuck Box Templates

By JCHendee, in Talisman Home Brews

Such things probably aren't of much interest to Talisman players, but I thought I would share a couple links I stumbled on to. With simple thought, the first is adaptable. The second actually helps you enter custom dimensions and general a usable template.

http://www.ee0r.com/boxes/

http://www.cpforbes.net/tuckbox/tuckbox.cgi
There is another site for this here - http://tuckbox.gameupdates.com/

A login is required as you can save your designs. But it would be worth experimenting.

I've been unable to upload images (drag and drop) in IE8 or FF3.5. Overall, it looks great, but it isn't fully operational. Not certain if or when the bugs will be corrected. Perhaps it might work in older browser versions.

The tool only uses JPG images, so that might be the issue. I have managed to use it in IE8.

One thing I will say is that it does not resize images to fit the space.

....and I don't know why I didn't think of it before...

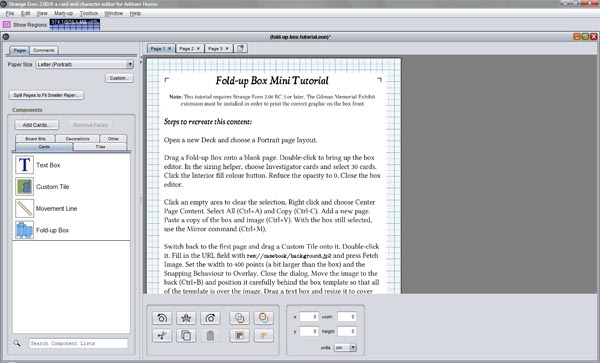
Strange Eons has the capability to make tuck boxes built in!

se_foldupbox.jpg

Go to Miriam Beecher's Basement and look at the Tutorials there.

(I wish you could edit posts after longer than 5 minutes...)

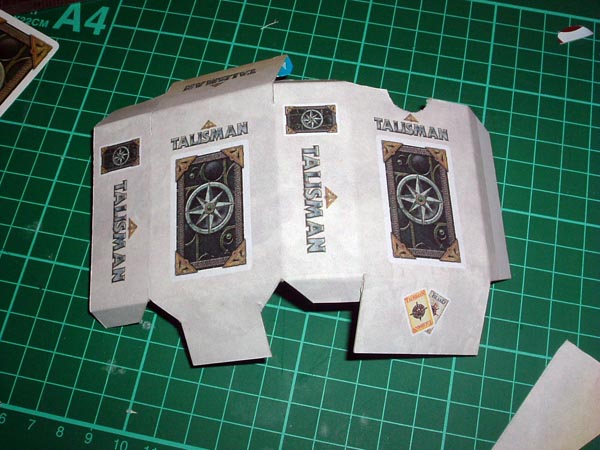
Okay, so a first try with Strange Eons yields this -

se_tuckbox.jpg

I printed it out on a sticker sheet and stuck it to a (nearly) empty cereal box.

Not bad, but some lessons learned -

1) I suck at using a craft knife to cut out curves, which is a pain for the thumb notch

2) The cardboard used in Asda's Choco Hoops is too thick to be useful!

I will have a try with some thinner card, which hopefully I can print directly onto.

Hwy, overall, it looks pretty good! Maybe consider a simplified square corner notch instead of the round. I would work just as well and be easier and cleaner to cut.

I think the thumb notch would be fine if I try some scissors instead, and if the cardboard was thinner.

I didn't manage to get out for some cardboard today, but will try this week.

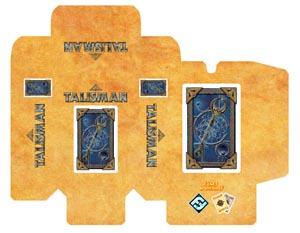
spl_tuck.jpg

In the mean time I was playing more with the Strange Eons box maker and have sorted it so I will print the design on one side and the template for cutting/folding on the other. There should be enough play to get it more or less correct. I shall report back later... If successful I will upload PNGs of the boxes to Talisman Island for people to use, should they so wish.

The above design is for 50 cards. Any more and I think it would be a little too deep.

Lookin' good! aplauso.gif

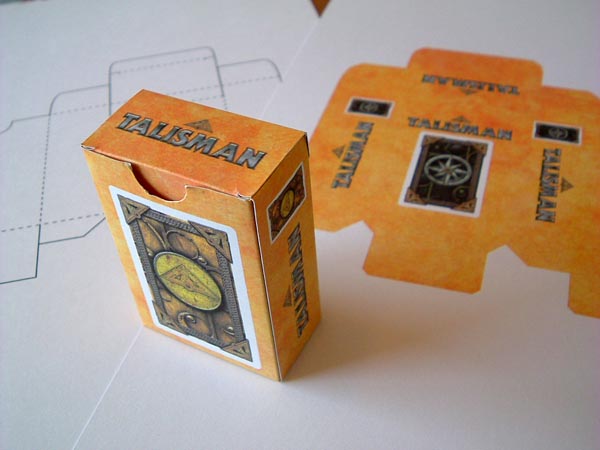
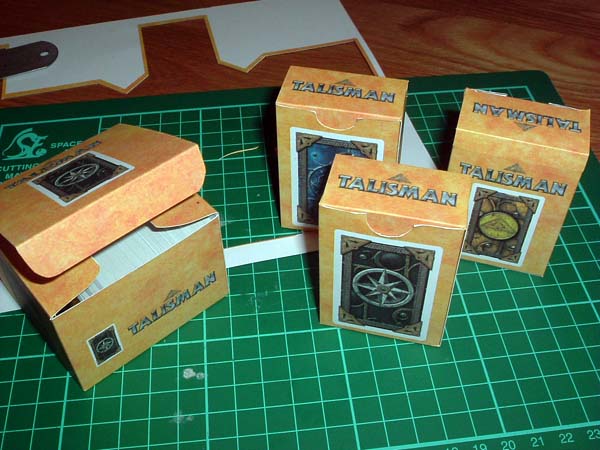
Okay, I managed to get some thin card today (50 sheets for £4) and have printed out a couple of tuck box designs.

se_tuckbox_example.jpg

I'm still not overly happy with the thumb notch, but I will probably make some with it intact and see what difference it makes in practice.

When I get a bit more confident with them I'll post the templates to Talisman Island. Though if anyone is itching to have a go sooner, just send me an email!

Awesome, and the thumb notch looks fine.

Oh, and like that new tuck box creator much better! Not as fancy a design, but at least it works in my browser. If I print to PDF, I should be able to import it directly into PS CS4.

That's good. I've just made another couple up and it's getting a bit easier to be honest! I kind of like the simplicity of the design, though it is still quite colourful.

I think I will need to make a fair few more Adventure ones as I think increasing the size to hold over 50 cards will be a bit unwieldy as I don't think the card will be stiff enough. We shall see.

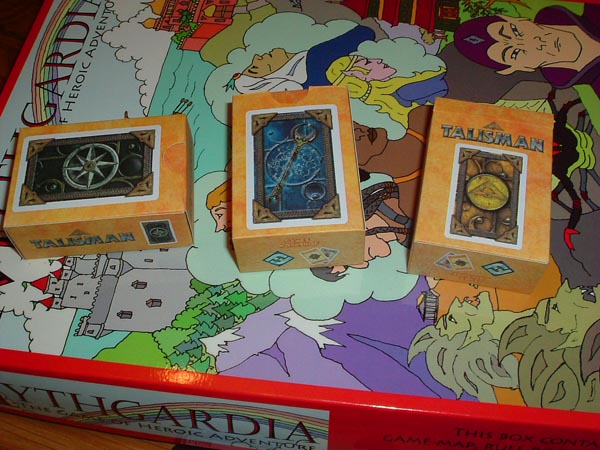
Below are the three so far. Can you guess what I plan to play tomorrow night?

se_tuckbox_three.jpg

I actually had a bit of an annoyance when I first printed these duplex though. Even though the images are central, and the card was going through correctly, they would print 2mm nearer to the left of the page, which of course meant the two sides ended up 4mm askew. I adjusted the print by 1mm to the right to correct it but it was puzzling. Hey ho, modern technology and all that!

So anyway, after all the trouble of getting them done - am I going to use them? Yes, I think I am because even the FFG insert isn't going to hold much more!

Ah ha, indeed there's a little hint in there for the next evening's gaming. And overall, just card backs and a textured (?) color scheme looks good... gives a little lenience for the drift problem you were talking about as well. I agree, at a guess, that a box beyond 50 cards or so would probably get to wobbly. And hey, now you're getting the hang of it, running off another box is becoming easy.

A notion: would two boxes back to back adher / glue together well once assemble, say with both top laps at the same end but opening in opposite directions?

I guess you could stick two together, but you would lose the ability to stack them differently if you needed.

In other news, it would seem that the creator you had trouble with has had an update to help with that.

http://www.boardgamegeek.com/thread/426062

It's getting there... however, resizing an uploaded image appears to operate by different measures (pixels) than dimensioning the box (mm). Makes it tricky to resize to fit via entering numbers. It's also a destructive resize of the graphic itself. Once you reduce an image, the reduction is permanent; it cannot be enlarged again.

Just FYI, I make my boxes on Bristol board and have had no problems with large decks so far (the Spell deck for Arkham Horror with all the expansions is 112 cards if memory serves). Typical home printers can't handle Bristol board, so if you wanted to be fancy you'd need to print your design on a sticker sheet or otherwise attach it separately.

I don't bother being fancy, though: my technique is based on functionality rather than looks (there are so many kinds of bits for AH that some kind of organization is essential). I just print an undecorated box template from SE onto a sheet of plain paper, cut around the outside of the template (you needn't get the nooks and crannies at this stage) and then tape it to the bristol board with masking tape. I score over the fold lines using a pen or pencil, then cut the cut lines with scissors—I don't bother with a craft knife anymore. I don't even use a ruler when scoring the fold lines. I use double-sided tape to assemble the box flaps. The box design is fairly forgiving and will tolerate some sloppiness. With a little practice you can easily make a box in a couple of minutes from start to finish. If you have a few decks that are roughly the same size, you can reuse the template sheet several times if you don't score too hard. To identify the contents I include a square text box or picture on the template sheet and then cut it out separately and glue it on after assembly.

Cheers,
Chris

Thanks Chris! That's an interesting thought. I shall have a look at the stationers tomorrow and see. It should certainly help with the "wobble factor" of larger boxes.

In a moment of madness tonight I loaded up the templates again and made one 6.5cm x 6.5cm x 4.5cm, which will fit 150 cards in it.

se_tuckbox_150.jpg

I think the fact that it is squat and square makes it quite sturdy and it actually fits on an A4 sheet, so you get to store more cards for the same usage of card stock.

As you can see I've opted not to use a thumb notch this time to save on spoiling the top by bending it. I just need to make the graphics nice enough and I think that should do it.

I suppose you could even use these for storing tokens and stuff too!

Wow, it's looking really good! In fact good enough that you might consider printing the whole finished thing to PDF for download at TalismanIsland.

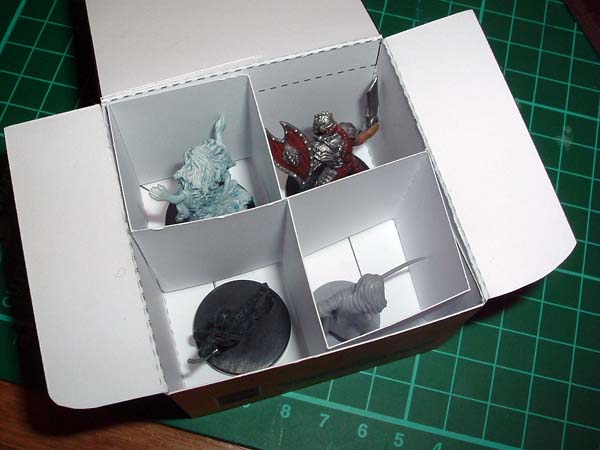
In fact, using a little cunning I've cobbled together a little divider to use inside the box, so you can keep your minis together.

se_tuckbox_minis.jpg

[edit]

I was thinking of making a nice little handle and base for the insert so it would be like one of those supermarket wine carriers. I thought that idea would be overkill though! If people are worried about the minis moving about they can always use cotton wool!

Again, very nice, though I think you may be right about people being concerned with their painted figurines. Of course you could make a half-height version for tokens gran_risa.gif

Hehe, maybe. I think I would probably just stick with the same size and stick the tokens in together. I shall make some more boxes and see how it all goes together in the main Talisman box without the insert.

These look fantastic, any chance of uploading the files to Talisman Island?

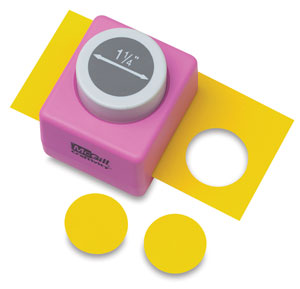
Also if your having trouble cutting thumb notches neatly,

try using a circular hole punch from a craft store like this one. 61825-1006-2ww-m.jpg

Great ideas.

I'm printing already, thanks! gran_risa.gif