Death Star Trench Run

By heychadwick, in X-Wing Battle Reports

So, last night, when the world was reeling from the uncloaked FAQ, I was having game night. When only 3 of us showed up, they played a game and I started to pull out all these printed out sheets of Death Star paper that I had printed out. I had read Dagobah Dave's awesome Trench Run scenario and wanted to try it out, but in style.

His scenario:

http://www.outworld-studio.com/xwing/pdf/Dagobahs-DSTR-v01.pdf

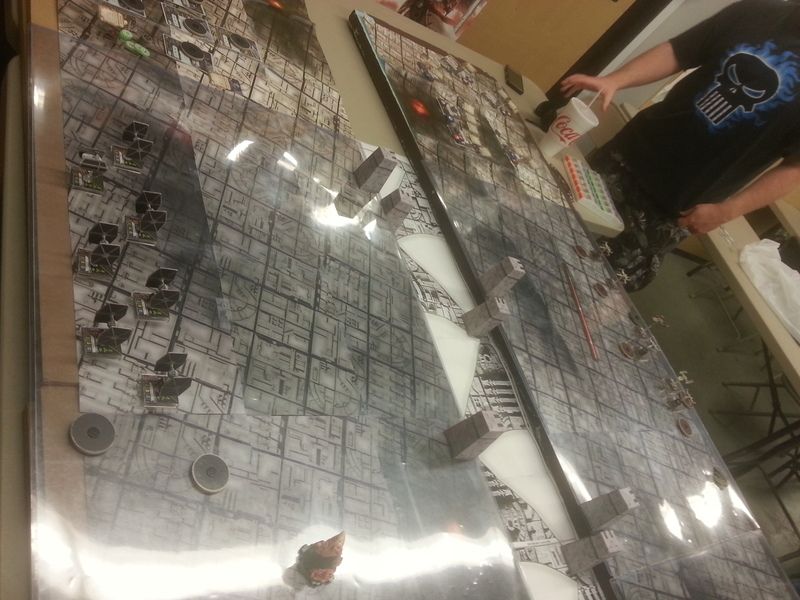
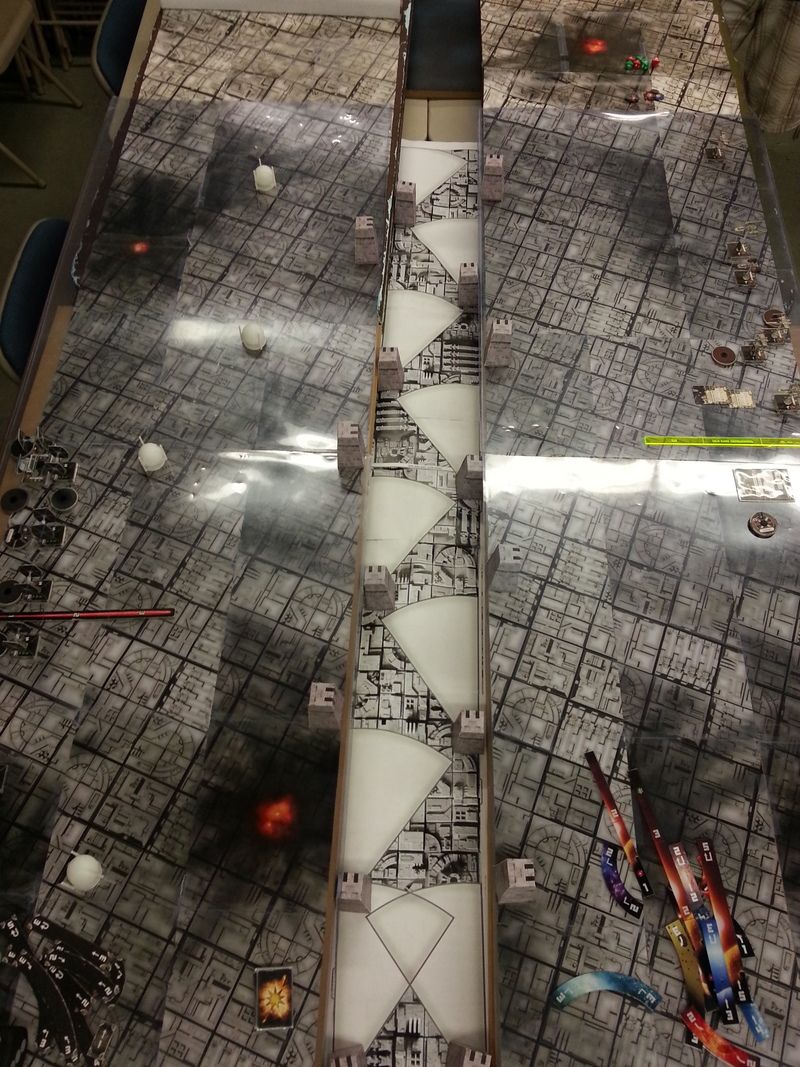
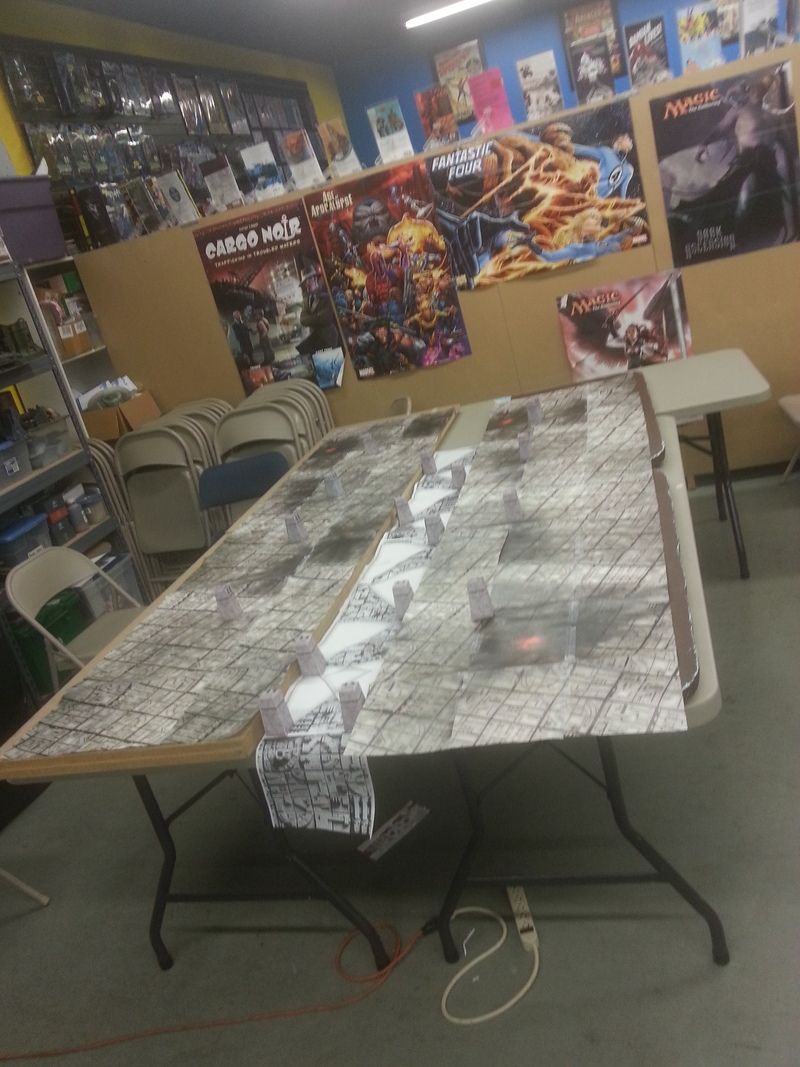
There are kits you can buy that have PDFs. There are great game mats you can buy. I'm a cheap gamer and work has a color printer. So, I found some free death star graphics and printed them out on a lot of sheets of paper. I had taped them into strips that were about 4 feet long, but hadn't been able to match them up. I was in a hurry last night and didn't want to really look into fitting all the different strips together in the appropriate format, so just taped them all together hodge podge. They don't match up, but I don't think anyone really noticed. If they did notice and didn't like it, I fully invite them to make their own dang table top and I'd be happy to play on it!

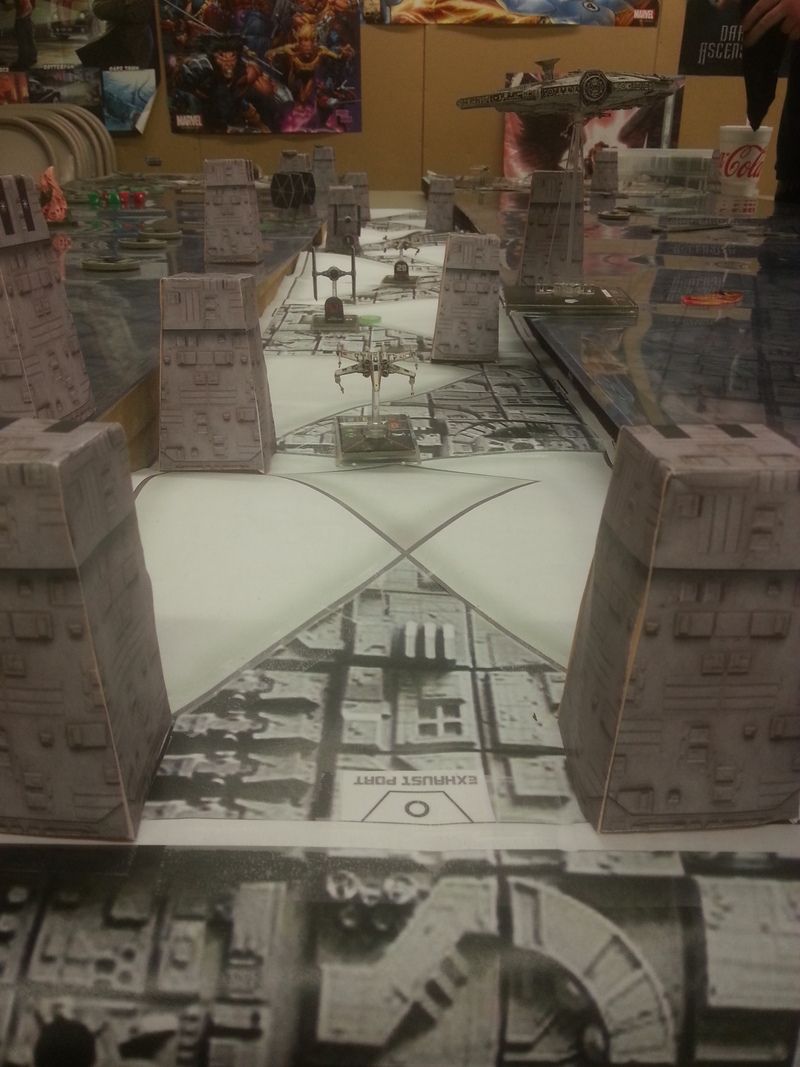
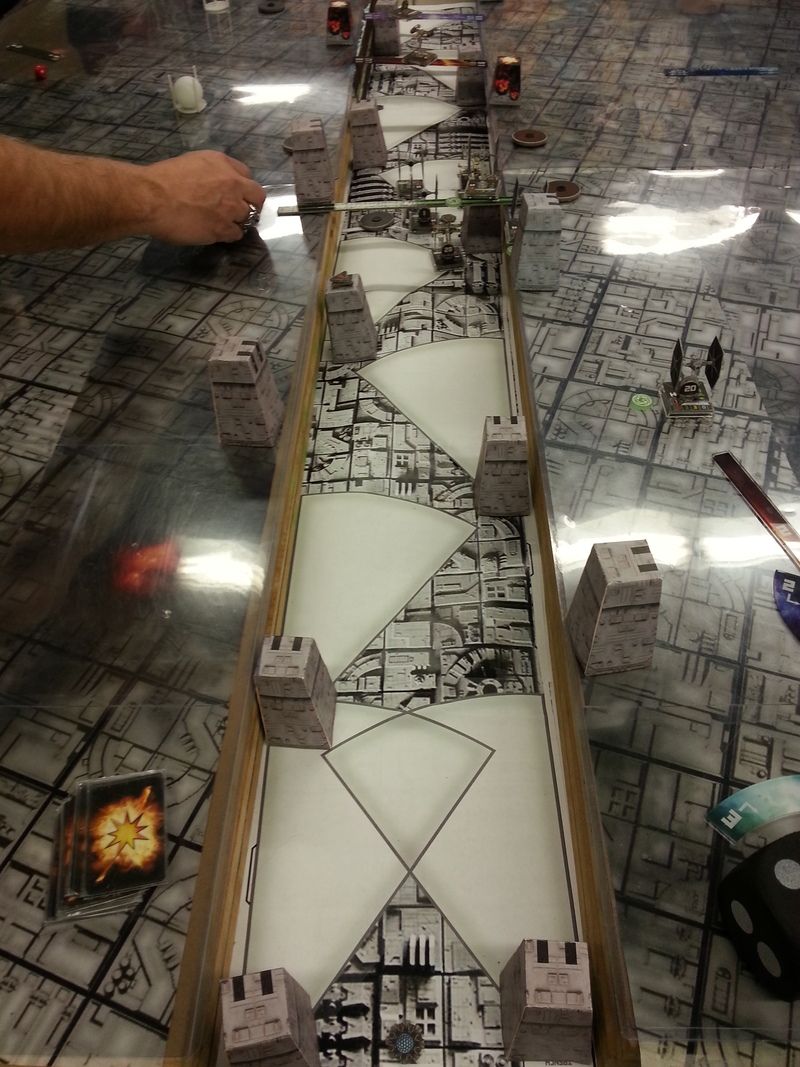
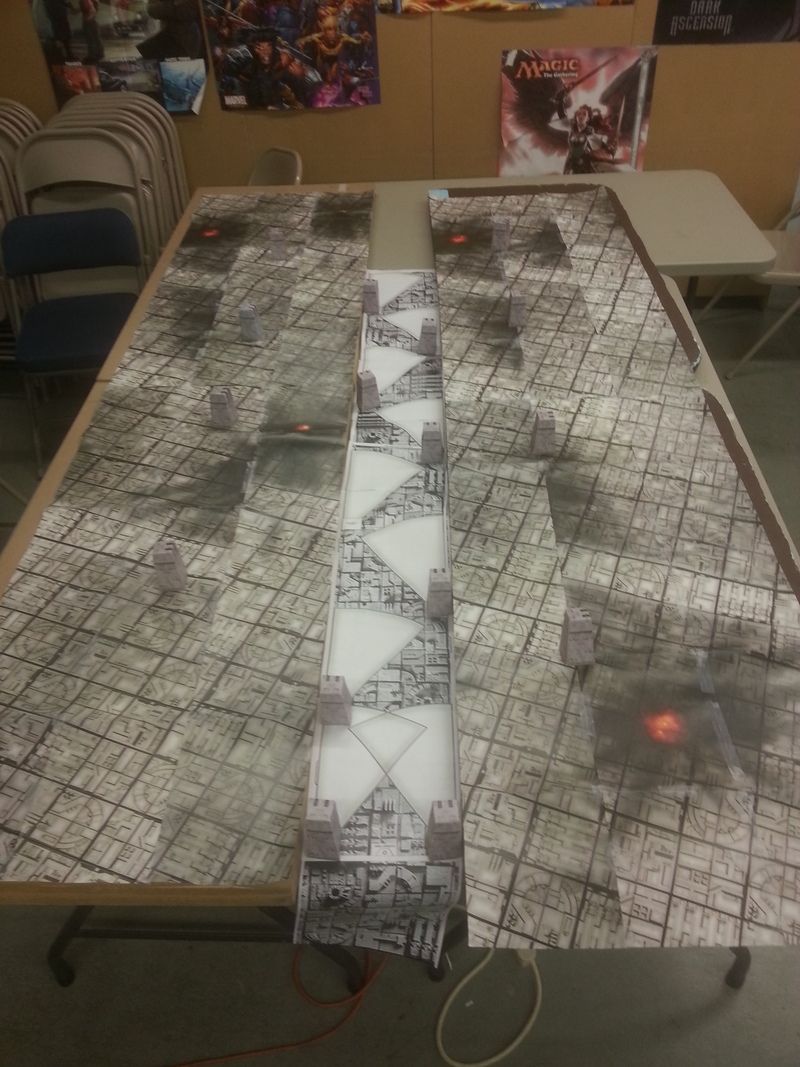
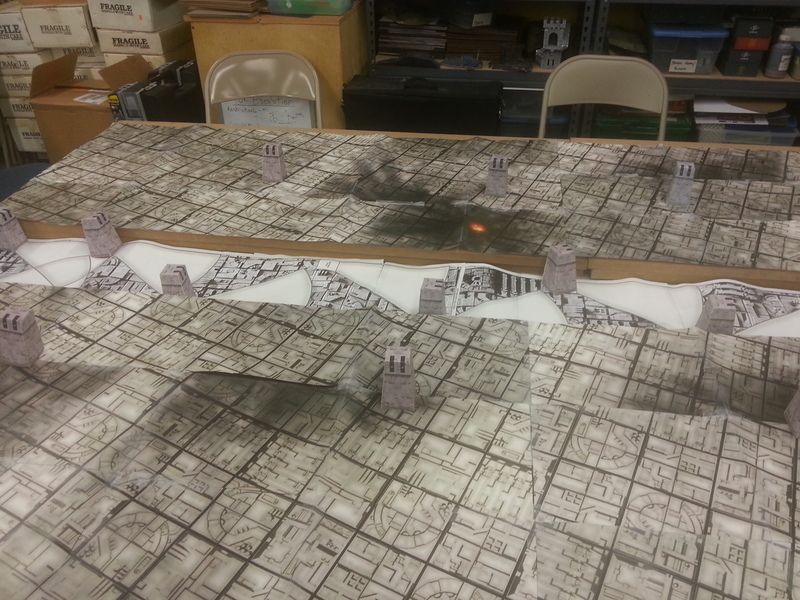
I wanted to make the trench 3D and be below the rest of the Death Star. I figured out after I had set a bunch up that this wasn't very deep, but I wanted to get gaming and didn't want to take the time to make as awesome as it could look. We were going to do it as a quick run and find all the mistakes in the scenario before we really did it well. So, it was OK that it didn't look as great as it could've. Oh, and I have some more death star paper to put on the walls of the trench, as well. I just...yadda yadda...quick game.

Here are some shots of it before the game store owner put some plastic sheets down on it for me. This darkened it, but also flattened it.

20150326_182725_zpsfh1dphro.jpg

20150326_182730_zps5mnk048s.jpg

20150326_182739_zpsox3wymdc.jpg

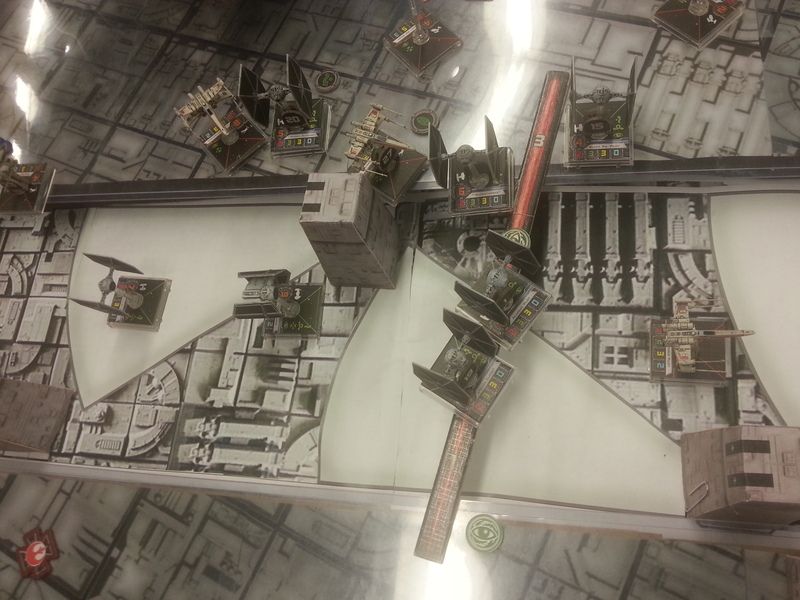
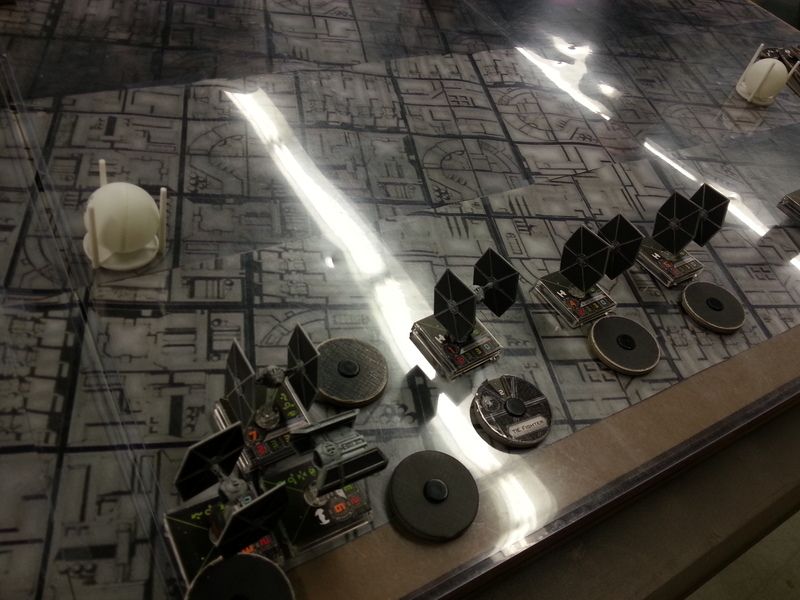
My buddies asked me to throw together two lists while they finished up their game. So....I just made up some stuff that I thought would be cool.

150 pts Rebels

Luke w/ R2-D2 and Elusiveness

Porkins w/ Expert Handling and R5-D8 (they insisted on him)

Red Squadron X-wing

Rookie X-wing

Grey Squadron Y-wing (no turret)

Gold Squadron Y-wing (no turret)

Don't forget that all ships are fully loaded w/ Torps for free. I think I threw on some R5 droids as I had a bunch at the top of my stack. I really did this fast and didn't think about it too much.

125 pts Imperials

Vader w/ Predator

Mauler Mithel w/ Calculation

Backstabber

Winged Gundark

Dark Curse

Black Squadron

Academy Pilot

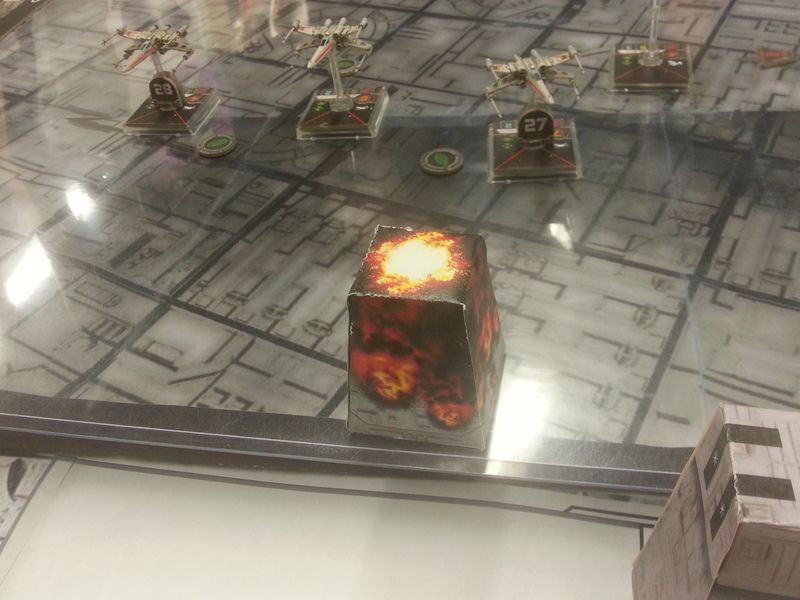
Now, I had bought some ping pong balls and was going to put them on those little tables you used to get inside pizza boxes for the power nodes, but I didn't bring them. Doh! We grabbed some 40k terrain for some alien pods for them.

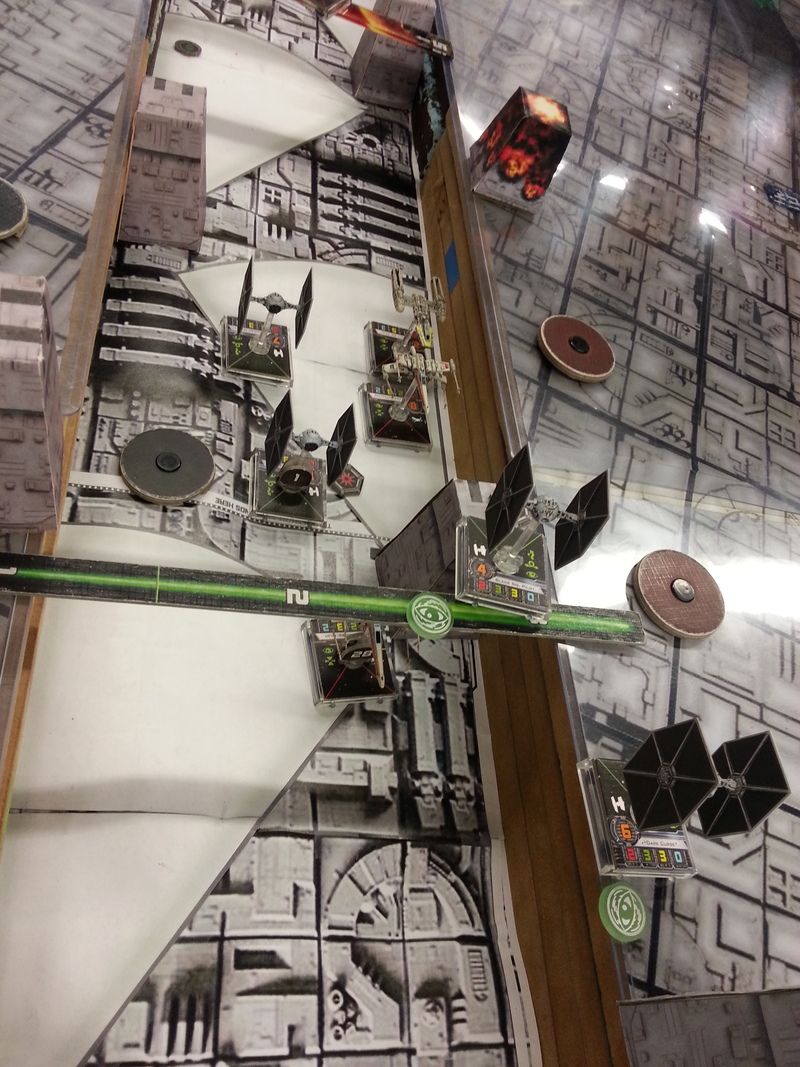
Also, we set up wrong. I looked at the set up diagram wrong. The Imps are supposed to set up on the far corner from the entrance to the trench. We set up on the one closest to it. So, that was not the best. The Rebels said this really impaired their game. Also, we totally forgot to bring in dead Imperial ships once they were blown up. I almost forgot to bring the Falcon in, too!

20150326_195118_zpsn2sd6u6v.jpg

20150326_195126_zps4tseik7i.jpg

20150326_195132_zps7nmycygm.jpg

The Rebels moved forward and forgot about the turrets. Porkins was the only one in range of one and failed all his 4 evade dice, which had his shields stripped. We joked about him not knowing they were there already and was too busy trying to stuff his hoagie down his throat to evade well. I think a Y-wing might have taken a hit. In return, the Rebels moved forward and blew up two turrets!

20150326_201204_zps2lso32dt.jpg

Things got ugly quickly. The Furball happened and a Rookie dropped into the trench to try to rush through. Vader and Mauler Mithel moved in behind.

20150326_202745_zpswzzxixrd.jpg

The rest doesn't have as many pictures for it. We were too busy playing to stop and take a shot. There were a couple of players that swapped out as some had to go home. There were a couple of new guys that came and looked at the game. They were so inspired that they bought the Core boxed set and needed some help getting going. So, sorry for the lack of pictures.

The Rookie tried to zip as far forward as he could with Vader and MM on his tail. The Red Squadron dropped in behind them. Everyone started to use the new Slide maneuver and increase their green dice. Vader spent a few turns shooting down the Rookie. We forgot about Predator until after he wasted a turn using TL, but with only 2 dice, it was pointless on a PS2 ship vs. Predator. Mauler Mithel slowed down to deal with the Red Squadron, who also tried not to get in front of MM. Eventually the Red Squadron pilot managed to take down Darth Vader a bit after a few turns. Dark Curse dropped in to help MM and they blasted the Red Squadron Pilot. Luke also dropped into the trench behind Vader, which we thought hysterical as it was the reverse from the movie. Luke spent a few turns shooting at Vader and a few more turns of sub-par rolling saw Vader go down. He screamed "What?!?!?" and spun off into space.

In the mean time, there was a lot of bumping as the various ships tried to blast each other. Porkins was the first to die to concentrated fire of the Tie Fighters. It actually didn't take that much effort as he rolled really bad. The Y-wings died pretty soon as they were swarmed by the Tie Fighters. I also kept forgetting to fire the turrets each turn. They were all just sort of swarming above the entrance to the trench when I was thinking they should've rushed over to the Power Nodes to try to take them out. A Tie Fighter or two were destroyed and that reset the clock for the Rebels.

So, at this point we have Luke rushing ahead towards the exhaust port with just the Red Squadron behind him trying to keep the Tie Fighters busy. Han Solo rushes on the board and moves up to knock out a Tie Fighter up top. The Ties decide to ignore Red Squadie and rush down the trench. Another Tie Fighter drops in behind Red Squadie.

20150326_223156_zpskculllax.jpg

Han Solo blasts Mauler Mithel to pieces. Luke fires at the turret in front of him and destroys it. There is little hope in stopping Luke from getting his shot off. The Tie Fighter in the rear shoots at Red Squadie and gets a crit! It's....munitions failure! He loses his Proton Torpedo! This leaves Luke with the only Proton Torpedo left to blow up the Death Star. The trubo laser turrets fire, but Luke easily evades them.

Luke moves in for the shot that can blow up the Death Star and save the Rebel base on the moon of Yavin IV. There are 2 shields and it has 1 green die (for being the size of a womprat). A ghostly voice tells Luke to turn off his targeting computer. Han shouts, "Let's blow this thing, kid, and get out of here!"

20150326_223629_zpsfe2gmms9.jpg

Luke ignores the voice in his head that tells him to turn off his targeting computer and fires at the exhaust port. He rolls.....hit, eyeball, blank, blank. The exhaust port rolls an evade. Luke doesn't even hit the shields on the exhaust port!!!!!!! That's the last Proton Torpedo the Rebels had. The Rebel ships pull up and bug out as the Death Star moves in range. "You may fire when ready," says Gran Moff Tarkin to the Imperial gunnery crew.

alderaan.jpg

Nice!

Seems odd giving the exhaust port shields. It should just have green dice to represent how hard it is to hit, and if one hit gets through...boom!

The exhaust port was ray shielded so they had to use proton torpedoes.

The exhaust port was ray shielded so they had to use proton torpedoes.

So just make a rule that says you can only use proton torpedoes!

Thinking about the math, I guess the 'expected' result of a torpedo 4 die attack is 2 hits + 1 eyeball (turned to crit) which would be enough to destroy it by the rules as described in the OP provided the 1 green is not an evade. But then someone could just shoot with blasters (once the shields are gone) and destroy the deathstar that way (despite it being 'ray shielded'). Personally, I would prefer it to be no shield tokens and just green dice (maybe 3 or 4?), but proton torpedo attacks only. But whatever! Its just for fun right?

Edited by blade_mercurial

That was a great report, heychadwick! Looks like loads of fun. And what a surprise ending!

It was funny how close to the movie it became at the end.

Great write up Haychad!! Looks like a great time, like the map too.

Slainte!

So, I ran the Trench Run again last night. 2nd week in a row. Right before it, I was able to get a regular at the store to try out the game. He said it was a lot of fun. He joined in the Trench Run. Also got another board game regular to play his first game on the Imperial side. There were a couple of late-to-show-uppers and they filled out the total players at 7! I decided to just run the game and sit it out. I figured I could give advice to anyone that was new, check on rules questions, and just make the game run smoother. Overall, the game was fun with everyone laughing, joking, and having a good time. Lots of people came by to watch the game as it happened.

I was able to remember my ping pong balls and those little tables in pizza boxes to ensure the center of the box doesn't smoosh your pizza. Those were the Power Nodes for the game. The guy with the plexiglass forgot....again.

I had asked my friends to help write a list for the rematch, but none obliged. So...I made them up myself. The Rebels were hard to go with. I went with the idea of lots of cheap. Y-wings carry lots of bombs and since they ran out last time, I figured it would be good. I wanted to try 2 Ion Turrets on them to see if it helped in the trench. Also, I forgot to give Luke Elusive EPT when I was setting up as I wasn't really planning on running it again. I gave the Y-wings R5 units as I knew that I gave the Imps Calculation. So, they might be able to shunt off damage and live longer. The newest guy was playing the Red Squadron and I don't think he ever got the chance for R3-A2.

REBELS

Luke w/ R2-D2

Red Squadron Pilot w/ R3-A2

Rookie w/ R2

Gold Squadron Pilot w/ R5

Gold Squadron Pilot w/ Ion Turret and R5

Grey Squadron Pilot w/ Ion Turret and R5

For the Imperials, I wanted to use the special guys to a fair degree so that they could then downgrade to regular Black Squadron when they died. I didn't want them getting killed off too soon. I went with two guys with Calculations as it was a cheap and nasty upgrade. Overall, though, I only think Calculations was used once.

IMPERIALS

Darth Vader w/ Predator & Shield Upgrade

Mauler Mithel w/ Calculations

Dark Curse

Backstabber

Black Squadron w/ Calculations

2 x Academy Pilots

Initial Set Up:

20150402_190631_zpshkymnwlu.jpg

20150402_190652_zpsarjjybde.jpg

20150402_190658_zpst31xeamc.jpg

This time it was harder for the Imperials to beat the Rebels to the Trench. The Rebels moved up and blasted turrets as they went. Darth and Backstabber went to their left to try to circle around and come at the rebels after they went for the trench. Most of the Ties went straight for the edge of the entry into Trench. The Red Squadron Pilot.....I'll call Red 5...zipped forward and dropped in the trench fast. The Rebels were blasting turrets so fast that I told them they can only blow up a total of 5 as I didn't have any more exploded turrets after that. :)

Right after Red 5 drifted through the trench (taking advantage of the extra green die for drifting - see special rule) Mauler Mithel and an Academy Pilot dropped in behind him. Luke and a Y-wing dropped in after them.

20150402_195342_zpsepwgtssy.jpg

A Rookie and Gold Squad went past the Trench and blasted the first Power Node. They rolled the die and could either take a shield off the Exhaust Port or set the turn back one. It was only Turn 5 and they were confident. They took the shield off. "Stay on Target."

20150402_195347_zpslpwgnciv.jpg

Red 5 drifted ahead and stayed between the Blaster Turret arcs of fire. Luke moved up as fast as he could and drifted closer to the Trench Wall to avoid Tie Fighter fire from behind.

20150402_202303_zpslzt1e6kp.jpg

Red 5 lost some shield to enemy fire. Mauler Mithel took a hit from the Y-wing at close range. Luke and Red 5 blew up another Blaster Turret. Luke lost a shield to MM. The Blaster Turrets fired. The Y-wing evaded like a champ, but Black Squadron was taken by surprise and hit! He got 6 dice and rolled so many blanks.

Back by the Trench, Backstabber and Vader traded shots with the Rookie and Y-wing. Vader lost a shield and Backstabber was ionized, but both Rebel ships lost shields. They did bump a bit with the Rebel being happy with that. Another Power Node was destroyed and the Rebels decided to set the clock back instead of giving all the Ties a stress.

In the turns that followed, Luke took a lot of hits in the trench from behind. He had to pull out and let R2-D2 try to rest his shields. The Y-wing takes a number of hits, including a Pilot critical (not a ship one). The Y-wing pilot is blasted to pieces. Red Squadron rolled like a champ and evaded all dice! He was drifting and juking like crazy. The Force was strong with this one.

20150402_205309_zpsh1xyttde.jpg

Once on top, some of the Tie Fighters that had been waiting saw a chance to take out Luke, as he had just popped up on their radar. Luke exchanged fire with an Academy Pilot to see the Tie fighter take a hit. After that, though, Luke didn't see the Turbo Laser Battery turn on him. Luke has a Focus and his special ability. He gets 4 green dice since they are doubled. The Turbo Lasers score 4 hits! Luke rolls.....all blanks! Luke is blown up by a Turbo Laser Battery!!!! First ship down.

There is one Y-wing that hasn't done much, but he drops down into the Trench now.

Vader and Backstabber try to get on the tail of the X-wing and Y-wing near them. They manage to blow up the X-wing and the Y-wing is really far away from the action at this point after a K-turn and then a slow green.

Time is running out and Han Solo appears and wonders where Luke is. He zips up and takes out Mauler Mithel, which helps the Rebels for another turn and saves Red 5 from a nasty shot. The Y-wing in the trench tries to move as fast as he can to get into the action. He even takes a red move 4-straight. He manages to ping a Tie Fighter down to 1 hull. Red 5 jukes and dodges as he moves down the Trench! He evades like a fiend! At one point, at R3, he rolls 4 evades!!!! He is doing amazingly well.

Red 5 is getting into position and TL's the Exhaust Port. An Academy Pilot moves to where Han will bump him. Han fires, but fails to kill a Tie Fighter!!! Red 5 takes the shot......and flubs his roll! Just like Luke in the first game! He only rolls 1 hit. You know, I think we forgot about the eyeball turning into a crit, but it doesn't matter as the Exhaust Port rolls an Evade! Even with the other hit, it would've only taken out the last shield.

At this point, Red 5 is destroyed. The Y-wing in trench can't get close enough. The only other ship isn't even near the Trench. Han Solo needs to kill a ship to keep the clock running. He rolls, 3 hits! The Academy Pilot rolls....1 evade and 2 eyeballs. Uses his Focus! Gunner kicks in and Han Solo fires again...only getting 2 hits after his re-rolls! Academy Pilot rolls 2 Evade!

The clock runs out and the Rebels lose! Grand Moff Tarkin says, "You may fire when ready."

It was a great game! Everyone had a lot of fun. The one fellow who had played a test game before this went over and spent about $100 on buying Scum and Villainy ships. People had a blast. It was overall a great time. I didn't get to test out any S&V lists...again, but hey, I'm building the scene. We had about 3-4 of us a month ago, but I think we will start seeing about 5-8 on a regular basis.

At this point, I need to think about what the Rebels need to do to win. I think Tarn Mison w/ R7 is going to have to work. I also think giving Luke Lone Wolf would be a good thing. Any other advice for these ships? I'd really like someone to throw in their 2 cents.

Yes, but that costs money. I used a work printer and got the above. :)

I wanted to ask, how are you engineering the trench? What are you using to elevate the play surface to make room and how are you planning to attach the side walls (once you have them)? How deep did you make your trench and was a tie fighter on 2 pegs fully below the lip?

I'm working on organizing a trench run at my local store and some of these engineering issues are proving vexing.

My local game store is a good sized one with lots of store owned....bits and bobs. I have used two things for them. The first is foam table tops used for Warhammer. You know the 6ft x 4 ft table tops that they use. They made them to fold up into 3 sections for easy storage, but many of them have broken apart. So I started with these. I use three 2x4 sections for each side. The problem with these is that they don' weight as much and can be knocked about a bit. It's not really that bad. If the store didn't have what I mention below I'd still be using them.

The store also has these 2x4 hard pieces of...maybe pressboard? They are about 1" thick. They are great to create a decent playing surface for board games, card games, or numerous mini games. I stacked about 4 of these per side. You can see them in the pictures.

I'll take pictures the next time we do it, but I must say that I am missing out in playing with all these lists I've been thinking about.

I used all my ships for this. I don't put 2 pegs on my ships. I am not sure if it would be tall enough for 2 pegs. It would be close. If I wanted to do that, I would probably use the foam for Warhammer as there are a lot of those.

I hadn't done the sides of the trench wall as I got lazy. I could always print more. I was planning on setting up the edges of the boards and then taping them down on the walls of the trench. I would have to tape them all into one long strip per side of trench. I would use legal sized paper for the print out to make it less work. Then I would put the trench down. Then I would put the regular top down. Our store has some plastic sheets that are about 2x4 that we put on top of the paper. It darkens it up, but flattens the paper.

Thanks

At this point, I need to think about what the Rebels need to do to win. I think Tarn Mison w/ R7 is going to have to work. I also think giving Luke Lone Wolf would be a good thing. Any other advice for these ships? I'd really like someone to throw in their 2 cents.

I would think some X-Wings with Predator and Engine Upgrade would help the rebels significantly. Say, on Wedge.

While flying down the trench, keep boosting. That should get him down to the target much faster, then when he makes his attack, predator allows a reroll to make it more likely to get 3-4 damage through. And put all that on Wedge to get rid of the defense dice that the target has. Seems to me that should improve the odds of one-shotting the thing.

I think Predator is good as it allows the re-roll. I also think Biggs might be worth it to go with a Y-wing.

Nice!

Seems odd giving the exhaust port shields. It should just have green dice to represent how hard it is to hit, and if one hit gets through...boom!

In the movie, Luke actually fires (kind of randomly) at the surface at one point, and I figured the mission could use some of that, and to have there be a good reason for it.

Edited by DagobahDave

Played the mission which was great fun.. but the Death star was blown up due to two Y-wings with Ion cannons destroying the power nodes and thus bring the shields down on the port. The two Y-wings had the BTL-4 upgrades - 360 turrets were banned as they are too effective in the trench and destroys the balance of the scenario). All the other rebels raced directly for the trench, reaching it one turn before the empire could.

A red squadron came through and made 3 hits in the first go... no "you may fire when ready"...

Great to hear! I need to have the Rebel players read this.

I don't think Ion Turrets are too powerful in the Trench Scenario. I figure that everyone in the trench is going to "drift" and get another Agility. That means 4 dice on a Tie Fighter and they are probably going to Focus. The turrets are only 3 dice and they only do 1 damage. Also, turrets are 5 pts! My guys were trying to skim on points everywhere. They had a Y-wing and X-wing go for Power Nodes, but Vader and Backstabber distracted them after 2.

Do you know what their list was?

Can´t remember.. But it was 2 Y-wings, and now i remember one was allowed to have a free moving turret. and then Luke plus 3 X-wings. The Ties could not afford to use defensive drift in the trench as they had to maximise their firepower to bring down the Xs and Ys in front. One of them got hit by the Ion cannon and after 1 round with speed one he was out of range from the the rebels in the trench.

Backstabber, Darth and Howlrunner as named pilots.

I have seen this mission played twice more at a Star Wars theme day the local board game café - Both times the rebels won.

Drift isn't an action, though. You can still drift and then Focus.

Did the Rebels gun it for the trench really fast? How did your games differ than how it was played in the two above?

2 X wings and 1 Y (the one with the turret) went straight for the trench which they reached one turn before the empire could possibly reach it.

Luke and one X (Rookie) flew top cover and the remaining Y went for the power nodes.

My mistake as Empire: I dropped 4 low PS Ties in the trench instead of the A team - so i kept bumping the Y-wing and thus slowing myself down and allowing one Rookie X to get ahead.

One X got shot down in the proces and the Y took a lot of damage.

The Rookie got through and hit the port with 3 hits on the first attempt. I had no shields at the time due to the other Y-wing

We played the version dated: 2014.08.07

Thanks!

We used Mauler Mithel in the trenches to good effect. I think Backstabber would be crazy good in the trenches, but never made it there.

You know, the Rebels always had one X-wing hang back to fire on any Ties that dropped in, but I think it might work better if there were 2 ships blocking the way and going a little slower while the main X-wing went for it full throttle.

I'm going to pull the old Tel Trevura on this thread as I prepare for the "I am your Father's Day" event. I've got my mat printed and attached to poster board (it ended up being quite a bit more expensive than I expected!) But it looks great! I used the one that Kevin Spooner posted on BoardGameGeek which has all the arcs and stuff printed out all pretty (there is a link to the files in the linked thread).

As I read these battle reports (again) it occurred to me that Outmaneuver would be great to put on some of the elite TIE fighters, because if they are destroyed, you get to carry those upgrades over to the Black Squadron Pilot reinforcements. Now you have tons of Backstabbers! Pretty handy in the trench when the Rebels keep drifting to increase their agility. There is undoubtedly a plethora of other cool squads to use in this scenario.