The Lost Star, a Yt-1300 mod.

By Cev Lost, in X-Wing

So once upon a time (about a year ago) I started to peruse the forums of various X-wing sites, Here, a few maneuvers, BGG (Board game geek). What was found was astonishing, breathtaking and just absolutely GAWK worthy.

So The lost star, based originally on a YT-2000 model, had been given several face lifts over the rears of role play. Converted back to a YT-1300 only with heavy modifications.

So first the concepts and ideas.

934872_768537669860731_23820572173161587

10703829_768536176527547_554417795564560

All in all not out of the normal.. okay shuttle cockpit maybe..

Then I saw imps in passing.

10628802_768537789860719_200518853957513

and the Lost Star got a face lift yet again!

So with concept in mind, I set out for my first ever kit bash. Just needed some helpers.

One of these....

swx06_main.png

And one of these...

swx13_main.png

Any decent X-wing gamer should have both in their library!

So then I set about my task, first I removed the Shuttle cockpit

(tutorial on taking the shuttle a part here)

Once removed I used a special plastic molding material

(like these)

And with patients and several tries I manage to make myself a shuttle cockpit mold With green stuff I crafted several iterations of the new cockpit Some were really good some were really bad.

Next I took the Yt-1300 piece, and started to cut

(A good lighting and opening Tutorial here)

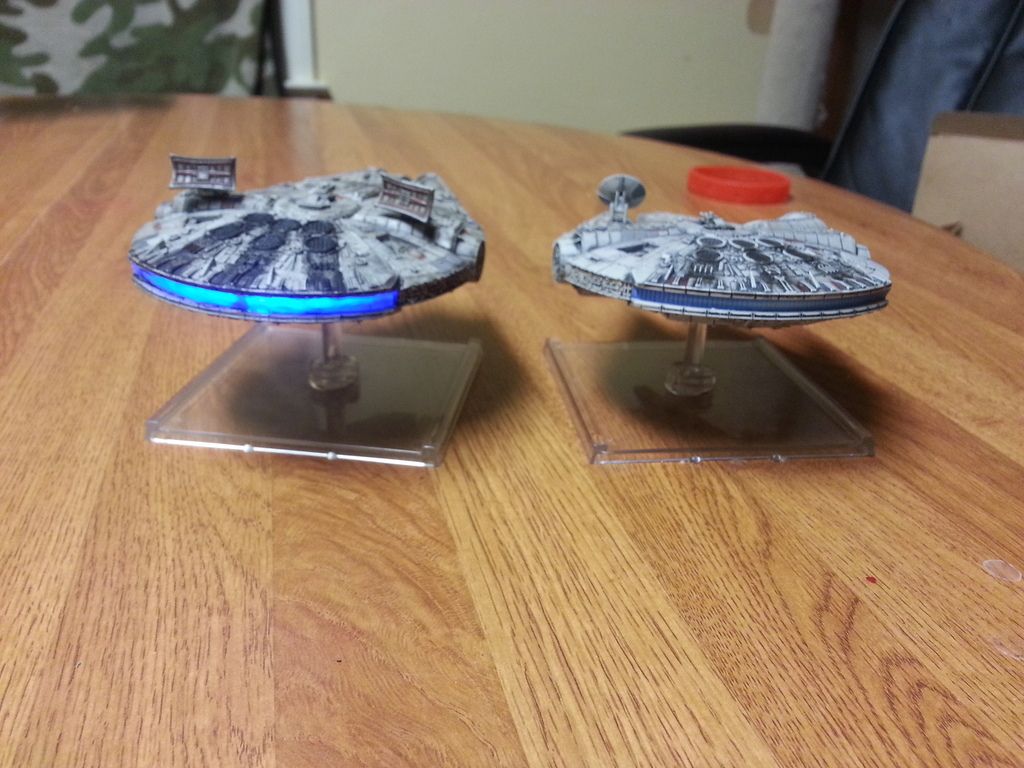
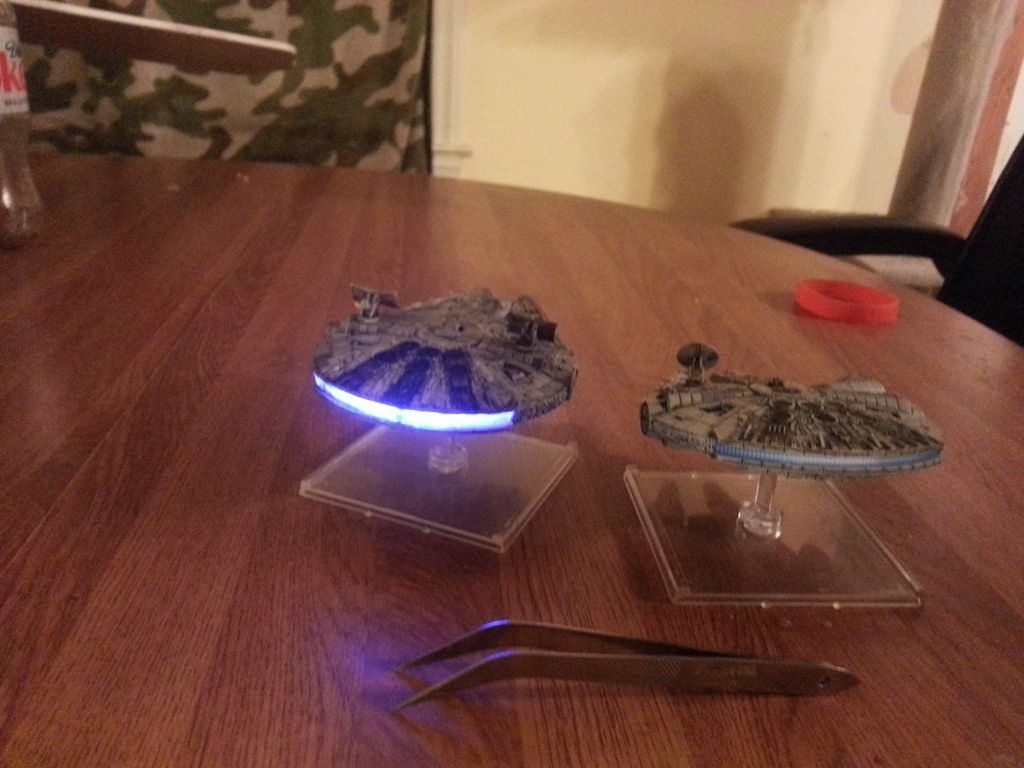
So here is the result thus far.

10500383_699022260145606_587735824053218

This shows the parts I cut off and used for molding.

10411987_699025986811900_357707102526477

The shuttle original cockpit and my fashioned new one, where it would belong on the new lost star. More to come.

So with a fitted cockpit, I was ready to continue the adventure of kit bashing.

10415600_699025950145237_487012982065215

With some plasticard and green stuff we were able to patch up holes as I created them.

With the plastic molding material I was able to even craft paneling to cover the Cockpit tunnel area.

10410801_700016096712889_889646570770218

10435921_702436709804161_546890229296756

In the above picture, you can see I've applied a basic paint scheme this I knew was going to be several months in the process no sense in not being able to use it int he mean time.

Then it happened. The trailer for Star Wars 7 emerged, and a talented individual crafted these

625x465_2901389_7709152_1418298586.jpg

(Get them here!) Thanks Mel! from Mels Minniatures

And I thought perfect!

So a pair got printed and you can now see my Lost star with the basic ideas.

11006385_817976008250230_169597627572700

My camera was having a conniption the day I took this. So the dishes sat for a week or two.. and scum hit.

Finally finding time I've managed to move the primary dish and seal the hole. Using magnets I've placed the new dishes in place.

11081283_827863570594807_245072801521326

11081431_827863537261477_585205018711629

So doing the picture math hehe

11080979_827863480594816_380555836418458

10647084_827863463928151_194793998459091

And so she's finally ready for painting.

I'll hopefully get that done and also show pictures of the lit engines cause who doesn't like a YT that actually has engine lights!

A nice conversion you have going their. I was playing around with a Shuttle cockpit with the idea of cutting off the "horns" of the Falcon, then having the Shuttle Cockpit sticking out the front on its own.

Nearly finished I want to put the side view ports on the transport but I've got everything in place other wise including some Neat renovations!

20150330_004434_zpsflsj8tw8.jpg

20150330_004503_zpsqkvtoqru.jpg

Angle the deflector shields while I charge up the main guns!

20150330_004518_zpsqj0gmltu.jpg

Watch yourself increase speed full throttle!

20150330_004535_zpsdrha7iv4.jpg

This was not the Transport you were looking for....

20150330_004711_zps1ew1sxbp.jpg

Blue and red though I need more red...

20150330_004759_zpsg734ycvp.jpg

20150330_004826_zps9srjyolv.jpg

As I said I need to put in the side view ports but other wise It turned out pretty good I'm happy with it.

Love the red lights. How did you go about installing the lights

Love the red lights. How did you go about installing the lights

I actually followed 2 different guides to building lights into the ship. I combined them and created my own set up really.

Here's number 1

http://www.afewmaneuvers.com/_/afm-articles/how-i-did-it-lighting-a-yt-1300-r173

And here's 2

http://www.afewmaneuvers.com/topic/1462-rodents-hobby-blog/page-8

This was the set up for the basics as far as the LED's themselves, I used the microchips from

http://www.modeltrainsoftware.com/ledlights1.html

I'll get pics of the set up tonight, and have them posted.

This was the set up for the basics as far as the LED's themselves, I used the microchips from

http://www.modeltrainsoftware.com/ledlights1.html

I'll get pics of the set up tonight, and have them posted.

Part 1, Further info on the LED's, the chips come with the resisters already on board so you don't have to mess with math, I also ordered a package of their push buttons, and their button cell battery holders. 2 things that you need to know with this.

1) Do not try to soldier these things together. unless you use a very low temp solder. I wound up melting a switch and coin cell holder.

2) Keep your lines in the right sides.. Like with all dc circuits you need to make sure that your electrons flow in 1 direction or your stuff won't work. Don't be afraid to play with the lights before hand.

Part 2 making room for the holder.

Okay so Prior to finishing and even painting I went through with a hobby knife (cause at the time the concept of a razor saw was along time ago in a galaxy far far away.) I cut the upper engine hull off like Rodent mastermind and went in through the top. Now looking back you can use the saw to get in, just have to be real patient. You won't beable to use it in the curve (unless you are extremely patient. I recommend that you have the razor saw to remove the engine itself. Any way You will be left with a gaping hole like this!

20150331_164319_zpsaceqxxwk.jpg

as you can see I've added a piece of plasticard and magnets to fit the "Cowl" back into place I also magnetized the fixture so that it won't come loose or jiggle

20150331_164336_zpslhw3mowd.jpg

As you can see I'm very crowded versus the neater ones of Rodents and TonyRockyHorror from AFM.

My defuser is actually hot glue. I started with this brilliant idea of making a mold for it but quickly gave up as my mold was also melting with the glue. I finally said to hell with that and started layering my glue onto the cowl itself. I took the tip of my glue gun and warmed the glue on the cowl back up and shaped it how I liked I got it as even as I could to match the other side.

As far as lights go I had 2 blue and 2 red chips: Either Pico, or nano ( Think I bought nanno's)

http://www.modeltrainsoftware.com/smd-chip-leds.html

I glued them in alternating format, though looking back I wish I had bought 3-4 red and 3 blue

The reds were not really that strong compared to the blues and I would space out the blues a bit more.

I lined the inside of my fixture with aluminum foil and glued the top on (sorry should have pic-ed this as I did it.)

20150331_164418_zpsooa5qyal.jpg

A good shot inside the unit you can see 4 led's pretty decently

20150331_164413_zpsajhdbcrn.jpg

Reds on

20150331_164401_zpsnvlkr0pk.jpg

Blues are way brighter.

hope this helps