Tutorial: Scratches, dents and blaster hits

By MacrossVF1, in X-Wing

I've recently been asked to do a quick tutorial of how I paint the laser scoring on my ships so here it is. Also included in this tutorial is how I represent small paint chips and other assorted small damages as the method is almost the same as for blaster hits.


To start with I had to have a test subject. I dug up an old shield from a plastic Gundam kit and quickly painted it, nothing fancy, just some VGC Scarlett Red base with VGC Bloody Red as highlights.


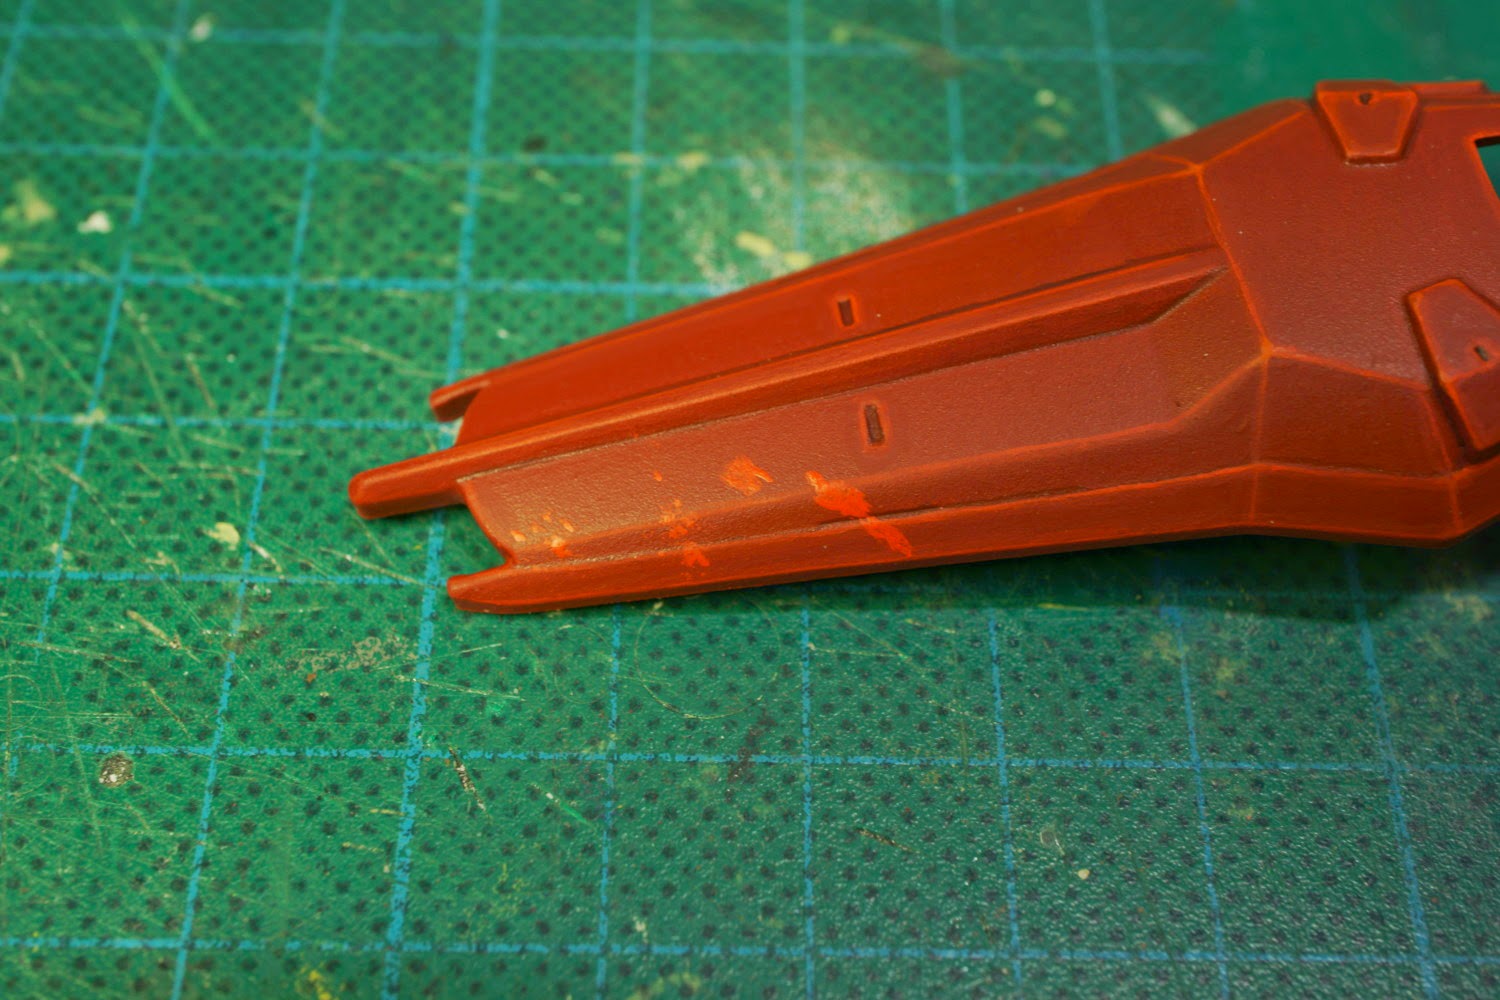
The first step when doing is marking the areas to 'damaged' with the main highlight colour, in this case Bloody Red. For small chips and scratches (The first two spots from the left) I often use a small piece of sponge or a really old drybrush that is pointing in all direction to get a suitably chaotic pattern. After the first application I usually go back and fill in some of the chips with additional paint to make them larger or cover specific areas.

For blaster hits I manually paint the entire 'damaged' area in a slightly irregular pattern. As can be seen in the picture above, the first hit is round while the other is elongated. The circular spot represent a fairly clean hit from the front, while the second one is intended to show a shot that has hit at a steep angle.


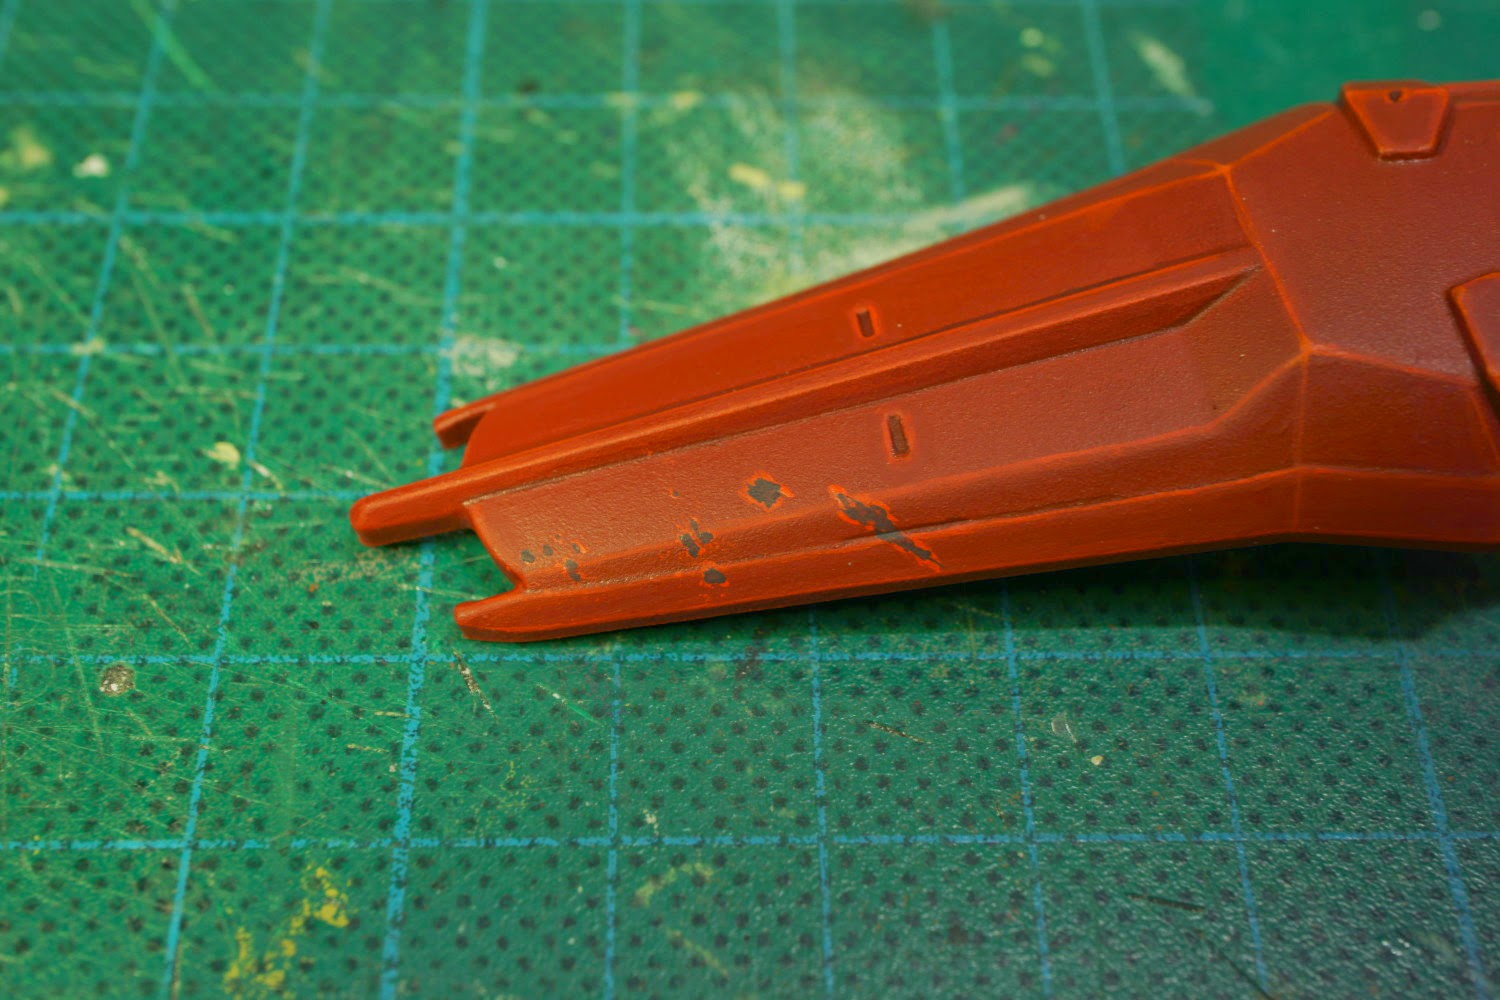
Second step is painting every bright red area with a dark grey, in this case VMC German Grey. Take care to not cover the entire previous paint with the second layer.


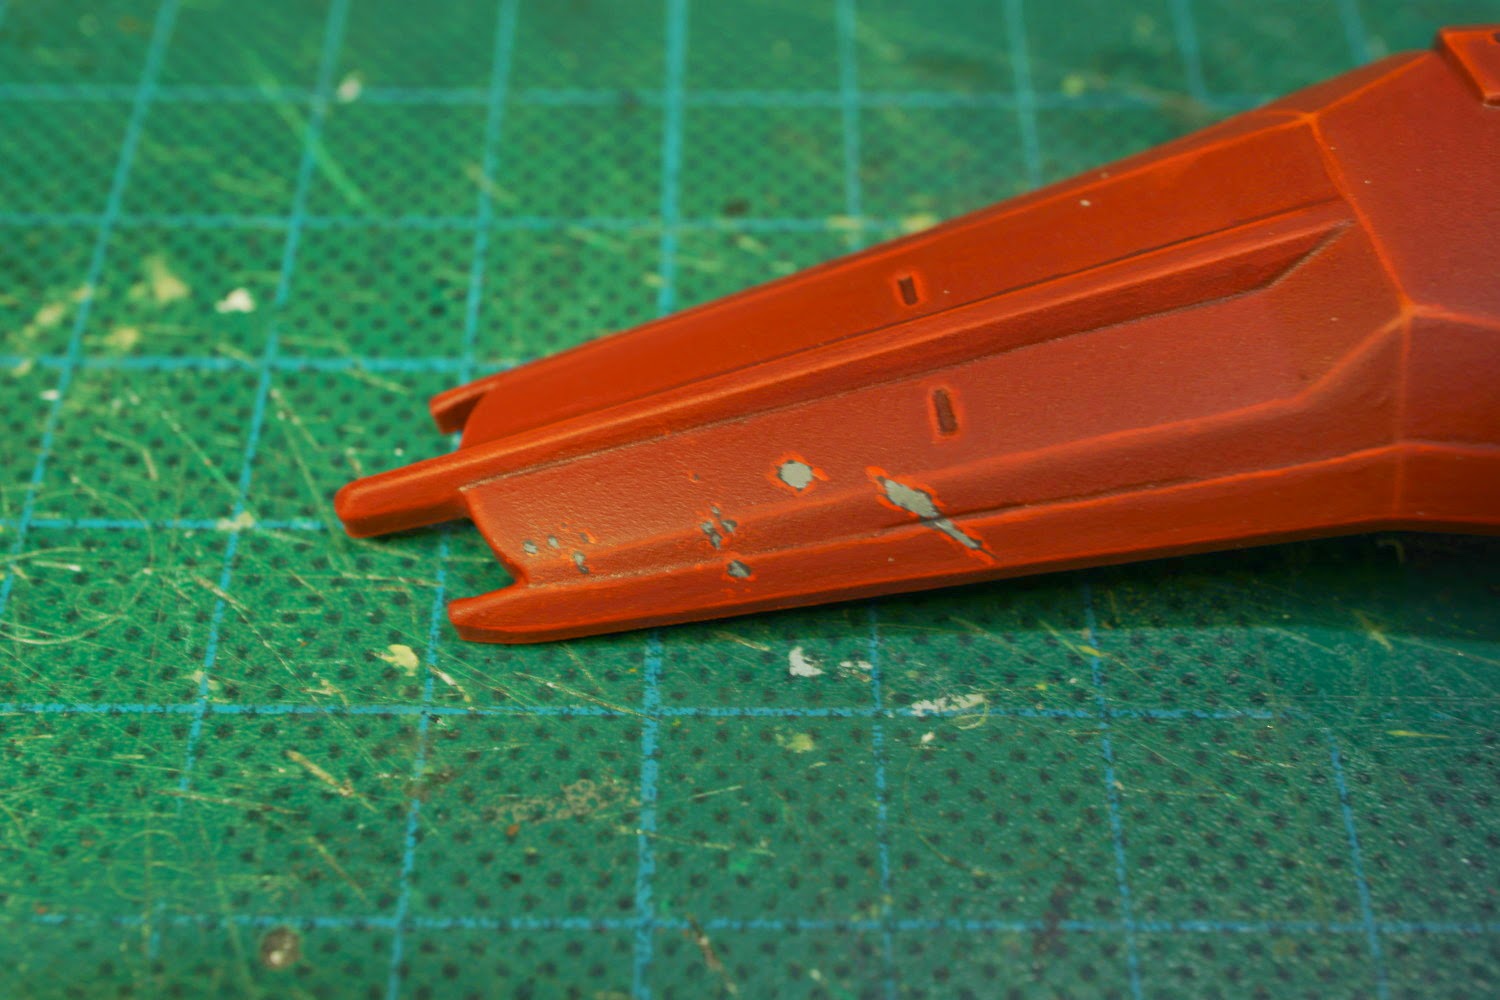
Third step is more of the same, only using a 'medium' grey, which is VGC Cold Grey for me. Also notice that not all the chips was painted with this colour. By leaving some chips darker, you can give the impression of both varying age and depth on the chips.


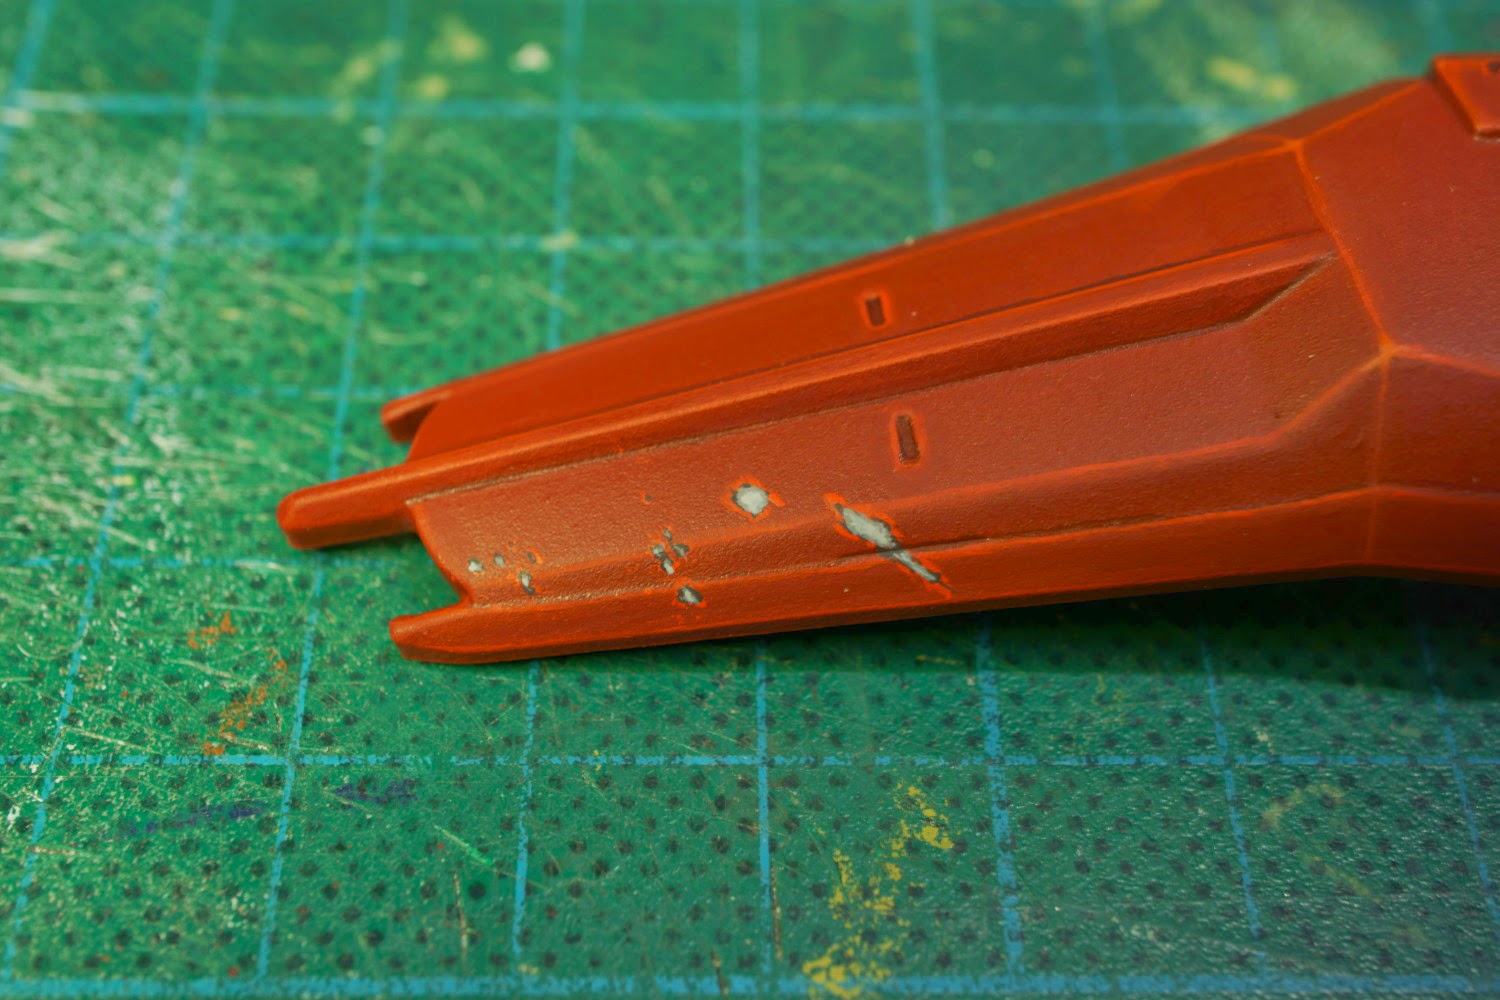
Fourth and final grey layer is a bright, almost white, grey, in this case VGC Stonewall Grey. Despite not using metallic paints, the smaller chips looks almost metallic.


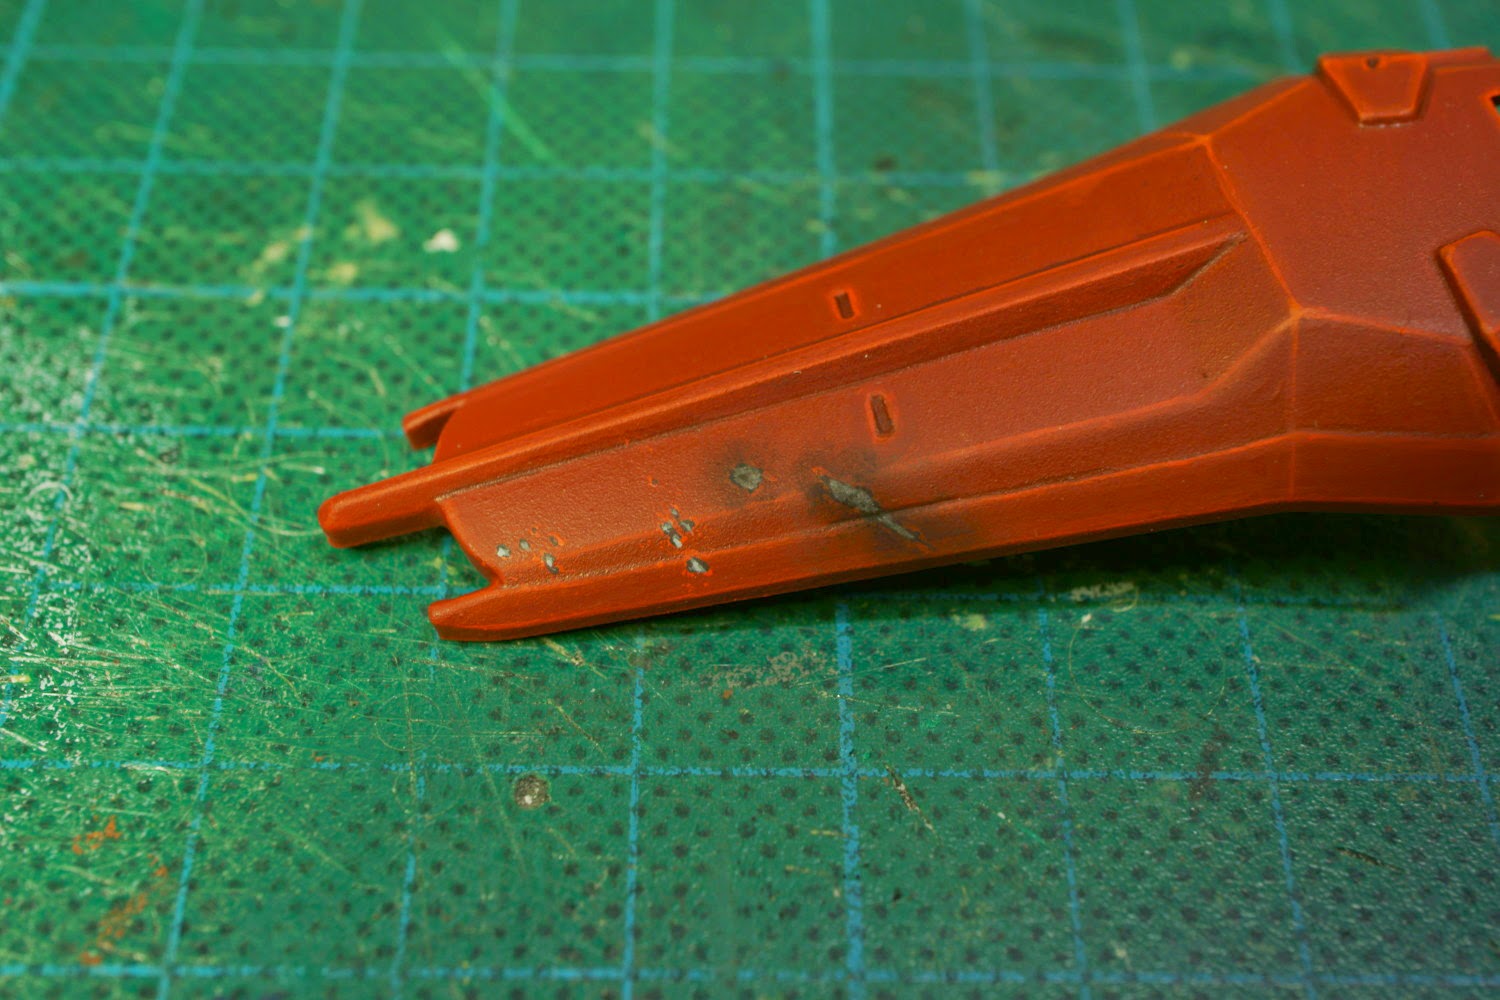
The blaster hits get a further layer using a black dry pigment. While I use MIG Black Smoke, I'm fairly confident that most dry pigments would work for this purpose. Anyway, I apply this with an old brush and basically stipple it on. Any excess pigments can easily be removed using the lungs you were born with.

To finish the scorch marks I take a fine brush and slightly wet the tip, often just with my own saliva. Then I gently clean up and push the pigments that are directly on top of the blaster hit to the edge of the mark. And that's all there is to it. Quick and easy chips and damage for everyone!

You just completely changed my paint game. Thank you so much!

How do you apply the black dry pigment? Is it with a brush or airbrush?

Appreciate this so much, Thanks for the know how.. now to figure out what I can use for dry brushing and to get me a proper technique and brush

very cool tutorial man, really appreciate it

Beautiful.

If this tutorial help you guys, then I have achieved what I set out to do. Now start painting something so I can see if you have been attentive little students. :)

How do you apply the black dry pigment? Is it with a brush or airbrush?

I don't want to sound rude but I did write it in the tutorial. Anyway I apply it by stippling with an old brush.

Wonderful tutorial. Thanks for taking the time to post it.

What gets me is the scale in which we are working. I would love to repaint my ships but the size of them is so daunting. I can apply battle damage to a 28mm model .. but an X-Wing .. the scale is intimidating.

Did you use these same techniques for the Red 2 and Red 5 that were painted for the Assault at Imdaar Alpha event? Those ships are inspiring!

Edited by Conandoodle

Now I need to go buy some more paints so I can do this!

Really helpful -- I've had no problem with rust and general weathering, but getting chips right always evaded me.

If this tutorial help you guys, then I have achieved what I set out to do. Now start painting something so I can see if you have been attentive little students. :)

How do you apply the black dry pigment? Is it with a brush or airbrush?

I don't want to sound rude but I did write it in the tutorial. Anyway I apply it by stippling with an old brush.

Derp. I'm sorry for not reading it as thoroughly as I should have.

Edited by SniperSnake28

You have inspired me to try my hand at painting. That's amazing. Thanks so much!

Great tutorial. Thanks for this, and I look forward to seeing more of your work!

Thanks for sharing. Can't wait to try it out.

Very nice guide.

Wonderful tutorial. Thanks for taking the time to post it.

What gets me is the scale in which we are working. I would love to repaint my ships but the size of them is so daunting. I can apply battle damage to a 28mm model .. but an X-Wing .. the scale is intimidating.

Did you use these same techniques for the Red 2 and Red 5 that were painted for the Assault at Imdaar Alpha event? Those ships are inspiring!

The scale is indeed a problem. To put it into perspective, the smallest chip I painted on the shield would probably be about 10cm across, the size of a closed fist really. Or we could look at it the other way, if you hit something with a car, chances are you would have some decent sized bumps on it, which can easily measure 30cm across. That would only be slightly above 1mm at 1/270 scale!

And yes, I used the same principles on the Red 2 and Red 5, though I have had time to refine and improve the technique a bit. For instance I didn't bother with more than one layer of grey back then.

Do you have to put anything on the mini surface to make the dry pigment stick when first applying it?

Thank you so much again for this tutorial. I used your exact technique (minus the fancy stuff I didn't have) for my A-wing that I posted and I love the results. You're the best for sharing this with the community!

Do you have to put anything on the mini surface to make the dry pigment stick when first applying it?

I've never had to do something like that though I would suspect that a model that has been given a good coat of gloss varnish would most likely be more slippery. Any paint, not just dry pigments would have trouble sticking to such a surface.

Thank you so much again for this tutorial. I used your exact technique (minus the fancy stuff I didn't have) for my A-wing that I posted and I love the results. You're the best for sharing this with the community!

Yes my apprentice, join the painting side. Muhahaha!

Do you have to put anything on the mini surface to make the dry pigment stick when first applying it?

I've never had to do something like that though I would suspect that a model that has been given a good coat of gloss varnish would most likely be more slippery. Any paint, not just dry pigments would have trouble sticking to such a surface.

Awesome. I'm planning on going out to get some new supplies, and I just wanted to make sure I wasn't going to need some kind of additional fixative.

Thank you so much!

Necro-bumping this thread as a great reminder of how to "damage" your ships; I honestly keep it pinned in my browser for my repaints.

3 hours ago, stuffedskullcat said:

Necro-bumping this thread as a great reminder of how to "damage" your ships; I honestly keep it pinned in my browser for my repaints.

Technically, it probably belongs in the paint forum instead of front and center here although it is nice.

5 hours ago, StevenO said:

Technically, it probably belongs in the paint forum instead of front and center here although it is nice.

Yeah, I don't remember the timeline, but I think this thread started when we used to have the old sub-forum, then got bumped into the Main when we lost it. Maybe a moderator can move it?
I'd hate for it to get buried beneath all the metric tonnage of "nerf ths plz" and "omg T-65 is shite" threads. :)

This is my first time seeing this thread, and it has me excited to try painting battle damage on one of my ships!

Nice tutorial. Thanks for posting.